Create a Project
What's about to happen?
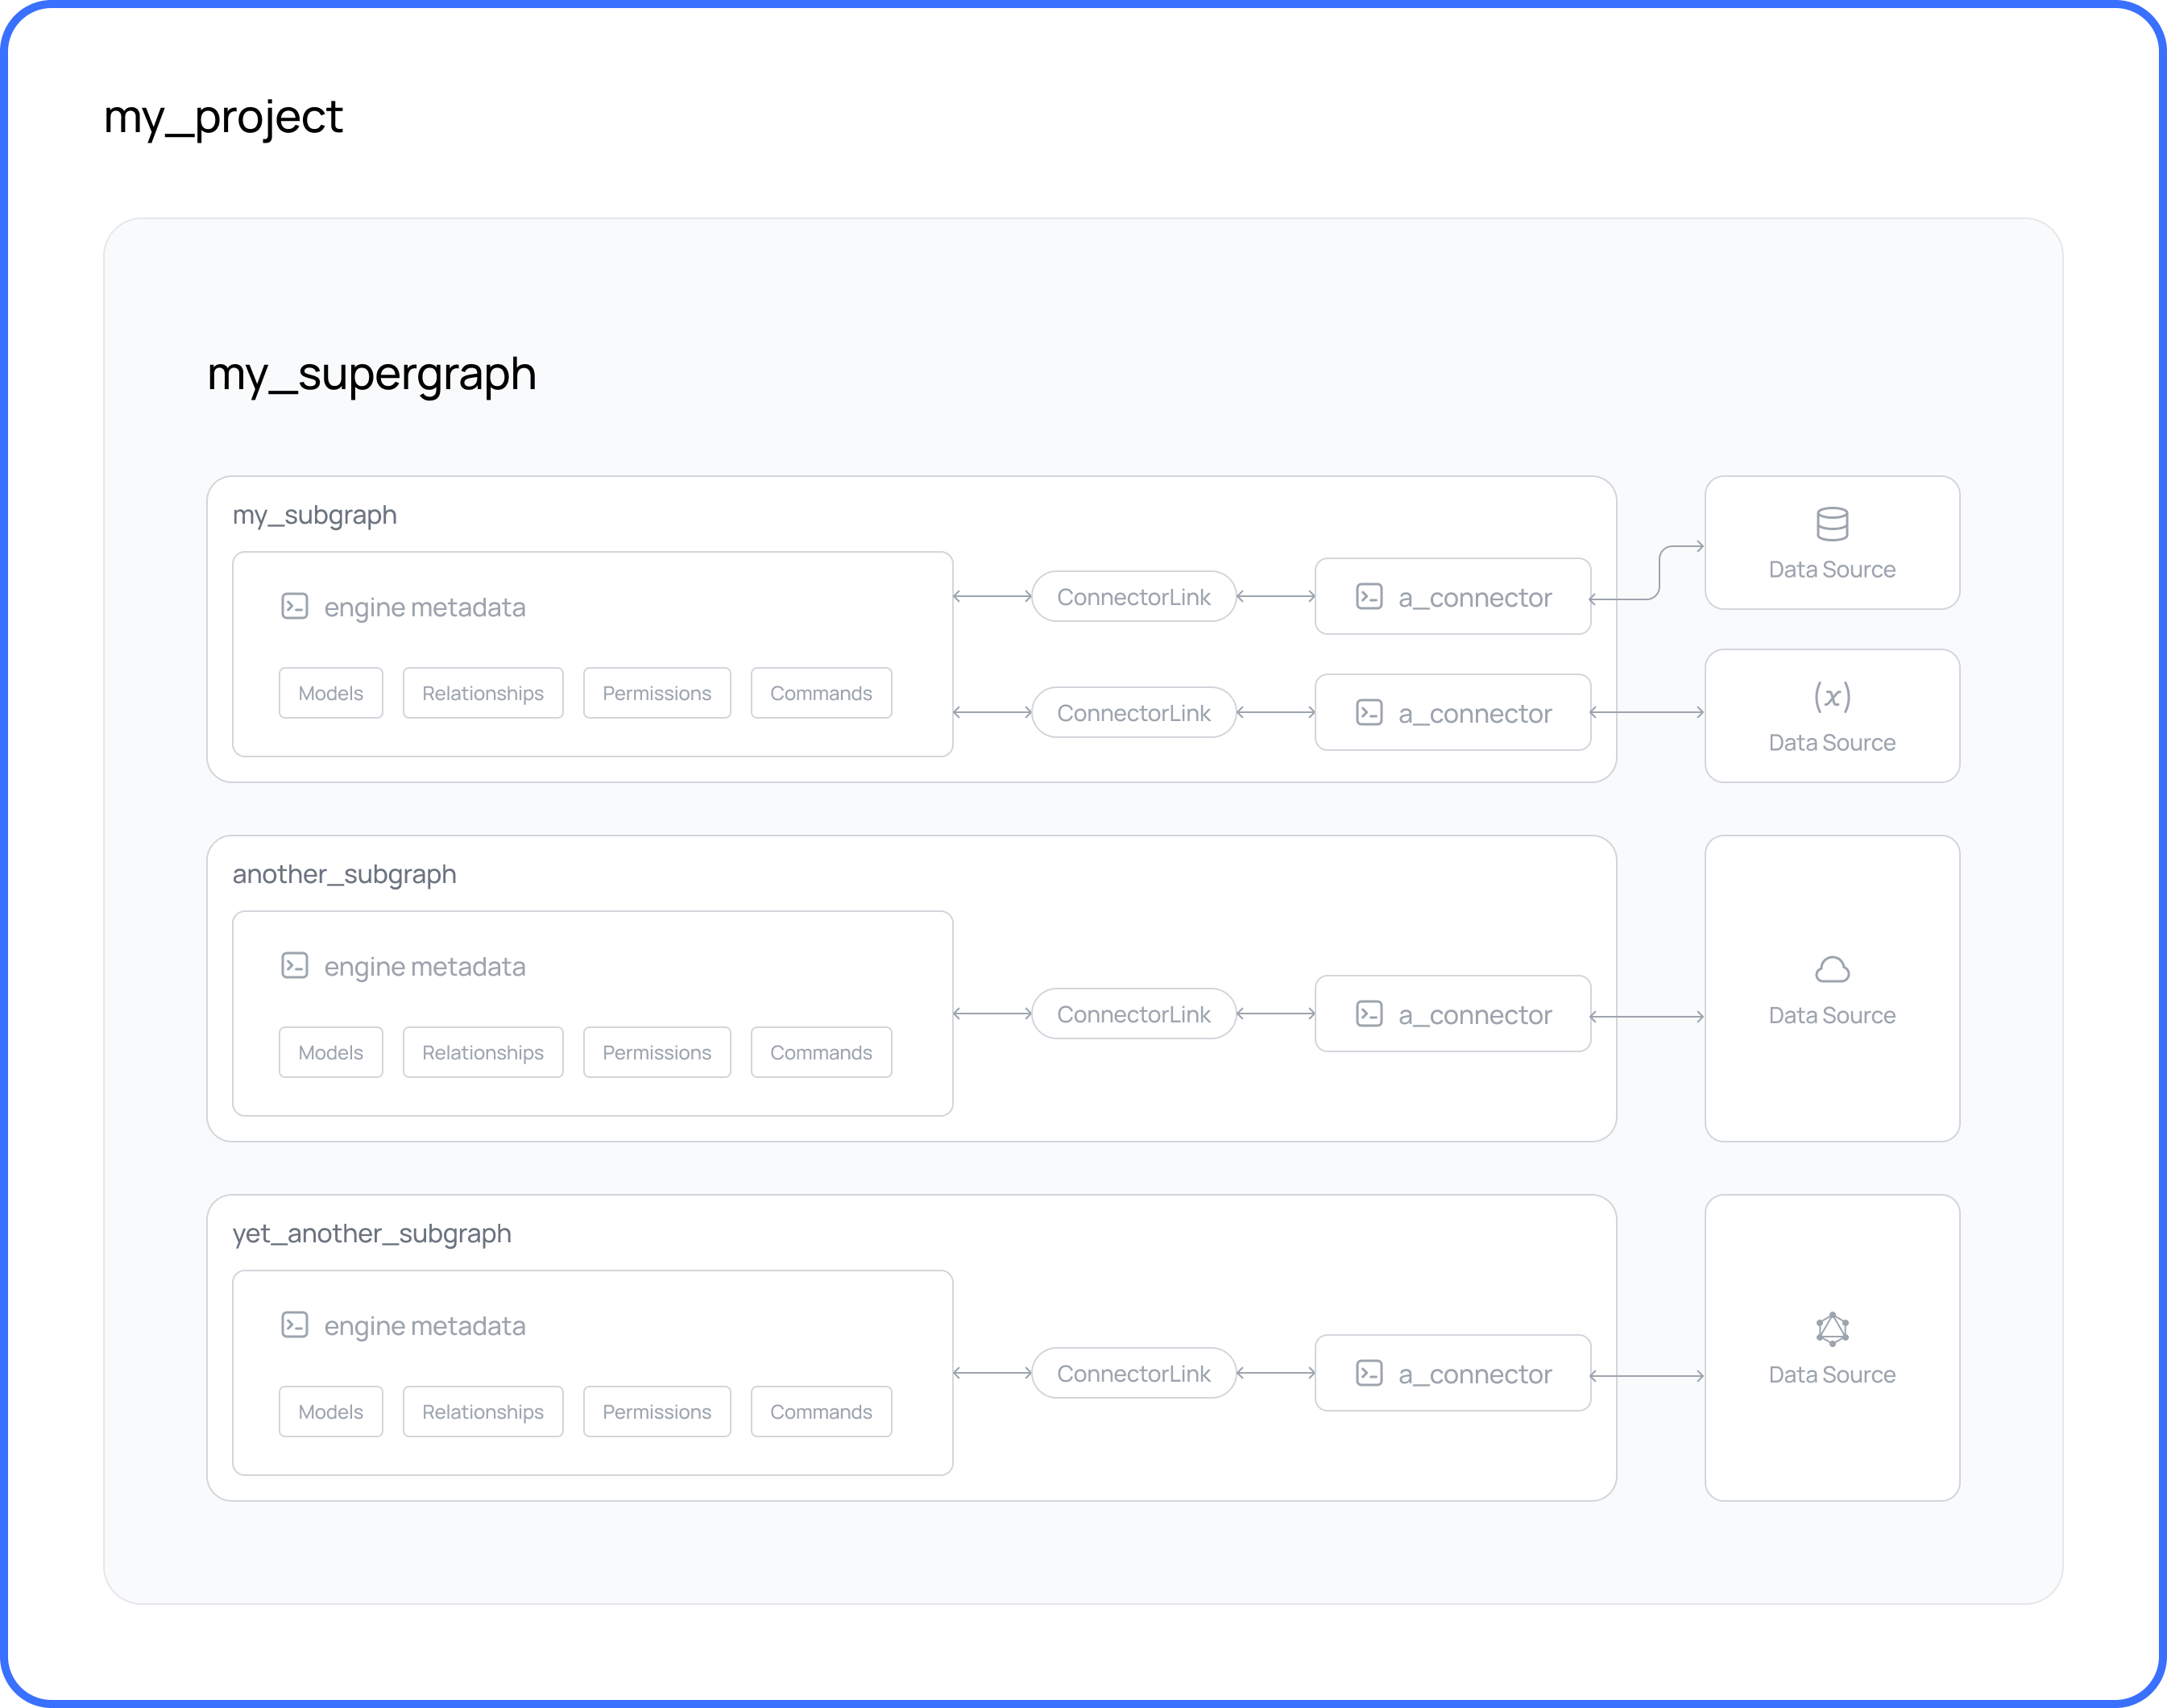
We're going to create a project on Hasura DDN.
Projects contain all the configuration and metadata for your supergraph. A project will contain exactly one supergraph. When you create a project, you're creating a resource on Hasura DDN. Eventually, this can be used to serve your API.
- DDN CLI
- A new or existing supergraph
Steps
Step 1. Create a project
Let's start by creating the project on Hasura DDN.
ddn project init
This command will return the project name and the console URL for your project:
4:19PM INF Project "cool-cat-3685" created on Hasura DDN successfully
+-----------+---------------+
| Project   | fast-pug-7230 |
+-----------+---------------+
| Subgraphs | globals,app   |
+-----------+---------------+
What did this do?
The CLI did a lot under the hood:
- It provisioned a new project for you on Hasura DDN and then returned the project name and console URL for your project.
- This command also set context so this local project is mapped to the newly-created Hasura DDN project.
- It created subgraphs from your existing local project for the project on Hasura DDN.
- The CLI created a new
.env.cloudfile for variables to be used in your hosted project.
Step 2. Update your environment variables
The following variables configure how the engine connects to a connector and authenticate that connection. These variables are automatically updated by the CLI when creating a new connector build. They define the URLs for both reading and writing data, as well as the authentication details needed to communicate with the connector.
| Variable | Description |
|---|---|
APP_MY_CONNECTOR_AUTHORIZATION_HEADER | Used for setting the authorization header to authenticate requests to the connector. |
APP_MY_CONNECTOR_READ_URL | URL for reading data from the connector. Separation of read URLs allows DDN to route requests across multiple database replicas. |
APP_MY_CONNECTOR_WRITE_URL | URL for writing data to the connector. Write URLs are routed to replicas that support write operations, configured via connector.yaml. |
Hasura DDN overrides the following values at runtime, so they can be left blank in the .env.cloud file and are
consumed by the data connector:
| Variable | Description |
|---|---|
APP_MY_CONNECTOR_HASURA_CONNECTOR_PORT | Configures the connector's HTTP server port. |
APP_MY_CONNECTOR_OTEL_EXPORTER_OTLP_TRACES_ENDPOINT | Endpoint for exporting OpenTelemetry traces. |
APP_MY_CONNECTOR_HASURA_SERVICE_TOKEN_SECRET | Secret for authenticating service requests. |
If your deployed data source is available at a different address than what was used locally, you'll need to update the
connection strings in your .env.cloud file for each connector. This is especially important for variables like
database connection URIs.
For example, if your local environment uses a MY_SUBGRAPH_MY_PG_CONNECTION_URI variable, and your cloud database is
hosted elsewhere, update the .env.cloud file with the correct connection string:
MY_SUBGRAPH_MY_PG_CONNECTION_URI="postgresql://read_only_user:[email protected]:5432/v3-docs-sample-app"
This updated value should point to the data source you intend to use with your deployed API, ensuring it can connect properly in the cloud environment.
If you want to test a build on Hasura DDN using a local database, you can use a tool like ngrok to
create a tunnel to your local machine. You can then update the connection URI to use this value in the .env.cloud
file.
Step 3. Deploy your supergraph
You're ready to deploy your supergraph! The following command will build and deploy your data connectors, update the
connectors' URLs in your .env.cloud file, and — finally — create a new build of your supergraph and deploy it 🎉
ddn supergraph build create
Next steps
After you check out your newly-deployed supergraph, we recommend applying a build so it's served by your project. You
can do that from the GraphiQL tab of the console, or using the CLI.
ddn supergraph build get
After the CLI returns the list of builds, you can apply one using its build version:
ddn supergraph build apply <supergraph-build-version>
