Quickstart
Let's see permissions in action by creating a simple example.
Step 1: Create a table
Head to your Console and create a table called users with the
following database schema:
users (
  id INT PRIMARY KEY,
  name TEXT
)
Then, insert some sample data into the table using the Insert Row tab of the users table.
Step 2: Run a query without permissions
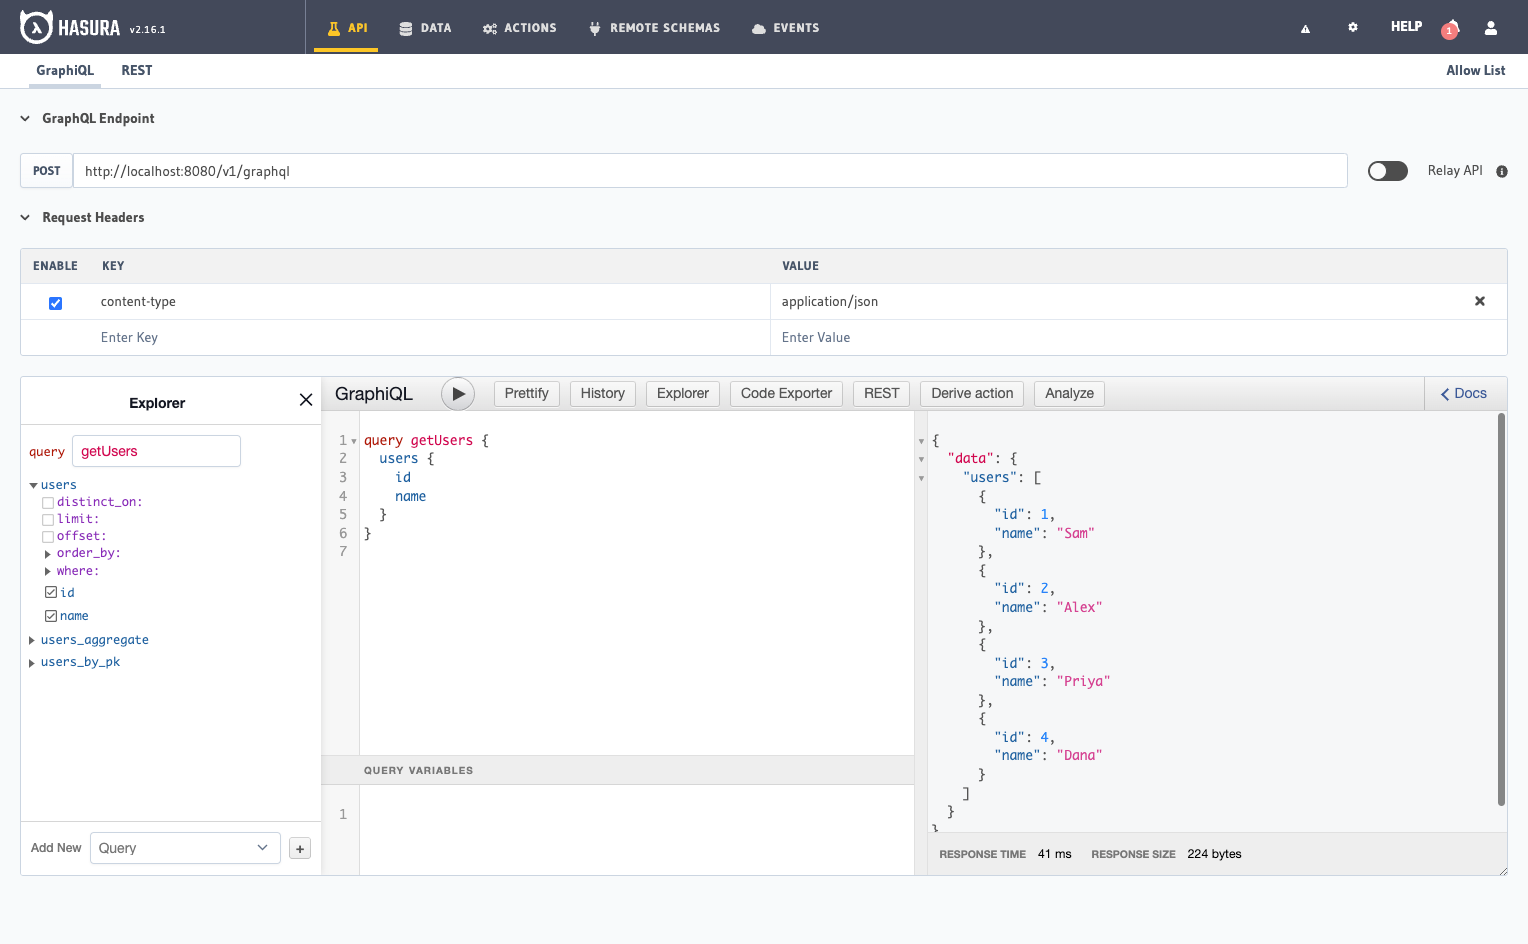
Head to the API tab in your Console and try out the below query:
query getUsers {
  users {
    id
    name
  }
}
The response of the above query contains all the users because, by default, the GraphQL query runs with admin permissions, giving access to all rows.
Step 3: Define permissions
Now let's define a permission for the users table for a role user.
- Console
- CLI
- API
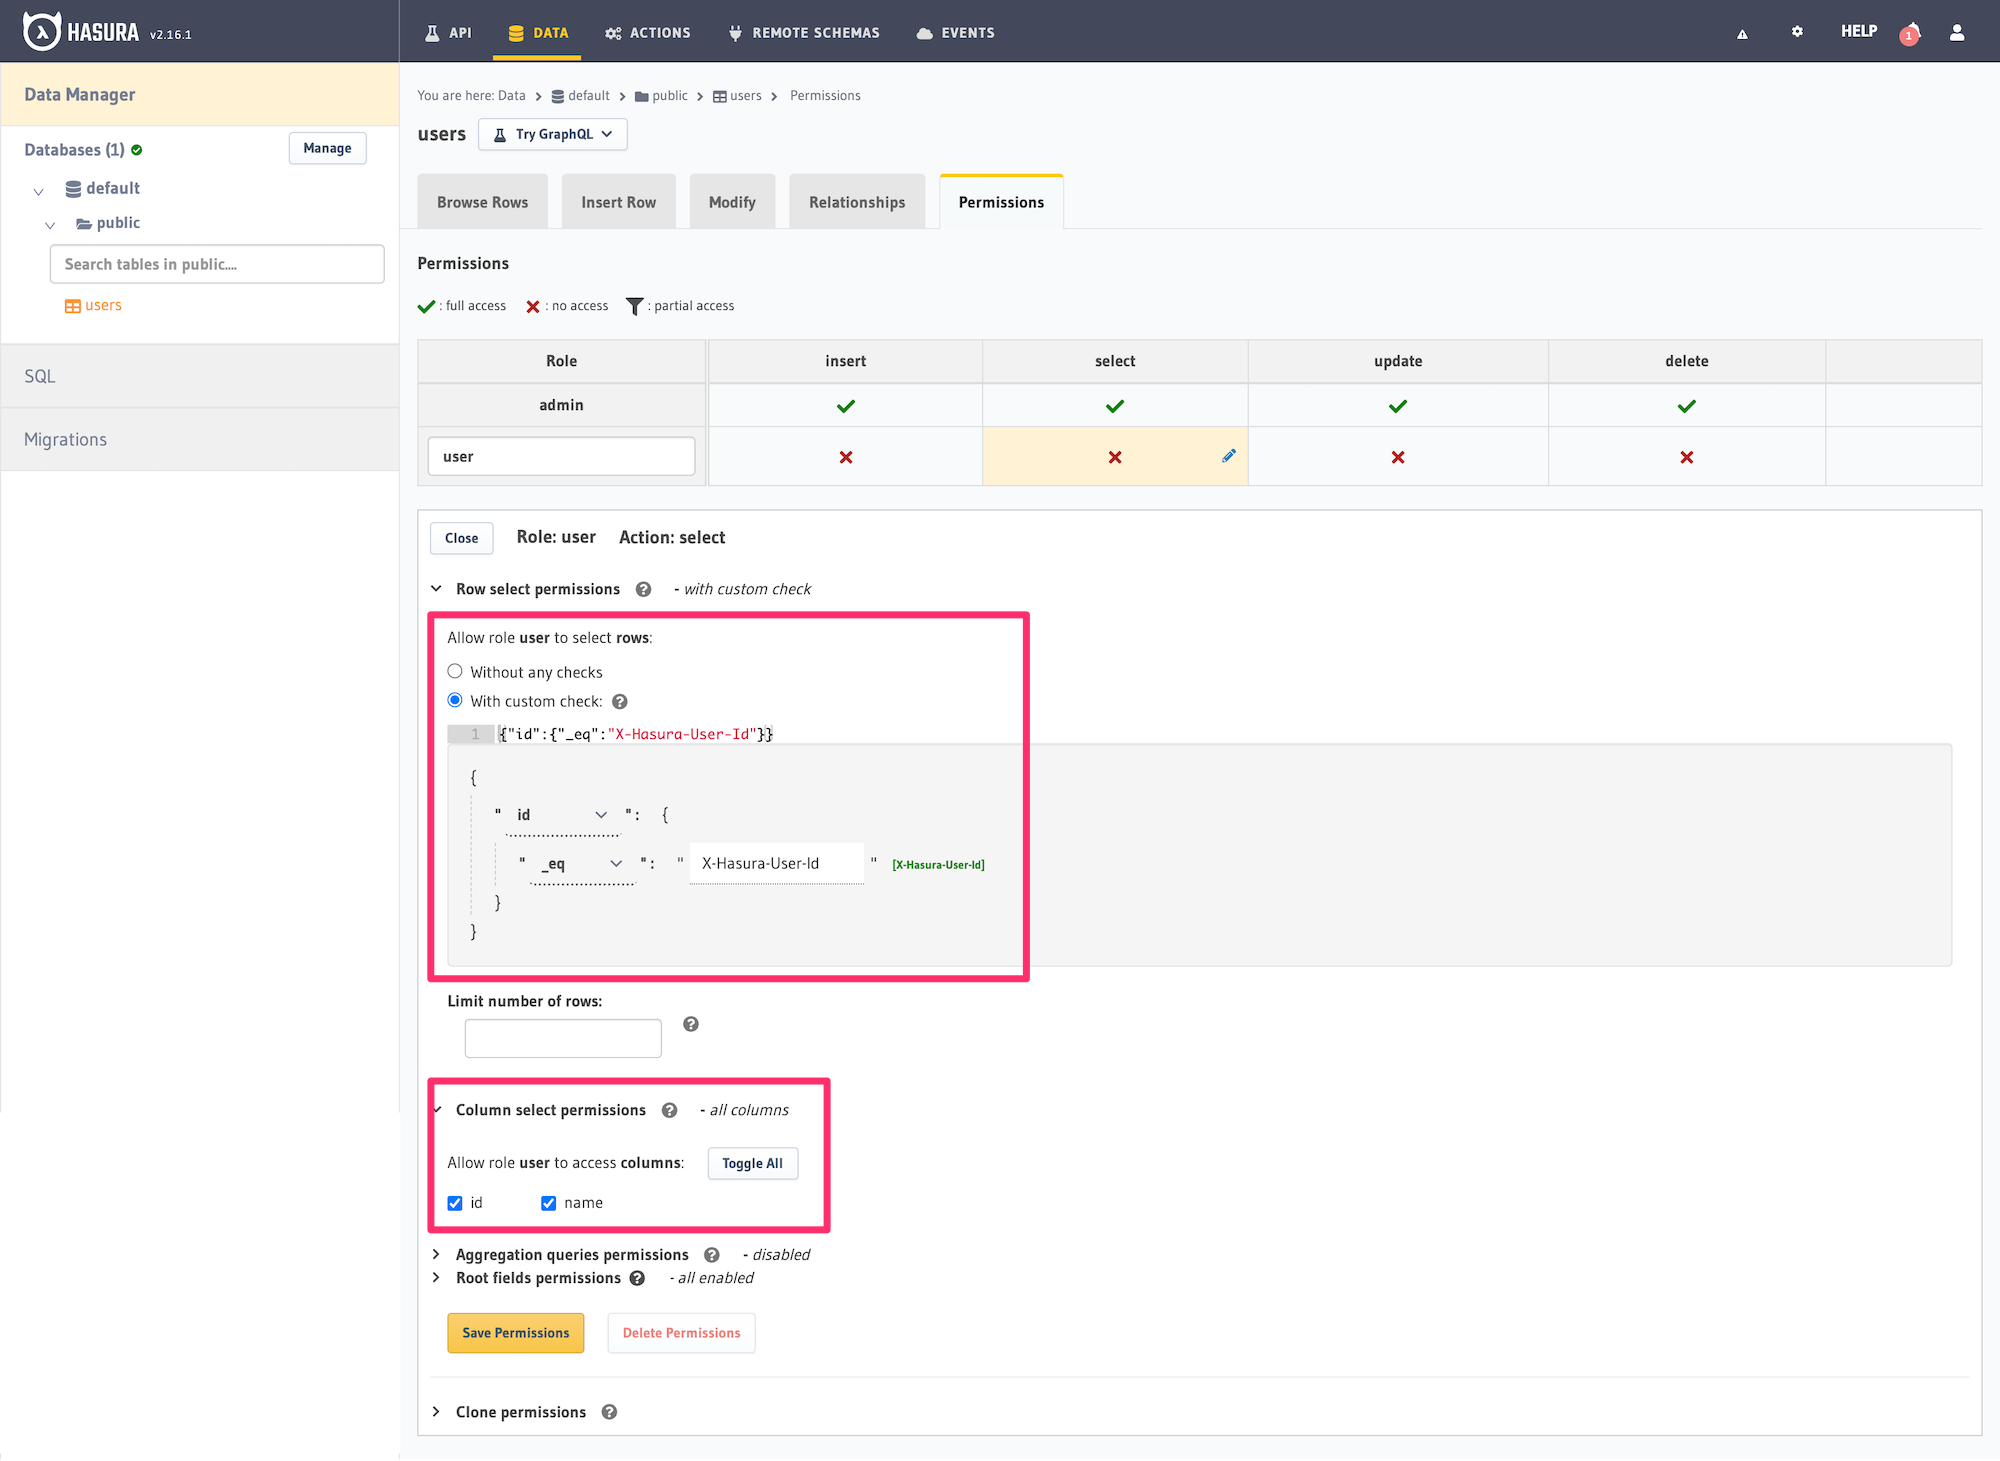
Head to the Permissions section of the table in the Data -> [table] -> Permissions tab in the Console. Enter a
new user role named user in the text input and define permissions for the select operation as:
Row permissions with custom check:
{
  “id”: {
    “_eq”: “X-Hasura-User-Id”
  }
}
You can either write this out as text without the line breaks in the text area provided or use the builder interface to construct the rule.
Column permissions allow access:
✅ id
✅ name
The role will be created "on the fly" when you click the "Save Permissions" button.
You can add permissions in the specific [table].yaml file inside the metadata -> databases -> [database-name] ->
tables directory in your metadata directory. To add permissions for the users table, you can add the following
to the file:
- table:
    schema: public
    name: users
  select_permissions:
    - role: user
      permission:
        columns:
          - id
          - name
        filter:
          id:
            _eq: X-Hasura-User-Id
Apply the Metadata using the Hasura CLI by running:
hasura metadata apply
You can add select permissions by using the pg_create_select_permission Metadata API:
POST /v1/metadata HTTP/1.1
Content-Type: application/json
X-Hasura-Role: admin

{
    "type" : "pg_create_select_permission",
    "args" : {
        "source": "<db_name>",
        "table" : "users",
        "role" : "user",
        "permission" : {
            "columns" : [
              "id",
              "name"
            ],
            "filter" : {
                "id" : "X-Hasura-User-Id"
            }
        }
    }
}
This permission rule reads as follows: "For the role user, in the table users and with operation select,
allow access to those rows where the value in the id column is the same as the value in the X-Hasura-User-ID
session variable, and allow access to the id and name columns".
Step 4: Run a query with permissions
Let's run the same query as before but now with the X-Hasura-Role and X-Hasura-User-ID session variables also
included to indicate role and user information. These session variables are passed in the Request Headers section of
GraphiQL as highlighted below:
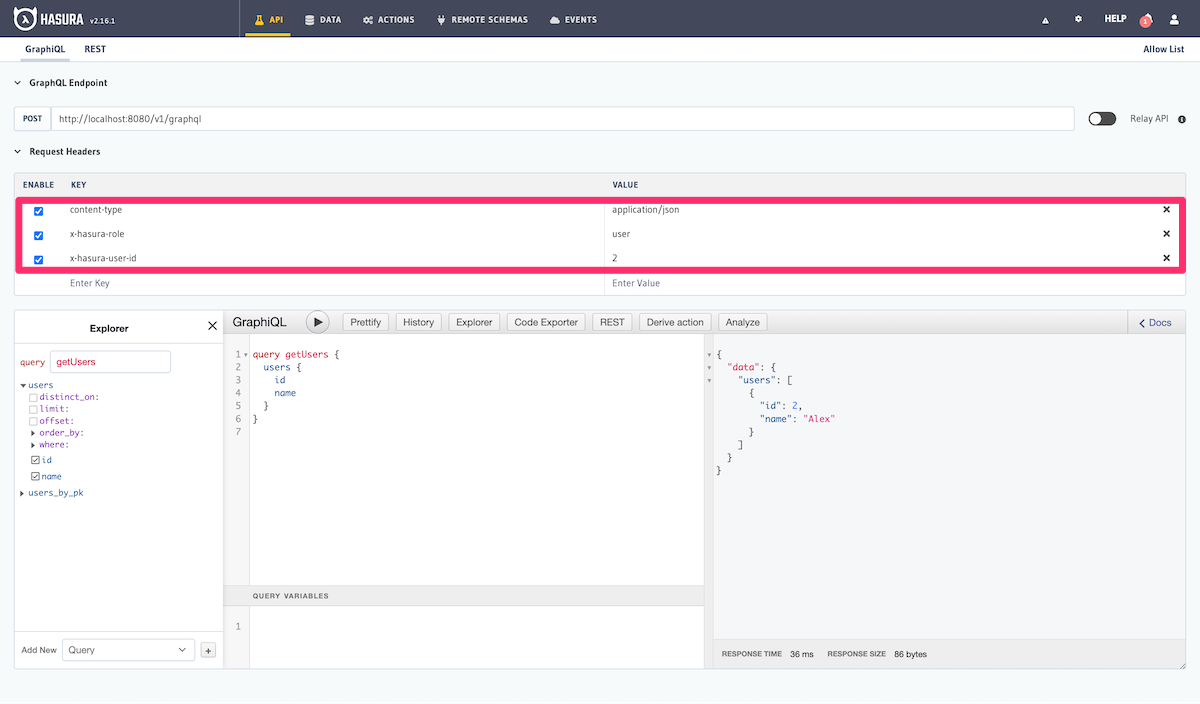
As you can see, the results are now filtered based on the access control rule for the role user (since that is the
role indicated by the X-Hasura-Role session variable) and the results are restricted to only those rows where the
value in the id column is equal to 3 (as indicated by the X-Hasura-User-ID session variable).
As described in the Introduction section of the docs, your auth service is required to resolve these session variables.
Basics
To understand the basics of access control in Hasura, let's take a look at the parts of a SQL query:
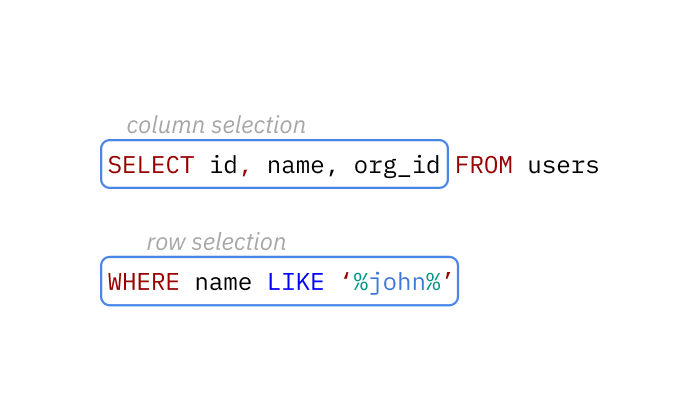
This query returns the right set of data by defining the requirements for the columns and rows in a given table.
Hasura's authorization rules work similarly - you define the permissions for a combination of table,
user role and database operation (insert, update, select and delete).
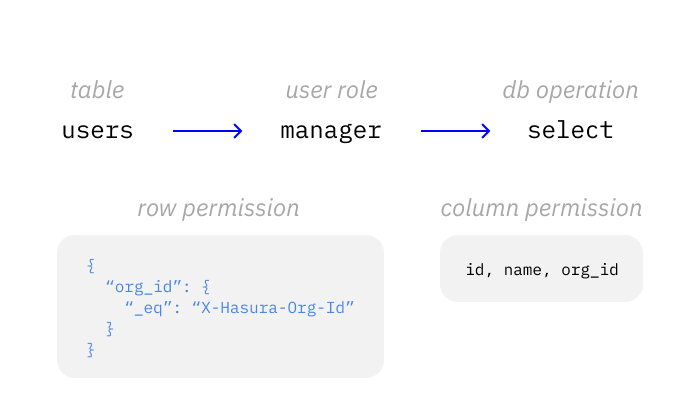
In this example, only the columns, id, name and org_id and only the rows where the organization id of the user,
org_id is equal to the supplied session permission X-Hasura-Org-Id value will be returned.
Hasura Engine uses both the database query itself and the permission rules to build one optimized query to the database. Which in this case would be something like:
SELECT id, name, org_id FROM users WHERE name LIKE '%john%' AND org_id = '1234';
Row-level permissions
Row-level permissions allow you to limit access to a subset of the rows in the table. These are essentially boolean expressions that, when evaluated against any particular row, determine access to it. They are constructed from the values in columns of the table, session variables and static values to build a boolean expression.
For example. The following row-level permission rule will restrict access to rows where the id column is equal to
the x-hasura-user-id session variable of the request:
{
  “id”: {
    “_eq”: “X-Hasura-User-Id”
  }
}
Column-level permissions
Column-level permissions allow you to limit access to only the columns you need for all the rows that are accessible based on the row level permission, as above.

Other permissions
There are many more configuration options for permissions and data access besides the main ones of row and column. For details on all the permissions configuration options, see Configuring permission rules.
Next steps
- Read about roles and session variables at: Roles & Session variables
- See more detailed examples at: Common access control examples