Get Started with MongoDB in Hasura Cloud
Introduction
This guide will help you get set up with Hasura Cloud and our MongoDB integration. This is the easiest way to set up Hasura Engine and the MongoDB GraphQL Data Connector.
Hasura GraphQL Engine v2.27.0 onwards
Hasura currently supports queries, table relationships, remote relationships and permissions on MongoDB databases.
A logical model or database validation schema is required for generating your GraphQL schema.
Try it out
Step 1: Create an account on Hasura Cloud and create a new Hasura Project
Navigate to your Hasura Cloud account or create a new one if you do not have one.
Create a project on Hasura Cloud and hit the "Launch Console" button to open the Hasura Console for your project.

Step 2: Connect to MongoDB
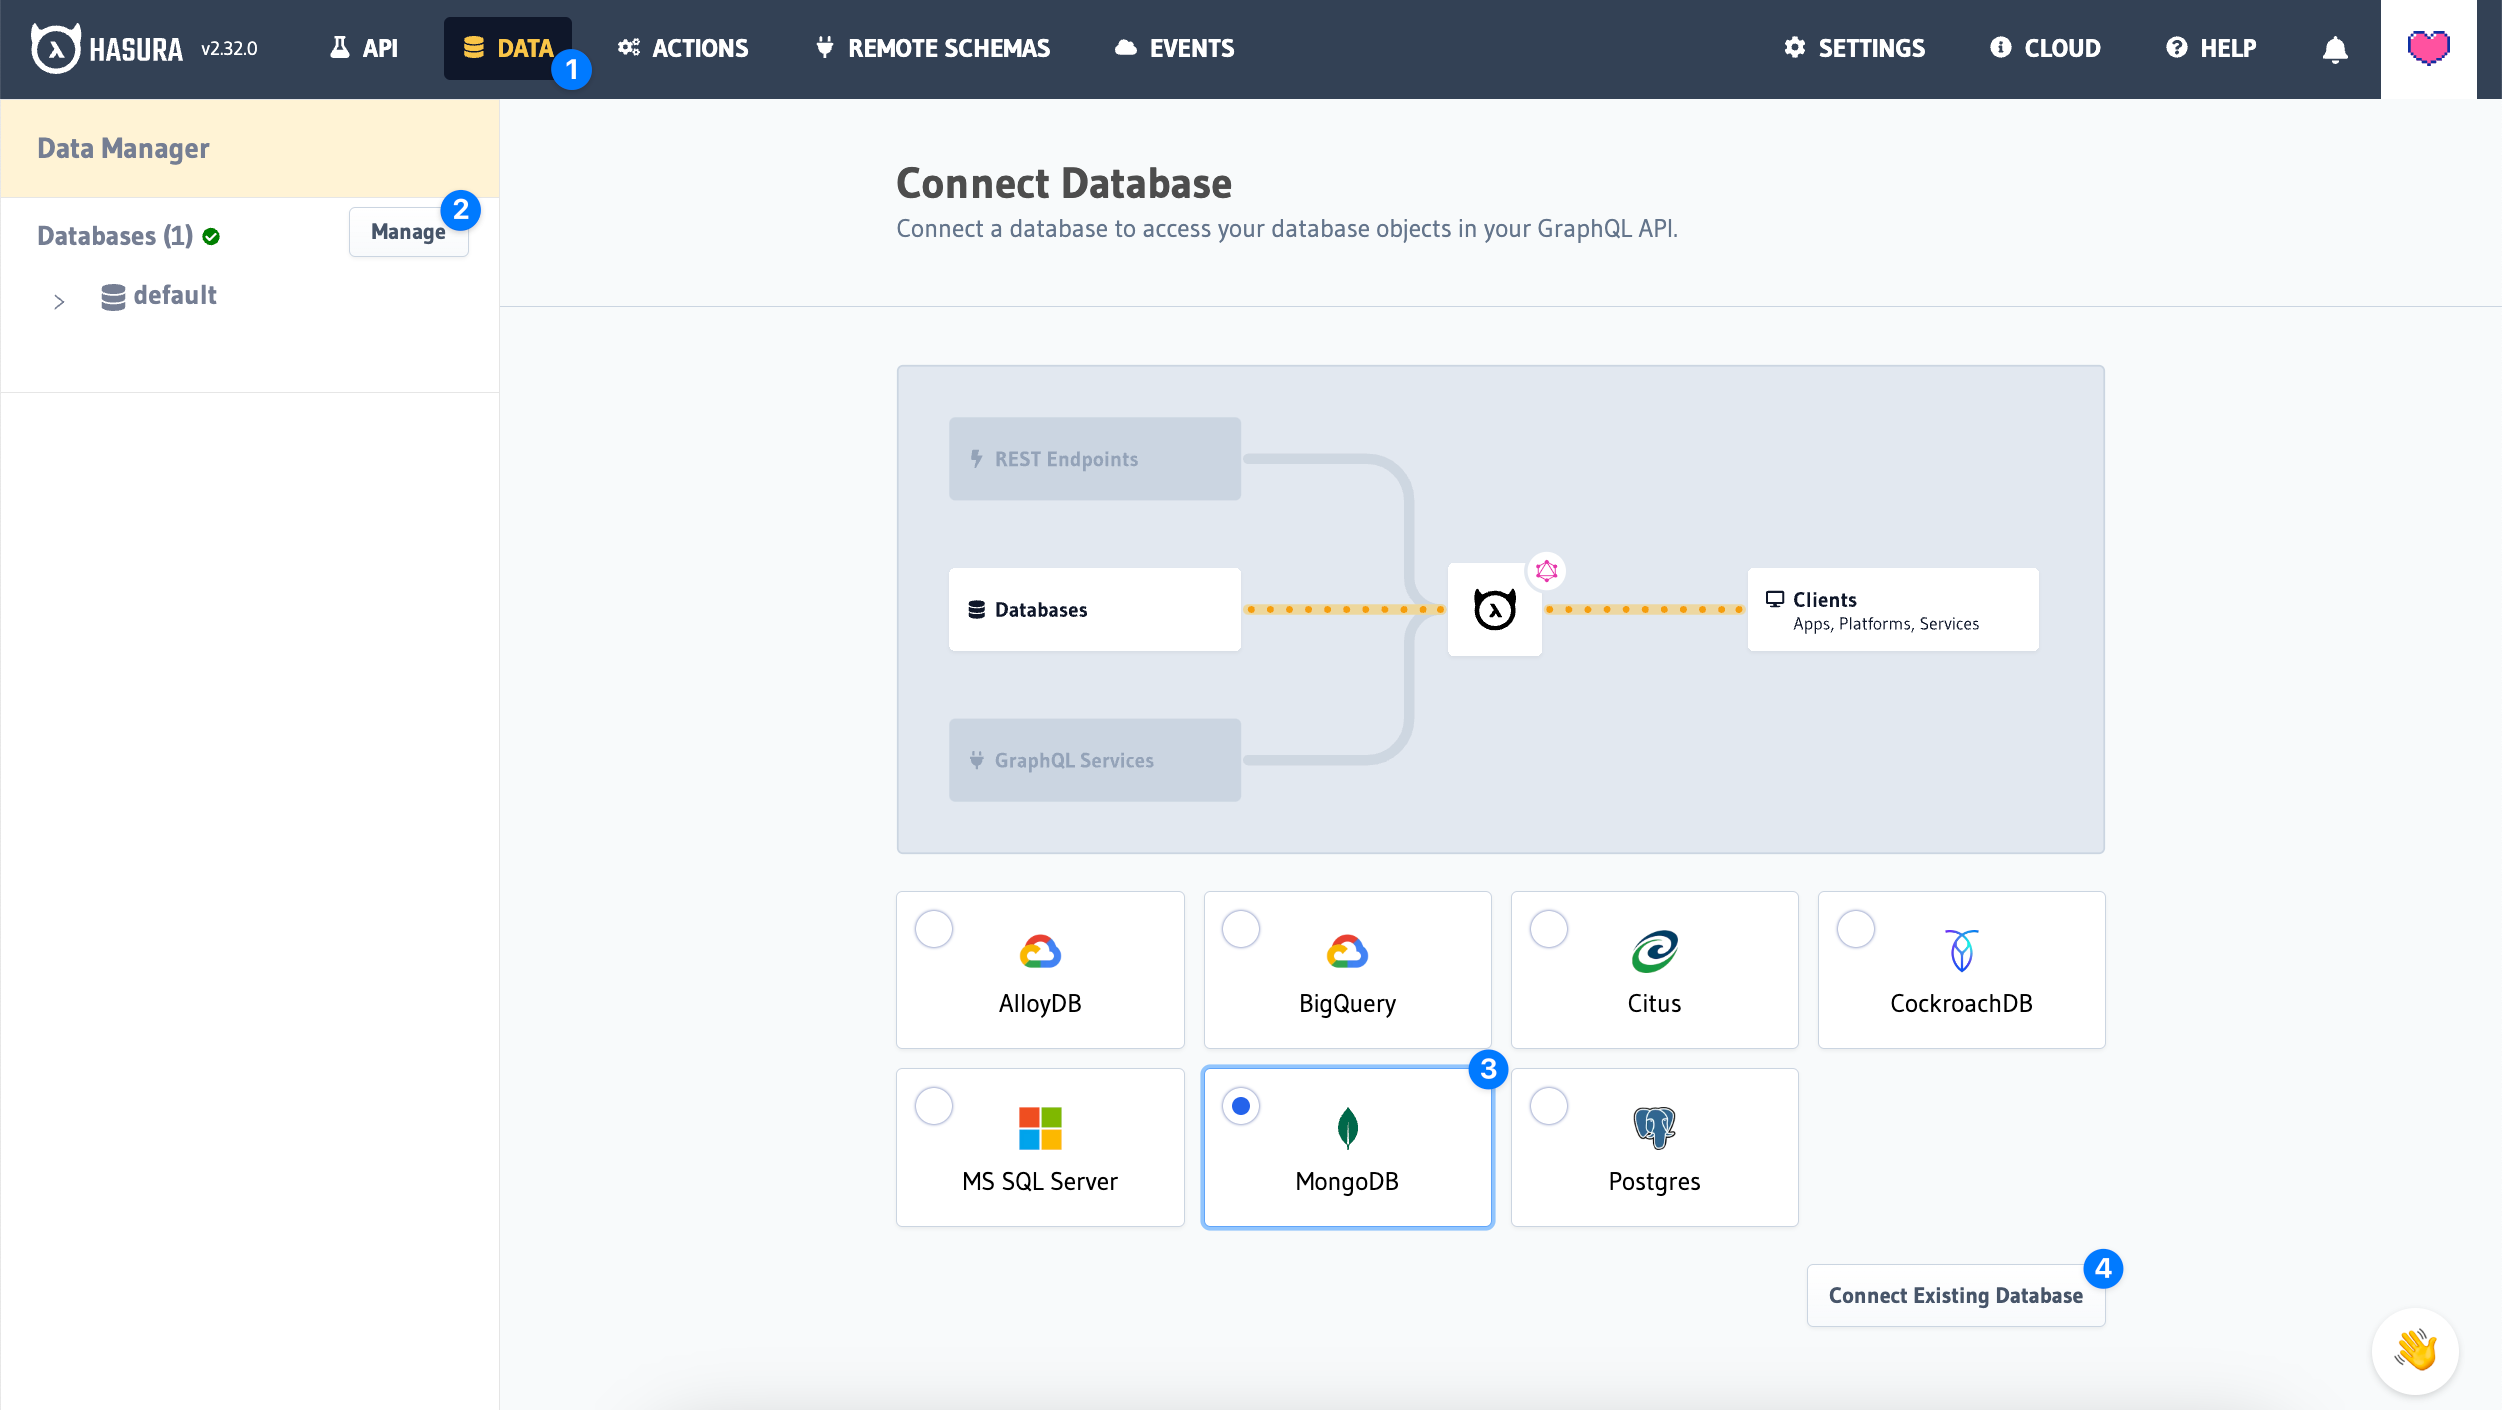
From the Console, visit Data > Manage to connect your MongoDB database.
Then click, Connect Database.
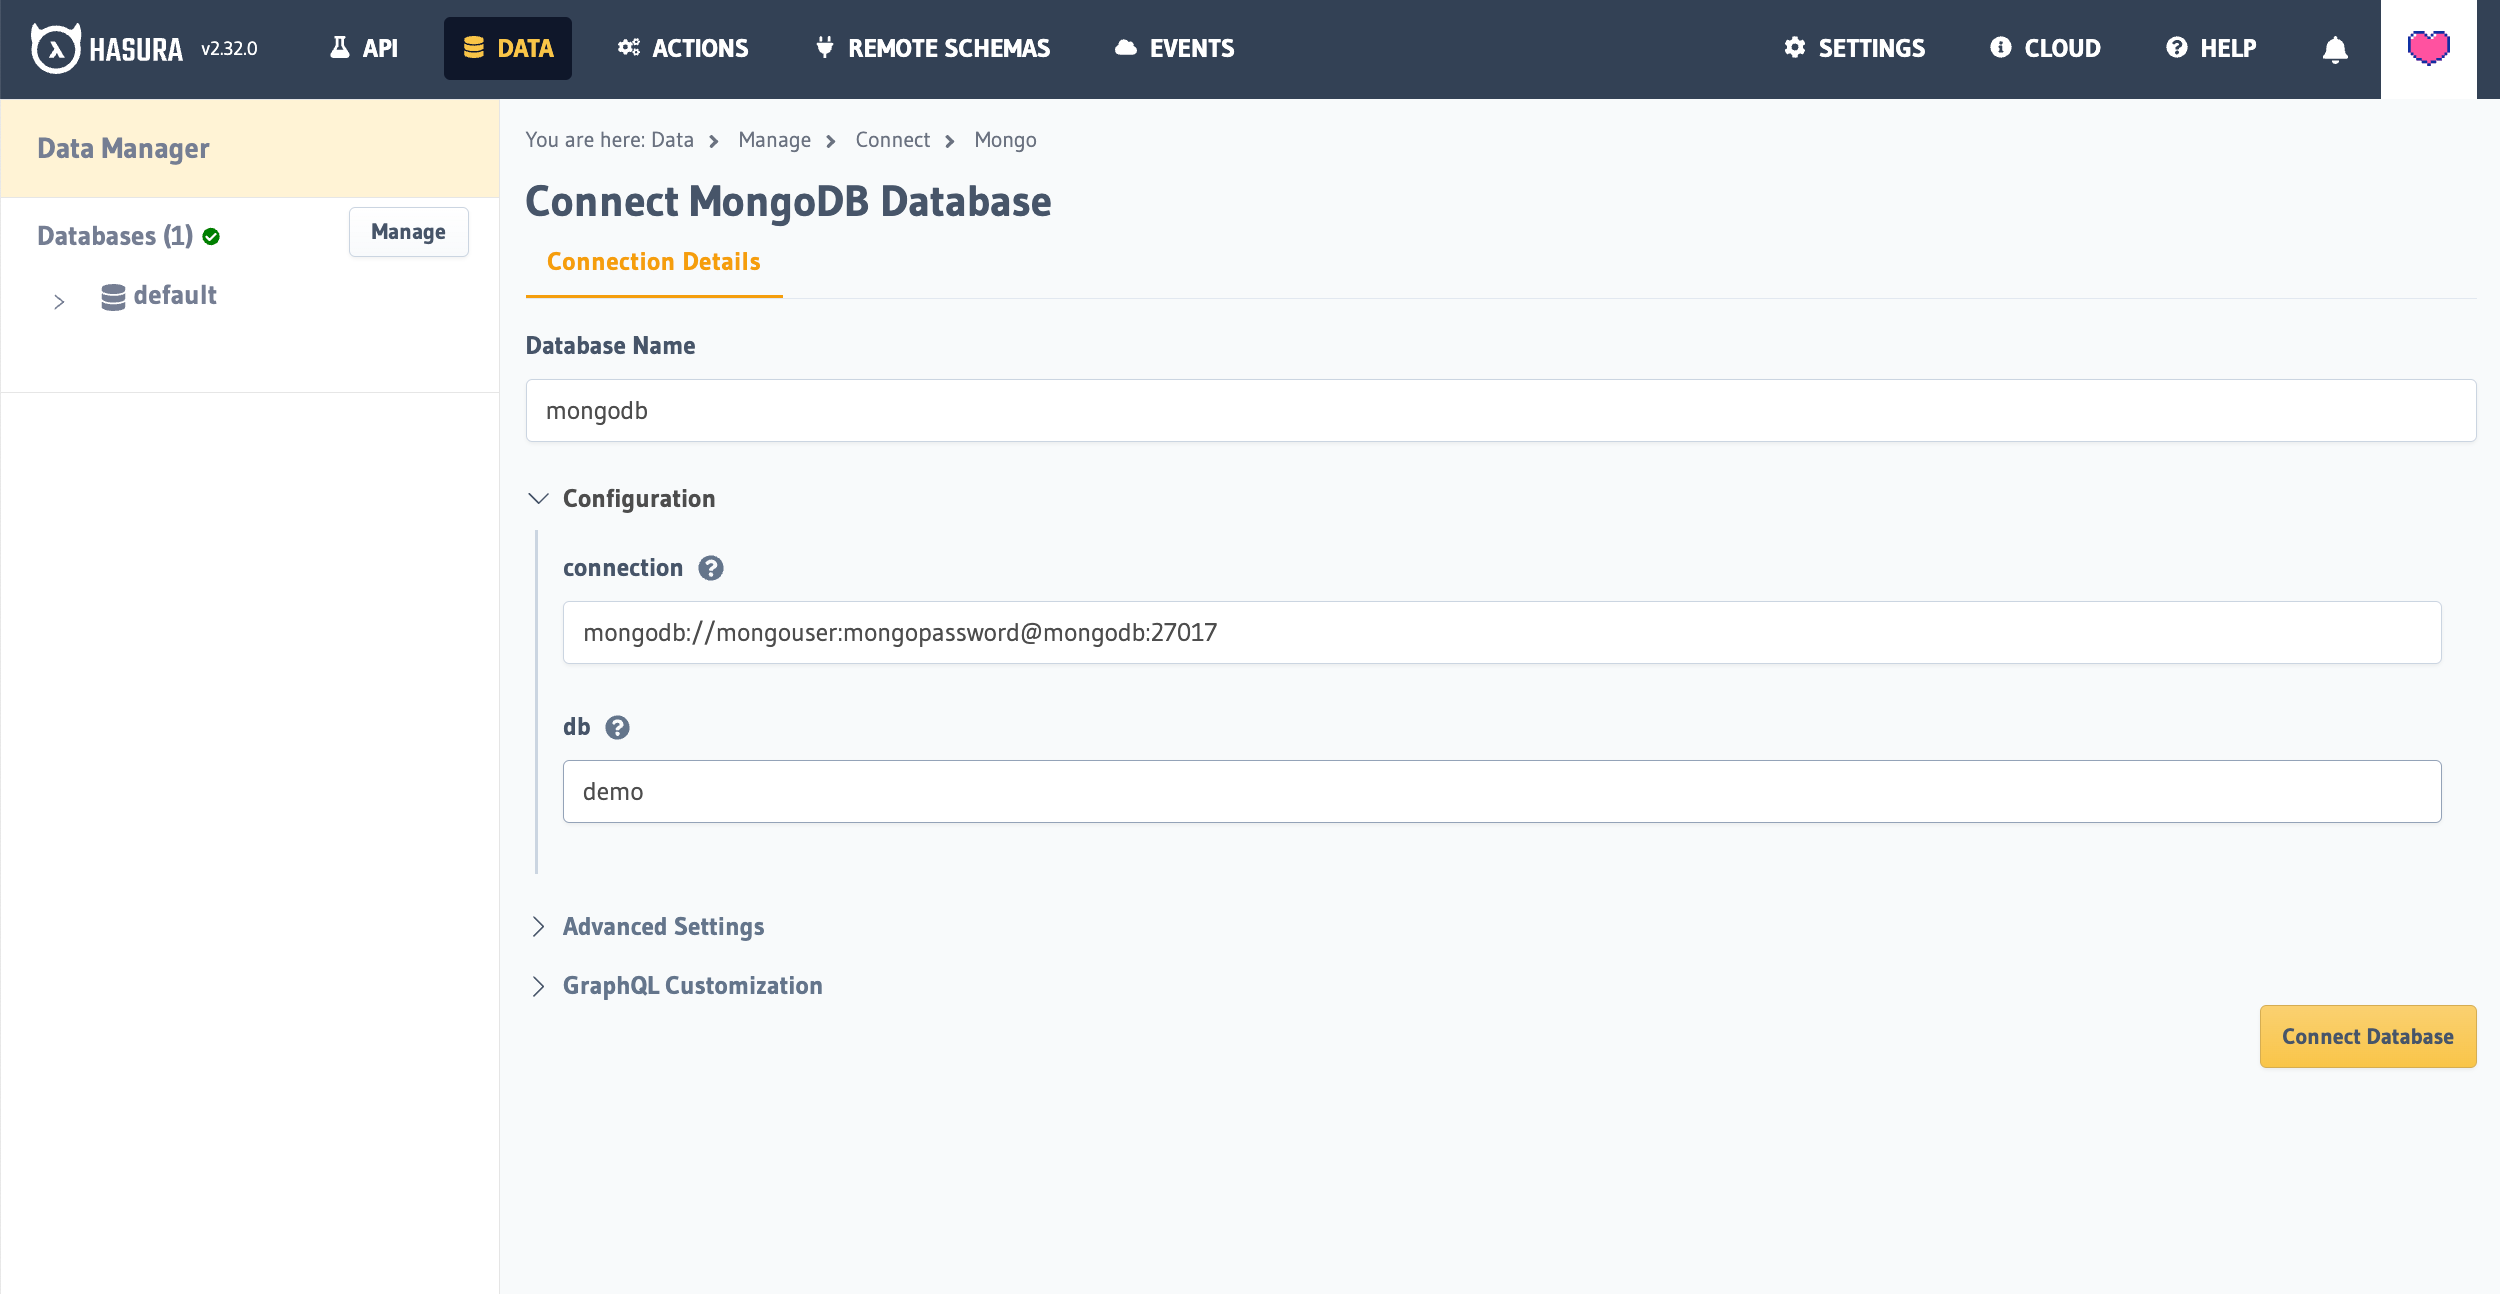
Connect your database using the following details:
- Database Name: (visual name of the database in Hasura)
- Connection: (in the format of
mongodb://[username]:[password]@[host]:[port]) - db: (name of the MongoDB database being connected to)
Step 3: Tracking Collections
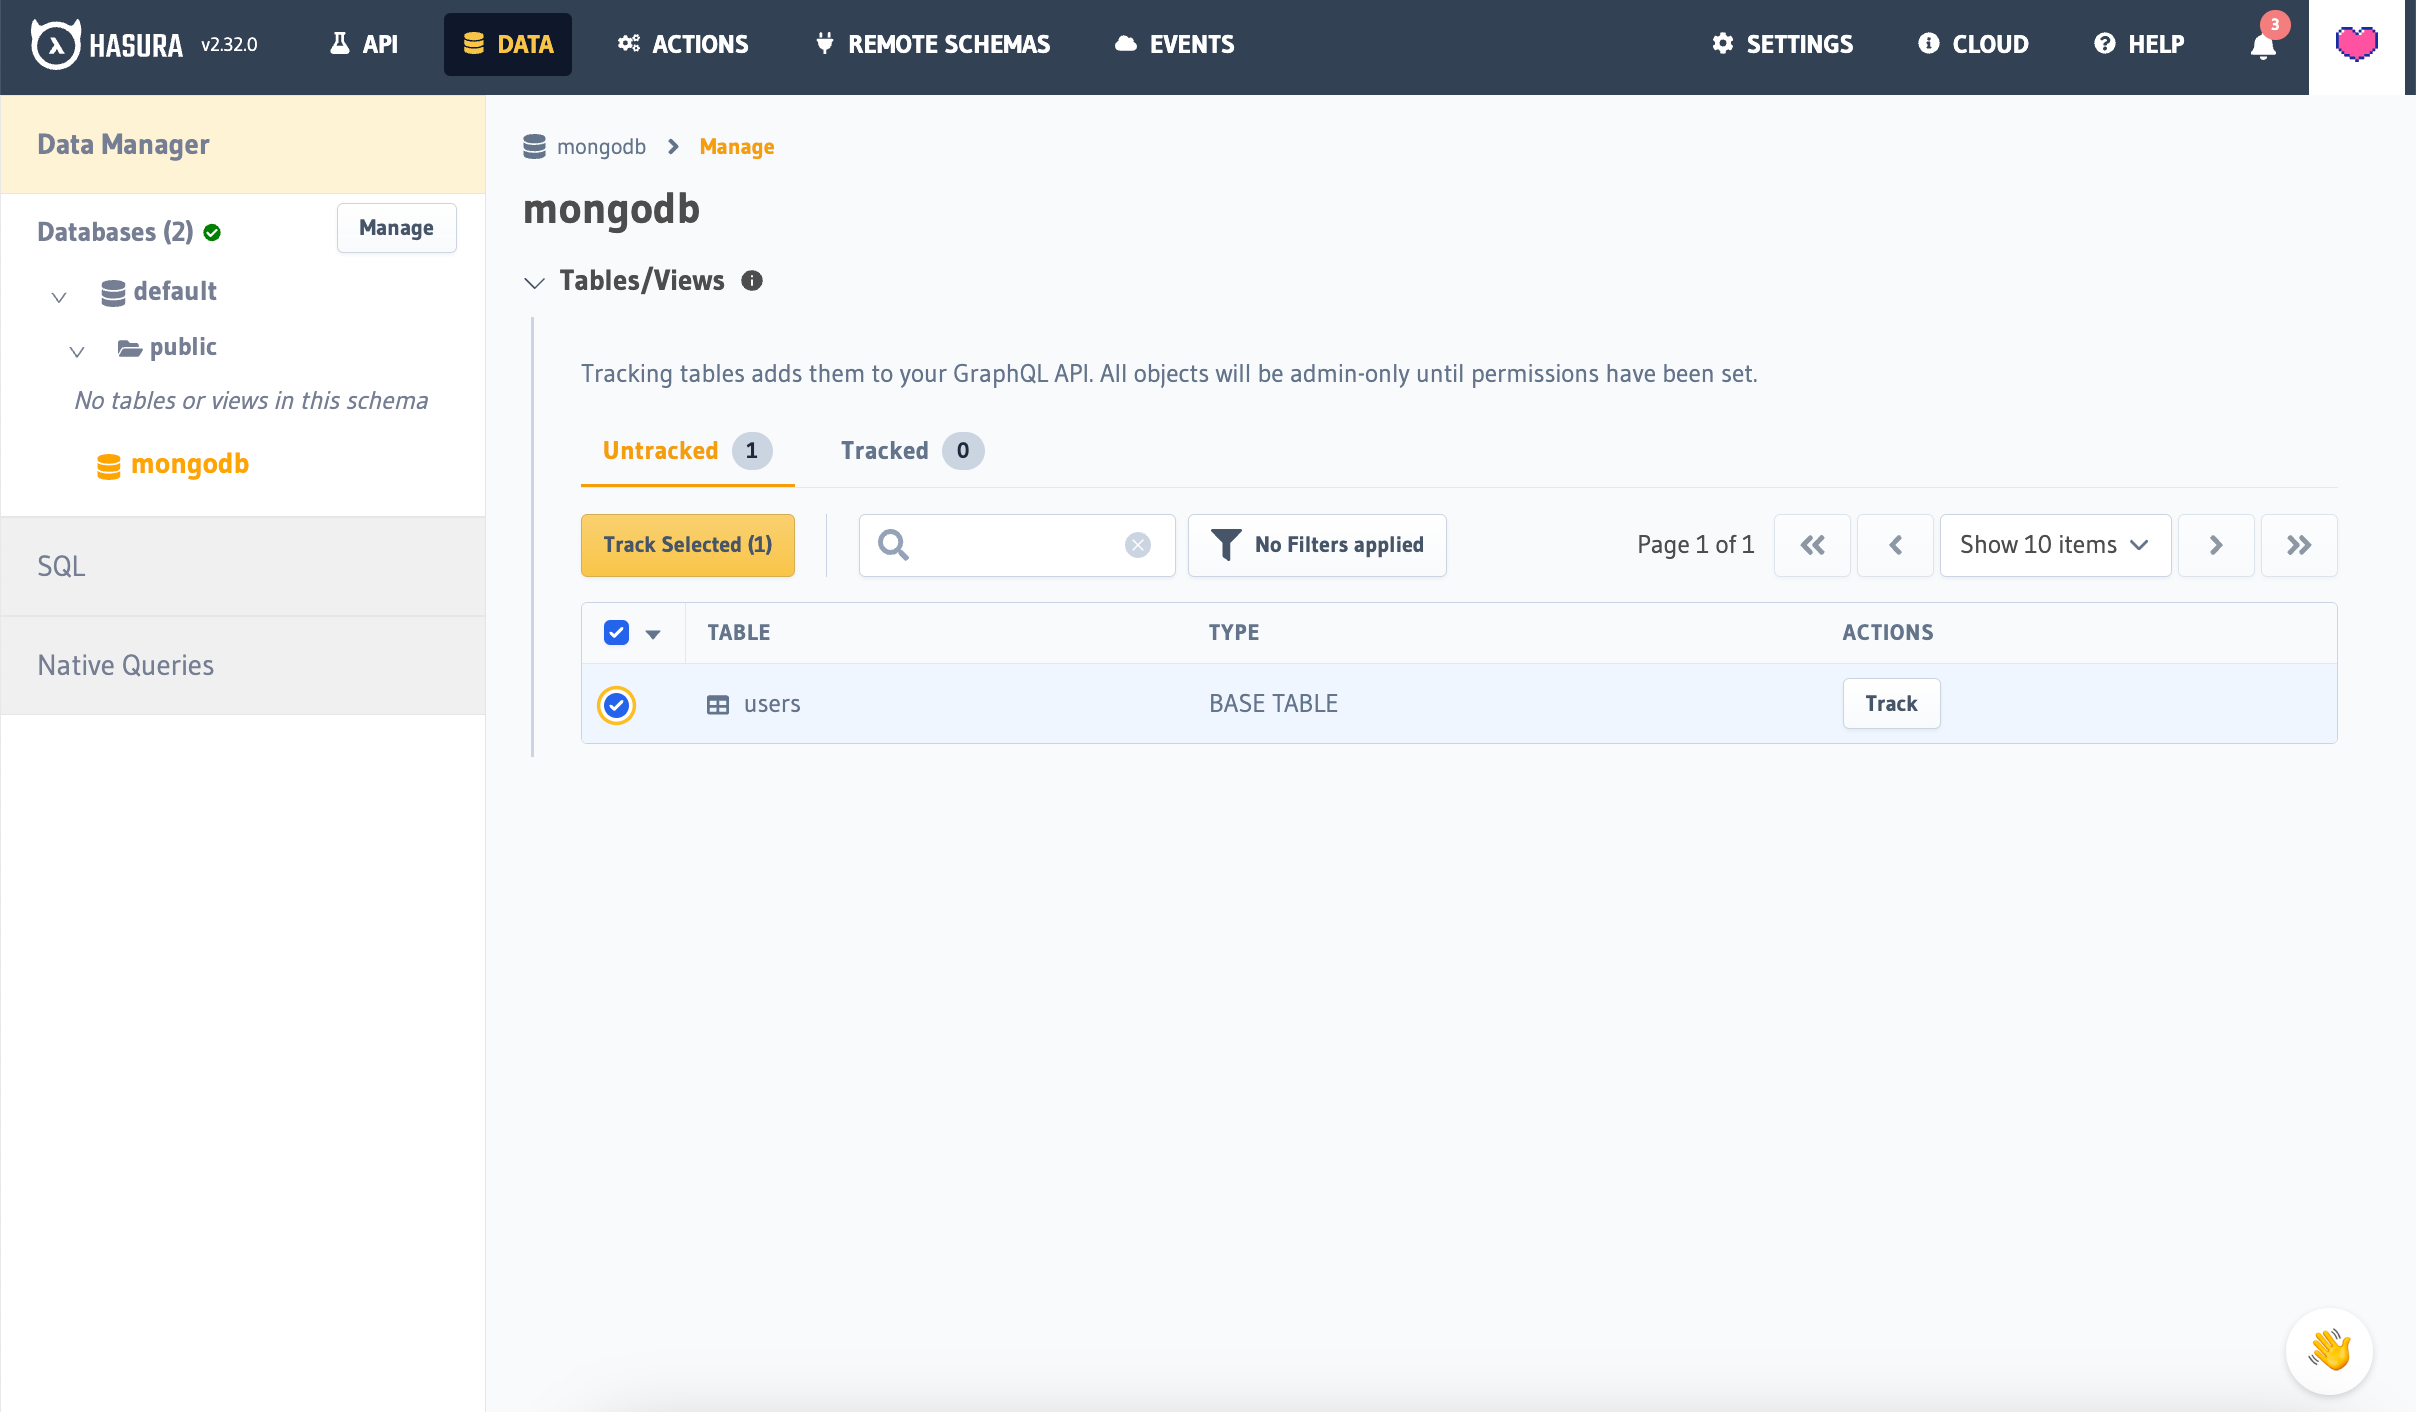
Once your database has been connected, select the database name from the left-hand sidebar.
You should see your users Collection listed here. Select it, and select Track Selected.
Since MongoDB is a NoSQL database, Documents can be variable within each of the Collections. Hasura supports and recommends defining a logical model for each Collection which will define the Document schema.
We also support optionally generating a schema automatically from your database's validation schema if one is available.
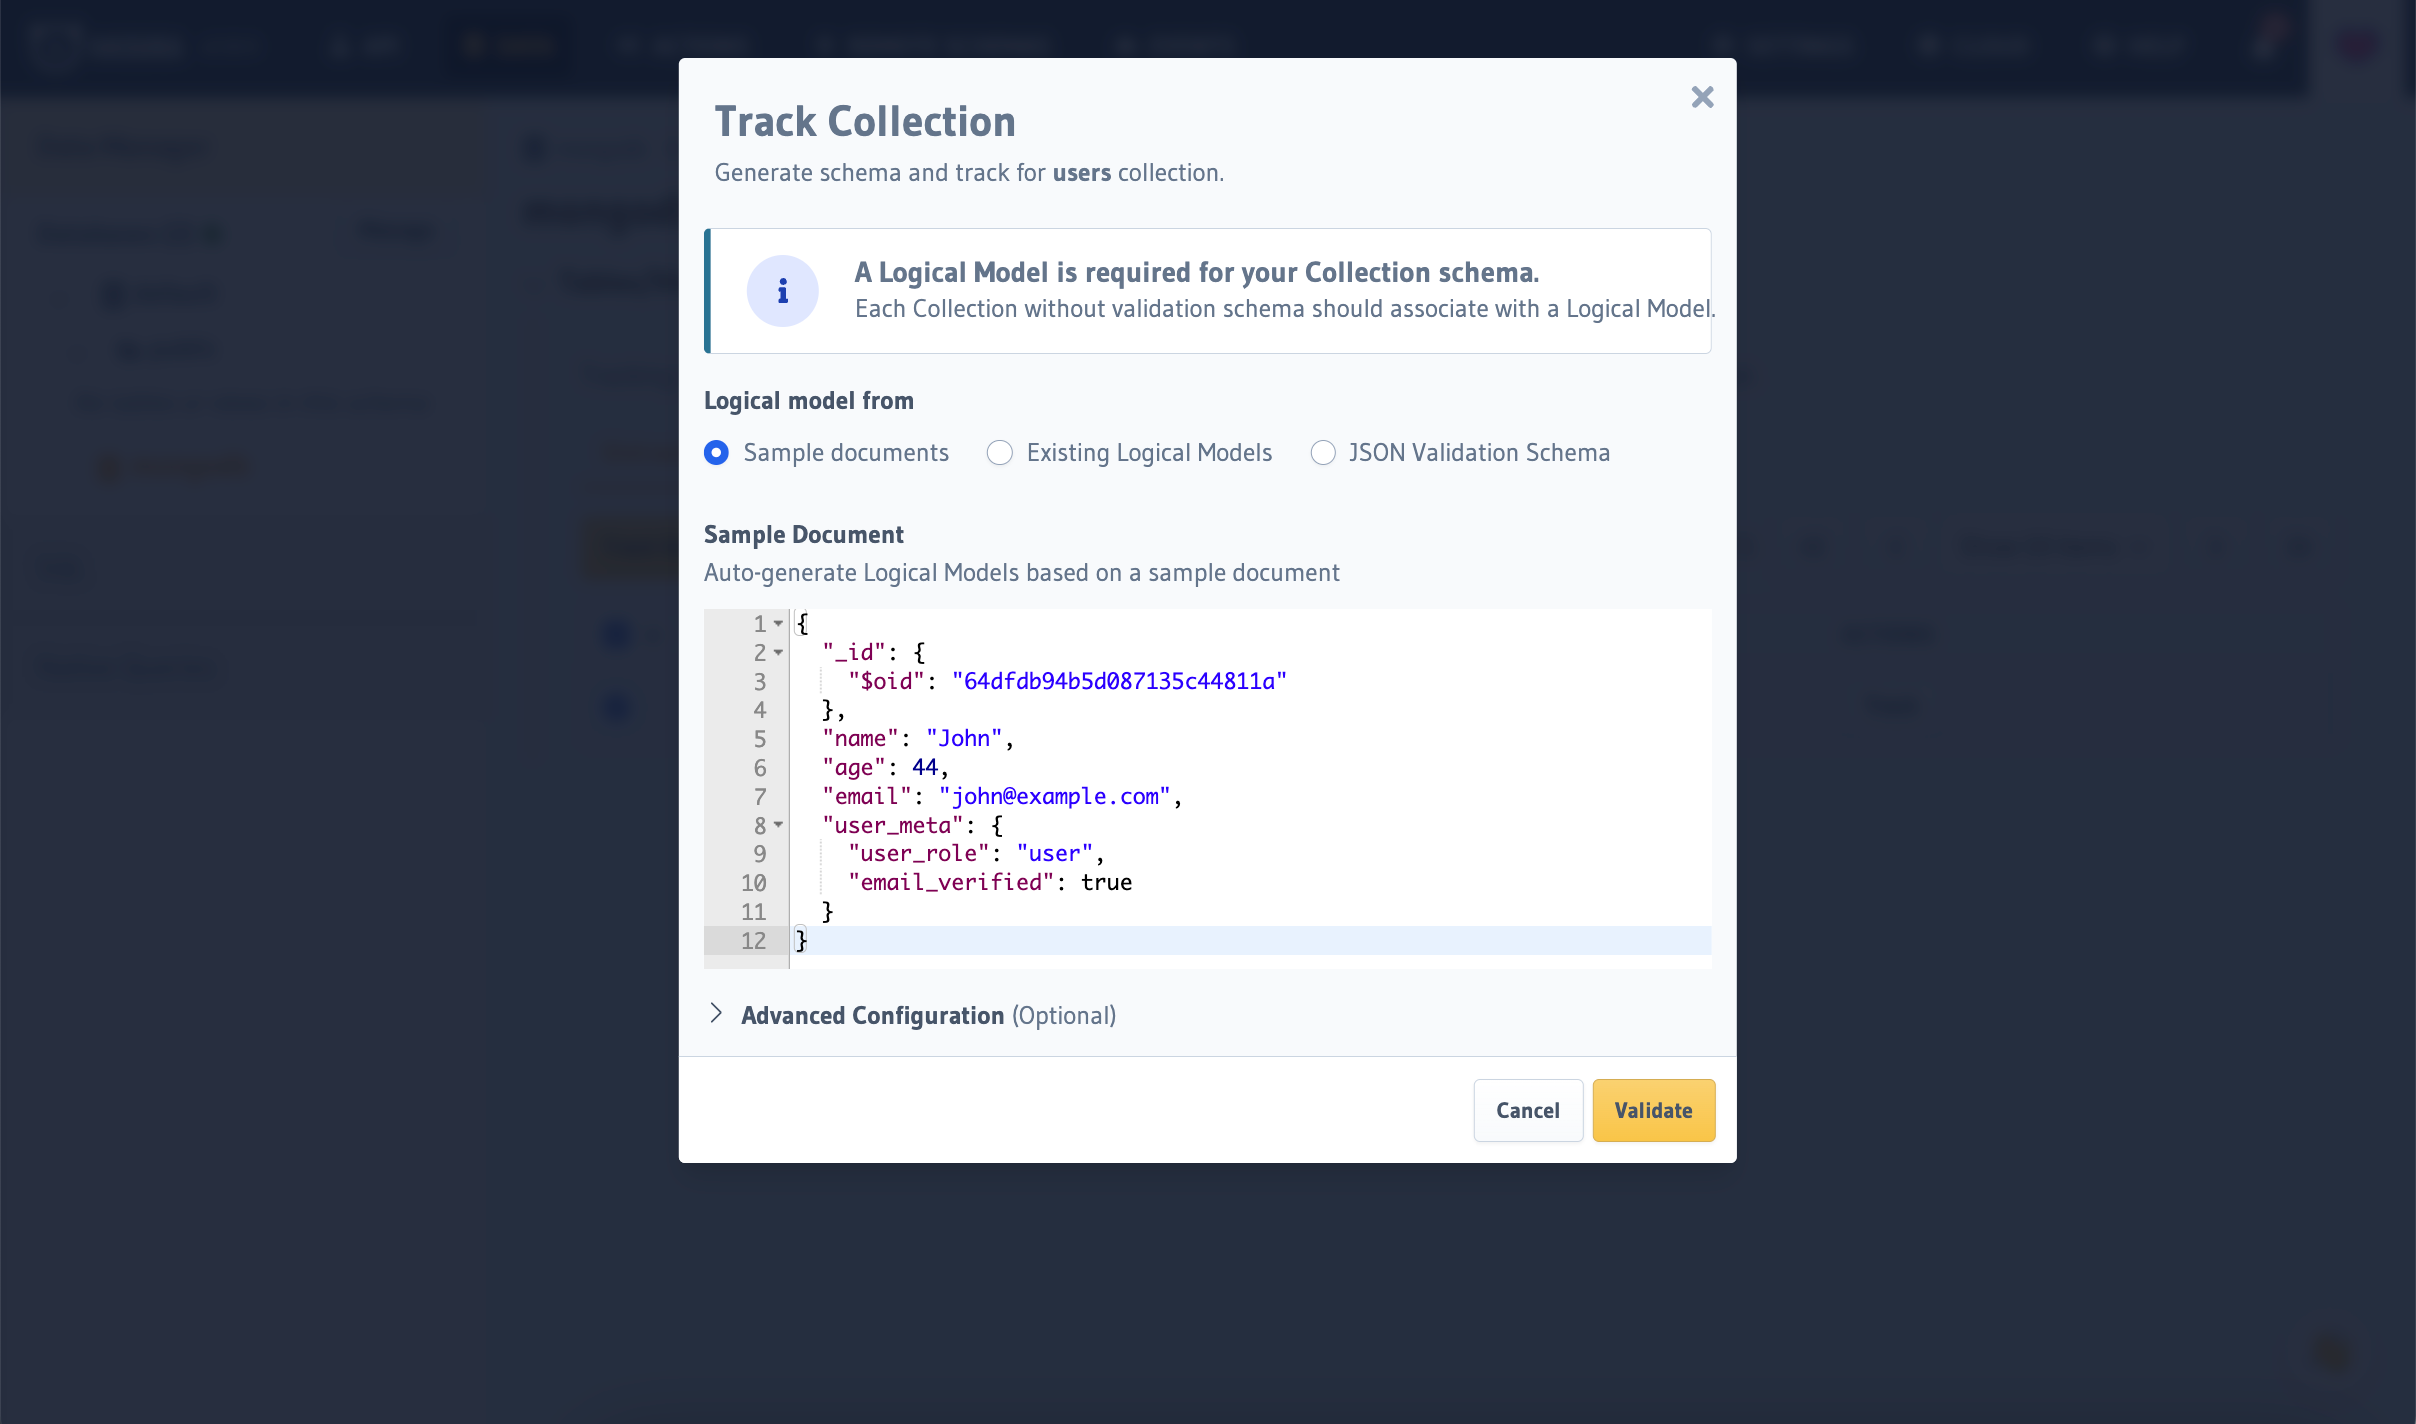
You will now see a modal with a few options for setting up your Collection's schema.
- Infer Schema from Document allows you to take a single Document from your Collection and infer the
- Use Existing Logical Model allows you to select a previously created logical model.
- Use Database Schema allows you to use your database's validation schema if one is present in your database (a GraphQL schema will be automatically generated for you).
Your Collection has now added to your GraphQL API! 🎉
By default, this Collection is only available to admin users. To make it available for more user groups, select the
Collection name from the left-hand sidebar, and select Permissions to setup permission rules for the Collection. You
can read more about permissions here.
Step 4: Running your first query
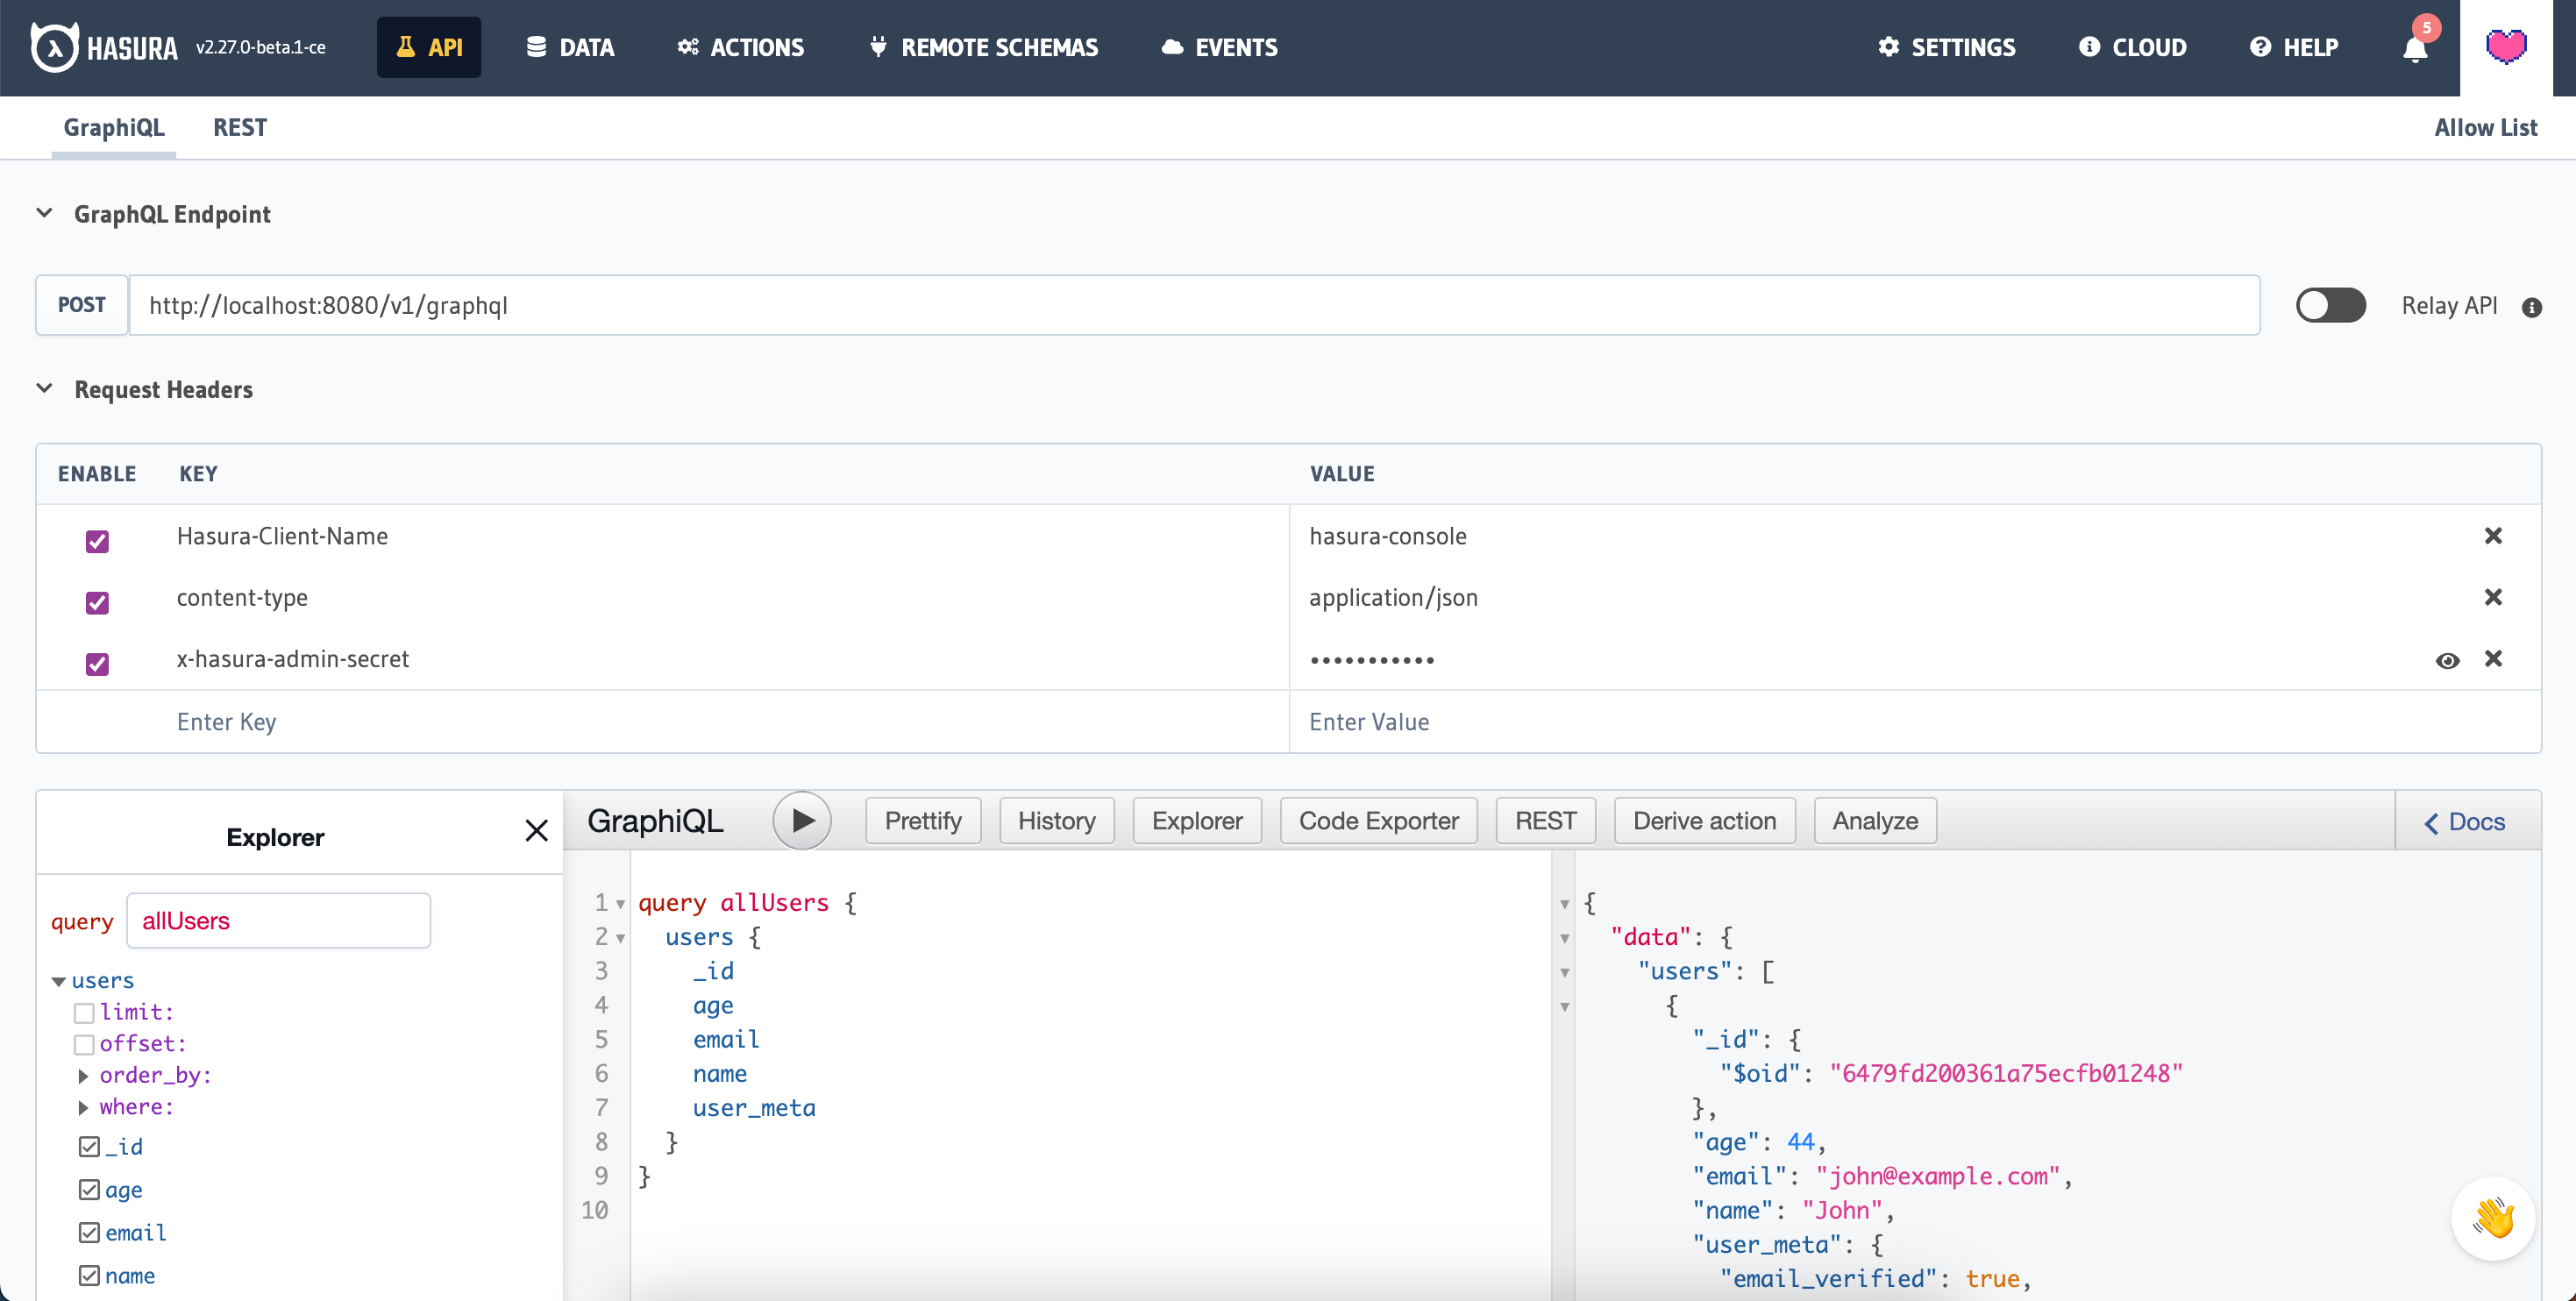
Click on the API tab in the Console navigation which will take you to GraphiQL, our API testing tool.
Utilize the explorer located on the left-hand sidebar to assist you in composing your query (the resulting query will be populated in the body area). When you’re ready, click on the play button to execute your GraphQL query. Your query’s result will be populated in the right-hand column of the interface.
Keep up to date
If you'd like to stay informed about the status of MongoDB support, subscribe to our newsletter and join our Discord!