Connecting Hasura to a Google Cloud SQL for MySQL Database
Introduction
This guide explains how to connect a new or existing Google Cloud SQL for MySQL database to a Hasura instance, either on Hasura Cloud or via one of our self-hosted solutions.
If you plan on using Hasura Cloud, which we recommend, follow steps 1 and 2 below. If you're self-hosting a Hasura instance and already have a project running, skip to step 3.
Step 1: Sign up or log in to Hasura Cloud
Navigate to Hasura Cloud and sign up or log in.
Step 2: Create a Hasura Cloud project
On the Hasura Cloud dashboard, create a new project:
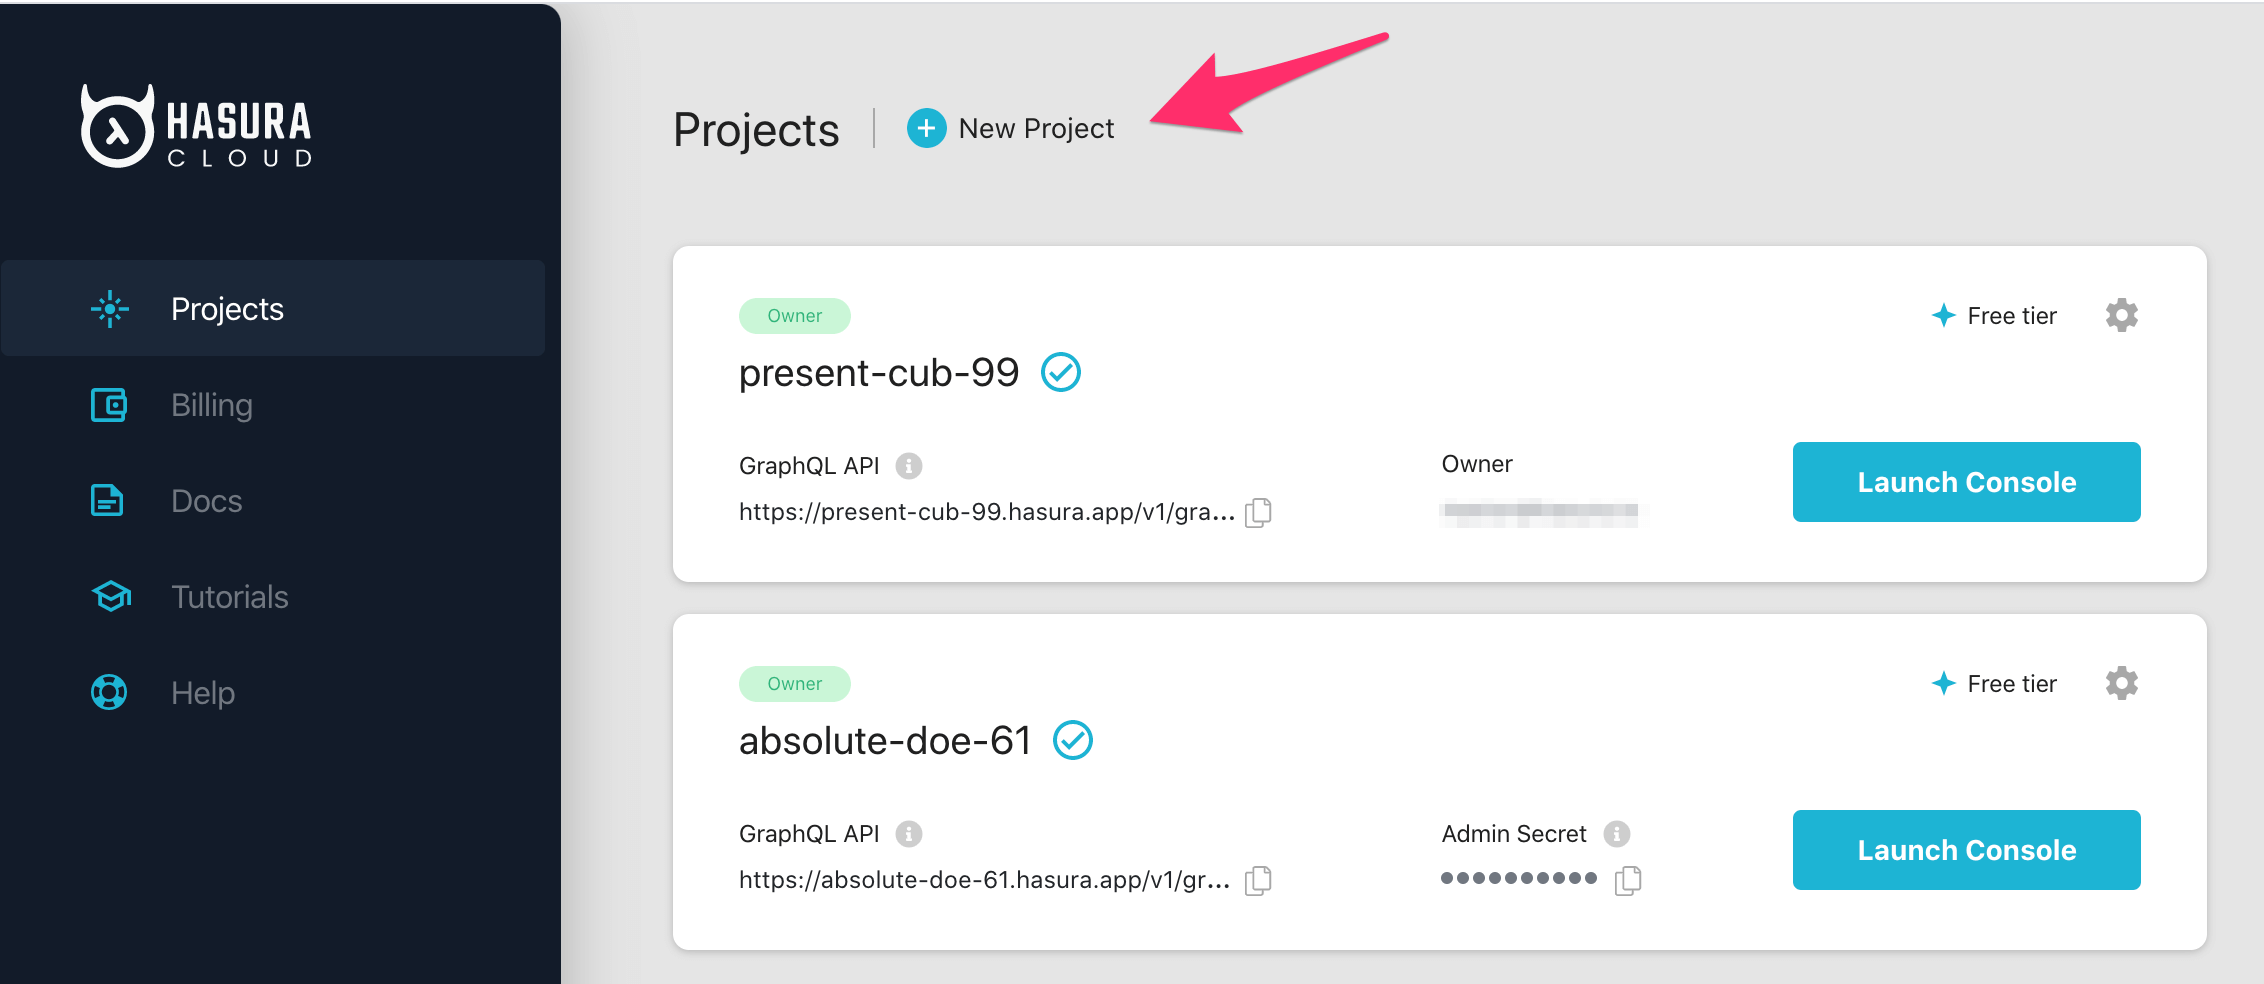
After the project is initialized successfully, click on Launch Console to open the Hasura Console in your browser.
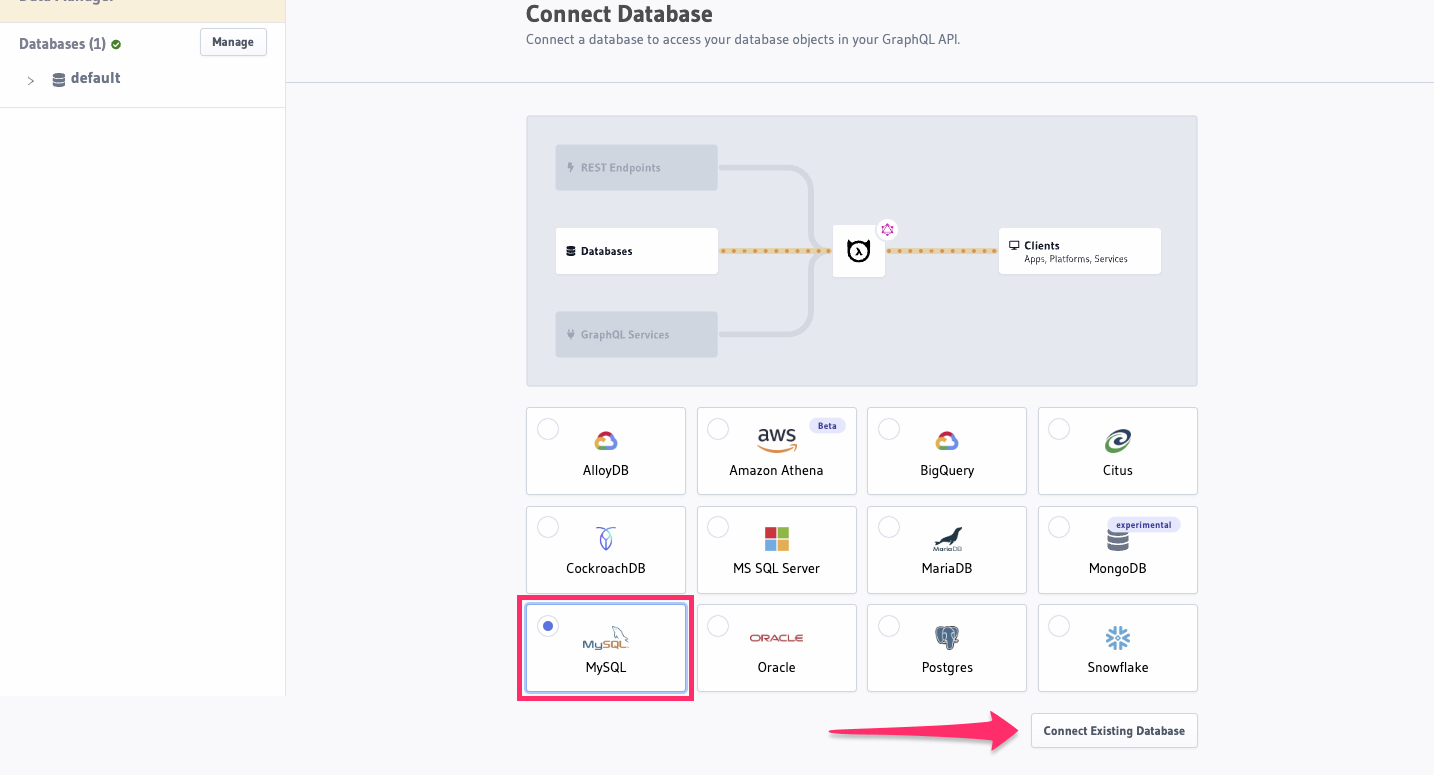
On the Hasura Console, navigate to the Data tab and choose Connect Existing Database. Hasura will prompt you for a
JDBC URL. We'll create this in the next step and then come back here.
Step 3: Create a MySQL DB on Google Cloud SQL
If you have an existing MySQL database on Google Cloud SQL, you can skip this step and move on to step 4.
Log into the GCP console.
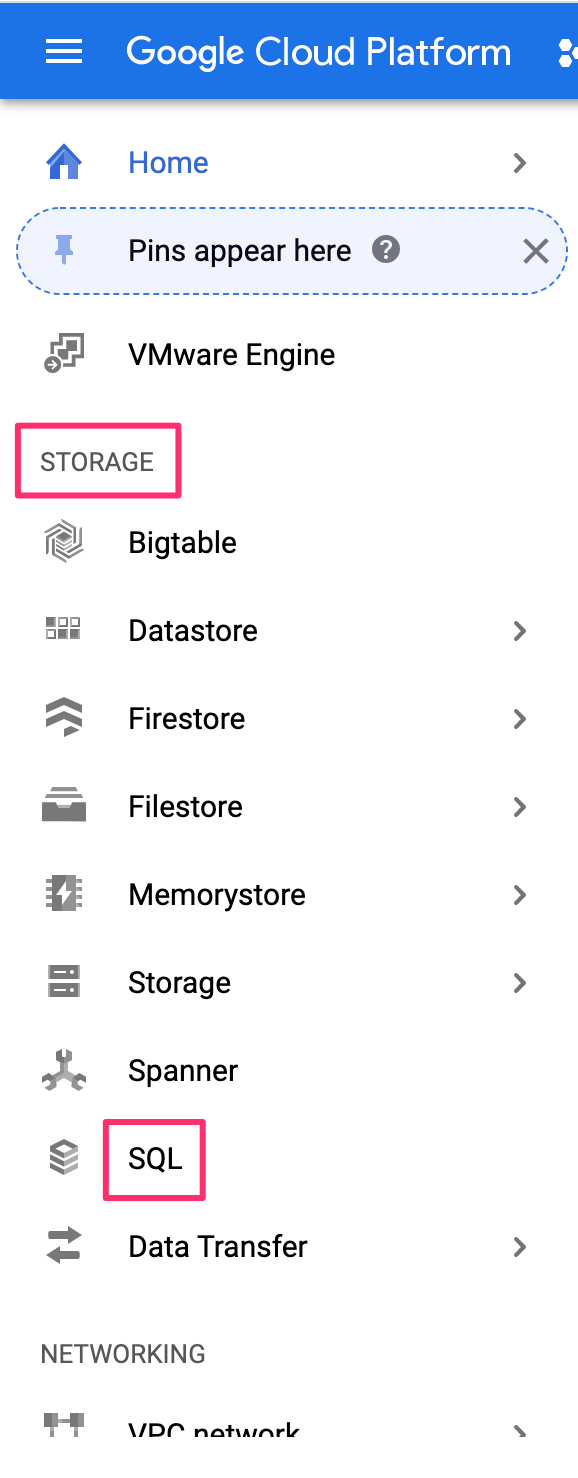
On the left-side navigation, scroll down to Storage and click on SQL:
On the top, click on Create instance:

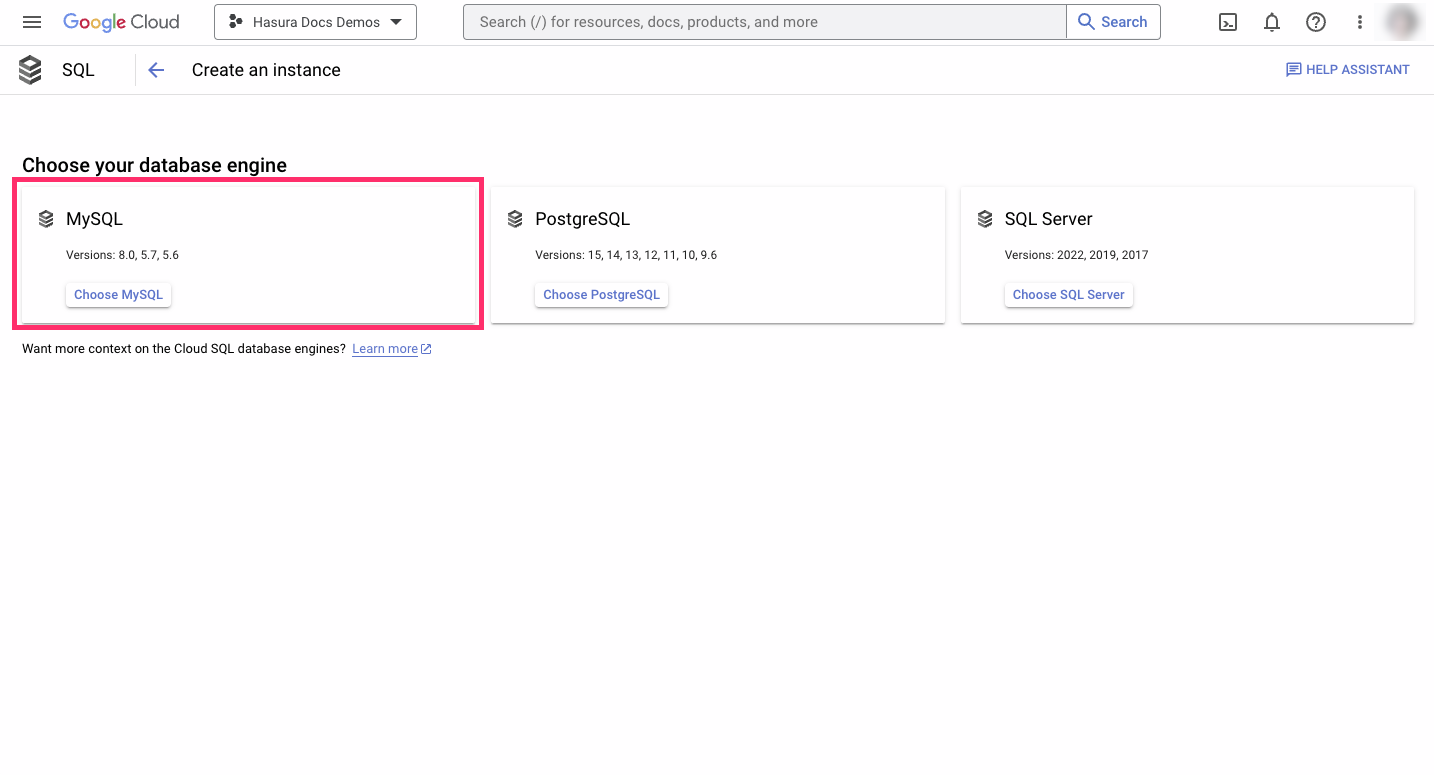
Select MySQL:
Select an instance ID, as well as a default user password. Choose a preset, and, if required, a specific region and zone.
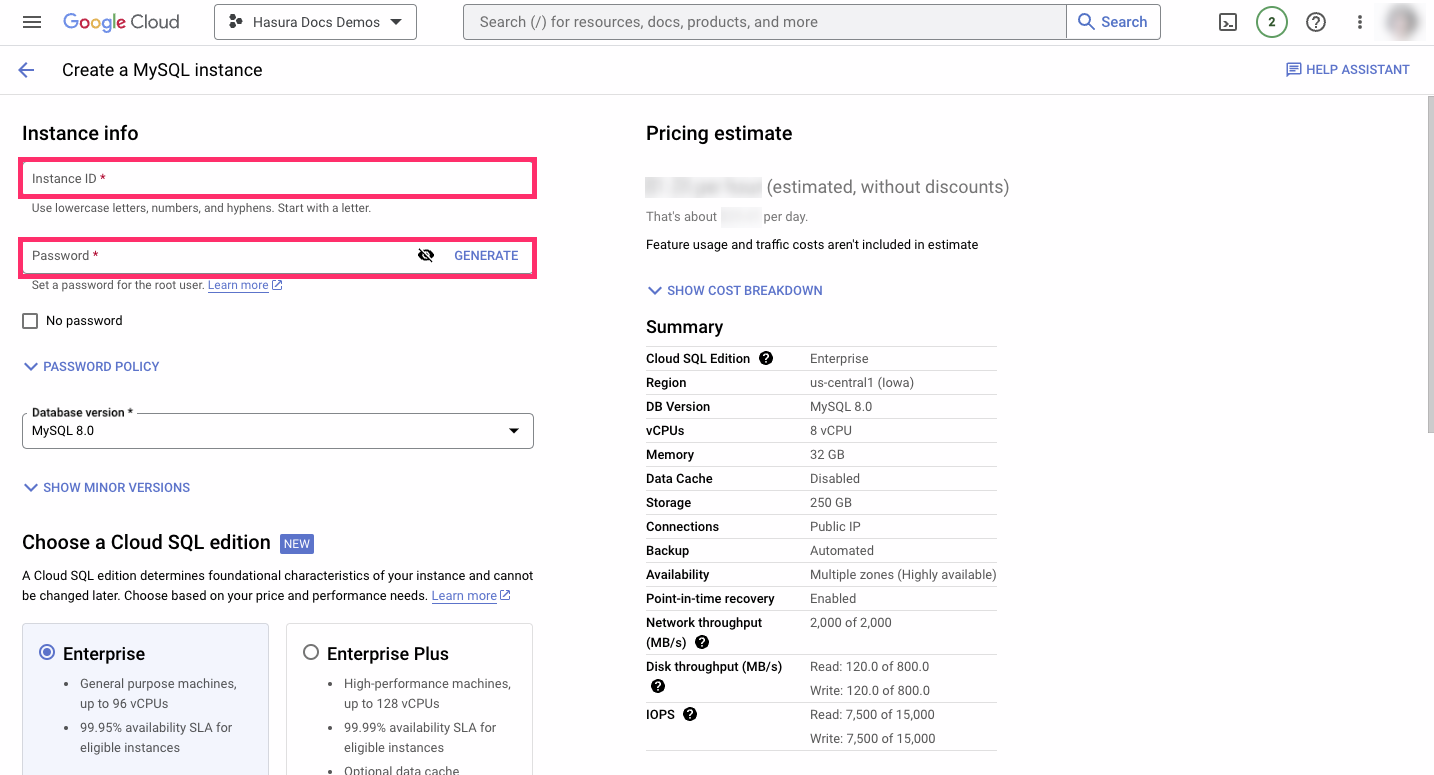
Then click Create Instance.
Step 4: Allow connections to your DB from Hasura
On the dashboard of your Google Cloud SQL database instance, on the left sidebar, click on Connections and then the
Networking tab. Then scroll down to the checkbox Public IP, and click Add a network:
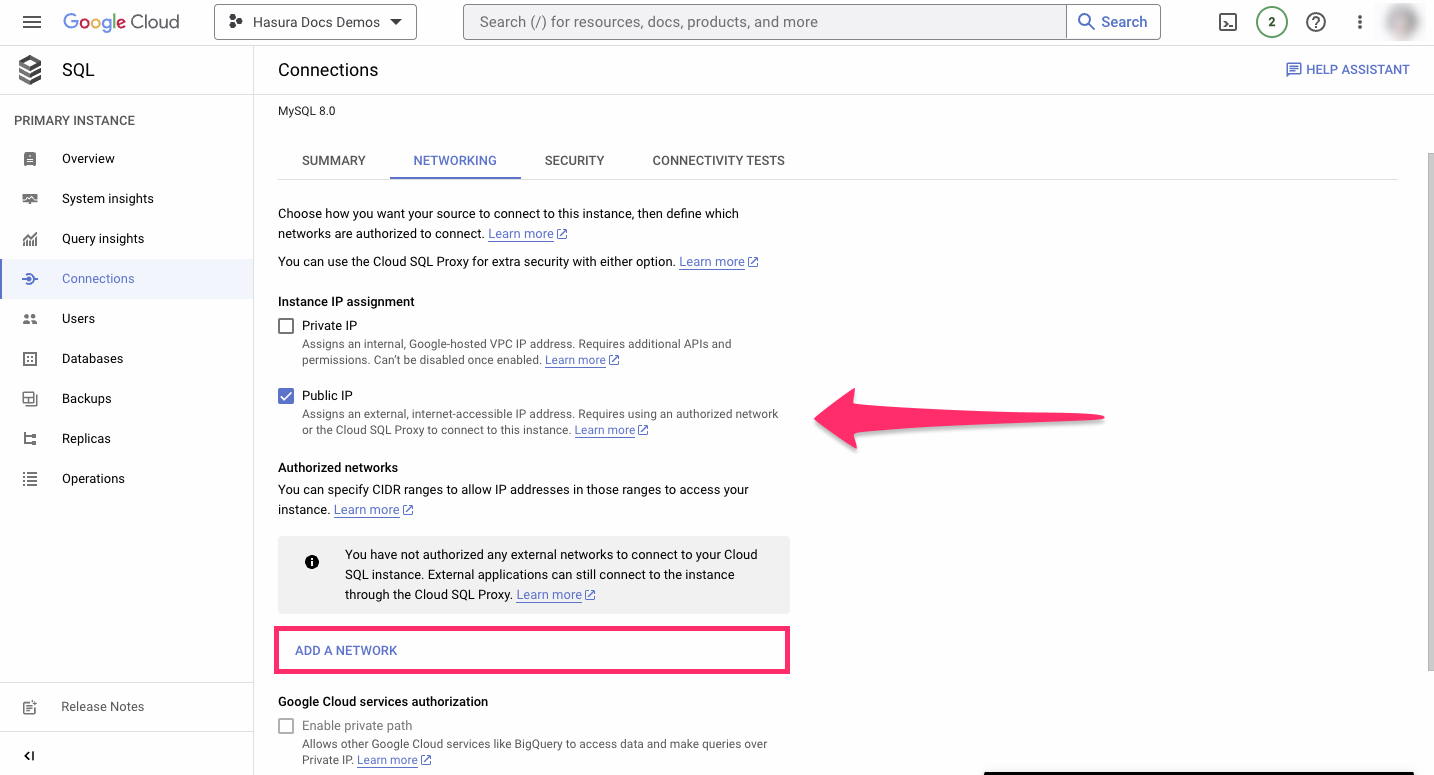
If using Hasura Cloud, from your project's dashboard, copy the Hasura Cloud IP address:
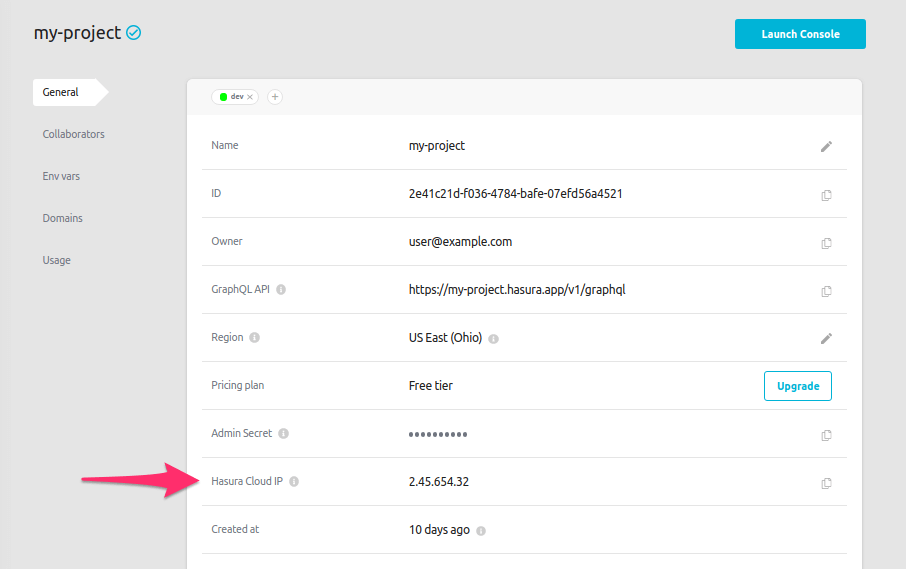
If you're using a self-hosted solution, you'll need to determine the IP address manually depending on your hosting service.
Enter the Hasura IP address that you copied along with a name (e.g., Hasura):
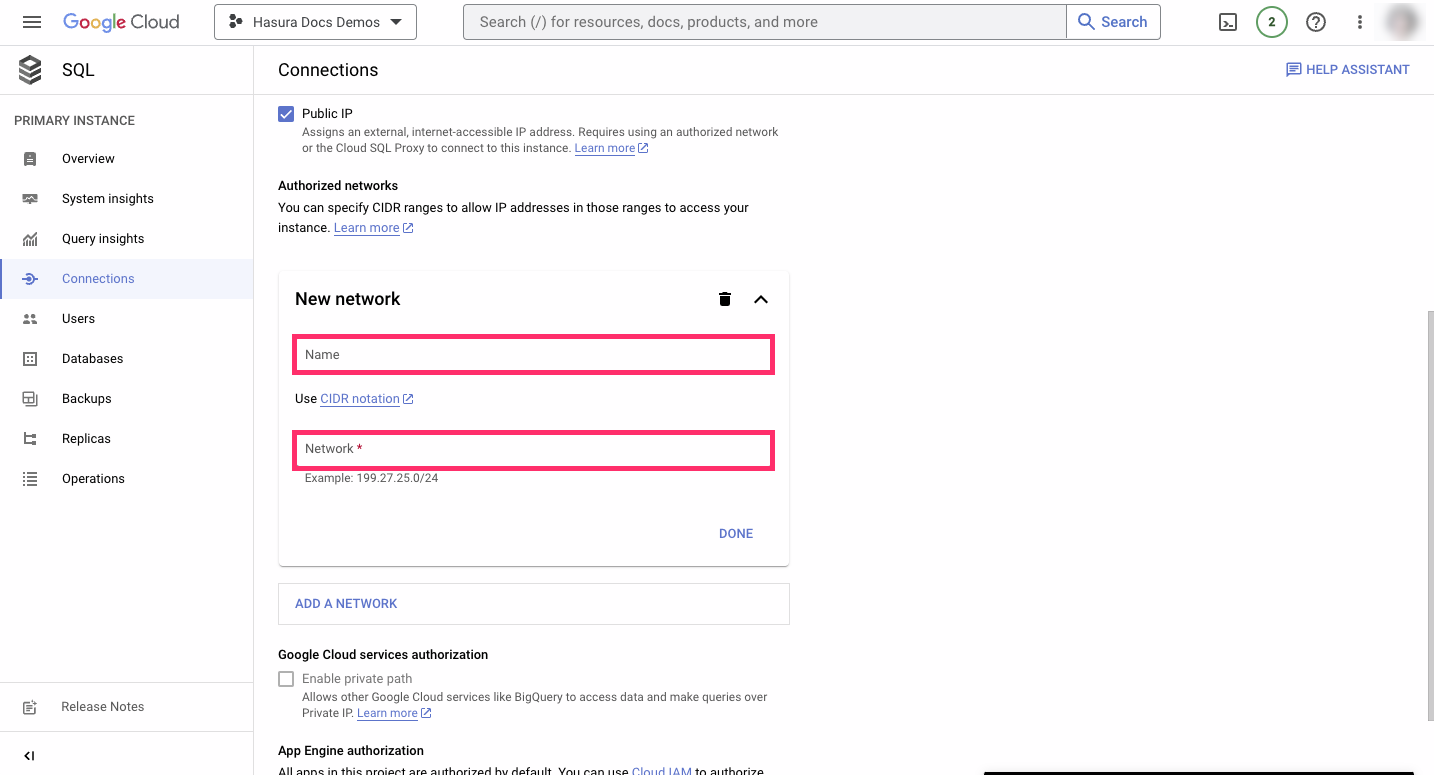
Then click Done and Save.
Step 5: Construct the database connection URL
The structure of the database connection URL looks as follows:
jdbc:mysql://<hostname>:<port>/<database_name>?user=<username>&password=<password>
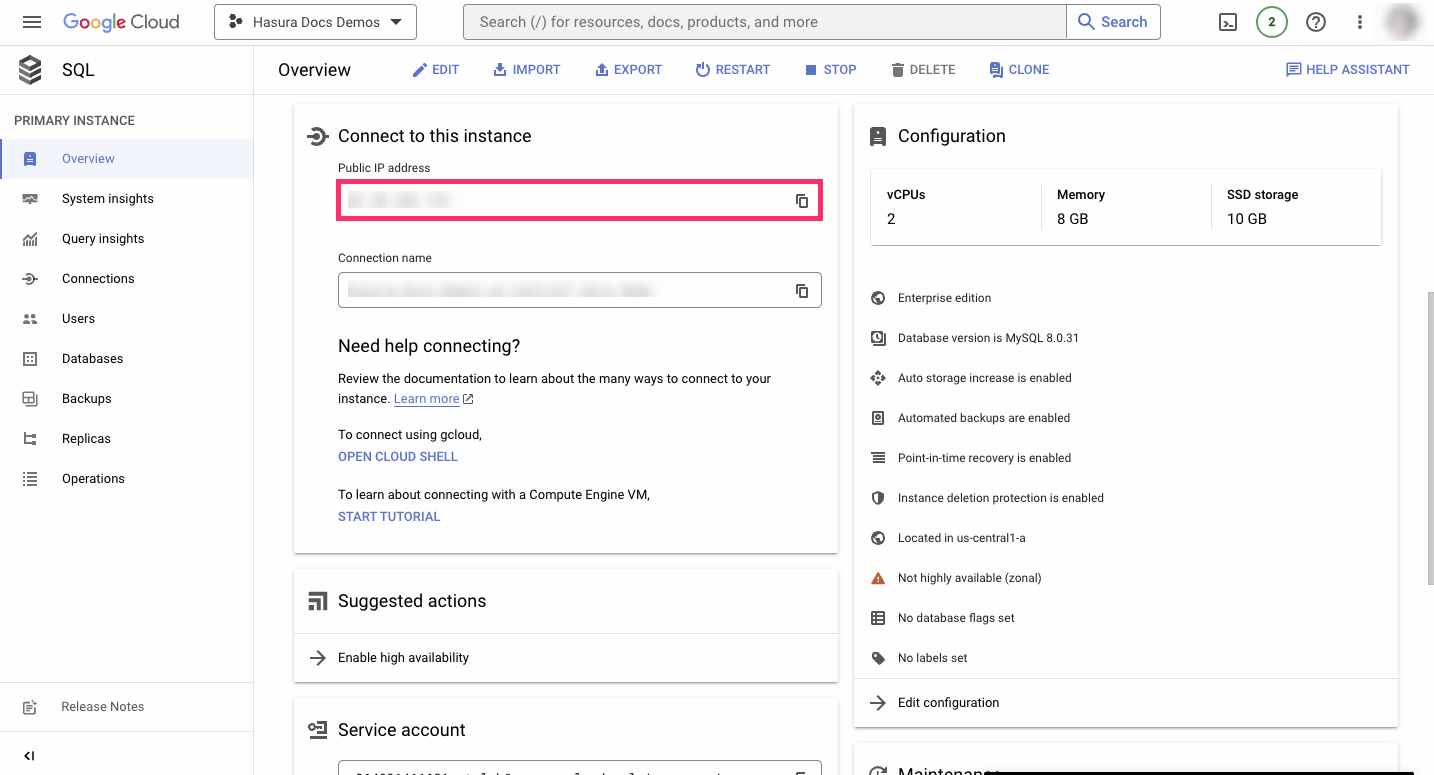
port: The default port for MySQL is3306if not specified otherwise.database_name: The name ismysqlby default unless otherwise specified.username: If you have a separate database user, the username will be theirs. If you didn't specify a user, the default username isroot.password: If you have a separate database user, use their password. Otherwise, use the password that you chose when creating the database.hostname: The public IP can be obtained by clicking onOverviewon the left-side navigation and then scrolling down toConnect to this instance:
If you're having trouble creating your connection string, check out Google Cloud SQL's docs.
Step 6: Finish connecting the database
Back on the Hasura Console, enter the database URL that we created in step 5:
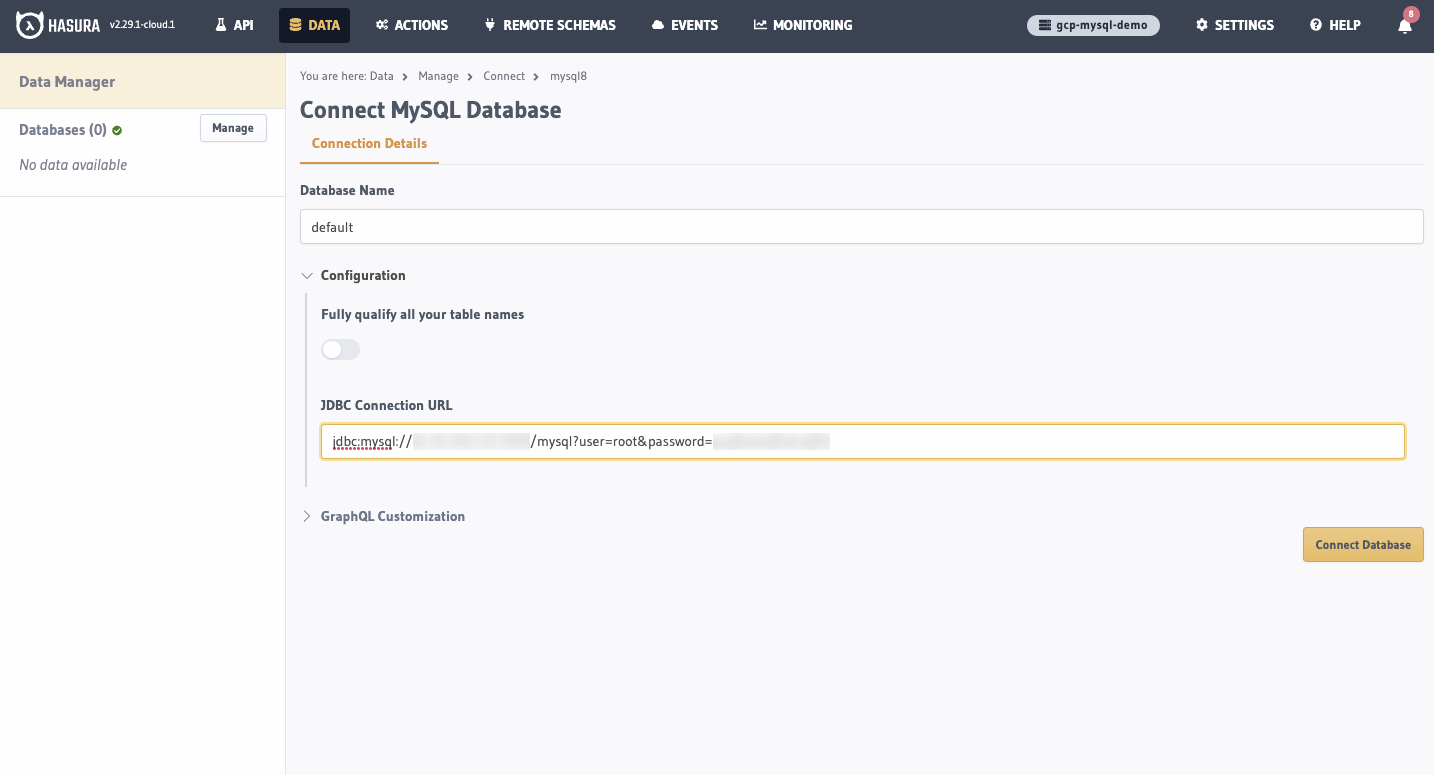
Then click Connect Database.
It is recommended to set database connection URLs as env vars in Hasura Engine instead of raw database URLs which would be saved to metadata and likely committed to a repository which may be a security risk.
Due to the potential variations in drivers, it's crucial to escape special characters used in the password of the
connection string. These include { } % & #. To escape a character, use the appropriate escape sequence based on your
database's driver's documentation.
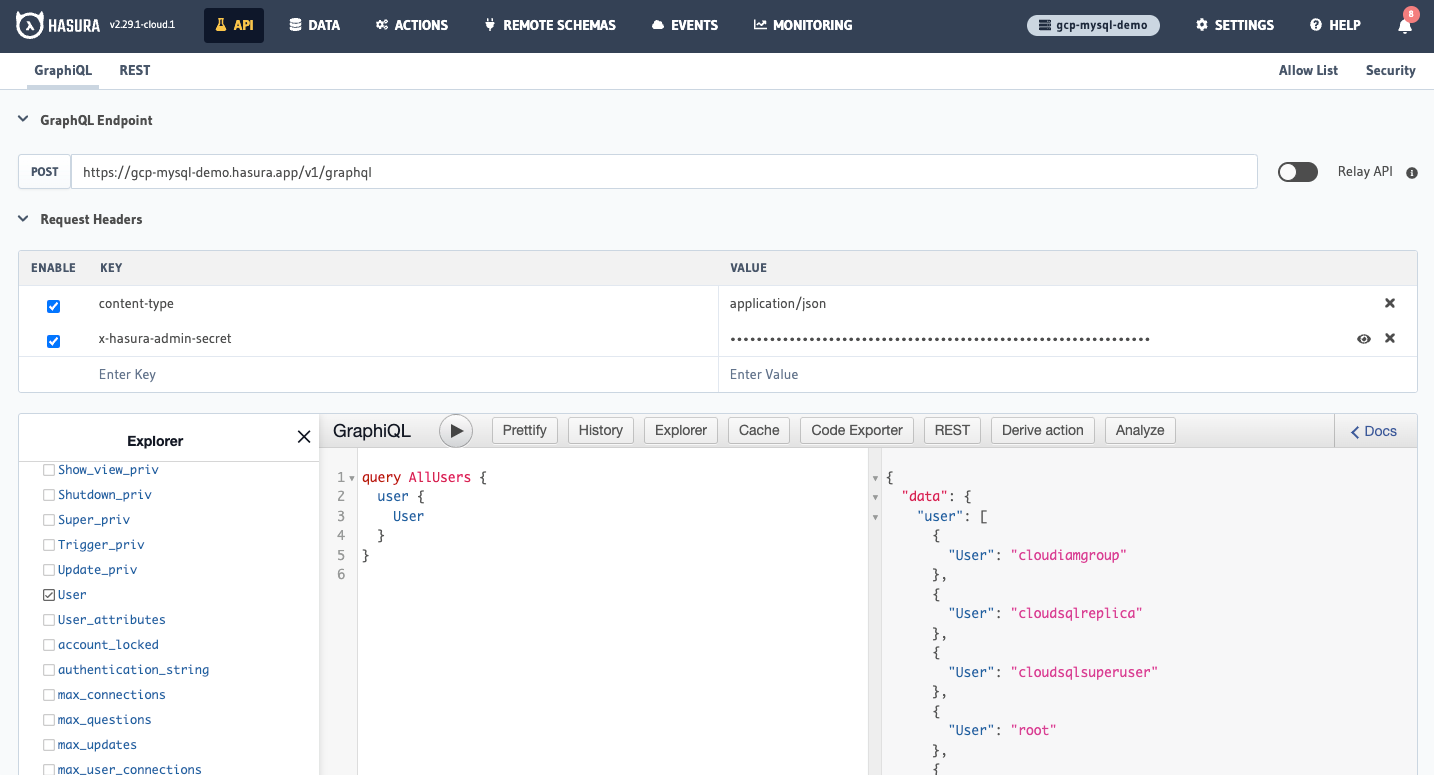
Track the tables on which you want to create your API, and voilà: you're ready to start developing.
Next steps
You can check out our 30-Minute Hasura Basics Course and other GraphQL & Hasura Courses for a more detailed introduction to Hasura.
If using Hasura Cloud, you can also click the gear icon to manage your Hasura Cloud project. (e.g. add collaborators, env vars or custom domains).

For more information on which MySQL features we support, check out this page.
Auth Proxy
Google Cloud SQL offers a Cloud SQL Auth proxy that can be used to connect to your database. This is useful if you want to connect to your database from a local machine or a server that doesn't have a public IP address.
To use the Cloud SQL Auth proxy, follow the instructions in the Cloud SQL Auth proxy docs.