Create a RESTified Endpoint
Introduction
There are two methods to create a RESTified endpoint in Hasura Cloud and EE.
Available for Postgres, MS SQL Server, Citus, AlloyDB and CockroachDB databases.
DOCS E-COMMERCE SAMPLE APP
This quickstart/recipe is dependent upon the docs e-commerce sample app. If you haven't already deployed the sample app, you can do so with one click below. If you've already deployed the sample app, simply use your existing project.
Option 1 - Create RESTified endpoints from table
With a few clicks and no custom code, you can create default CRUD style REST endpoints from your tables.
To create a RESTified endpoint on a table, check out our Quickstart guide here.
Option 2 - Create custom RESTified endpoints from GraphiQL
Step 1: Write a query
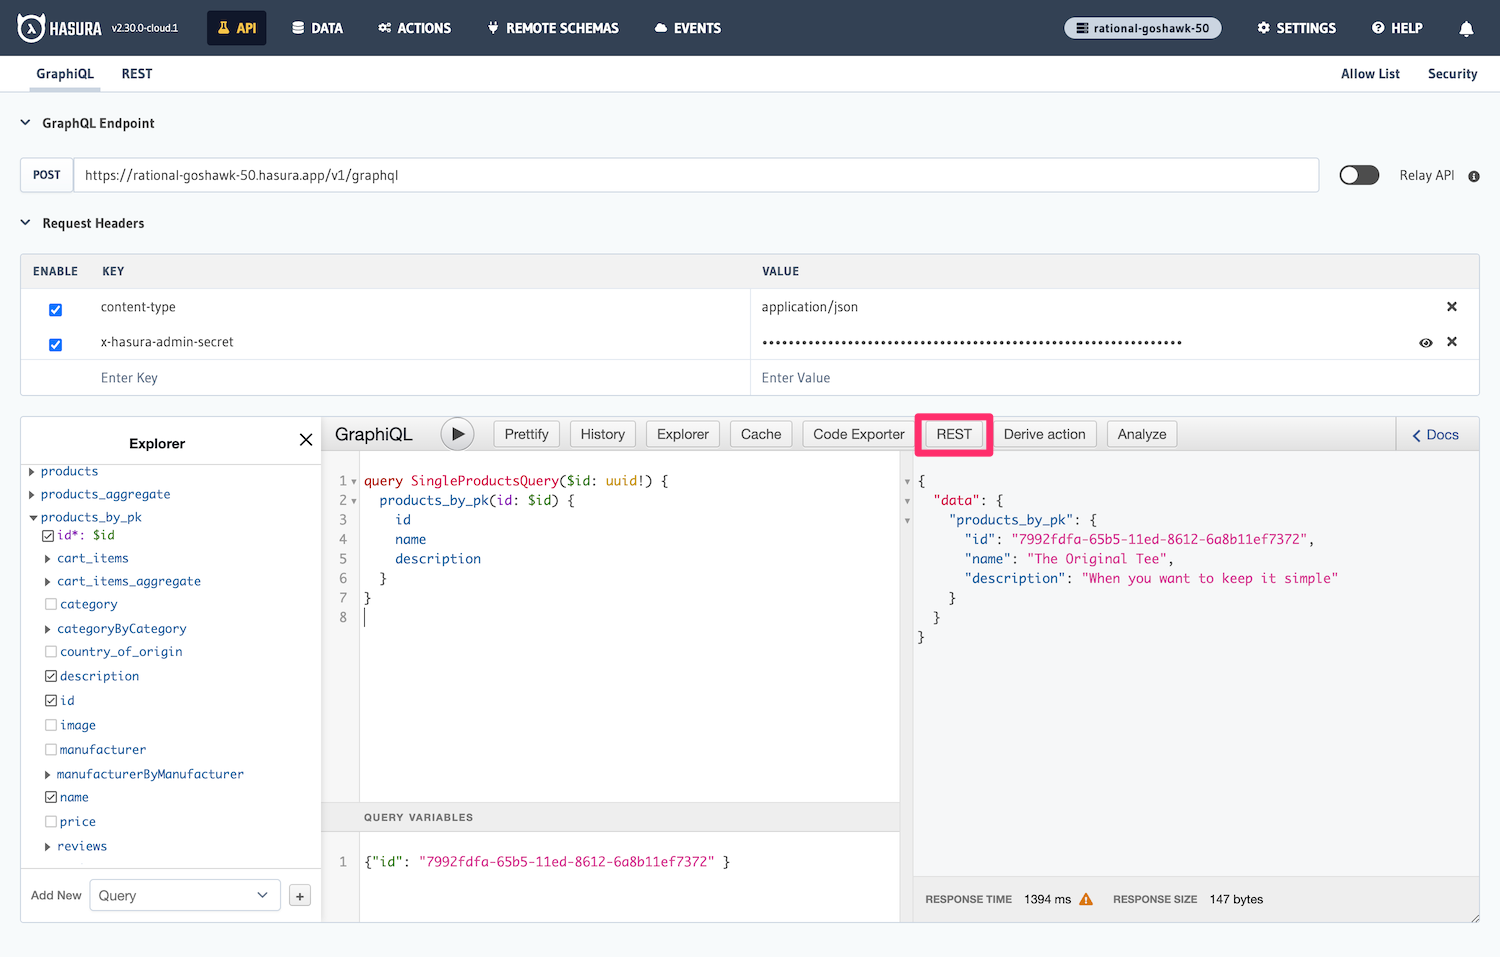
In the GraphiQL interface in the API tab of the Hasura Console, create a query:
After entering the query, click the REST button in the Explorer to configure your endpoint:

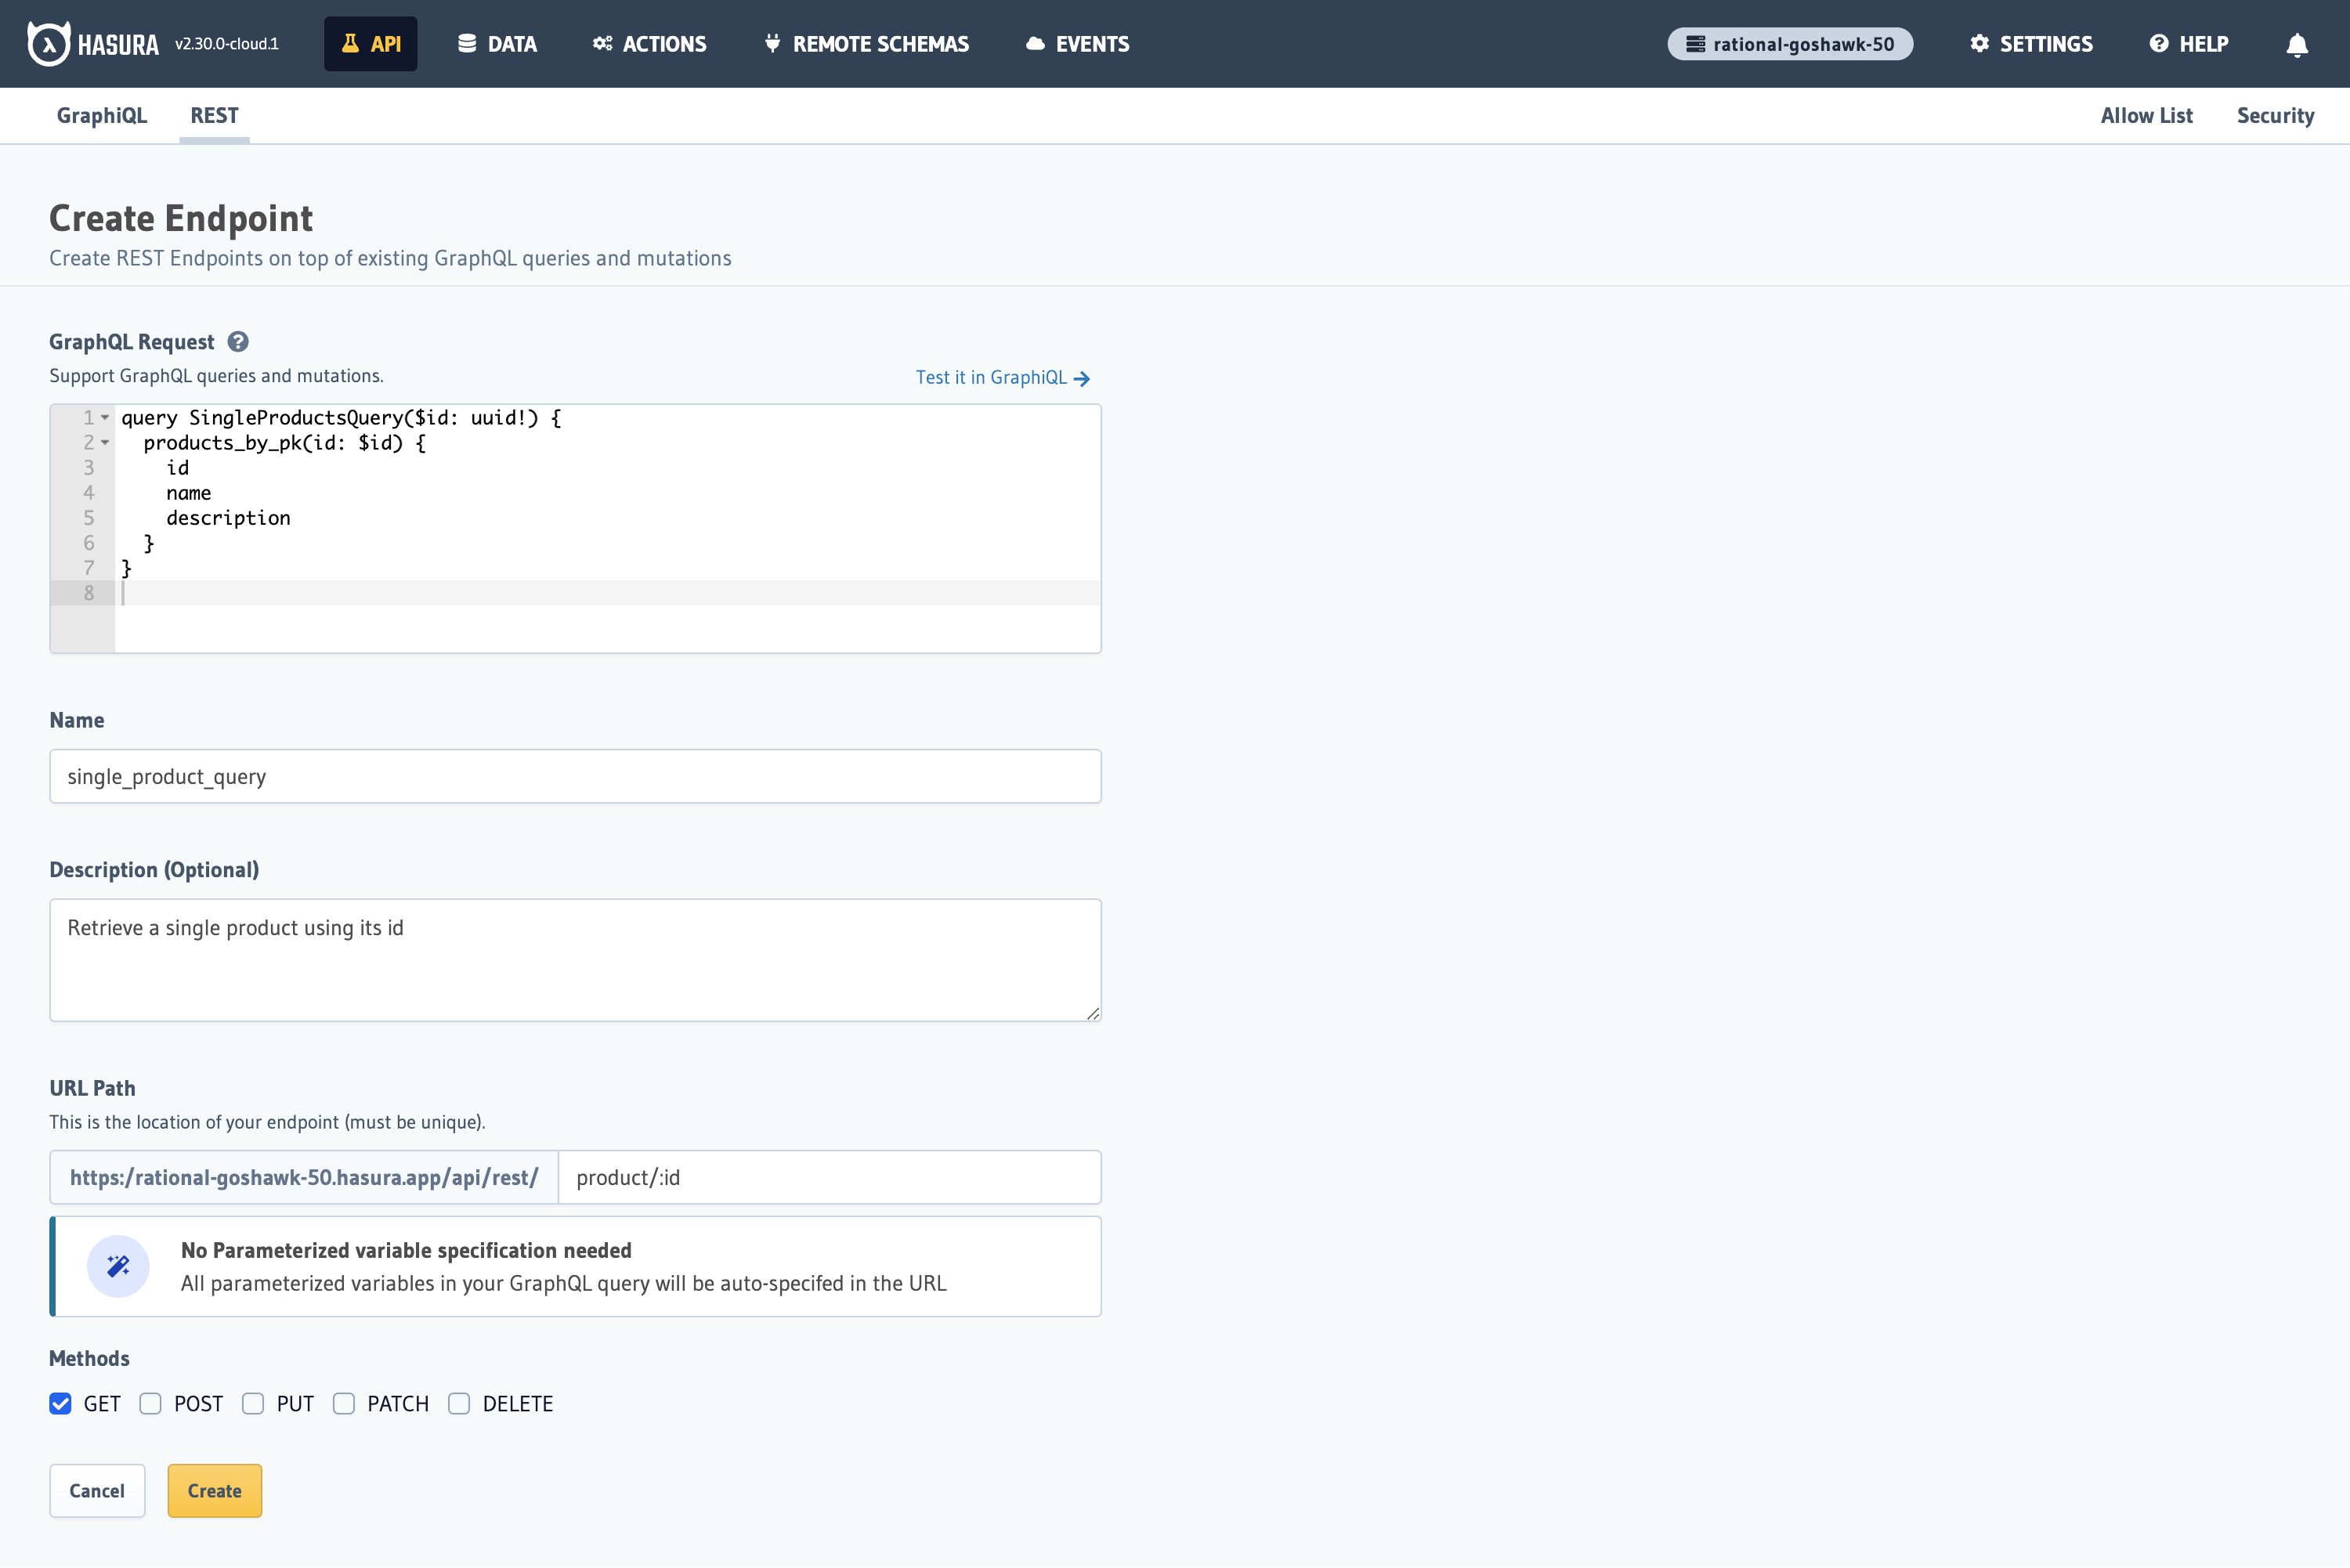
Step 2: Configure the endpoint
Enter a name, eg:
single_product_query
Followed by a brief description if you wish:
Retrieve a single product using its id
Next, we'll provide a route that describes the endpoint's purpose and indicates that we wish to accept a query parameter
of id for the product:
product/:id
We'll mark GET as the allowed method and finish creating the endpoint by clicking Create.

Step 3: Test the endpoint
To test this endpoint, run the following curl request in your terminal:
curl --location --request GET 'https://<your-hasura-project>/api/rest/product/7992fdfa-65b5-11ed-8612-6a8b11ef7372' \
--header 'Content-Type: application/json' \
--header 'x-hasura-admin-secret: <your-admin-secret>'
You should see a response similar to this:
{
  "products_by_pk": {
    "id": "7992fdfa-65b5-11ed-8612-6a8b11ef7372",
    "name": "The Original Tee",
    "description": "When you want to keep it simple"
  }
}