Explore your Supergraph
Overview
Exploring an API's structure and relationships is often problematic, posing significant challenges to developers and teams. The reliance on limited external tools can result in incomplete or inaccurate representations of the API, making it difficult to fully understand its complexities.
Manual documentation further complicates the process, as it is time-consuming to create and update, and is prone to errors. Additionally, coordinating across teams without a shared understanding of the API can lead to miscommunication and delays, hampering efficient development. These issues underscore the need for more robust and integrated solutions.
The console's — Hasura's web-based GUI — explorer page offers:
- Comprehensive Visualization: See a complete, real-time visual representation of your API, including relationships and permissions.
- Auto-Generated Documentation: Automatically generate and update API documentation, ensuring consistency and accuracy.
- Enhanced Collaboration: Foster better communication and coordination across teams with a shared, intuitive visual tool.
You can also use the console to interact with and monitor your API.
Step 1. Explore your supergraph
Click on the Explorer button in the sidenav to quickly and easily see a visualization of your entire
supergraph:
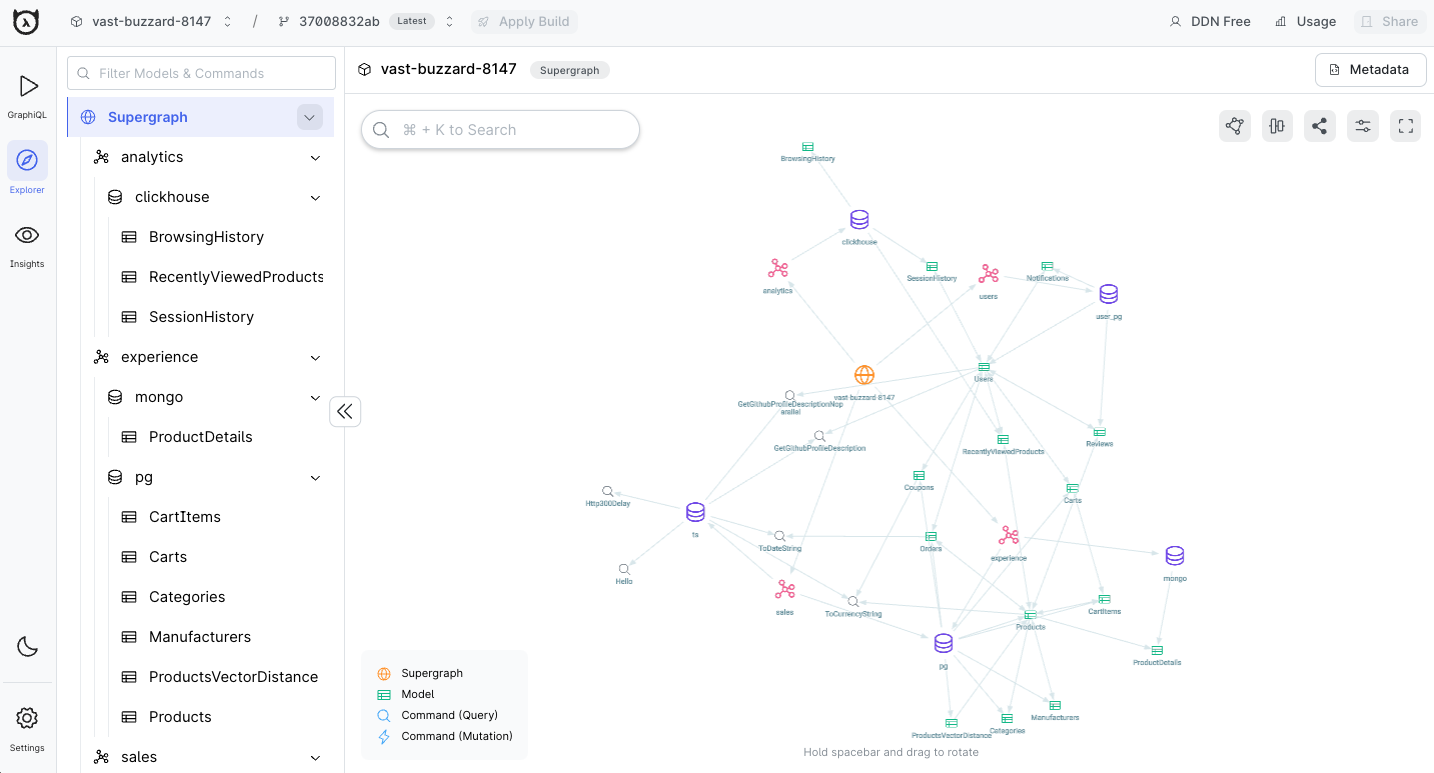
This provides a high-level overview of your entire supergraph. You can see the various subgraphs, their data sources, and any relationships present within or between subgraphs. You can also adjust the view options to project different layouts, helping you represent your data in the most effective and informative way to suit your needs.
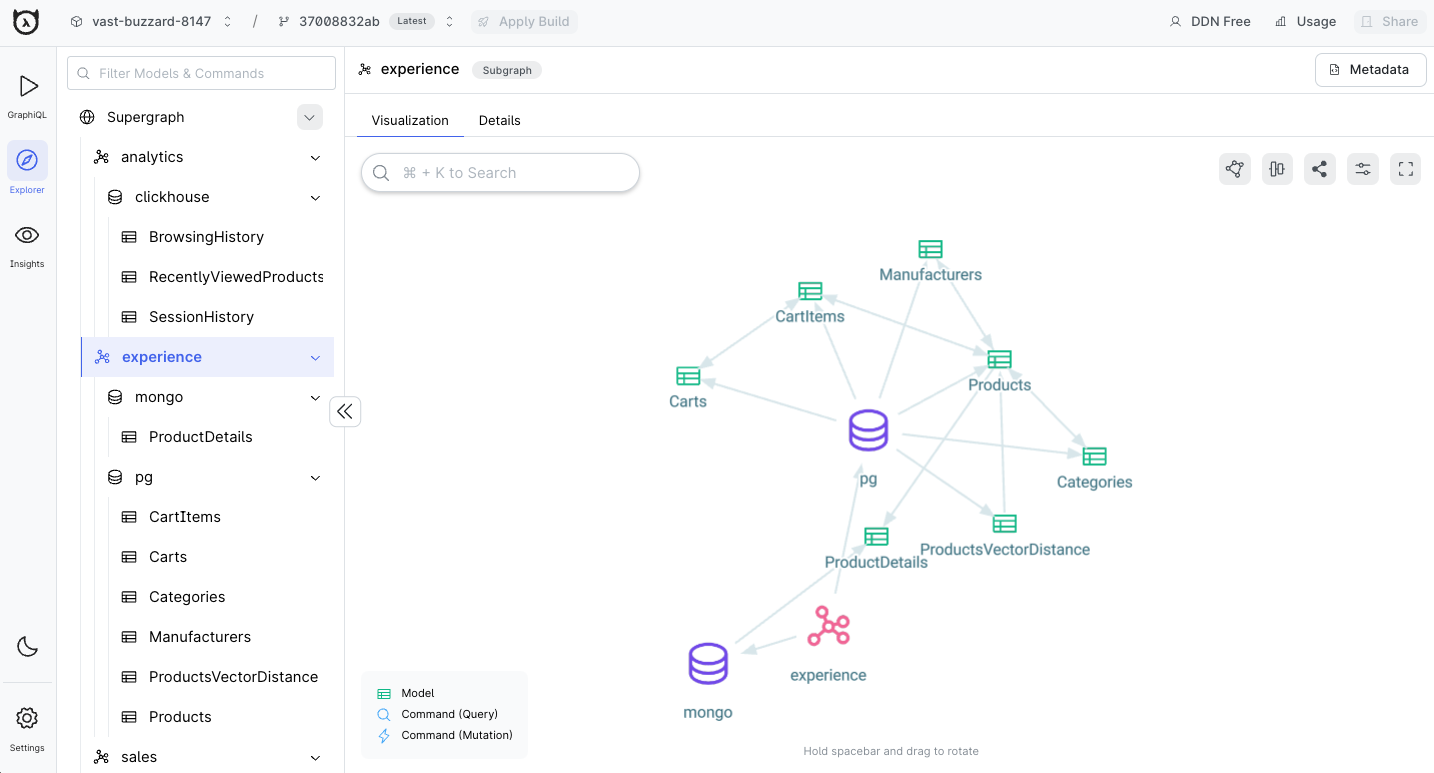
Step 2. Explore a subgraph
By clicking on an individual subgraph, you'll see only its details: the connectors belonging to it, and their models and commands.
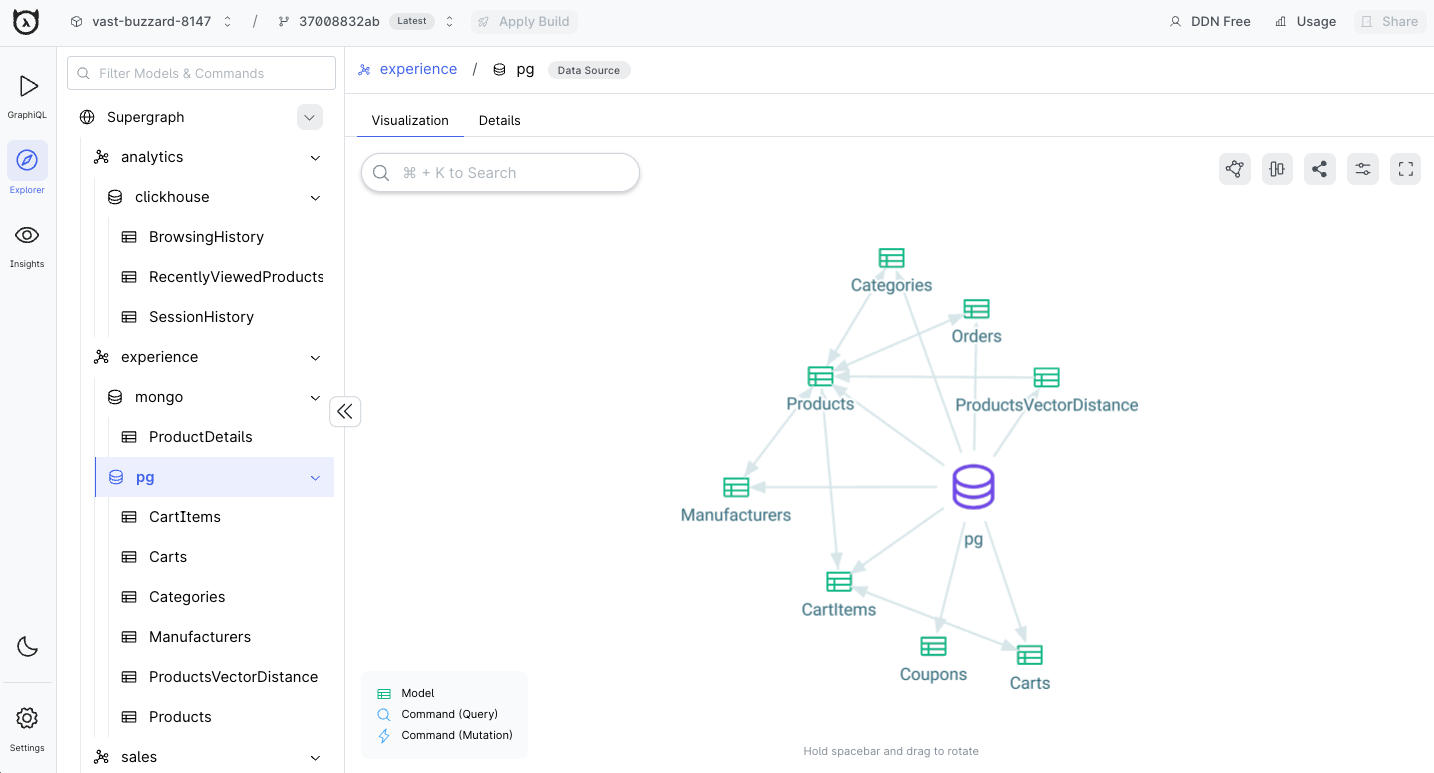
Step 3. Explore a data source
If you have a high number of connectors within a subgraph, it may be easier to view a single data source's models and commands by clicking on the connector. The UI will focus on this single connector and its related entities.
Step 4. Explore a model or command
The console allows you to search for any entity within your supergraph by name. In the example below, we're typing
Carts and then selecting the option that's returned under the experience subgraph's pg connector:
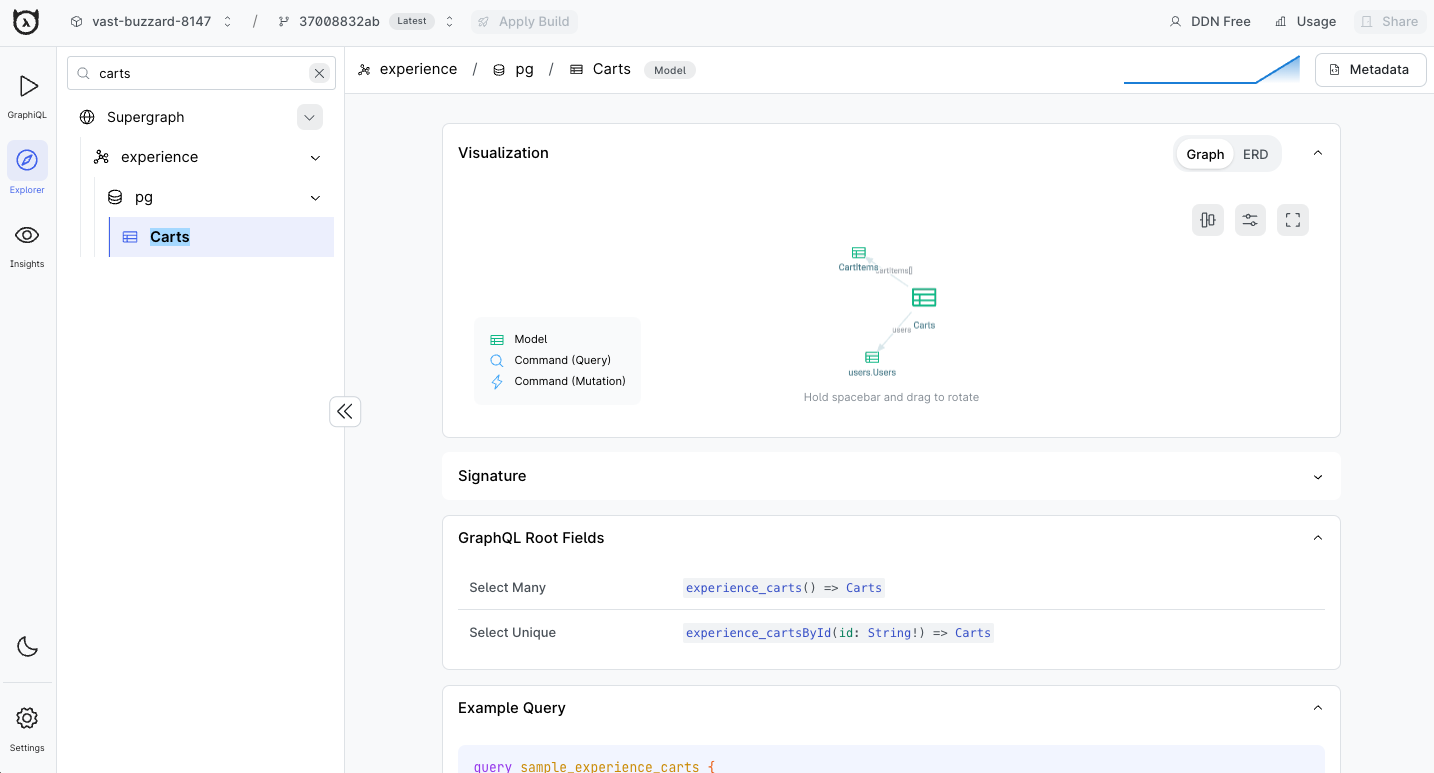
From this detailed page, you can see a graph or ERD visualization of an entity, see the GraphQL root fields available, list all available relationships and permissions, and even execute a sample query!
Signature
A signature shows what goes into (input) a model or command and what comes out (output).
For Model:
-
Input: Usually empty, as models represent data structures
-
Output: The model's type
Example:
Carts() => CartsThis shows that Carts doesn't take input and returns data of type Carts.

For Command:
-
Input: Arguments the command needs
-
Output: The type of data it returns
Example:
GetFruits() => [Fruit!]!This means GetFruits takes no arguments and returns a non-nullable list of non-nullable Fruit objects.

Signatures help you quickly understand what each resource in your supergraph does and how to use it.
GraphQL root fields
This section lists the corresponding fields from the GraphQL schema root for a given model or command. These fields define the entry points for querying your data.
For the Cart model, two root fields are available:
- Select Many:
app_carts() => CartsThis root field allows querying multiple cart entries. - Select Unique:
app_cartsById(id: String!) => CartsThis root field enables fetching a specific cart by its ID.

These root fields appear in your GraphQL schema and determine how you can access Cart data in your queries. For example:
query {
  app_carts {
    id
    isComplete
  }
}

query {
  app_cartsById(id: "123") {
    id
    isComplete
  }
}
The first query uses the "Select Many" field to retrieve multiple carts, while the second uses the "Select Unique" field to fetch a specific cart by ID.
Output fields
Output fields define the structure and types of data that can be retrieved from a
model or command. In the example below, for the Cart model, the output fields might include: id (Uuid!): A unique
identifier for each cart and other fields as well.
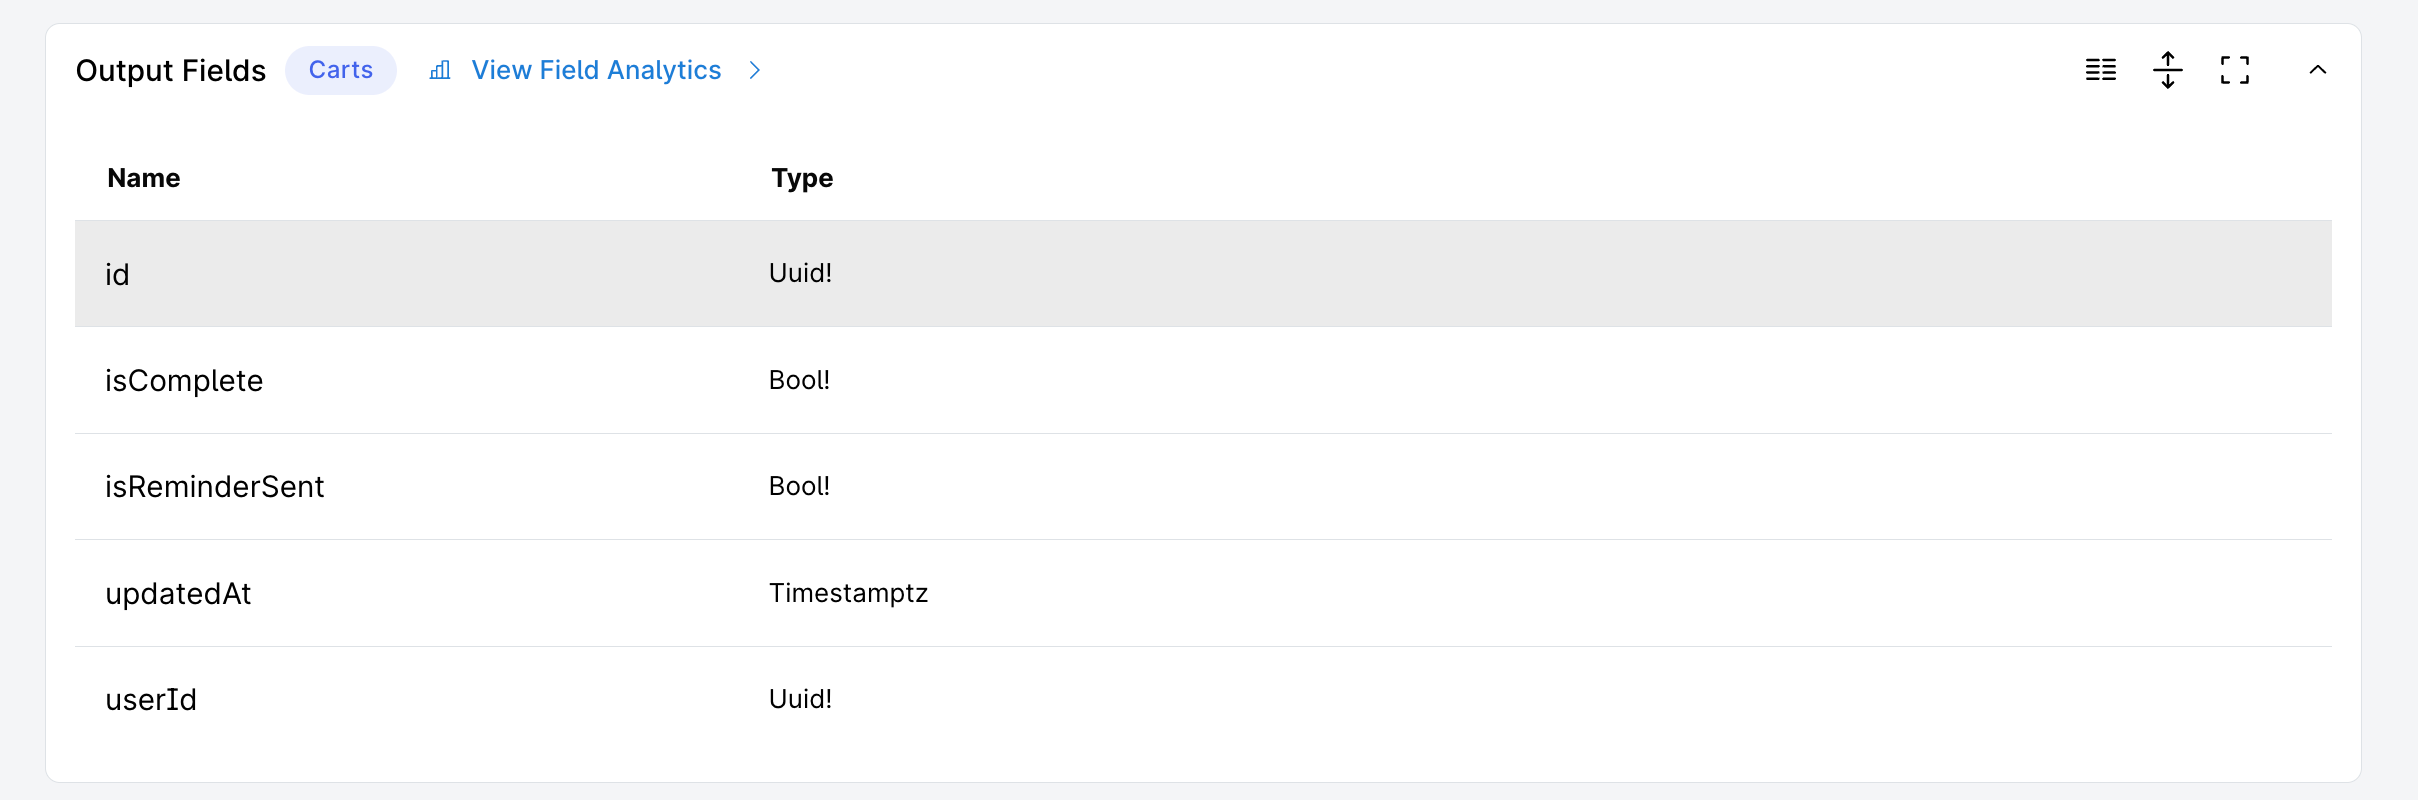
These fields allow you to query and retrieve specific information about each cart in your application. The ! indicates
that the field is non-nullable, meaning it will always have a value.
Arguments
Arguments are input parameters that can be passed to models or commands in your GraphQL API. They allow you to filter, sort, or modify the data returned by a query or mutation. In the context of Hasura's supergraph, arguments play a crucial role in making your API flexible and powerful.
The Arguments table in the Hasura console provides a clear overview of the available arguments for a given model or command.

Relationships
Relationships define how a model or command connects to other models or
commands in your database. For the Cart model: The user relationship links a cart to its owner in the Users table.
This connection is made through the userId field in the Cart model, which corresponds to the id field in the Users
table.

This structure allows you to easily access related user data when working with carts, enhancing the flexibility of your queries.
Permissions
Permissions define access control for different roles interacting with the model
or command. For the Cart model: This configuration means that users with the admin role can view cart information but
cannot create new carts, modify existing ones, or delete them. This read-only access allows admins to monitor cart
activity without making changes.

Next steps
Now that you have the knowledge to explore your API, let's see how easy it is to interact with and test your API using the GraphiQL explorer.