Create a Subgraph
What's about to happen?
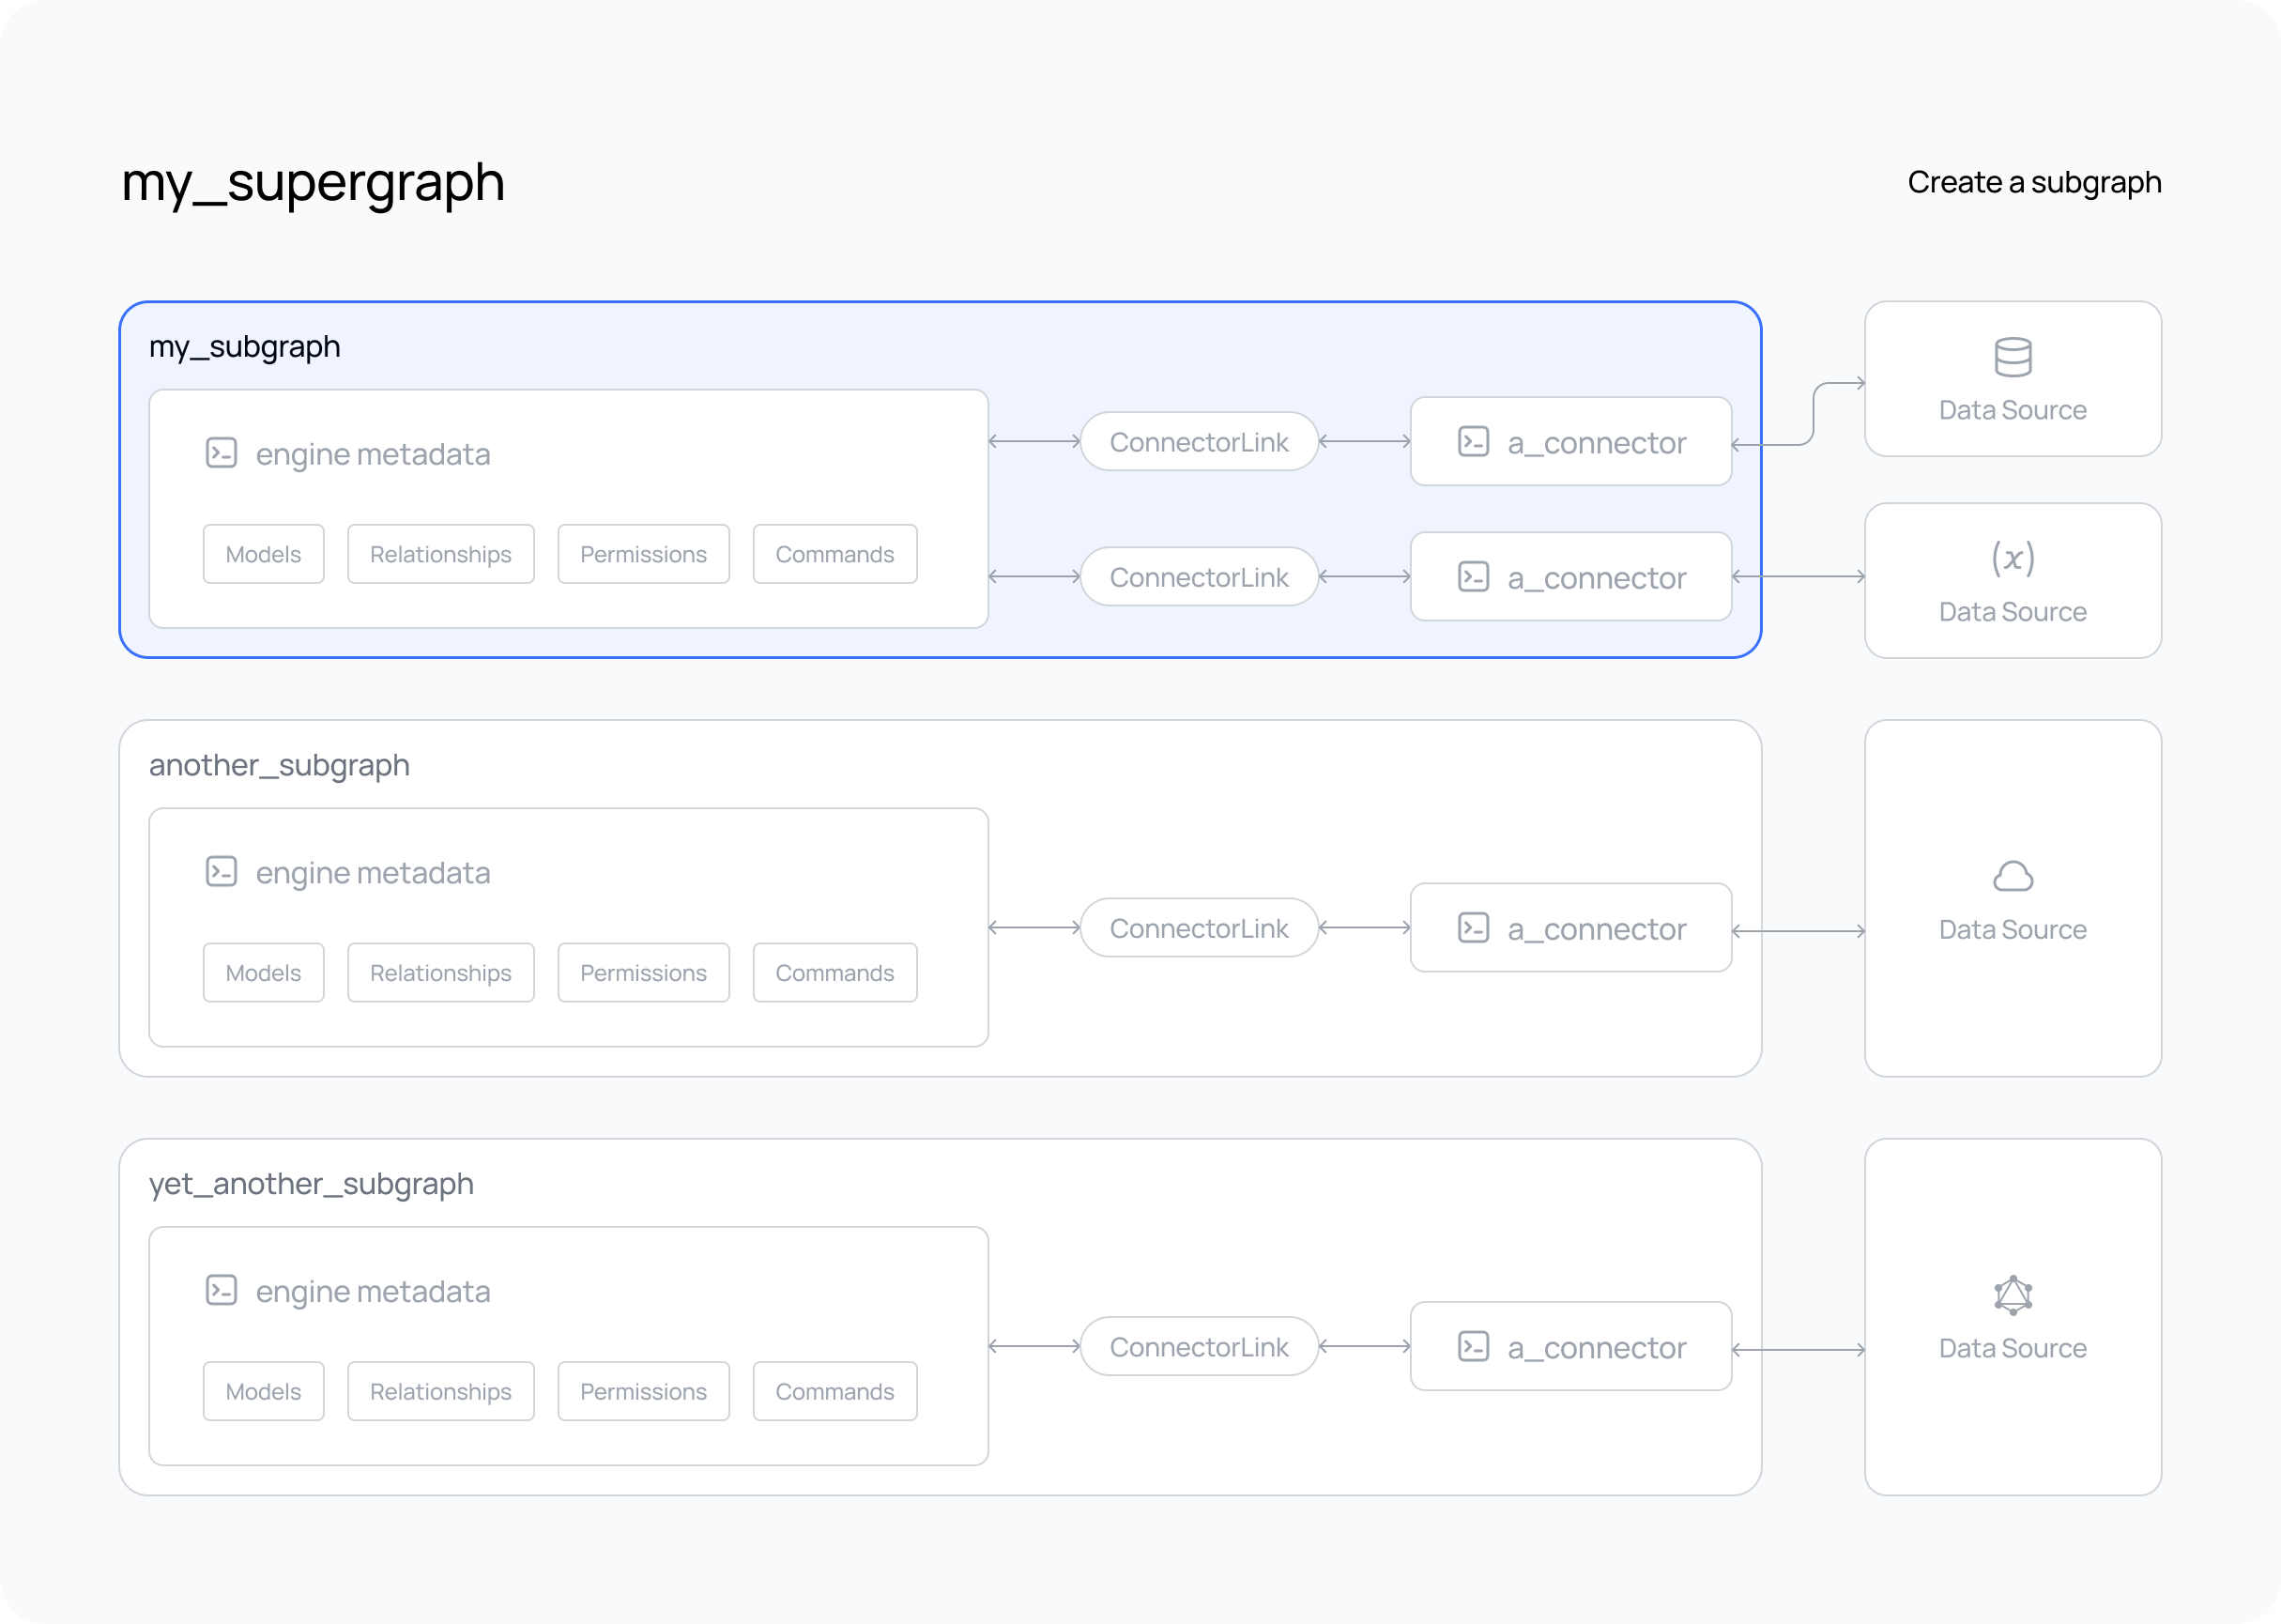
We're going to add a subgraph to our supergraph.
A subgraph is a way of organizing your data and allows you to connect multiple data sources to your supergraph. A supergraph must have at least one subgraph, at least if you want it to do anything. 😉
When you initialize a new supergraph, the CLI will create a default subgraph called app. However, you can follow this
guide to add subsequent subgraphs, extending your API.
Steps
- The DDN CLI, VS Code extension, and Docker installed
- A new or existing supergraph
Step 1. Init a subgraph
ddn subgraph init my_subgraph --dir ./my_subgraph --target-supergraph ./supergraph.yaml
The CLI will respond with a success message (and a hint to add a connector to the subgraph).
We're passing a few values to the subgraph init command:
Subgraph name:
We're naming the subgraph my_subgraph in this example.
Directory: --dir
We're specifying the directory where the subgraph will be created. The CLI will create this directory.
Target supergraph: --target-supergraph
For convenience we're specifying the supergraph(s) to which this subgraph will be added. Here we're specifying both our local and cloud supergraphs which were created when we initialized our supergraph. The CLI will edit these supergraph configuration files and add details of our subgraph to both of them.
What did subgraph init do?
The subgraph init command created a new subgraph directory and a subgraph.yaml file in the root of the new subgraph
directory.
The CLI also edited the supergraph configuration files to include the new subgraph in your supergraph.
The subgraph is where we will be organizing metadata objects which define our API and without a data connector, our subgraph is just a placeholder which doesn't do much, yet...
Subgraph independence
Subgraphs are used to maintain a logical separation of concerns and/or to allow different teams to work on different parts of the supergraph at the same time without stepping on each other's toes. Usually, a subgraph is "owned" and maintained by a team that is responsible for the data source, or more broadly: "data domain", that it connects to. And by convention, one data domain is allocated to one subgraph.
A subgraph is analogous to a microservice owned by a particular team.
When we talk about data domains, we're talking about the collection of data and operations for one area of the business, or team within the business. This could be a single database, a set of databases, a database and business logic, some other 3rd party APIs, or a combination of all of these.
Subgraphs can reference each other, allowing, for example, the creation of relationships between them.
The supergraph is the composition of all subgraphs and their relationships, but it does not care how the metadata is structured or organized into directories. That is up to the developer. The supergraph only cares that all metadata is valid and can be compiled into an API build. The CLI and this documentation will suggest best practices for organizing your metadata, but you can organize it however you choose.
Subgraphs have their own permission models and development lifecycles separate to that of the supergraph. They can be developed, tested, and built independently while the supergraph guarantees the integrity of subgraph composition. Meaning that the supergraph will only build, and generate an API if all subgraphs are in a valid state. In this Getting Started section we propose best-practice for organizing your subgraphs, but it can be done however you choose.
Naming
Let's say we're in an organization and the data source we'll be connecting to is for customer profile data. The team
responsible for this data and some services related to it is called the "Customer Data" team. As such, we could create a
customer_data_team subgraph, reflecting the team's name, indicating that they're the ones who will be working on it.
Or, we could choose to be more specific and name it customer_profile to reflect the data domain itself, if multiple
teams are going to work on it.
Another example is, if we're working with a data source for a small project which we plan on using to contain all the
data for our whole project, and it's all in PostgreSQL, with some business logic in TypeScript, we could name it
postgres_data or app to keep it simple. This one subgraph would contain all the data domain specific metadata for
the whole project, at least for the time being.
Step 2. Set subgraph context
Next, for convenience, we'll set the subgraph using the context set command in the CLI. This will simplify any
commands we use later on and save us from having to explicitly call out to which subgraph we're applying certain
actions.
ddn context set subgraph ./my_subgraph/subgraph.yaml
What did context set subgraph do?
This command simply updates a key-value pair in a context file in a project's .hasura folder to set your current
subgraph to whatever value you passed.
Step 3. Customize prefixes
To avoid collisions between GraphQL root fields and type names, you can optionally customize the prefixes for each
subgraph. For example, if two subgraphs both have a Users type, you can apply different prefixes to distinguish one
from the other. This ensures that each subgraph remains unique and prevents any naming conflicts.
You can make these modifications in the subgraph.yaml file for a subgraph.
kind: Subgraph
version: v2
definition:
  name: my_subgraph
  generator:
    rootPath: .
    graphqlRootFieldPrefix: my_subgraph_
    graphqlTypeNamePrefix: My_subgraph_
By default, the subgraph.yaml file is generated without any prefixes. You can read more about these fields
here.
Next steps
We now have a subgraph in which we can configure a data connector. Data connectors will enable you to connect external data sources to your supergraph.