Create a Supergraph
What's about to happen?
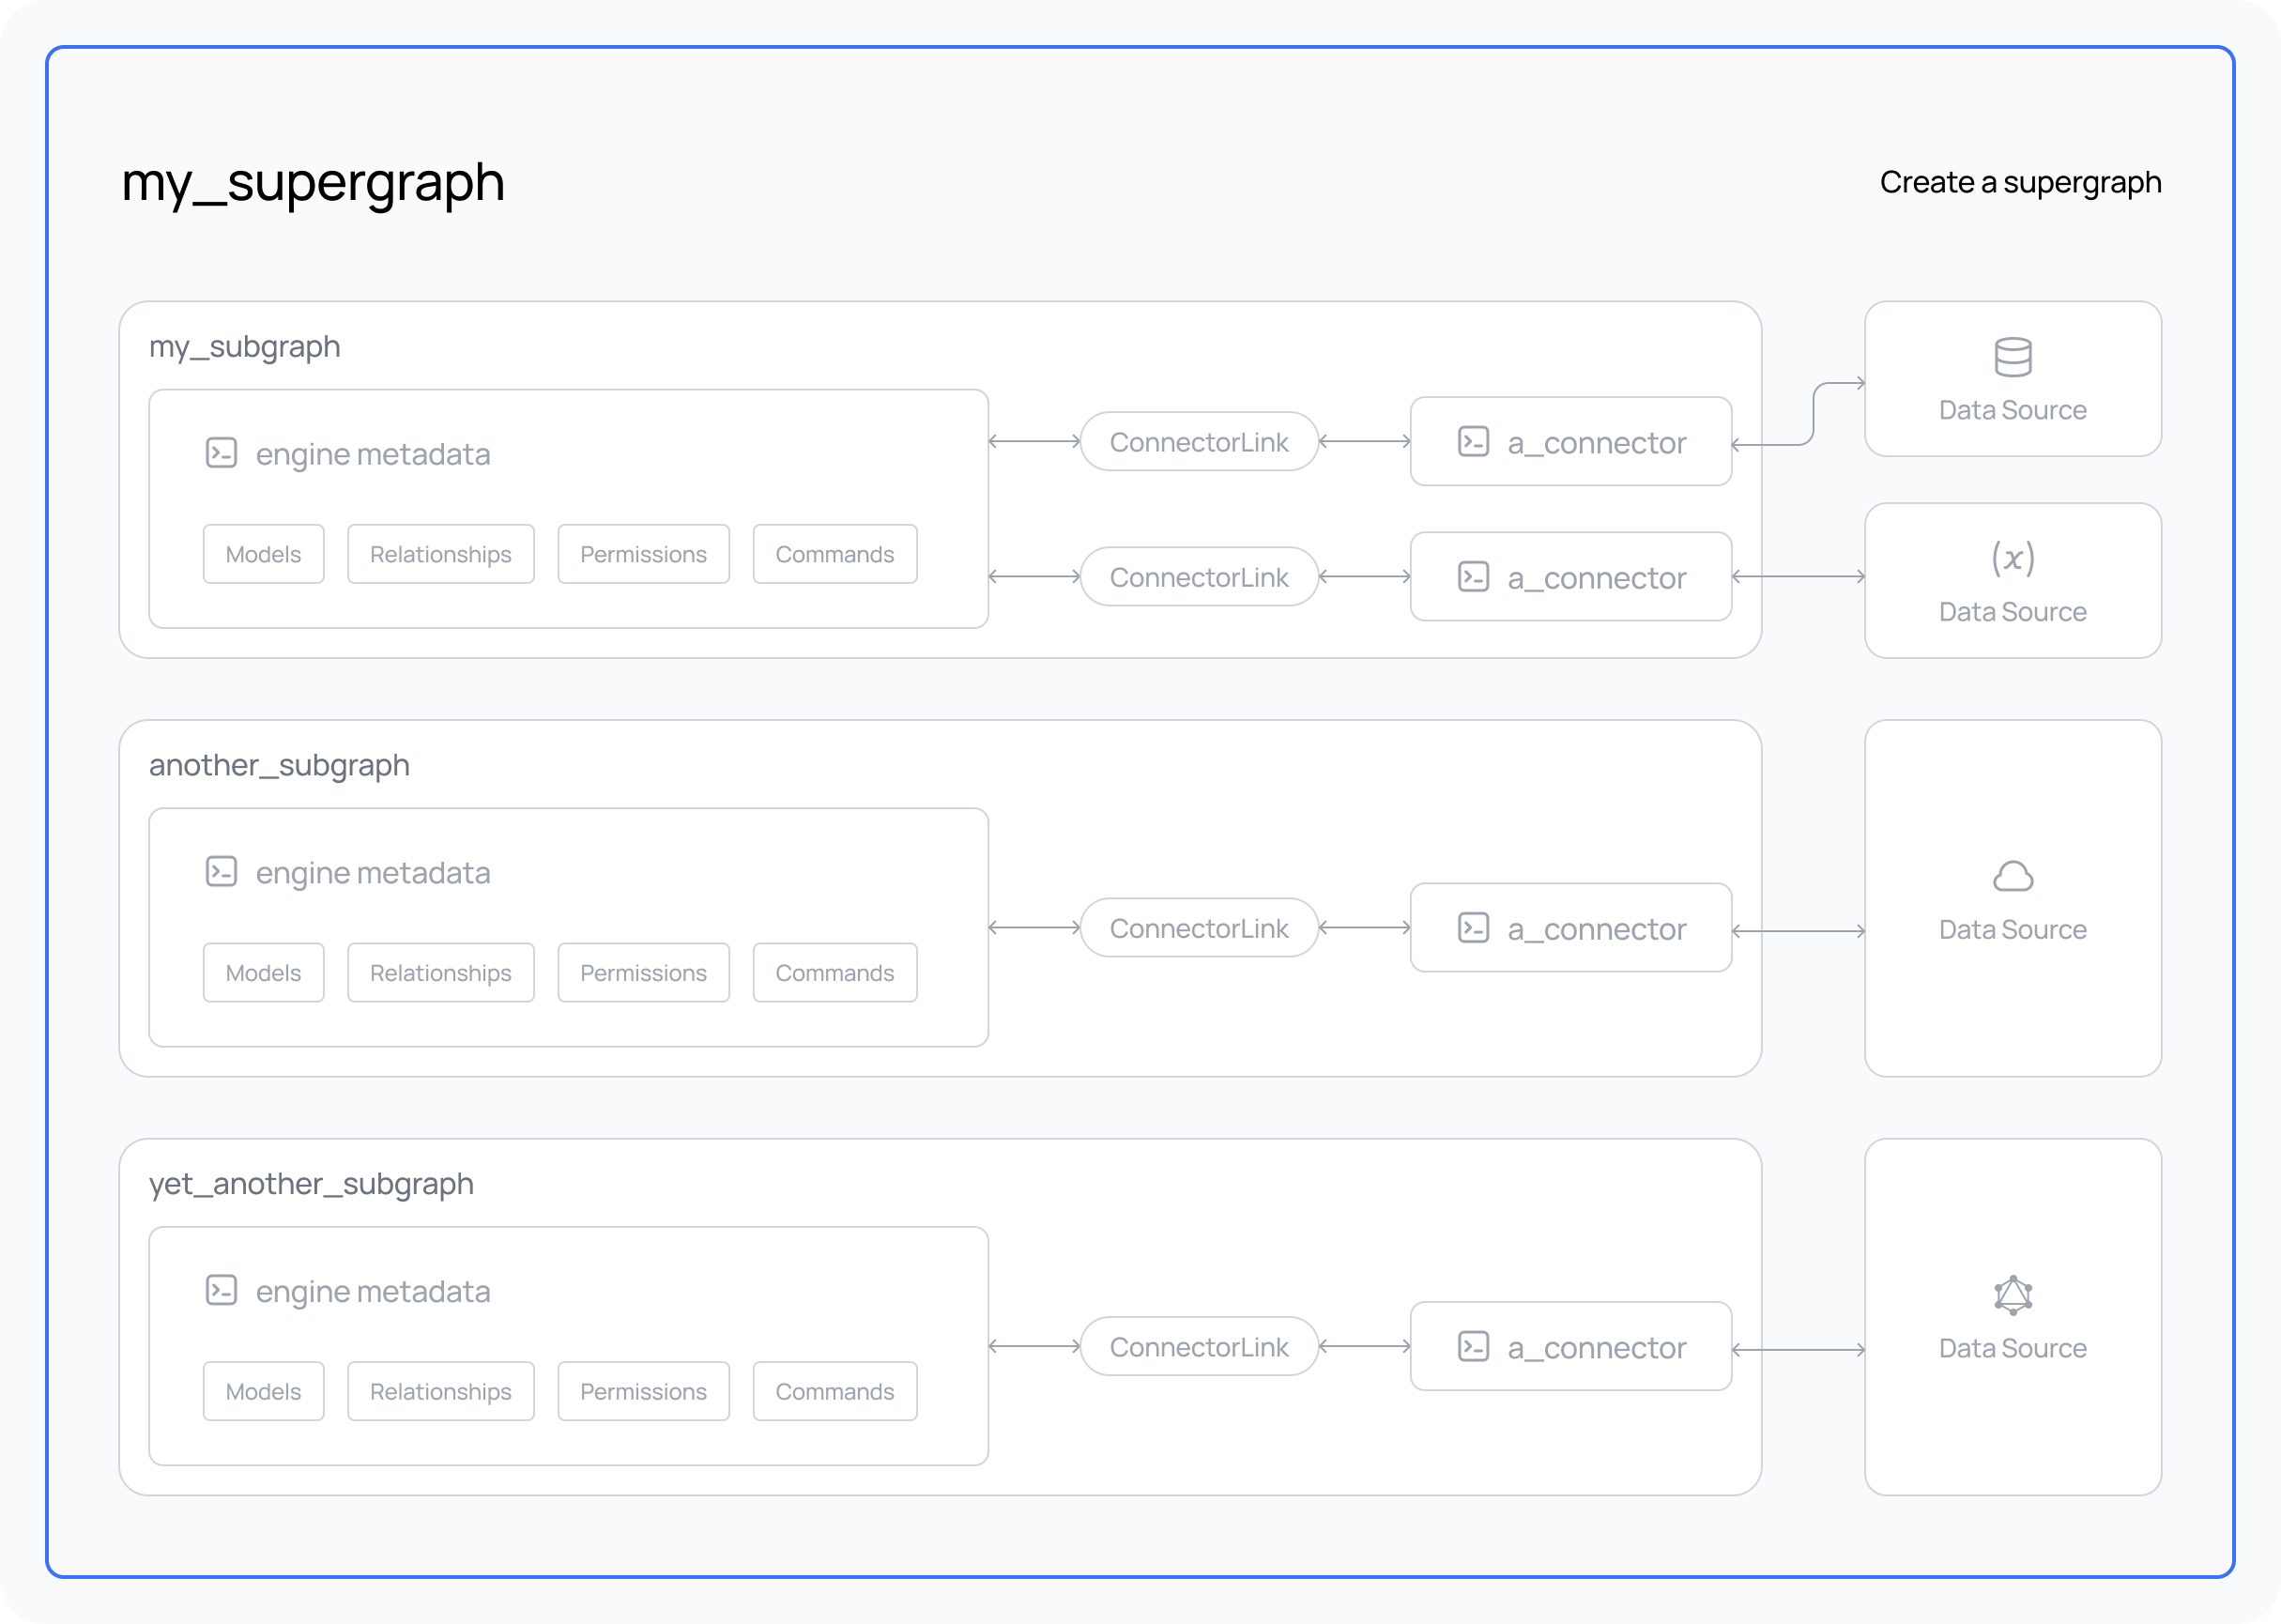
We're going to create a supergraph.
Your supergraph is the composite of all your subgraphs, their various data sources and business logic, and when we "build" a supergraph, we create a GraphQL API.
Steps
Step 1. Initialize your supergraph
ddn supergraph init .
Instead of passing a . (the "this" directory specifier) you can pass the --dir flag and a directory name to the
supergraph init command to create your supergraph in a specific directory. If it doesn't exist it will be created.
Step 2. Start your supergraph
With the Docker daemon running on your machine, you can immediately start the Hasura Engine, your supergraph and its accompanying services.
ddn run docker-start
The CLI and the build directory; click here to read how these work.
build directory; click here to read how these work.The CLI automatically creates a build directory for you when running the ddn supergraph init command. This
directory contains all of the JSON necessary to configure and serve your supergraph. The JSON files within it are
already referenced for you in the docker compose.yaml file, allowing you to start your services straight away.
The docker-start command is defined in your hasura/context.yaml. This command sets the HASURA_DDN_PAT
environment variable using a value retrieved from the command ddn auth print-pat and then uses Docker Compose to
start the Hasura services defined in the compose.yaml file. Your PAT is your personal access token generated by
Hasura DDN and used by the CLI.
Running the Docker daemon as a non-root user
If you're running the Docker daemon as a non-root user (rootless mode), v26.0 now allows you to disable the default
host-loopback-isolation which prevents communication back to the host machine.
To disable this feature, set the environment variable DOCKERD_ROOTLESS_ROOTLESSKIT_DISABLE_HOST_LOOPBACK to false
before starting the daemon.
This will now allow container-to-host communication via 10.0.2.2 address.
You should also amend this line in your compose.yaml files for both the main services and connectors to reflect this
change:
extra_hosts:
  - local.hasura.dev=host-gateway
to:
extra_hosts:
  - local.hasura.dev=10.0.2.2
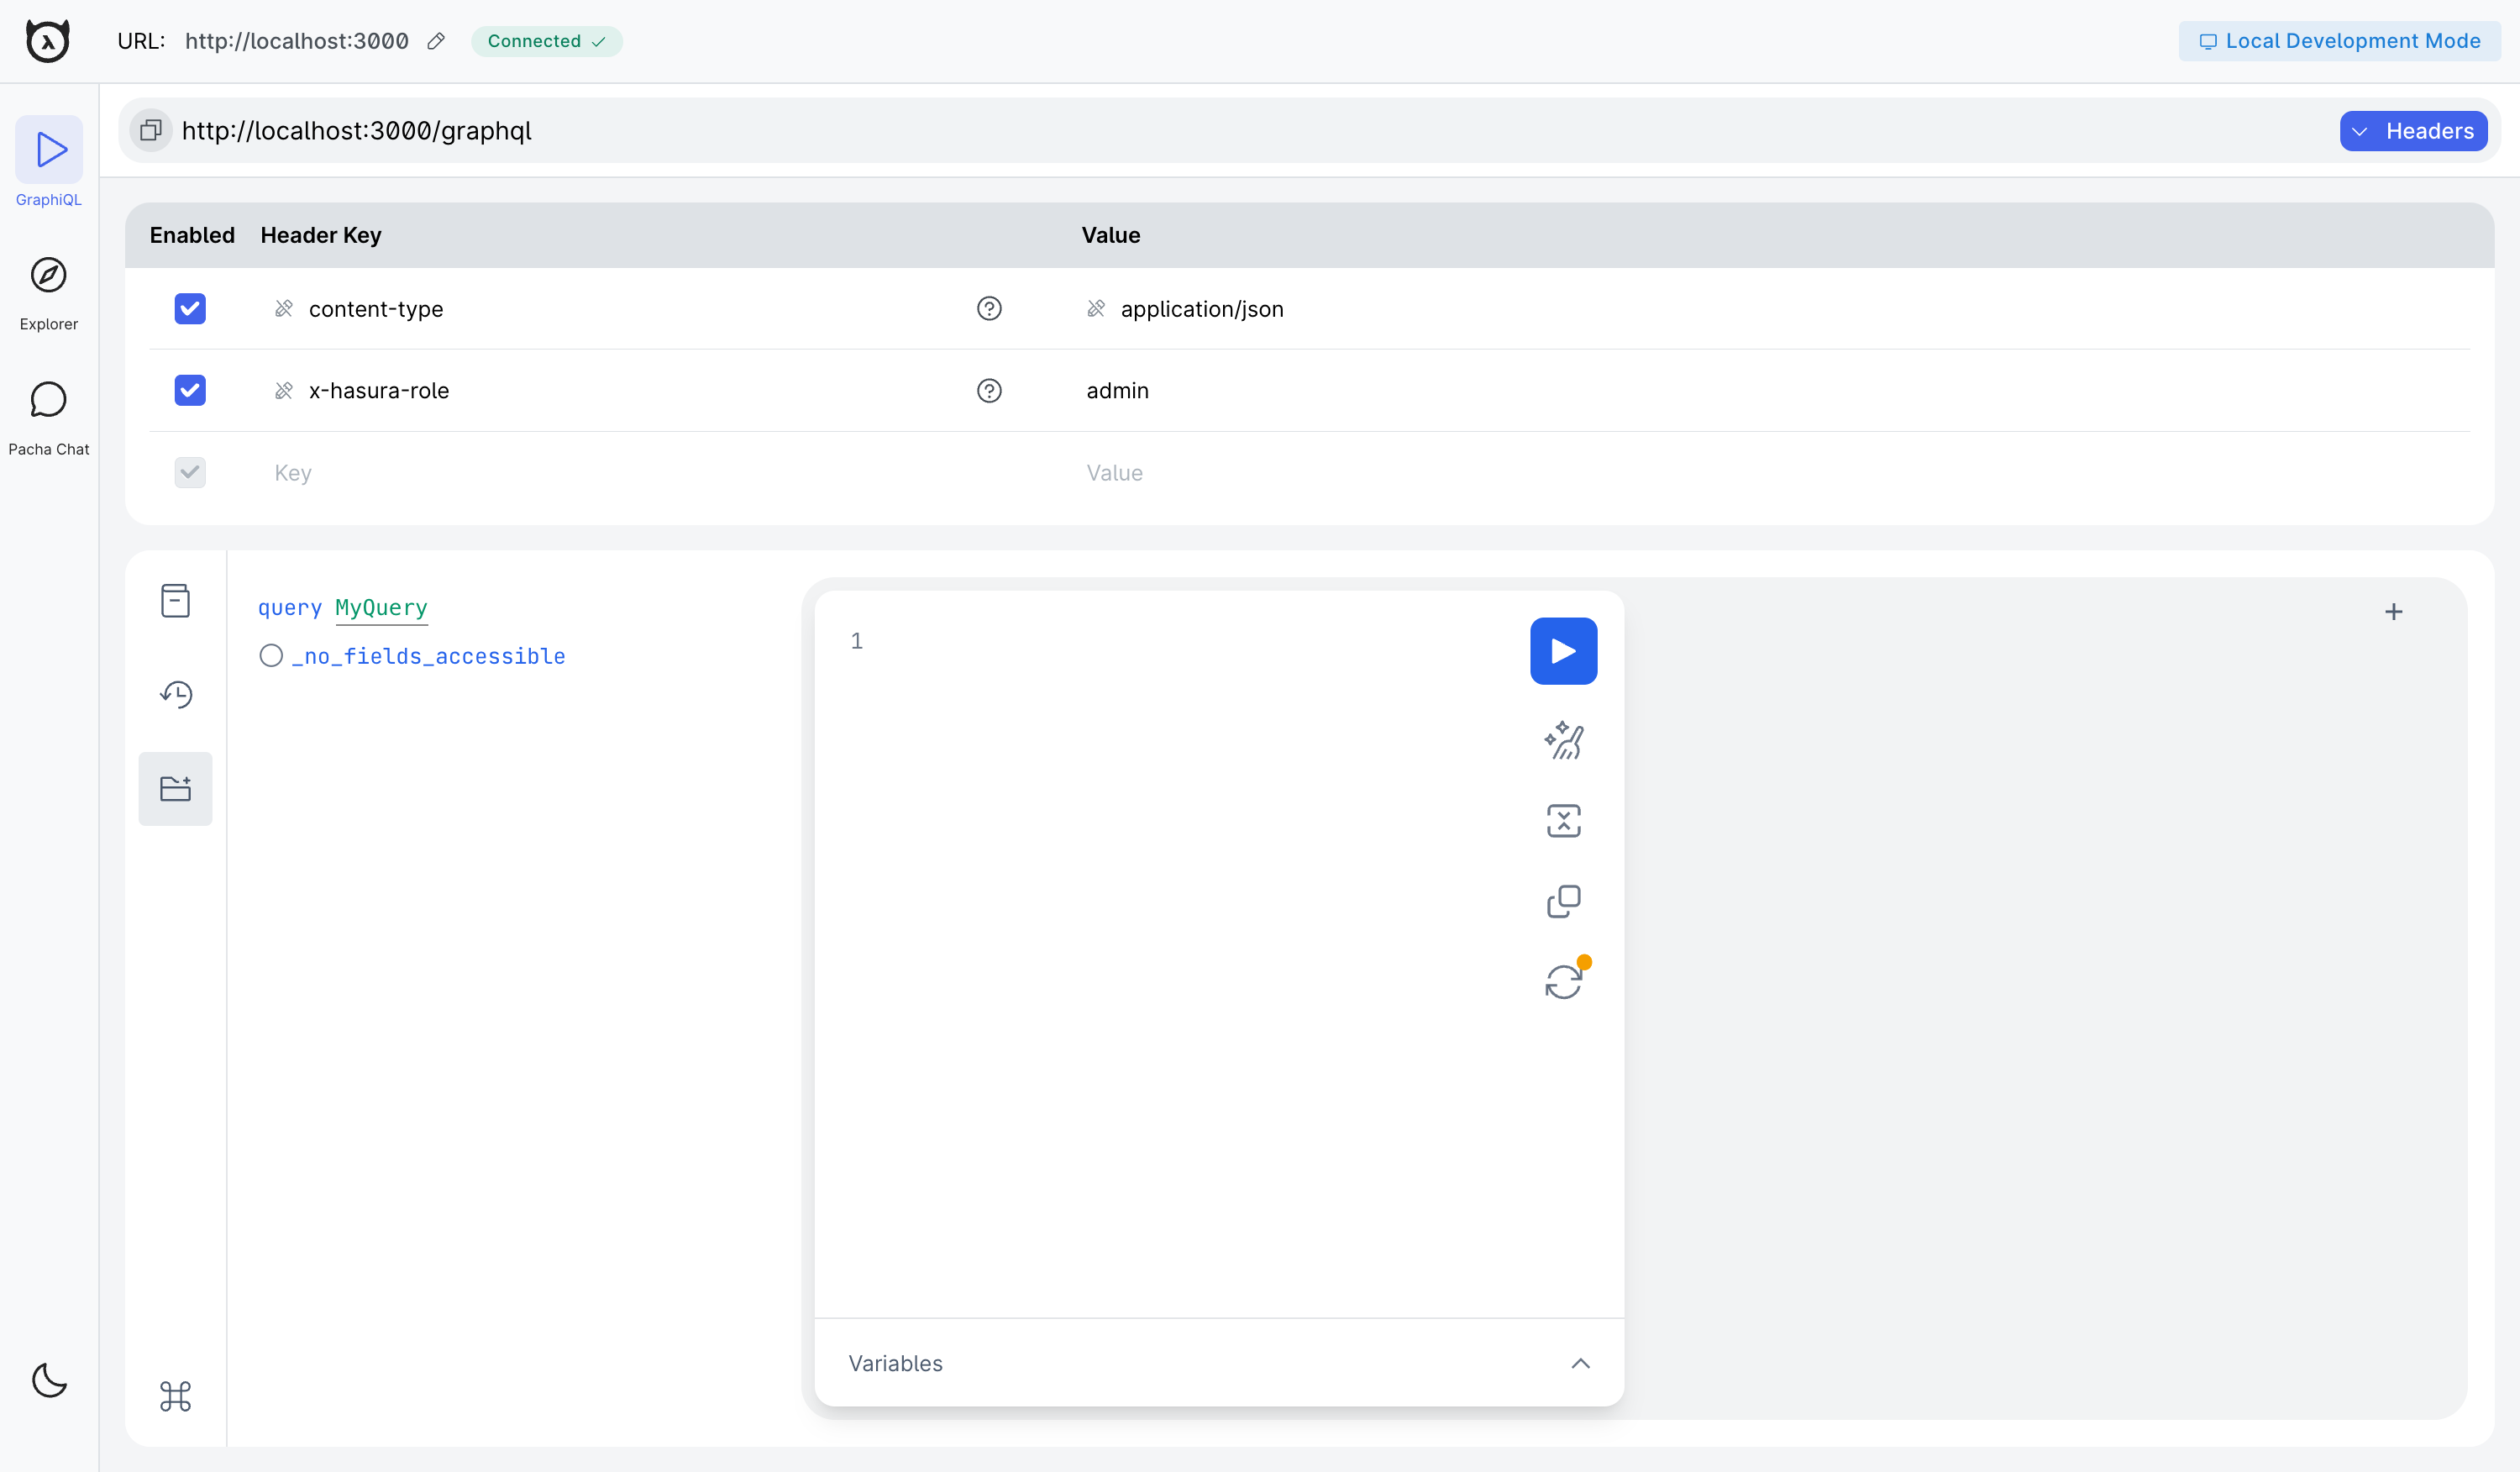
Step 3. View your supergraph API
In a new terminal window, you can launch your local project's console using the CLI.
ddn console --local
This will open https://console.hasura.io/local/graphql and allow you to
view your (still empty) API running on your own machine using the Hasura console!
Your browser settings, privacy tools or browser extensions may prevent the Console from accessing your local Hasura
instance. This could be due to features designed to protect your privacy and security. Should you encounter one of these
issues, we recommend disabling these settings for the console.hasura.io domain.
Chrome and Firefox are the recommended browsers for the best experience with the Hasura Console including for local development.
Step 4. Create a new build of your supergraph
Hasura utilizes a system of immutable builds which provide a stable snapshot of your API at any point in your development process.
ddn supergraph build local
The above command regenerates all the JSON for our supergraph. As we passed the local subcommand, this will output the
files to our local ./engine directory by default, which is referenced in our Docker compose.yaml. We won't see any
difference to our deployed API from running this now, but once we start to add subgraphs and data sources we'll need to
run this command to update our API.
As a feature of convenience, when initializing the supergraph, we also set the context in the CLI. This removes the
need to set frequently used default values (such as the flag --supergraph or --subgraph) when running CLI commands.
You can learn more about using context here.
What did this do?
The CLI created all the files needed for local and cloud development in your local project directory, including a docker compose file for local development and helper files for VS Code. We then started the Hasura Engine and all the services needed to run your supergraph locally and viewed the Hasura console to see our empty API. Finally, we set the context for our supergraph and created a new — albeit empty — build of our supergraph.
Starting a new supergraph or joining an existing one
ddn supergraph init will always be the first command you run when starting a new project. However, you may have
arrived here after being invited to join an existing project. In that case, your supergraph will already exist; you can
simply clone the repository containing your supergraph and pick up with the next section.
Regardless of how you've arrived at your supergraph, you'll have needed to create a build and then run it using Docker. This is the typical workflow when starting a new project or picking up with an existing one.
Next steps
The most common next step from here is to add a new subgraph.