Quickstart Actions
Actions extend your GraphQL schema, allowing it to include traditional REST endpoints. This quickstart will show you how to implement an Action using the Console of your Hasura project. This Action, using a REST API, will convert a currency value that we'll query directly from our GraphQL API.
All you need to do is to follow the steps listed below, but if you're more curious about what's happening, check out the recap at the bottom of the page.
DOCS E-COMMERCE SAMPLE APP
You can use this quickstart with any project, but it pairs well with our docs e-commerce sample app, which you can deploy to Hasura Cloud with one click below. If you've already deployed the sample app, access your existing project.

Step 1: Open the Actions page
From the Console of a Hasura Project, open the Actions page and click Create:

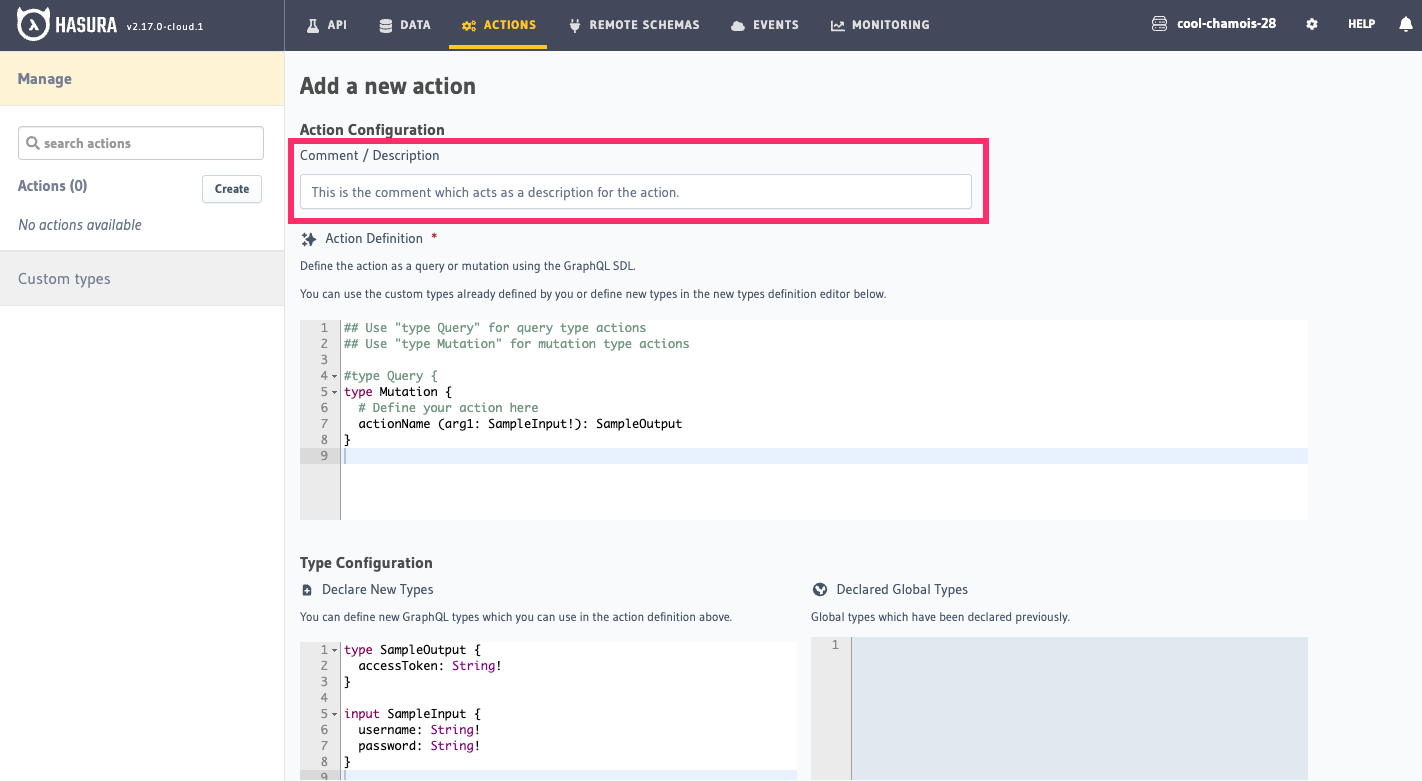
Step 2: Describe the Action
Copy and paste the following string in the Comment / Description field at the top of the page:
Convert currency with real-time exchange rates.
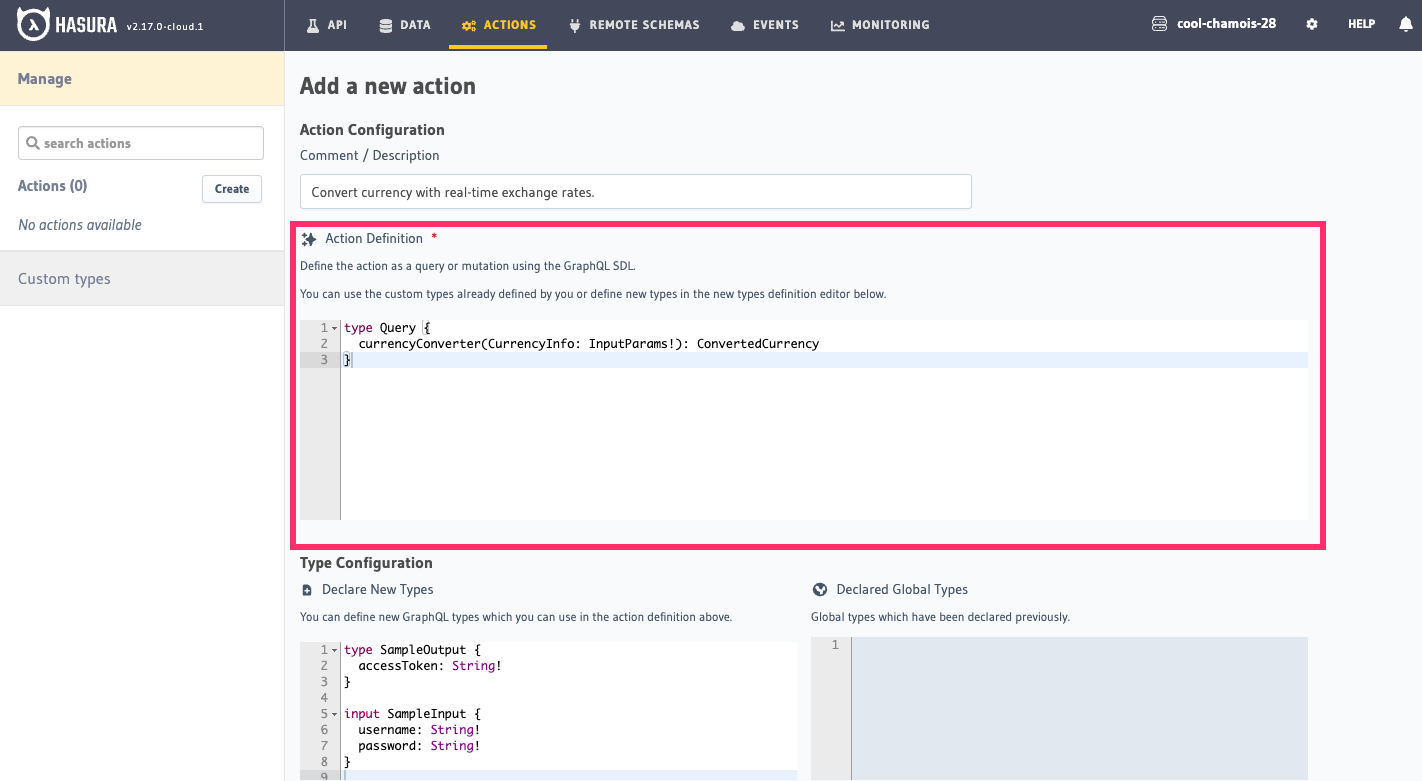
Step 3: Define the Action
Copy and paste the block below into the Action Definition field. It will take the place of all placeholder text:
type Query {
  currencyConverter(CurrencyInfo: InputParams!): ConvertedCurrency
}
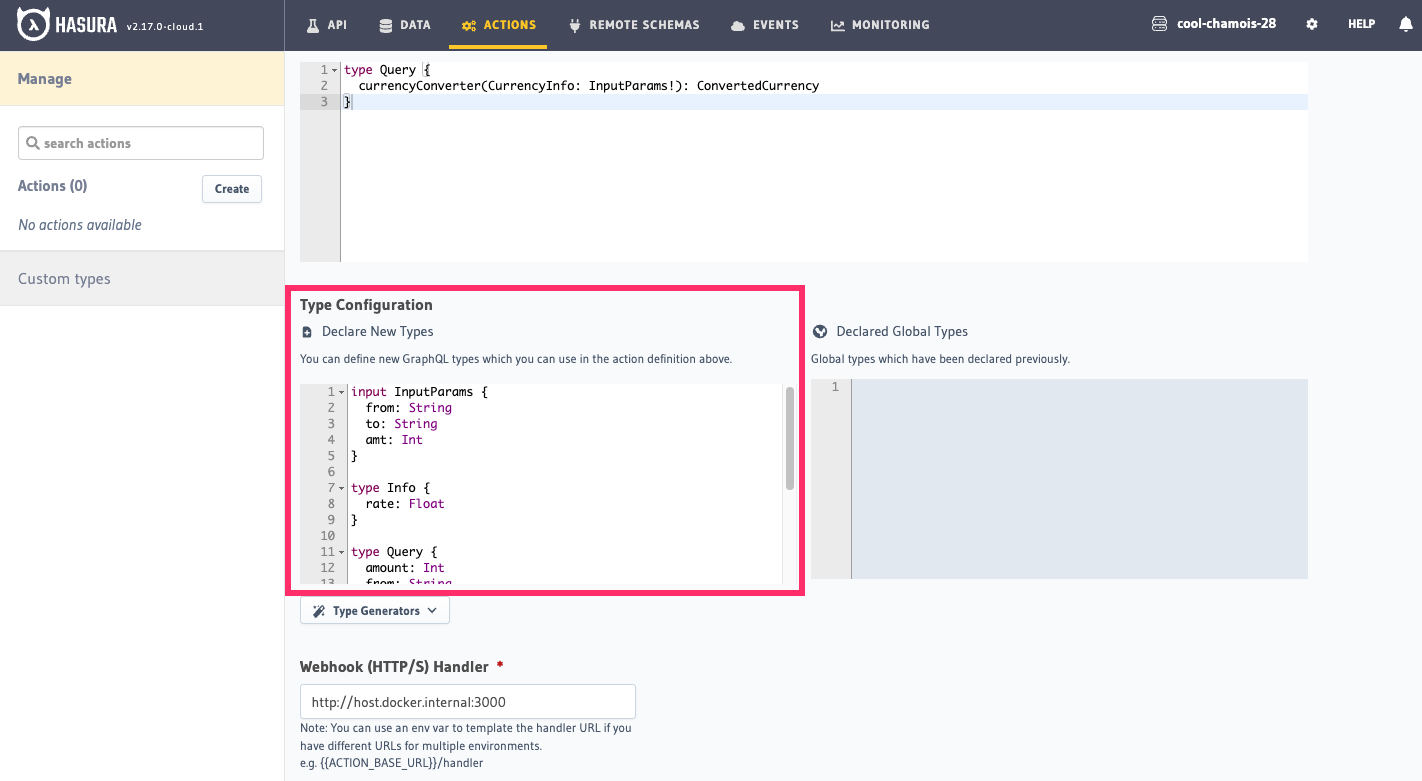
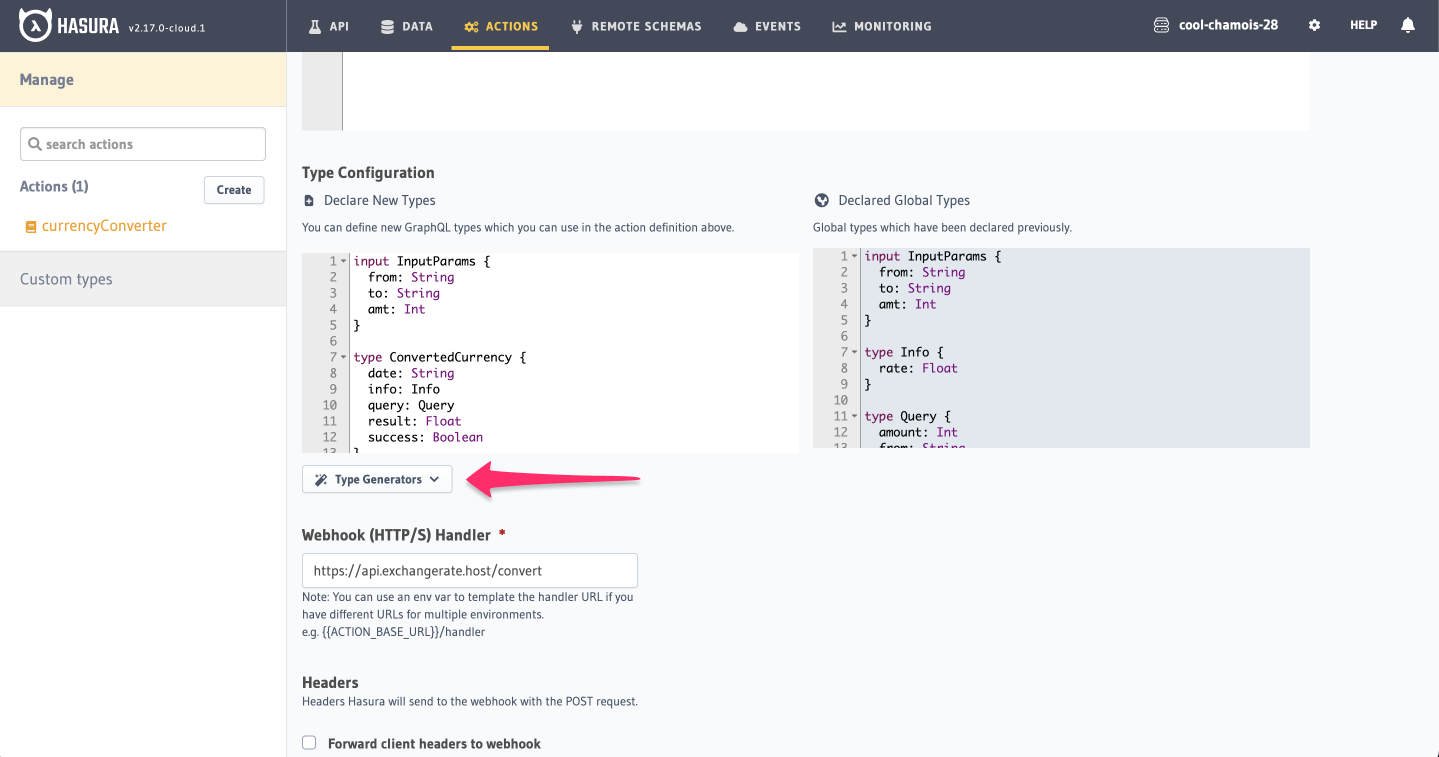
Step 4: Configure your types
Copy and paste the block below into the Type Configuration field. It will take the place of all placeholder text:
input InputParams {
  from: String
  to: String
  amt: Int
}

type Info {
  rate: Float
}

type Query {
  amount: Int
  from: String
  to: String
}

type ConvertedCurrency {
  date: String
  info: Info
  query: Query
  result: Float
  success: Boolean
}
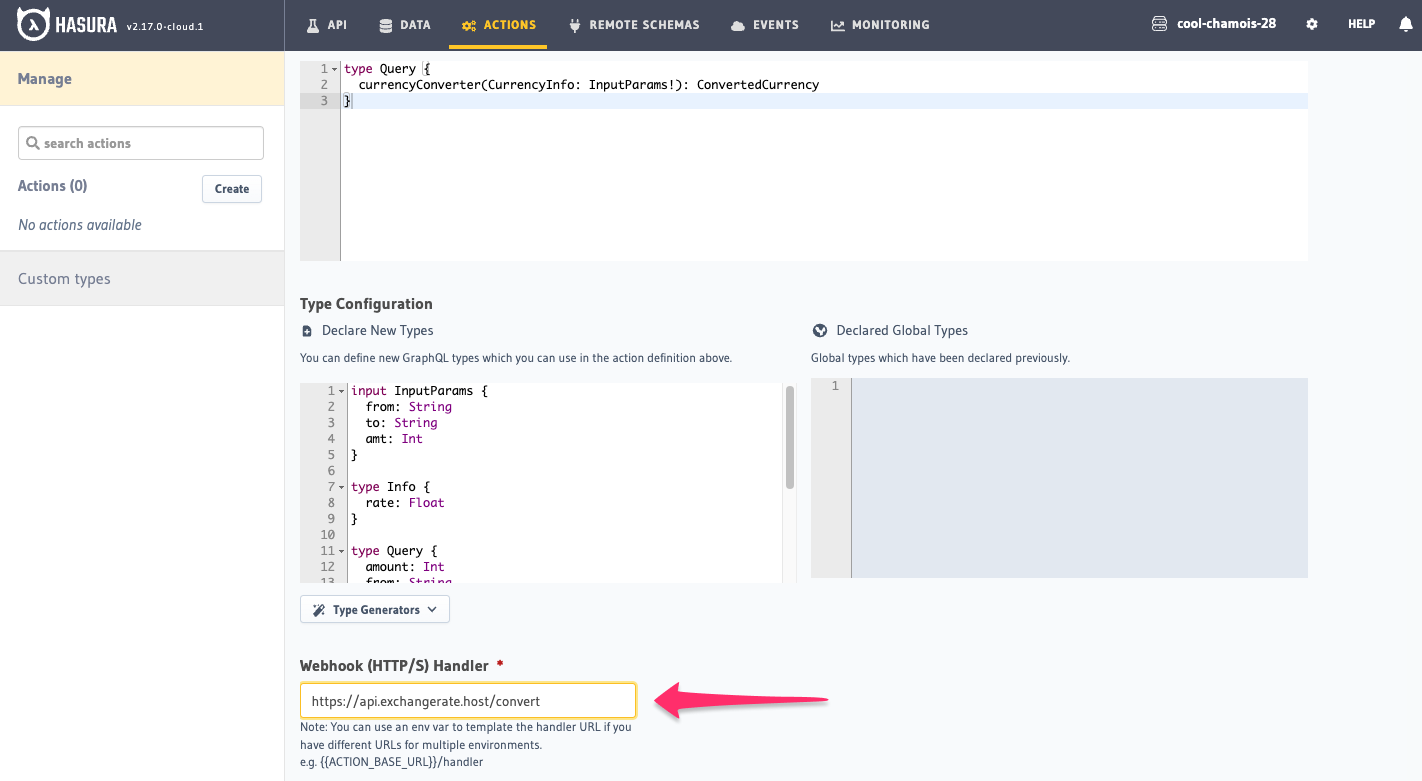
Step 5: Add the REST endpoint
In the Webhook Handler field, copy and paste the following:
https://api.exchangerate.host/convert
Step 6: Change the request options and add query params
Click Add Request Options Transform and change the Request Method to GET:
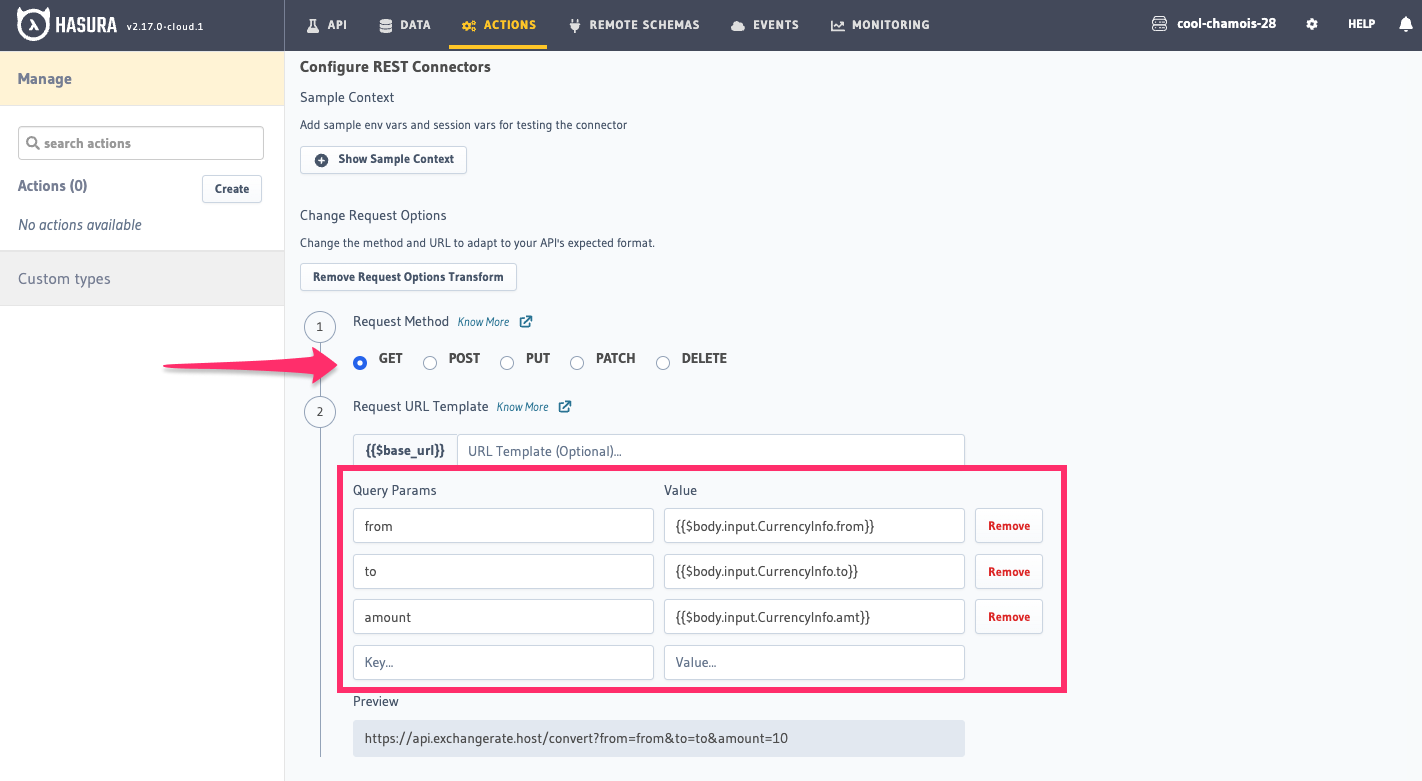
Add the following query parameters and values as separate pairs in the available fields:
| Query Param | Value |
|---|---|
| from | {{$body.input.CurrencyInfo.from}} |
| to | {{$body.input.CurrencyInfo.to}} |
| amount | {{$body.input.CurrencyInfo.amt}} |
| access_key | 0417395c100e46d35f7ff0b01ccb638d |
Scroll to the bottom of the page, click Create Action, then head to your API page.
Step 7: Run a query
Copy and paste the query on the left into your GraphiQL explorer and execute the query by clicking the Play button.
The response should look similar to what's on the right (depending on rates):
Recap
What just happened? Congrats! You just extended your GraphQL API with a REST endpoint 🎉
Actions can do a lot of things, but chances are - wherever you are in your GraphQL journey - you still have some legacy REST APIs that you need to integrate with. Whether you built them yourself or you're trying to integrate with public APIs, Actions are a great way to do that.
We started by describing our Action. This may seem like an excessive step, but - since our GraphQL API is self-documenting - it's a good idea to add a description to your Action so that your consumers know what it does. The value we entered is available as a tooltip in the GraphiQL explorer and in the API's documentation.
From there, we defined our Action. This is where we tell Hasura what our Action will do. In this case, we're
defining a Query that will return a ConvertedCurrency type. This is the type that we'll be returning from our REST
API. We haven't actually defined these types yet; we're just telling Hasura that when running this query, with these
inputs, we'll be returning a ConvertedCurrency type.
Next, we configured our types. This is where we tell Hasura what our ConvertedCurrency type looks like. We
defined the types of our inputs and output. In the case of our inputs, we're defining an InputParams type that will be
used as the input to our Action (i.e., a user will have to pass in an InputParams object that contains from, to,
and amt when executing our Query).
We're also defining the types of our outputs. In this case, we're defining a ConvertedCurrency type that will be
returned from our REST API. It can be laborious to define these types, but Hasura can take care of that for you. The
Console's Type Generator is a great way to do that: simply paste in some sample JSON output from your endpoint and
Hasura will generate the types for you.
Finally, we added the REST endpoint and configured the request options. This is where we tell
Hasura where to send our request and what to send. In this case, we're sending a GET request to the
https://api.exchangerate.host/convert endpoint. We're also passing in the from, to, and amount query parameters
that our REST API expects.
Hasura automatically amends the base url of the REST endpoint with these query parameters and their values from the query to produce a request that looks like this:
https://api.exchangerate.host/convert?from=EUR&to=USD&amount=1
To learn about creating your own Actions, check out the Create Actions page.