Quickstart Auth
In this quickstart, we'll use a JWT and permissions to limit a query to only the user making the request. We're using
our sample app, which you can read more about below. If you don't use the sample app, you'll need to ensure your data
model includes a users table and modify the values of the encoded and decoded JWT to match your user's information.
DOCS E-COMMERCE SAMPLE APP
You can use this quickstart with any project, but it pairs well with our docs e-commerce sample app, which you can deploy to Hasura Cloud with one click below. If you've already deployed the sample app, access your existing project.

Step 1: Add an environment variable
Depending on how your instance is deployed, you can either use the GUI or your configuration files to set this secret.
- Cloud
- Self-hosted
Head to your Project's settings page and click on the Env vars option in the side navigation:
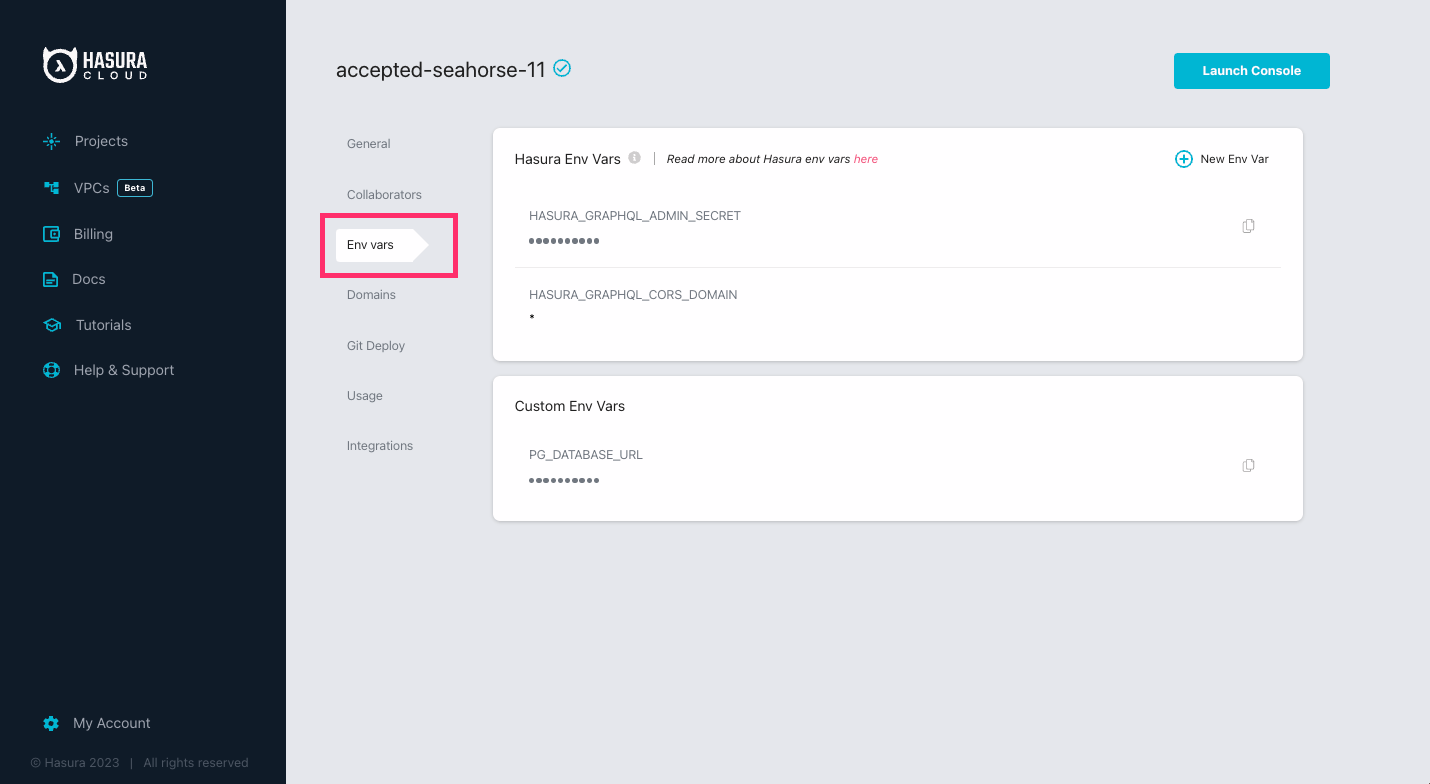
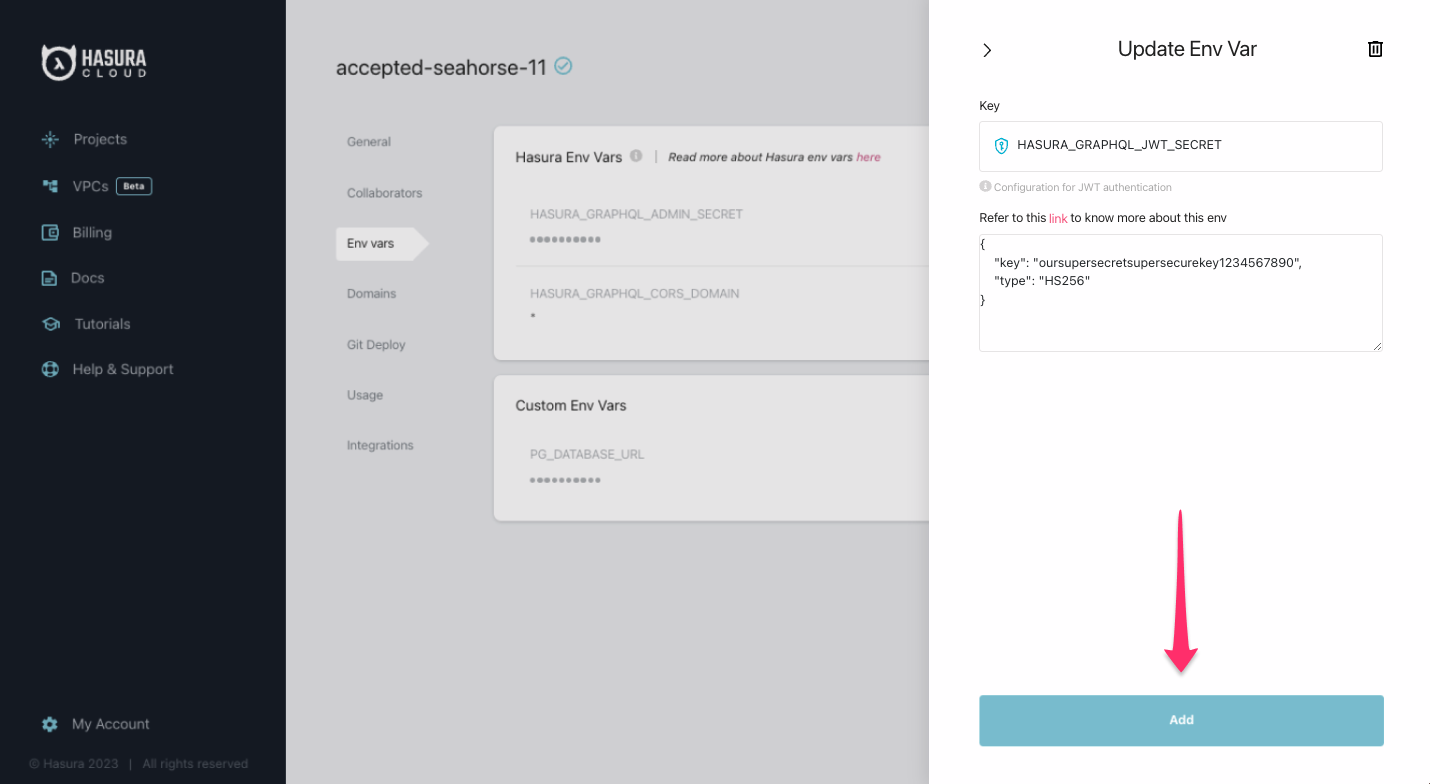
Once there, click on New Env Var and select HASURA_GRAPHQL_JWT_SECRET from the Key field. Paste this value into the
environment variable's value field:
{
  "key": "oursupersecretsupersecurekey1234567890",
  "type": "HS256"
}
Click Add:
In your docker-compose.yml, add the following environment variable and value:
HASURA_GRAPHQL_JWT_SECRET: '{ "type": "HS256", "key": "oursupersecretsupersecurekey1234567890" }'
If you don't already have a users table, add one with the following SQL using the Data tab's SQL editor:
CREATE TABLE users (
  id uuid NOT NULL,
  name text NOT NULL,
  email text NOT NULL,
  PRIMARY KEY (id)
);
Then, insert these users:
INSERT INTO public.users (id, name, email) VALUES ('7cf0a66c-65b7-11ed-b904-fb49f034fbbb', 'Sean', '[email protected]');
INSERT INTO public.users (id, name, email) VALUES ('82001336-65b7-11ed-b905-7fa26a16d198', 'Rob', '[email protected]');
INSERT INTO public.users (id, name, email) VALUES ('86d5fba0-65b7-11ed-b906-afb985970e2e', 'Marion', '[email protected]');
INSERT INTO public.users (id, name, email) VALUES ('8dea1160-65b7-11ed-b907-e3c5123cb650', 'Sandeep', '[email protected]');
INSERT INTO public.users (id, name, email) VALUES ('9bd9d300-65b7-11ed-b908-571fef22d2ba', 'Abby', '[email protected]');
Step 2: Create a user role
Head to the Data tab of the Hasura Console. If you have a users table, select it from the list on the left-hand
side, and open the Permissions tab:
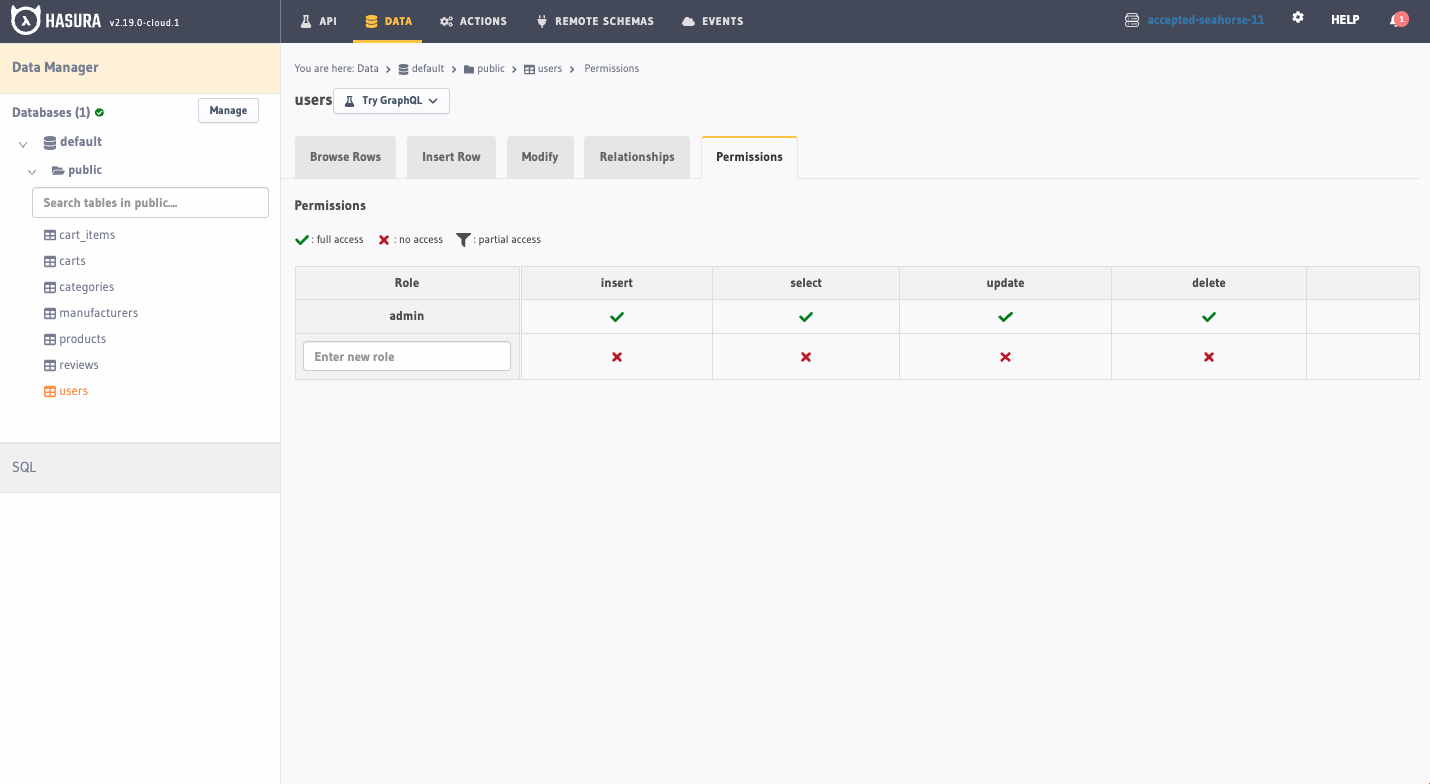
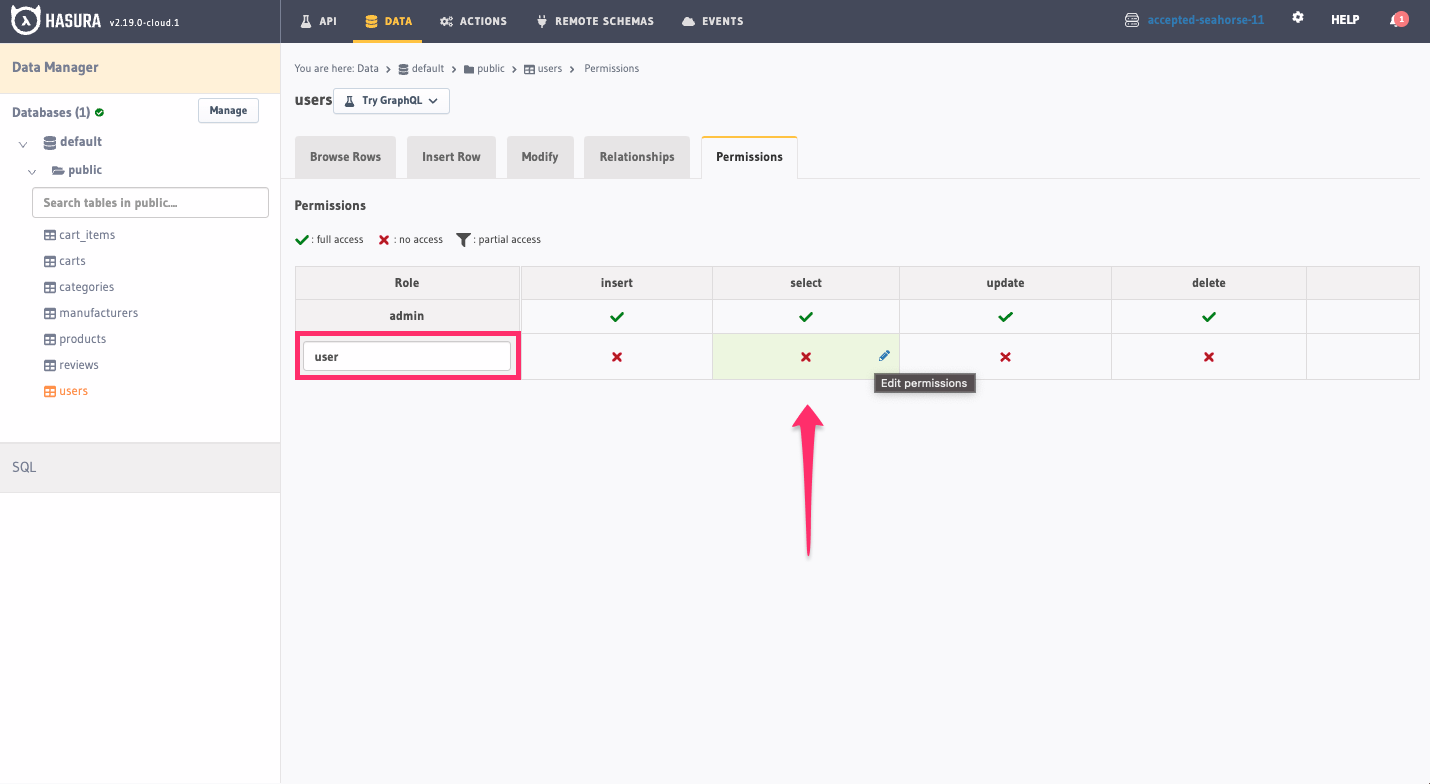
As you can see, we currently only have an admin role. To make access to data more granular, we'll create a new role by
entering user into the text input. After entering the name of the role, click the ❌ in the select column:
Configure the Row select permissions by choosing With custom check and pasting the following value in the editor on
line 1:
{ "id": { "_eq": "X-Hasura-User-Id" } }
Configure the Column select permissions by clicking Toggle All:
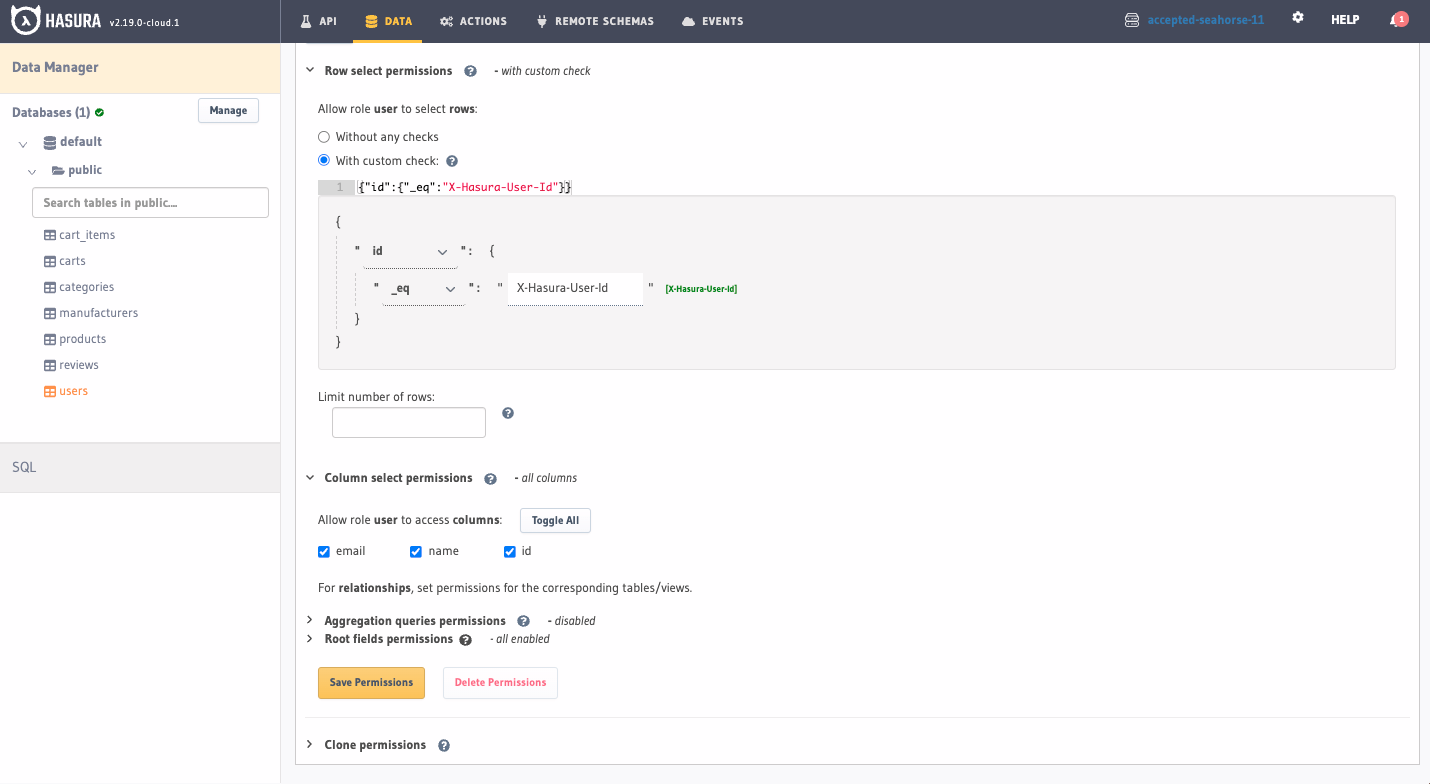
Finally, click Save Permissions.
Step 3: Add a header in the GraphiQL explorer
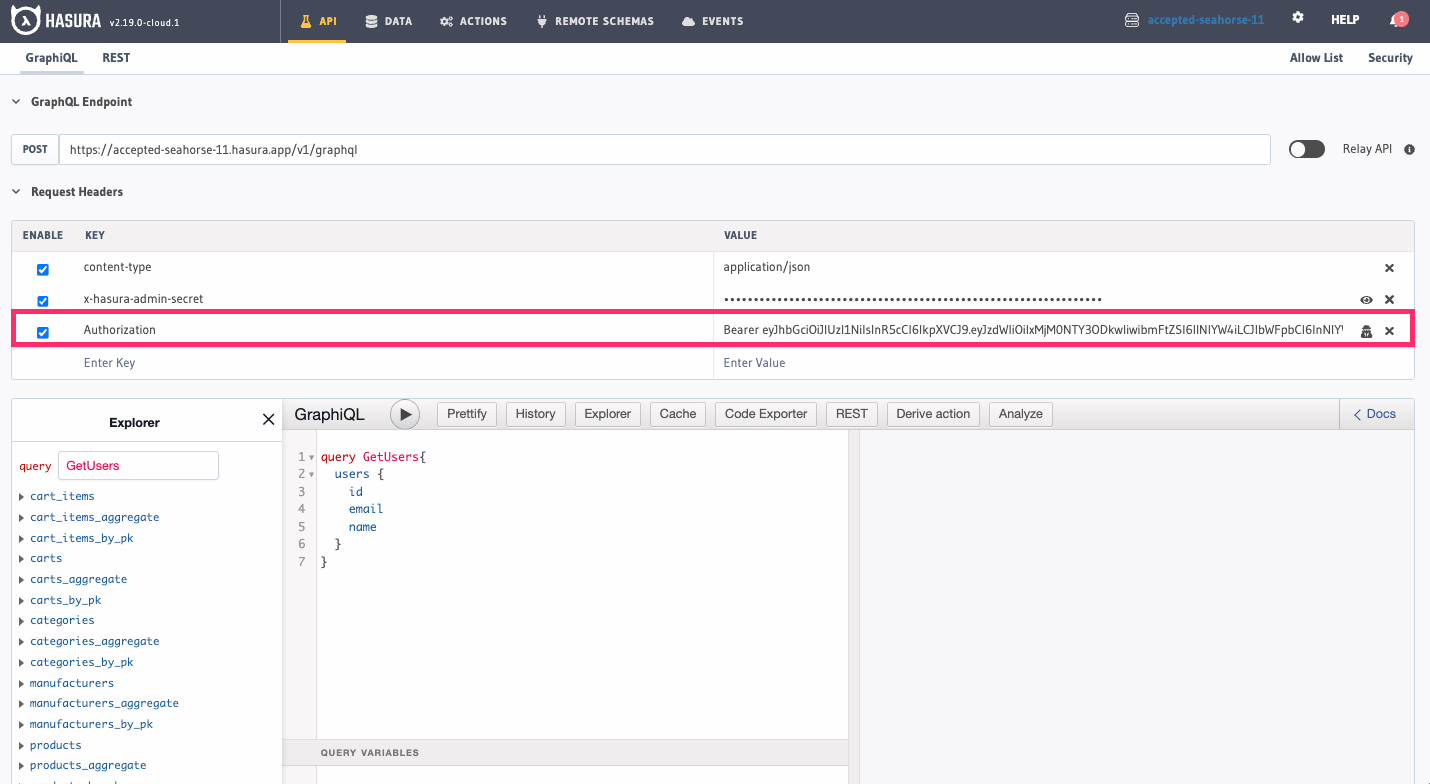
Head back to the API tab and add a new row to the Request Headers. Enter this key:
Authorization
And this value:
Bearer eyJhbGciOiJIUzI1NiIsInR5cCI6IkpXVCJ9.eyJzdWIiOiIxMjM0NTY3ODkwIiwibmFtZSI6IlNlYW4iLCJlbWFpbCI6InNlYW5kZW1vQGhhc3VyYS5pbyIsImlhdCI6MTUxNjIzOTAyMiwiaHR0cHM6Ly9oYXN1cmEuaW8vand0L2NsYWltcyI6eyJ4LWhhc3VyYS1hbGxvd2VkLXJvbGVzIjpbInVzZXIiLCJhZG1pbiJdLCJ4LWhhc3VyYS1kZWZhdWx0LXJvbGUiOiJ1c2VyIiwieC1oYXN1cmEtdXNlci1pZCI6IjdjZjBhNjZjLTY1YjctMTFlZC1iOTA0LWZiNDlmMDM0ZmJiYiJ9fQ.jSp42PsCa4r-2ObfopkiDBvTn9nDysIv-NOIEnU3wR0
Check the box next to Authorization; the final result should look like this:
Step 4: Test it out
Before demonstrating the access control you just designed, run the following query:
query GetUsers {
  users {
    id
    email
    name
  }
}
You should see an array of 5 records returned:
{
  "data": {
    "users": [
      {
        "id": "7cf0a66c-65b7-11ed-b904-fb49f034fbbb",
        "email": "[email protected]",
        "name": "Sean"
      },
      {
        "id": "82001336-65b7-11ed-b905-7fa26a16d198",
        "email": "[email protected]",
        "name": "Rob"
      },
      {
        "id": "86d5fba0-65b7-11ed-b906-afb985970e2e",
        "email": "[email protected]",
        "name": "Marion"
      },
      {
        "id": "8dea1160-65b7-11ed-b907-e3c5123cb650",
        "email": "[email protected]",
        "name": "Sandeep"
      },
      {
        "id": "9bd9d300-65b7-11ed-b908-571fef22d2ba",
        "email": "[email protected]",
        "name": "Abby"
      }
    ]
  }
}
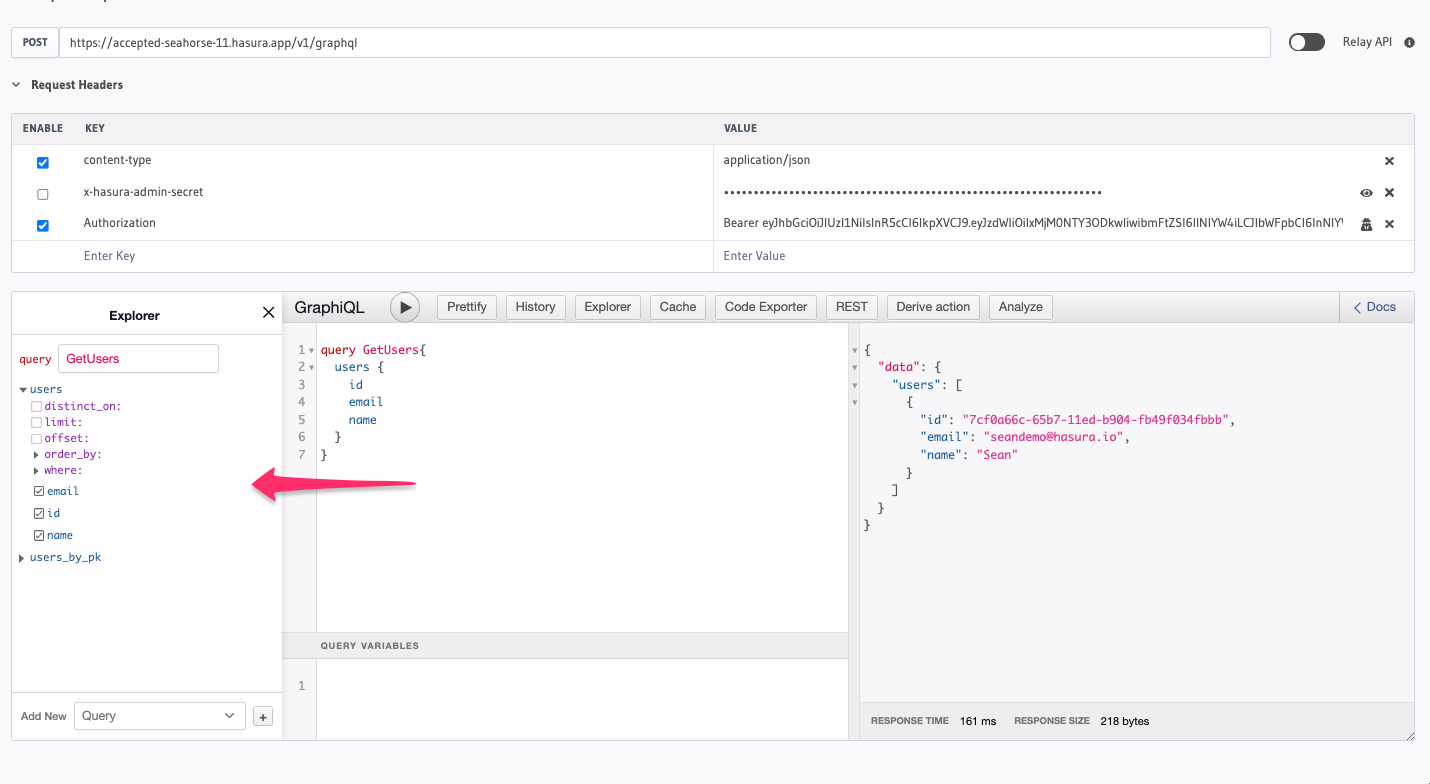
Uncheck the x-hasura-admin-secret request header. Re-run the query; this time, your output should be similar to this:
{
  "data": {
    "users": [
      {
        "id": "7cf0a66c-65b7-11ed-b904-fb49f034fbbb",
        "email": "[email protected]",
        "name": "Sean"
      }
    ]
  }
}
If you weren't watching closely, you may have missed it. When you deselected your admin secret in the request headers
and used only the authorization header, the available schema changed to what you defined in step 2 🔥
You can see that in the screenshot below, the only field available to the user is the users table:
Recap
What did we just do? Well, you just implemented a JWT-based authorization system with Hasura 🎉
Is this production-grade? Not quite. In a real-world application, you'd need to generate and verify the JWTs on the server-side. You'd also need to implement a mechanism to refresh the JWTs. What we've demonstrated is how Hasura utilizes the JWT to determine the role of the user and the permissions that they have access to.
The environment variable we set up in the beginning contains a secret; this secret is used to encode your JWTs wherever they're generated, be it on your own server, a third-party service, or even a client-side library. Hasura is agnostic about how or where you generate your JWTs. Saving that secret as an environment variable allows Hasura to decode the JWTs and verify that they're valid.
If you're curious about the composition of the JWT, you can view the decoded version one of two ways. By visiting
this link,
you can see the payload and other data associated with the JWT we used in this example. Alternatively, Hasura provides a
JWT decoder tool that you can use to decode any JWT. You can utilize this by clicking the "detective" icon next to the
Authorization header's value in the GraphiQL explorer.
The permissions we set up in step 2 are the most basic form of access control. We created a new role called user and
limited the rows returned on the users table to only those whose id matches the x-hasura-user-id claim in the JWT.
As you can see from the example, Hasura automatically provides a schema that only exposes the users table to the
user role. This is a great way to limit the exposure of your data to the outside world and ensure that your users only
have access to the data they're authorized to see.