Connecting Hasura to a MongoDB Atlas hosted database
Introduction
This guide explains how to connect a new or existing MongoDB Atlas hosted database to a Hasura instance, either on Hasura Cloud or via one of our self-hosted solutions.
If you plan on using Hasura Cloud, which we recommend, follow steps 1 and 2 below. If you're self-hosting a Hasura instance and already have a project running, skip to step 3.
Step 1: Sign up or log in to Hasura Cloud
Navigate to Hasura Cloud and sign up or log in.
Step 2: Create a Hasura Cloud project
On the Hasura Cloud dashboard, create a new project:
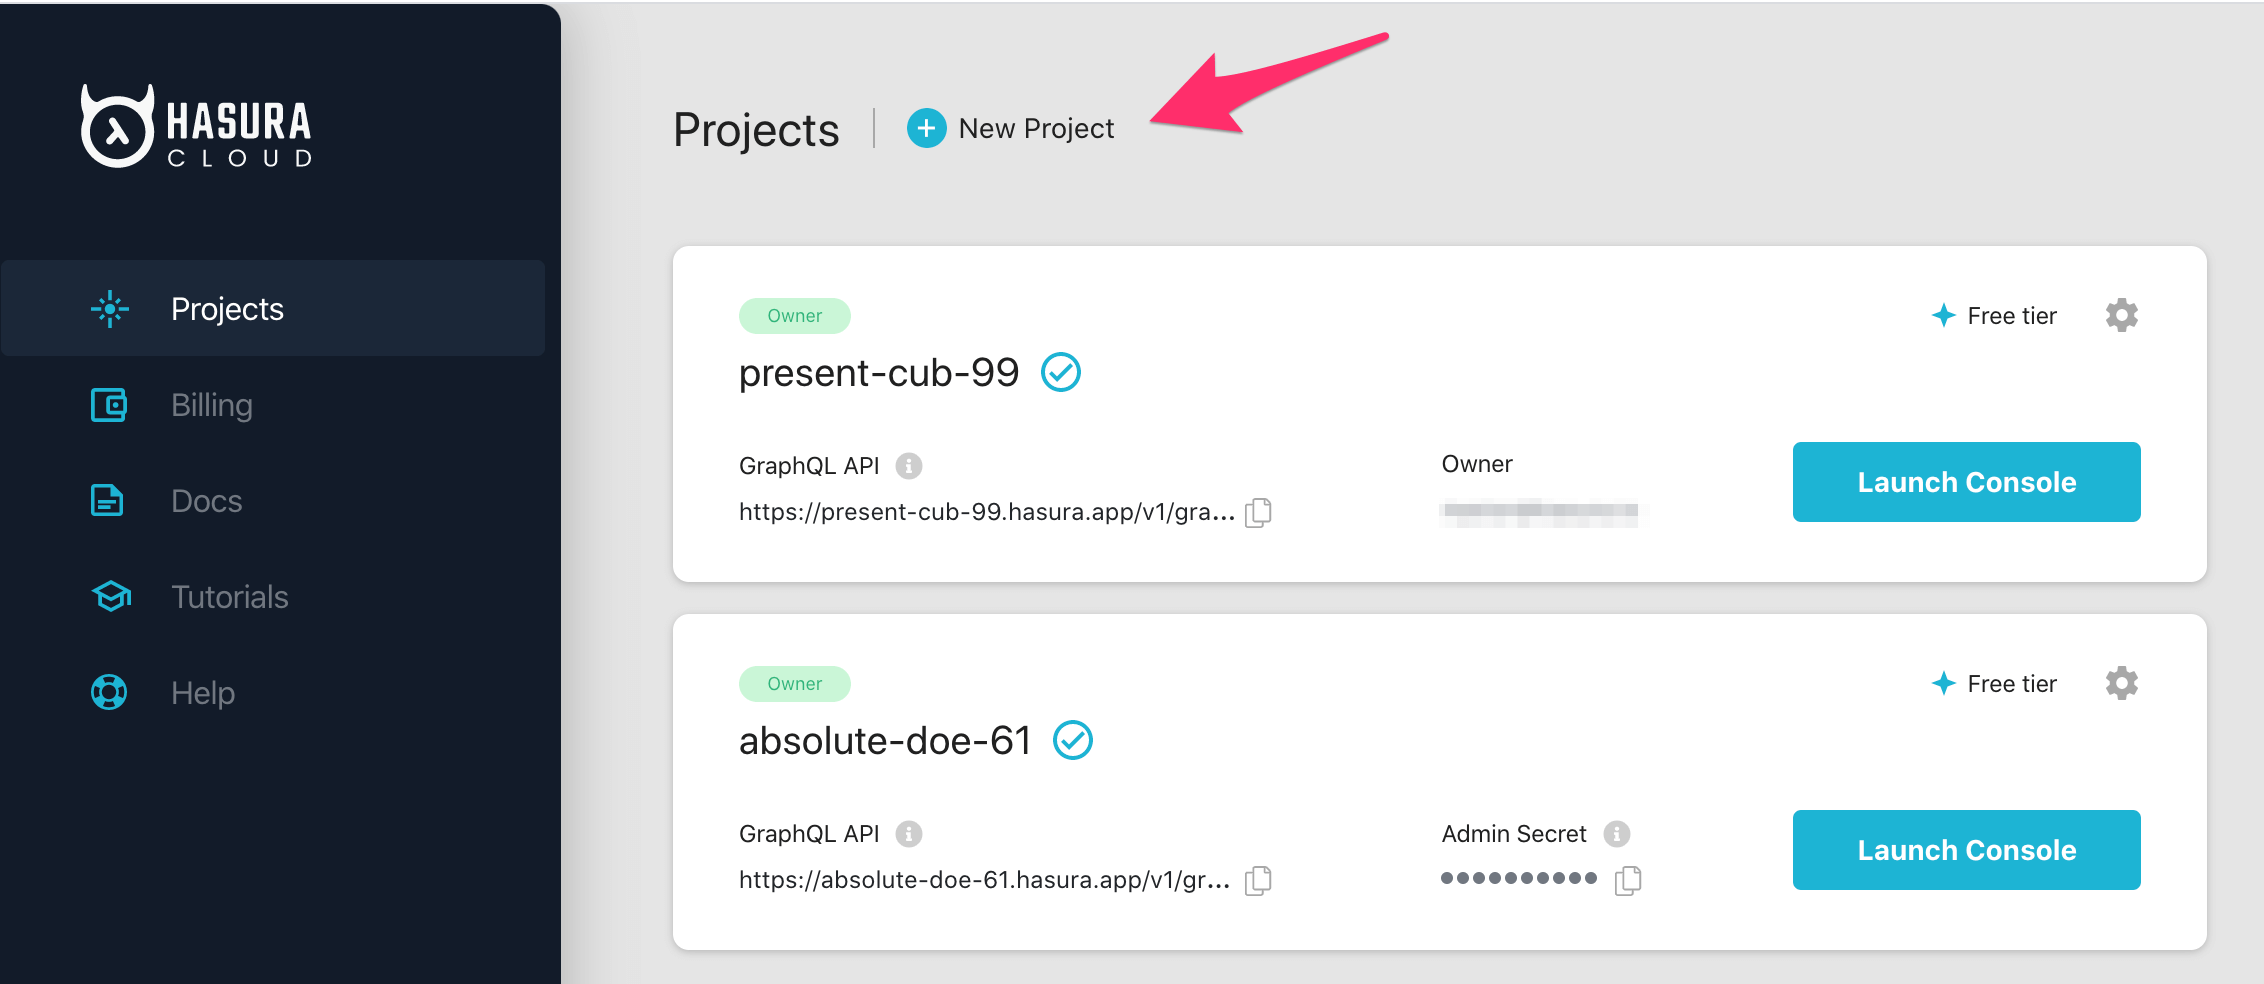
After the project is successfully initialized, click on Launch Console to open the Hasura Console in your browser.
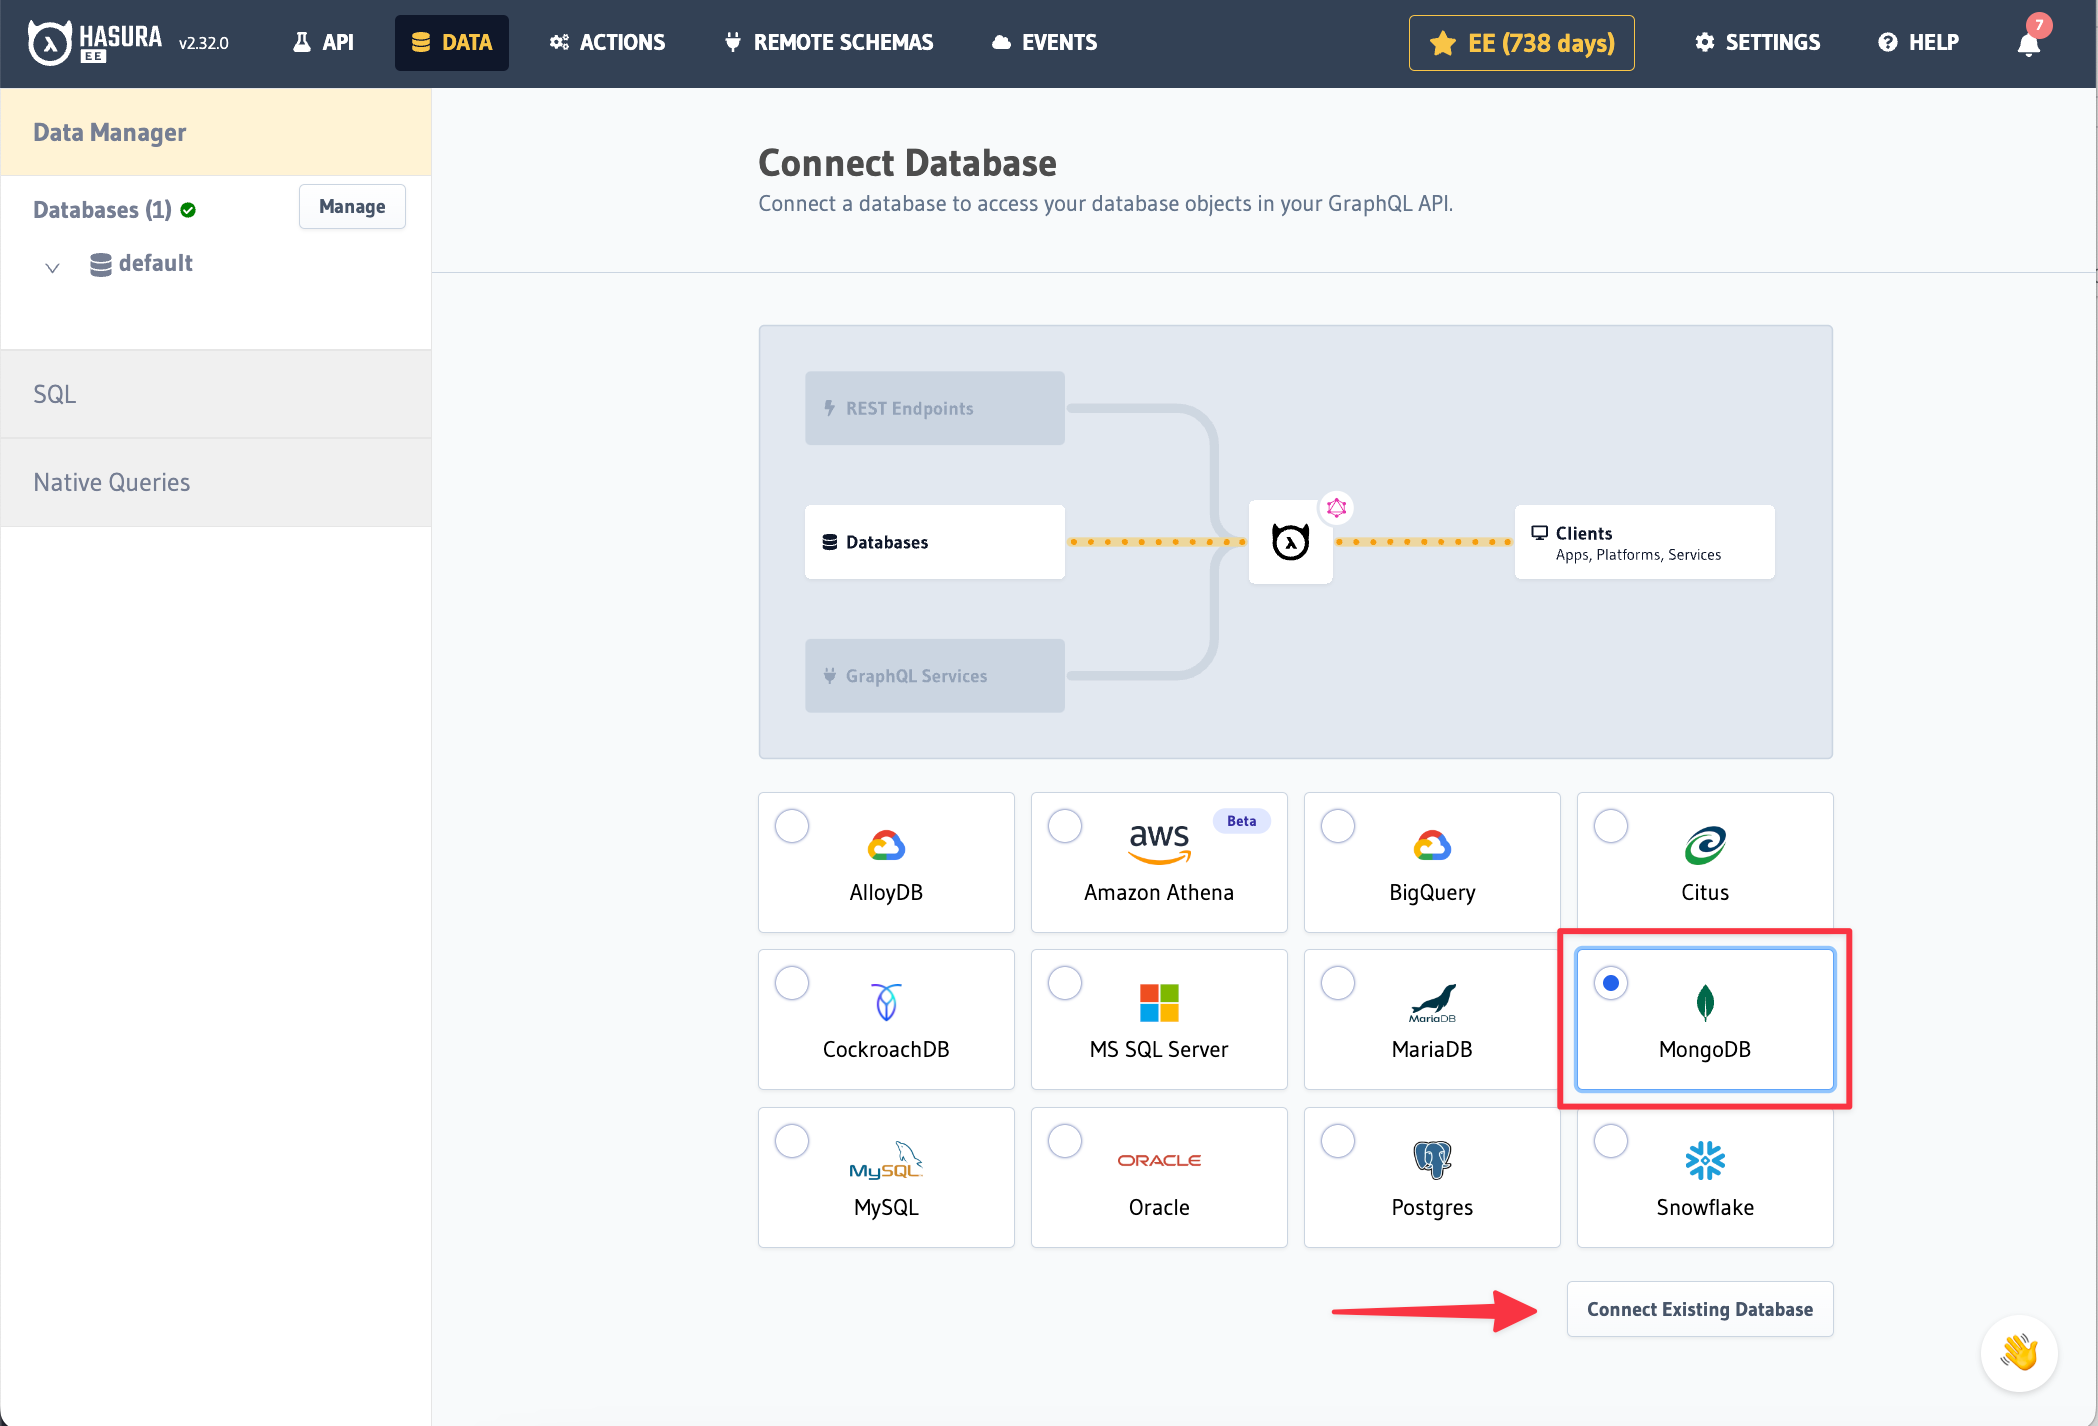
On the Hasura Console, navigate to the Data tab and choose Connect Existing Database. Hasura will prompt you for a
mongodb:// URL. We'll grab this after creating our database and then come back here.
Step 3: Create a Database in MongoDB Atlas
If you have an existing database on MongoDB Atlas, you can skip this step and move on to step 4.
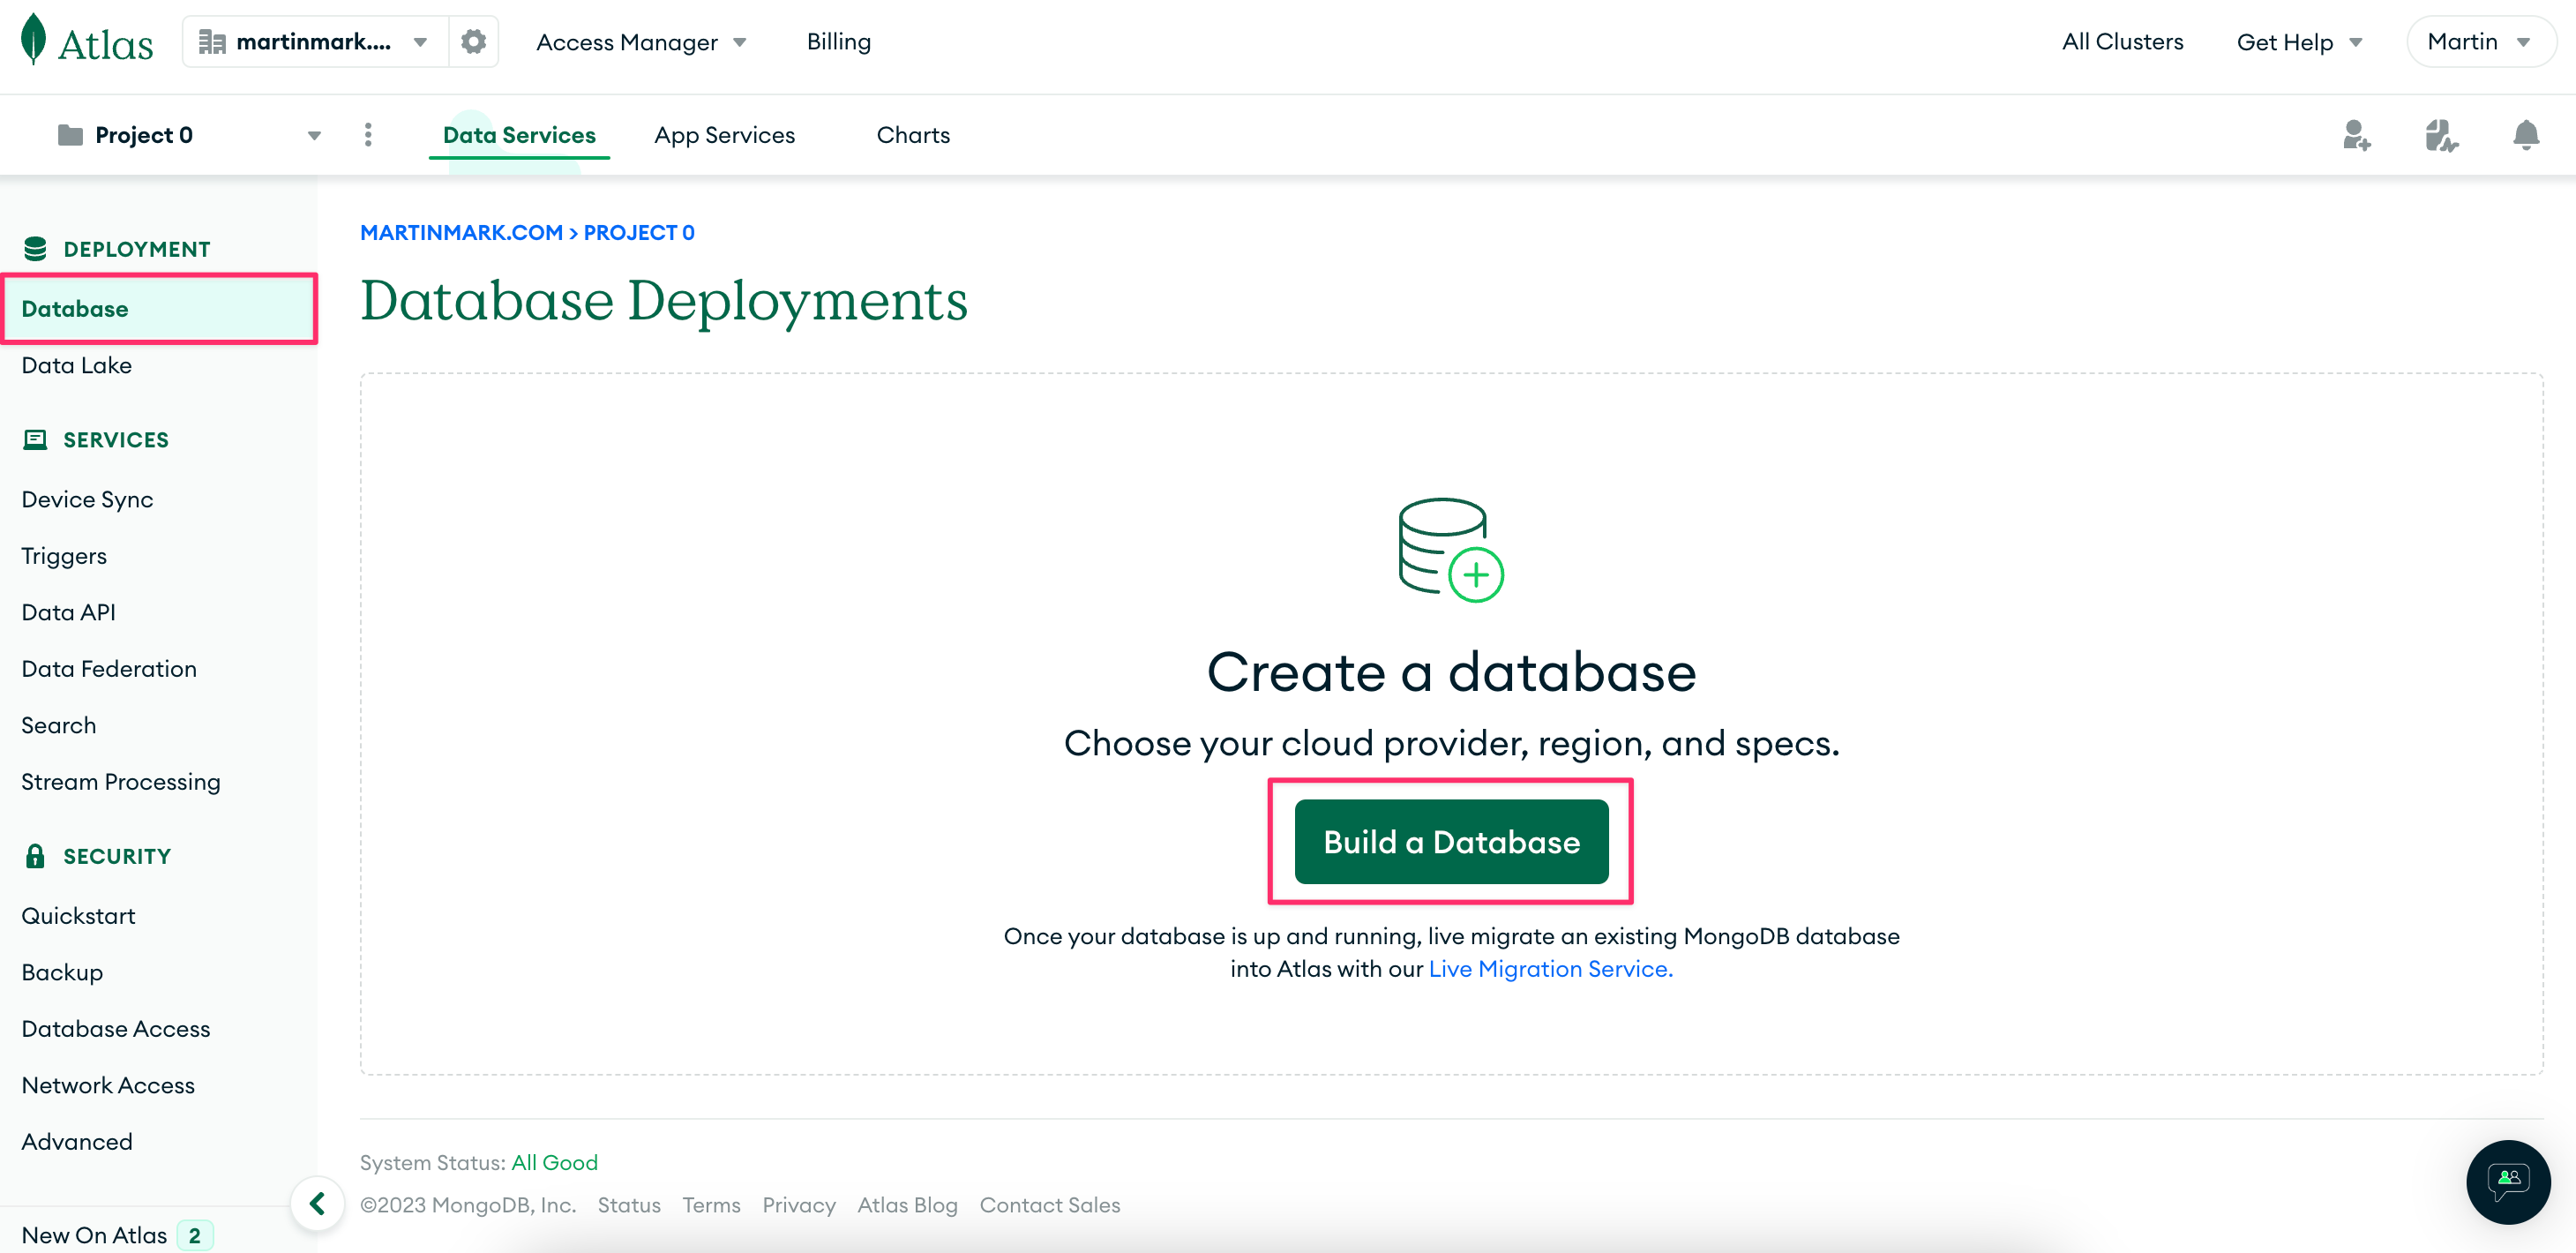
Log into the MongoDB Atlas control panel.
On the left-side navigation, under Deployment, click on Database.
Select Build a Database when prompted.
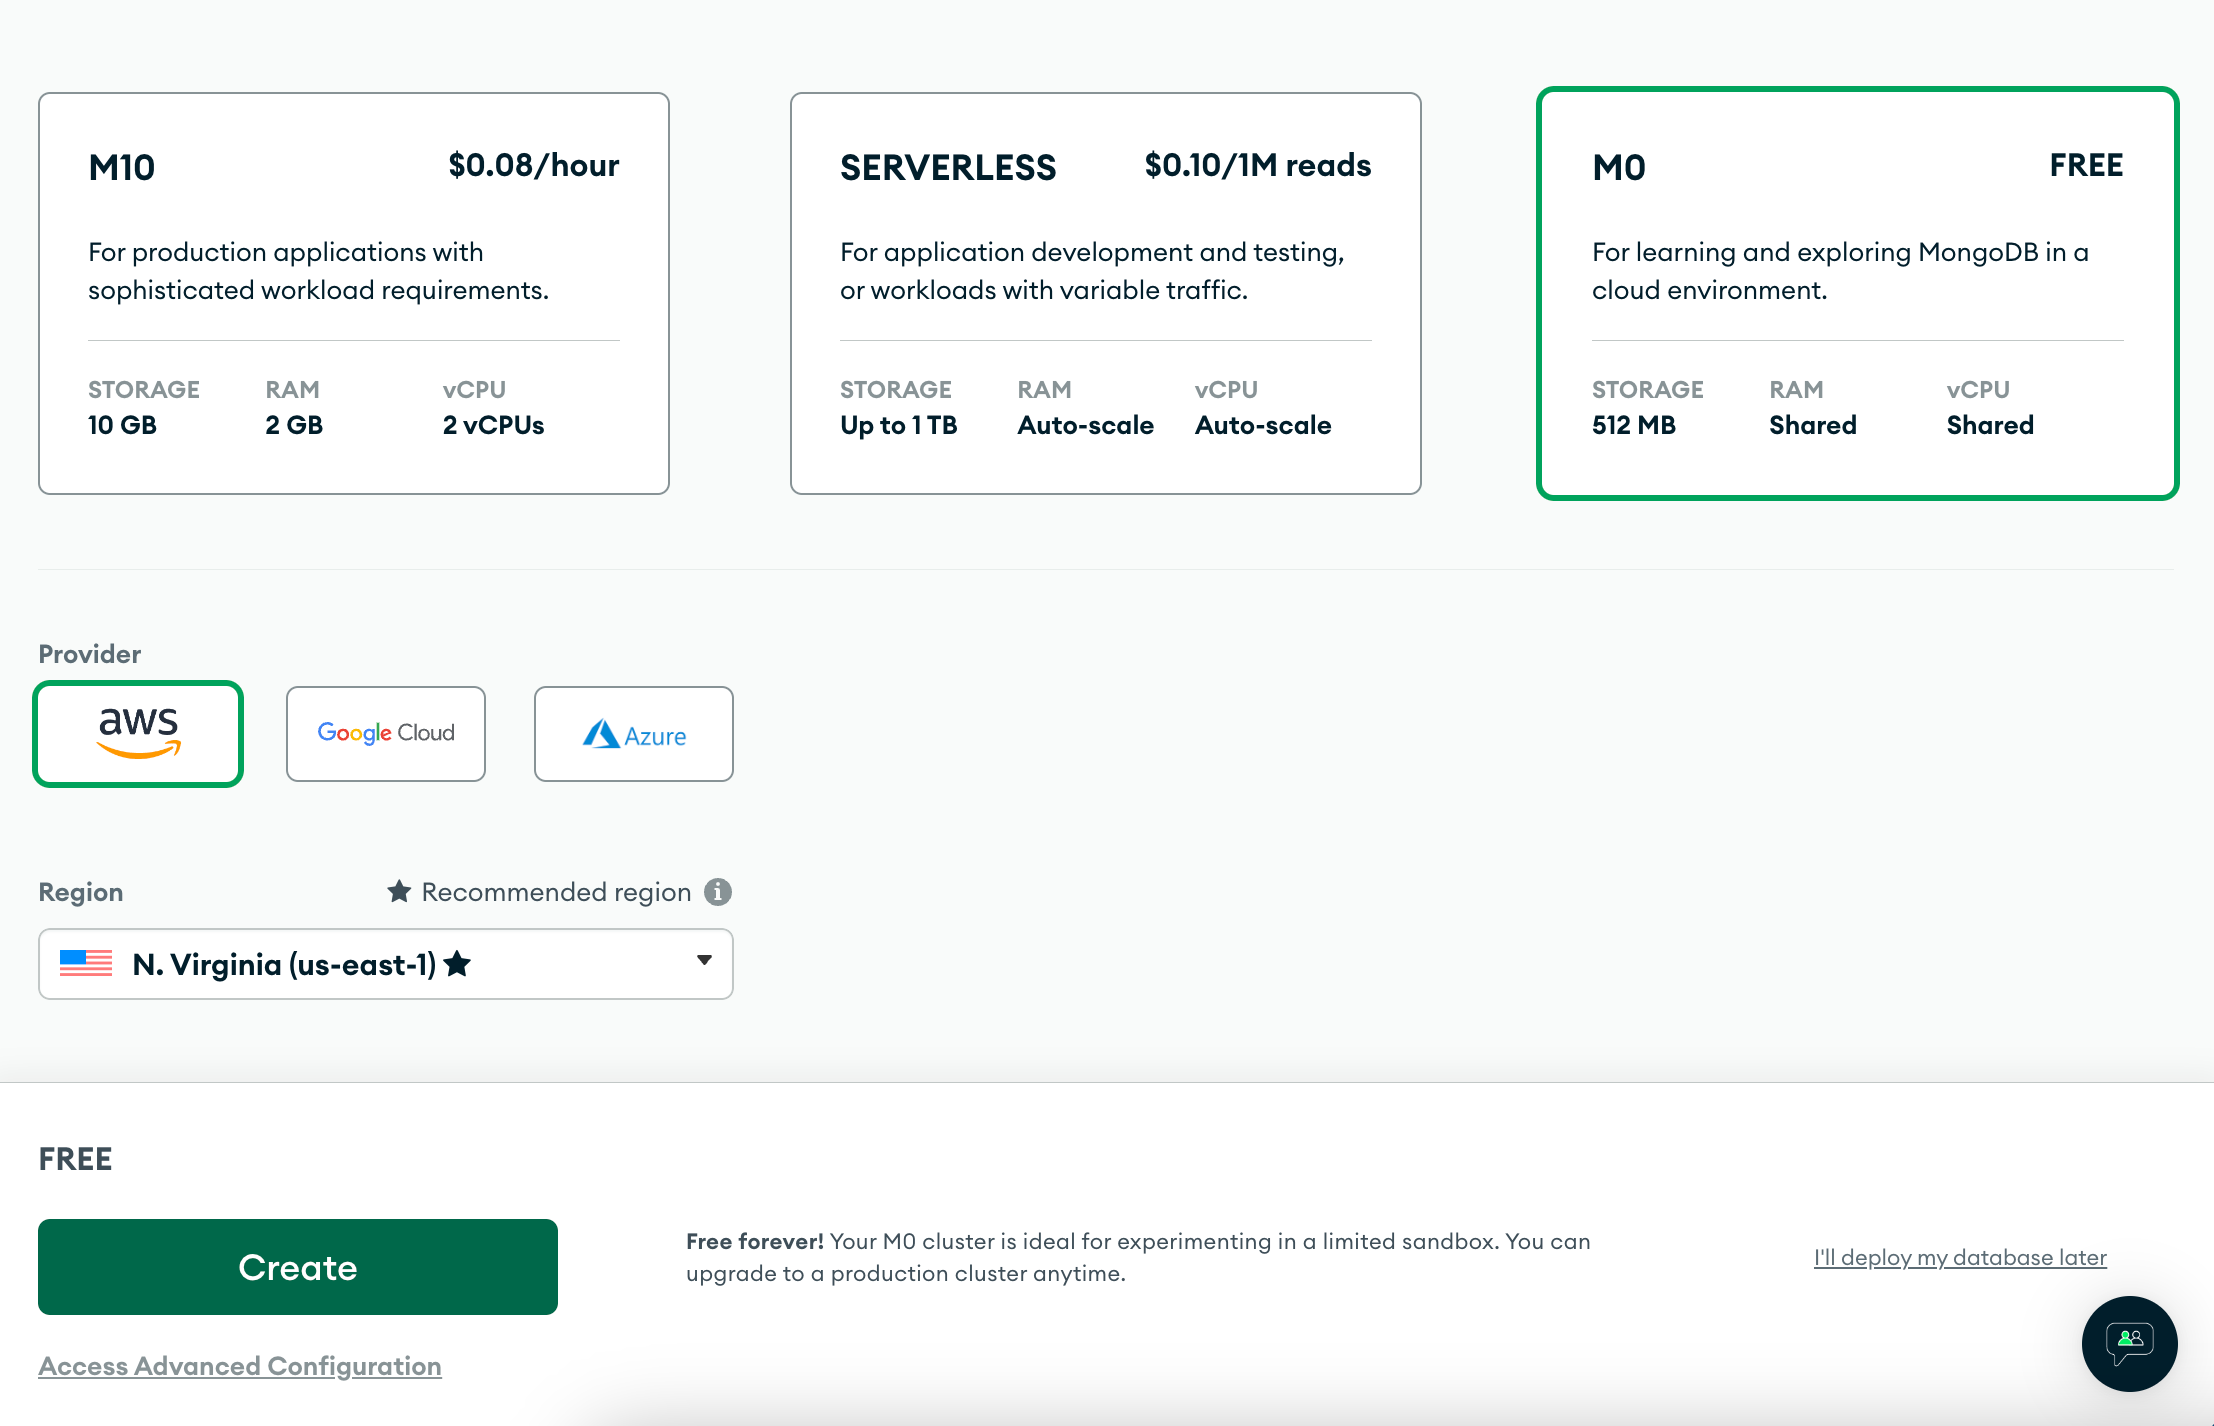
Select your instance type, and enter your MongoDB cluster specifics.
Keeping your MongoDB Atlas in the same hosting provider and region as your Hasura Cloud project will help reduce latency and will yield the best performance.
Step 4: Allow connections to your MongoDB Atlas database from Hasura
We need to allowlist the IP on which Hasura is running to be able to communicate with the database.
After clicking create you should be taken to the Quickstart for your MongoDB cluster.
At this stage you can configure any other credentials for your cluster as needed and setup your MongoDB cluster to allow connecting to your Hasura Cloud project.
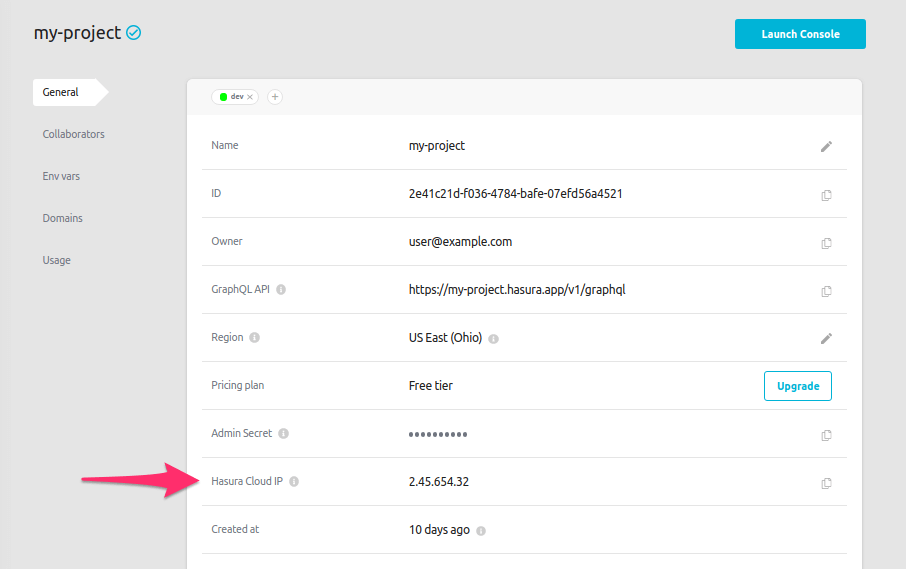
If using Hasura Cloud, from your project's dashboard, copy the Hasura Cloud IP address:
If you're using a self-hosted solution, you can select Add My Current IP Address to allow the local IP address that you're connected from, if hosting on the same IP as your instance - or you can retrieve the IP address from your self-hosted server.
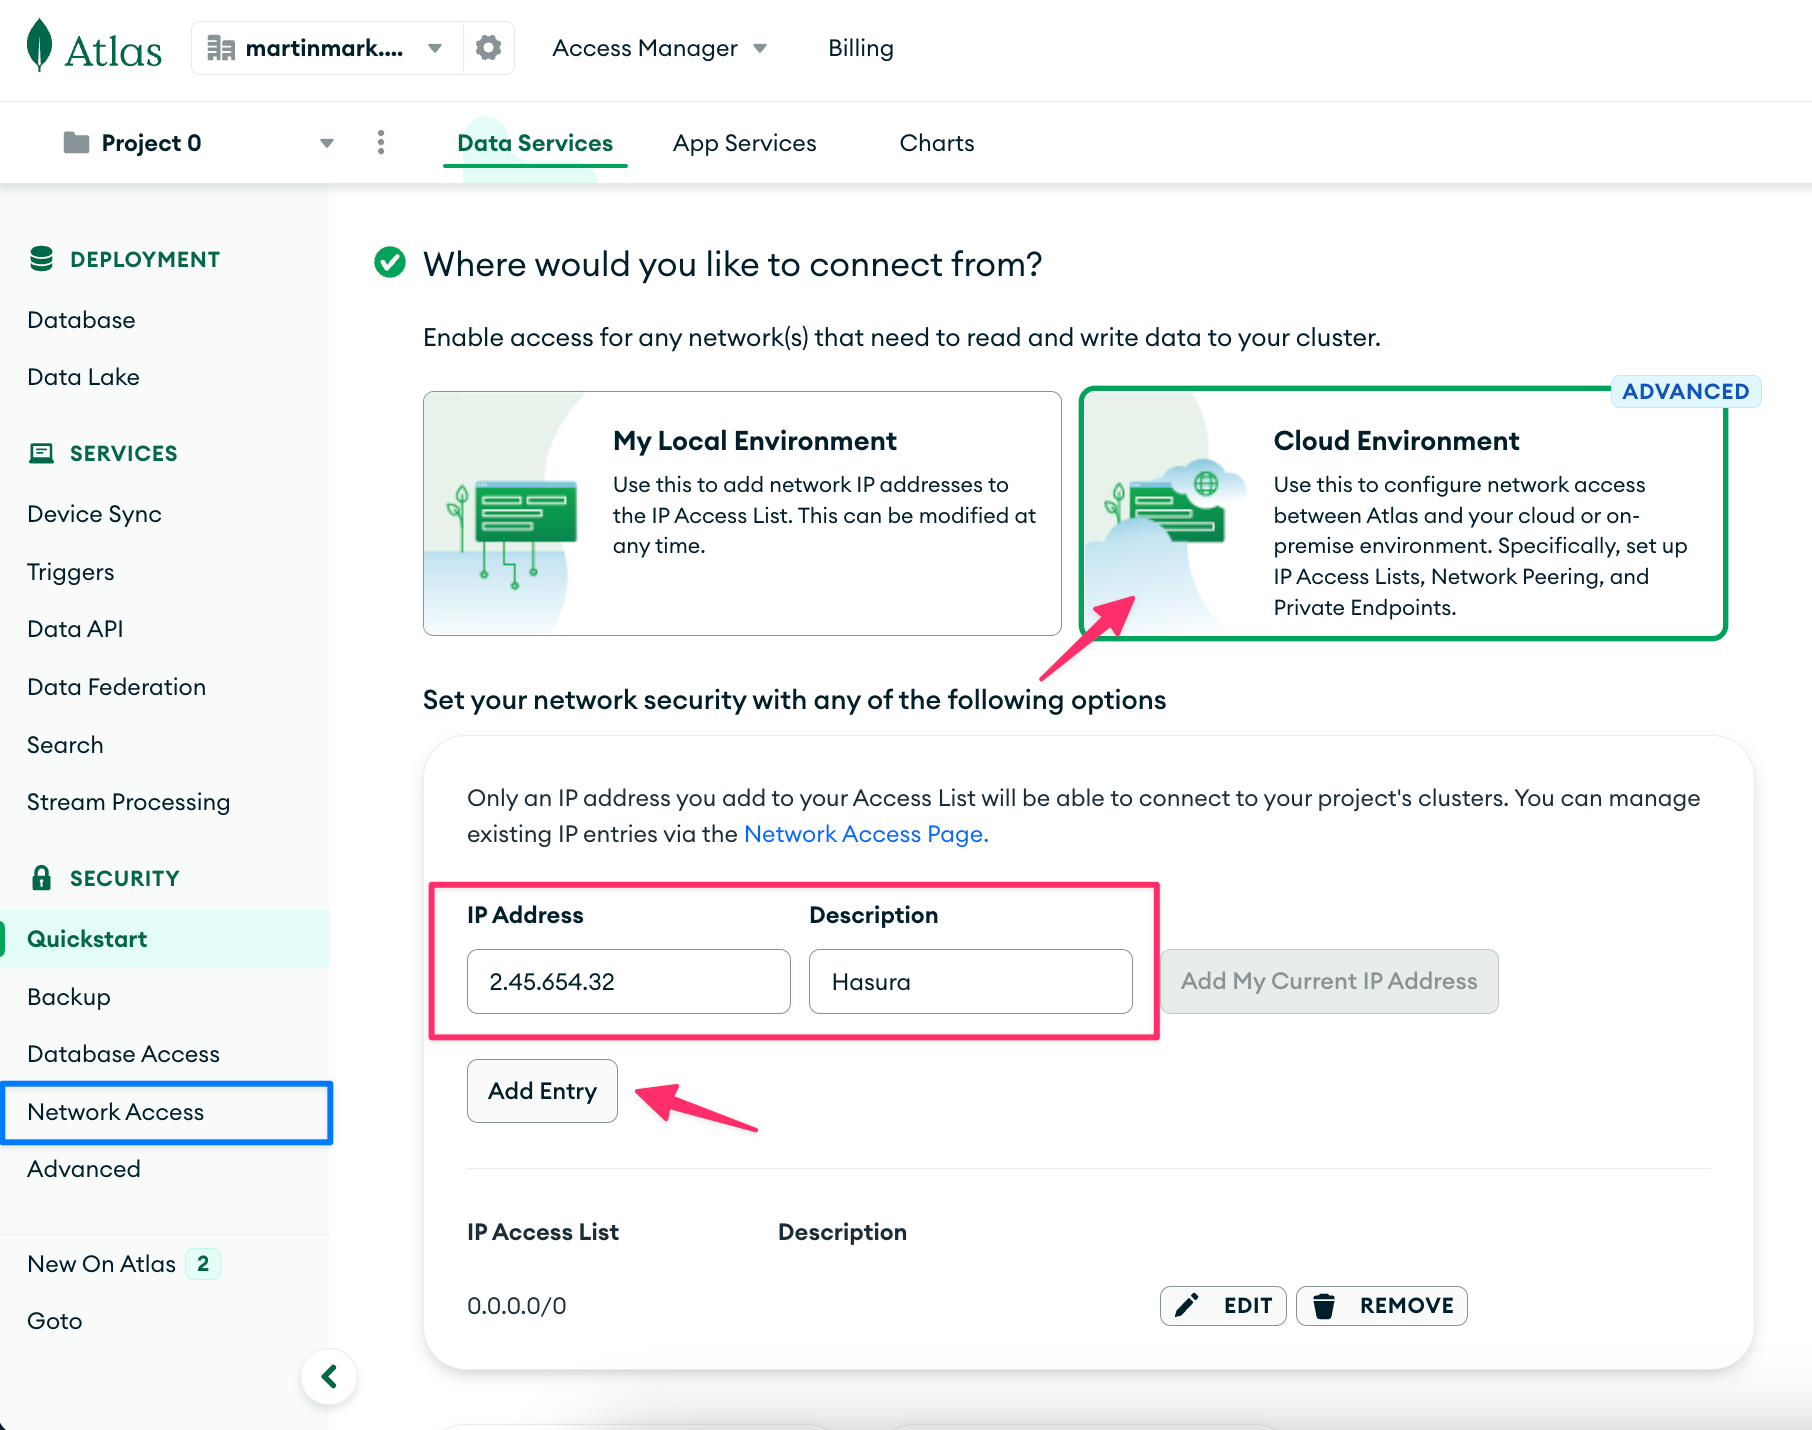
At the bottom of your MongoDB Atlas Quickstart, there should be an area for Where would you like to connect from?.
(If you don't see this, you can also access IP allowlisting through the Network Access section in the left sidebar).
Then to setup your allowed IP address:
- Select Cloud Environment for the type of IP address.
- Enter the Hasura IP address that you copied along with a name (e.g.,
Hasura):
Then click Finish and Close at the bottom of the page.
Step 5: Get your database connection URL
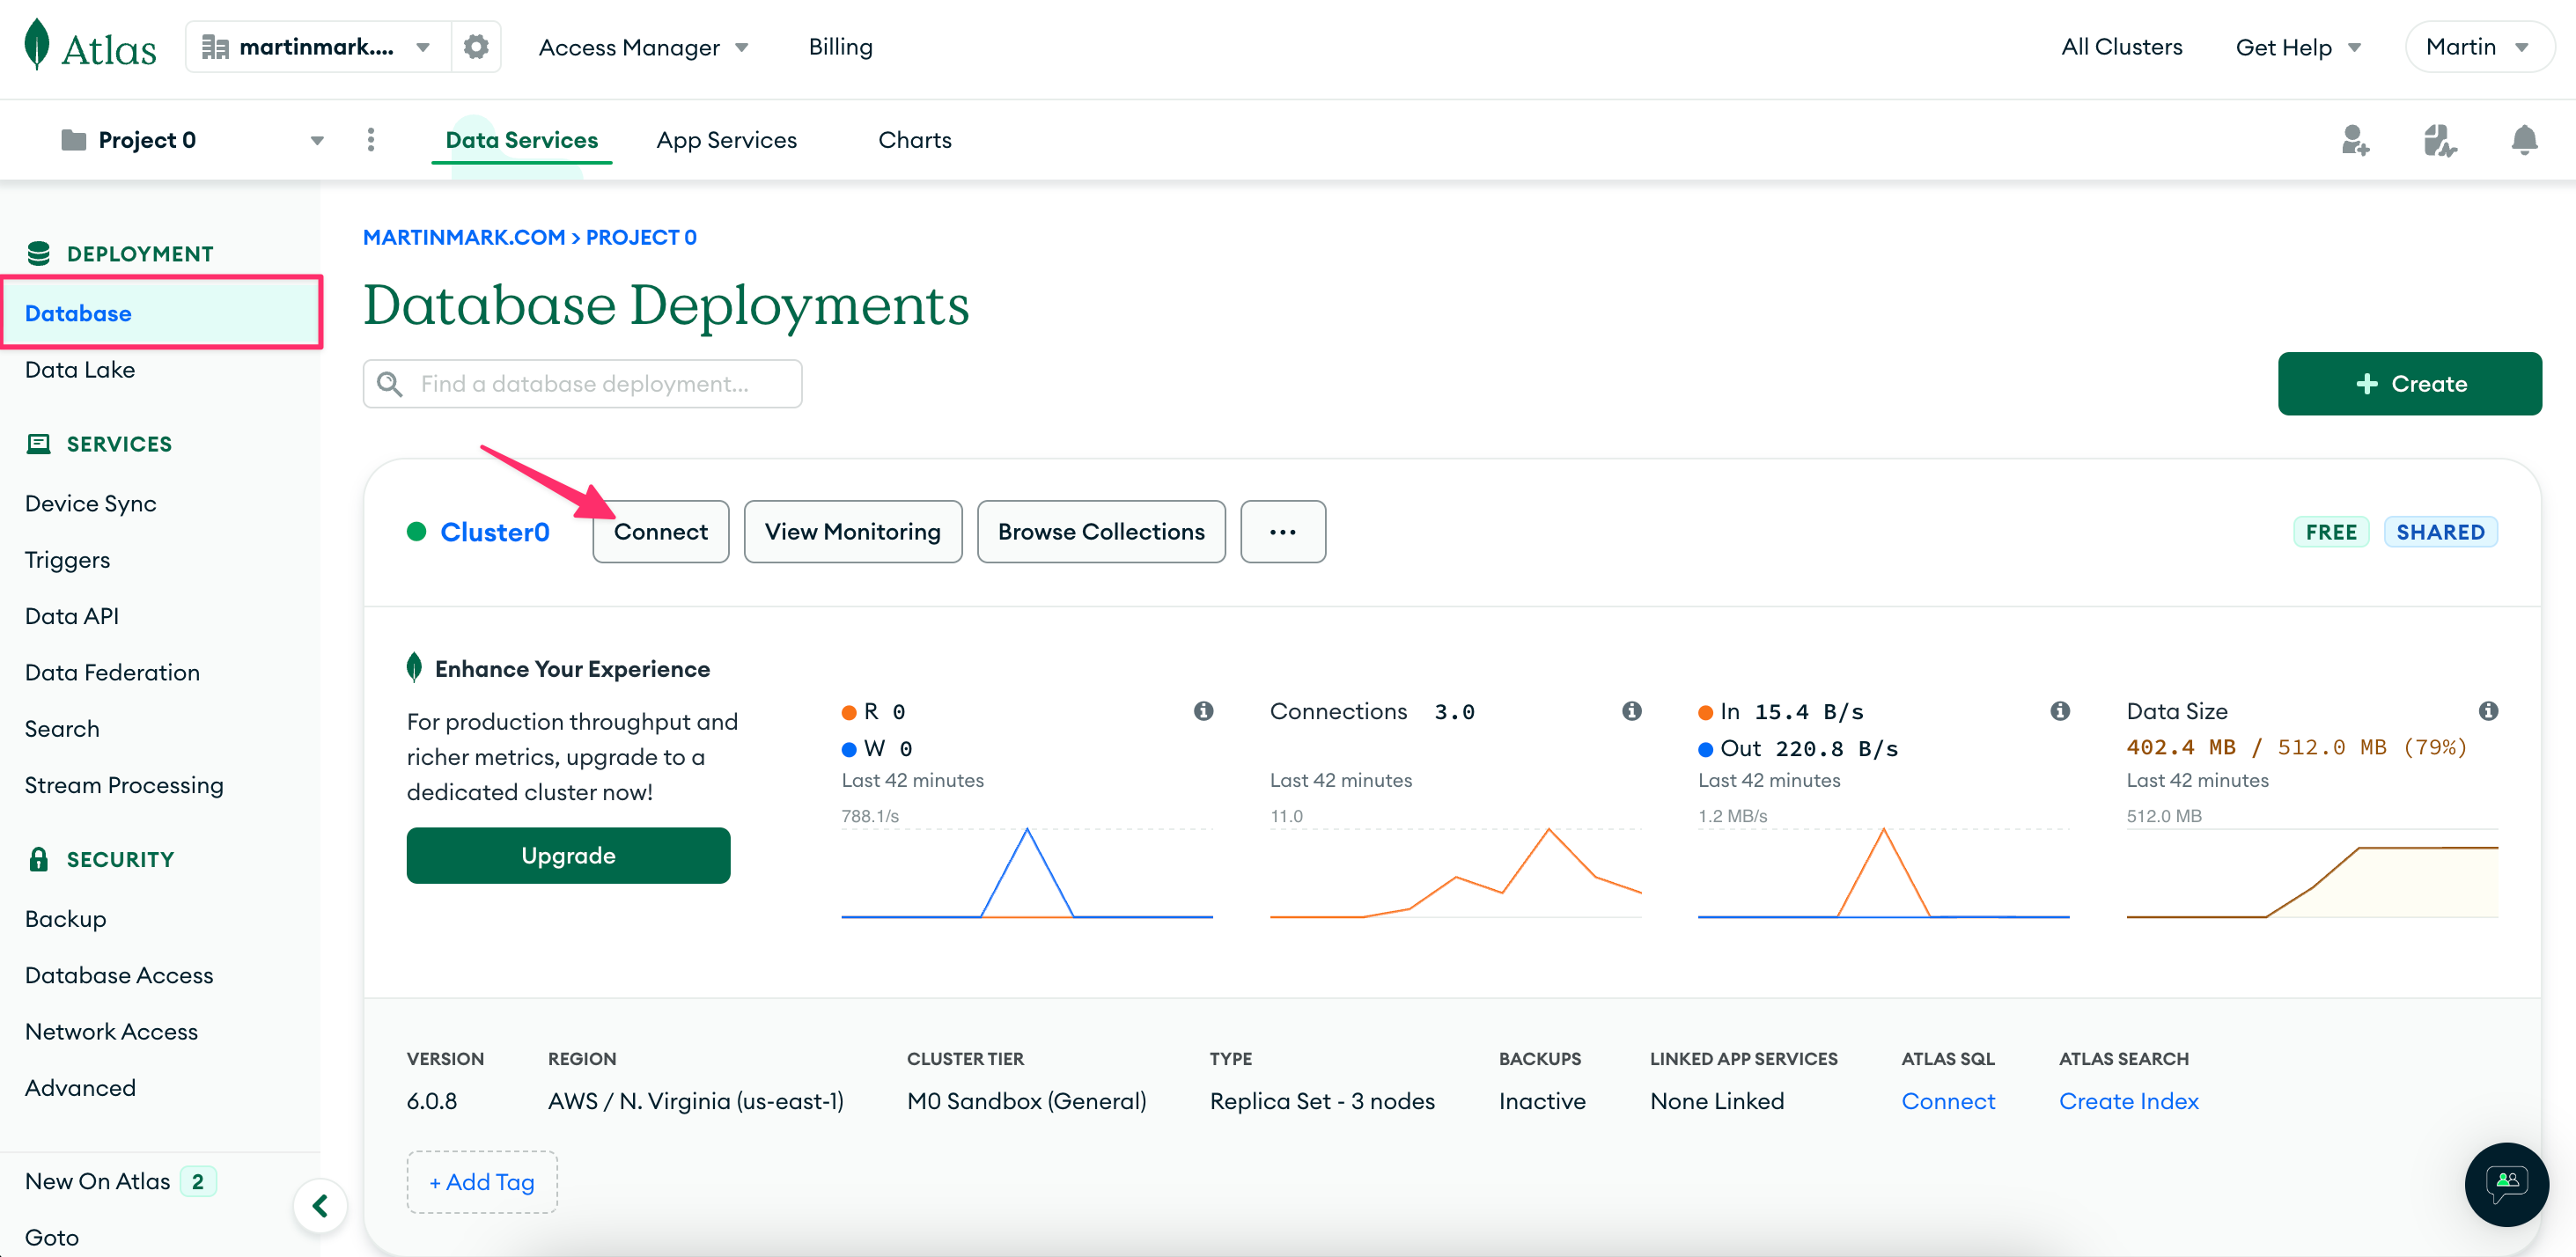
Once you've finished the getting started guide select Database from the top-left corner.
When you get a listing of your database clusters, select Connect on the one you just created.
You should get a number of options for how to connect, from here select Drivers:
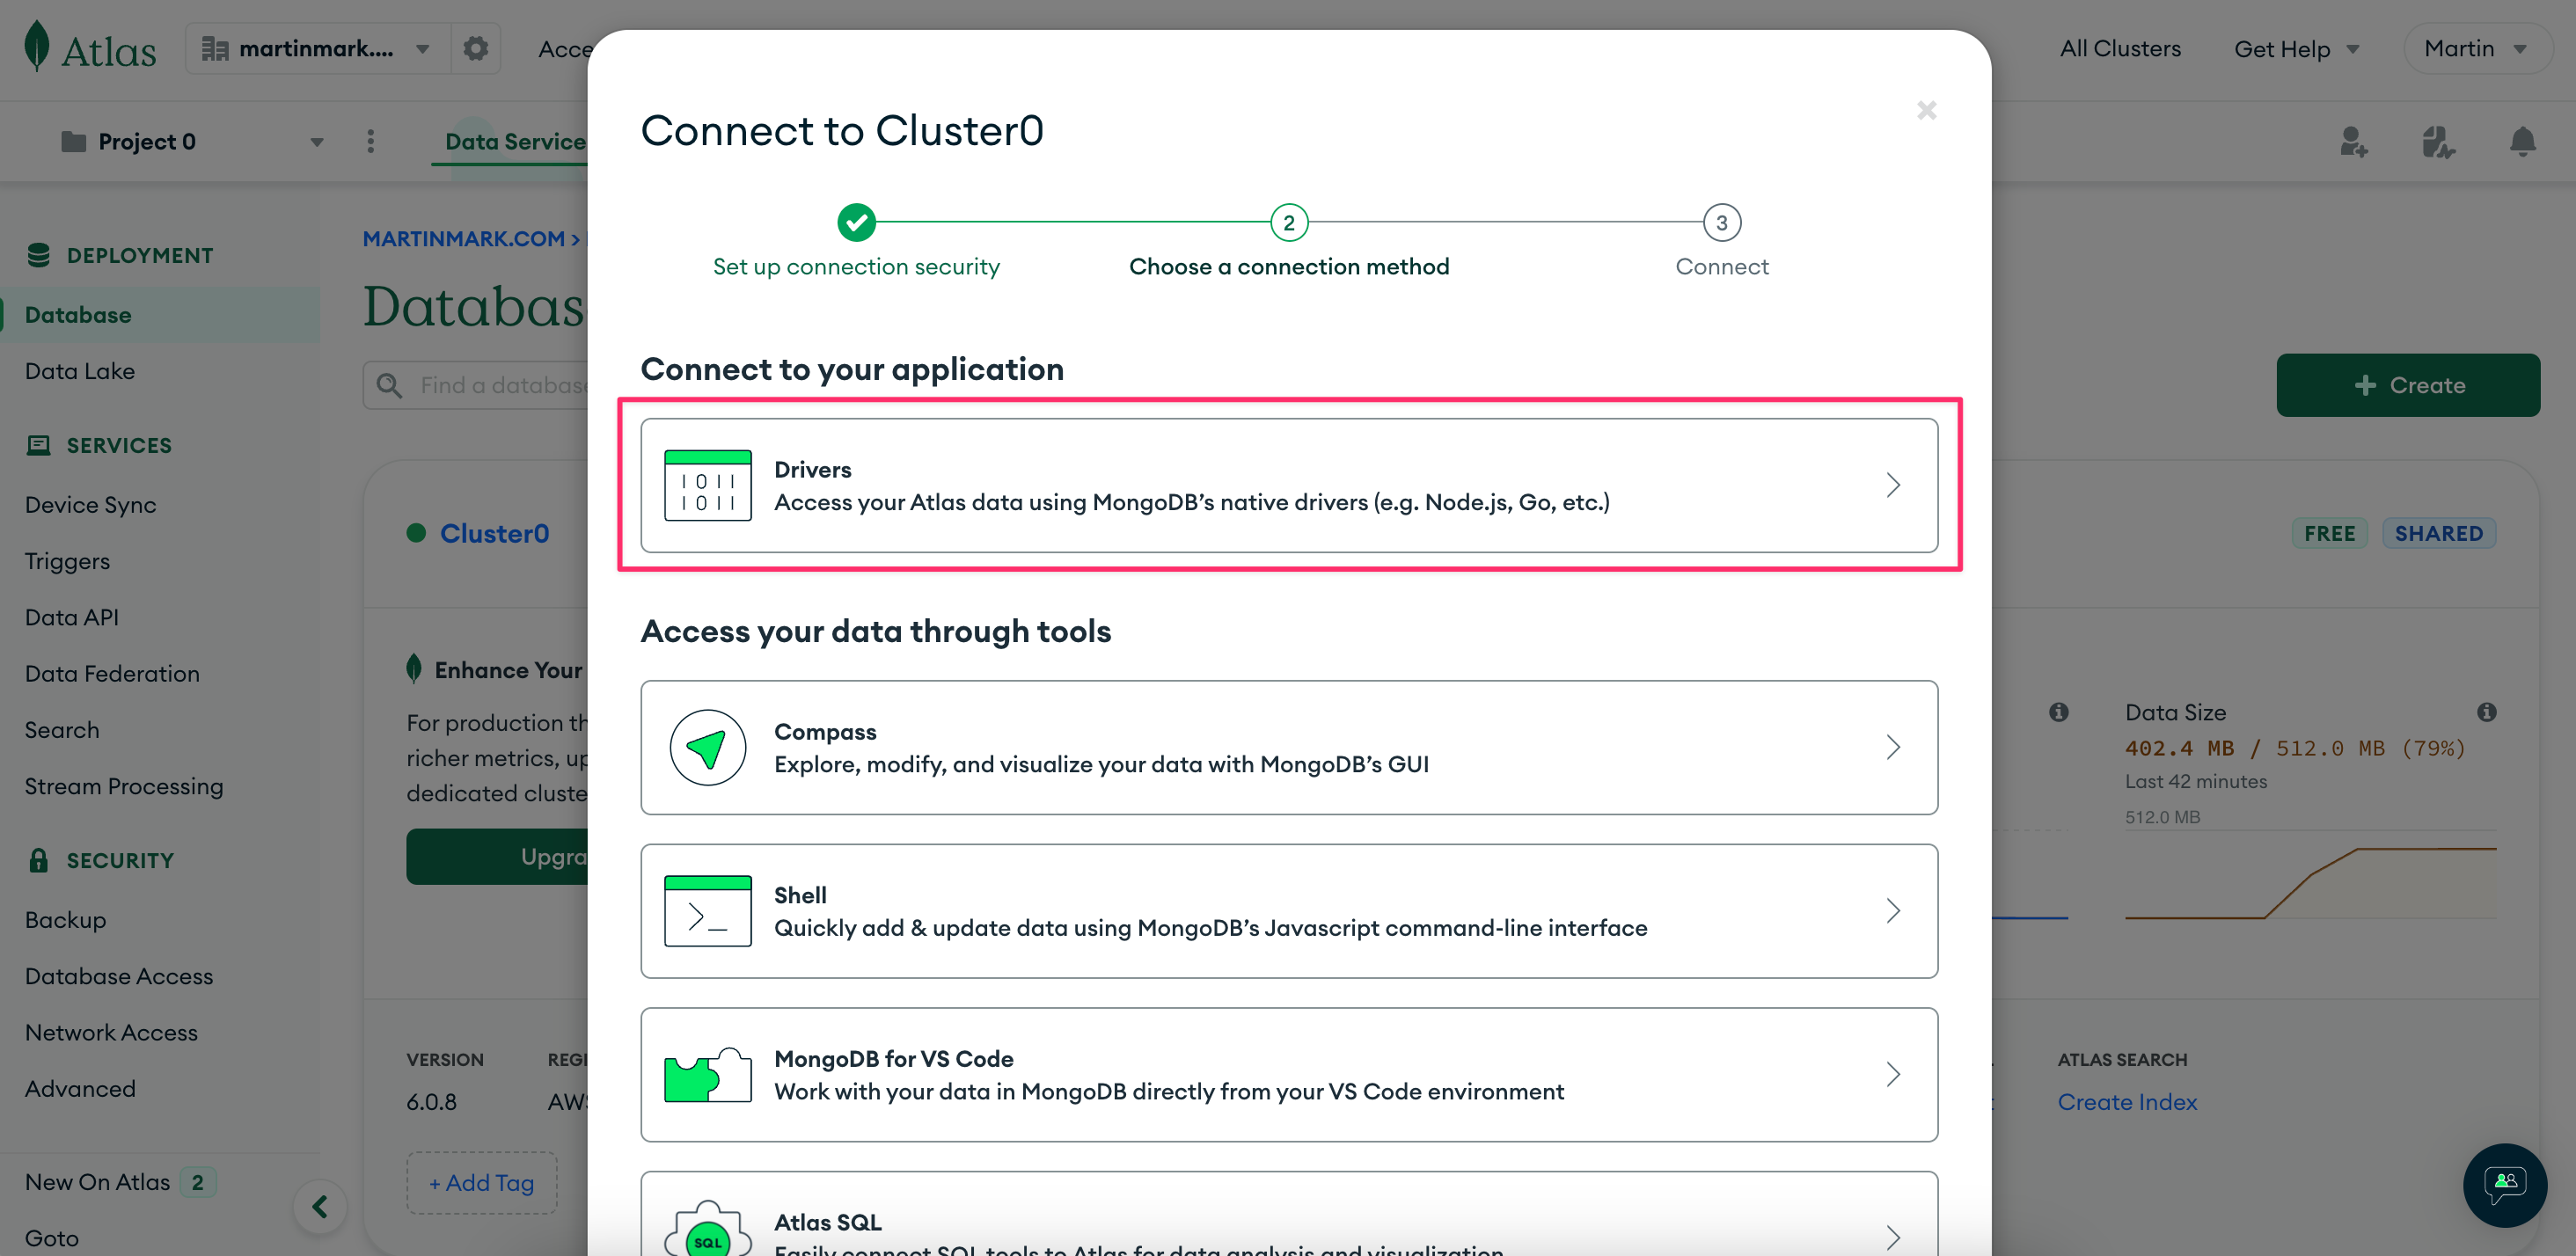
From the drivers instructions you can select and copy your connection connection string (note: you'll have to swap out your database's user access control password manually):
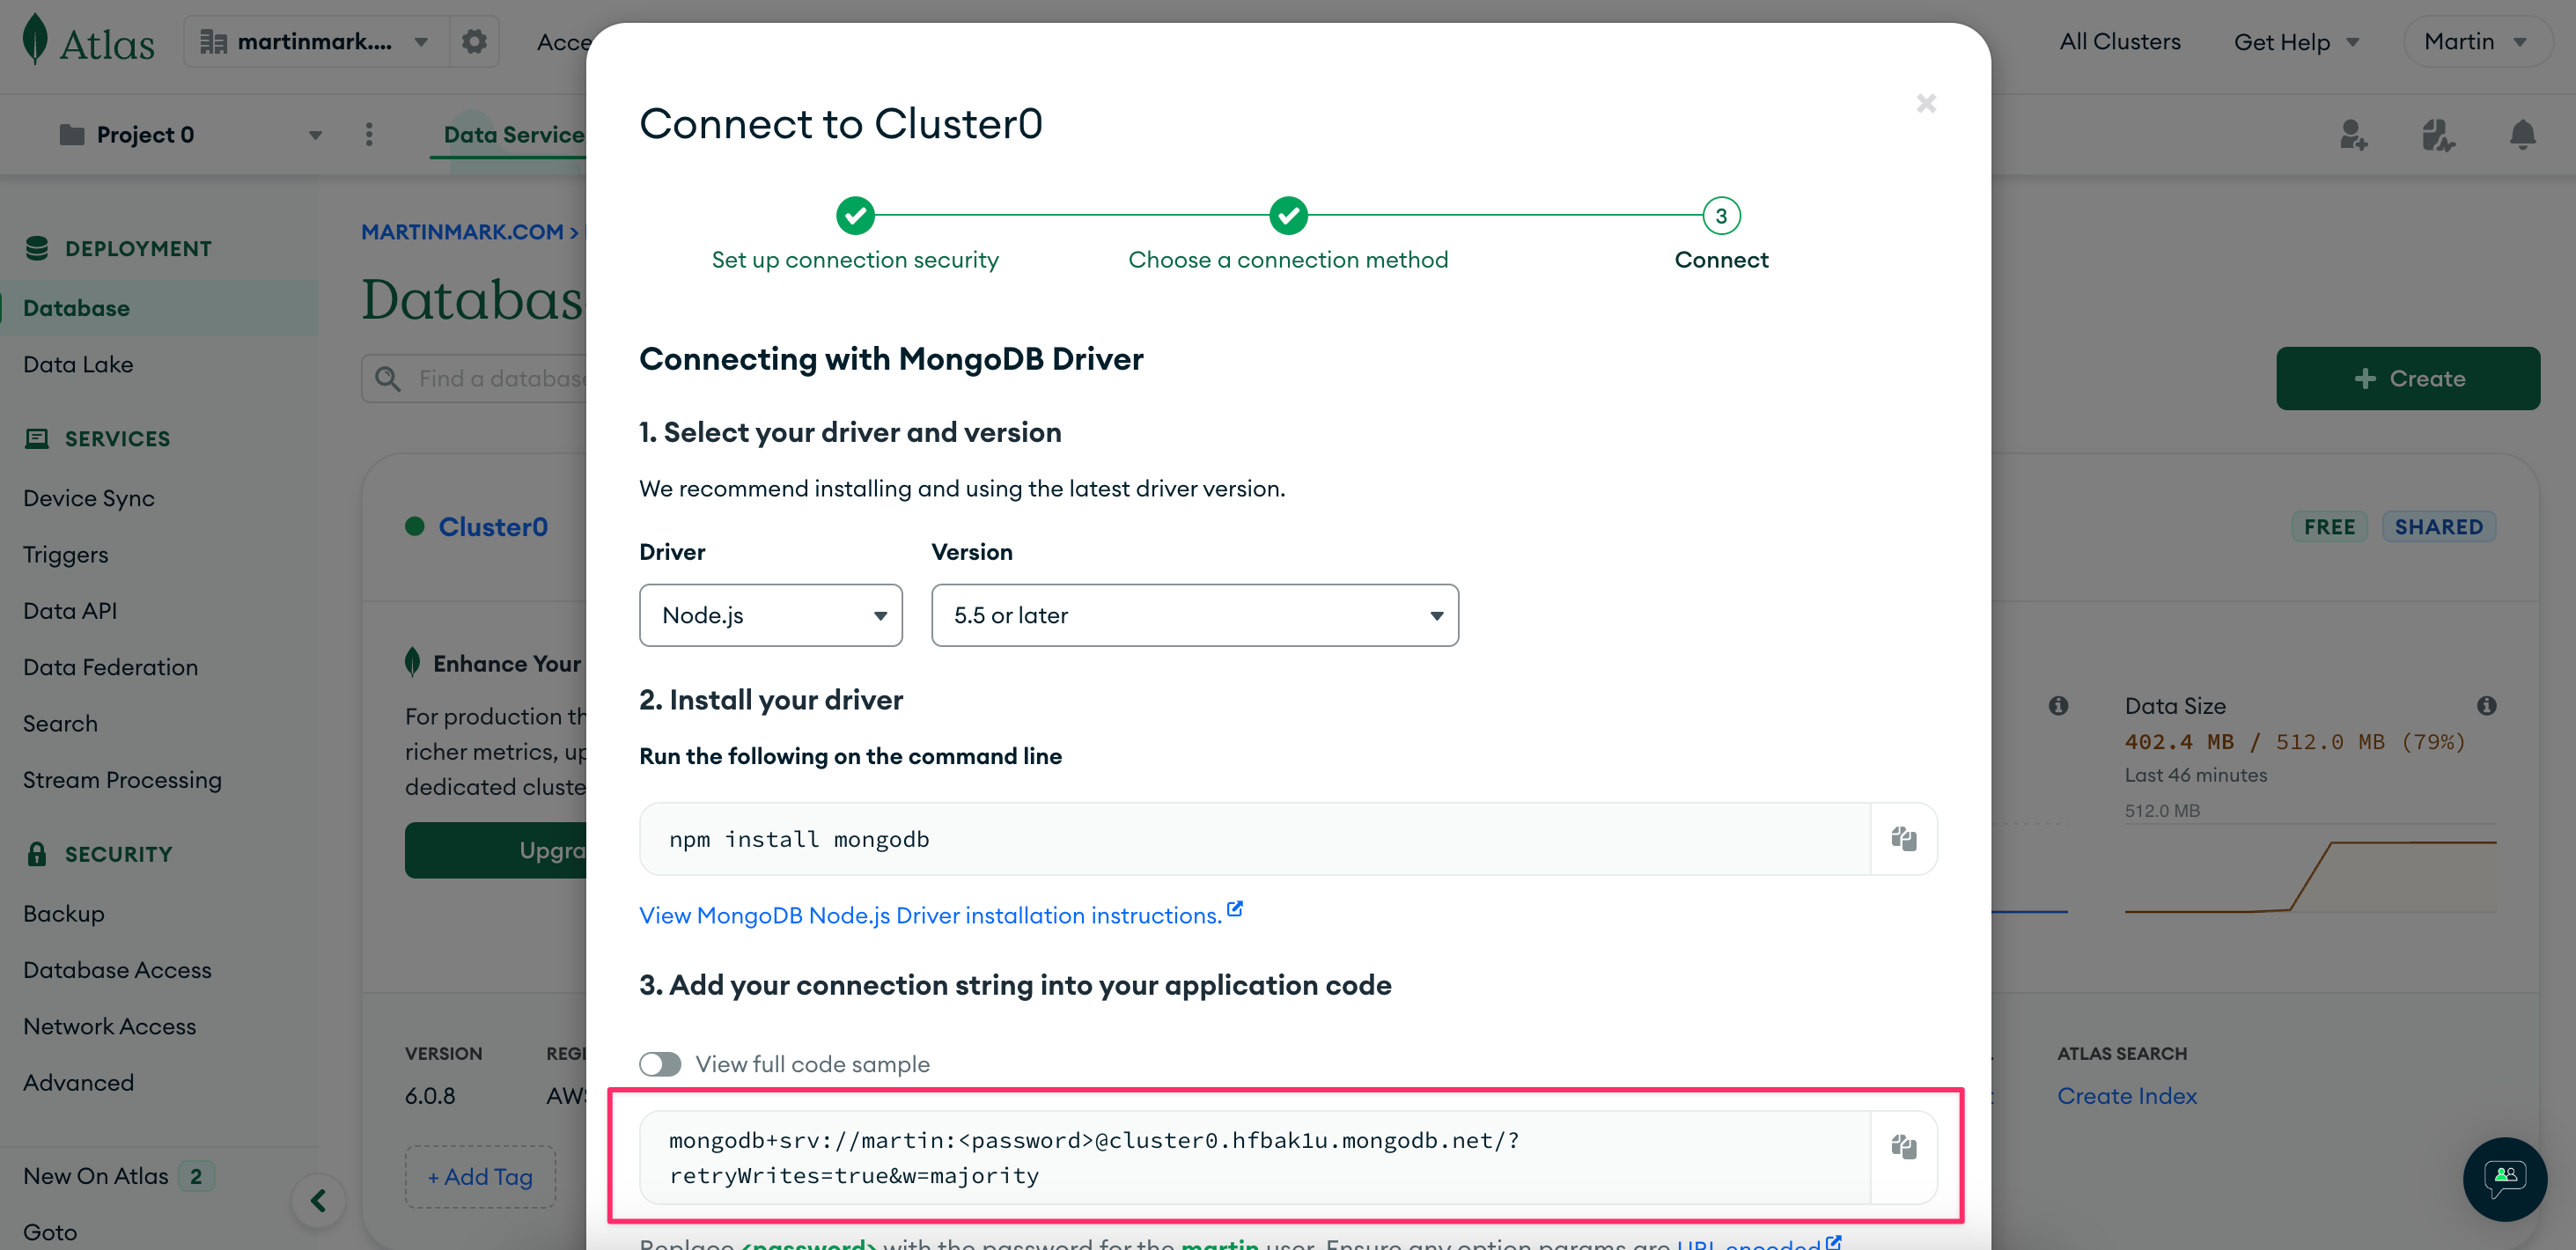
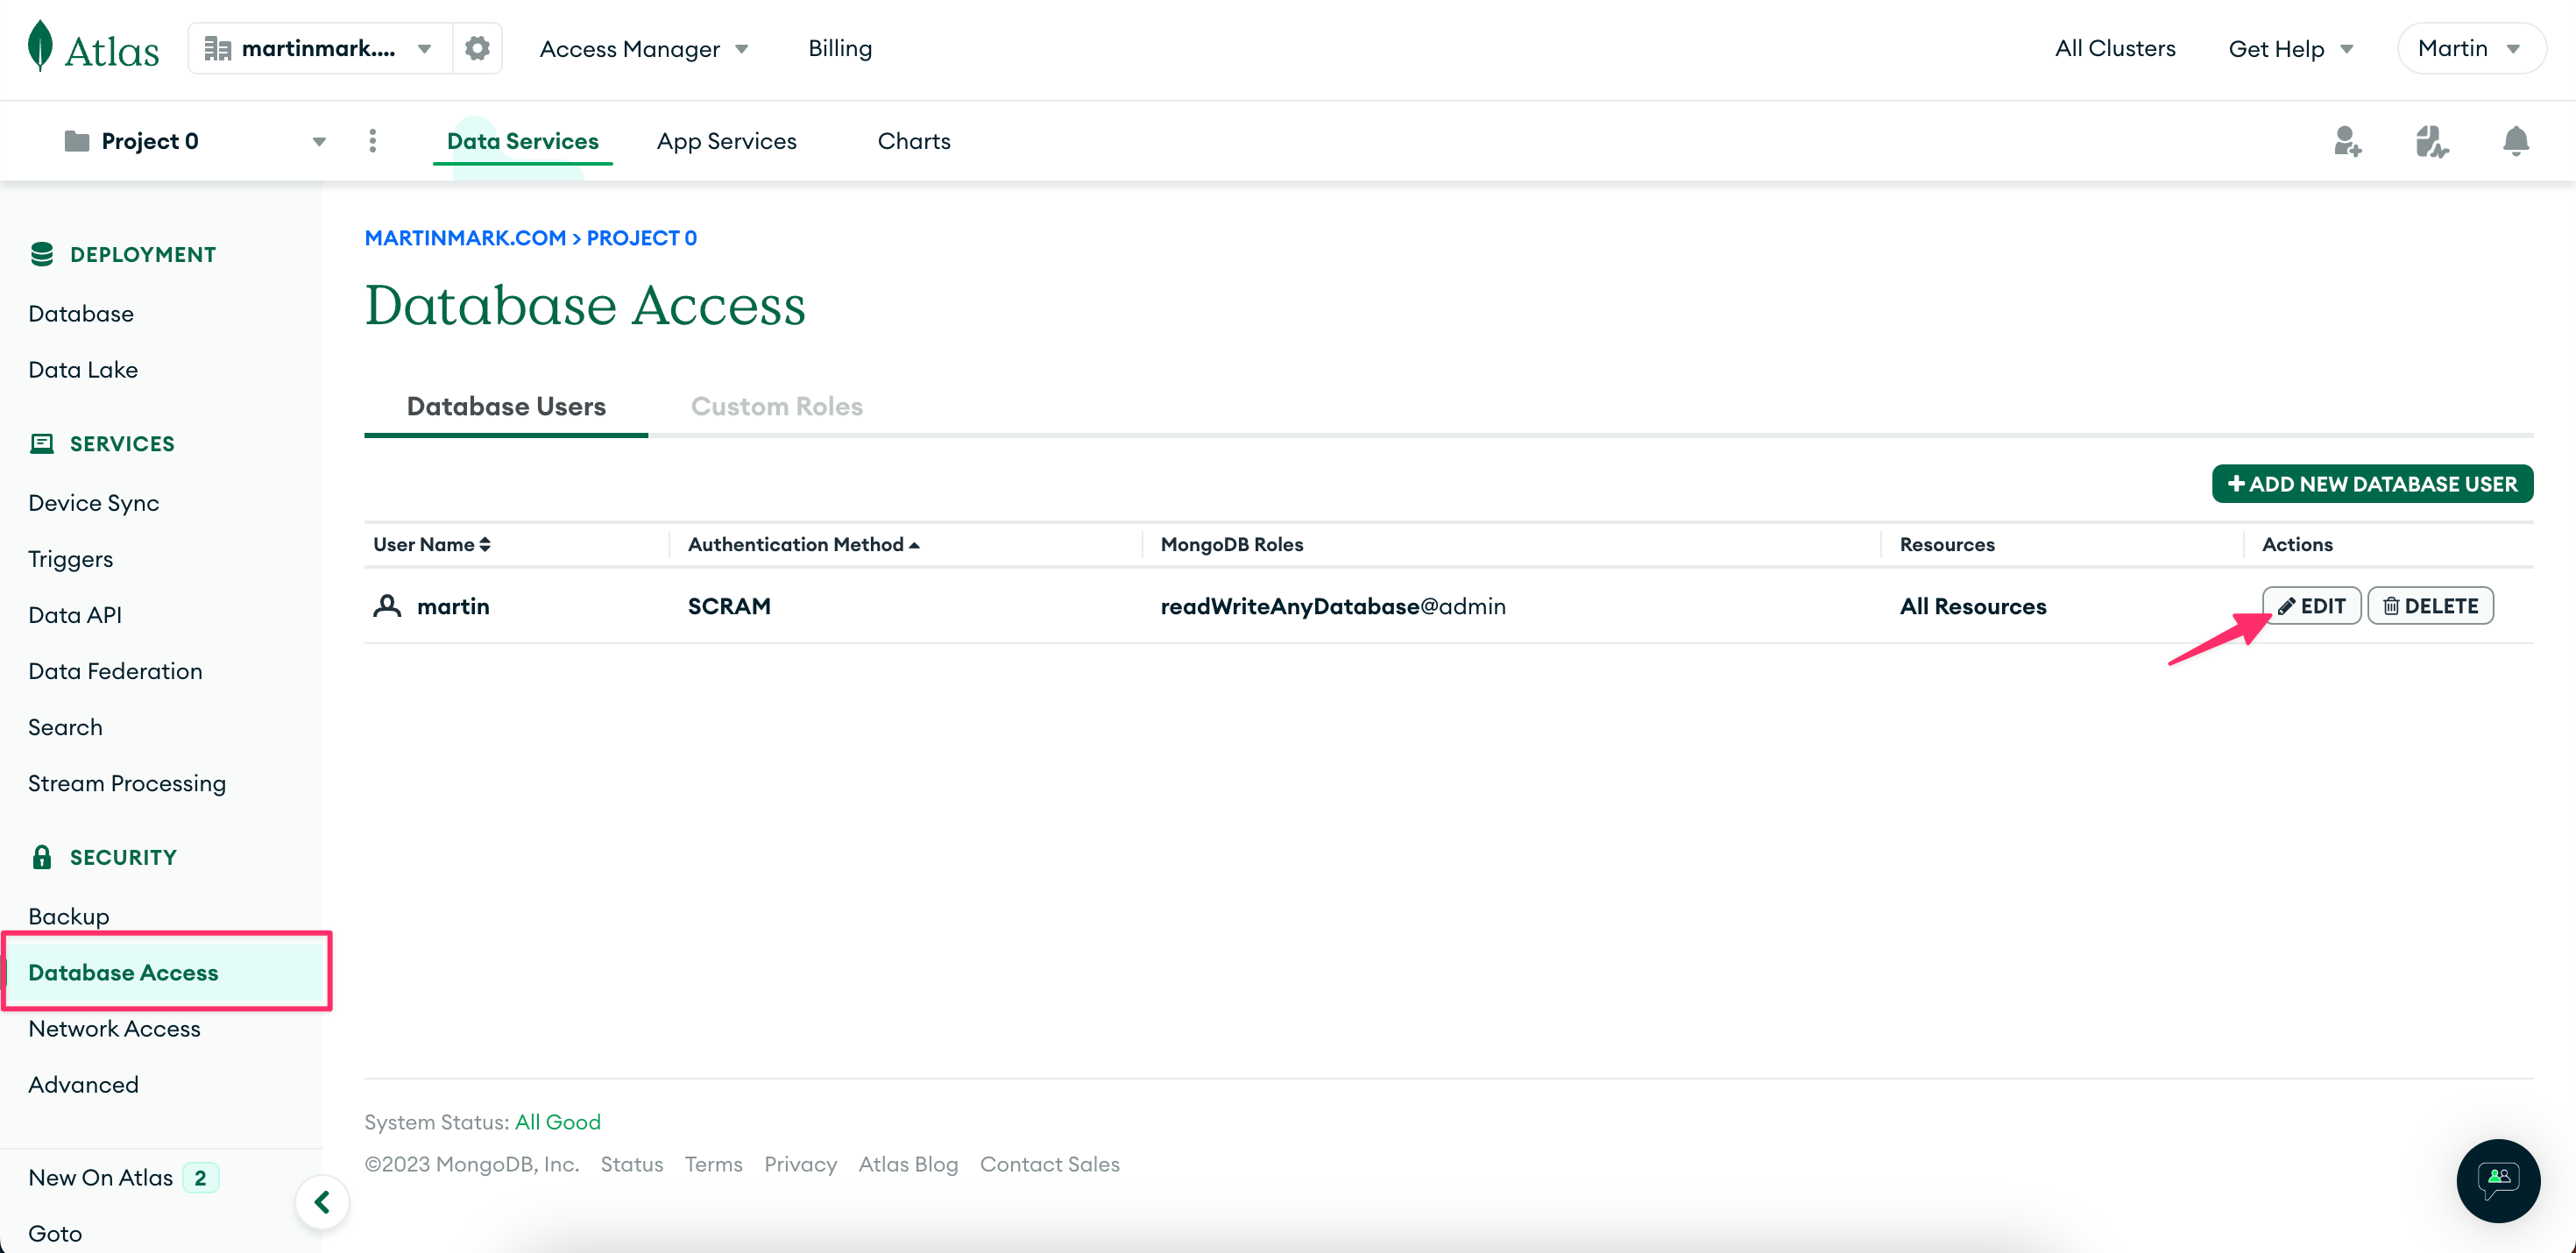
If you've forgotten your MongoDB Atlas database user password, you can reset it from Database Access in the left-hand sidebar.
Step 6: Finish connecting the database
Back on the Hasura Console, enter the database URL that we retrieved in step 5 under connection.
Your db is the database name within your cluster.
If you've loaded the sample data, there should be a few samples available (such as sample_analytics).
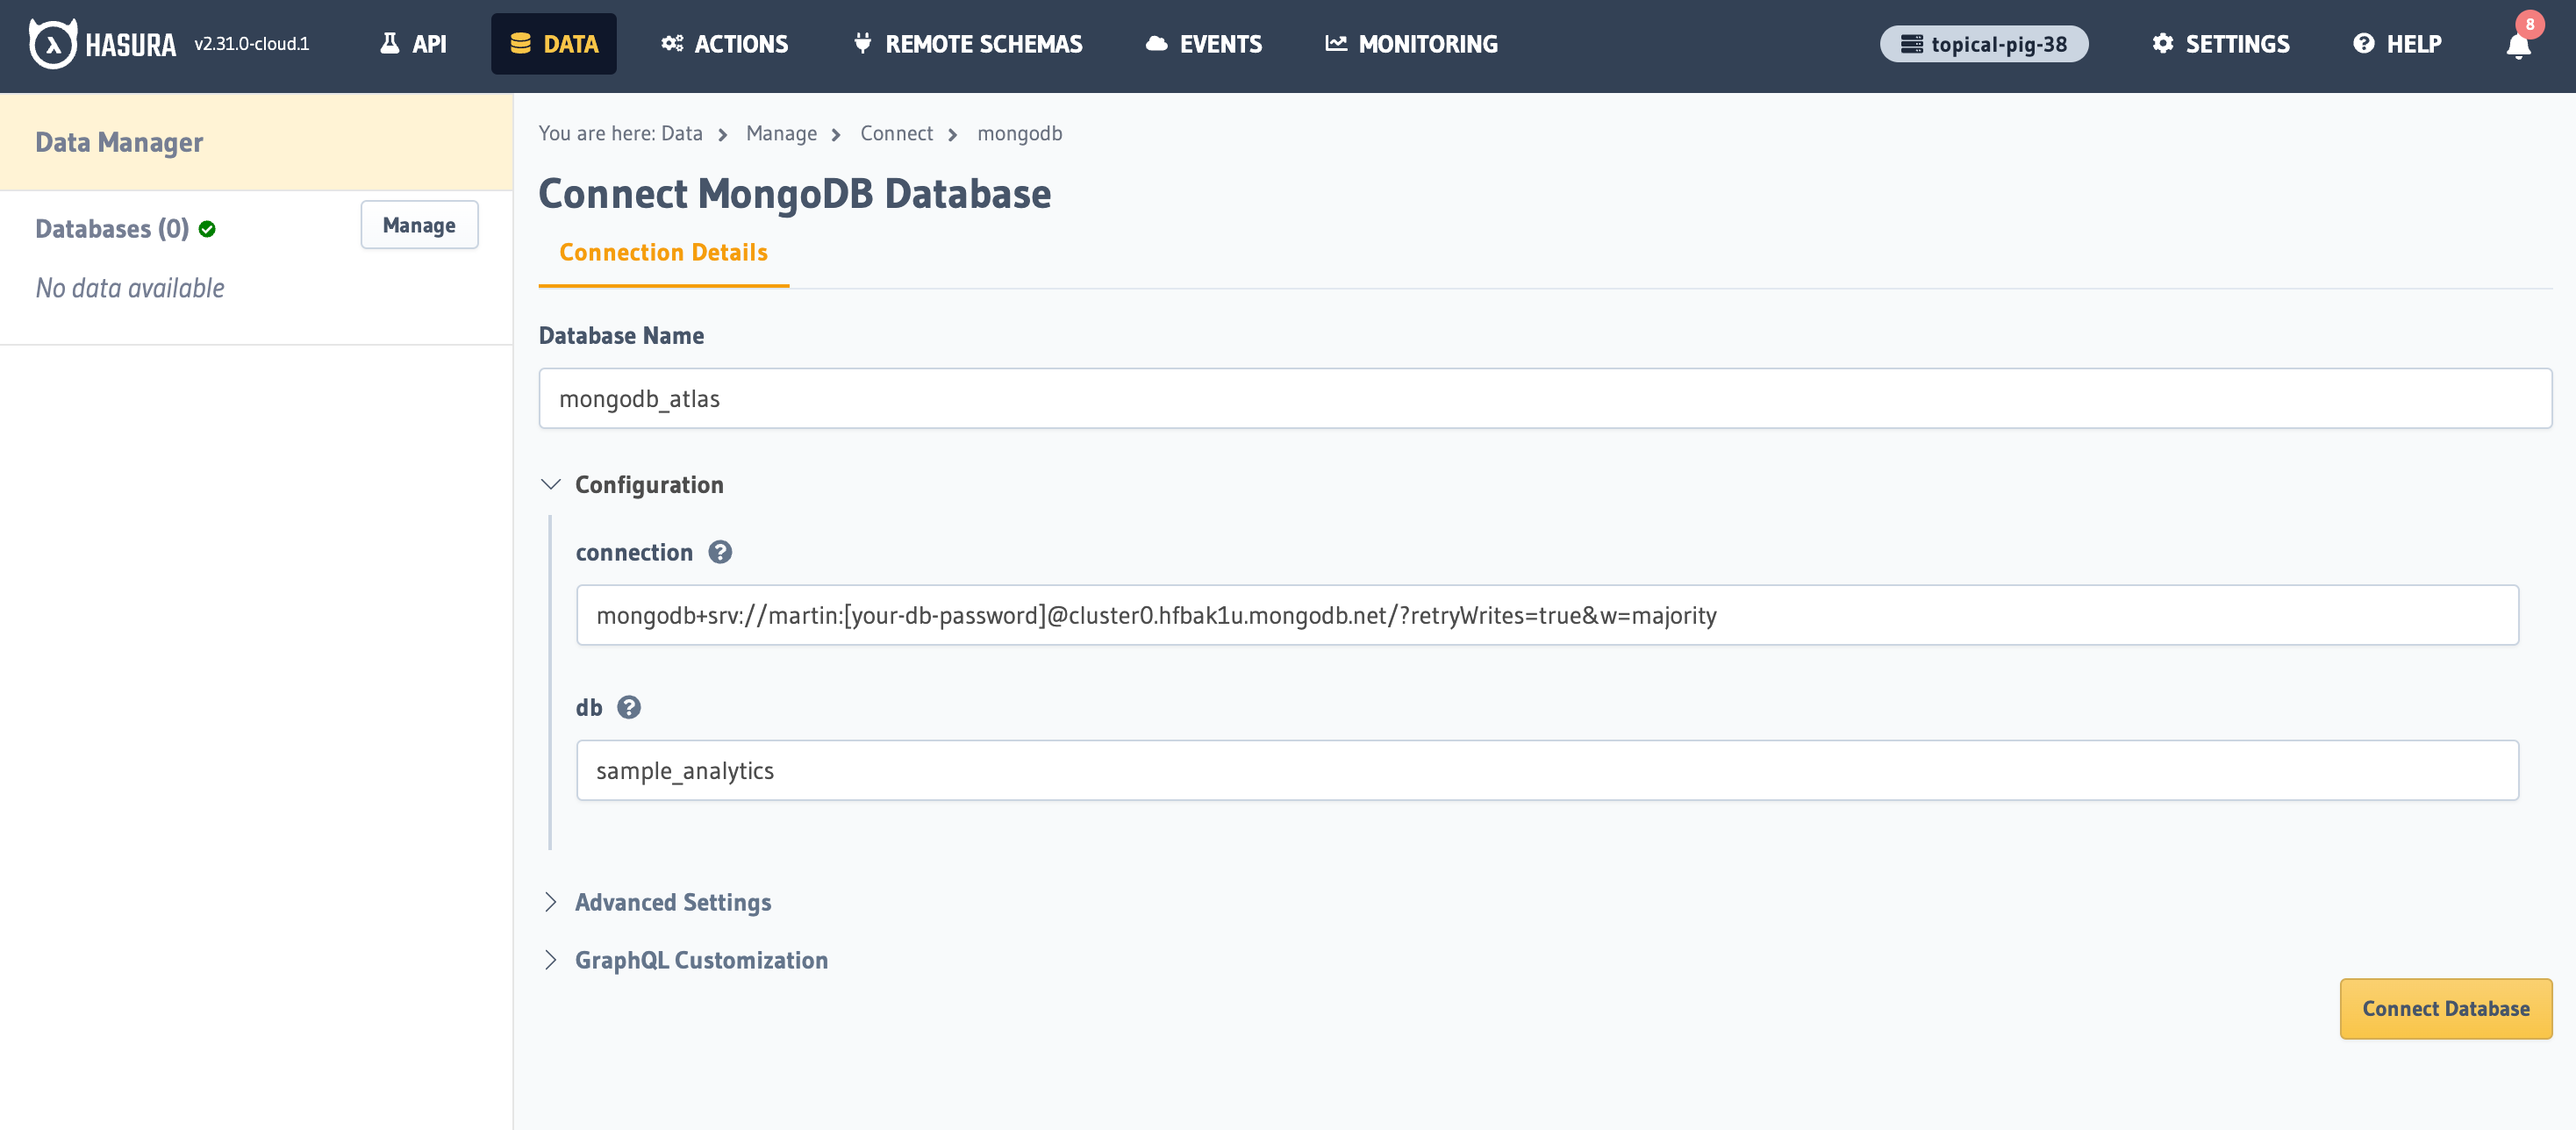
Then click Connect Database.
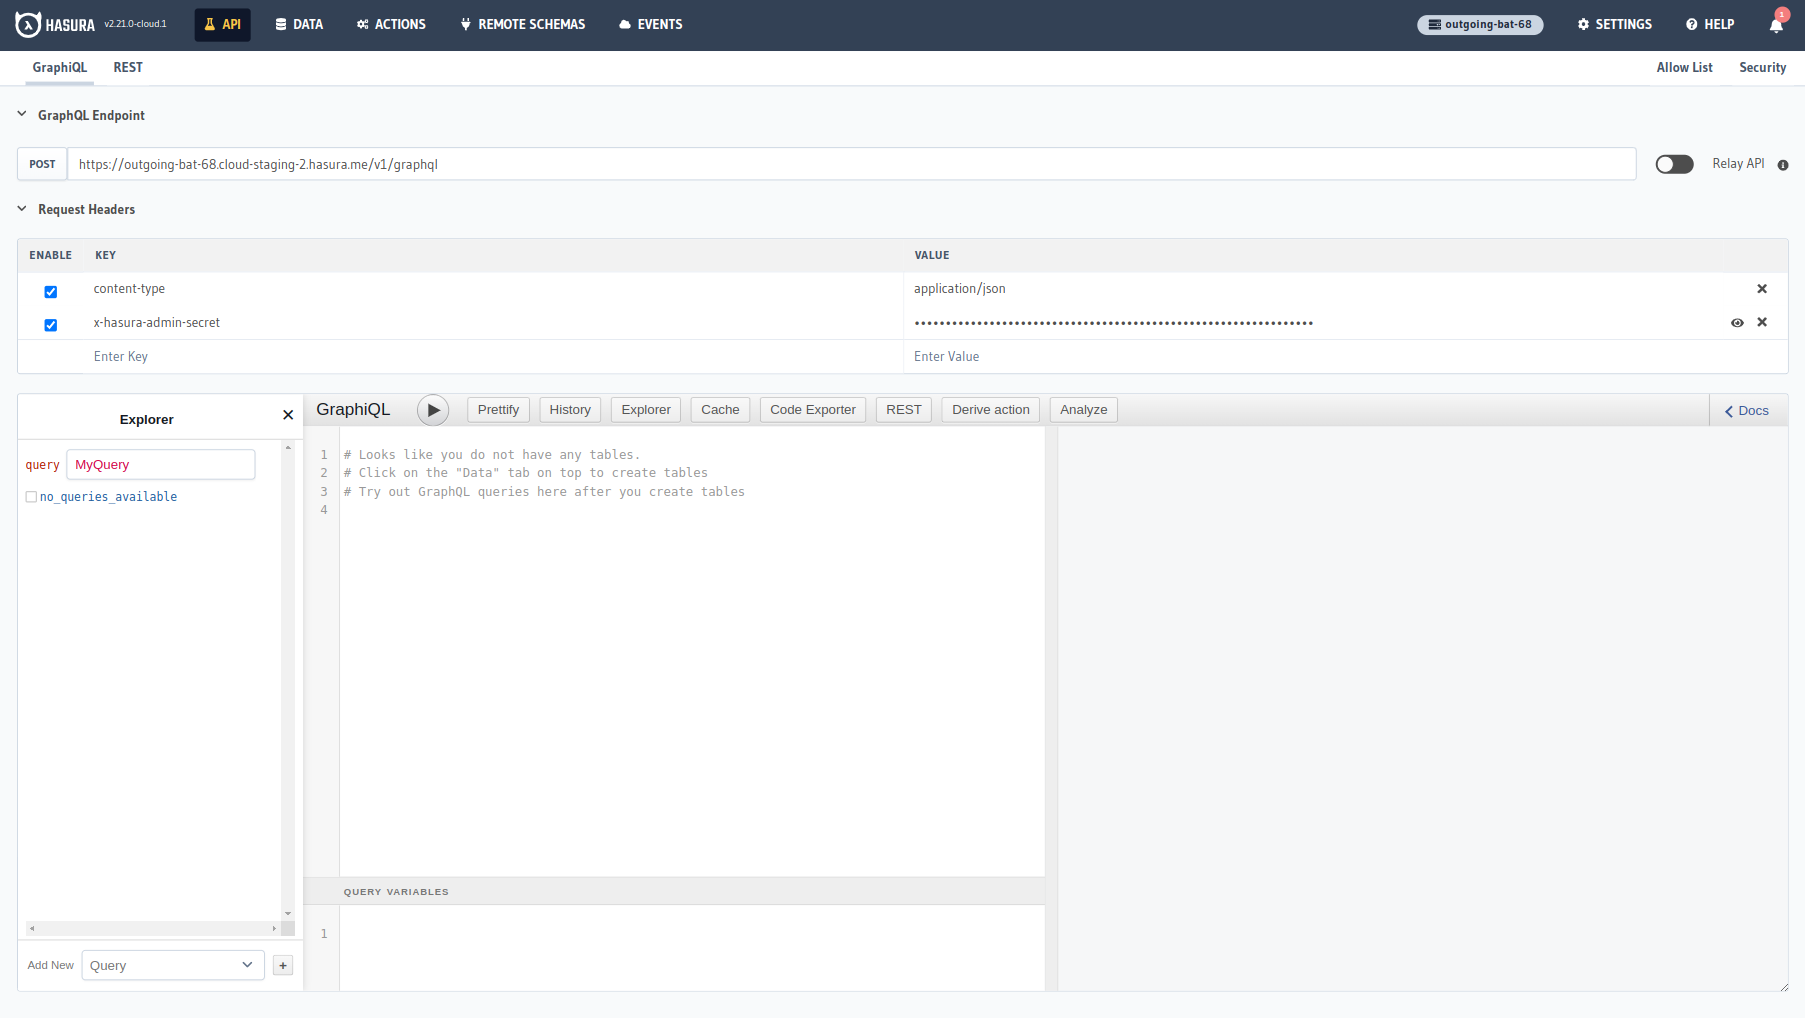
Voilà. You are ready to start developing.
Next steps
You can check out getting started guide for MongoDB on Cloud or using Docker for a more detailed instructions for setting up your MongoDB database with Hasura.
You can check out our 30-Minute Hasura Basics Course and other GraphQL & Hasura Courses for a more detailed introduction to Hasura.
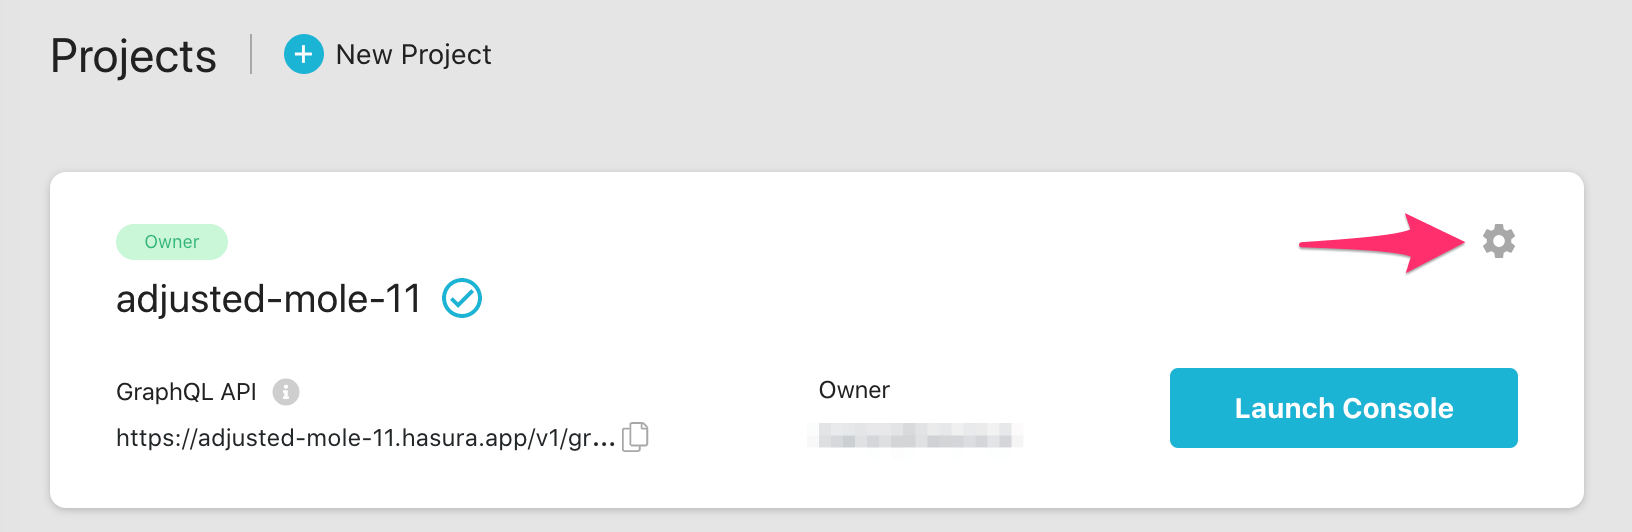
If using Hasura Cloud, you can also click the gear icon to manage your Hasura Cloud project. (e.g. add collaborators, env vars or custom domains).
For more information on which MongoDB features we support, check out this page.