Connecting Hasura to an MS SQL on Azure Database
Introduction
This guide explains how to connect a new or existing MS SQL database on Azure to a Hasura instance, either on Hasura Cloud or via one of our self-hosted solutions. If you're exploring MS SQL on Azure, and are interested in migrating an existing MS SQL database, check out their docs before continuing below.
If you plan on using Hasura Cloud, which we recommend, follow steps 1 and 2 below. If you're self-hosting a Hasura instance and already have a project running, skip to step 3.
Step 1: Sign up or log in to Hasura Cloud
Navigate to Hasura Cloud and sign up or log in.
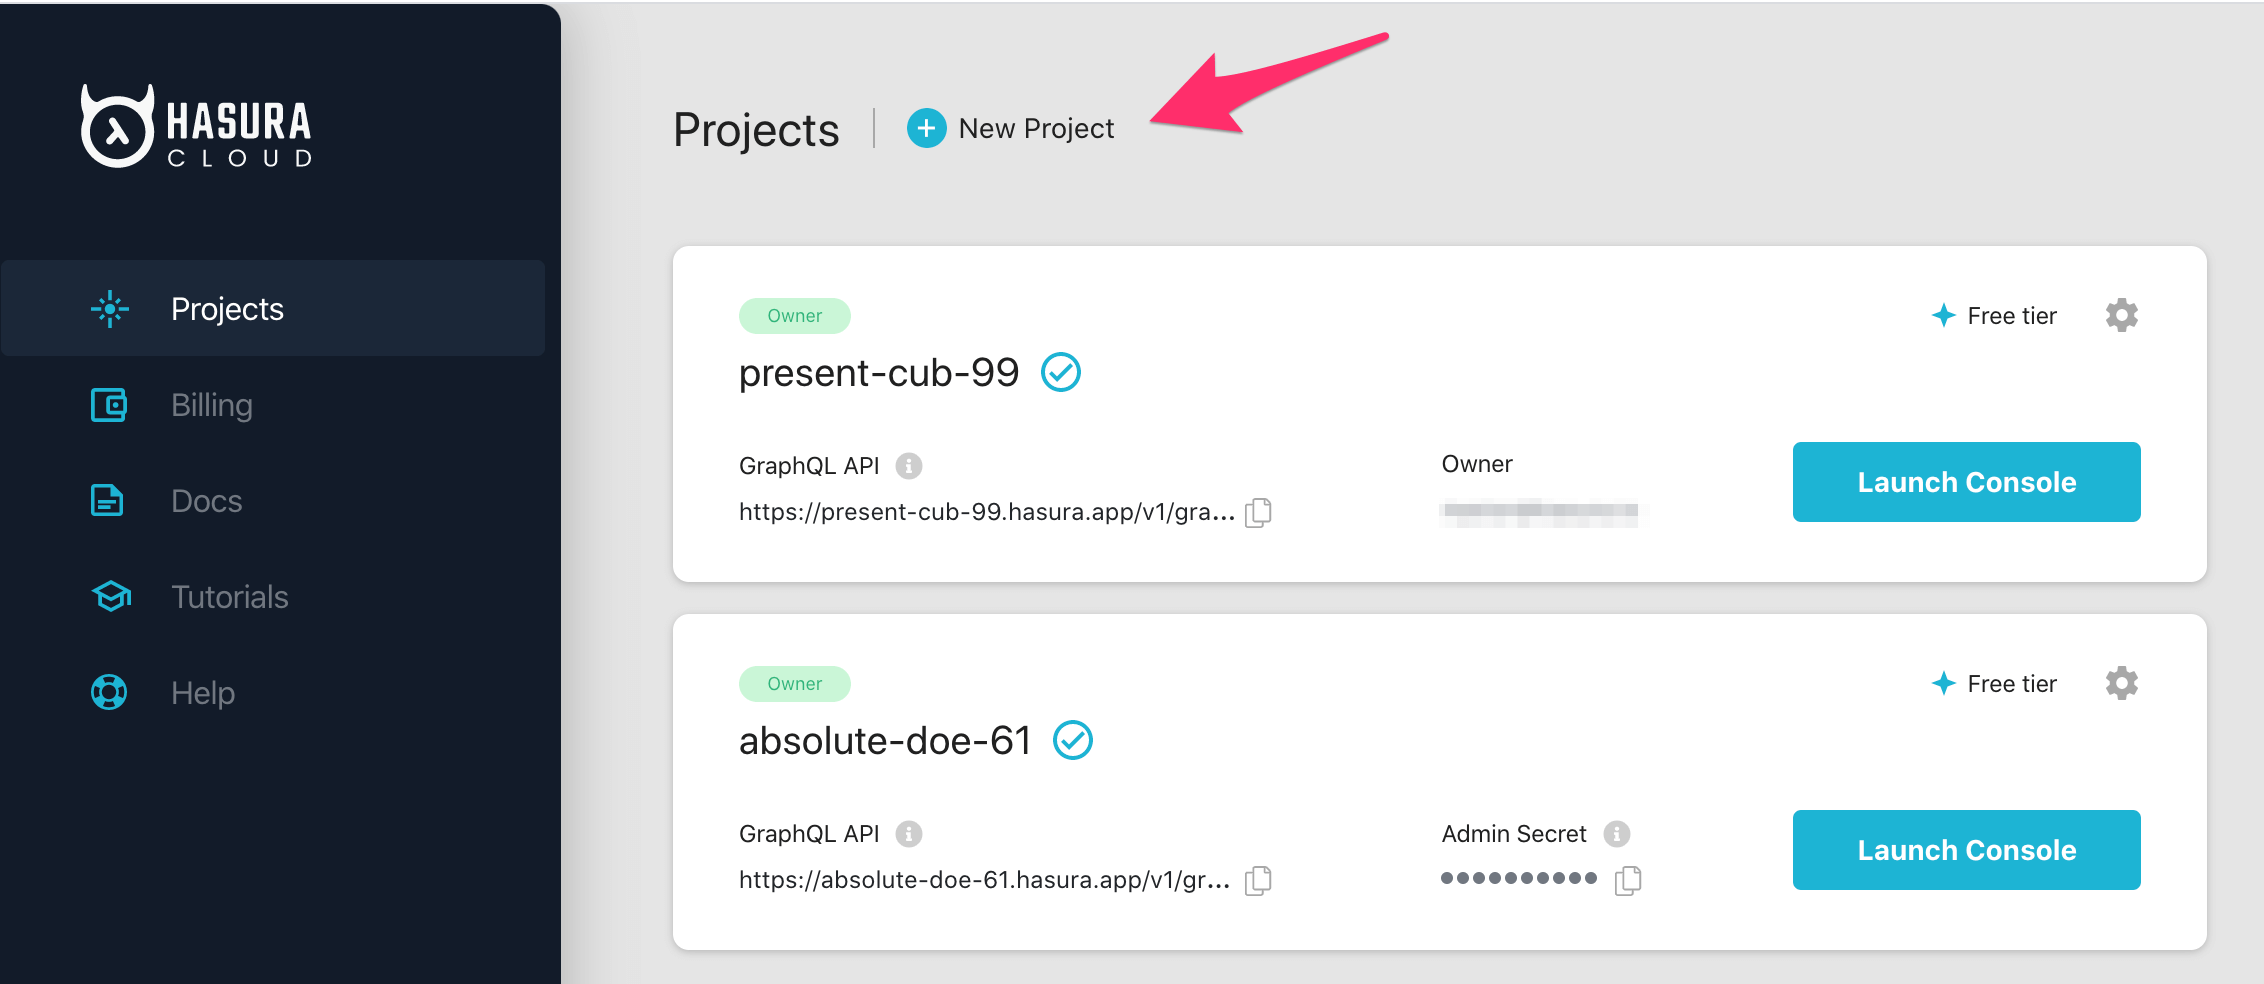
Step 2: Create a Hasura Cloud project
On the Hasura Cloud dashboard, create a new project:
After the project is initialized successfully, click on Launch Console to open the Hasura Console in your browser.
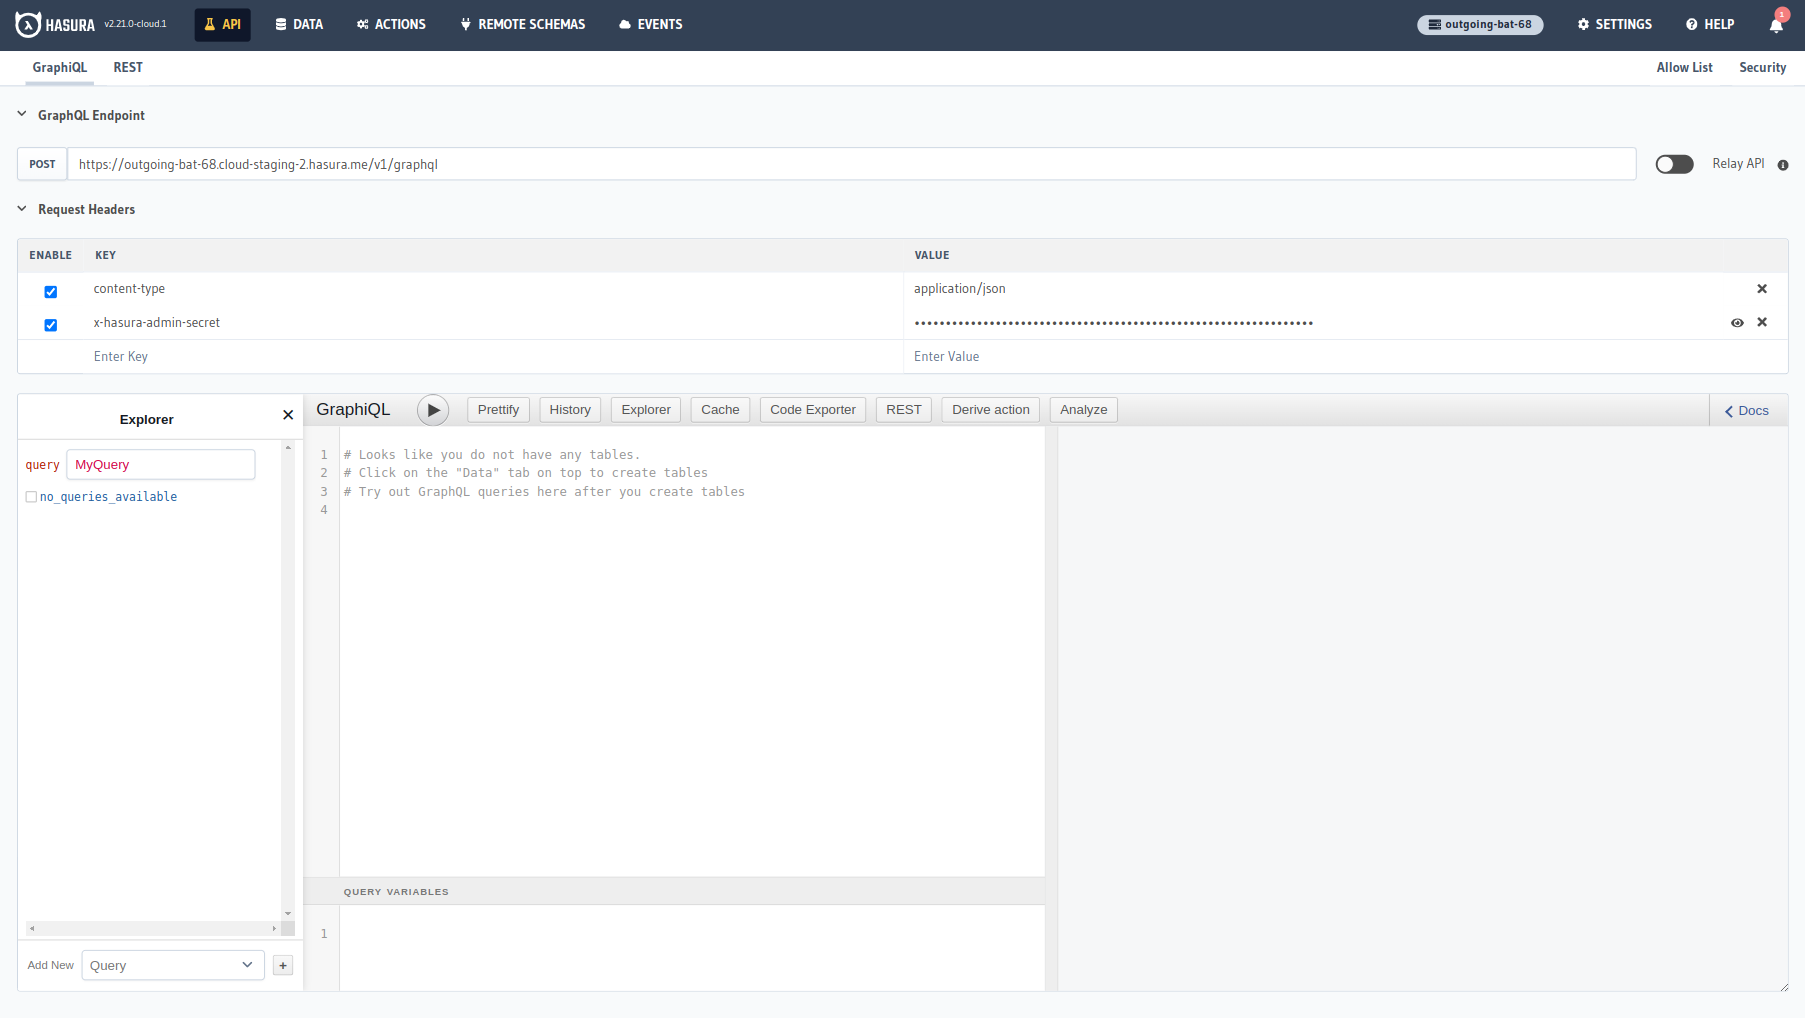
On the Hasura Console, navigate to Data -> Manage -> Connect Database -> Connect existing database:
You will get prompted for a MS SQL Database URL. We will create this in the next step and then come back here.

Step 3: Create an MS SQL Instance on Azure
Log into the Azure Console.
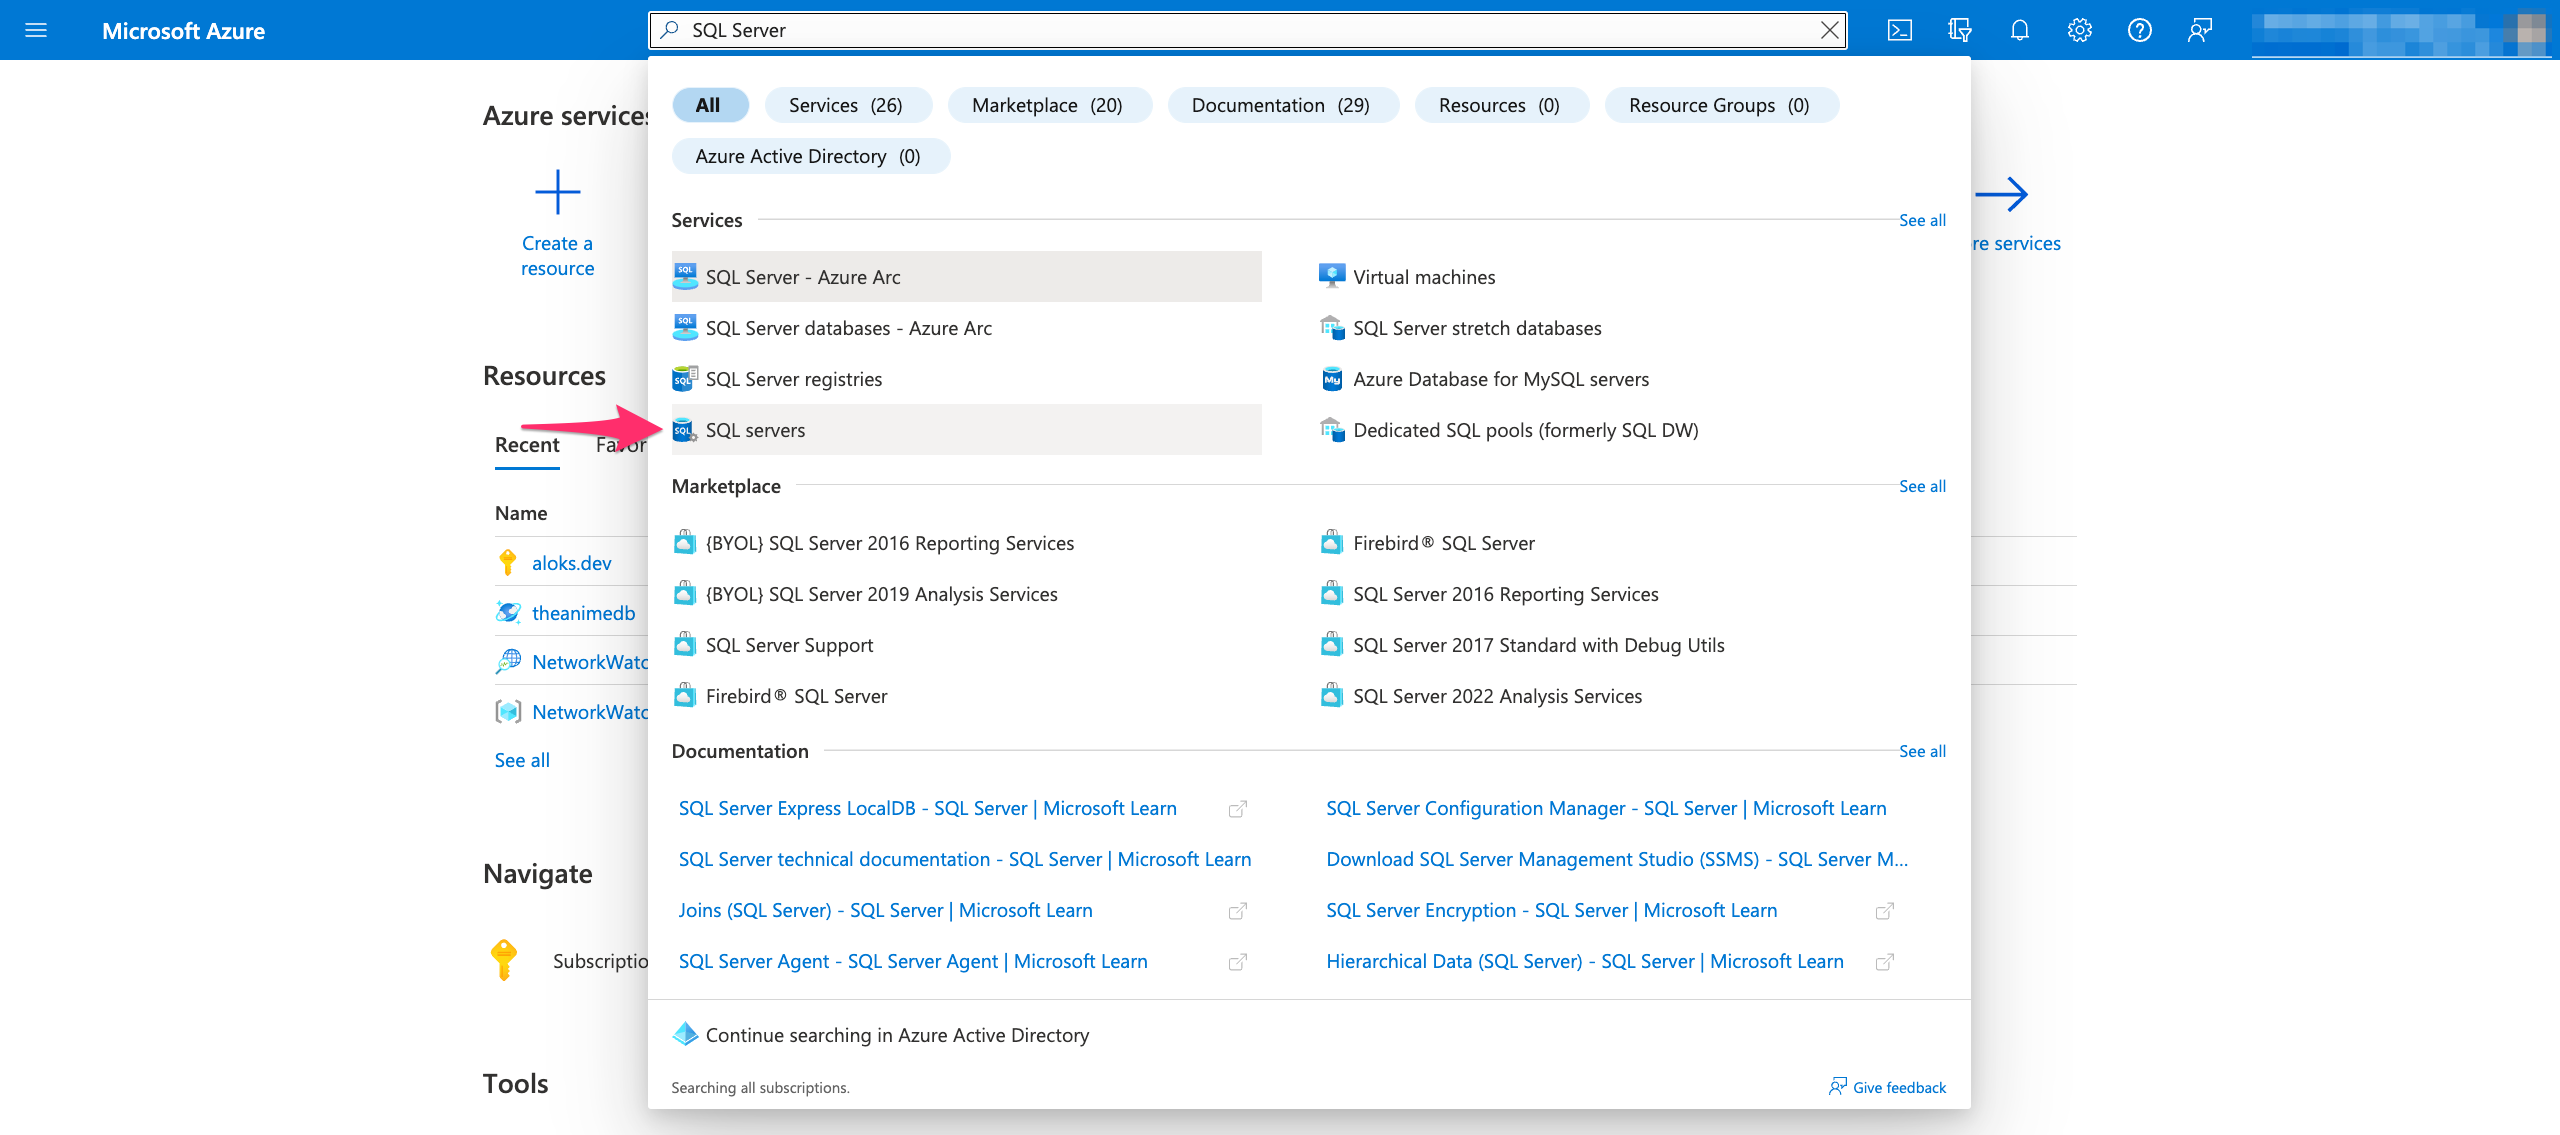
On the top, click on Search and type "SQL Server" into the search field. Then click on SQL Servers:
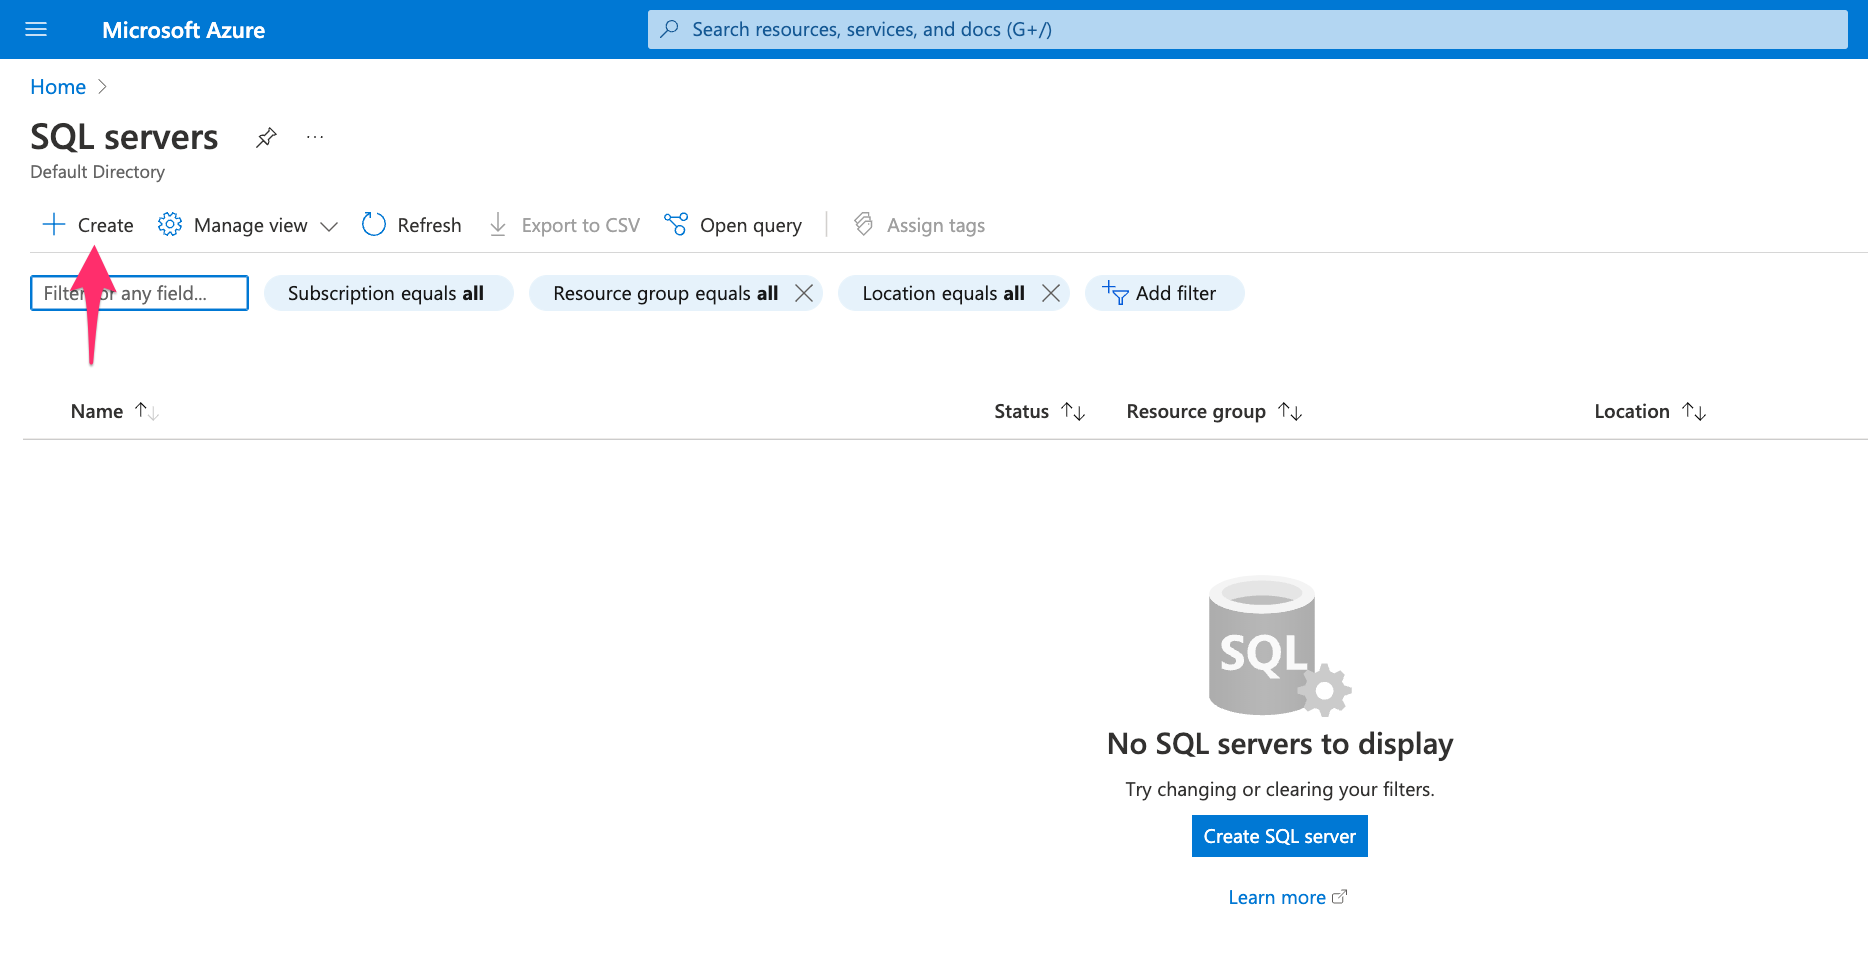
Click on the Create button:
Select the current Subscription (Billing Account) and the resource group. Fill in all the necessary fields. In the
Authentication part, select Use SQL Authentication and fill the username and password for the SQL user.
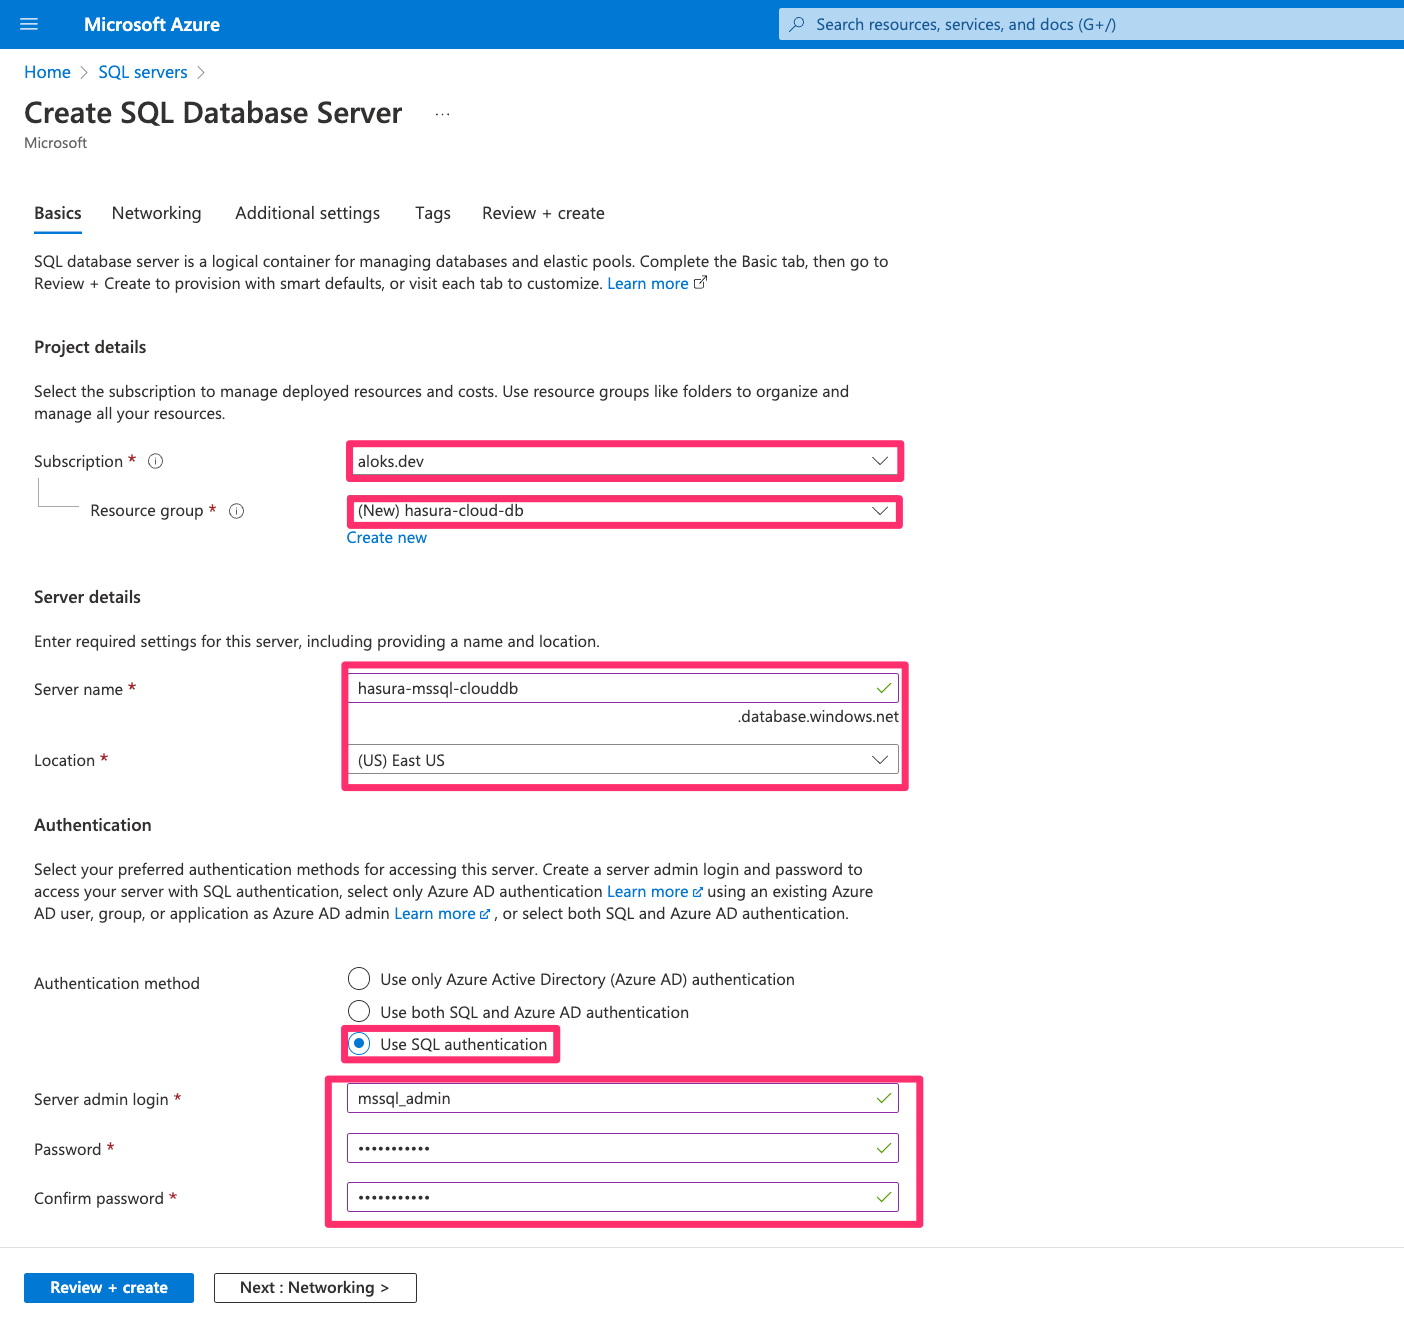
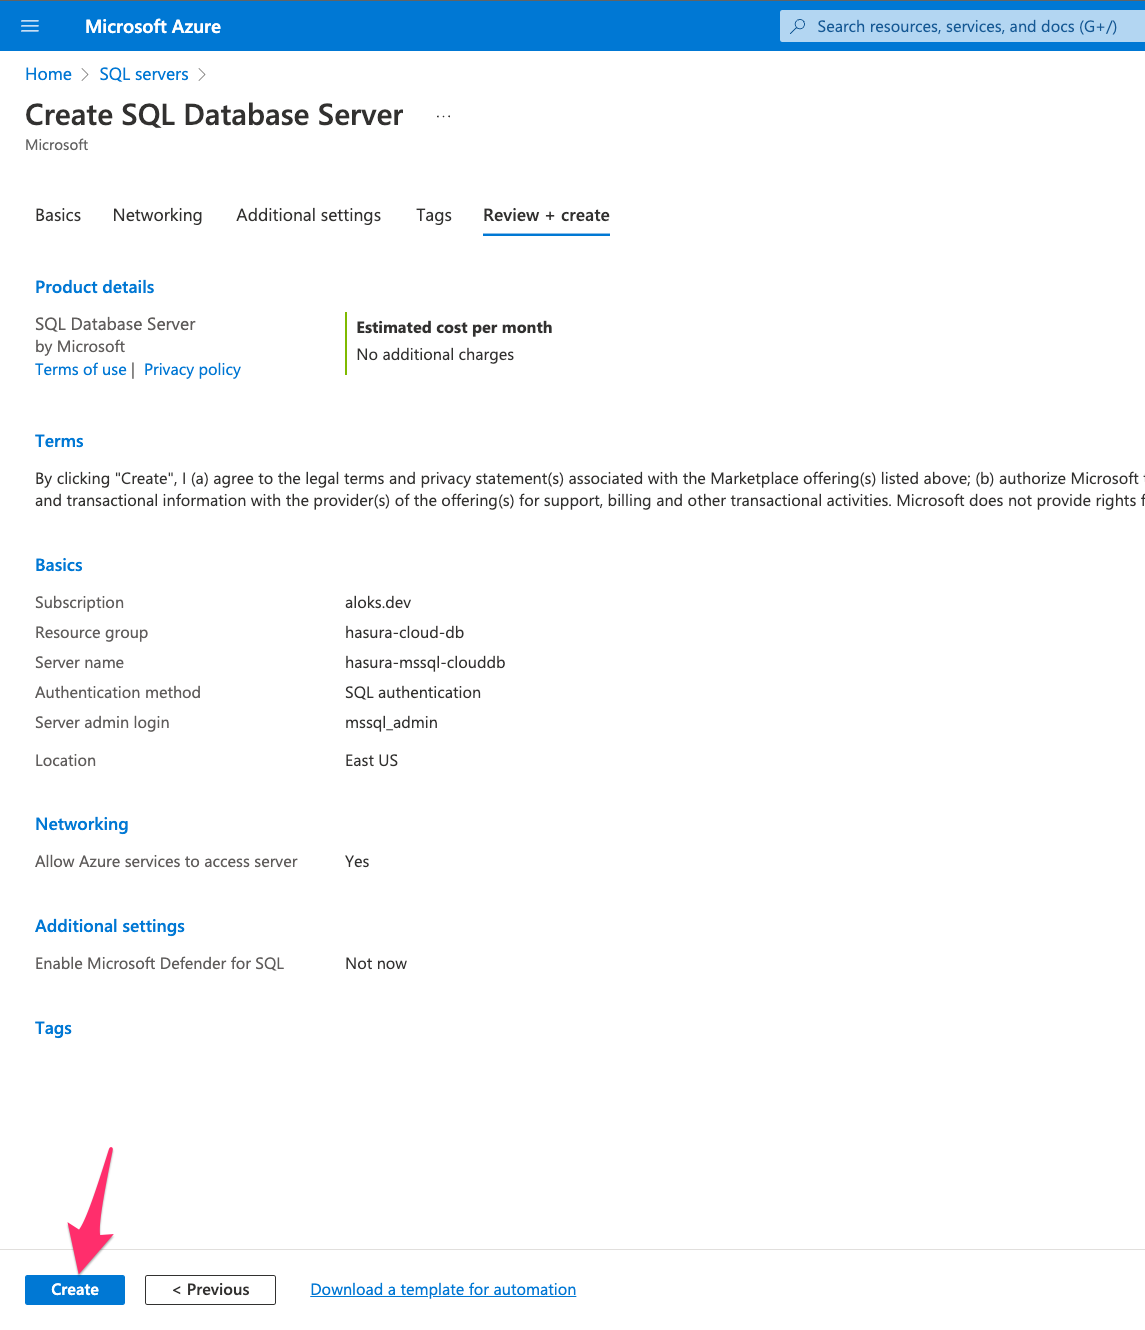
Change additional settings or add tags to the instance if required. Once you reach to Review + Create tab, review all
the fields. You can go back and change any field if required. Then, click on Create to start deploying the server
instance.
Step 4: Allow connections to your DB from Hasura
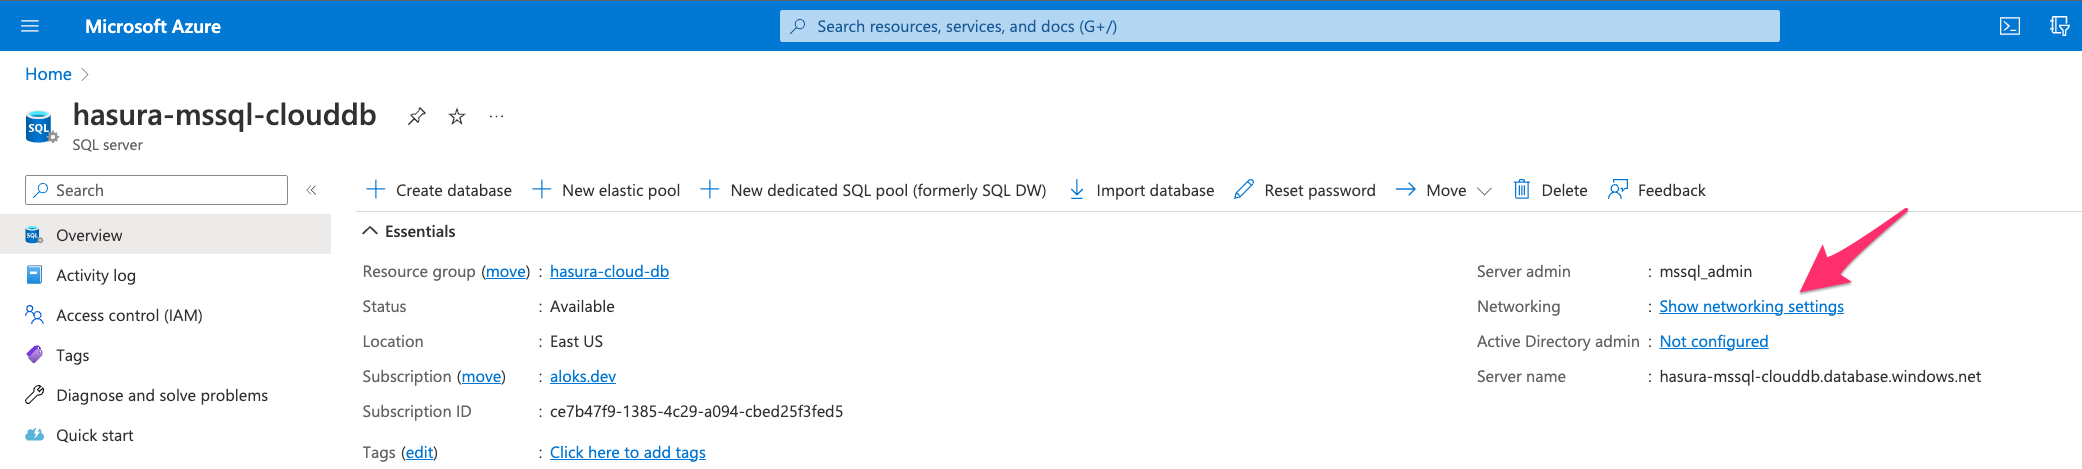
Once Azure provisions the server, navigate to the server instance page and click on Show networking settings.
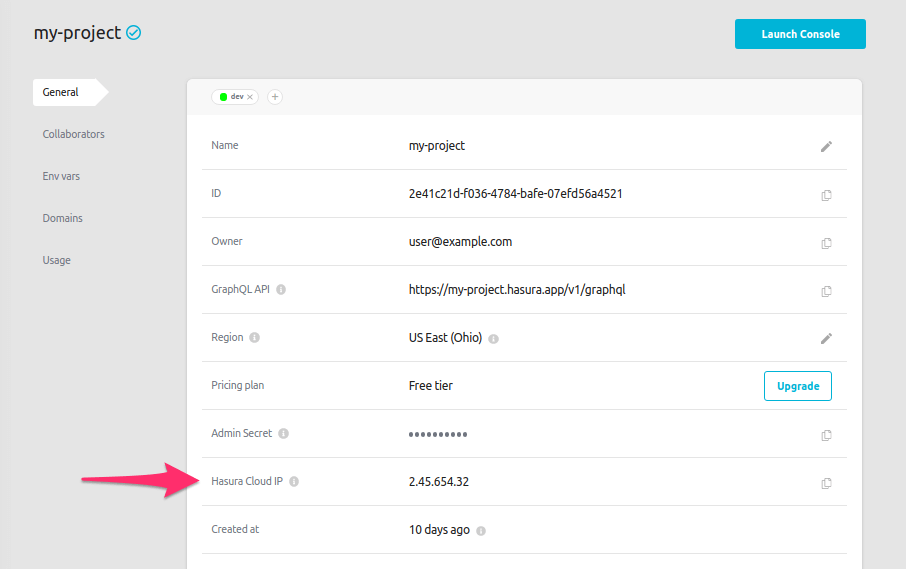
If using Hasura Cloud, from your project's dashboard, copy the Hasura Cloud IP address:
If you're using a self-hosted solution, you'll need to determine the IP address manually depending on your hosting service.
On Azure, under Firewall rules in networking settings, click on Add a firewall rule. Name the firewall rule and
paste the Hasura instance's IP address on both the Start IP and End IP input boxes:
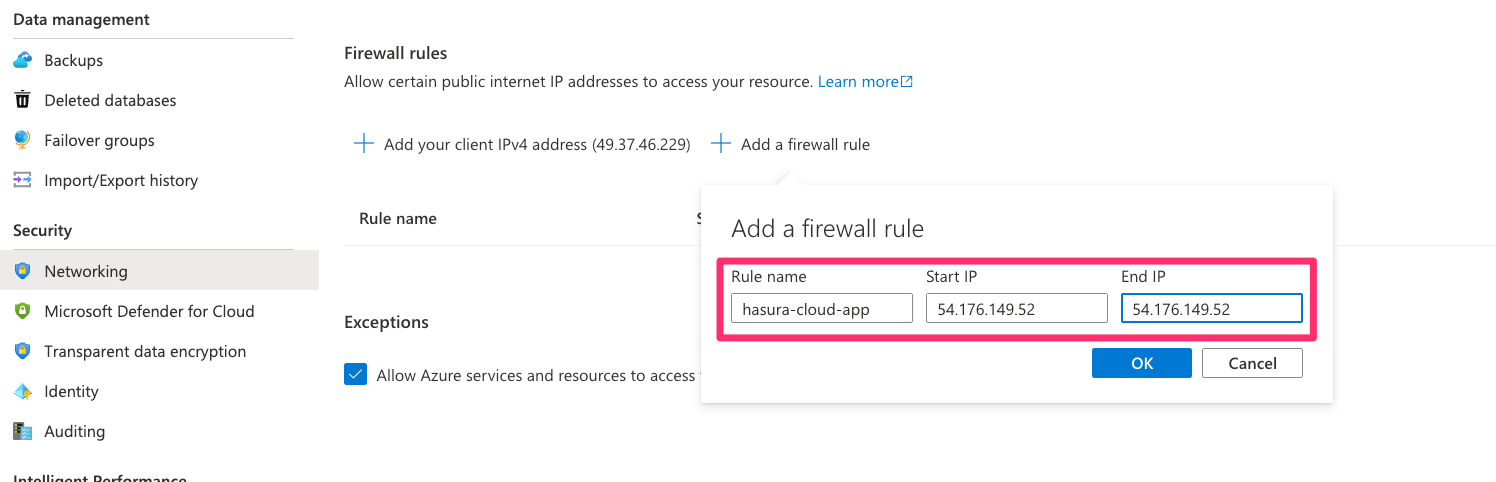
After entering the IP of your Hasura instance, click on OK and then click on Save at end of the page for the changes
to take effect.
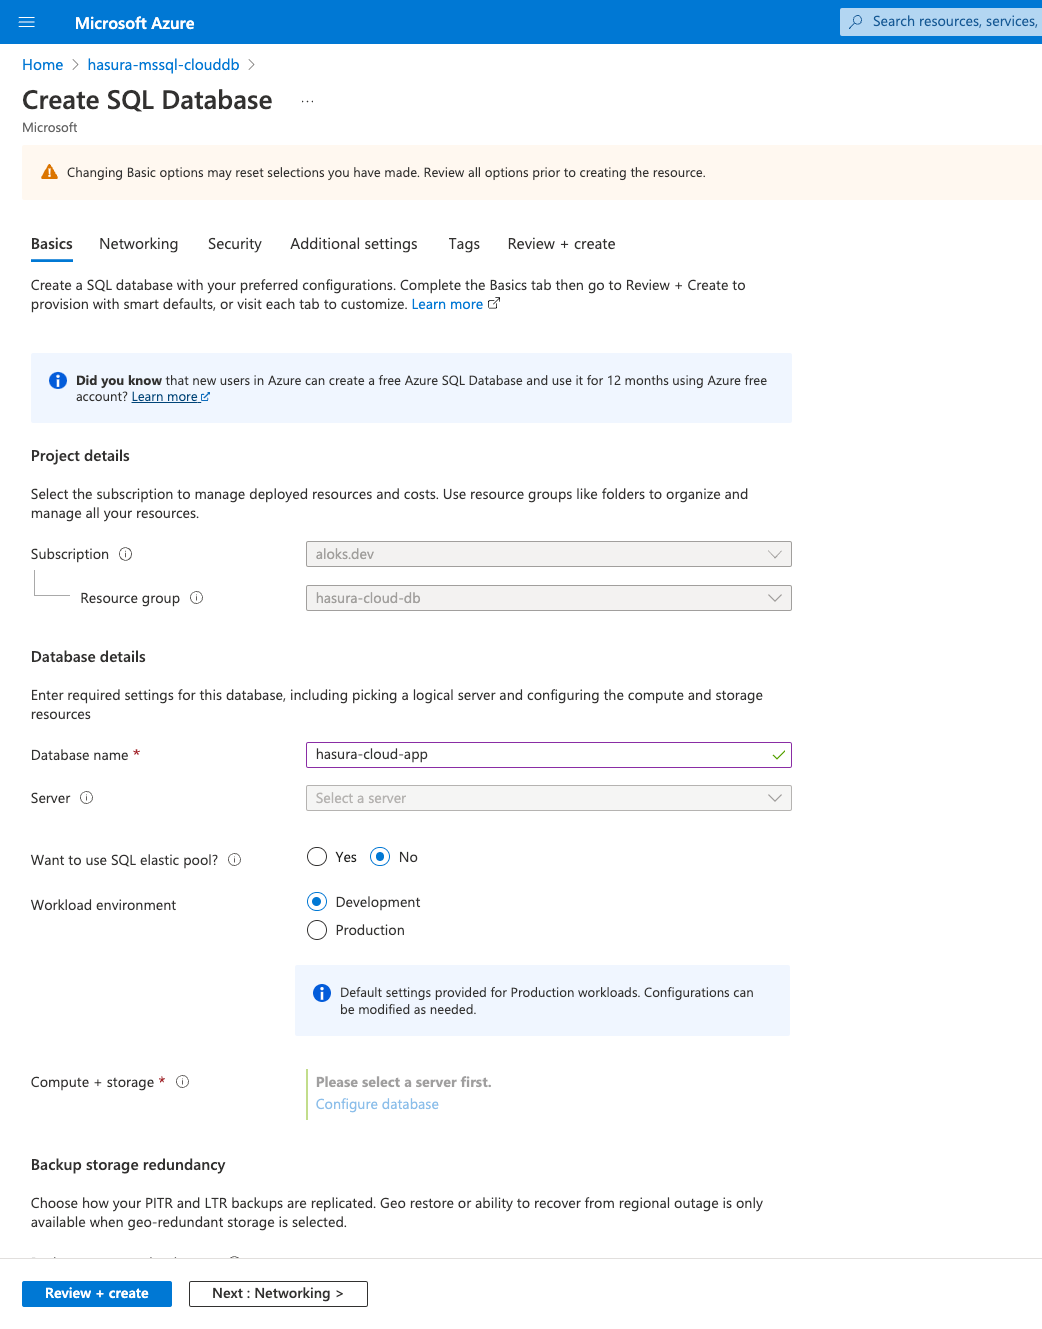
Step 5: Create database
Go to the SQL Server instance's home and click on Create Database
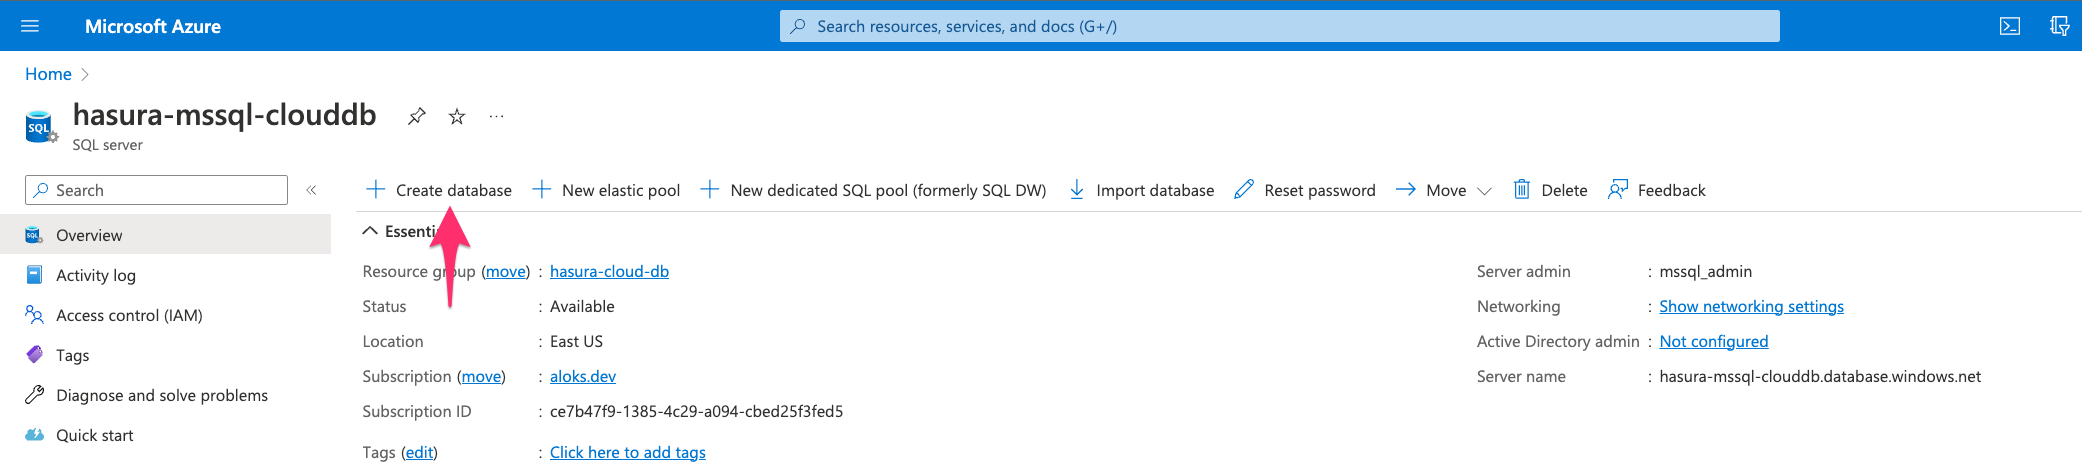
Fill in all the required fields and additional settings if required. Click on Review + create and create the database.
Step 6: Construct the database connection URL
The structure of the database connection URL looks as follows:
Driver={ODBC Driver 17 for SQL Server};Server=myServerAddress;Database=myDataBase;UID=myUsername;PWD=myPassword;
We recommend copying and pasting this string into the Hasura Console's Database URL field (in the next step) to serve
as a template. Using the information below, you can modify the attributes to meet your databases's values.
Copy the server name from instance home.
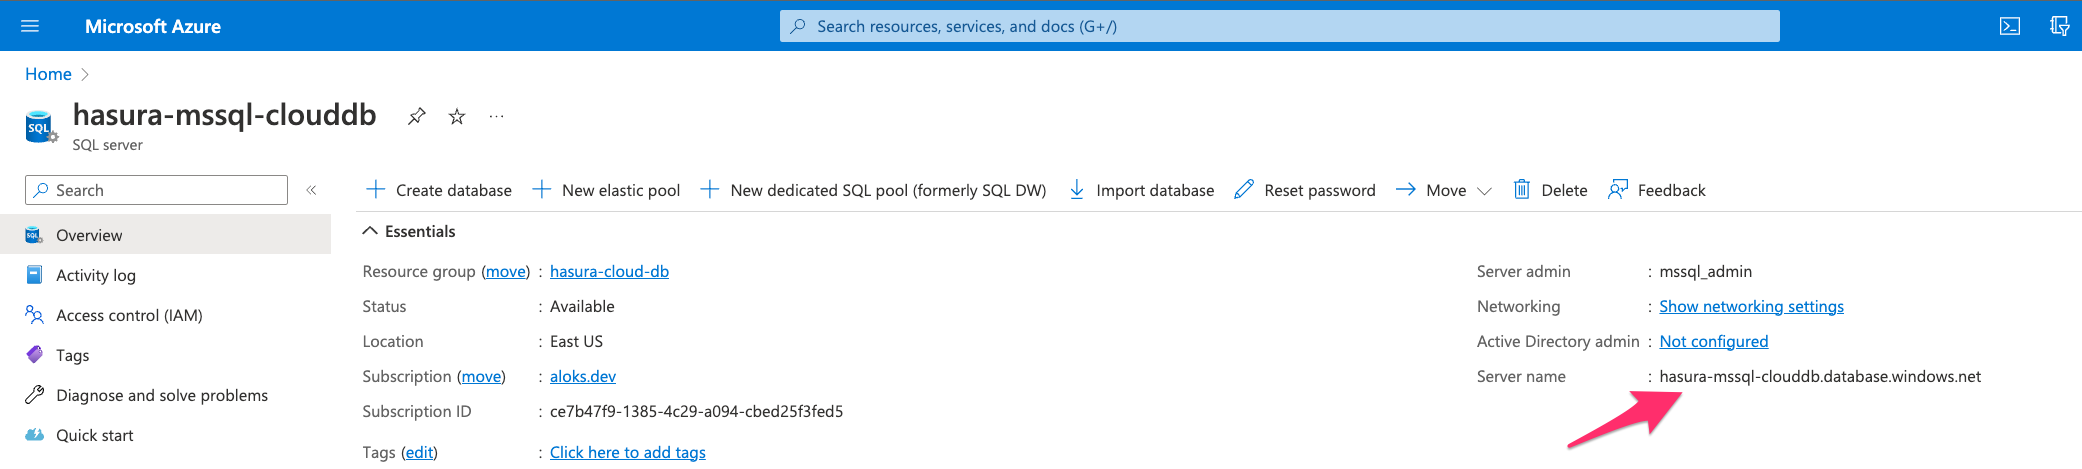
Driver: Driver to use for connection to the SQL Server. If you are not sure, useODBC Driver 17 for SQL Server.Server: The server name copied from the instance page.Database: Database name created in step 5.UID: Username for the SQL User created in step 3.PWD: Password for the SQL User created in step 3.
Step 6: Finish connecting the database
Back on the Hasura Console, enter and modify the connection string that we referenced in step 6:
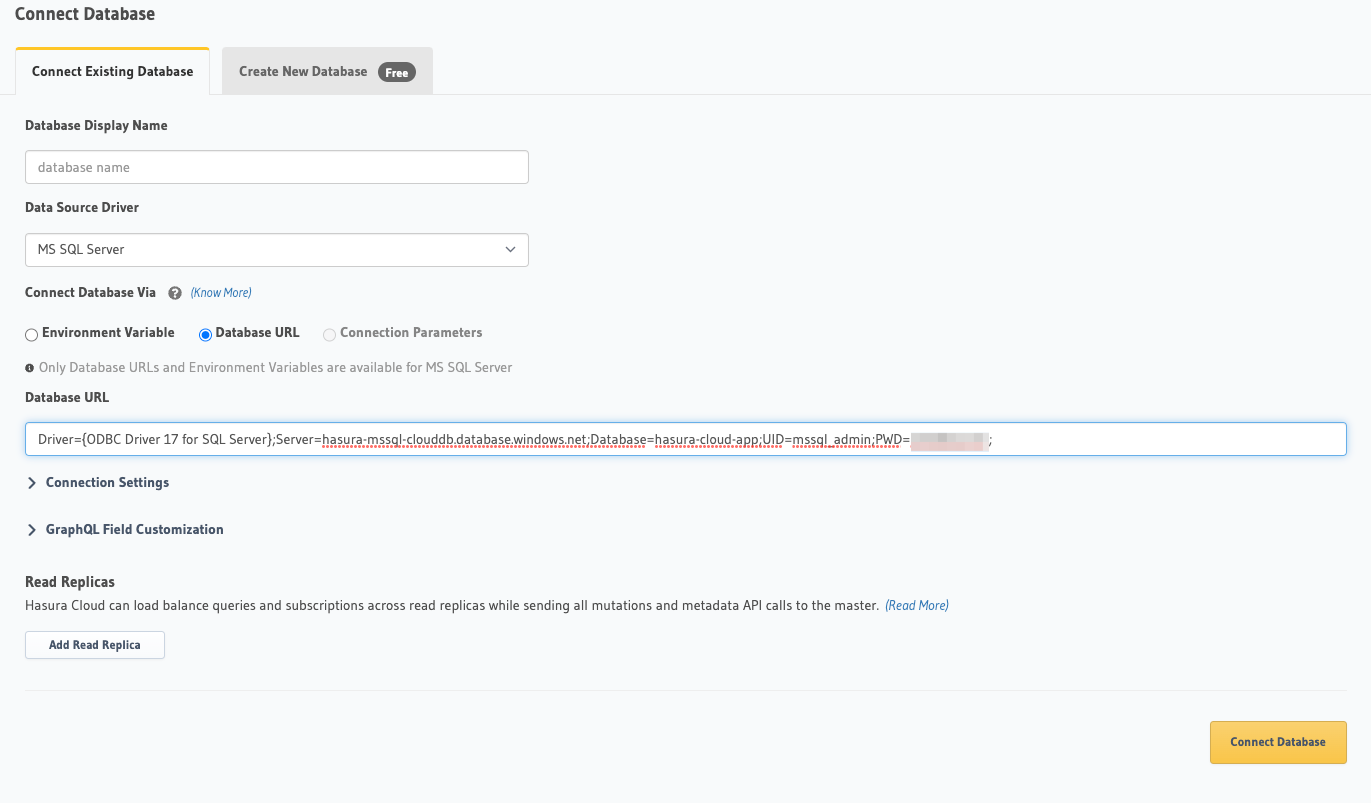
Then click Connect Database.
For security reasons, it is recommended to set database URLs as env vars and using the env vars to connect to the databases in place of the raw database URLs.
Voilà. You are ready to start developing.
Next steps
You can check out our 30-Minute Hasura Basics Course and other GraphQL & Hasura Courses for a more detailed introduction to Hasura.
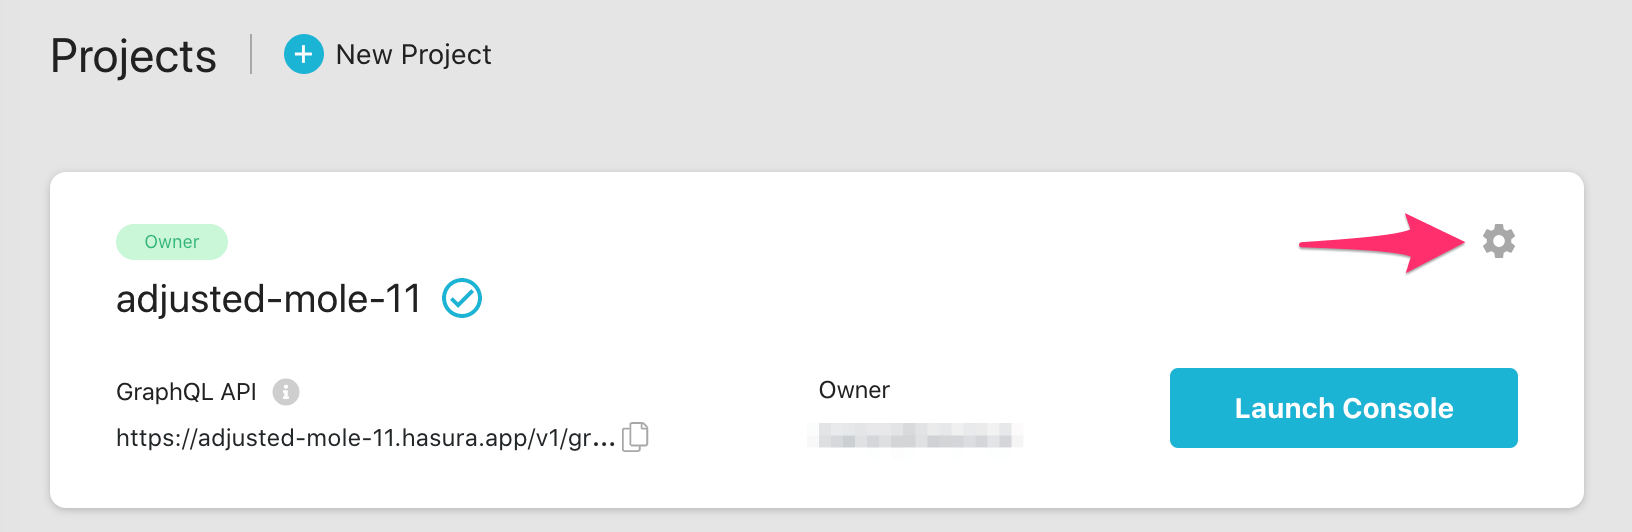
If using Hasura Cloud, you can also click the gear icon to manage your Hasura Cloud project. (e.g. add collaborators, env vars or custom domains).
For more information on which SQL Server features we support, check out [this page]/databases/supported-databases.mdx).