Connecting Hasura to a Neon Serverless Postgres Database
Introduction
This guide explains how to connect a new Neon serverless Postgres database to a Hasura Cloud instance.
Creating a New Neon Database
Step 1: Sign up or log in to Hasura Cloud
Navigate to Hasura Cloud and sign up or log in.
Step 2: Create a Hasura Cloud project
On the Hasura Cloud dashboard, create a new project:
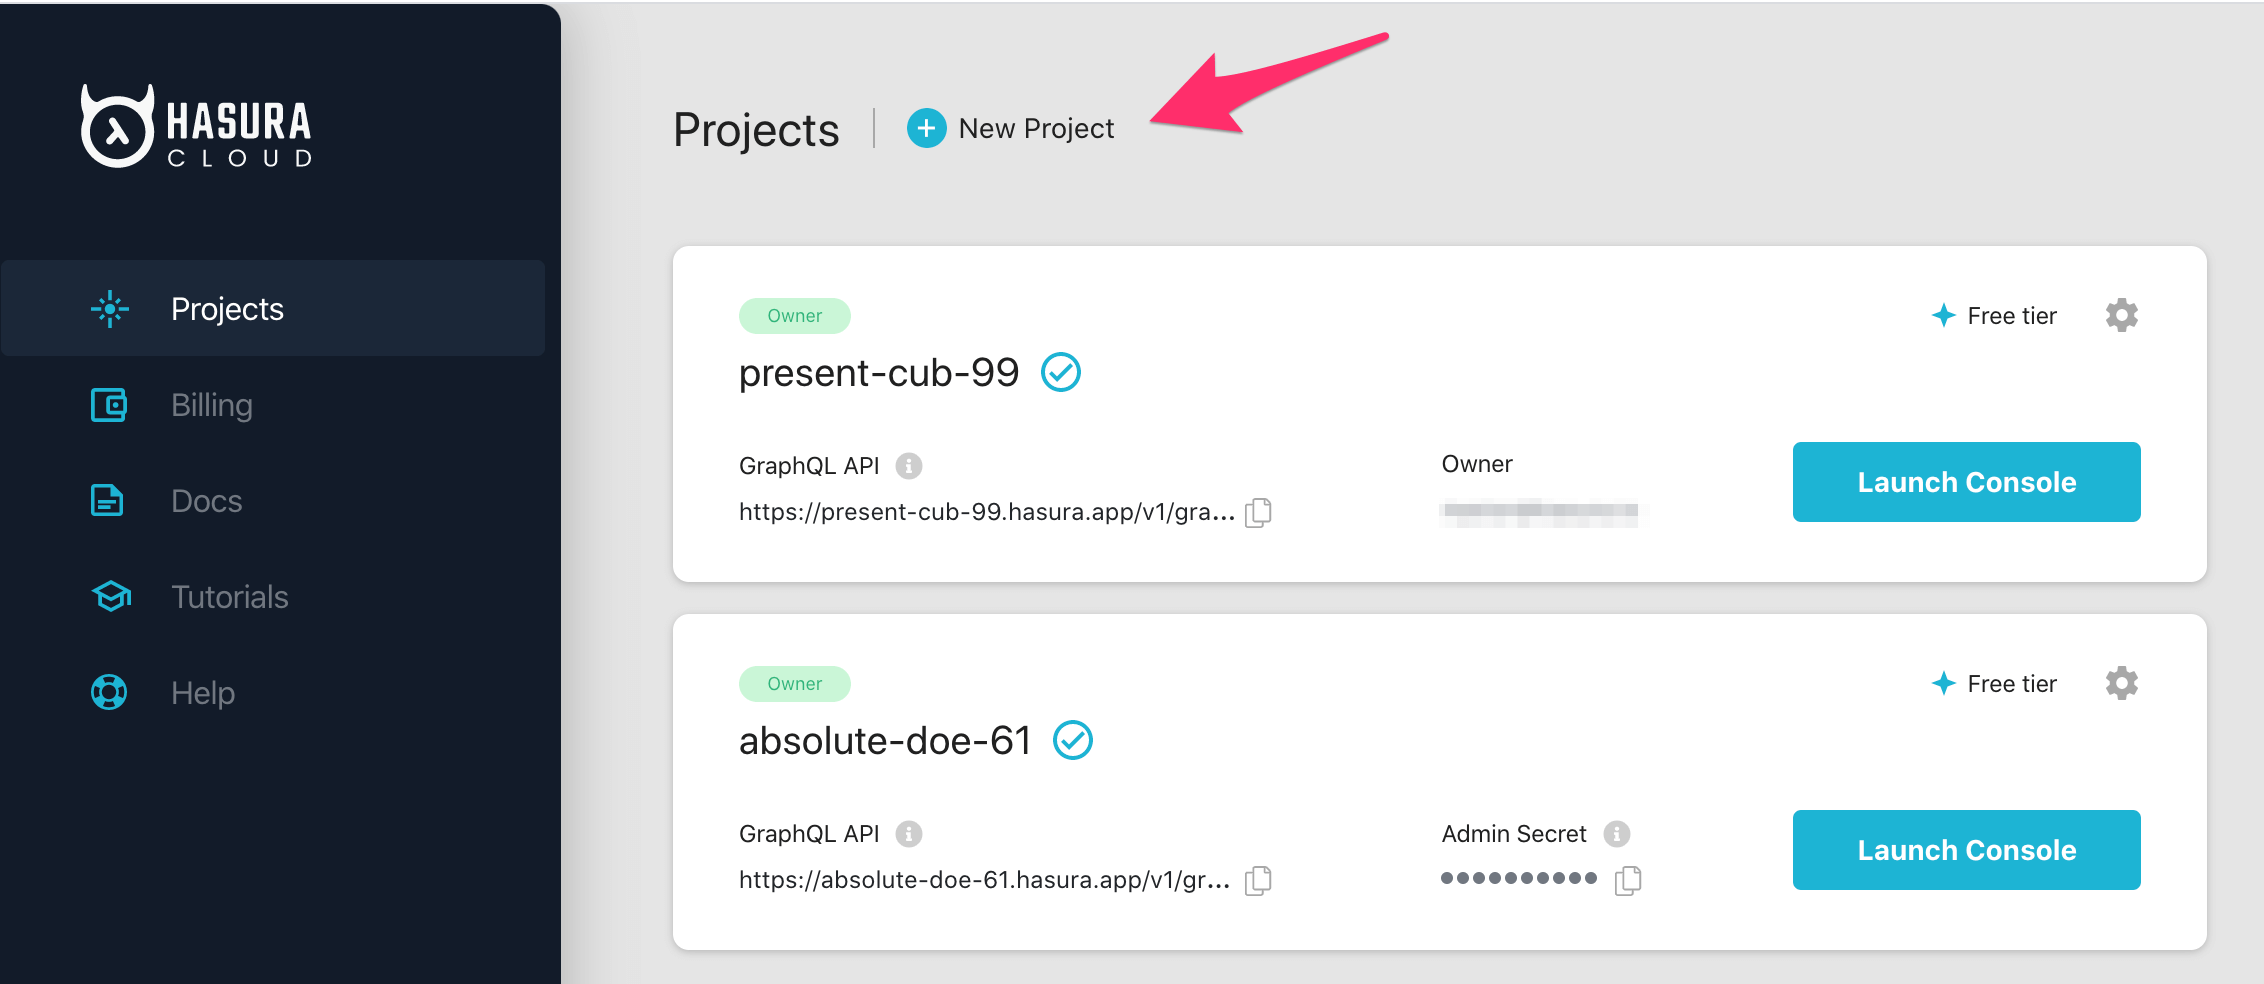
After the project is initialized successfully, click on Launch Console to open the Hasura Console in your browser.
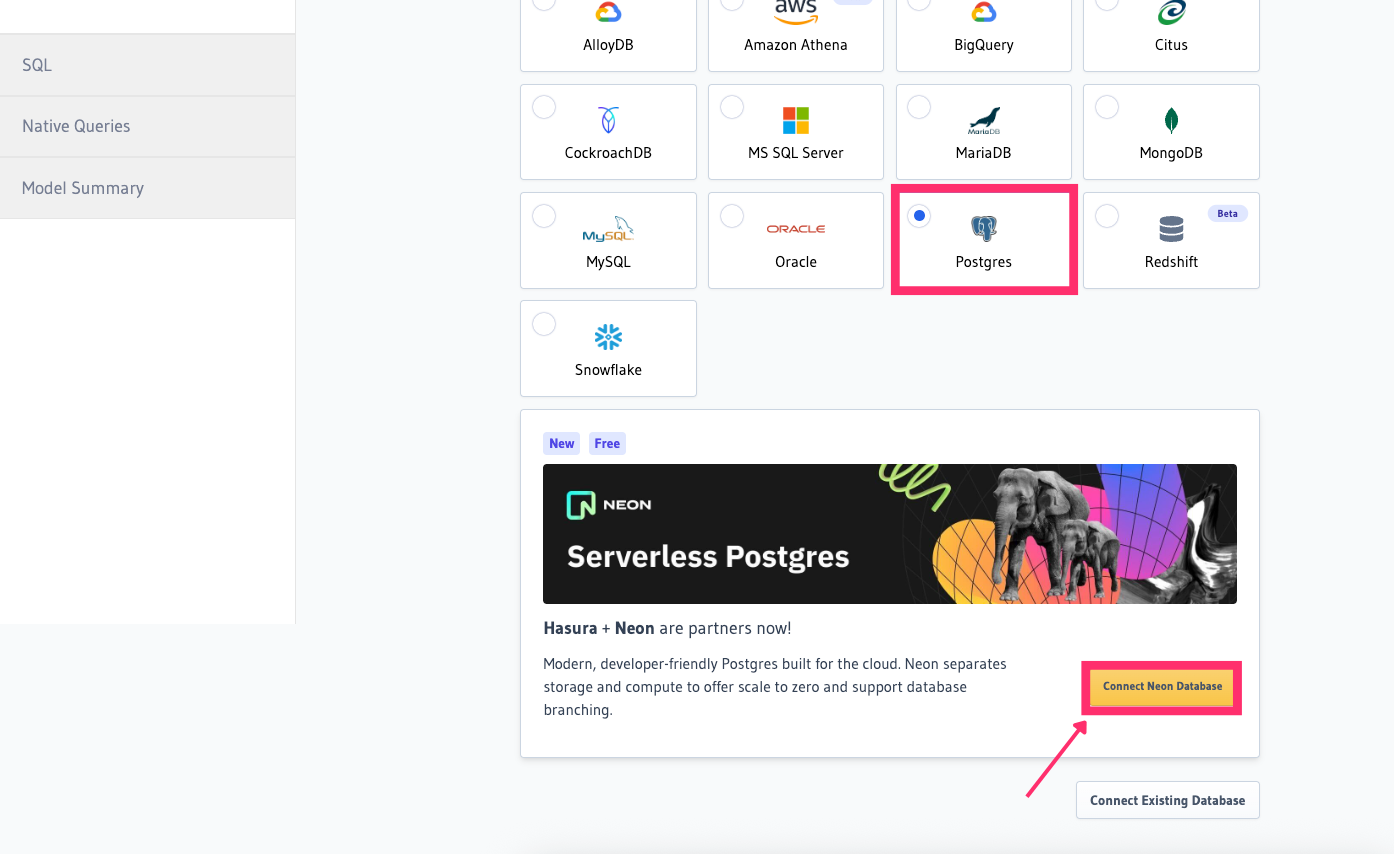
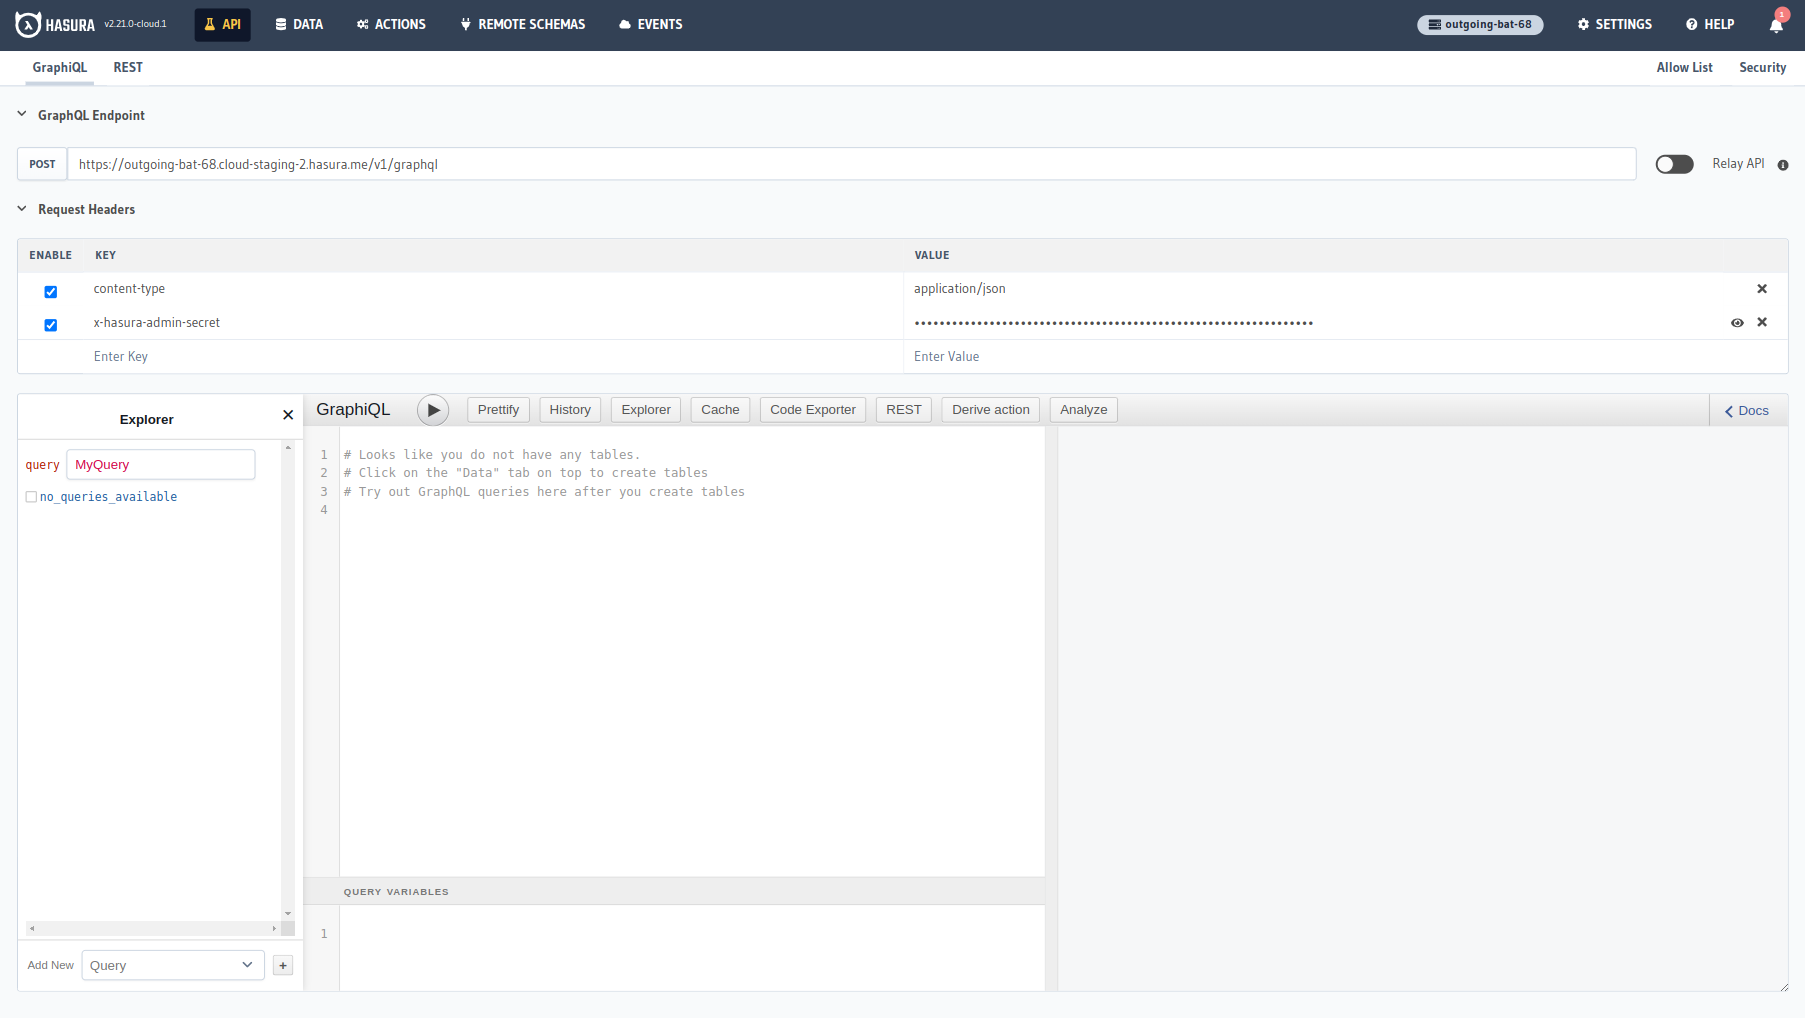
On the Hasura Console, navigate to Data -> Postgres:
Click on Connect Neon Database to create and connect a new Postgres database to your Hasura Project.
On the next step, you'll be prompted to Login/Sign up for Neon. We recommend Hasura for a seamless experience.
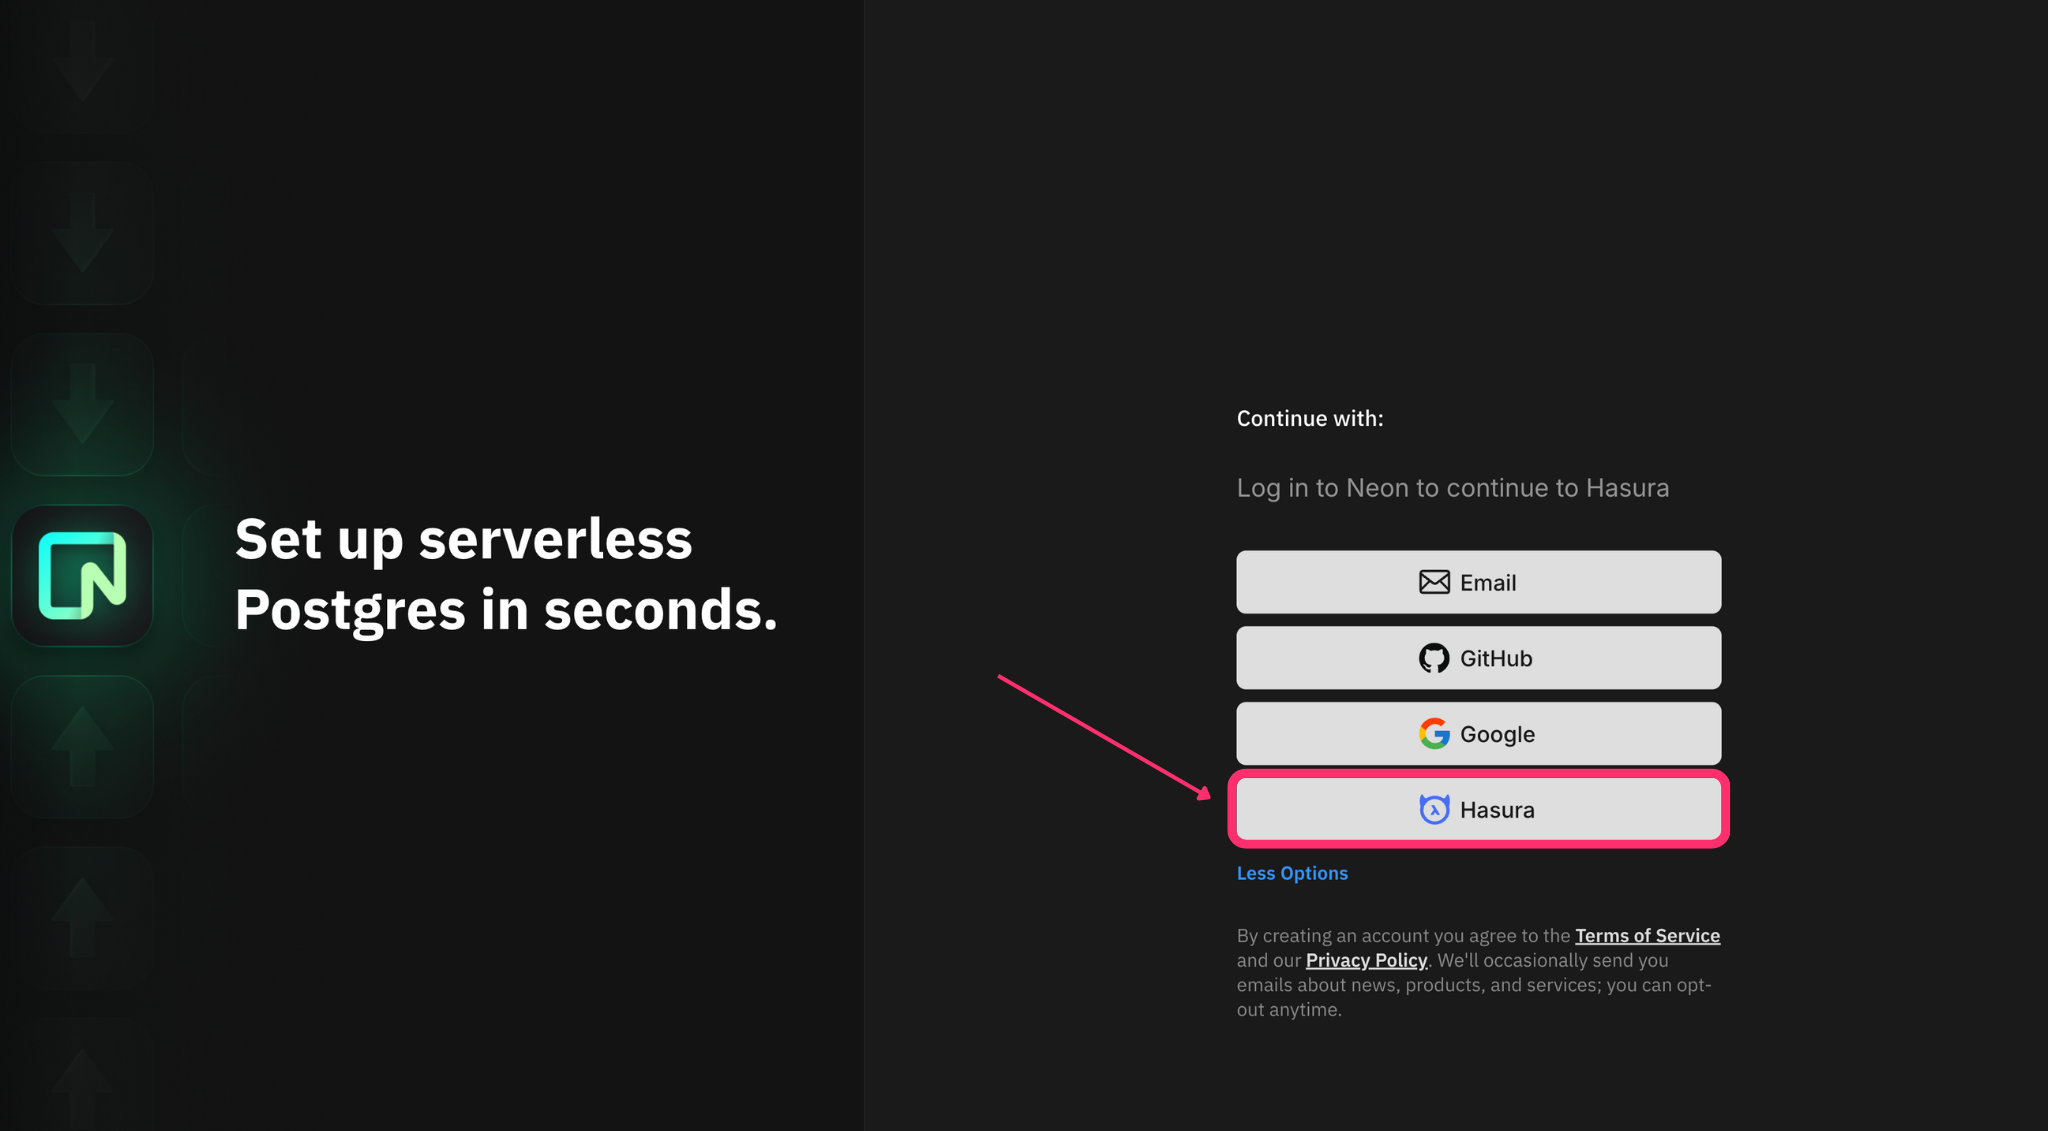
After successful authorization, a new Neon Postgres database will be created and connected to your Hasura Project with
the connection string associated with the environment variable PG_DATABASE_URL.
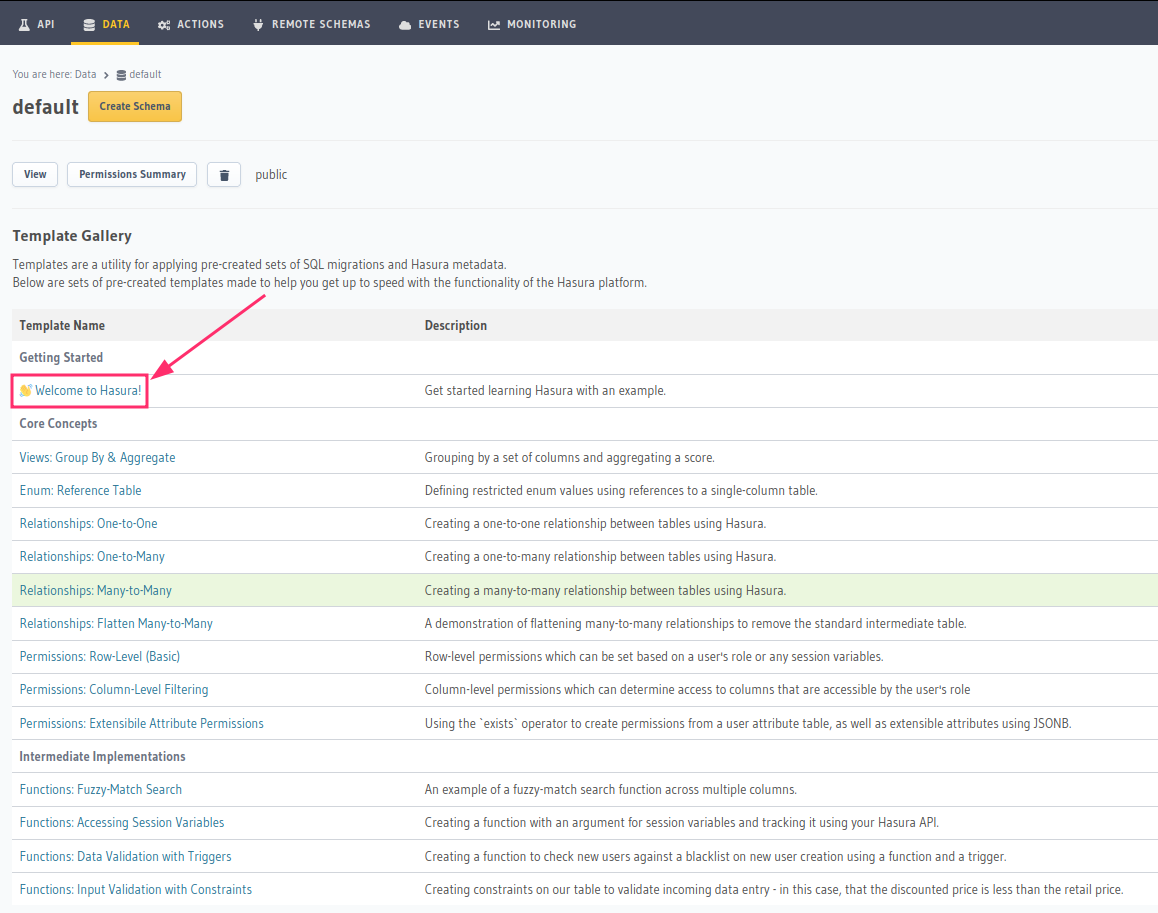
Step 3 (optional): Load a template
Once the database is successfully connected, you can explore Hasura's GraphQL API by loading any of the templates from the template gallery instantly.
For example: to get started, you could try the Welcome to Hasura template:
This installs a schema with data that you can now query using your Hasura GraphQL API from the API tab.
Voilà! You are ready to start developing.
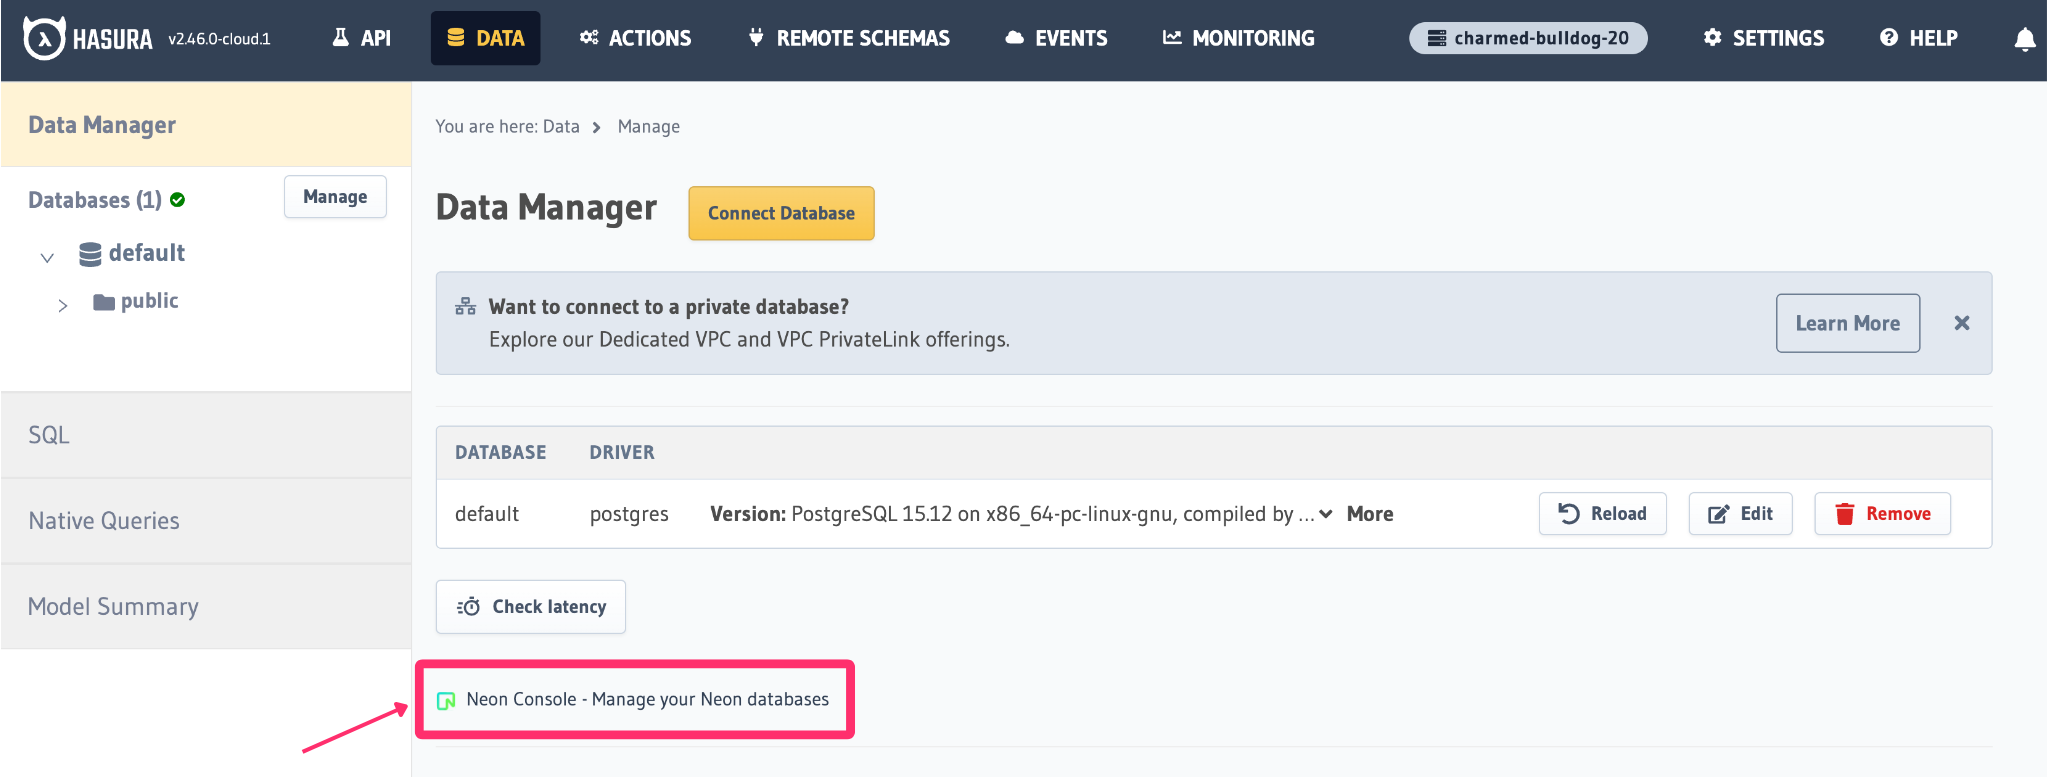
You can visit the Neon console from the Data tab to manage your created database.
Migrating an existing database to Neon
If you want to migrate your existing database to Neon, you must use Postgres's pg_dump utility to copy over your
database.
pg_dump -h <host> -U <username> <dbname> | psql <neon-connection-string>
For more info, follow Neon's detailed guide for importing a database.
If you're migrating from Heroku, check out Neon's platform-specific migration guide.
Using Neon Branching with Hasura Dynamic Routing
This section explains how to combine Neon's database branching with Hasura's Dynamic Database Routing feature, allowing you to manage multiple environments (dev, staging, feature previews) using a single Hasura instance connected to different Neon branches.
Self-Hosted Enterprise plans. :::
Step-by-step Implementation
Create Neon Branches
Use the Neon Console, API, or CLI to create branches for your environments. Refer to Neon's Create a branch guide. Copy the connection string for each branch.
Define the Connection set in Hasura
Add your Neon branch connection strings to the connection set for your existing Neon data source in Hasura:
- Go to the
Hasura Console -> Data -> Manage. - Click "Edit" next to your Neon data source.
- Navigate to the
Dynamic Routingtab. - Under "Available Connections for Templating", click
+ Add Connection. - In the modal:
- Connection name: Enter a unique, lowercase name (e.g.,
dev_branch). This is used in the Kriti template. - Connect Database via: Choose
Database URLorEnvironment Variable. - Database URL / Environment Variable: Enter the connection string for your Neon branch (e.g., the
devbranch). - Click
Add Connection.
- Connection name: Enter a unique, lowercase name (e.g.,
- Repeat step 5 for other branches (e.g.,
staging_branch,feature_x_branch).
Create the Connection template
Define the routing logic using Kriti:
In the
Dynamic Routingtab, find the "Connection Template" section.Select
Custom Template.Enter your Kriti template. This example routes based on an
x-hasura-branch-nameHTTP header:{{ if ($.request.headers?["x-hasura-branch-name"] == "dev")}}
{{$.connection_set.dev_branch}}
{{ elif ($.request.headers?["x-hasura-branch-name"] == "feature-x")}}
{{$.connection_set.feature_x_branch}}
{{ elif ($.request.headers?["x-hasura-branch-name"] == "staging")}}
{{$.connection_set.staging_branch}}
{{ else }}
{{$.default}}
{{ end }}$.request.headers?["header-name"]: Accesses the header.?handles missing headers.{{$.connection_set.member_name}}: Routes to the named connection from the set.{{$.default}}: Uses Hasura's default logic (read replicas for queries/subs, primary for mutations if replicas exist; otherwise primary).- See Kriti Templating Specification for more details.
Click
Update Connection Templateto save.
Update your application
Modify your client applications or CI/CD pipelines to send the x-hasura-branch-name header (or other context used in
your template) with GraphQL requests to route them to the appropriate Neon branch via Hasura.
Using read replicas with Dynamic Routing
Neon read replicas can be used alongside dynamic routing.
Configure read replicas in Hasura: Add Neon read replica connection strings to the main
Connection Settingstab of your primary Neon data source in Hasura (under the "Read Replicas" section).Control via Kriti: Your Kriti template determines how these replicas are used:
{{$.primary}}: Always uses the primary read-write connection.{{$.read_replicas}}: Uses a random read replica (for queries/subscriptions only).{{$.default}}: Uses read replicas for queries/subscriptions if configured, otherwise uses primary. Uses primary for mutations.{{$.connection_set.<member_name>}}: Bypasses the primary/replica logic and routes directly to the specified branch connection.
Example Template incorporating
no-stale-readheader:{{ if ($.request.headers?["x-hasura-branch-name"] == "dev")}}
{{$.connection_set.dev_branch}}
{{ elif ($.request.headers?["x-hasura-branch-name"] == "feature-x")}}
{{$.connection_set.feature_x_branch}}
{{ elif ($.request.query.operation_type == "mutation")}}
{{$.primary}}
{{ elif ($.request.headers?["no-stale-read"] == "true")}}
{{$.primary}}
{{ else }}
{{$.default}}
{{ end }}
Neon Free Tier
With Neon's Free Tier, you can create up to 10 projects with the following limits:
- 10 Branches per project
- 0.5 GB-month total storage across all projects
- 190 Compute hours per month
- Instant Point-in-Time Restore up to 24 hours in the past
For more info, check out Neon's Free Plan allowances.
For more information on which Postgres features we support, check out this page.
:::