Get Started with Hasura Cloud & Snowflake
Try it out
Step 1: Create an account on Hasura Cloud and create a new Hasura Project
Navigate to cloud.hasura.io, and create a new Hasura Cloud account.
Once you create a project on Hasura Cloud, hit the "Launch Console" button to open the Hasura Console for your project.

Step 2: Add your Snowflake database as a source to Hasura
Head to the Data > Manage databases section on the Console to add your Snowflake database as a source to Hasura.
- Allow public connections or allowlist the Hasura Cloud IP on your Snowflake firewall: This is good for testing and will allow you to quickly try out Hasura with your database!
- VPC peering: VPC peering and private network access is available on Hasura Cloud paid tiers and is recommended for production. Get in touch with us if you'd like to try this out against your existing databases.
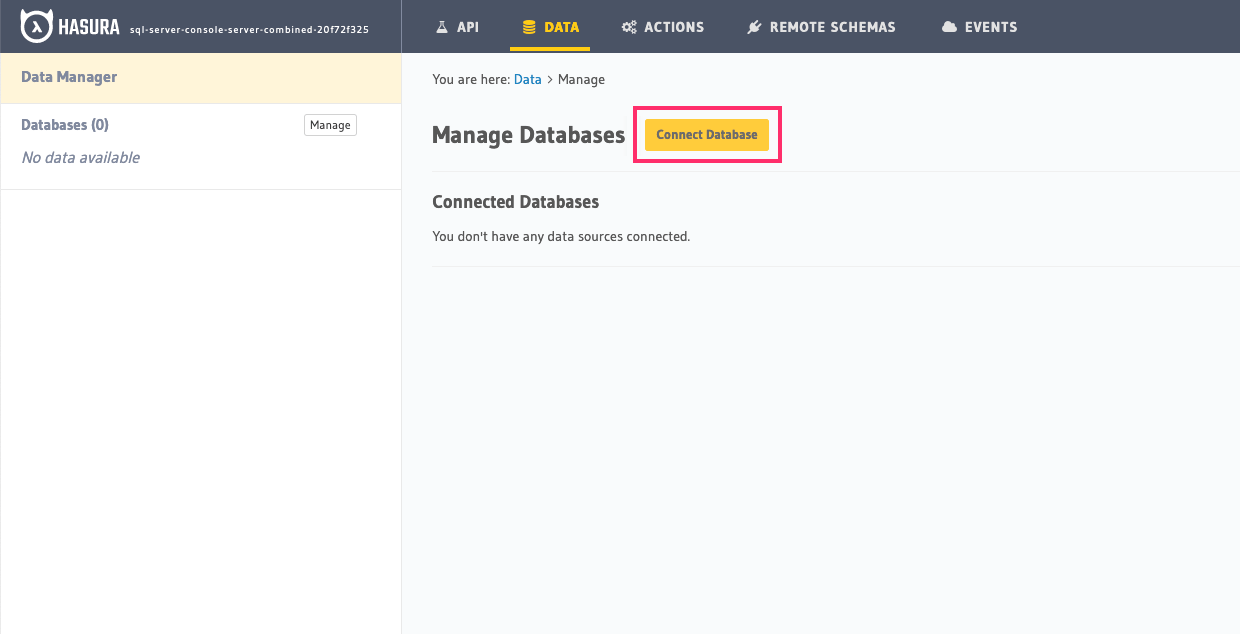
Step 2.1: Begin by clicking "Connect Database"
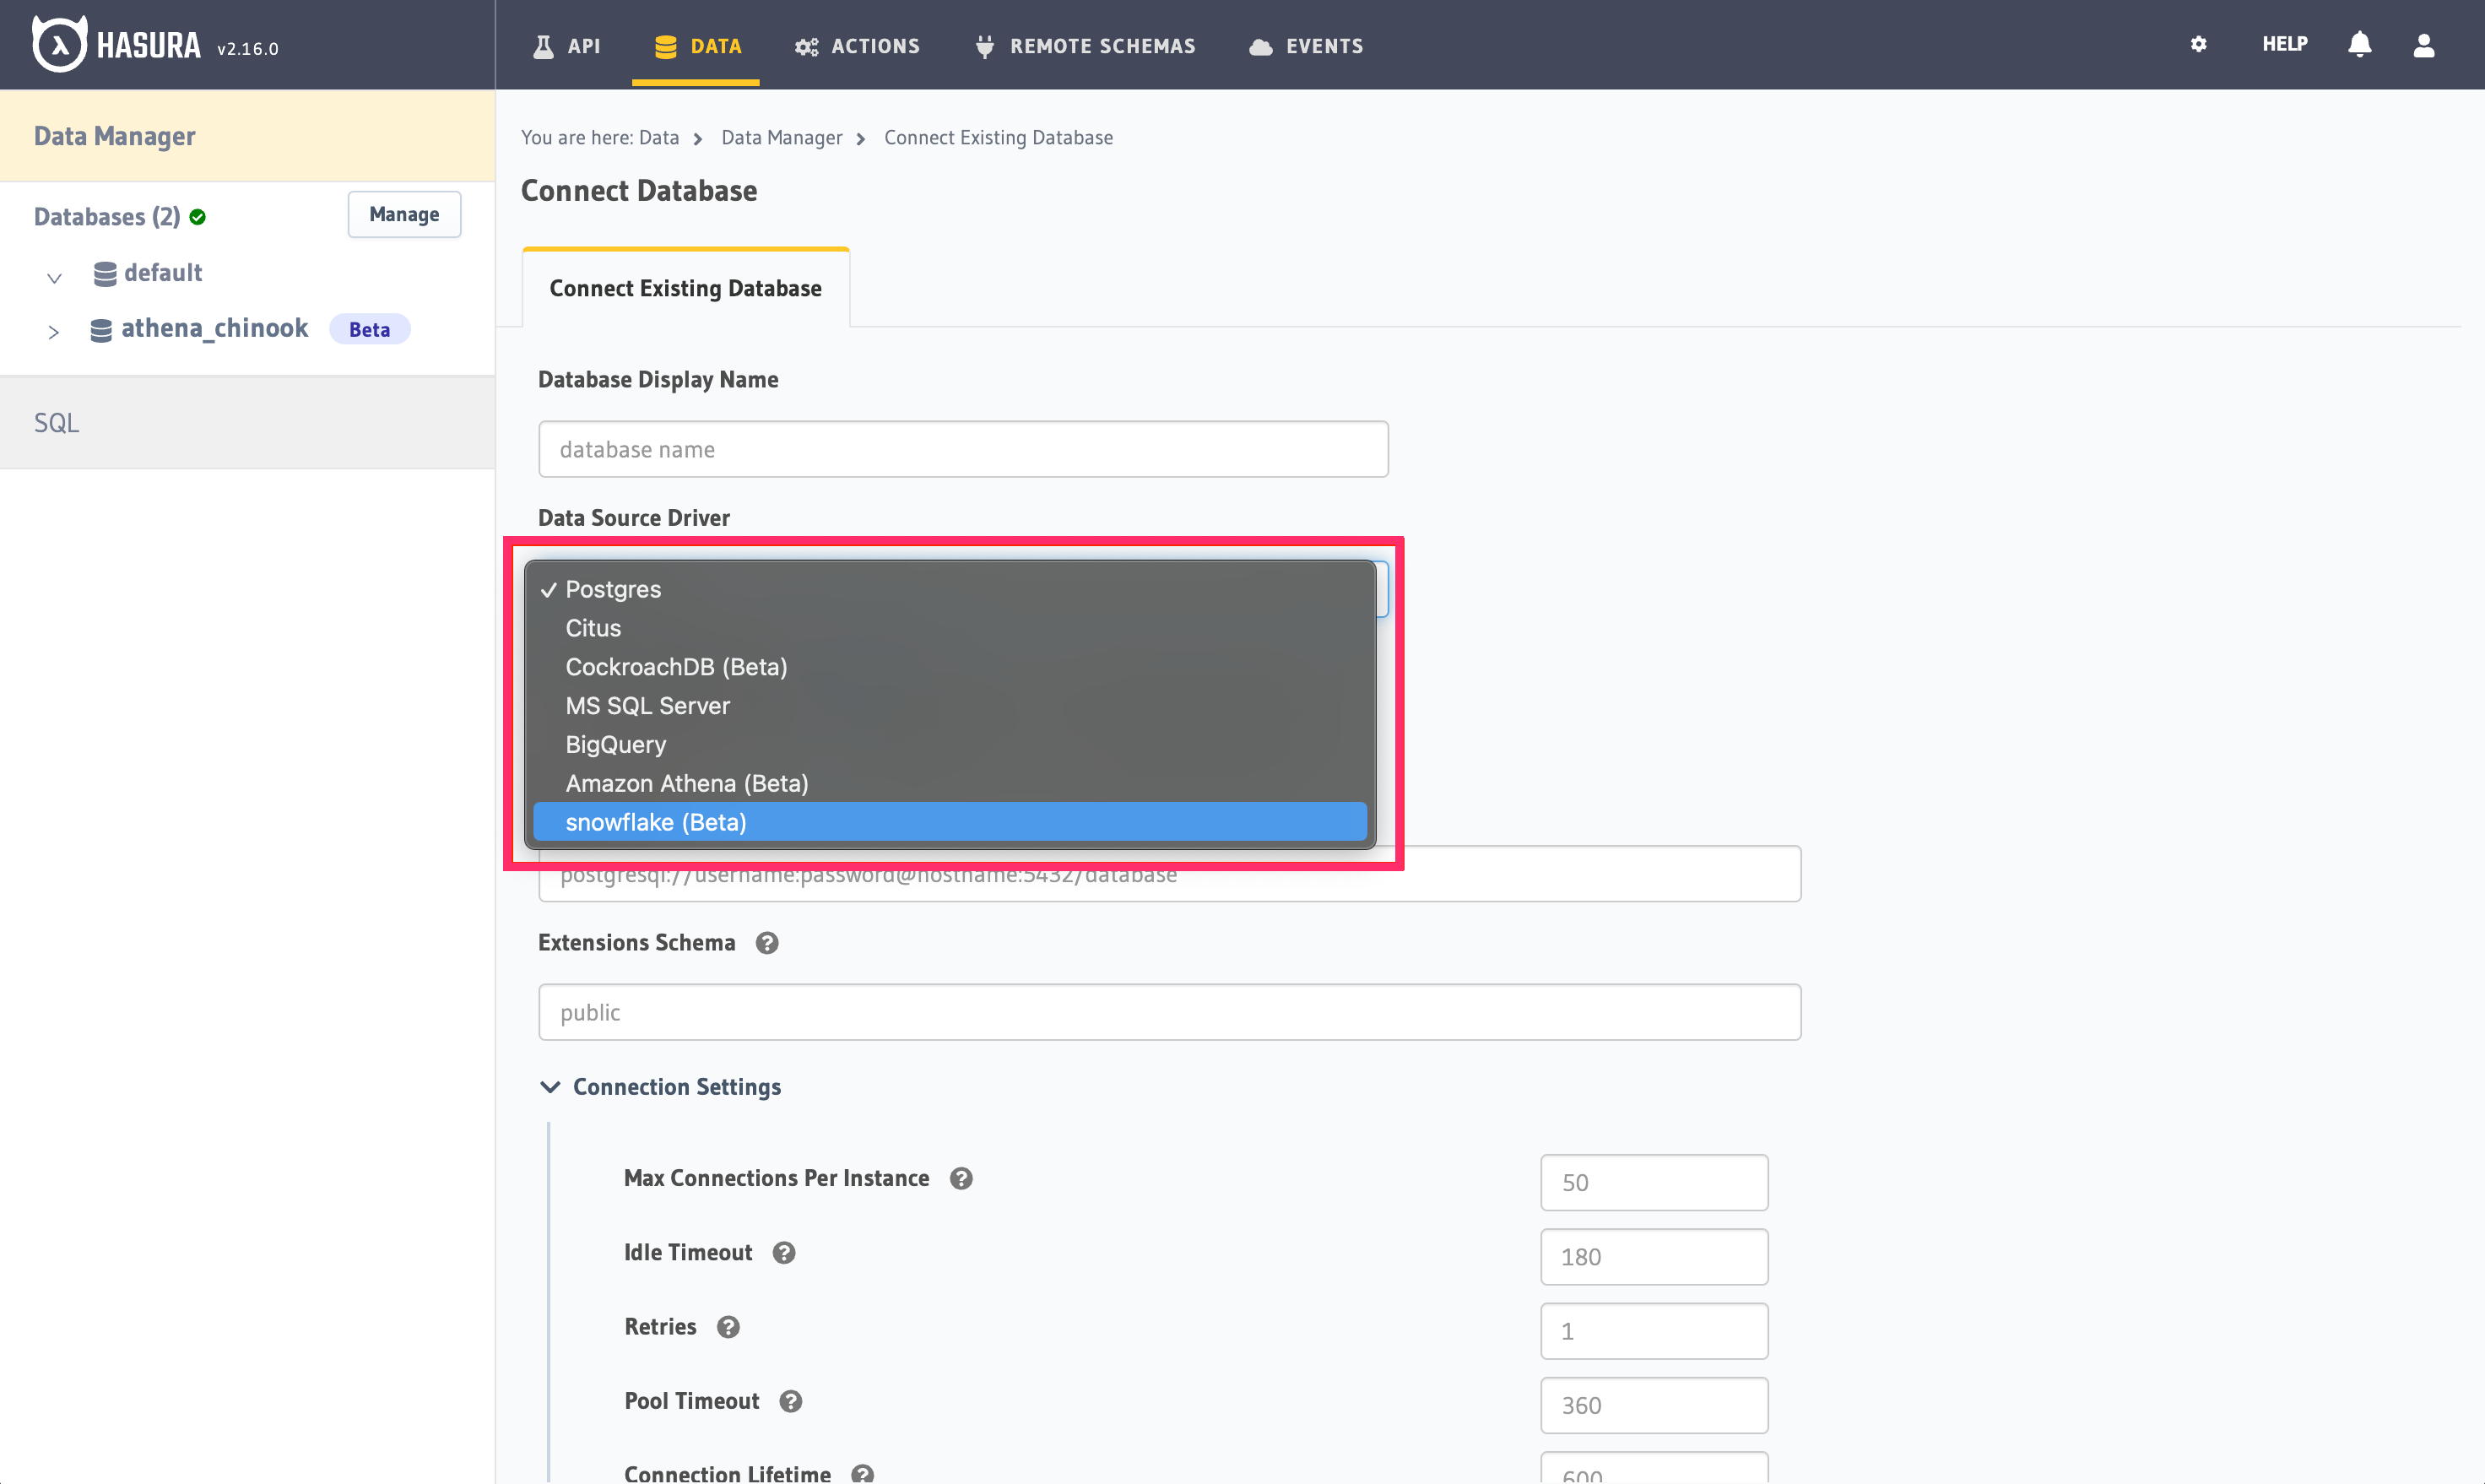
Step 2.2: Next, choose the snowflake driver
Step 2.3: Enter your Snowflake JDBC Connection string
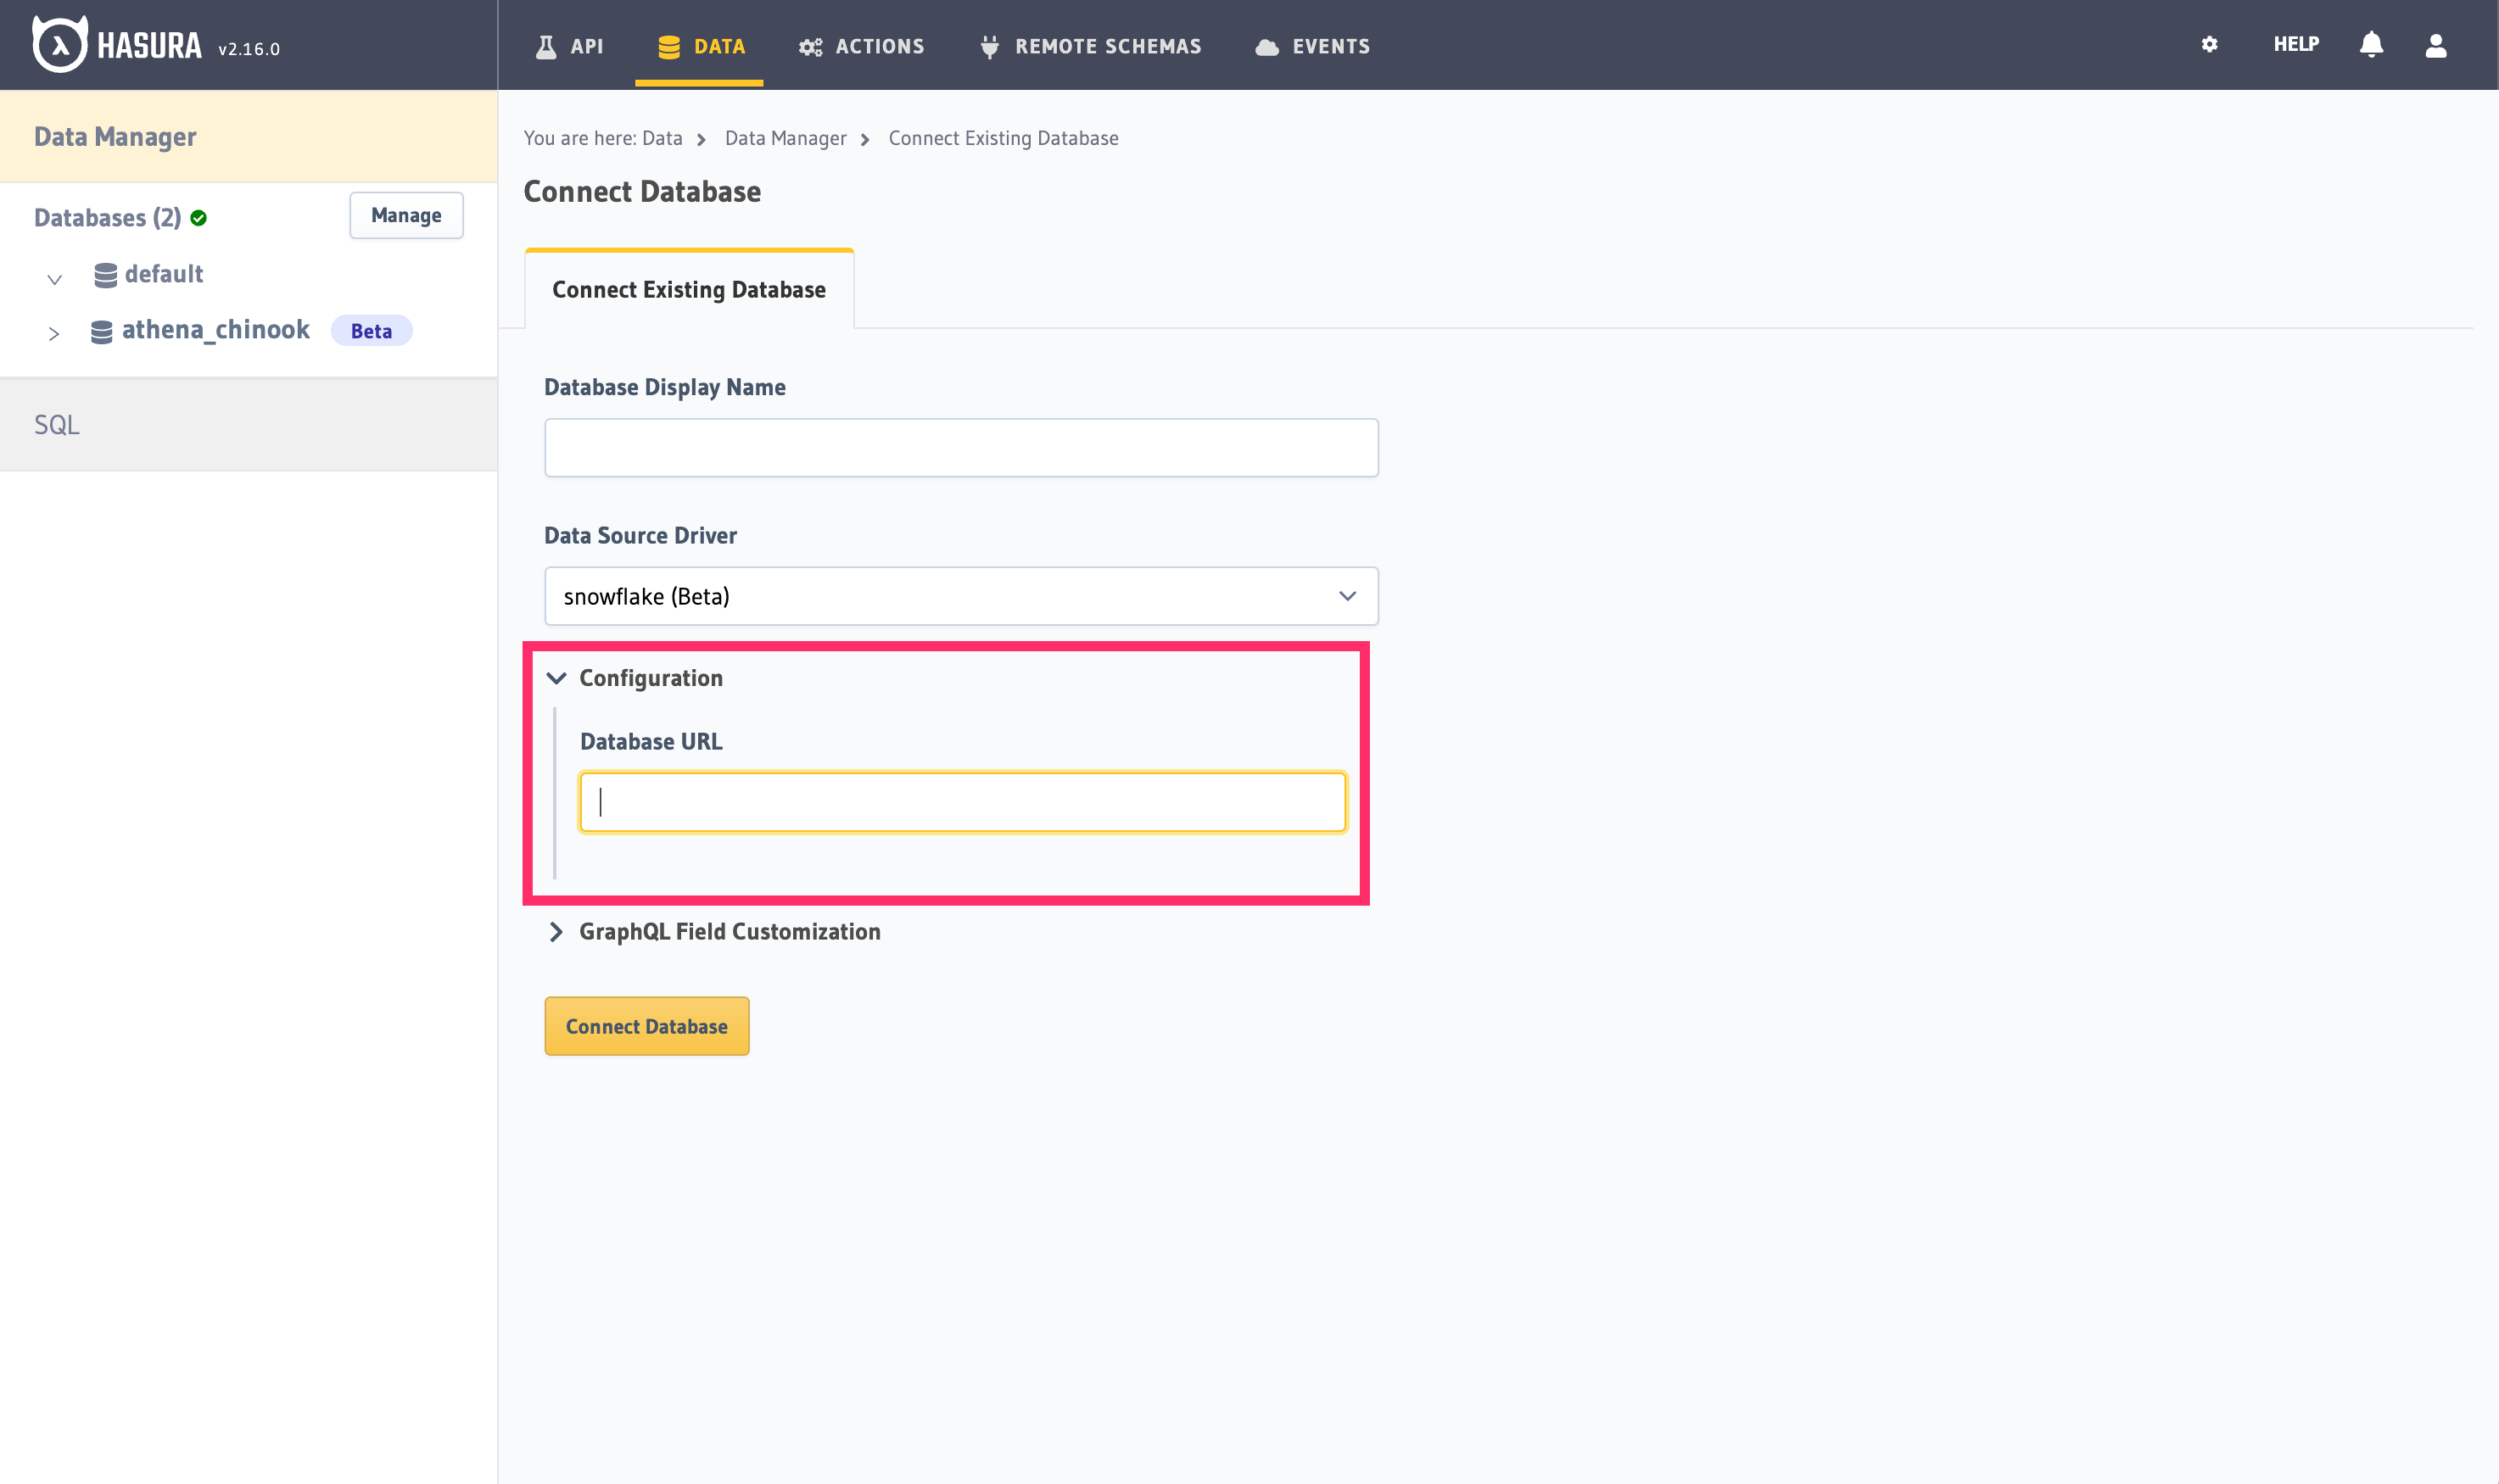
Snowflake JDBC connection strings have the following formats:
jdbc:snowflake://myorganization-myaccount.snowflakecomputing.com/?user=peter&warehouse=mywh&db=mydb&schema=publicjdbc:snowflake://xy12345.snowflakecomputing.com/?user=peter&warehouse=mywh&db=mydb&schema=public
You can get your account id for the second syntax by logging in to Snowflake and navigating to Admin -> Accounts.
You can find more info on Snowflake's JDBC Connection docs here.
Once you add the Snowflake service, you will find it listed as an available database on the sidebar.
It's generally accepted that setting the connection string as an environment variable is a better practice as it's more secure and prevents any secrets from being exposed in your instance's metadata.
An example would be to create a new
environment variable called
SNOWFLAKE_JDBC_URL and set it equal to your JDBC connection string.
Then, export the metadata - in JSON form - using the Console's Settings page or by making a call using the
metadata API and add the following key-value
pair to the metadata.json's configuration object:
"template": "{\"fully_qualify_all_names\": false, \"jdbc_url\": \"{{getEnvironmentVariable(\"SNOWFLAKE_JDBC_URL\")}}\"}"
You can then apply the metadata to your instance by either using the Console's Settings page or by making a call using
the metadata API.
Due to the potential variations in drivers, it's crucial to escape special characters used in the password of the
connection string. These include { } % & #. To escape a character, use the appropriate escape sequence based on your
database's driver's documentation.
Encrypted Keys are supported only with Hasura Enterprise Edition.
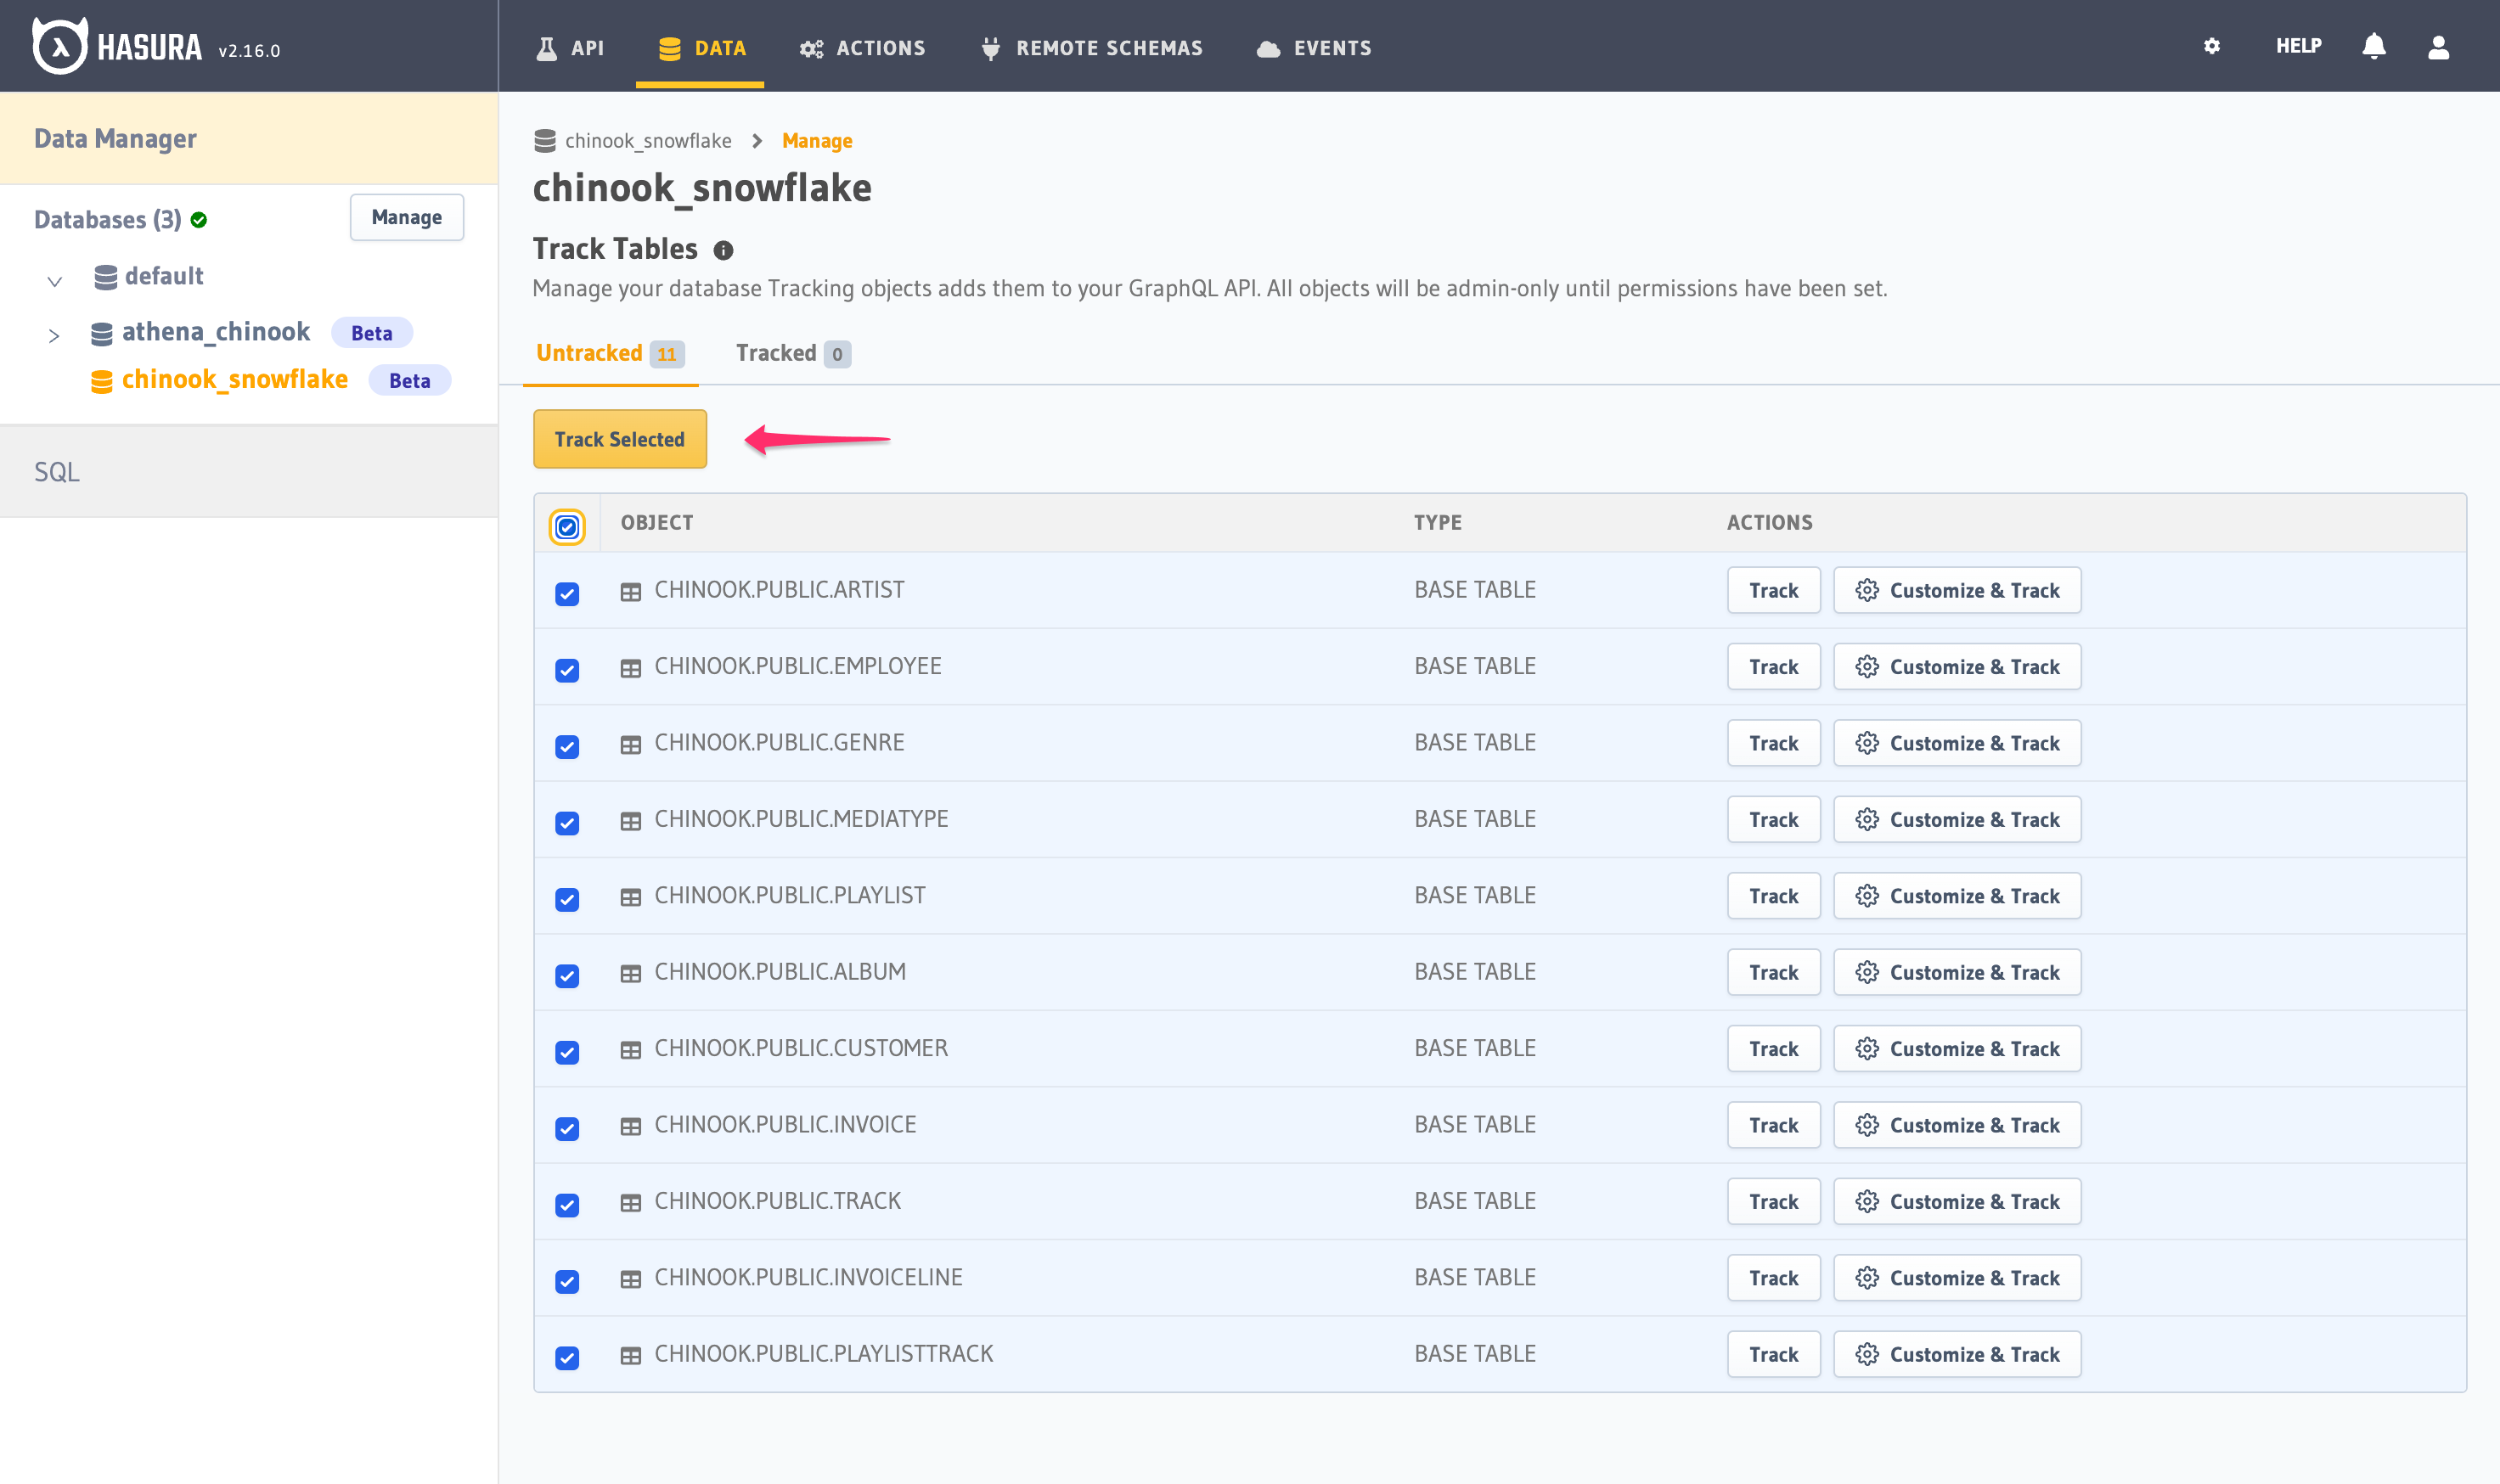
Step 3: Track existing tables
To query your Snowflake service using Hasura, you'll need to have existing tables to select. Those tables will appear under the database as shown.
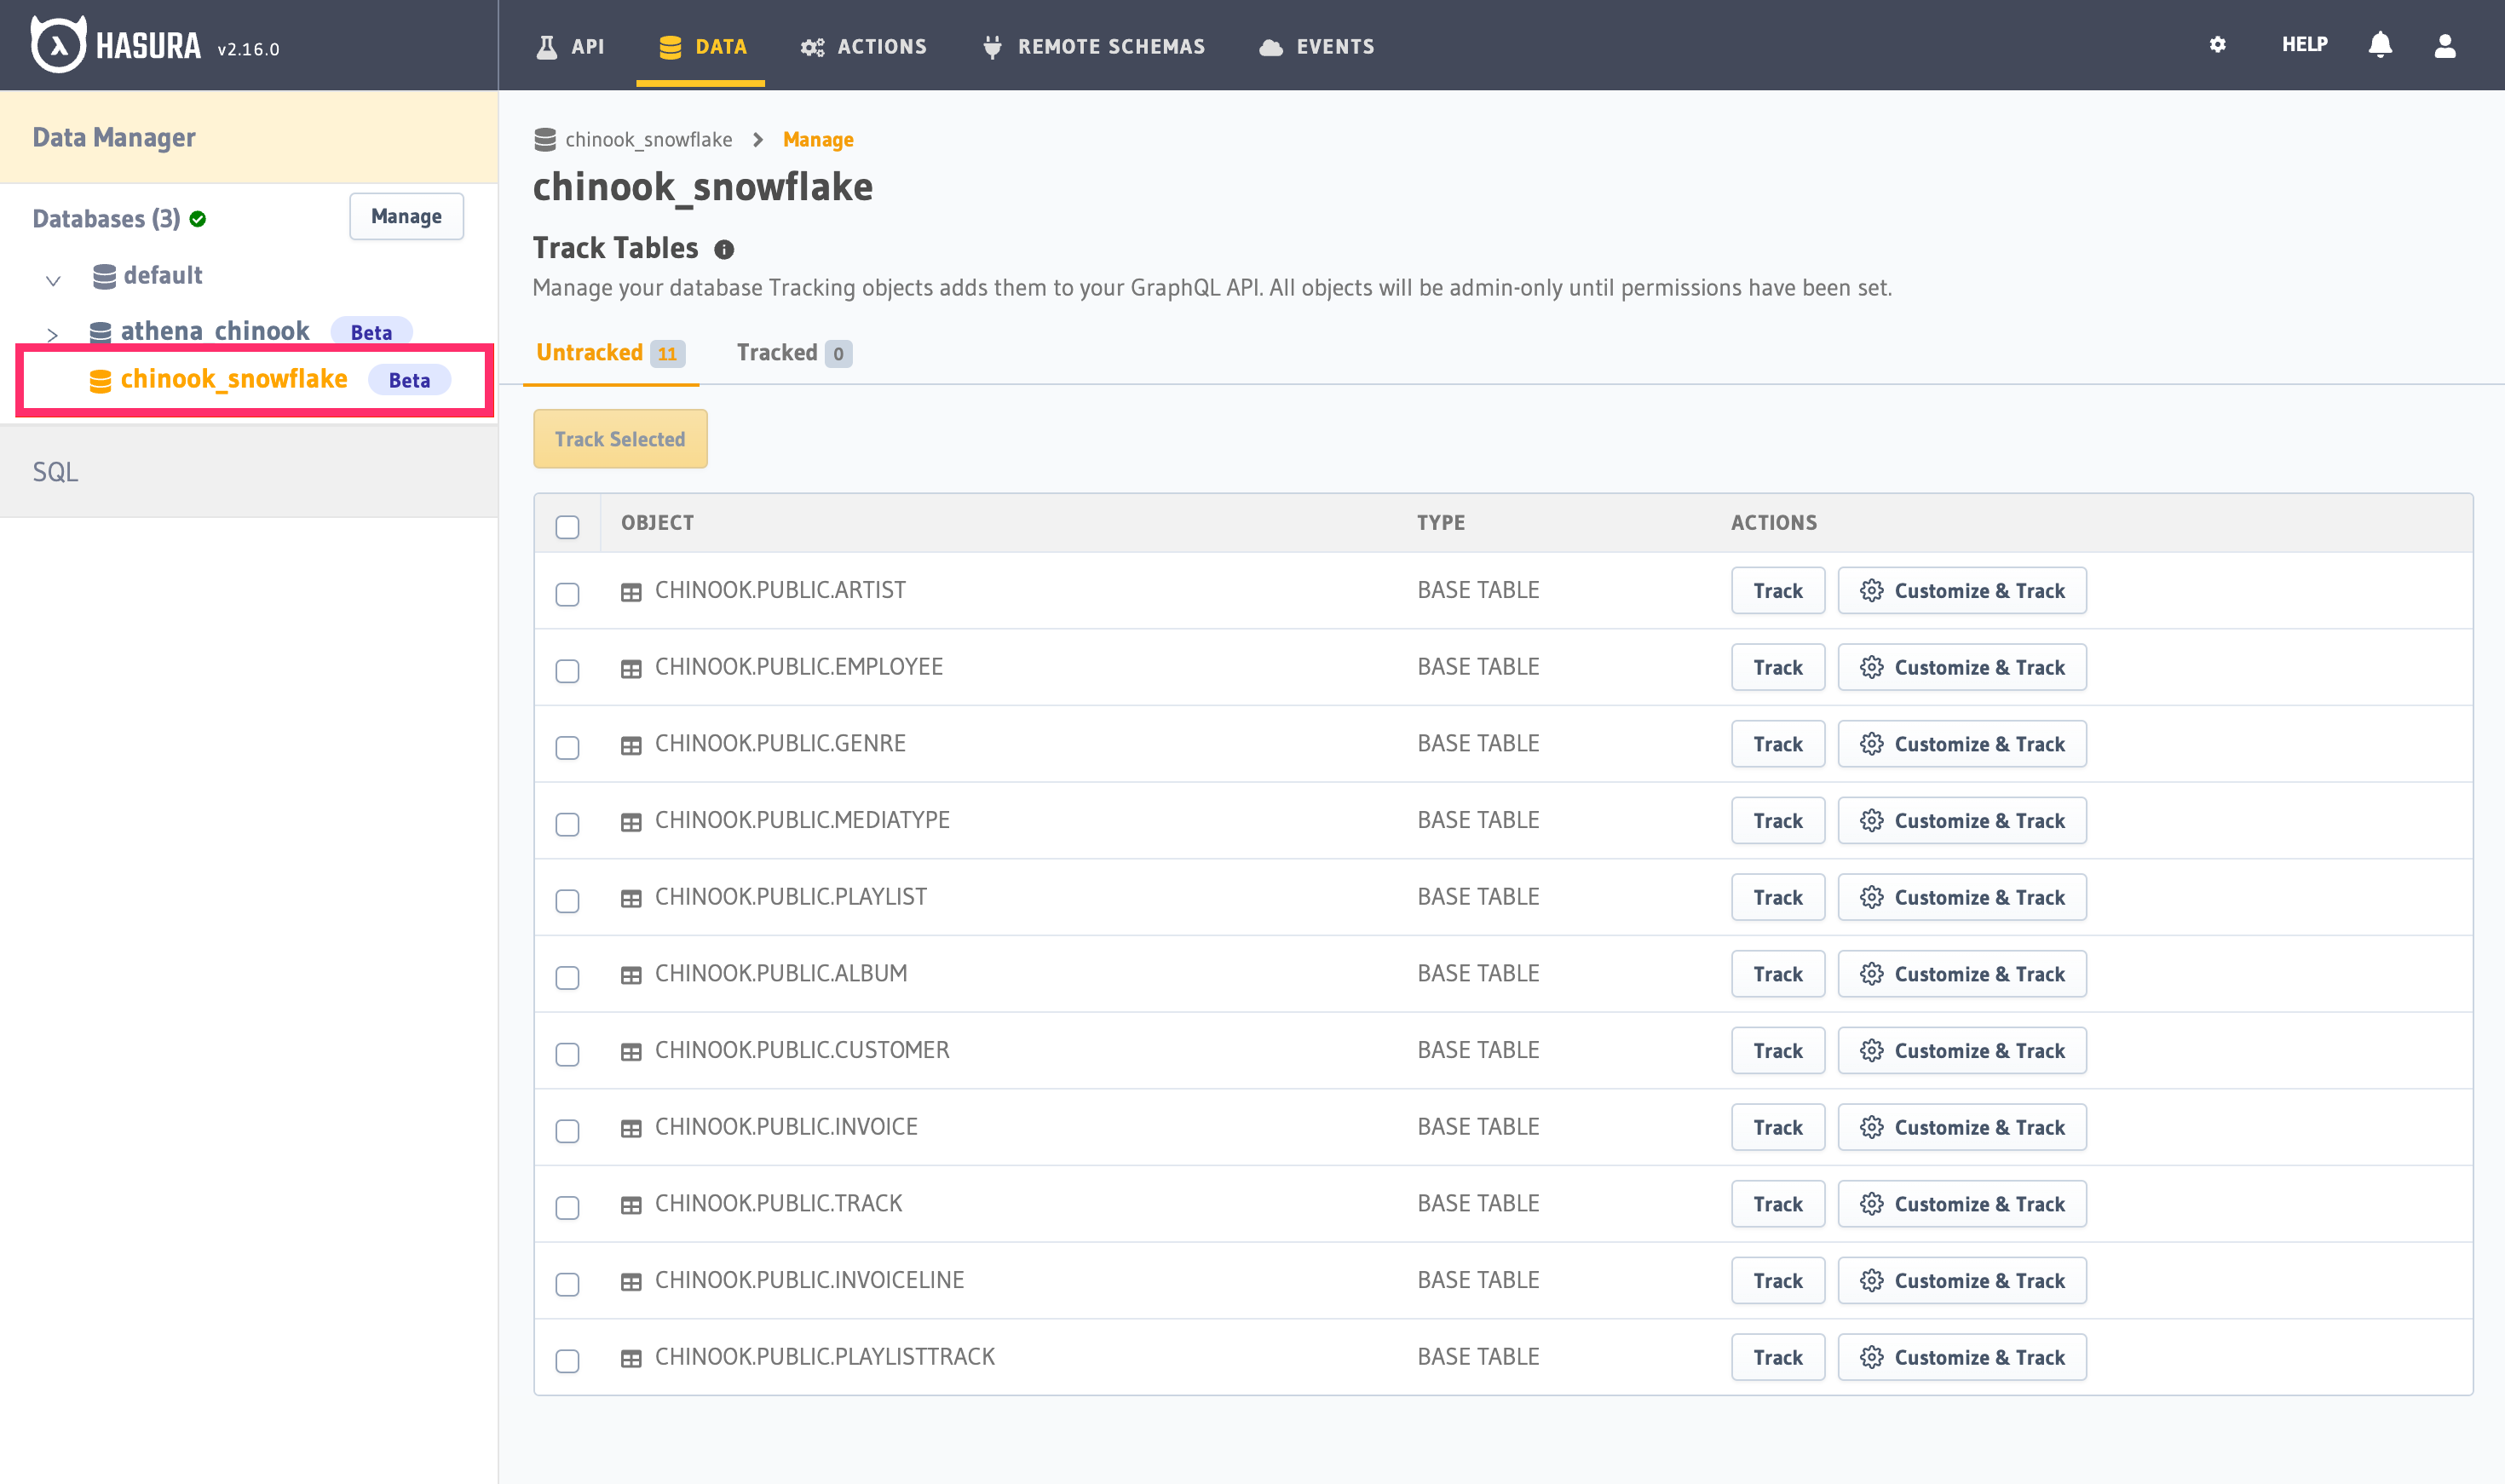
You can select all or select individual tables to track. Click "Track Selected" for Hasura to introspect them and create the corresponding GraphQL schema.
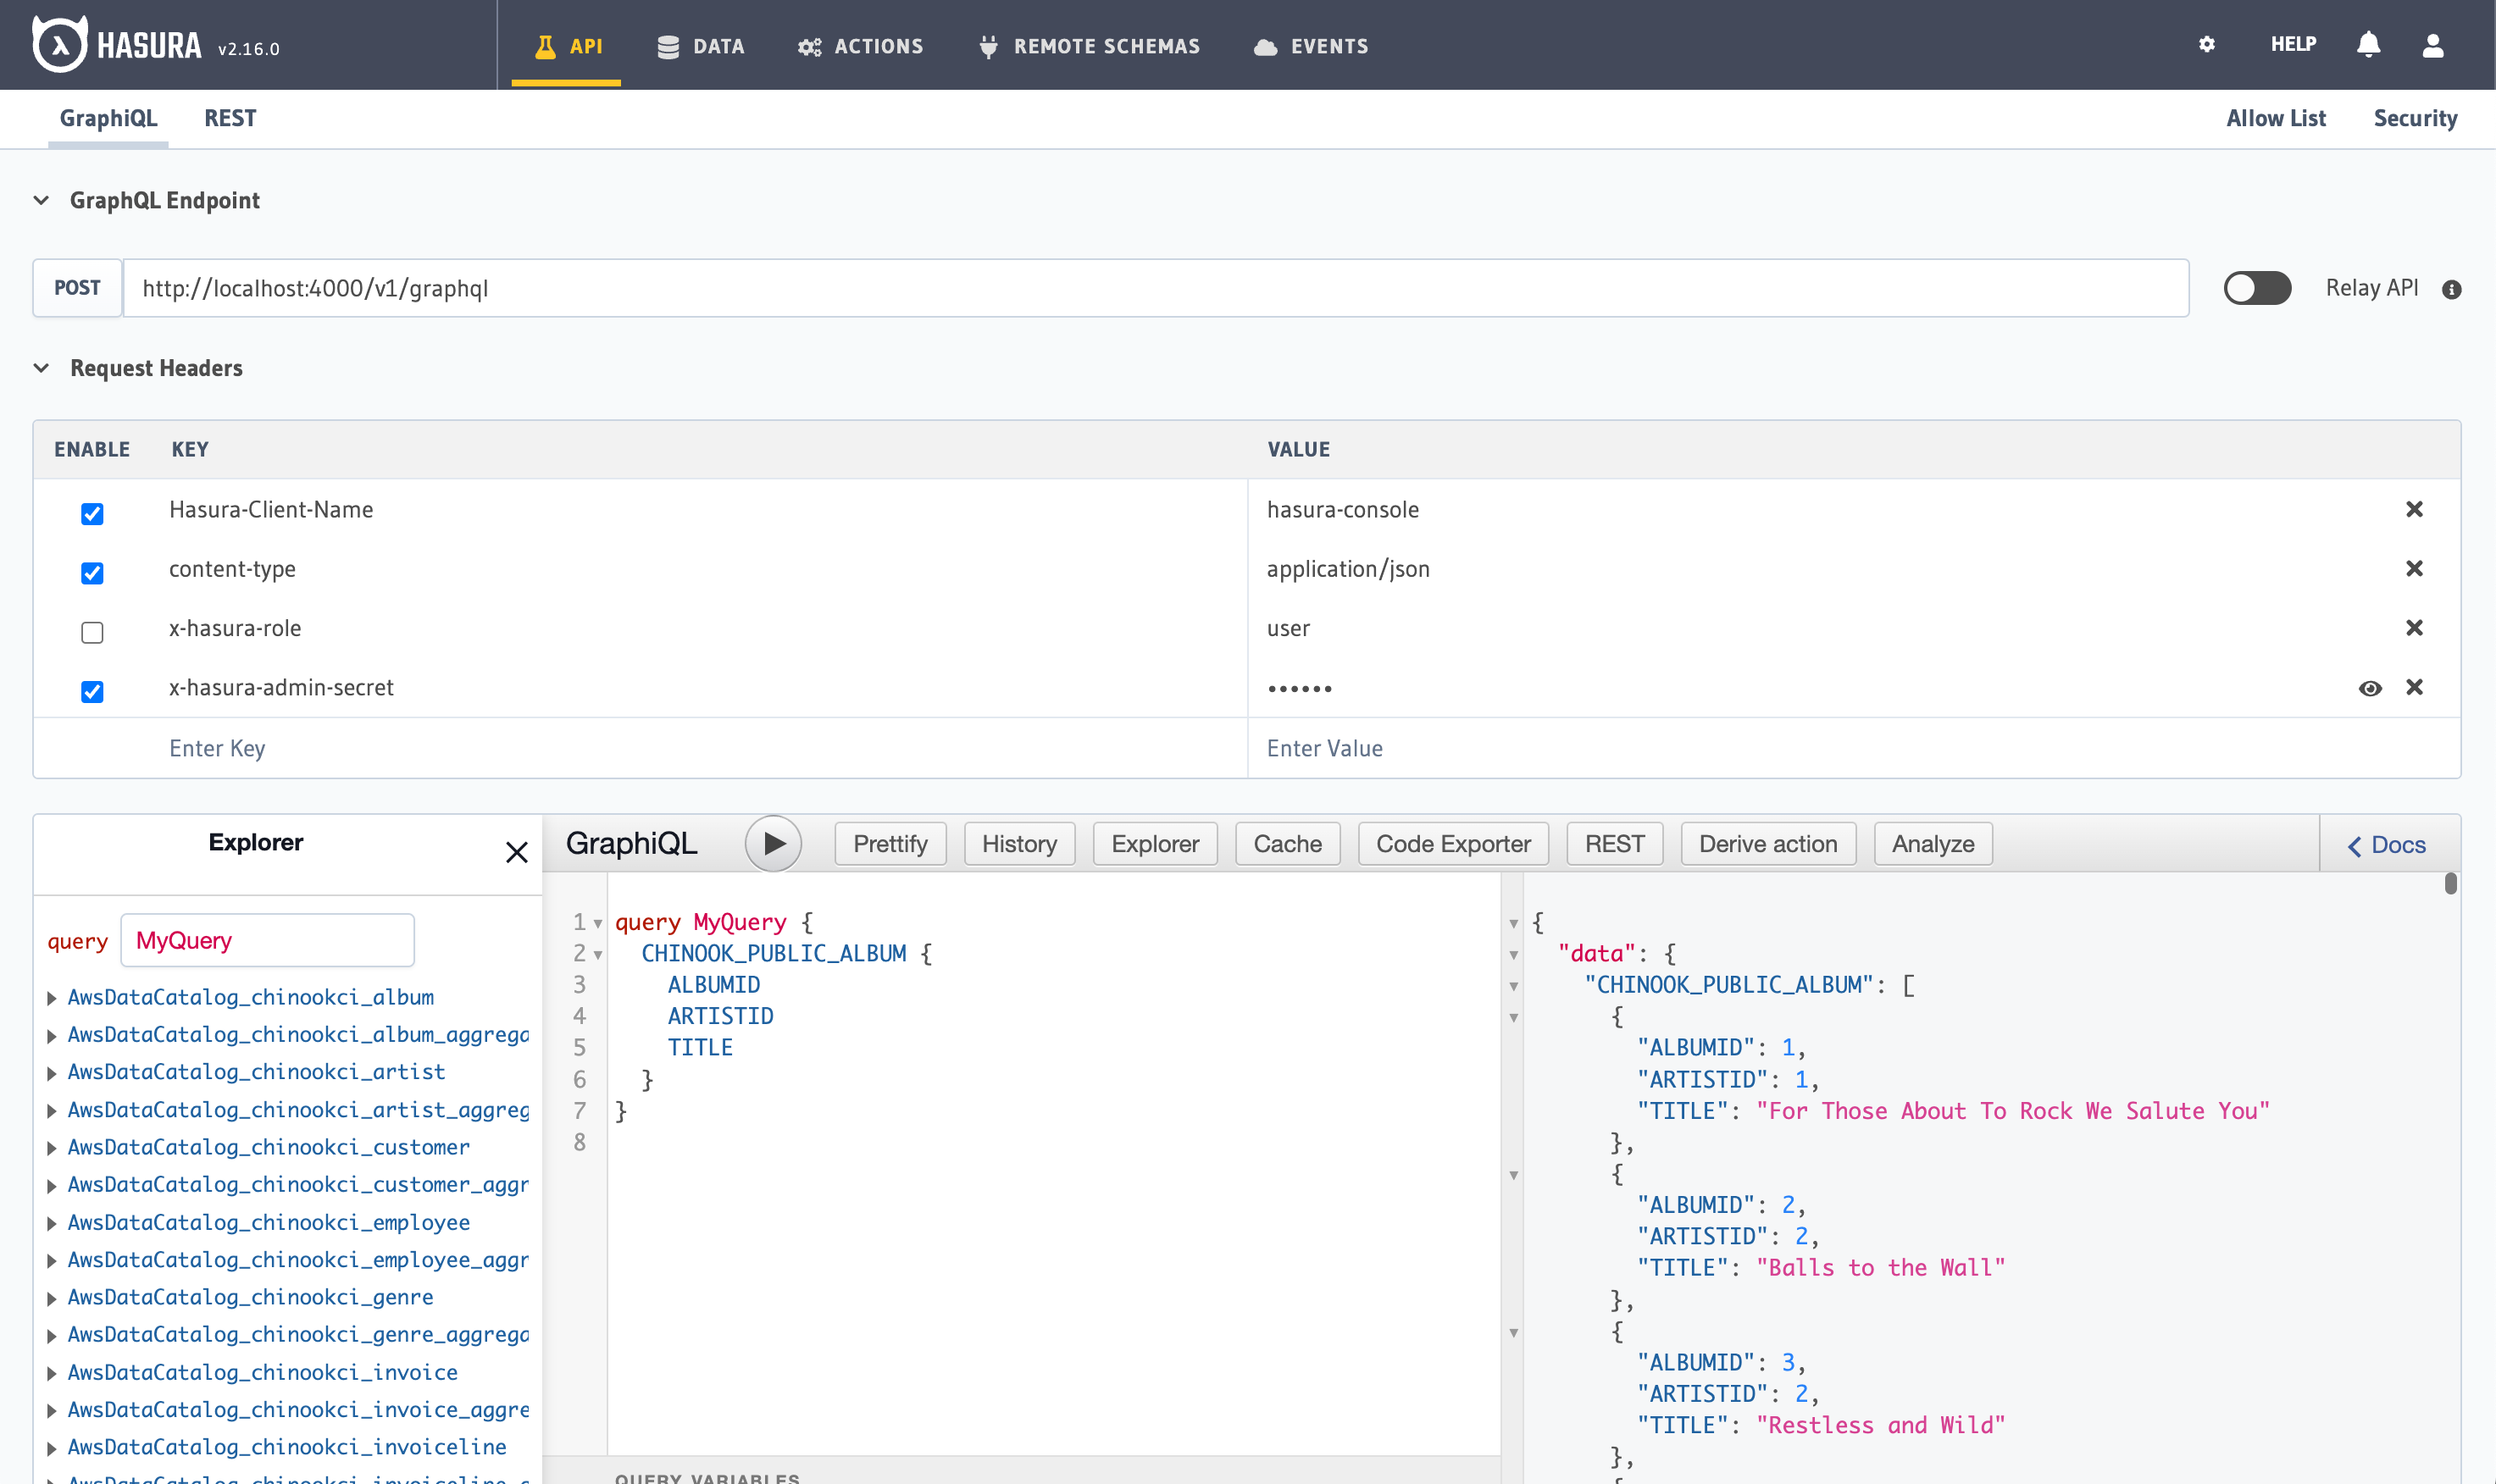
Step 4: Try out a GraphQL query
Head to the API tab in the Console and try running a GraphQL query! Use the explorer sidebar on GraphQL to get help in
creating a GraphQL query.
Keep up to date
Currently, Hasura supports read-only queries, relationships, and permissions on Snowflake.
If you'd like to stay informed about the status of Snowflake support, subscribe to our newsletter and join our discord!