Connect Hasura to Weaviate
Introduction
Weaviate is a cloud-native, modular, real-time vector search engine that allows you to build intelligent applications by using machine learning models as the data layer. It is open-source and can be deployed on-premise or in the cloud.
To connect a vector database to Hasura, you'll need to take advantage of Hasura Data Connectors.
If you're curious what other connectors are available, check out our NDC Hub.
Step 1: Deploy a data connector agent
As these connectors are HTTP services built with Docker, you can deploy your data connector to your service of choice. Once you've deployed it, use the URL to access it in the next step.
Step 2: Add the data connector agent to your Hasura Cloud project
In your Cloud project, navigate to the Data tab and click Manage in the left-hand sidebar.
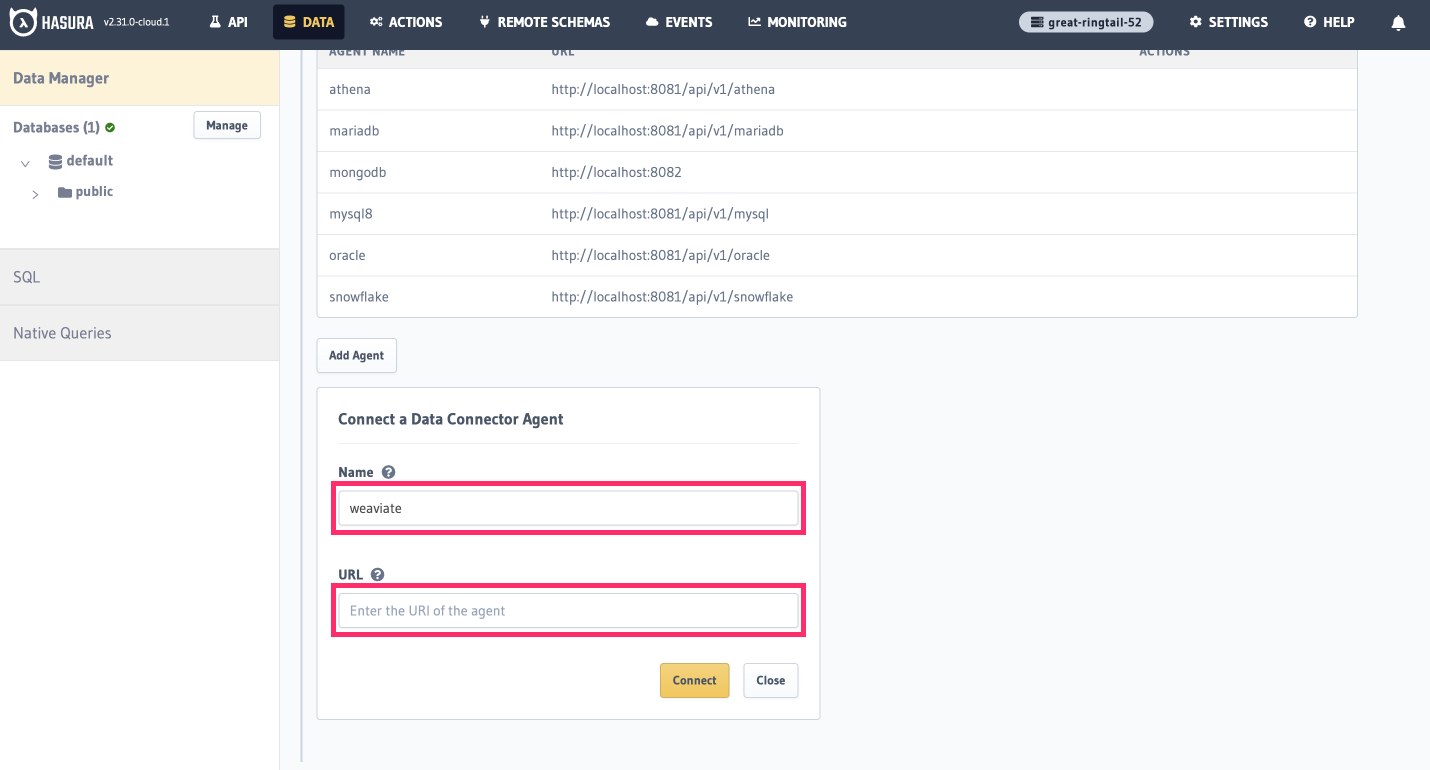
At the bottom of the screen, you'll see an expandable section titled Data Connector Agents.
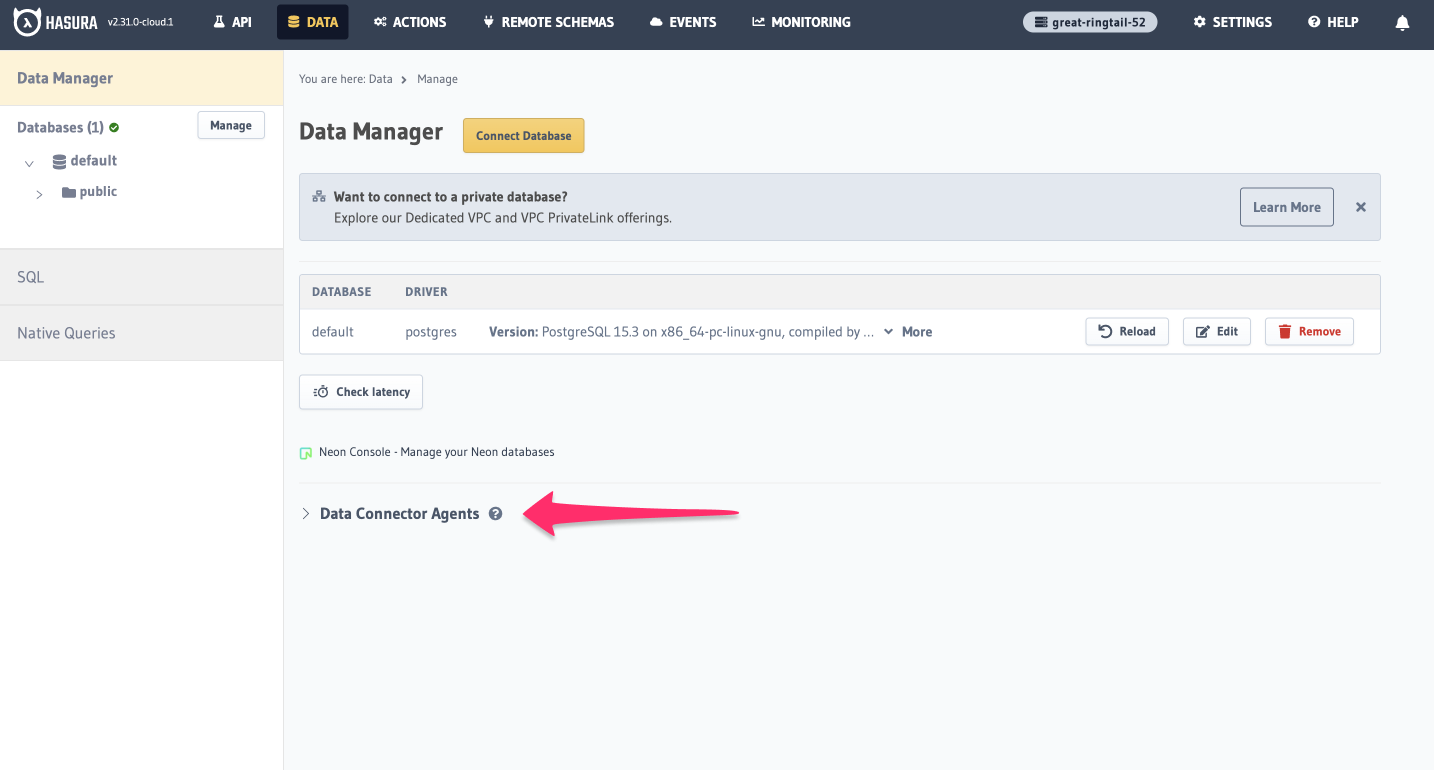
Click this and scroll down to Add Agent.
Name this agent weaviate and paste the URL you copied from the CLI into the URL field and click Connect.
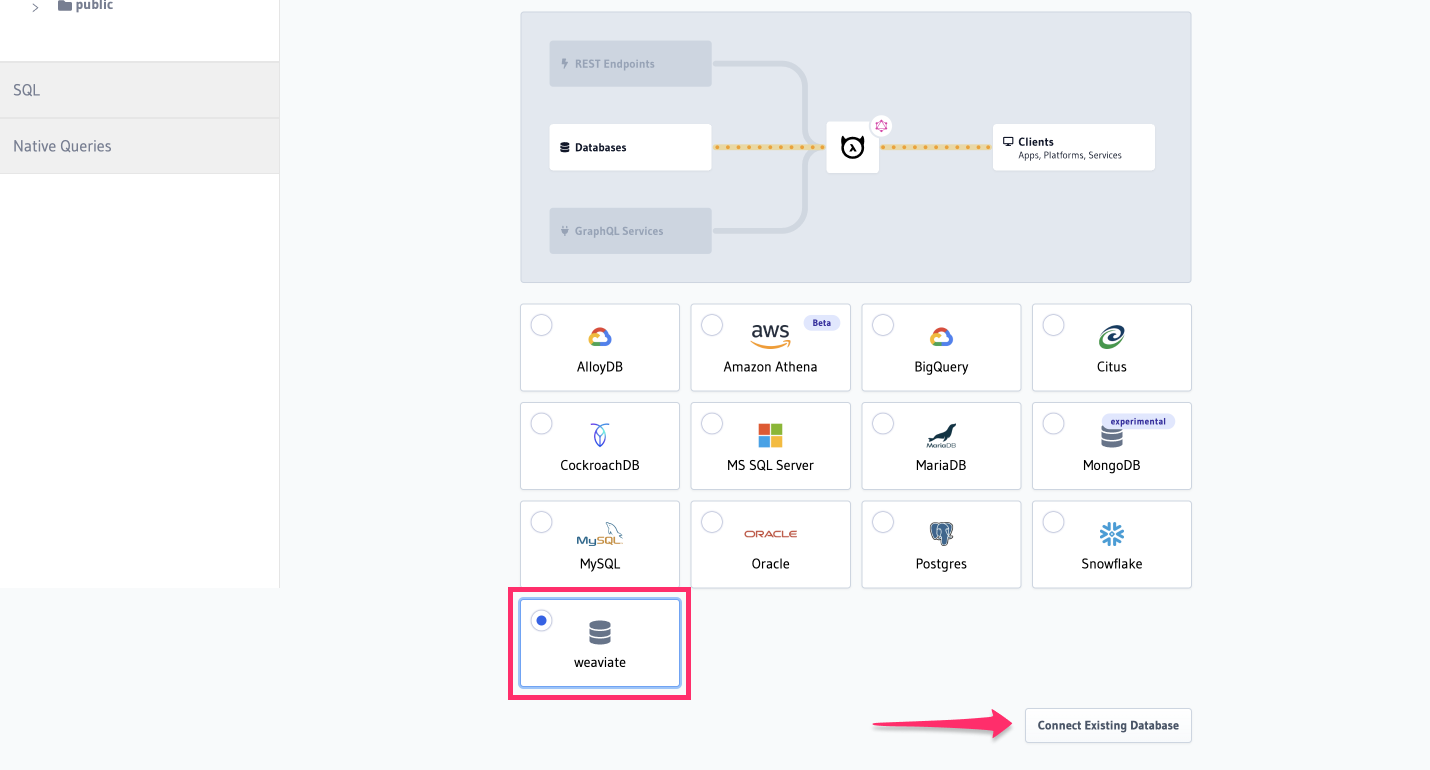
Step 3: Select the driver
Navigate to the Data tab and select Connect Database, then select Weaviate from the list of drivers:
Step 4: Connect your database
At this point, we'll need to configure a few parameters:
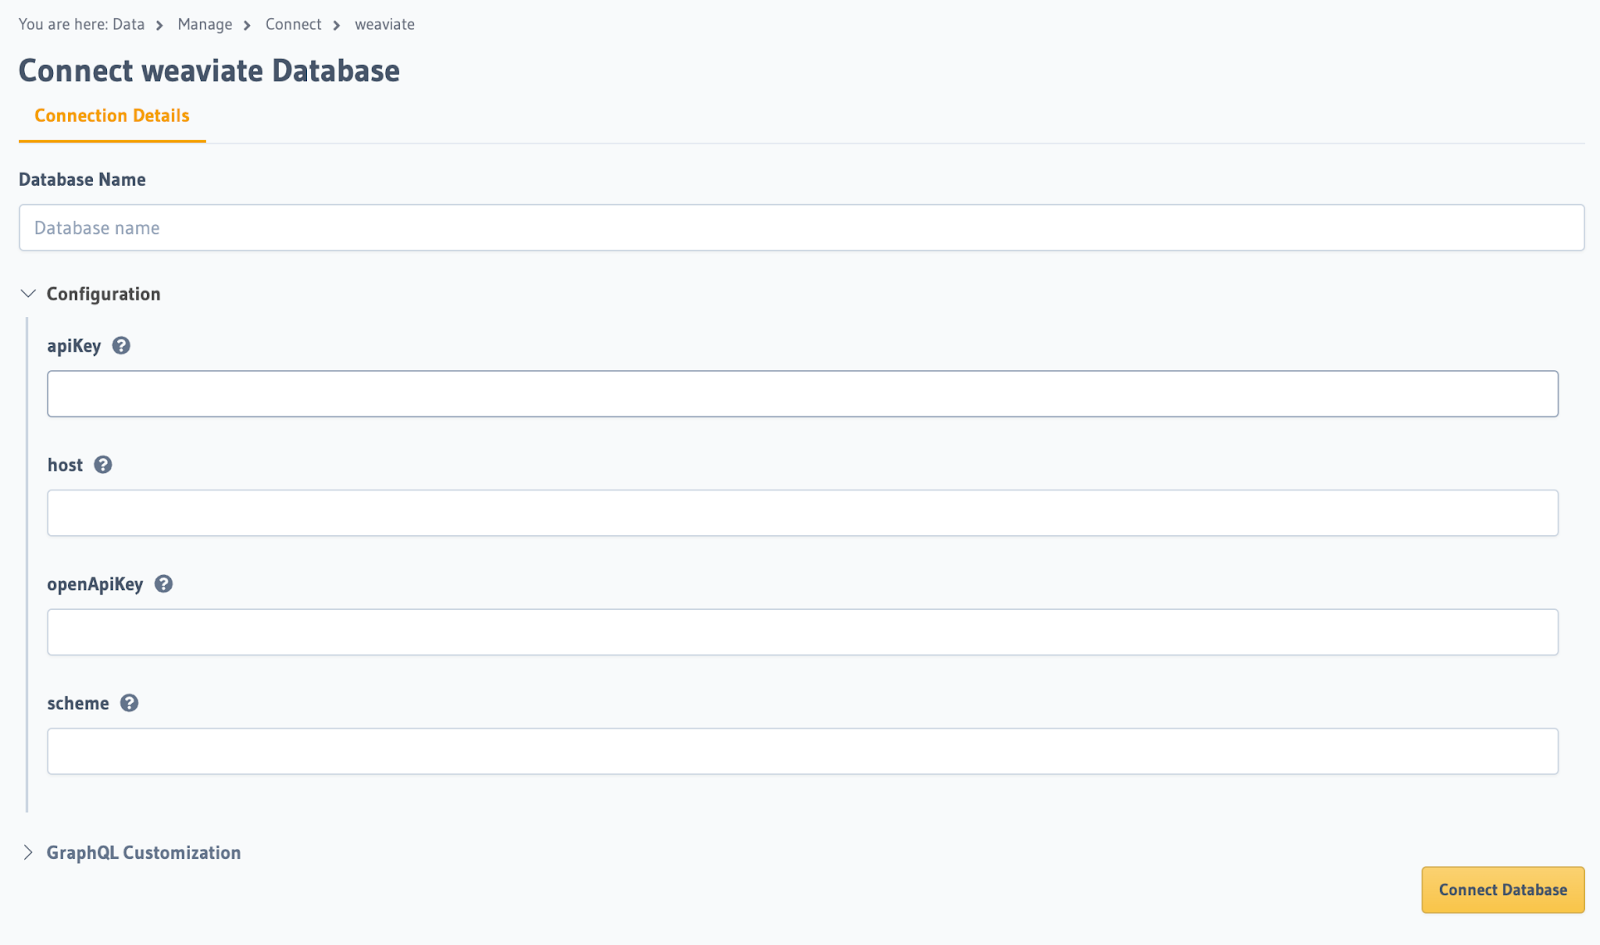
| Parameter | Description |
|---|---|
| Database Name | The name of your Weaviate database. |
apiKey | The API key for your Weaviate database. |
host | The URL of your Weaviate database. |
openAIKey | The OpenAI key for use with your Weaviate database. |
scheme | The URL scheme for your Weaviate database (http/https). |
For the Weaviate-specific parameters, on the Weaviate Cloud Services' Console, you can see your cluster's connection information on the cluster's card.
You can register for an OpenAI key here.
Step 5: Track your tables
To make schemas accessible for querying using GraphQL, we'll need to track them. In the example below, we're tracking a
schema called Resume by checking the box next to it and clicking Track Selected:
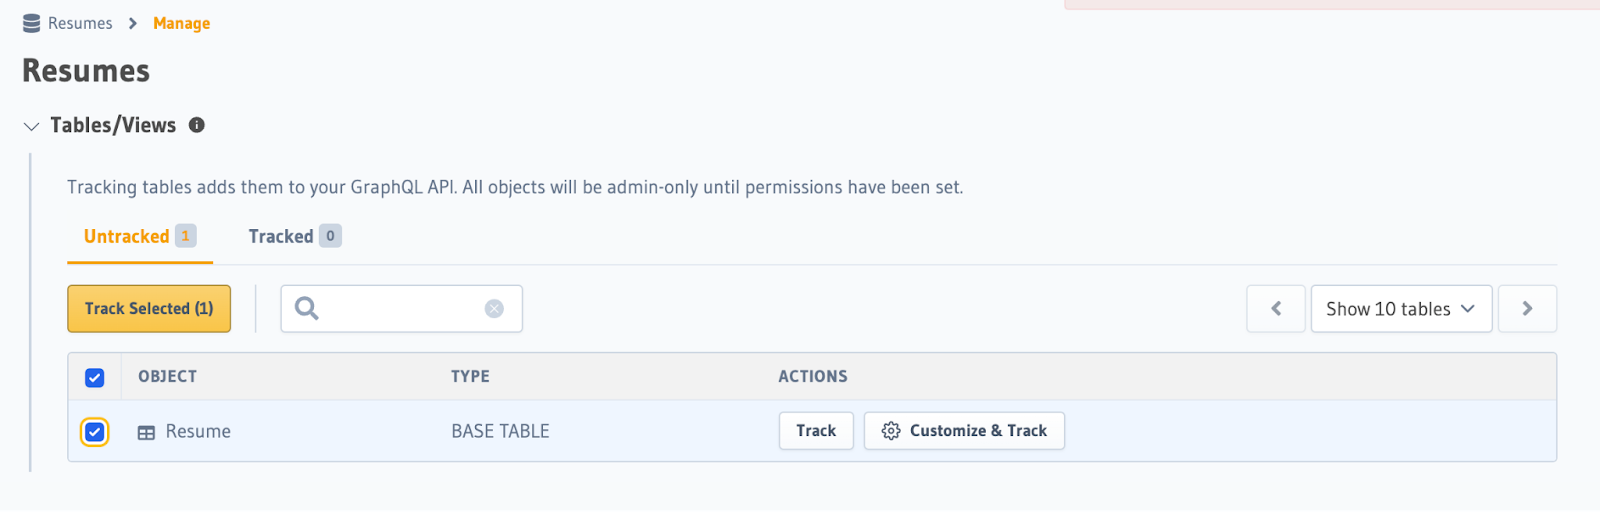
Tracking this schema will generate a type available in your GraphQL API that you can query against 🎉
You will need to define the schema in your vector database. For a walkthrough of setting up a Weaviate schema, refer to this tutorial.
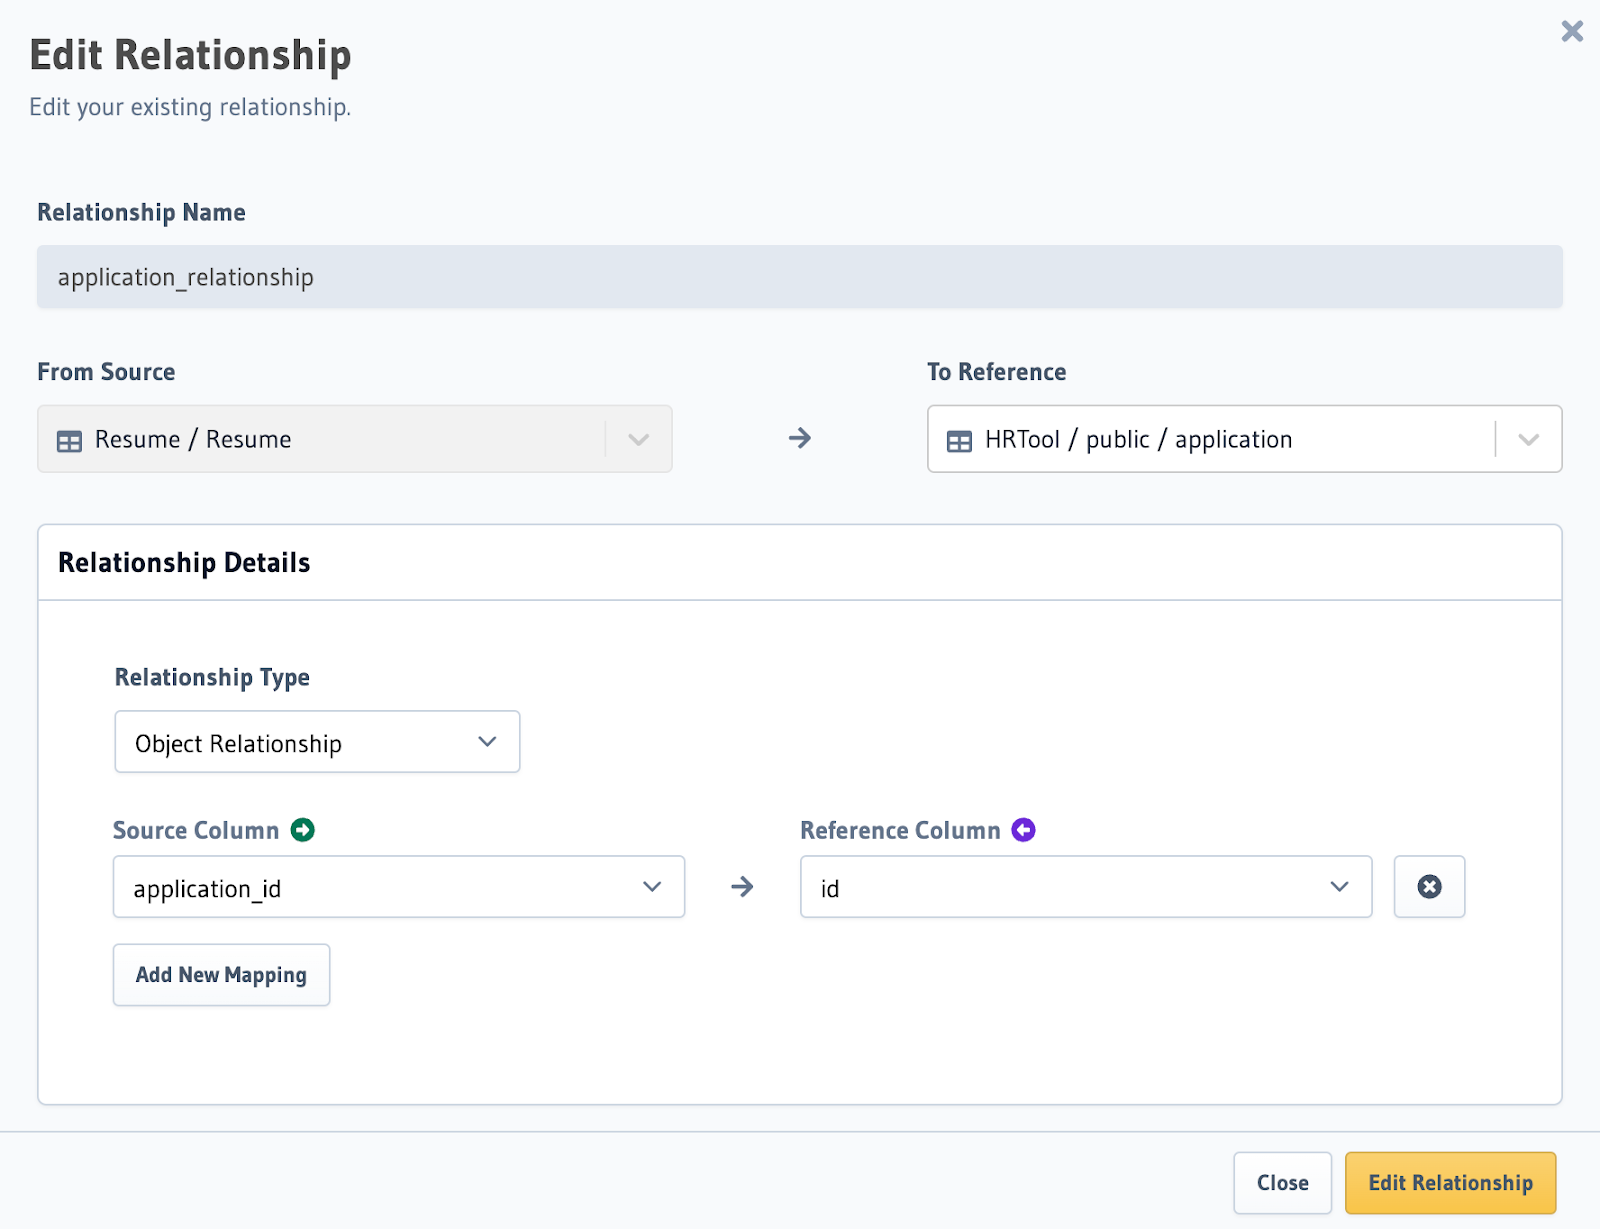
Step 6: Define a remote relationship
The information stored in Weaviate is vectorized and not in a human-readable format. We want to be able to return the information from our relational database using the vectorized data from Weaviate. To do this, we need to define a remote relationship.
In the example below, we're defining a remote relationship between the Resume schema in our vector database and the
application table in our relational database. This way, whenever we query the vectorized information in our Resume
table, we can return the information from our relational database.
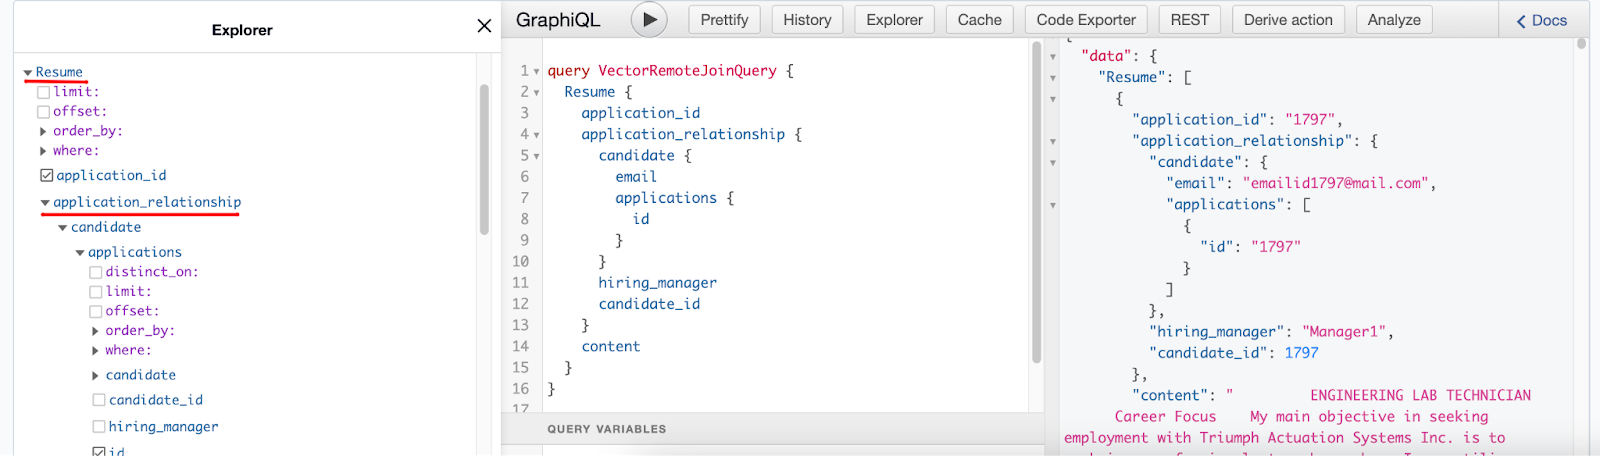
Step 7: Query your data
You can now query across both your vector database and your existing relational database tables as if they were in one location!
In our example, we have two tables in our relational database:
candidate
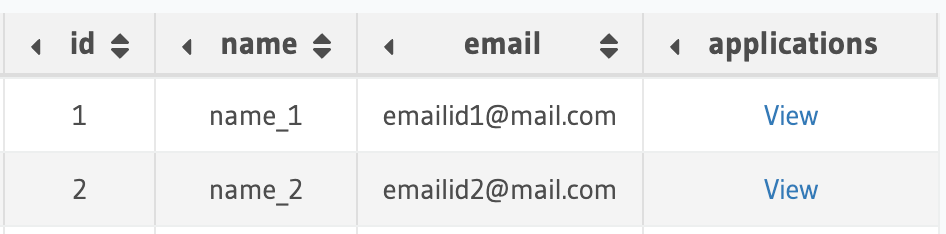
application

Our vector database stores the resumes as:

If we head to the API tab in the Hasura Console, in our GraphQL query, we are able to fetch all the candidate and
application information for a resume. Hasura brings this all together to provide this seamless querying experience.
Next Steps
- Check out our Learn tutorial on Generative AI using Hasura, Weaviate, Next.js and Tailwind CSS 🎉
- Learn more about Hasura Data Connectors.
- Check out the available connectors on the NDC Hub... or build your own!