Database Observability
Introduction
The purpose of this document is to provide an overview of how to configure database observability. The scope covers configuring the observability tools for the database host and database. While the specifics of this guide may vary depending on the host, database, and other aspects of your deployment, we have used Hasura Cloud and a self-hosted (Ubuntu) Postgres database.
The basics
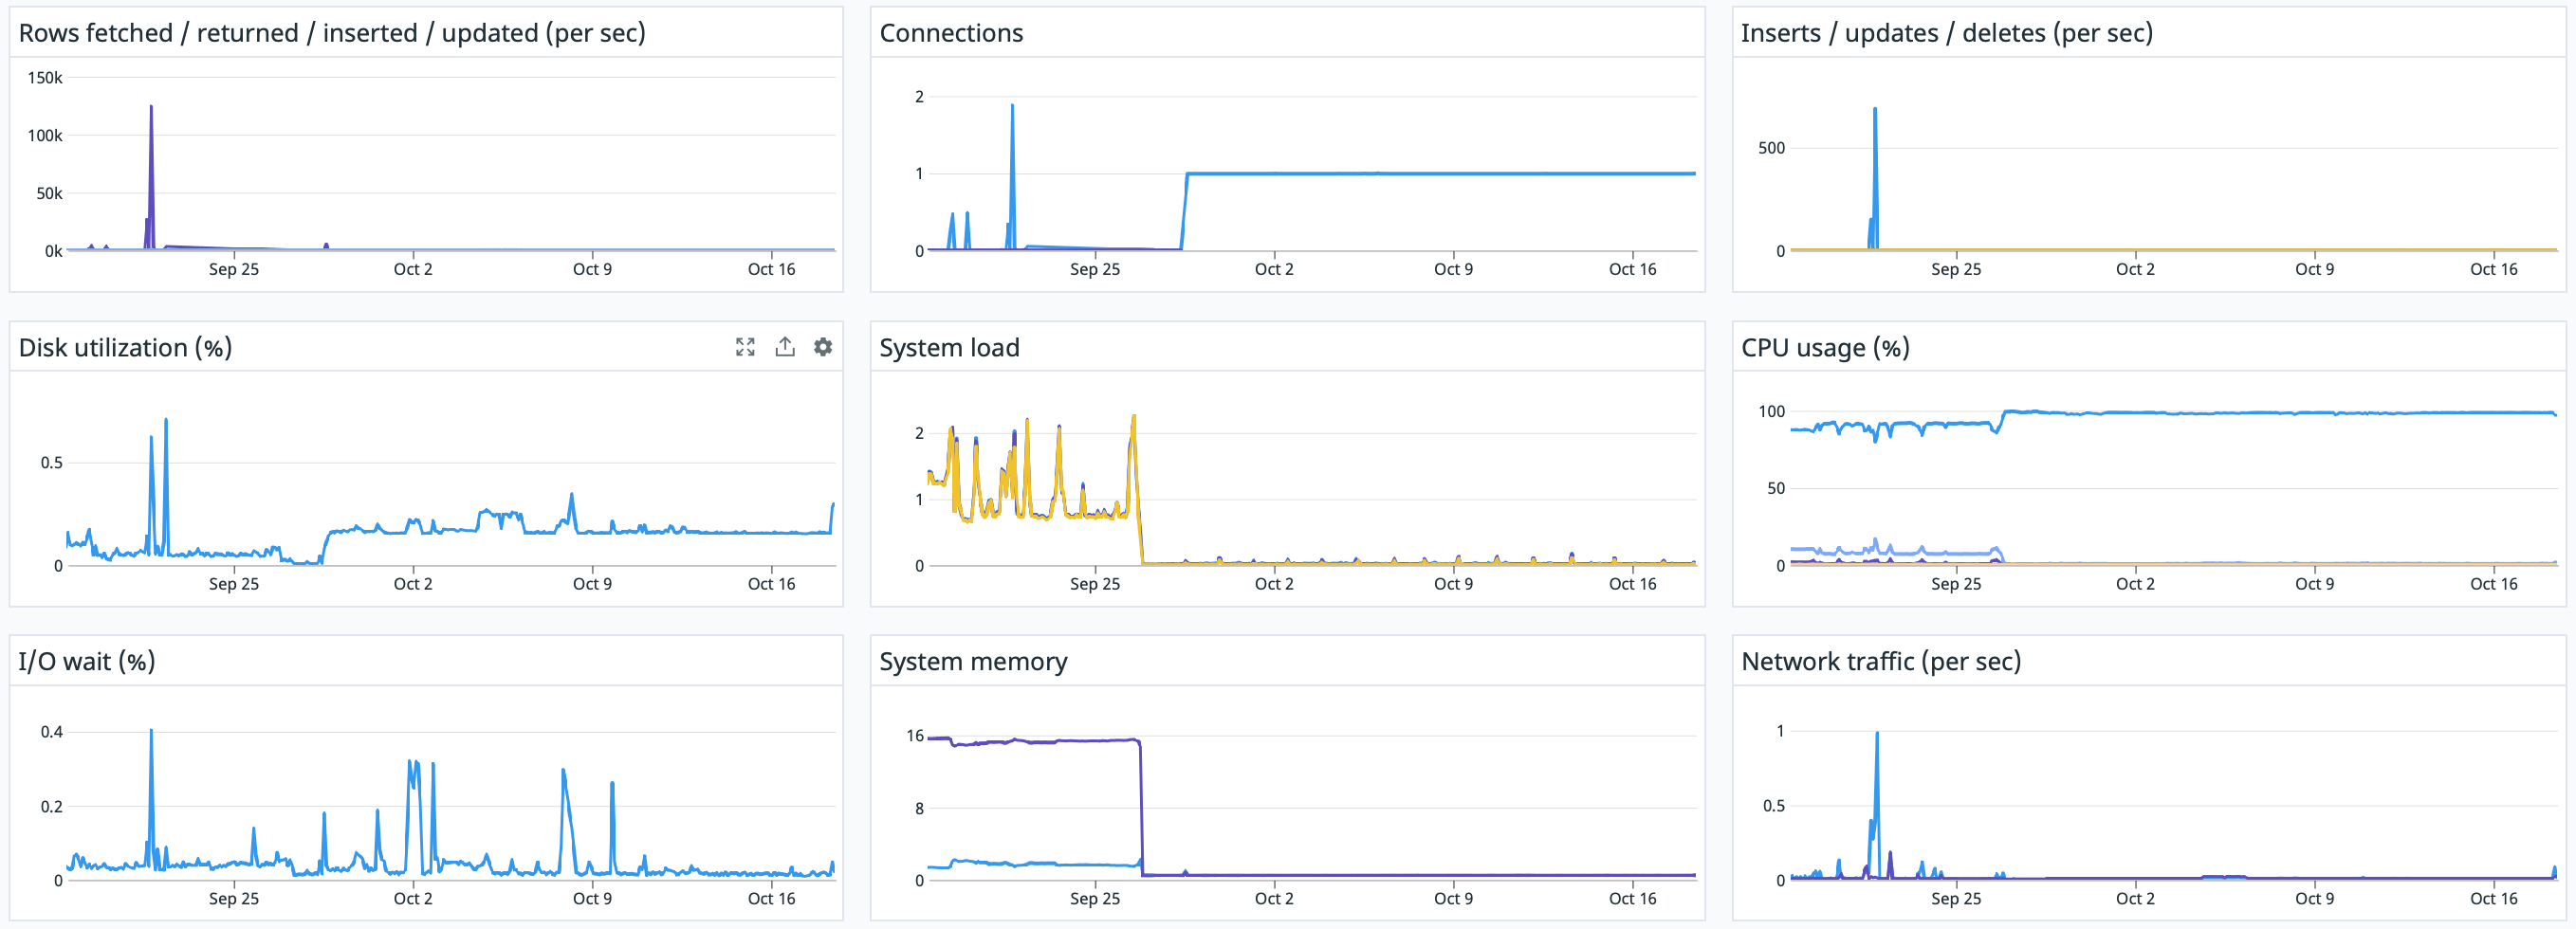
Diagnosing and troubleshooting issues in an application can be challenging when a database is involved, thereby making database observability and telemetry critical. When you combine telemetry with application context, database instances become more observable and manageable. You can quickly spot problems and troubling trends and address them without costly downtime. Additionally, by using such information, you can set up newer database instances to start collecting the appropriate data immediately. Database observability allows you to:
- View query metrics and explain plans in a single location.
- Quickly locate slow-performing or costly queries.
- Drill down into execution details of costly queries.
- Correlate query and host metrics to understand whether you are constrained by resources.
Agent installation
Installing an agent applies to the host where you have your database running. This step is irrelevant if you are not using your own hosted (on-premises or cloud) database. For this guide, we use Datadog and a self-hosted Postgres database. Refer to this link to install the Datadog agent for your DB and DB host.
Making sure your agent has the correct permissions for your database metrics is vital. You should refer to the observability platform’s integration documents to enable the proper permissions. Different databases store metrics and data in their custom tables, but you generally provide the observability agent with the necessary access to the correct tables.
In this example, we will use Postgres and Datadog:
Log into a psql session as a user who has
CREATEROLE privileges, create a datadoguser and
password, and grant it read access to pg_stat_database.
create user datadog with password '<PASSWORD>';
grant SELECT ON pg_stat_database to datadog;
If you use PostgreSQL version 10.x or later, you can provide the Datadog user access to monitoring-related statistics
and configuration options typically only available to superusers. grant pg_monitor to datadog;
Verify that the agent installation is successful and the Datadog user can access your metrics by running:
psql -h <server> -U datadog postgres -c \ "select * from pg_stat_database LIMIT(1);" && echo -e "\e[0;32mPostgres connection - OK\e[0m" || \ || echo -e "\e[0;31mCannot connect to Postgres\e[0m"
Configure the agent to collect PostgreSQL metrics
You should create a configuration file that gives the agent the details it requires to start gathering data. The platform that hosts your database determines the location of these files. For further information, please see your observability agent's documentation.
In the following example, we tell the agent to utilize the newly generated Datadog user and password to view metrics
locally over port 5432. Additionally, you have the choice to limit metric collection to particular schemas and to add
custom tags to your PostgreSQL metrics.
init_config:

instances:
  - host: localhost
    port: 5432
    username: datadog
    password: <PASSWORD>
    tags:
      - optional_tag
Detect and optimize slow queries
You'll need to add a few settings to your setup and give your observability agent a few extra permissions if you want to go even further and gain query-level performance insights with your observability platform. Please refer to your platform and agent documentation for the exact configurations. In the following example, we will enable advanced permissions for Datadog on Postgres:
init_config:
instances:
  - dbm: true
    host: localhost
    port: 5432
    username: datadog
    password: <PASSWORD>
    tags:
      - optional_tag
With this configuration change, you have now enabled the option to track all normalized queries on your Datadog console. You can now see comprehensive explanation plans for each normalized query that reveal the precise Actions the query planner used to carry out the query, along with their anticipated costs. You can also create time-series graphs of normalized query performance indicators, allowing you to track long-term trends.
Building an observability dashboard with Datadog
The most effective dashboards you create are with your audience in mind. When you organize information in a way where the most critical elements occupy the prime space and most components are interactive enough to allow drill-downs, you deliver the most value and insight into your platform and its performance.
An ideal observability dashboard should contain the following:
- Structured raw events.
- Persistent context through the event path.
- Ordered dimensions for traceability.
- Dynamic sampling.
- Visual elements arranged in a logical manner.
- Data refreshed as close to real-time as possible.
- Indexes or schemas avoided when possible.
- Plan for fast load times, use live connection for streaming data.
Sample dashboard demonstration and code
- Sign up for Datadog.
- Enable Datadog integration for your Hasura Project.
- Set up Tags.
- Enable Hasura Integration for Datadog.
- Create a New Dashboard and import the JSON file by following the instructions here.