Quickstart Hasura CLI
The Hasura CLI is a command line tool that helps you create a new project, manage Metadata, apply Migrations, and more. In this guide, we will create a new project using the Hasura CLI. We will also see how to add a data source, track tables, and deploy the project to another environment.
Prerequisites
Before continuing, please make sure you have the following:
- The Hasura CLI installed
- Docker installed and running
Step 1: Init the local project
Let's create a new project locally called cli-demo:
hasura init cli-demo
This will create a new directory called cli-demo with the following structure:
cli-demo
├── config.yaml
├── migrations
├── metadata
├── seeds
If you followed our Quickstart with Docker, you'll already have a local project. In that case, in the project's directory, you can run the following command to initialize the current directory as a Hasura project:
hasura init .
Then, skip to step 3.
Step 2: Get the docker compose file and start the containers
The docker-compose.yaml file contains the configuration for the Hasura GraphQL Engine and a Postgres database. If you
haven't yet followed our getting started guide for Docker, inside the cli-demo
directory, run:
curl https://raw.githubusercontent.com/hasura/graphql-engine/master/install-manifests/docker-compose/docker-compose.yaml > docker-compose.yaml
Curious? Read this in the recap to find out why.
Now, start the containers:
docker compose up -d
Update your docker-compose.yml file to specify platform.
graphql-engine:
    image: hasura/graphql-engine:v2.36.0
    platform: linux/arm64
    ...
Step 3: Run the Hasura Console
If you've followed our simple getting started guide for Docker, you'll already be
familiar with the Hasura Console. However, the way we access the Console is slightly different when using the Hasura
CLI. Instead of opening your browser and navigating to http://localhost:8080/console, we'll use the Hasura CLI to open
the Console in our browser. In the directory containing your project, run:
hasura console
Curious? Read this in the recap to find out why.
Step 4: Add a data source
Now that we have the Hasura Console open, let's add a data source. Click on the Data tab in the top navigation bar.
Our docker-compose.yaml file already contains the PG_DATABASE_URL environment variable which is set equal to a
connection string for the local Postgres database running in a container:
PG_DATABASE_URL: postgres://postgres:postgres@postgres:5432/postgres
We'll enter the name default for the Database Display Name field. This name is used to identify the data source in
Hasura's Metadata and is not your database's name.
Next, we'll choose Environment Variable from the Connect Database Via options; enter PG_DATABASE_URL as the name:
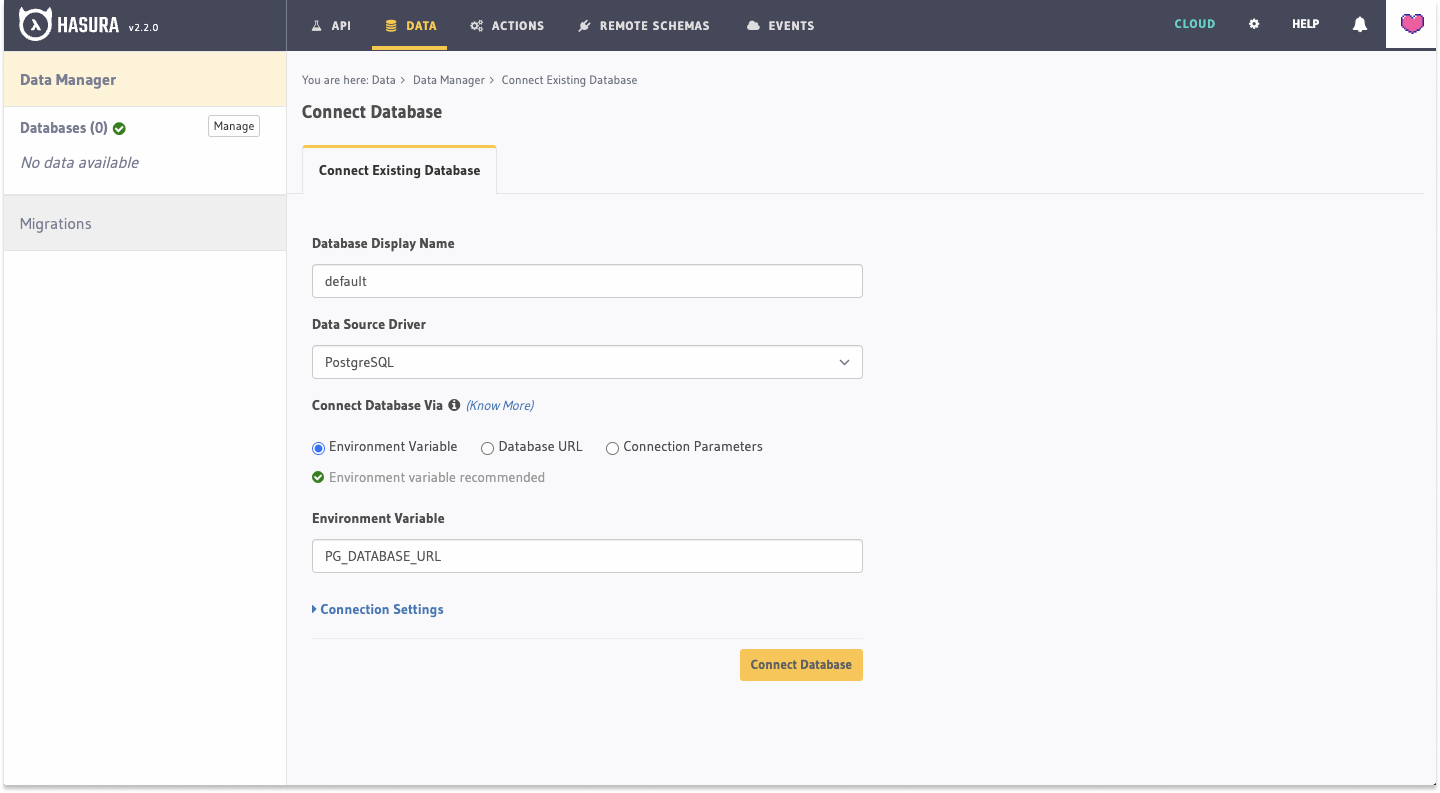
This will add the local Postgres database running in a container as a data source. Later, we'll see that we can use the same environment variable - with different values - to connect to a different database on either our staging or production environments.
Click Connect Database.
Curious? Read this in the recap to find out why.
Step 5: Add some data and track the tables
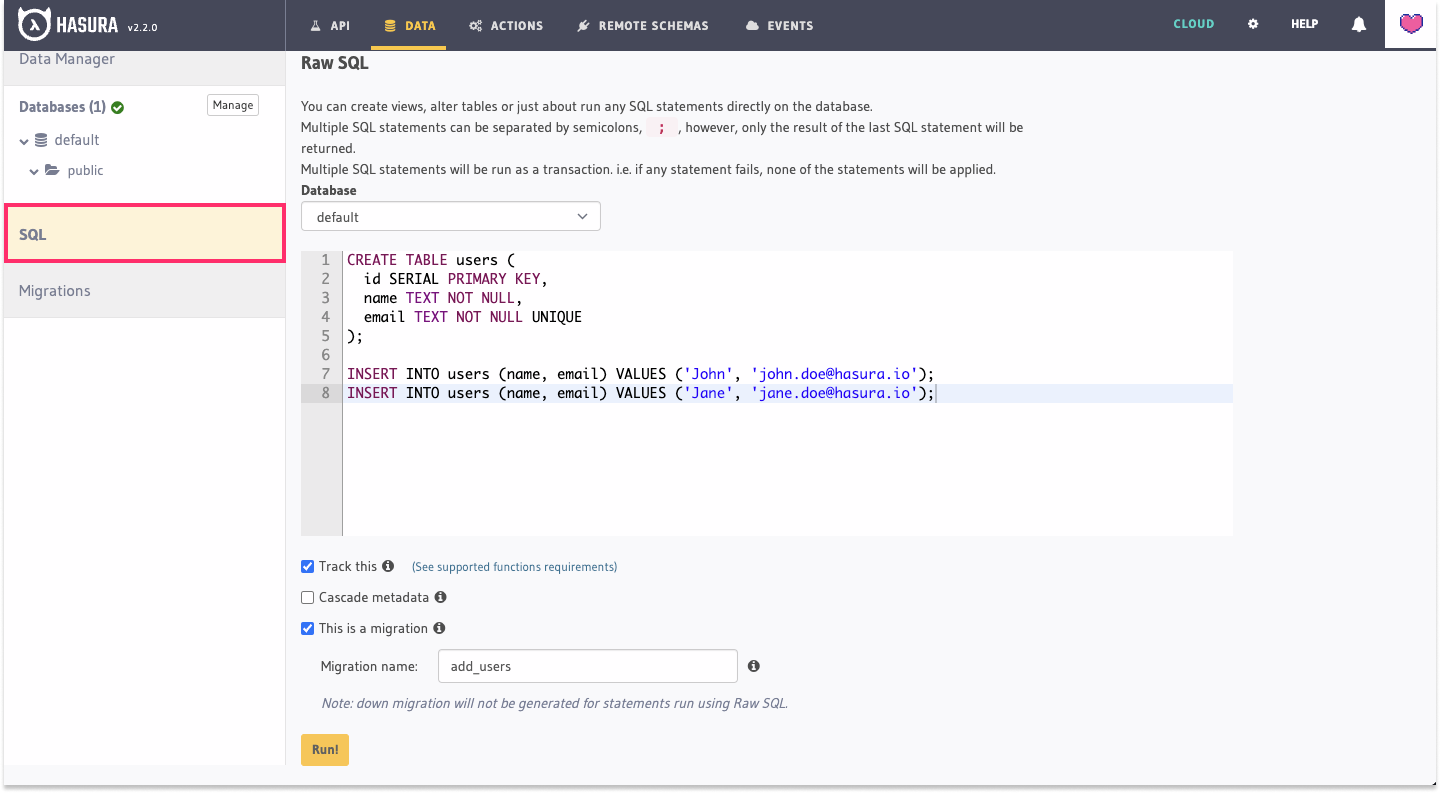
Now that we have a data source, let's add some data and track the tables. From the Data tab, click the SQL option on
the left-hand navigation. If you already have some seed data, you can paste it in the editor. Otherwise, you can use the
SQL below this image to create a table called users and insert some data:
CREATE TABLE users (
  id SERIAL PRIMARY KEY,
  name TEXT NOT NULL,
  email TEXT NOT NULL UNIQUE
);

INSERT INTO users (name, email) VALUES ('John', '[email protected]');
INSERT INTO users (name, email) VALUES ('Jane', '[email protected]');
After pasting the seed data, check the Track this and This is a migration boxes before clicking the Run button.
This will create the users table, insert the data, and track the table in the Metadata. Optionally, you can include a
name (in our example, add_users) for the Migration, which the GraphQL Engine appends to the end of the Migration's
version number. This is useful if you're working on a team and want to keep track of the changes you're making.
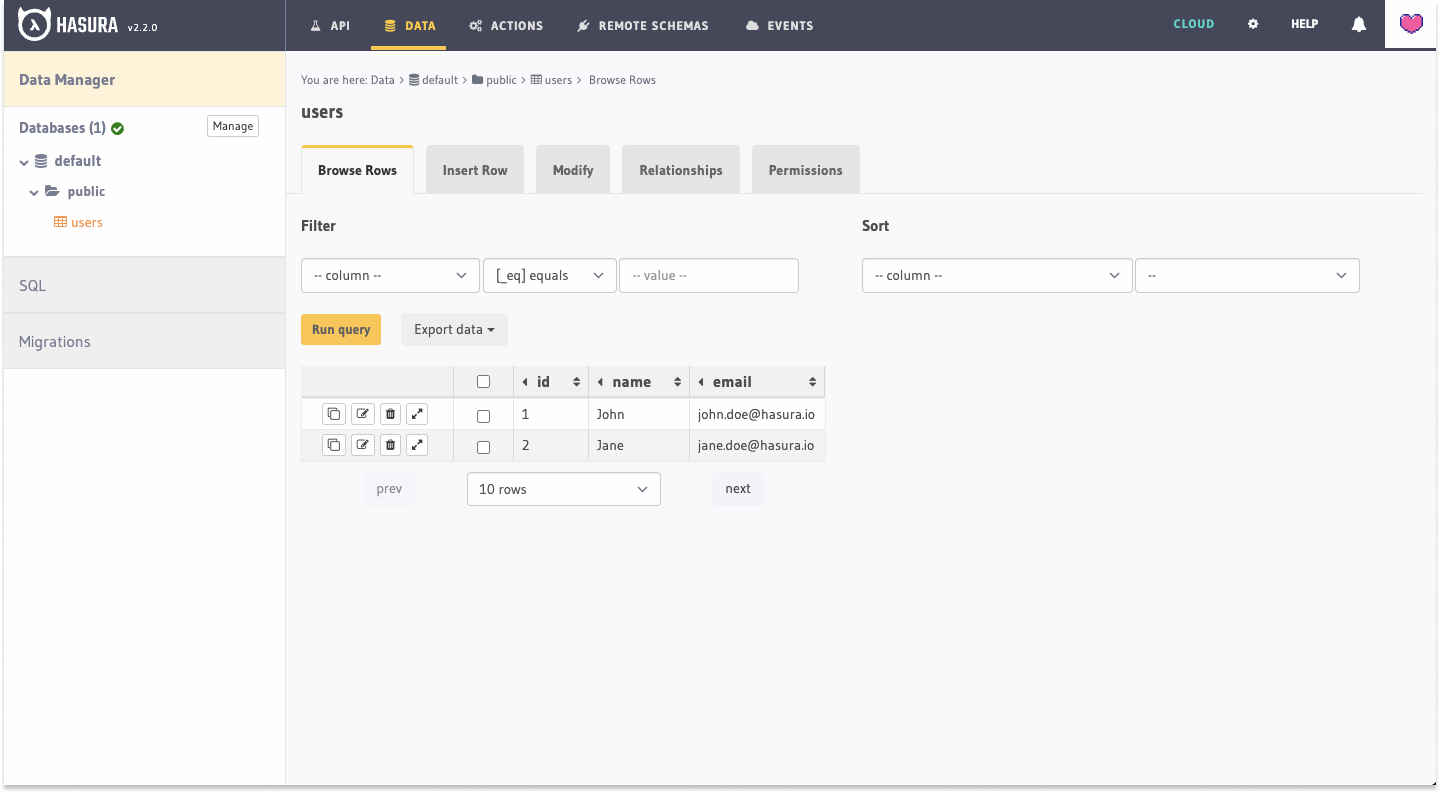
If we navigate to our Data tab, we'll see that the users table has been added to the Tables section:
Additionally, if we look inside our migrations directory, we'll see that a new Migration - complete with up and
down sql files - has been created with a timestamped version number and our name for the Migration:
cli-demo
├── config.yaml
├── migrations
│   └── 1675957424387_add_users
│       ├── down.sql
│       └── up.sql
├── metadata
├── seeds
Step 6: Init a new git repository
While this is a basic example, we've achieved a lot in just a few steps. Let's commit our changes to Git so we can deploy our project to another environment.
git init
git add .
git commit -m "Initial commit"
With our repository initialized, we can now deploy our project to another environment. Depending on where you're deploying to, you'll need to use a different method. You can pick up right where we've left off in the next section.
Step 7: Deploy to another environment
If you're deploying to Hasura Cloud, you can use the Hasura CLI or our GitHub integration. If you're deploying to a different environment, you'll need to use the Hasura CLI.
Deploy to Hasura Cloud
If you're deploying to Hasura Cloud, you can use the Hasura CLI or the GitHub integration. We recommend the latter as it's an easier way to deploy your project and allows you the benefits of version control. If you're using the GitHub integration, you'll need to push your changes to a GitHub repository.
Picking up from the previous section, we'll push our changes to GitHub:
git remote add origin <your-git-repo-url>
git branch -M main
git push -u origin main
From here, you can follow the instructions in the GitHub integration guide to deploy your project to Hasura Cloud. With this connection in place, you can iterate and develop your project locally - and then push your changes to GitHub to deploy to Hasura Cloud 🎉
Head down to the recap section to learn more about some of the design decisions we made in this guide.
Hasura Cloud can be used as a staging or production environment. If you're curious about testing your project in a staging environment, consider our Preview Apps feature.
Deploy to a hosted environment
If you're deploying to a provider other than Hasura Cloud, you can use your own CI/CD pipeline or the Hasura CLI. Assuming you have a Hasura instance running, you can use the following command to deploy your project:
hasura deploy --endpoint http://your-other-instance.com --admin-secret your-admin-secret
This command will will apply the local changes of your Metadata and Migrations to the remote Hasura instance running at
http://your-other-instance.com using the your-admin-secret as the admin secret.
Recap
What did you just do? Well, in just a few steps, you've created a new local project, added a data source, and deployed your project to another environment! 🎉
If you're curious about why we did some of the things we did, read on for some answers to common questions.
Why do I need to include the Postgres container in the docker-compose.yaml file?
If you're not using a Postgres database as one of your data sources, you'll still need to include the Postgres container
in the docker-compose.yaml file. This is because the Hasura GraphQL Engine requires a Postgres database to store its
Metadata. Click here to head back up to Step 2.
Why are we opening the Console from the CLI?
So that the Metadata and Migrations are tracked in the local project directory, we need to use the Hasura CLI to open the Console. The Console served directly by the Hasura GraphQL Engine in Docker will not track any changes to the Metadata or Migrations. Click here to head back up to Step 3.
Why aren't we just pasting in a connection string?
The Hasura CLI allows you to manage your project using environment variables. This means that you can use the same project directory on different environments and not have to worry about updating different values in your CI/CD pipeline. This is ideal for iterating on your database's schema and data locally before deploying to another environment (e.g., staging or production).
If we were to paste in a connection string, we'd have to change that value - to match the database used by an environment - every time we wanted to deploy our project to a different environment.
Hasura Cloud does not host databases. If you don't already have a database hosted somewhere, take a look at our list of cloud databases to quickly get started.
Additionally, it's a security vulnerability to store connection strings in version control. These values are safer in an
.env file or the environment variables wherever your project is deployed.
Click here to head back up to Step 4.