AWS VPC Peering
Your Dedicated VPC can be peered with other networks that you own on AWS, or with managed services like Aiven or Timescale Cloud that run on AWS.
VPC peering lets you connect to your databases and other APIs from Hasura Cloud without exposing them to the public internet. When you route traffic through a VPC peering, you can significantly reduce latency for queries to the database and gain other security and performance improvements. Further, utilizing a VPC with peering can result in substantial cost reductions instead of routing traffic using traditional, publicly exposed means.
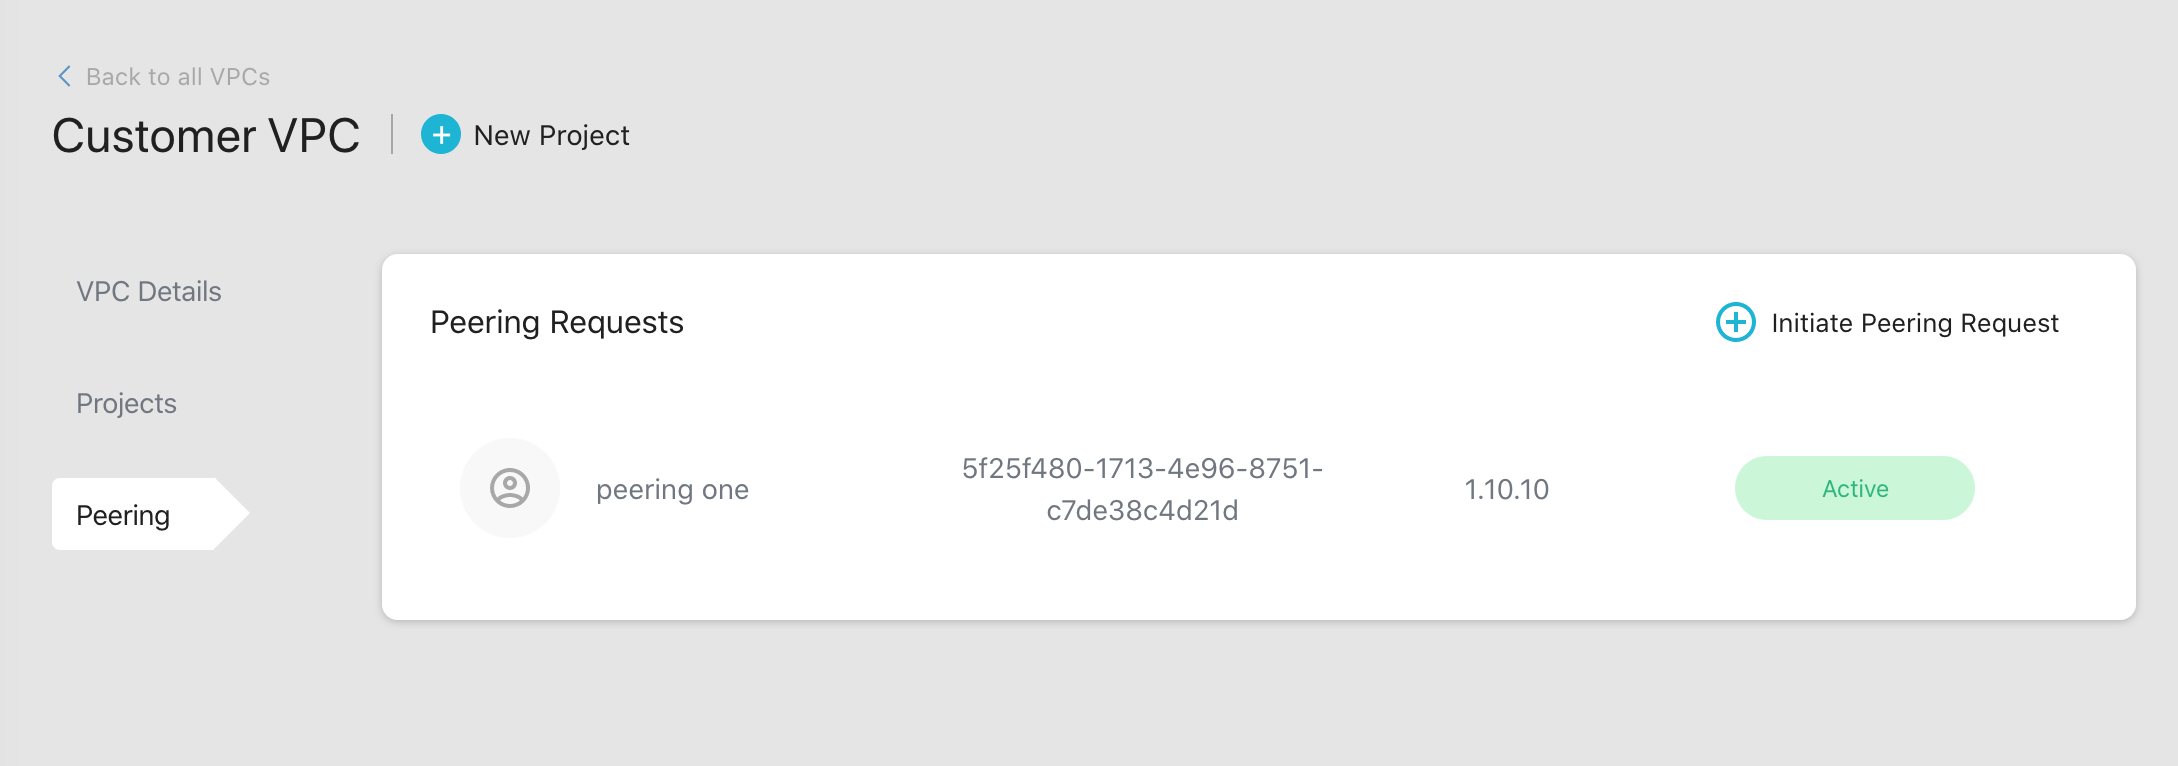
You can view all the requests and active peerings in the Peering tab.
Create a peering request
Step 1: Create a new peering request
To create a new peering request, click on the Initiate Peering Request button.
There are two types of peering requests in AWS:
- Hasura to Customer
- Customer to Hasura
Hasura to Customer
This is typically used if you want to connect to RDS or Action/Event Trigger webhooks within an AWS VPC that you own.
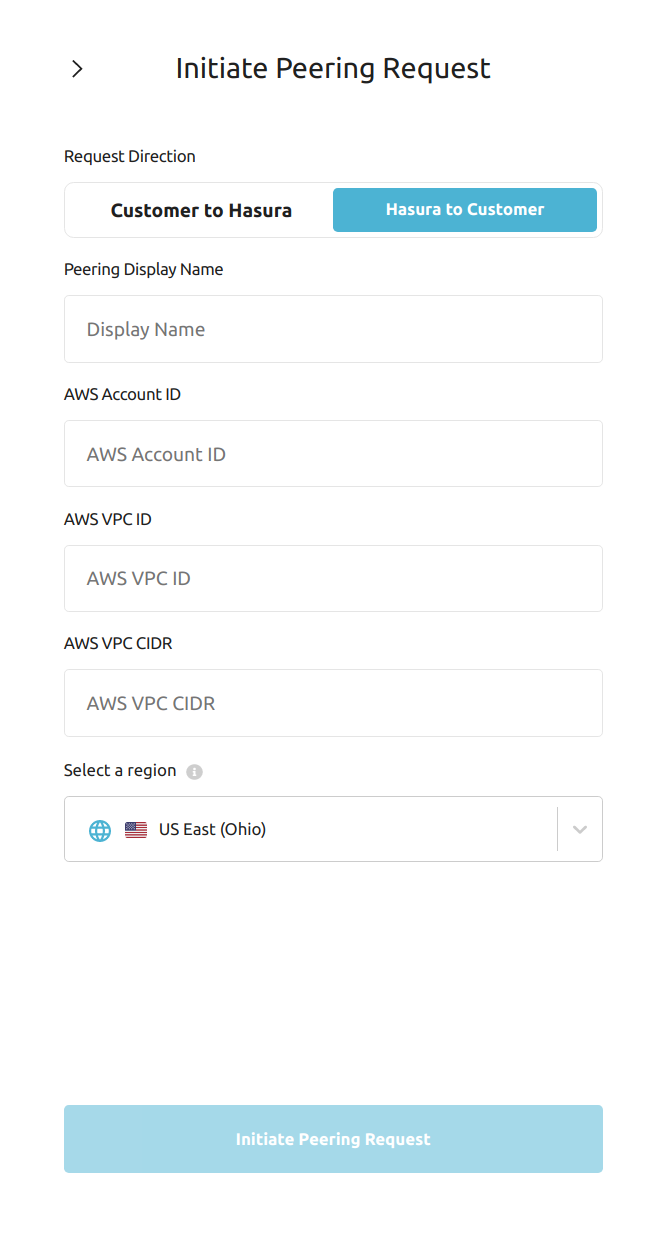
Fill in the form with the following details:
| Field | Description |
|---|---|
| Display Name | The name you'll see in the Hasura Cloud dashboard. |
| AWS Account ID | Account ID of your AWS account which contains the VPC (typically a 12 digit number) |
| AWS VPC ID | ID of your AWS VPC that you want to peer with (starts with vpc-) |
| AWS VPC CIDR | CIDR of your AWS VPC (if you have more than one CIDR for the VPC please mention the secondary ranges in AWS Additional VPC CIDR) |
| AWS Additional VPC CIDR | Additional CIDR of your AWS VPC, keep it blank if there is only 1 CIDR associated with VPC |
| Region | AWS region where your VPC is provisioned |
Once you fill in these details and initiate the peering request, it will appear as Request Pending. Hasura Cloud will
now provision the resources and send a peering request; the status will change to Action Required.
Step 2: Accept the peering request
Accept the request on your AWS account to activate the peering connection. Once you do this, the status will turn to
Active. Note that it might take a few minutes for the status to update on the dashboard.
- Login to AWS account
- Select the region and VPC service
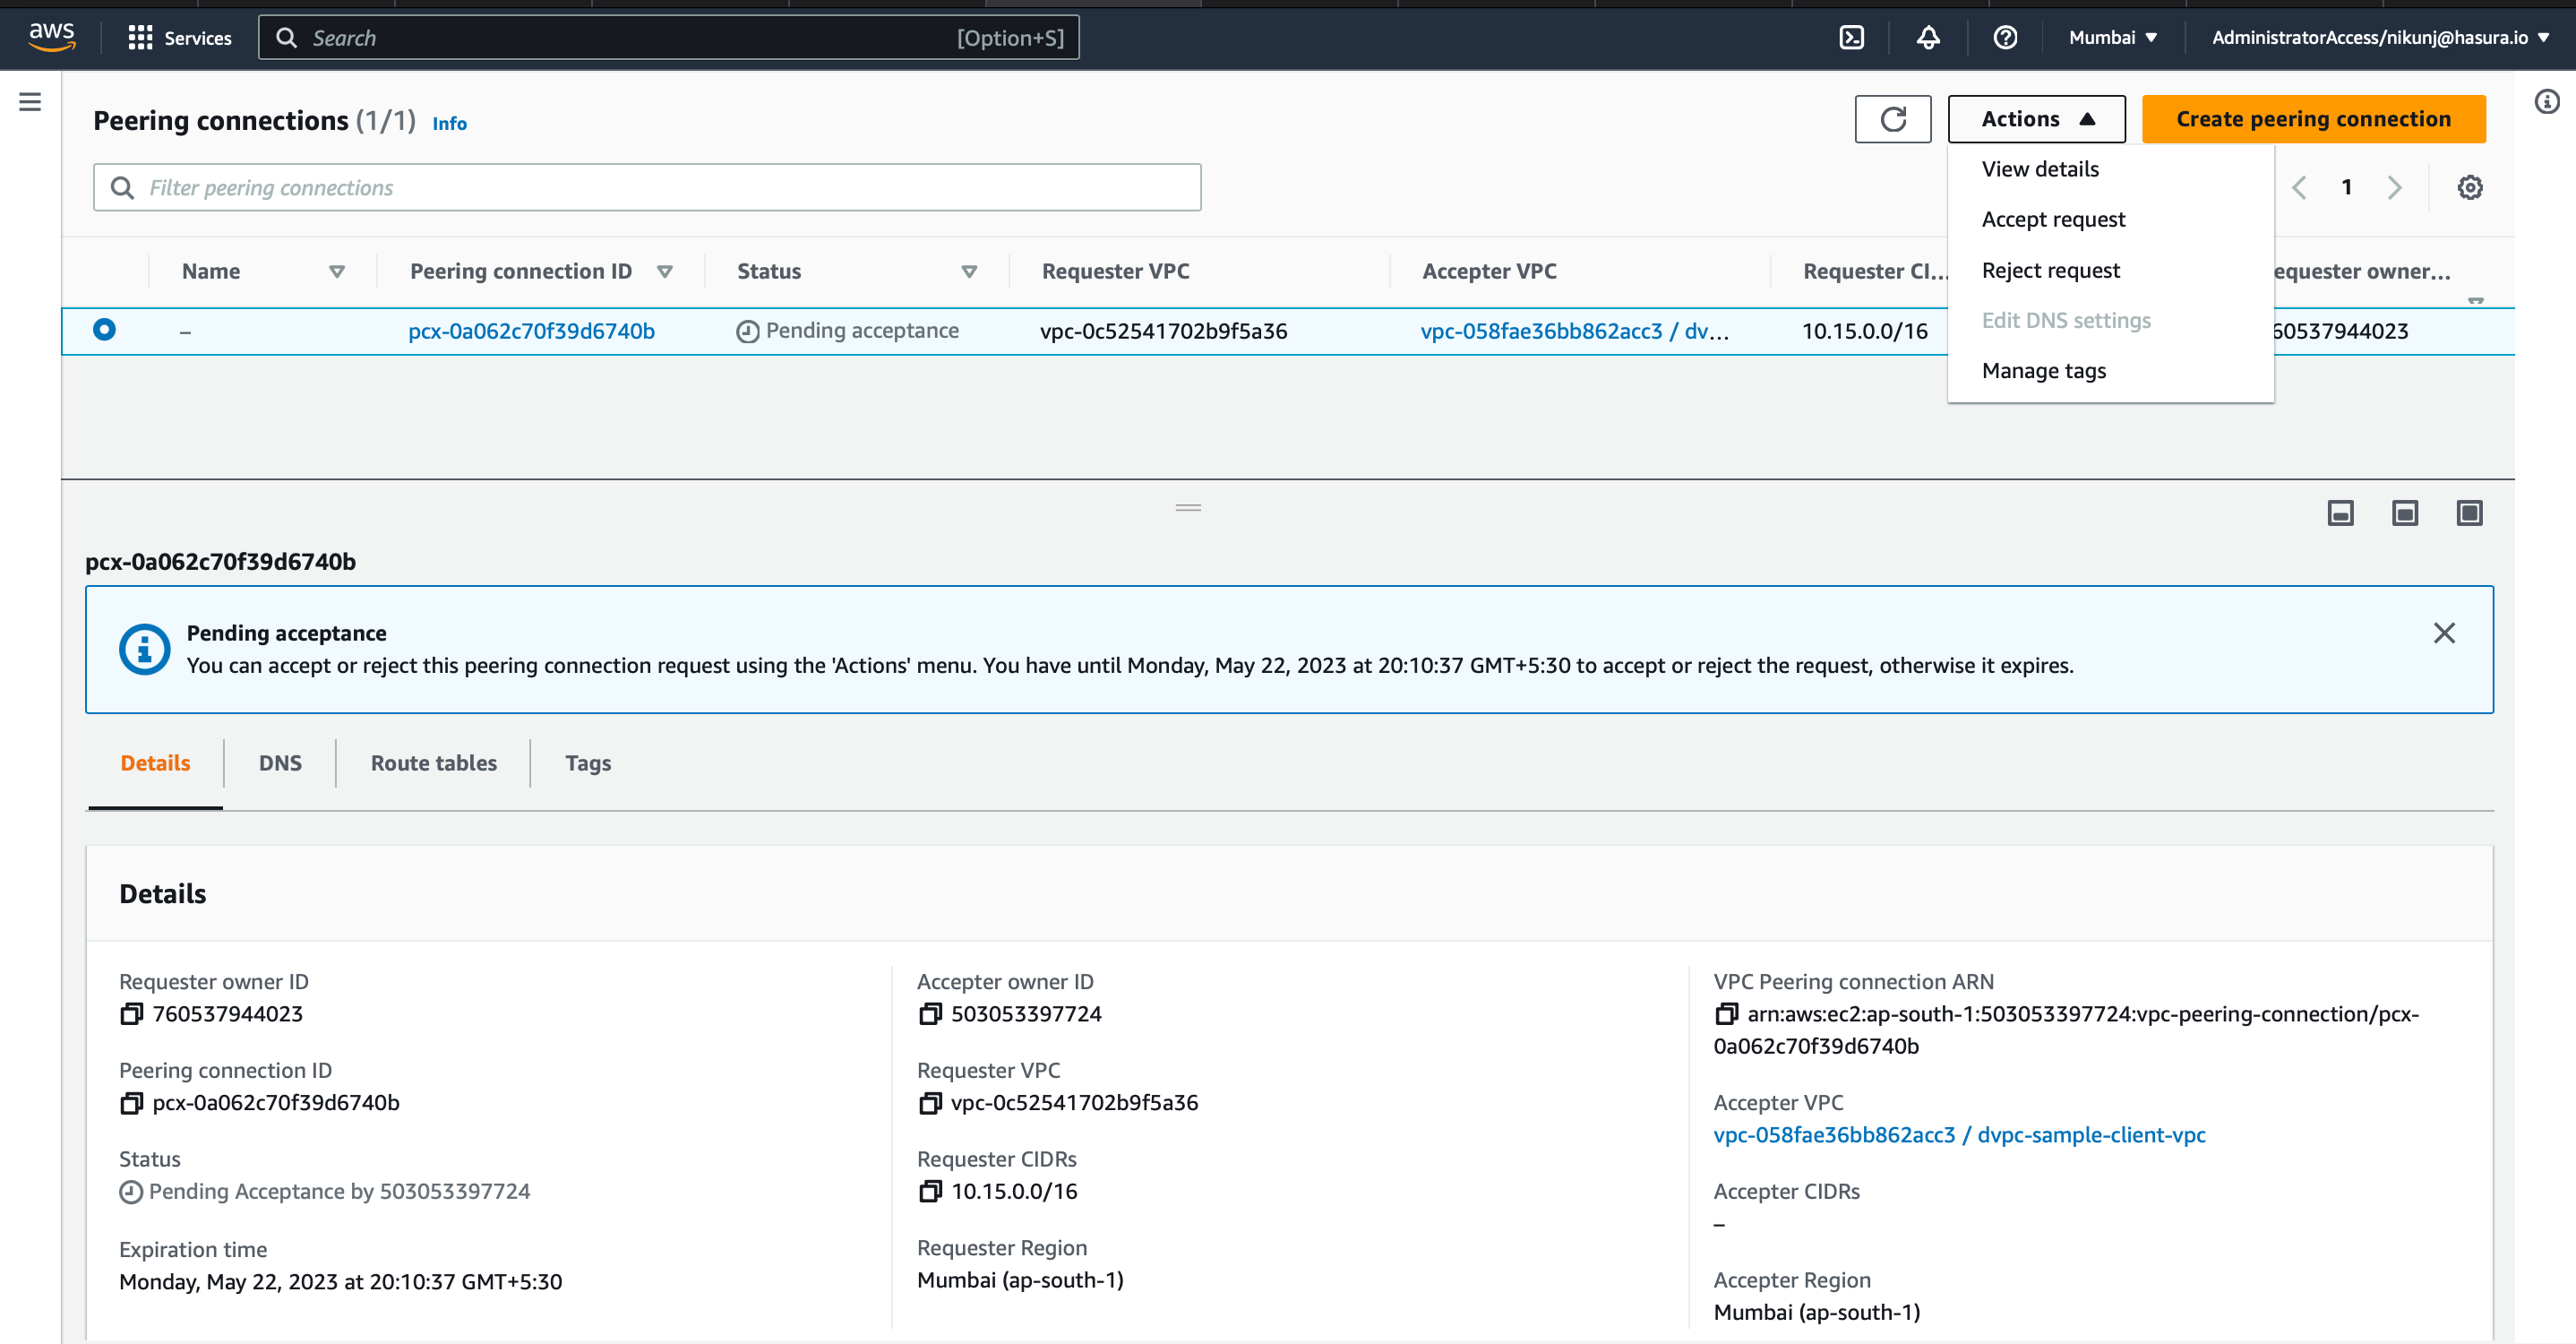
- Go to VPC peering. Select the peering request and accept the request.
In the screenshot below, the sample VPC peering request is in pending acceptance state.
Step 3: Start using the private network
After accepting the peering request, you need to follow these steps to start using the private network:
Access the subnets associated with the resource(s) that you want to connect to Hasura Cloud. i.e. database, read replicas, Action Endpoint
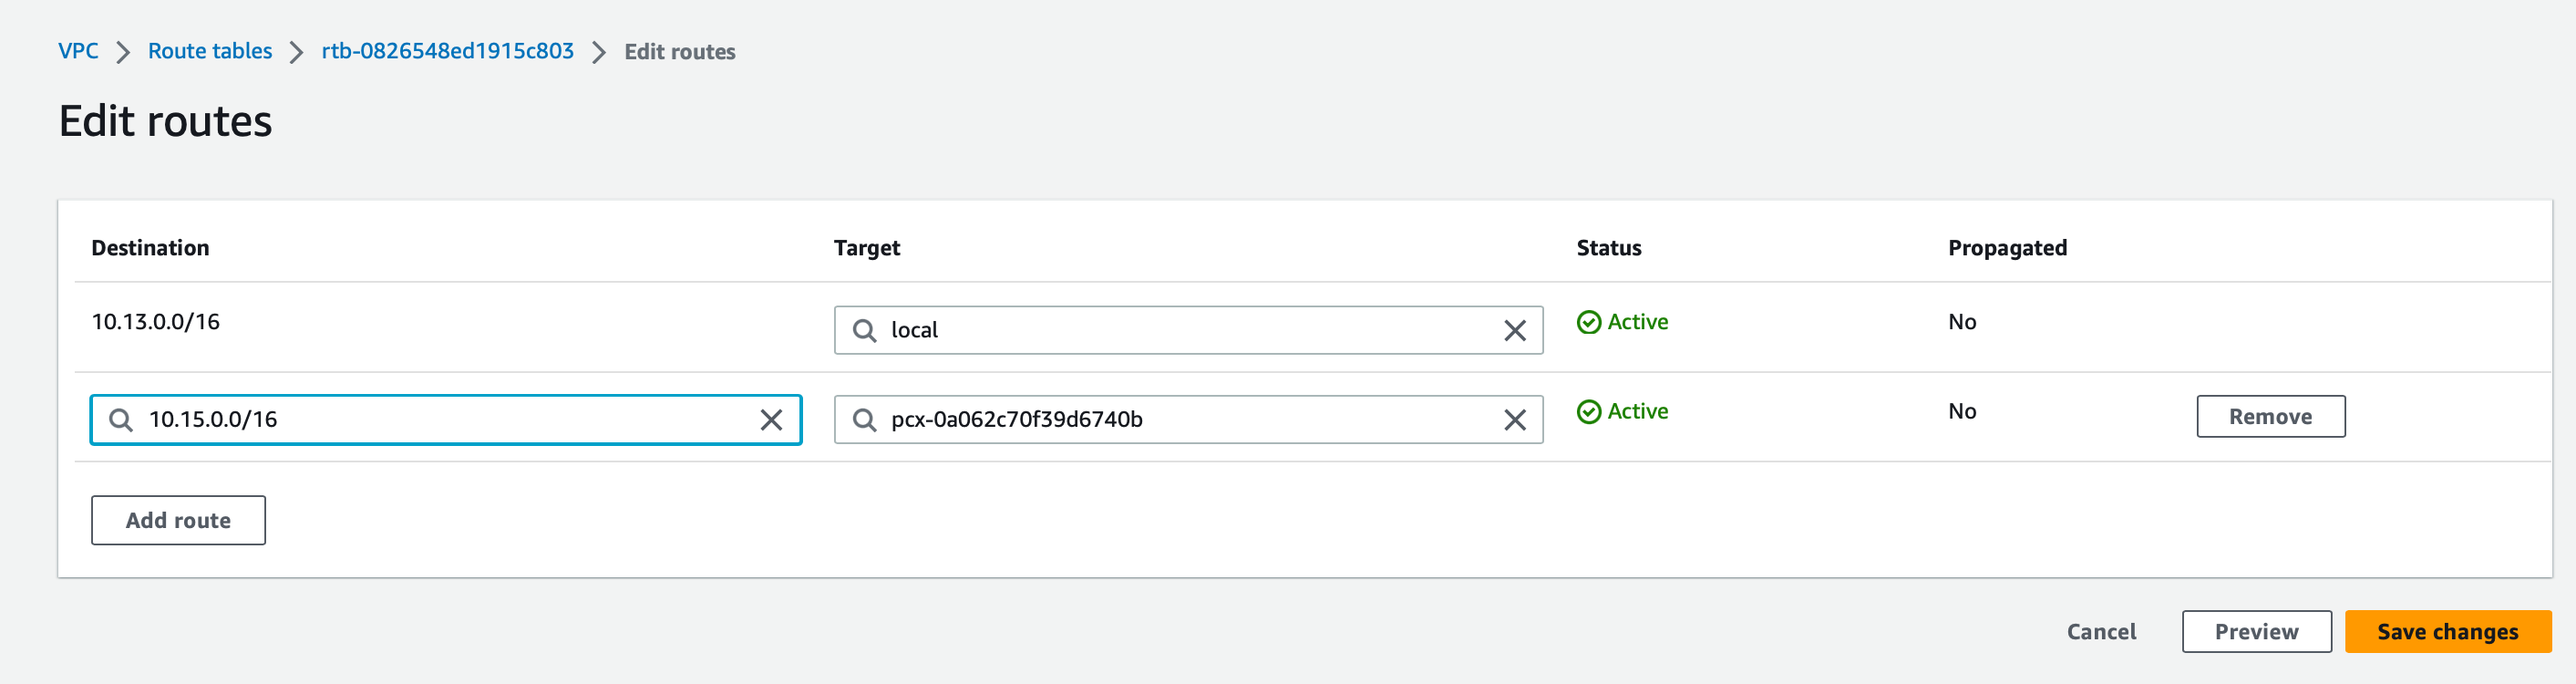
- Access the route table for this subnet(s)
- Add a new entry for the Dedicated VPC CIDR(can be found on Hasura cloud Dashboard -> VPCs -> VPC) with target as the VPC peering connection ID from Step 2
In the example below, we are allowlisting the peering established in step 2 for the Hasura Cloud VPC Created before.
Access the security group associated with the resource
- Add an inbound rule to allow required traffic (say port
5432) from your Dedicated VPC CIDR
In the example below, we are allowlisting port
5432for the Hasura Cloud VPC CIDR for connecting to the RDS from the Hasura Project.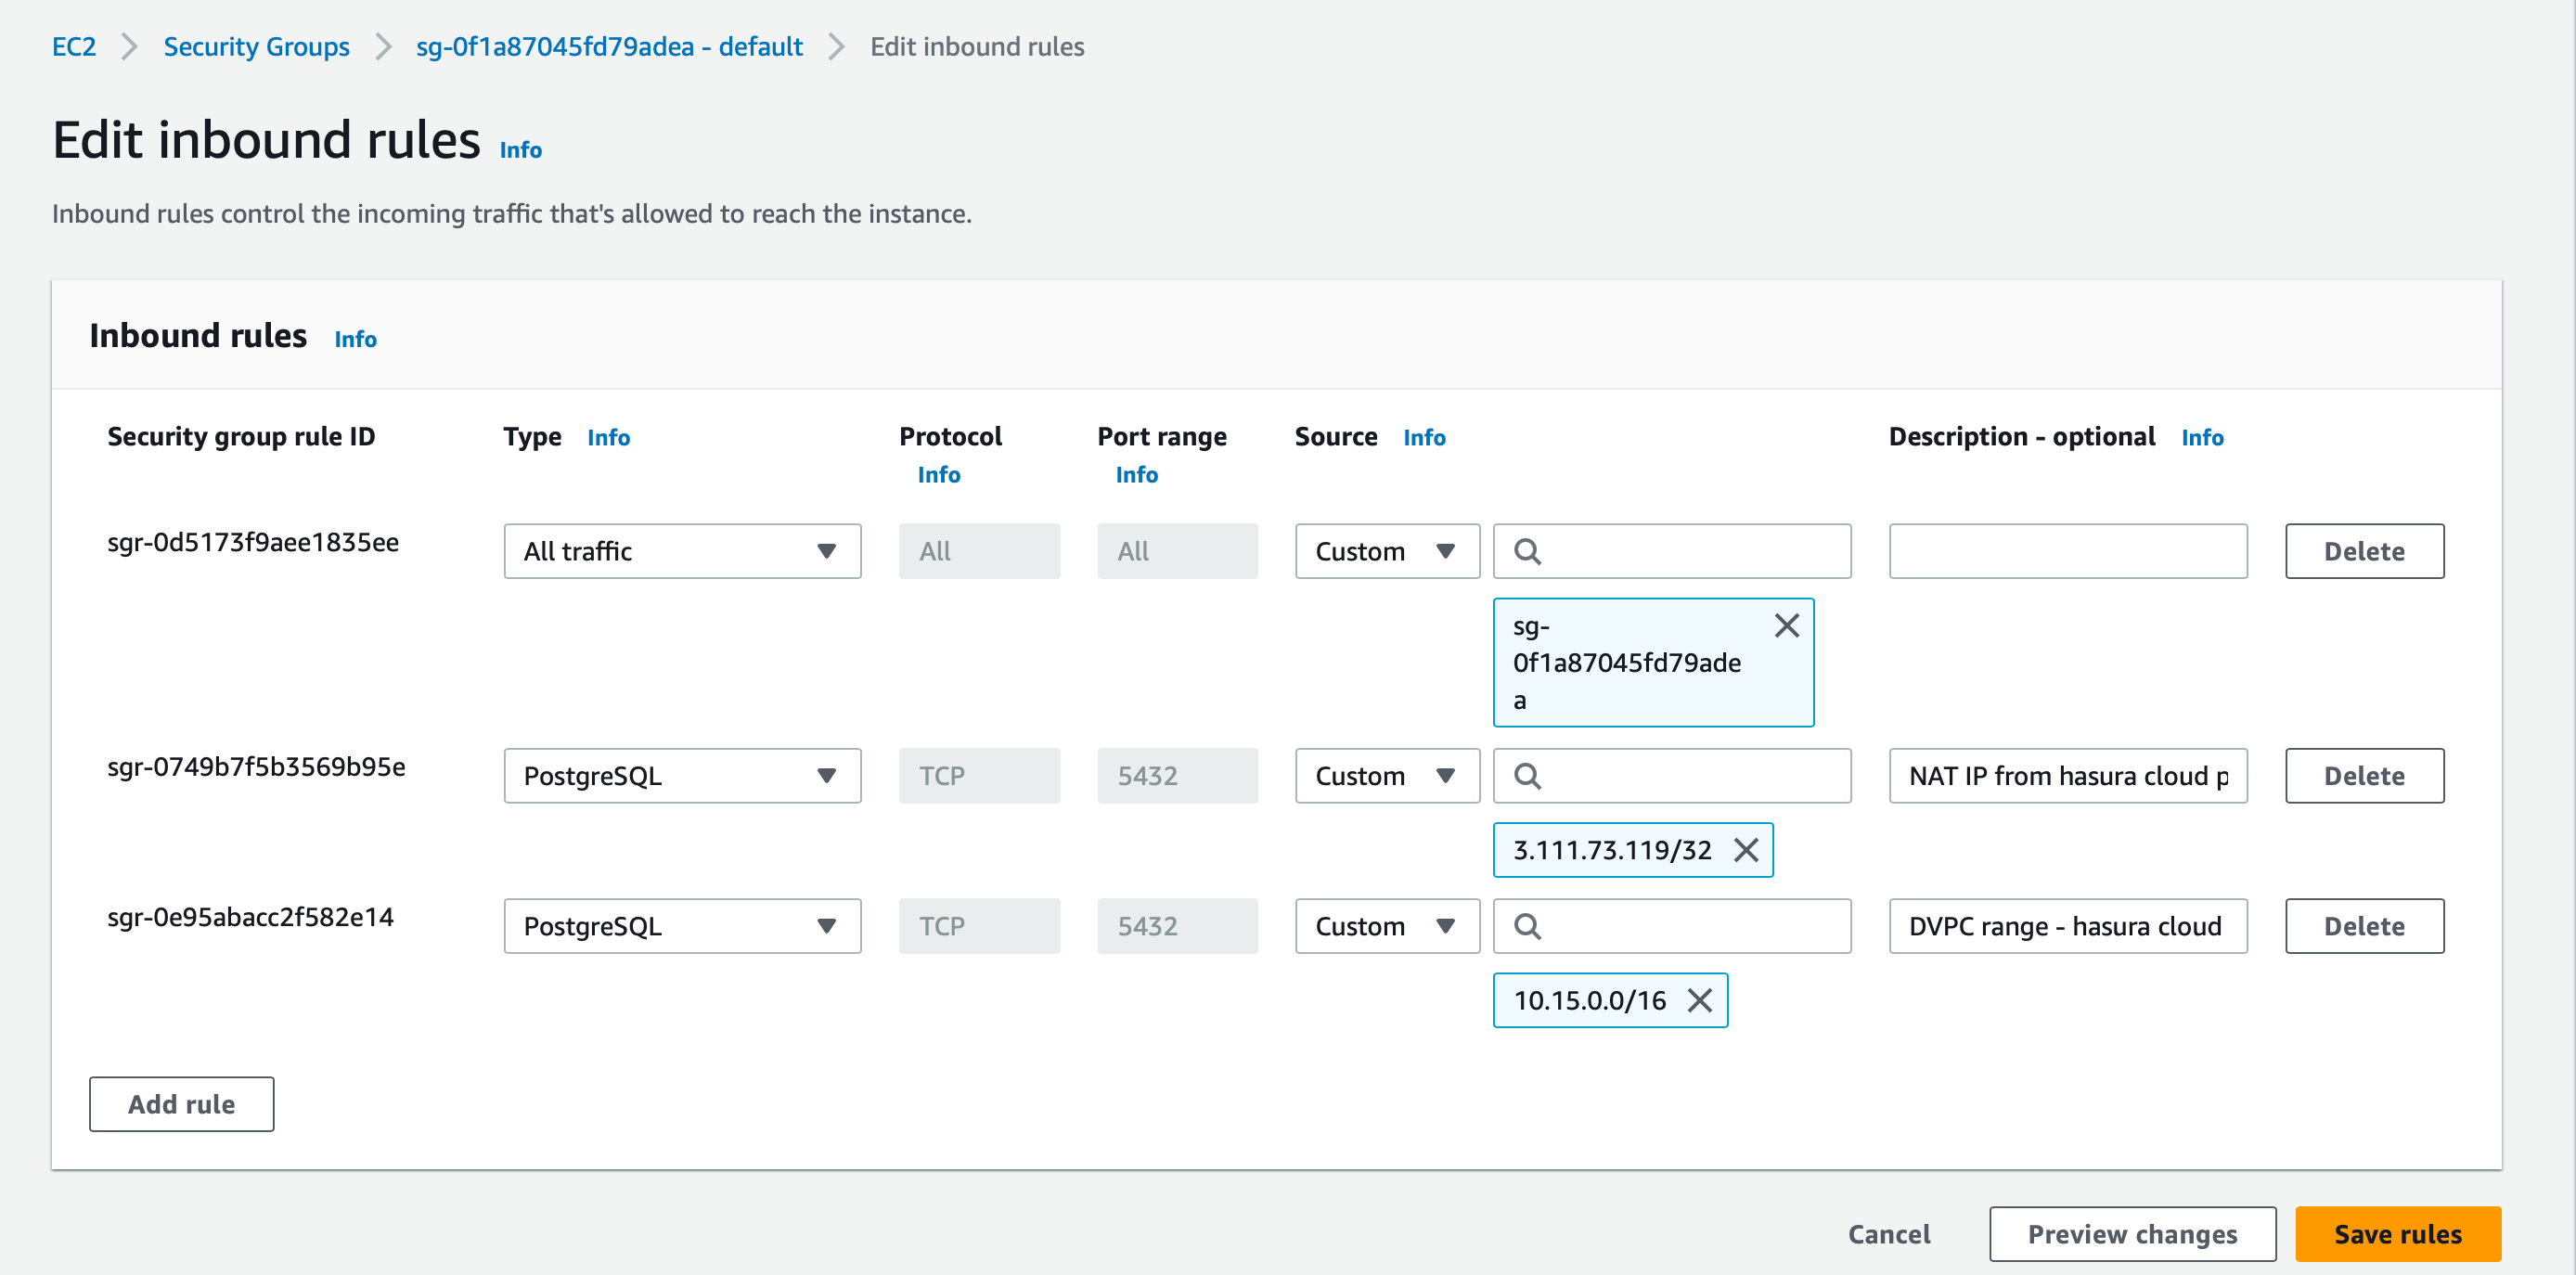
- Add an inbound rule to allow required traffic (say port
Until this step, traffic is not yet routed if the database is publicly accessible.
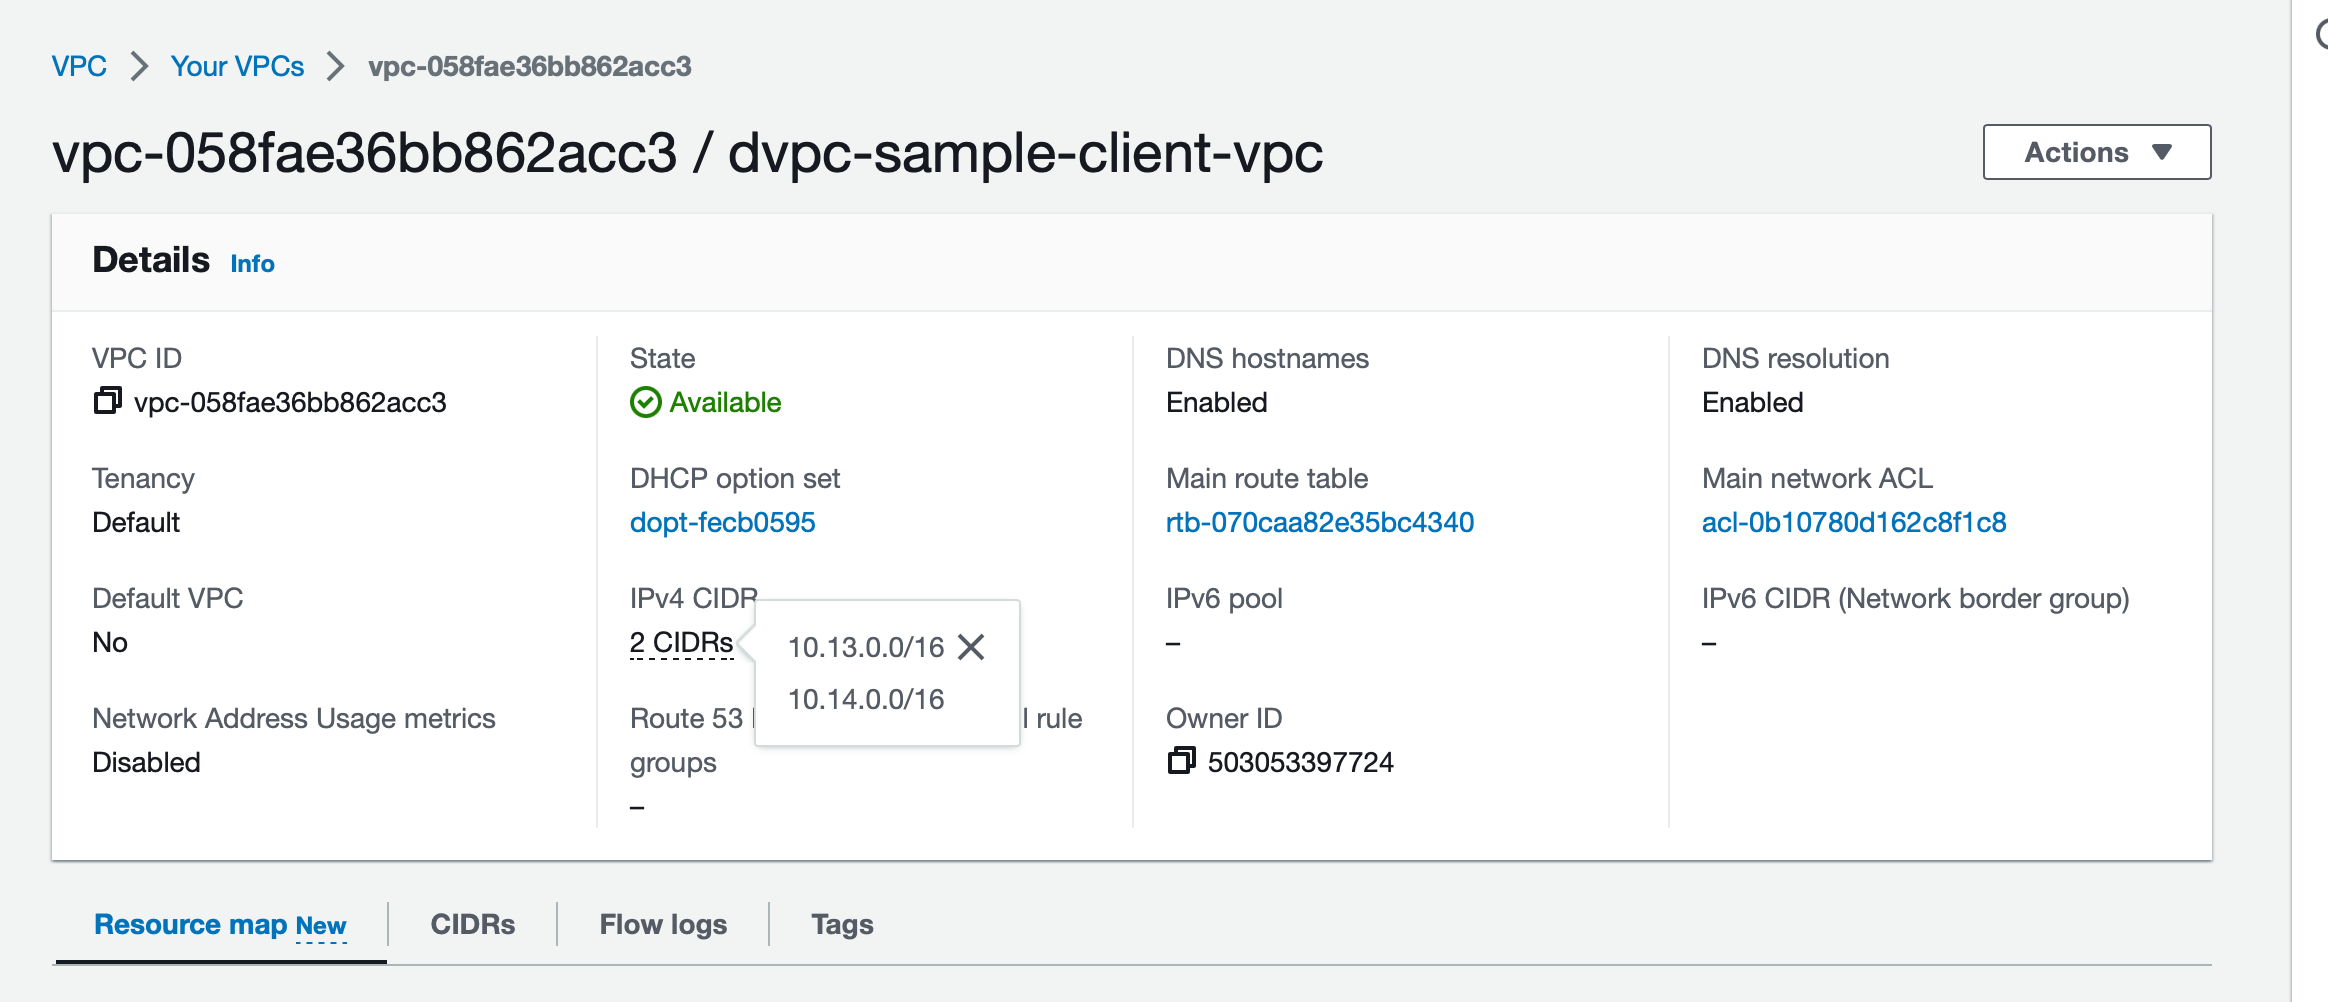
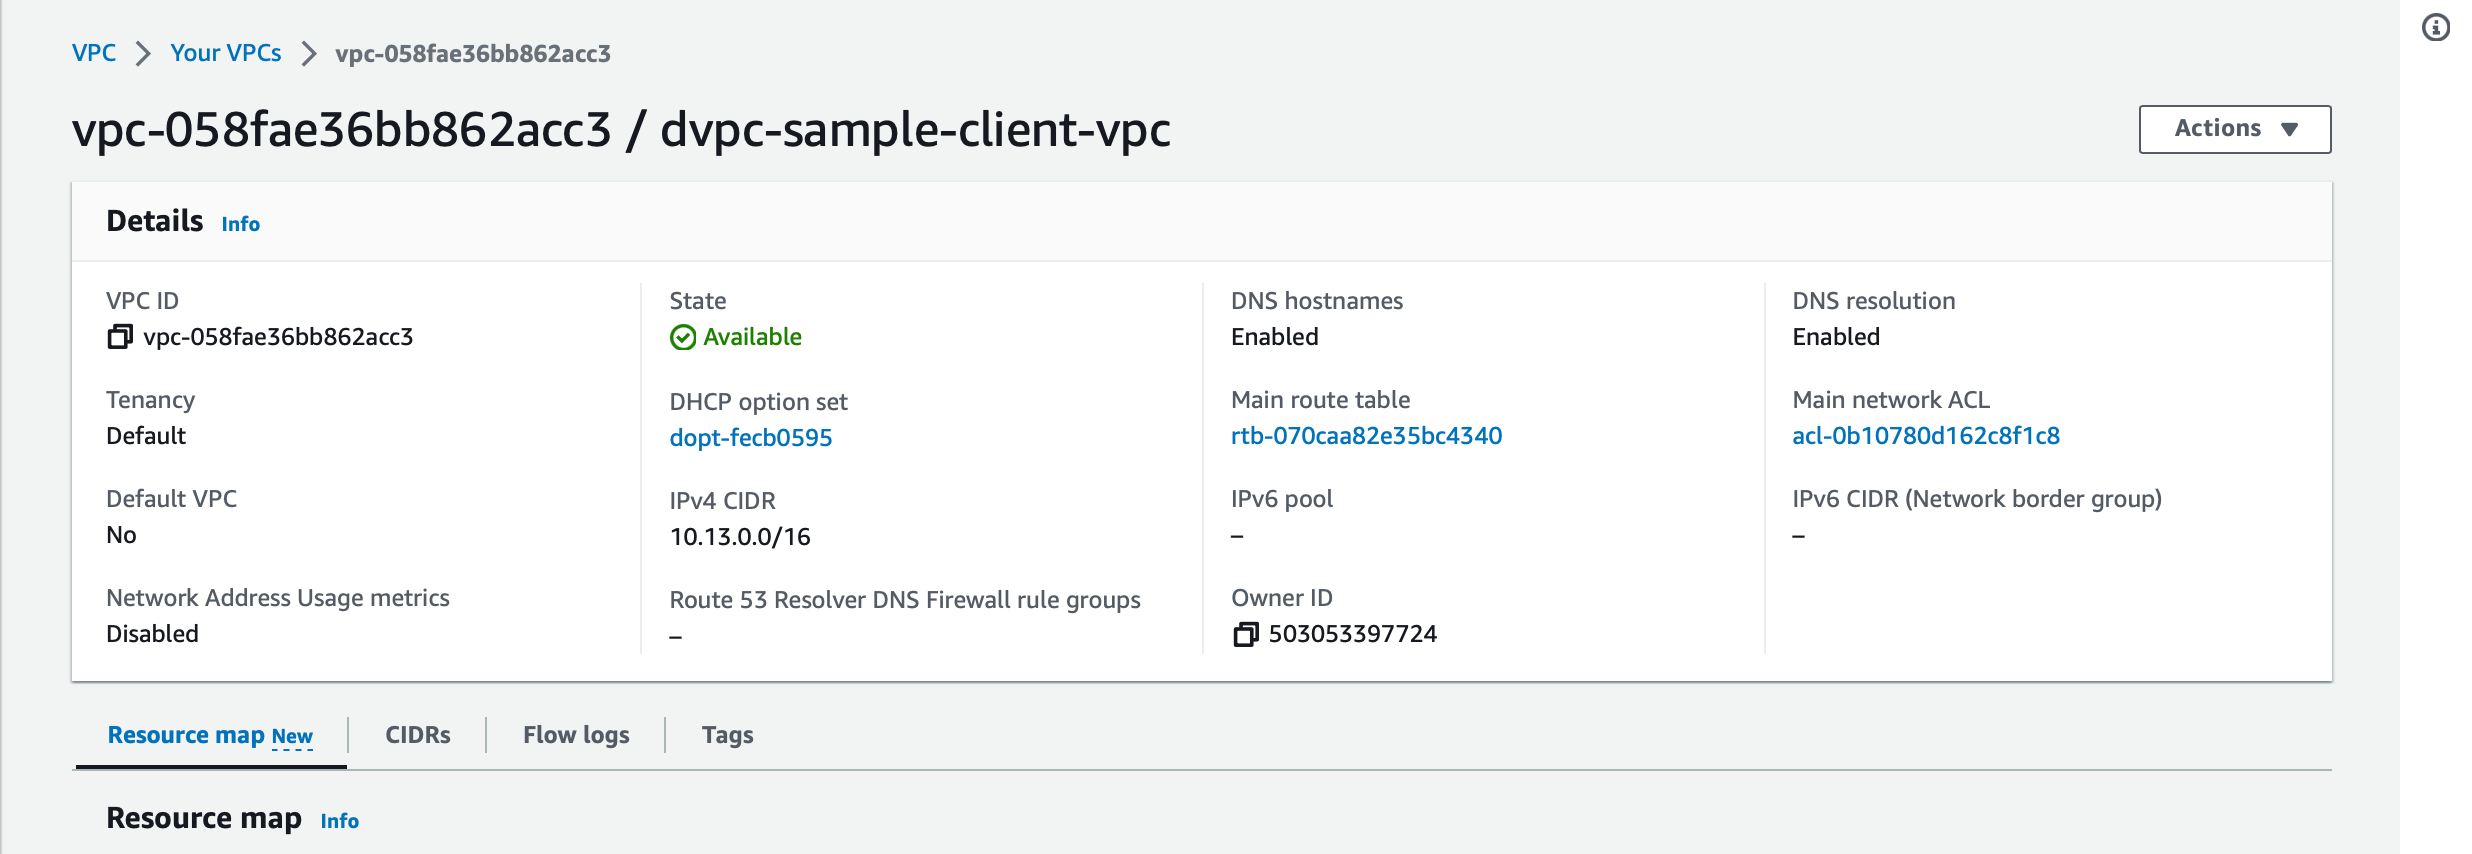
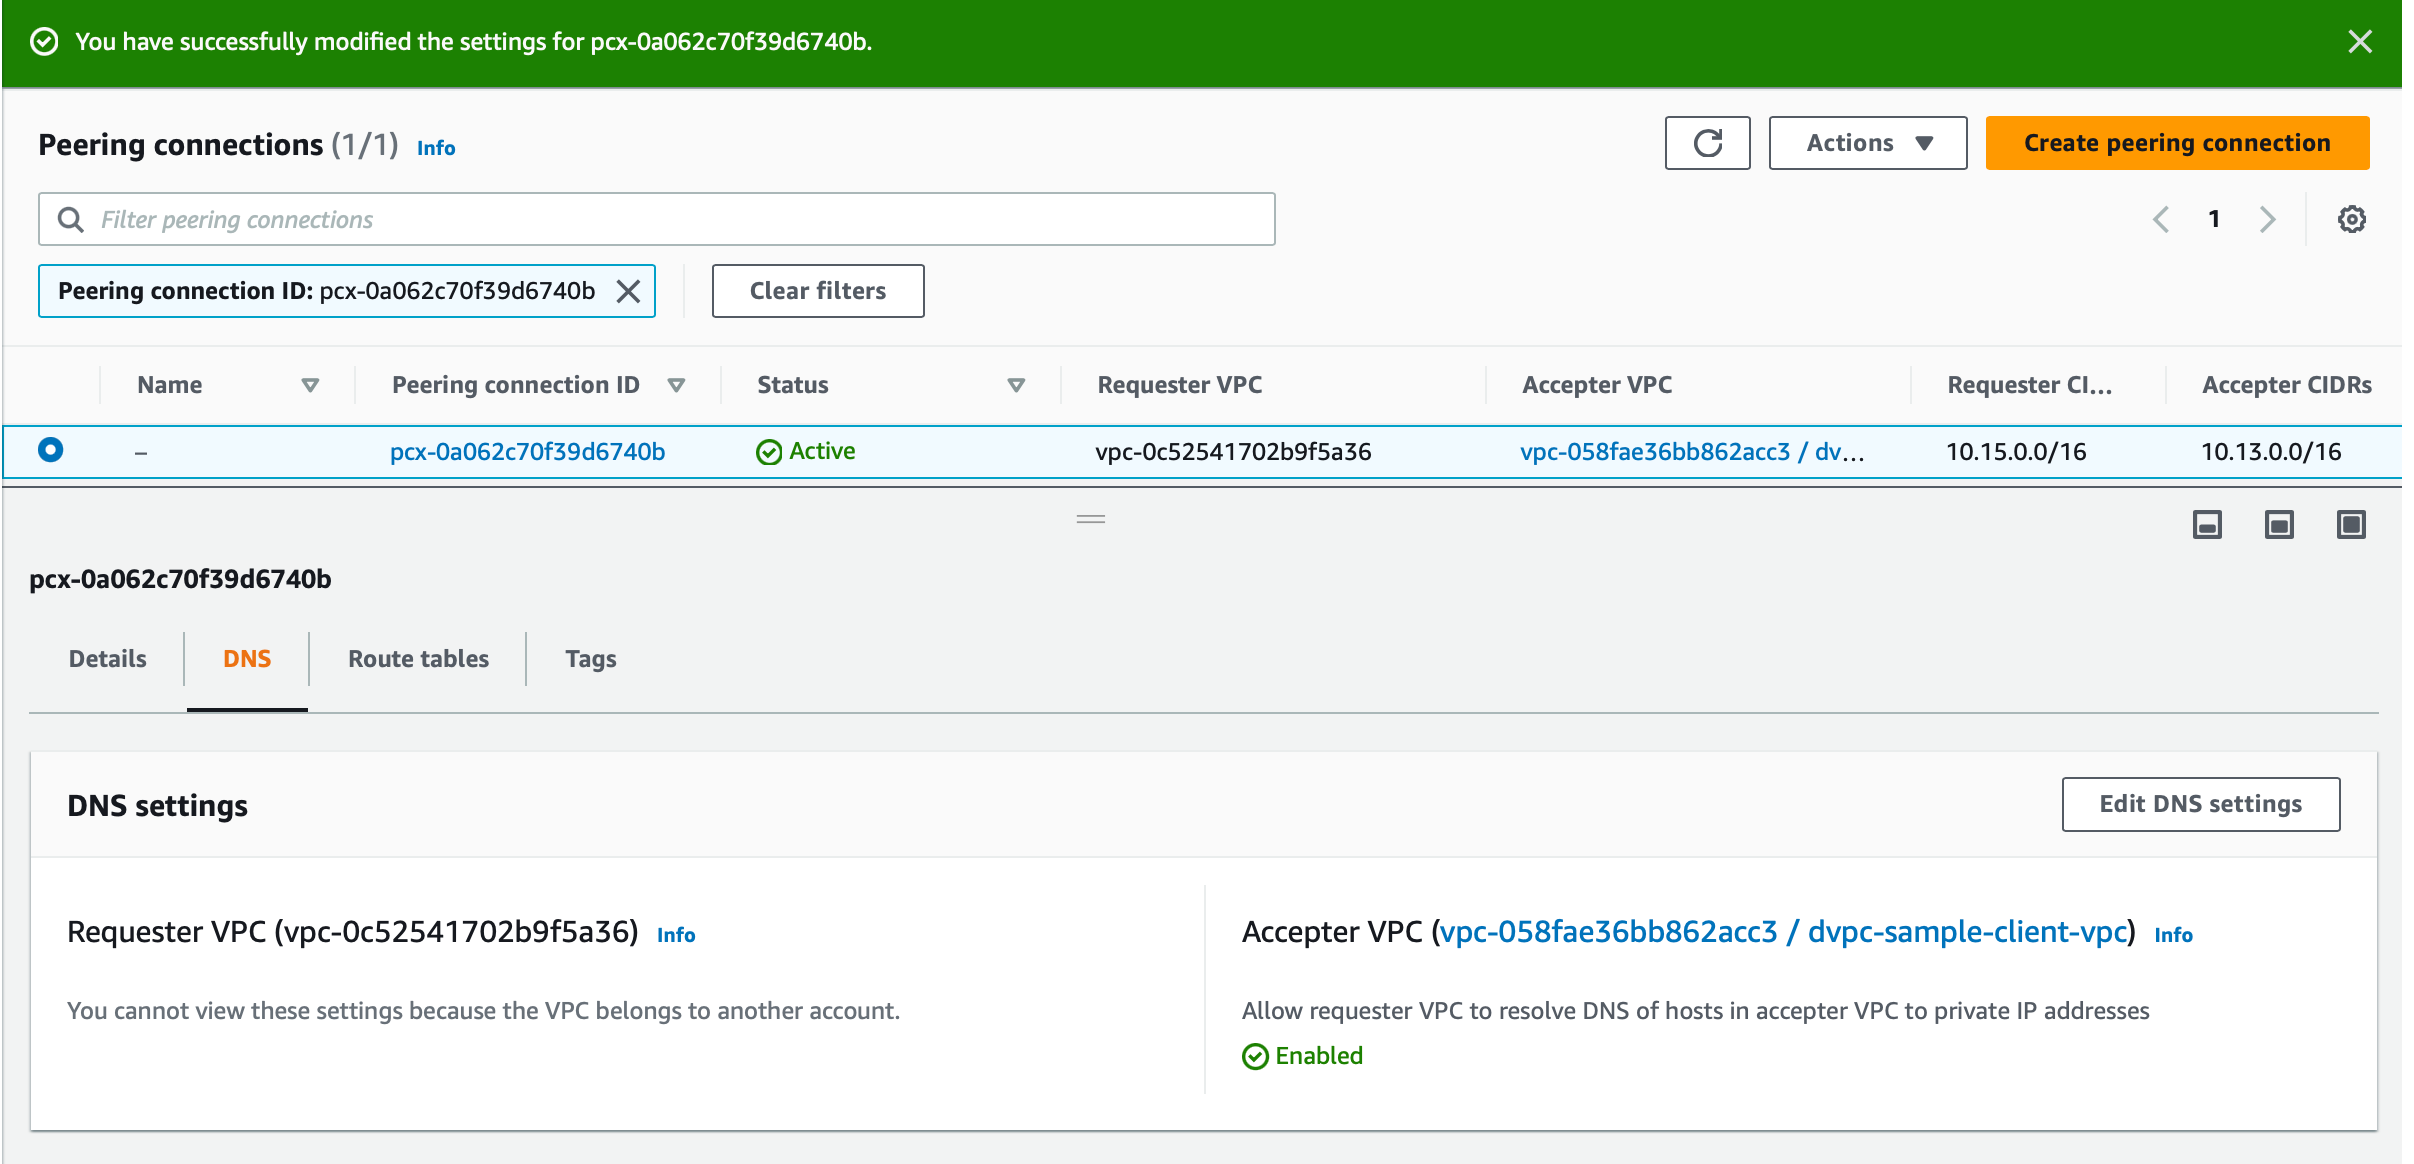
Access the VPC and check if the DNS hostnames and DNS resolution are enabled for the VPC
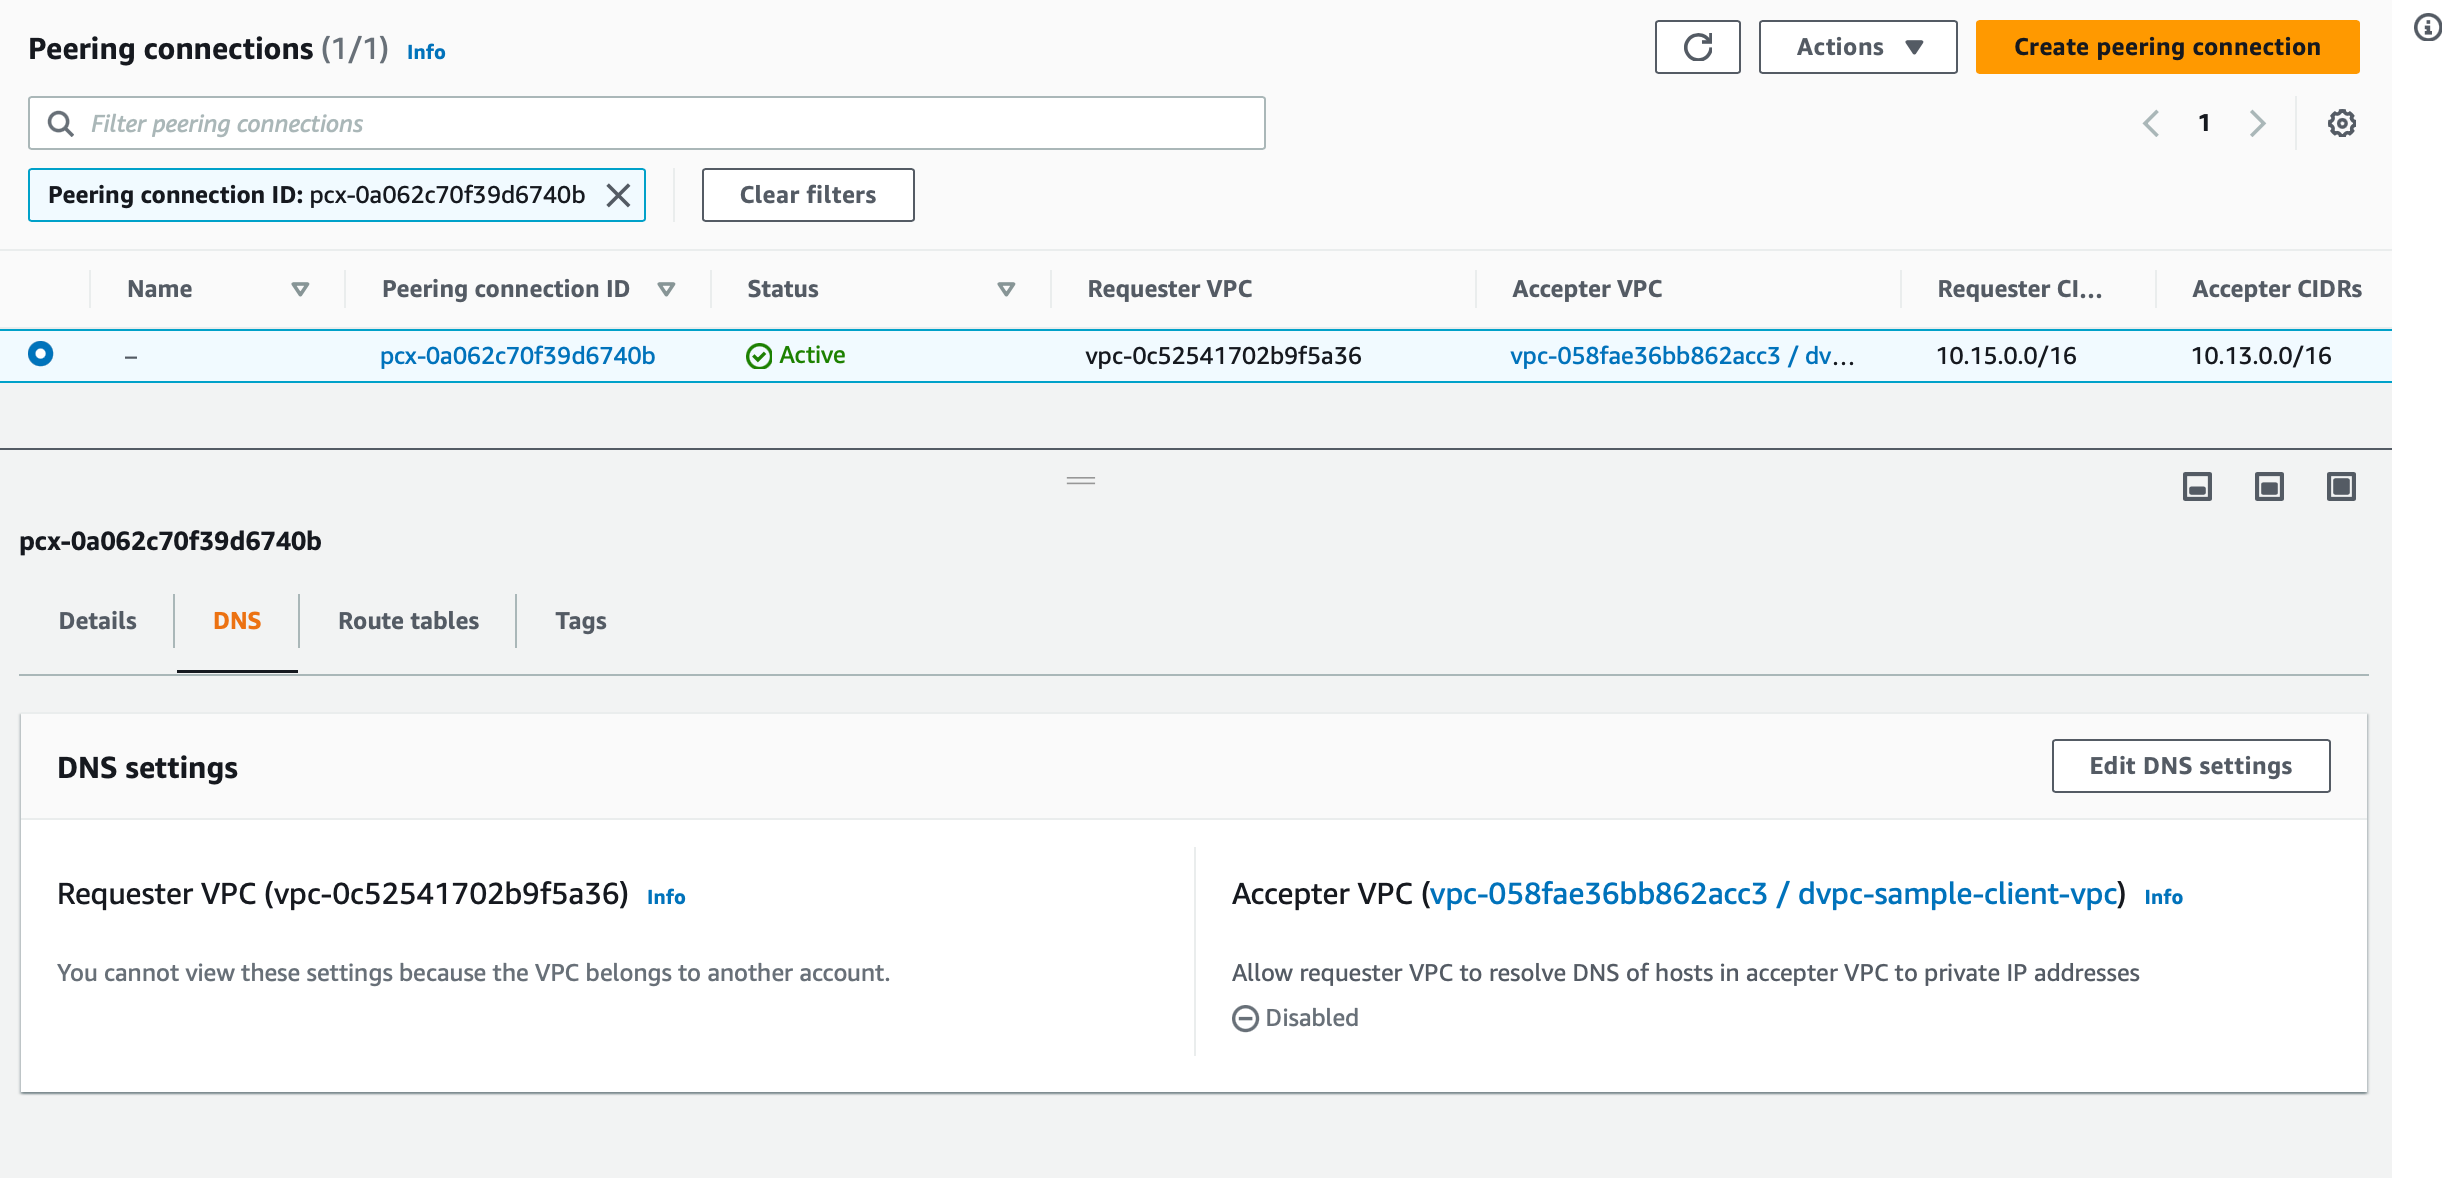
Enable DNS resolution over VPC peering.
- Access the VPC peering
- Go to DNS tab, Edit DNS settings
- Modify the settings to resolve DNS of the accepter VPC.
With this, projects within your Hasura VPC will start resolving the RDS endpoint or any other endpoint part of the VPC and will begin resolving to private IP addresses.
Once complete, database URLs and webhook URLs will start resolving to private IP addresses, and the project can connect to them over a private AWS network via VPC peering.
Reach out to support if you face any issues.
If the provisioning failed, you'll see the status as Failed. Reach out to support to
resolve this.
Step 4: [Optional] Remove extra settings
This step is optional and for users who already have peering set up but didn't enable DNS resolution under peering before.
- Remove the
Hasura Cloud IP(mentioned under project created under VPC) accessibility from security group - Change the RDS setting to
Publicly accessible falseif Hasura is the only one connecting to RDS over a public network
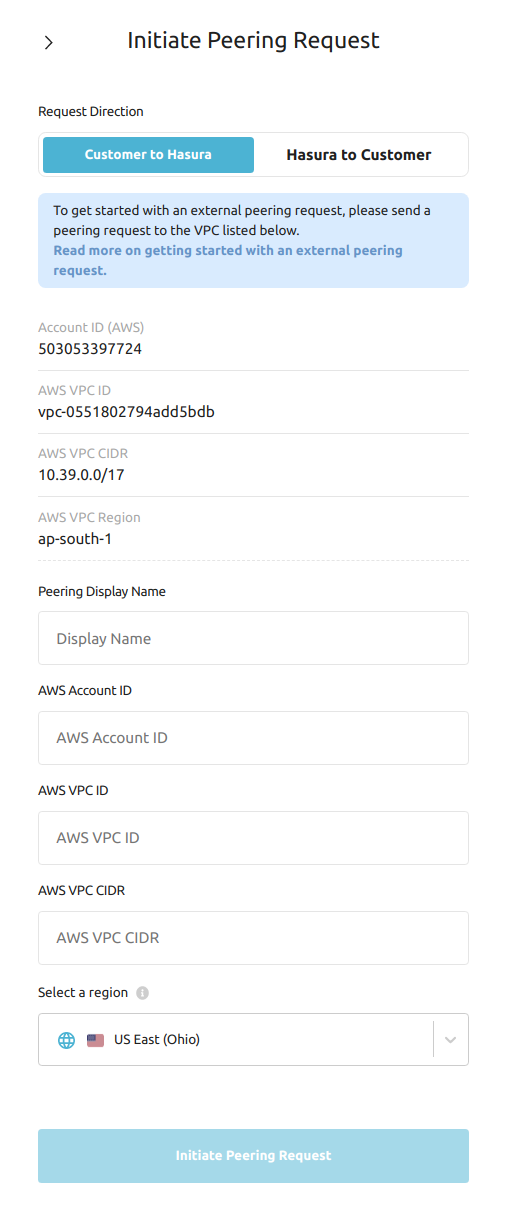
Customer to Hasura
This mode can be used if you're using a managed 3rd-party service, like Aiven or Timescale Cloud, and want to initiate a peering request towards Hasura Cloud.
This popup shows all the required info to create a peering request from the 3rd party service:
| Field | Description |
|---|---|
| AWS Account ID | This is the account ID of Hasura Cloud's AWS account |
| AWS VPC ID | This is the ID for the Dedicated VPC that Hasura Cloud has provisioned for you on AWS |
| AWS VPC CIDR | CIDR of your Dedicated VPC |
| AWS VPC Region | Region where your VPC is provisioned |
Enter these details into the peering connection form of the 3rd party service. Once you do that, the 3rd party service will show similar details so that they can be entered into the form on Hasura Cloud Dashboard.
VPC CIDR on the 3rd party service could be any valid CIDR block other than 10.2.0.0/16 and the CIDR of your VPC on
Hasura Cloud.
Once you enter and initiate the peering request, you will see the peering as Request Pending on the dashboard. Once
Hasura accepts the request, you will see that the peering is Active. It will take about 5-10 minutes.
Now, you should be able to use private IP addresses and private DNS names as database URLs or webhook URLs.
Reach out to support if you face any issues.
If the provisioning failed, you will see the status of Failed. Reach out to support to
resolve this.