Send a User Re-engagement Email
Introduction
Scheduled Triggers allows you to schedule business, or other logic to occur at specific times or intervals. In this
guide, we'll explore how to use Scheduled Triggers to send an email to users if they haven't been active in over a week.
We'll do this by executing this trigger every morning and seeing which users' last_seen property is older than a week.
If it is, we'll send them an email persuading them to come back to our app.
DOCS E-COMMERCE SAMPLE APP
This quickstart/recipe is dependent upon the docs e-commerce sample app. If you haven't already deployed the sample app, you can do so with one click below. If you've already deployed the sample app, simply use your existing project.

Prerequisites
Before getting started, ensure that you have the following in place:
- The docs e-commerce sample app deployed to Hasura Cloud.
- A working SMTP server or email-sending service that you can integrate with to send emails.
If you plan on using a webhook endpoint hosted on your own machine, ensure that you have a tunneling service such as ngrok set up so that your Cloud Project can communicate with your local machine.
Our model
When sending transactional emails such as this, there are three fundamental components to consider:
- Your data source: In your database, which table contains the value that you want to use to determine whether or not to send the email?
- Your querying logic: In your webhook, how will you query your database to determine whether or not to send the email? How will you return information so that you have the correct data to include in the email?
- Your email templating: How will you generate and send the email containing the information you want to send?
Our sample app's database contains, among others, a users table that contains a last_seen property. We'll use this
property to determine whether or not to send the email. We'll query the database to find all users whose last_seen
property is older than a week. Then, we'll send an email to each of those users.
Step 1: Create the Scheduled Event
Head to the Hasura Console of your project and navigate to the "Events" tab. From there, click on the Cron Triggers
item in the sidebar. Then, click Create:

Step 2: Configure the Scheduled Event
First, provide a name for your trigger, e.g., user_reengagement_email. Then, enter a webhook URL that will be called
when the event is triggered. This webhook will be responsible for sending the re-engagement emails and can be hosted
anywhere, and written in any language, you like.
The route on our webhook we'll use is /user-reengagement-email. Below, we'll see what this looks like with a service
like ngrok, but the format will follow this template:
https://<your-webhook-url>/user-reengagement-email
You'll need to use a tunneling service such as ngrok to expose a webhook endpoint running on your local machine to the internet and Hasura Cloud. This will give you a public URL that will forward requests to your local machine and the server which we'll configure below.
You'll need to modify your webhook URL to use the public URL provided by ngrok.
After installing ngrok and authenticating, you can do this by running:
ngrok http 4000
Then, copy the Forwarding value for use in our webhook 🎉
Next, we'll configure the cron expression that will trigger the event. In this example, we want to send requests at 9:00 AM every morning. We can do that with the following cron expression:
0 9 * * *
Our trigger must also have a payload. This payload will be sent to the webhook endpoint when the event is triggered. We
don't have to include any data in the payload, but we can if we want to. In this example, we'll simply send a
trigger_type property categorizing the event as a daily_recap_email. In the Payload section, enter the following:
{
  "trigger_type": "user_reengagement_email"
}
Under Advanced Settings, we can configure the headers that will be sent with the request. We'll add an
authentication header to prevent abuse of the endpoint and ensure that only Hasura can trigger the event. Set the
Key as secret-authorization-string and the Value as super_secret_string_123.
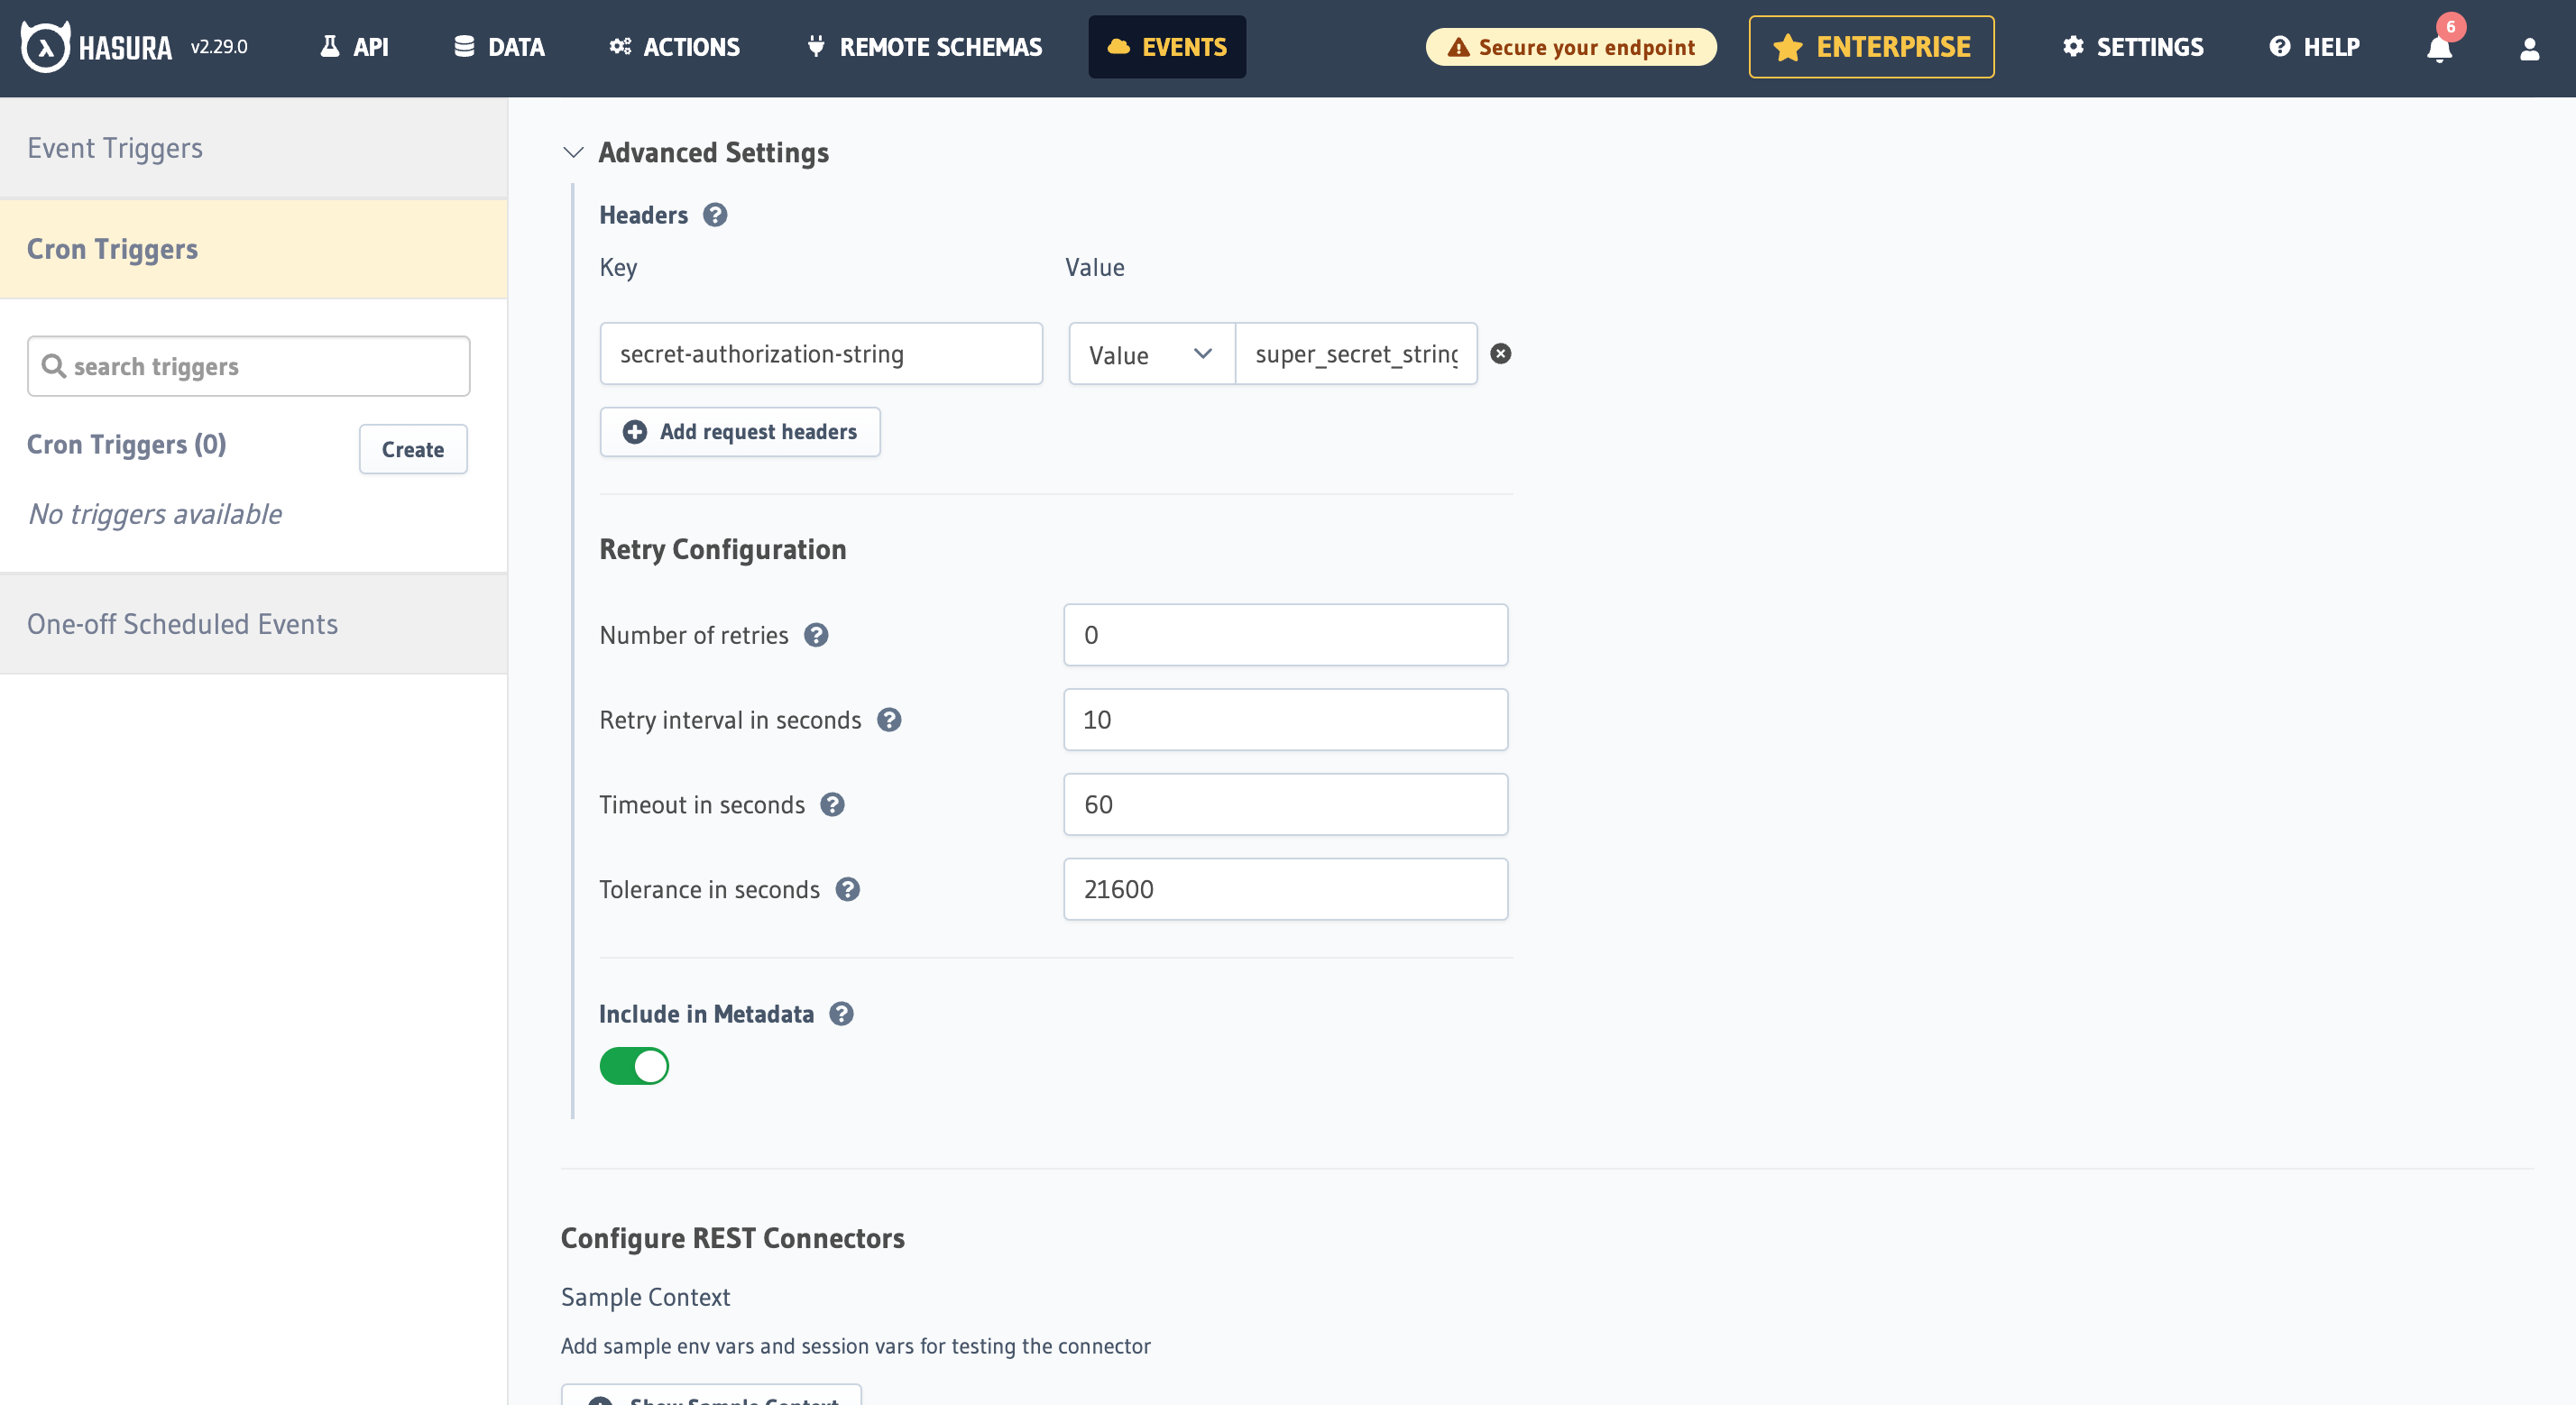
Also, change the Request Transform Options to POST so that the payload is sent in the request body.
Finally, click the Add Cron Trigger button to create the Scheduled Event.
Step 3: Create a webhook to handle the request
Whenever a cron job is triggered, Hasura will send a request to the webhook URL you provided. In this example, we're
simply going to send a POST request. Our webhook will parse the request, ensure the header is correct, and then query
the database to determine which users will receive an email.
Below, we've written an example of webhook in JavaScript. As we established earlier, this runs on port 4000. If you're
attempting to run this locally, follow the instructions below. If you're running this in a hosted environment, use this
code as a guide to write your own webhook.
Init a new project with npm init and install the following dependencies:
npm install express nodemailer
Then, create a new file called index.js and add the following code:
const express = require('express');
const nodemailer = require('nodemailer');

const app = express();

// Create a Nodemailer transporter using Ethereal email service
// Ideally, this configuration would be stored somewhere else
nodemailer.createTestAccount((err, account) => {
  if (err) {
    console.error('Failed to create a testing account. ' + err.message);
    return process.exit(1);
  }

  // If all goes as planned, here's the console telling us we're 👍
  console.log('Credentials obtained, listening on the webhook...');

  // Create a transporter object for nodemailer
  const transporter = nodemailer.createTransport({
    host: 'smtp.ethereal.email',
    port: 587,
    secure: false,
    auth: {
      user: account.user,
      pass: account.pass,
    },
  });

  // Function to fetch inactive users
  async function getInactiveUsers(oneWeekAgo) {
    const response = await fetch('<YOUR_CLOUD_PROJECT_ENDPOINT>', {
      method: 'POST',
      headers: {
        'Content-Type': 'application/json',
        'x-hasura-admin-secret': '<YOUR_ADMIN_SECRET>',
      },
      body: JSON.stringify({
        query: `
          query InactiveUsersQuery($oneWeekAgo: timestamptz!) {
            users(where: {last_seen: {_lt: $oneWeekAgo}}) {
              id
              name
              email
            }
          }
        `,
        variables: {
          oneWeekAgo: oneWeekAgo.toISOString(),
        },
      }),
    });

    const { data } = await response.json();
    return data.users;
  }

  // Function to send emails to inactive users
  async function sendInactiveUserEmails(transporter, inactiveUsers) {
    for (const user of inactiveUsers) {
      // Create a message object
      const message = {
        from: 'SuperStore.com <[email protected]>',
        to: `${user.name} <${user.email}>`,
        subject: `We miss you, ${user.name.split(' ')[0]}!`,
        text: `Hi ${
          user.name.split(' ')[0]
        }, it's been over one week since you last logged in. Come back and do things!`,
      };

      // Send the message using the Nodemailer transporter
      const info = await transporter.sendMail(message);

      // Log the message info
      console.log(`\nMessage sent to ${user.name}: ${nodemailer.getTestMessageUrl(info)}`);
    }
  }

  // Our route for the webhook
  app.post('/user-reengagement-email', async (req, res) => {
    // confirm the auth header is correct — ideally, you'd keep the secret in an environment variable
    const authHeader = req.headers['secret-authorization-string'];
    if (authHeader !== 'super_secret_string_123') {
      return res.status(401).json({
        message: 'Unauthorized',
      });
    }

    // Calculate the date one week ago
    const oneWeekAgo = new Date();
    oneWeekAgo.setDate(oneWeekAgo.getDate() - 7);

    // Fetch the list of users who haven't logged in for over one week
    const inactiveUsers = await getInactiveUsers(oneWeekAgo);

    // Send emails to inactive users
    await sendInactiveUserEmails(transporter, inactiveUsers);

    // Return a JSON response to the client
    res.json({
      message: 'Inactive user emails sent!',
    });
  });

  // Start the server
  app.listen(4000, () => {
    console.log('Server started on port 4000');
  });
});
You can run the server by running node index.js in your terminal. If you see the message
Webhook server is running on port 4000, you're good to go!
Step 4: Test the setup
First, let's update one of the users in our database to have a last_seen property that is older than a week. In the
Hasura Console, navigate to the Data tab and click on the users table. Then, click on the Modify tab and update
the last_seen property of one of the users to be older than a week:
YYYY-MM-DDTHH:MM:SS.SSSZ
The format above is the ISO 8601 format. Enter the year,
month, day, hour, minute, second, and millisecond of the date you want to set. For example, if you want to set the date
to 2023-10-10, you would enter 2023-10-10T00:00:00.000Z.
With your server running, Hasura should start hitting our endpoint. As we set our cron expression to 0 9 * * *, the
webhook will be triggered at 9:00 AM every day. We don't want to wait that long to test it. For now, update the
expression to * * * * * to trigger the webhook every minute. Then, check out your invocation logs in the Hasura
Console to verify that the webhook was triggered successfully and your terminal to see the outputted information and
link to a handy email 🎉

Feel free to customize the webhook implementation based on your specific requirements and chosen email sending service. Remember to handle error scenarios, implement necessary validations, and add appropriate security measures to your webhook endpoint.