Getting Started with Hasura and MySQL in Docker
Introduction
This guide will help you get set up with the Enterprise Edition of Hasura GraphQL Engine with our MySQL integration using Docker Compose. This is the easiest way to set up Hasura Enterprise Edition and the MySQL GraphQL Data Connector.
- Hasura GraphQL Engine
v2.24.0onwards - Hasura supports most databases with standard implementations of MySQL 8.0 and higher including: Amazon RDS, Amazon Aurora, Google Cloud SQL and Digital Ocean.
- PlanetScale and certain other providers are unsupported.
Hasura currently supports queries, mutations (INSERT, UPDATE, DELETE), table relationships, remote relationships and permissions on MySQL.
Note that Hasura doesn't yet support the ability to modify the database schema for MySQL, so the database you connect to should already contain tables and data. You should also ideally have access to it outside of Hasura to modify the schema.
Deploying Hasura Enterprise with Docker
Prerequisites
This tutorial assumes that the following prerequisites have been met:
- You have Docker and Docker Compose working on your machine.
- To deploy Hasura Enterprise Edition, you will either need to sign up for the Hasura Enterprise Edition free trial or you will need to contact Hasura Sales for a license key.
- You have access to a MySQL database for which you would like to create an API.
Step 1: Get the Docker Compose file
The install manifests repo contains all installation manifests required to deploy Hasura anywhere. The Docker Compose manifest also contains a Postgres database in order to store the Hasura metadata and a Redis instance for caching.
# in a new directory run
wget https://raw.githubusercontent.com/hasura/graphql-engine/master/install-manifests/enterprise/mysql/docker-compose.yaml
# or run
curl https://raw.githubusercontent.com/hasura/graphql-engine/master/install-manifests/enterprise/mysql/docker-compose.yaml -o docker-compose.yaml
Step 2: Set the Hasura Enterprise Edition license key and the admin secret
Edit the downloaded docker-compose.yaml and set the license key and admin secret. If you've been provided a license key by the Hasura team, you can enter it according to the directions below.
---
graphql-engine:
  image: hasura/graphql-engine:v2.24.0
  environment:
    HASURA_GRAPHQL_EE_LICENSE_KEY: <license key>
    HASURA_GRAPHQL_ADMIN_SECRET: <your secretkey>
An admin secret key is required to make sure that your GraphQL endpoint and the Hasura Console are not publicly accessible.
If you don't already have a license key and are interested in trying out Hasura Enterprise Edition with MySQL, you can
start a free 30-day trial. Leave the HASURA_GRAPHQL_EE_LICENSE_KEY environment variable commented out we'll return to
this in Step 4.
The HASURA_GRAPHQL_ADMIN_SECRET should never be passed from the client to the Hasura GraphQL Engine as it would give
the client full admin rights to your Hasura instance. See Authentication & Authorization for
information on setting up auth in Hasura.
Step 3: Run Hasura GraphQL Engine
The following command will create and run the containers in the Docker Compose manifest:
docker compose up -d
Check that the containers are running:
docker ps

CONTAINER ID IMAGE                              ... CREATED STATUS PORTS          ...
097f58433a2b hasura/graphql-engine              ... 1m ago  Up 1m  8080->8080/tcp ...
b0b1aac0508d postgres                           ... 1m ago  Up 1m  5432/tcp ...
3a29aa348999 redis:7                            ... 1m ago  Up 1m  6379/tcp ...
7b5b2ee70ece hasura/graphql-data-connector      ... 1m ago  Up 1m  5005/tcp ..
You can check the health of the connector using the /health endpoint. The connector is available at the following
endpoint:
http://localhost:8081/api/v1/mysql/health
This data source utilizes the hasura/graphql-data-connector to connect your data source to the GraphQL engine.
Step 4: Load the Hasura Console
Open the Hasura Console by navigating to http://localhost:8080/console. You will need to input your admin secret key
as set in your Docker Compose file to log in.
If you don't already have a license key, you can start a 30-day free trial by clicking the ENTERPRISE button in the
top navigation. You can read more details here.

Step 5: Connect to a MySQL database
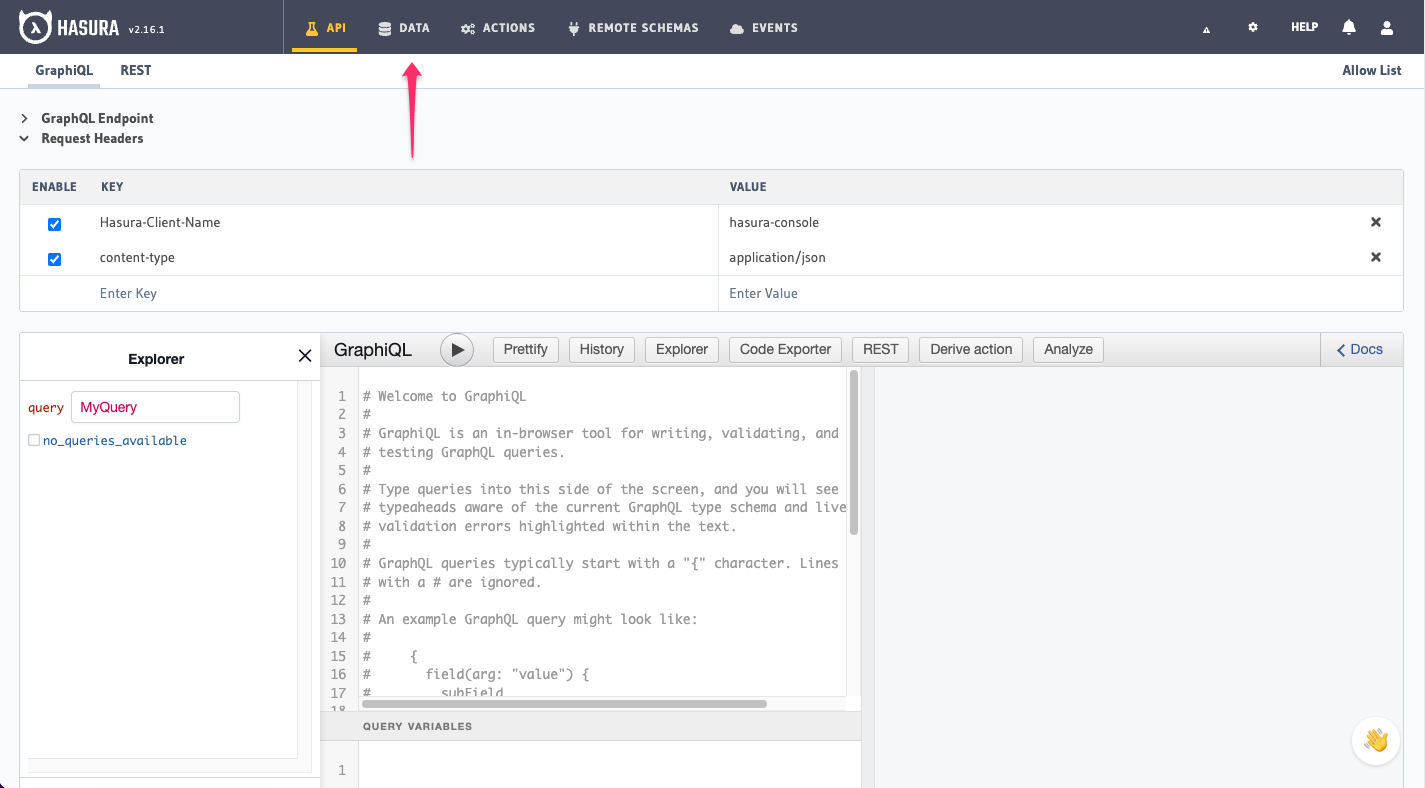
From the Console, click the Data tab:

Select the MySQL data source driver, enter in a display name for the database and set the JDBC Connection URL for your MySQL instance.
The JDBC connection URL should look like this:
jdbc:mysql://<hostname>:<port>/<database name>?user=<username>&password=<password>
For example:
jdbc:mysql://myhost.mycompany.com/mysqltest?user=abc&password=pqr  # assuming the default port 3306
jdbc:mysql://localhost:4533/mysqltest?user=abc&password=pqr        # assuming MySQL is running on port 4533
For more information see MySQL Connection URL syntax.
Click Connect Database.
Due to the potential variations in drivers, it's crucial to escape special characters used in the password of the
connection string. These include { } % & #. To escape a character, use the appropriate escape sequence based on your
database's driver's documentation.
Step 6: Track tables and run GraphQL API queries
Now that you have successfully connected your MySQL database to Hasura, you can track tables and use Hasura to automatically build a full-featured GraphQL API for it.
Step 7 (optional): Use managed PostgreSQL and Redis instances
The Hasura Enterprise Edition Docker compose files come with containerized open-source versions of PostgreSQL and Redis.
We highly recommend using managed PostgreSQL and Redis instances especially when running in production.
To switch to using your PostgreSQL or Redis instances, set the following environment variables:
HASURA_GRAPHQL_METADATA_DATABASE_URL HASURA_GRAPHQL_REDIS_URL HASURA_GRAPHQL_RATE_LIMIT_REDIS_URL
For example:
---
graphql-engine:
  image: hasura/graphql-engine:v2.24.0
  environment:
    HASURA_GRAPHQL_METADATA_DATABASE_URL: postgres://postgres:postgrespassword@postgres:5432/postgres
    HASURA_GRAPHQL_REDIS_URL: 'redis://redis:6379'
    HASURA_GRAPHQL_RATE_LIMIT_REDIS_URL: 'redis://redis:6379'
Resources
- Hasura GraphQL Engine logs for more details on log types.