Deploy Hasura GraphQL Engine on Kubernetes with Helm Chart
To help you easily install Hasura GraphQL Engine on Kubernetes, we're happy to provide a Helm Chart repository with GraphQL Engine and its ecosystem, including:
- GraphQL Engine: the chart deploys the GraphQL Engine service with a Postgres instance for metadata storage.
- Hasura Enterprise Stack: the complete end-to-end Hasura GraphQL Engine Enterprise ecosystem with Redis, Observability, Dex (SSO middleware), and Data Connectors.
In this guide, you will get up and running quickly with the Hasura GraphQL Engine and a Postgres database on Kubernetes using Helm Chart.
Prerequisites
- A working Kubernetes v1.18+ cluster
- Helm v3 installed on your machine.
- Kubectl installed and configured to be able to connect to the Kubernetes cluster.
Step 1: Configure a Hasura Helm repository
Run this command to add Hasura Helm repository:
helm repo add hasura https://hasura.github.io/helm-charts
Step 2: Install the Helm Chart
Run the following command to install both the Hasura GraphQL Engine and a Postgres database. We assume that the release
name is hasura and the admin secret is hasura:
helm install hasura --set secret.adminSecret=hasura hasura/graphql-engine
Remember to set strong admin secrets before going live.
After the GraphQL Engine Helm Chart was installed successfully, print Kubernetes pods with kubectl to verify.
NAME                                  READY   STATUS    RESTARTS      AGE
hasura-graphql-engine-6cc69694dd-r4dnh   1/1     Running   1 (75s ago)   2m58s
hasura-postgres-5fd95db548-f4vhg         1/1     Running   0             2m58s
By default, the Helm Chart doesn't enable ingress. You need to enable port-forwarding on the graphql-engine pod to
localhost.
kubectl port-forward hasura-graphql-engine-6cc69694dd-r4dnh 8080:8080
Hasura relies on a Postgres database to store its metadata, and this database can also be used to store your application data.
If you'd like to connect another type of database for storing application data, check out our list of supported databases.
Open the Hasura Console by navigating to http://localhost:8080/console.
Step 3: Try out Hasura
Create a table and insert some demo data
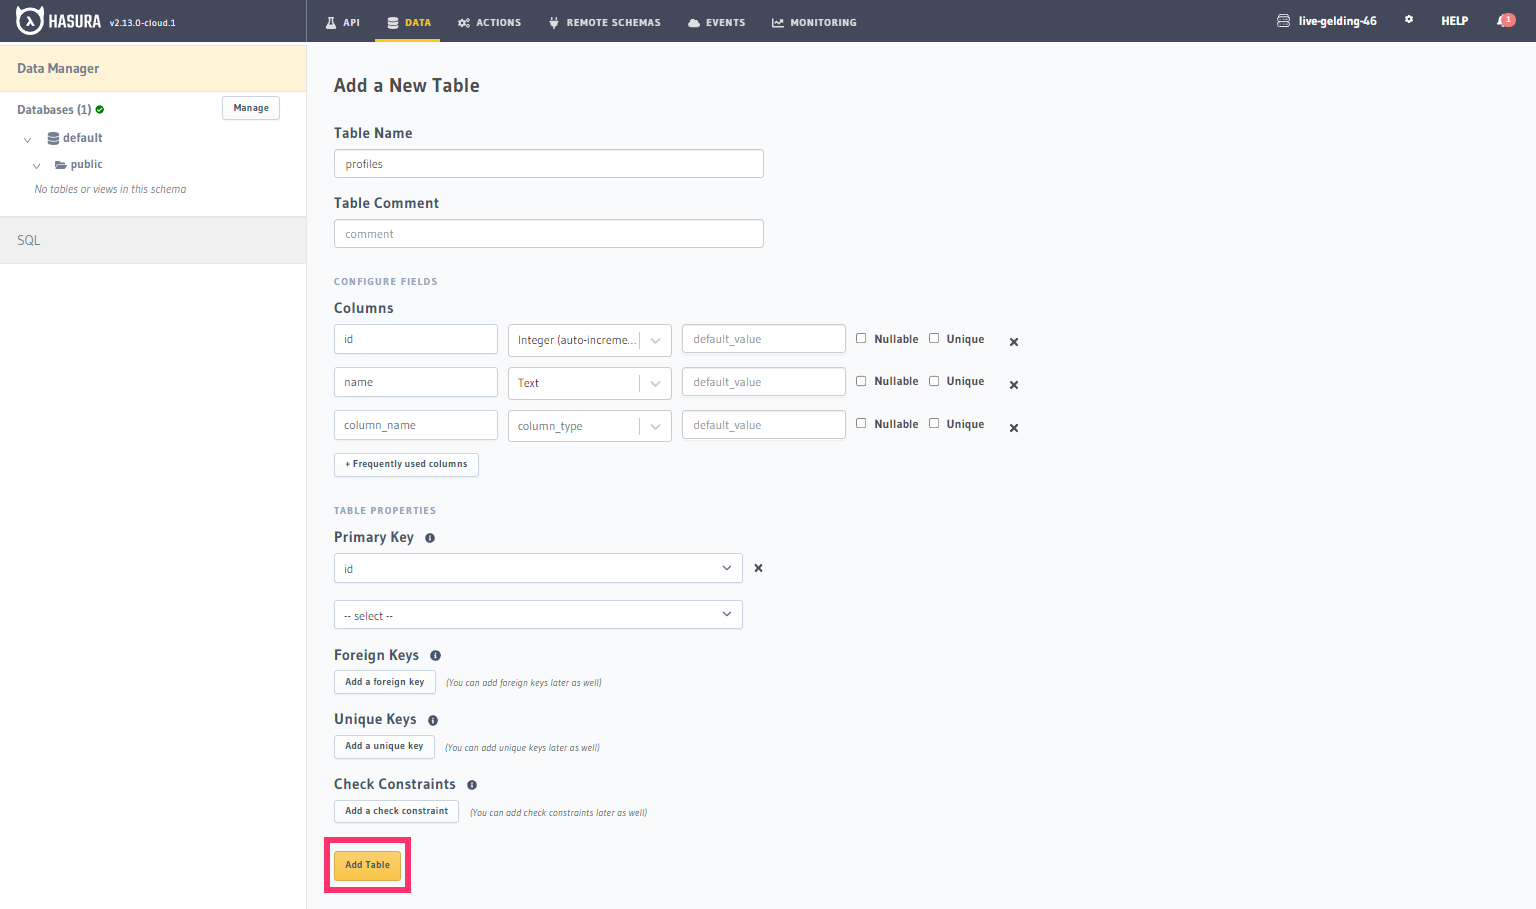
On the Hasura Console, navigate to Data -> Create table and create a sample table called profiles with the following
columns:
profiles (
  id SERIAL PRIMARY KEY, -- serial -> auto-incrementing integer
  name TEXT
)

Now, insert some sample data into the table using the Insert Row tab of the profiles table.
Try out a query
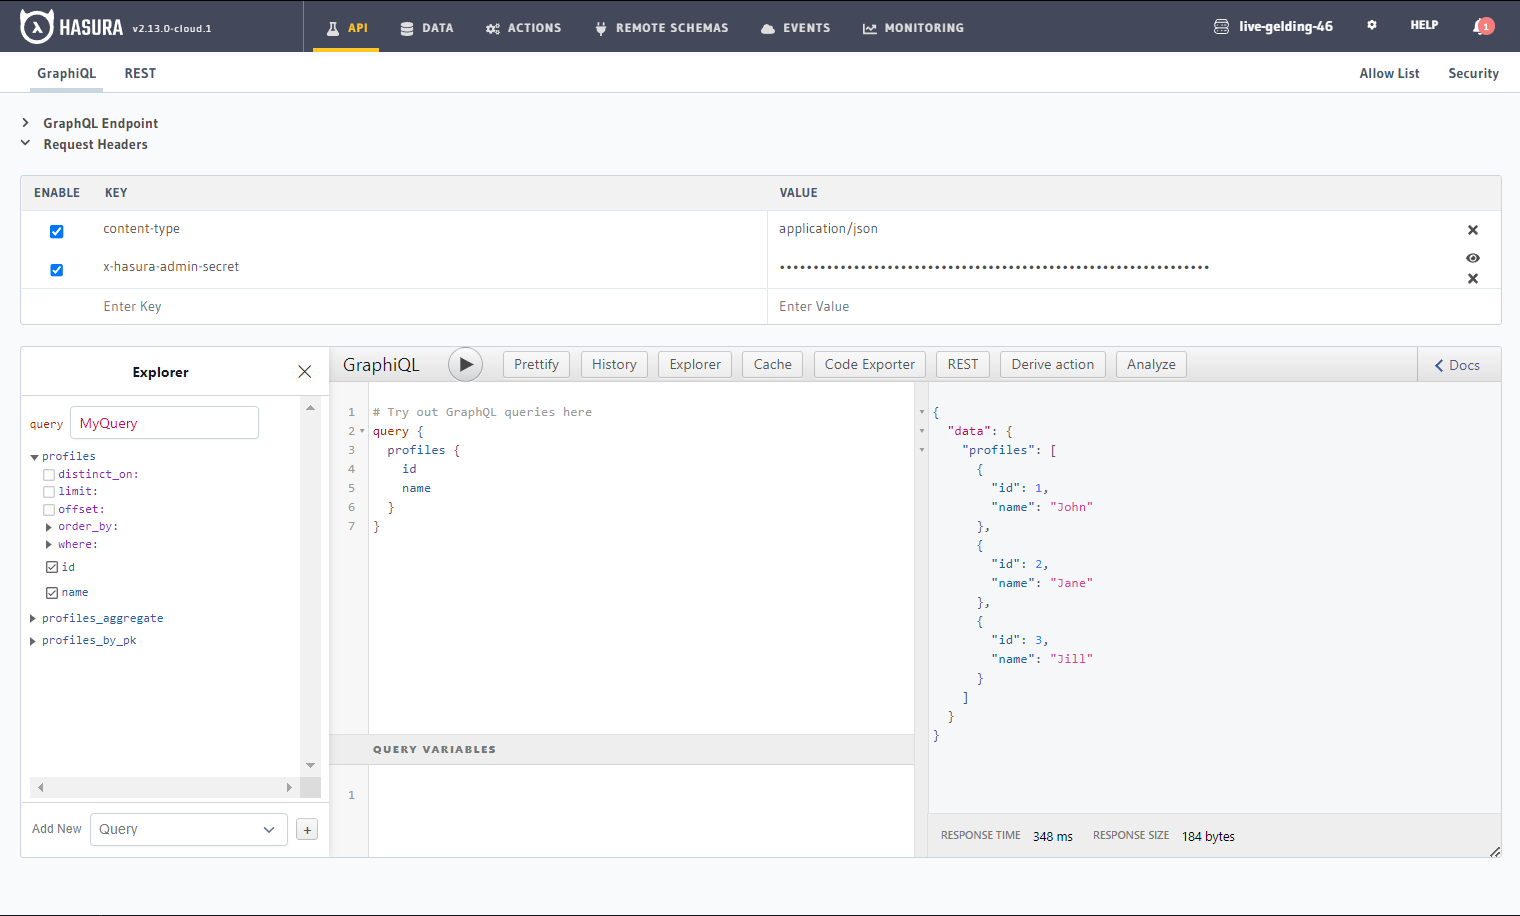
Head to the API tab in the Console and try running the following query:
query {
  profiles {
    id
    name
  }
}
You'll see that you get all the inserted data!

Enable GraphQL Engine Enterprise
You can set the Enterprise License Key value when installing the Helm chart to enable Enterprise features.
helm install hasura --set secret.adminSecret=hasura --set secret.eeLicenseKey=<license-key> hasura/graphql-engine
Advanced configuration
You can see full configuration values at the Github repository and example values to get started.
Hasura Enterprise Stack
If you intend to install the all-in-one deployment stack with Hasura Enterprise and its ecosystem you can try the hasura-enterprise-stack Helm Chart. The Helm Chart is a collection of sub-charts that includes:
- GraphQL Engine Helm Chart.
- Bitnami Redis(R) for caching and rate limit.
- Kube Prometheus Stack for observability.
- Jaeger for trace collector.
- Dex for Single Sign-on middleware.
- Data connector Helm Charts (GraphQL, Mongo, etc...).
Those sub-charts are disabled by default. You can enable desired charts only.
Prerequisites
- A working Kubernetes v1.18+ cluster
- Helm v3 installed on your machine.
- Kubectl installed and configured to be able to connect the Kubernetes cluster.
Step 1: Configure Hasura Helm repository
Run this command to add Hasura Helm repository:
helm repo add hasura https://hasura.github.io/helm-charts
Step 2: Install the helm chart
By default, the Helm Chart will start with the basic GraphQL Engine chart above. In this guide, we will enable Hasura Enterprise with a Redis cache.
Create an extended values.yaml file locally with the following values:
global:
  redis:
    enabled: true
    password: redispassword

graphql-engine:
  secret:
    adminSecret: 'hasura'
    eeLicenseKey: '<set your license key here>'
Then install the Helm Chart with the file.
helm install hasura -f ./values.yaml hasura/hasura-enterprise-stack
After the Helm Chart was installed successfully, print Kubernetes pods with kubectl to verify.
NAME                                  READY   STATUS    RESTARTS   AGE
hasura-graphql-engine-65d75f997f-pkwj9   1/1     Running   0          11s
hasura-postgres-5fd95db548-6x844         1/1     Running   0          11s
hasura-redis-master-0                    1/1     Running   0          11s
hasura-redis-replicas-0                  1/1     Running   0          11s
Advanced configuration
You can see full configuration values at the Github repository and example values to get started.