Hasura DDN Plans, Pricing, and Billing
Overview
Hasura DDN Pricing is designed for simplicity with fewer pricing components while maintaining consistency across different plans and deployment methods. Additionally, this pricing model remains independent of traffic, meaning that you won't incur higher costs as your traffic loads grow.
The DDN Base Trial Plan and DDN Advanced Trial Plan offer new users the opportunity to experience our DDN Base Plan and DDN Advanced Plan free of charge for 30 days.
The trials are activated immediately and are free for 30 days. Once the trial period ends, the account or project plan will automatically downgrade to the last active non-trial plan (either DDN Free or DDN Base). You will not be charged or automatically converted to the DDN Base or Advanced plan after the trial expires. These trials are available only once per user.
During the DDN Base trial, you'll have access to all features, including: unlimited collaboration for your team, real-time performance metrics and query tracing, model and field analytics, insights for the last 30 days, and schema registry and tracking.
During the DDN Advanced trial, you'll have access to all DDN Base features and all features of DDN Advanced, including: modular metadata management, multi-repo CI/CD, continuous validation, and team-based governance. You can upgrade at any time before the trial expires by adding your credit card, and we will notify you two weeks before your trial period ends.
This ensures you can explore the full benefits of both plans without any commitment or automatic billing.
Pricing units and terminology
| Pricing Unit | Details |
|---|---|
| Model | The number of models for billing purposes maps directly to the sum of Model and Command objects in the metadata. A model or a command can be created for a database table, view, microservice, API, etc. |
| Active Model | An active model is defined as a model that is accessed more than 1000 times a month. A model is considered to be accessed if it is queried over the GraphQL API either directly or via a relationship |
| Availability Zone | An Availability Zone is a redundant location within a data center where Hasura is running. These typically map to data center locations on major cloud providers. |
| Data Transfer | Amount of data in Gibibytes (GiB) transferred across various channels while running a Hasura instance. |
Plans and Pricing
See our pricing page for more information.
Hasura DDN Billing
With Hasura DDN, you can setup billing in just a few steps. All you need to do is add a credit card to your plan and you're off to the races!
Add a payment method
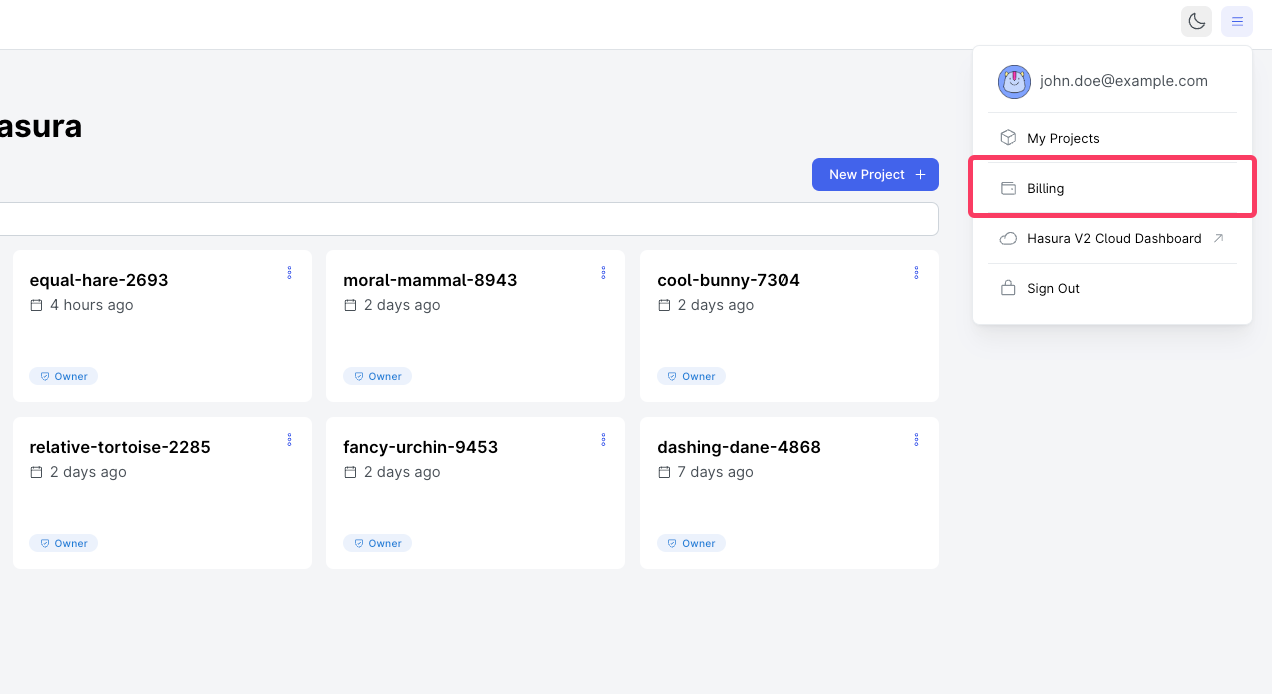
You can manage the payment methods for your Hasura account by navigating to the billing section of the console. You can access this via the menu in the top-right of the projects page.

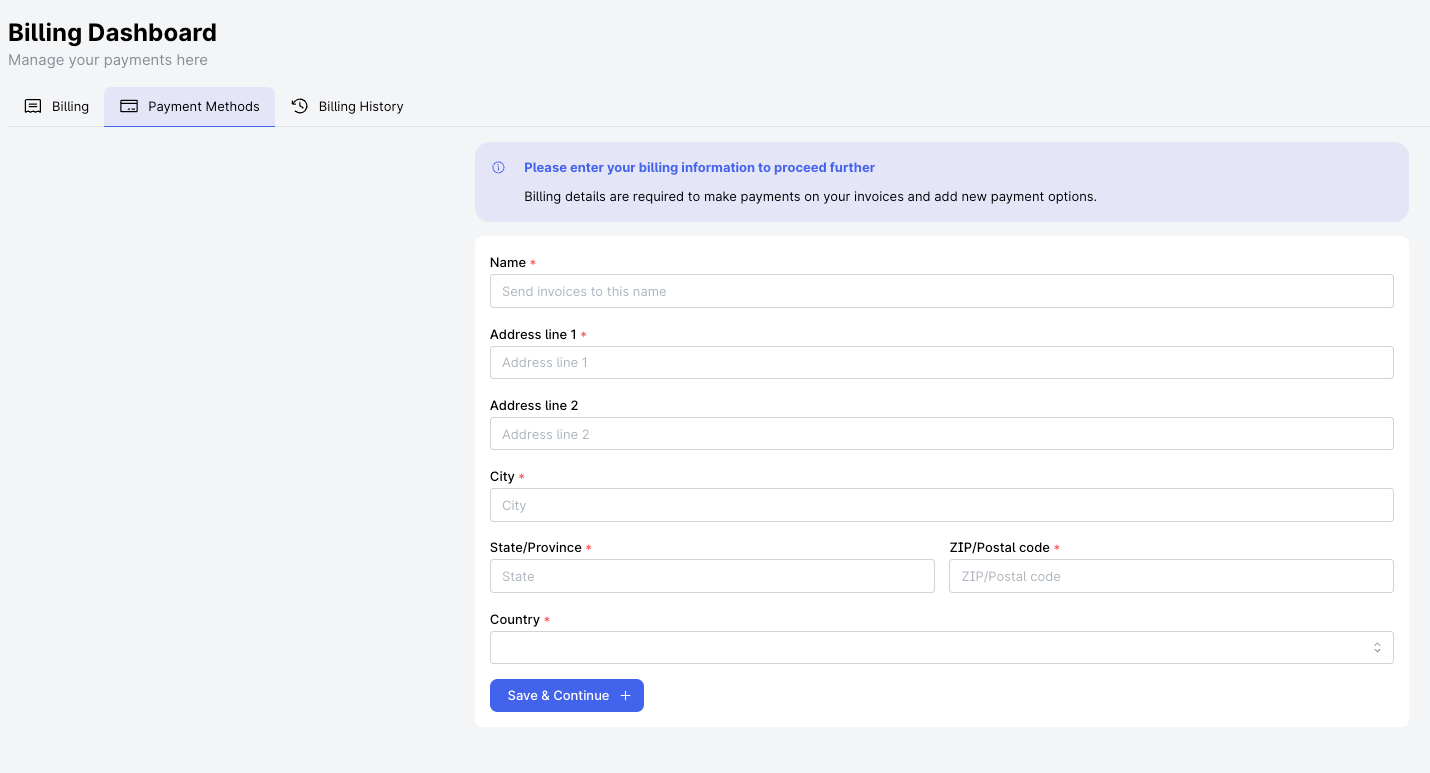
Step 1: Add a billing address
If you do not have a billing address associated with your user account, please add one in the payment methods management screen.

Step 2: Add the payment details
To add a credit card, navigate to the Card Management section and click on Add Card to save a new payment method.
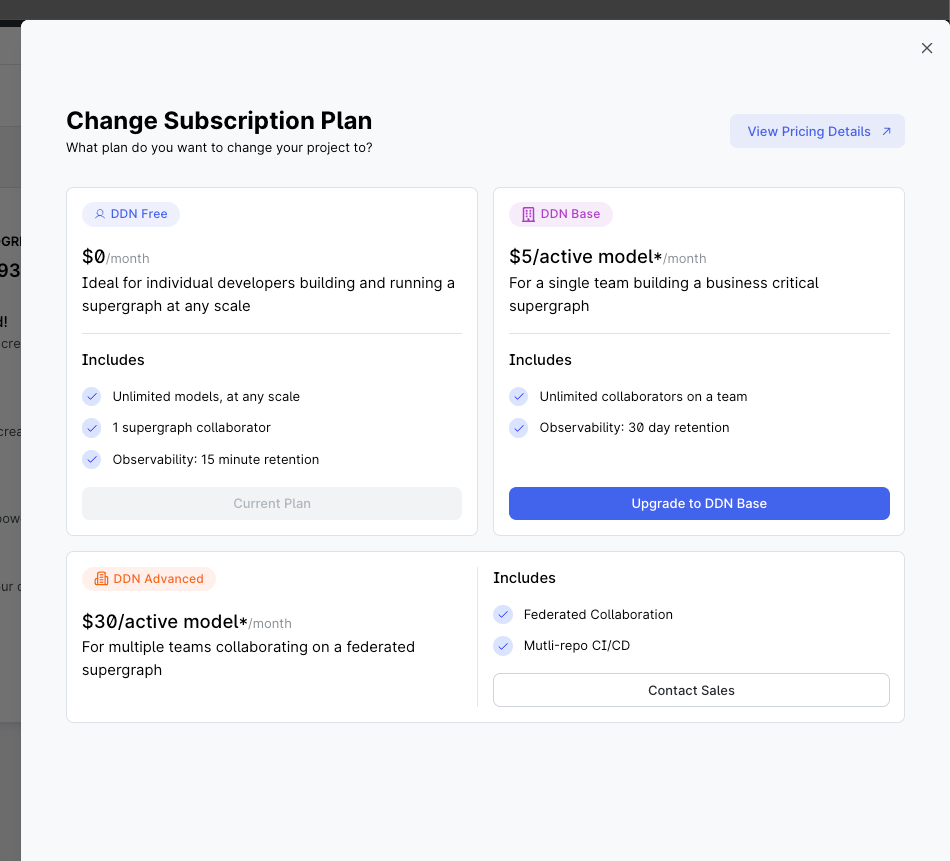
Step 3: Choose your plan (for an existing project)
-
Click on the project plan button on the header.

-
Choose your project plan.

-
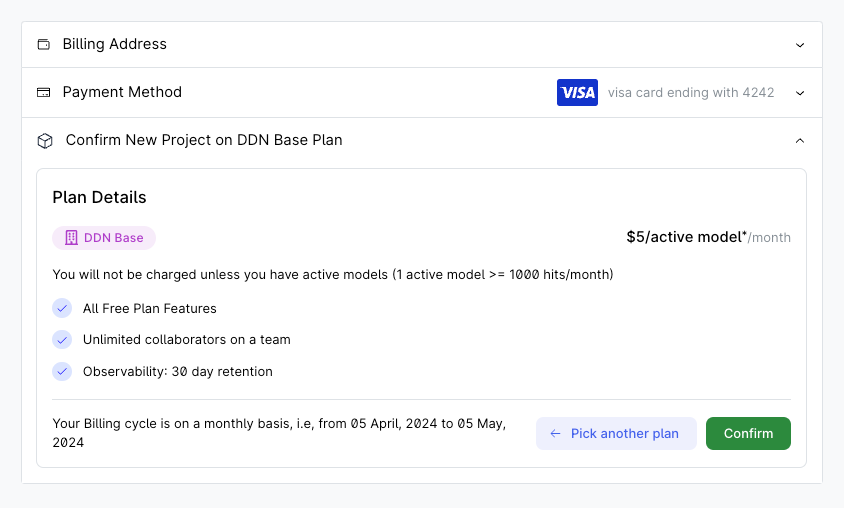
Confirm the plan details. You can also edit your billing details and add/remove payment methods.

-
You should see a message that confirms that your project has been updated 🎉
Edit an existing payment method
To edit an existing payment method, navigate to the
payment methods management screen and manage
your saved payment methods under Card Management section.

