Add Authorization
What's about to happen?
If you've already created and tested your supergraph, you'll have seen that queries are executed by default using the
admin role. However, you can easily add authorization rules — what we term permissions — by simply using the same
declarative metadata approach we've seen for relationships and versioning.
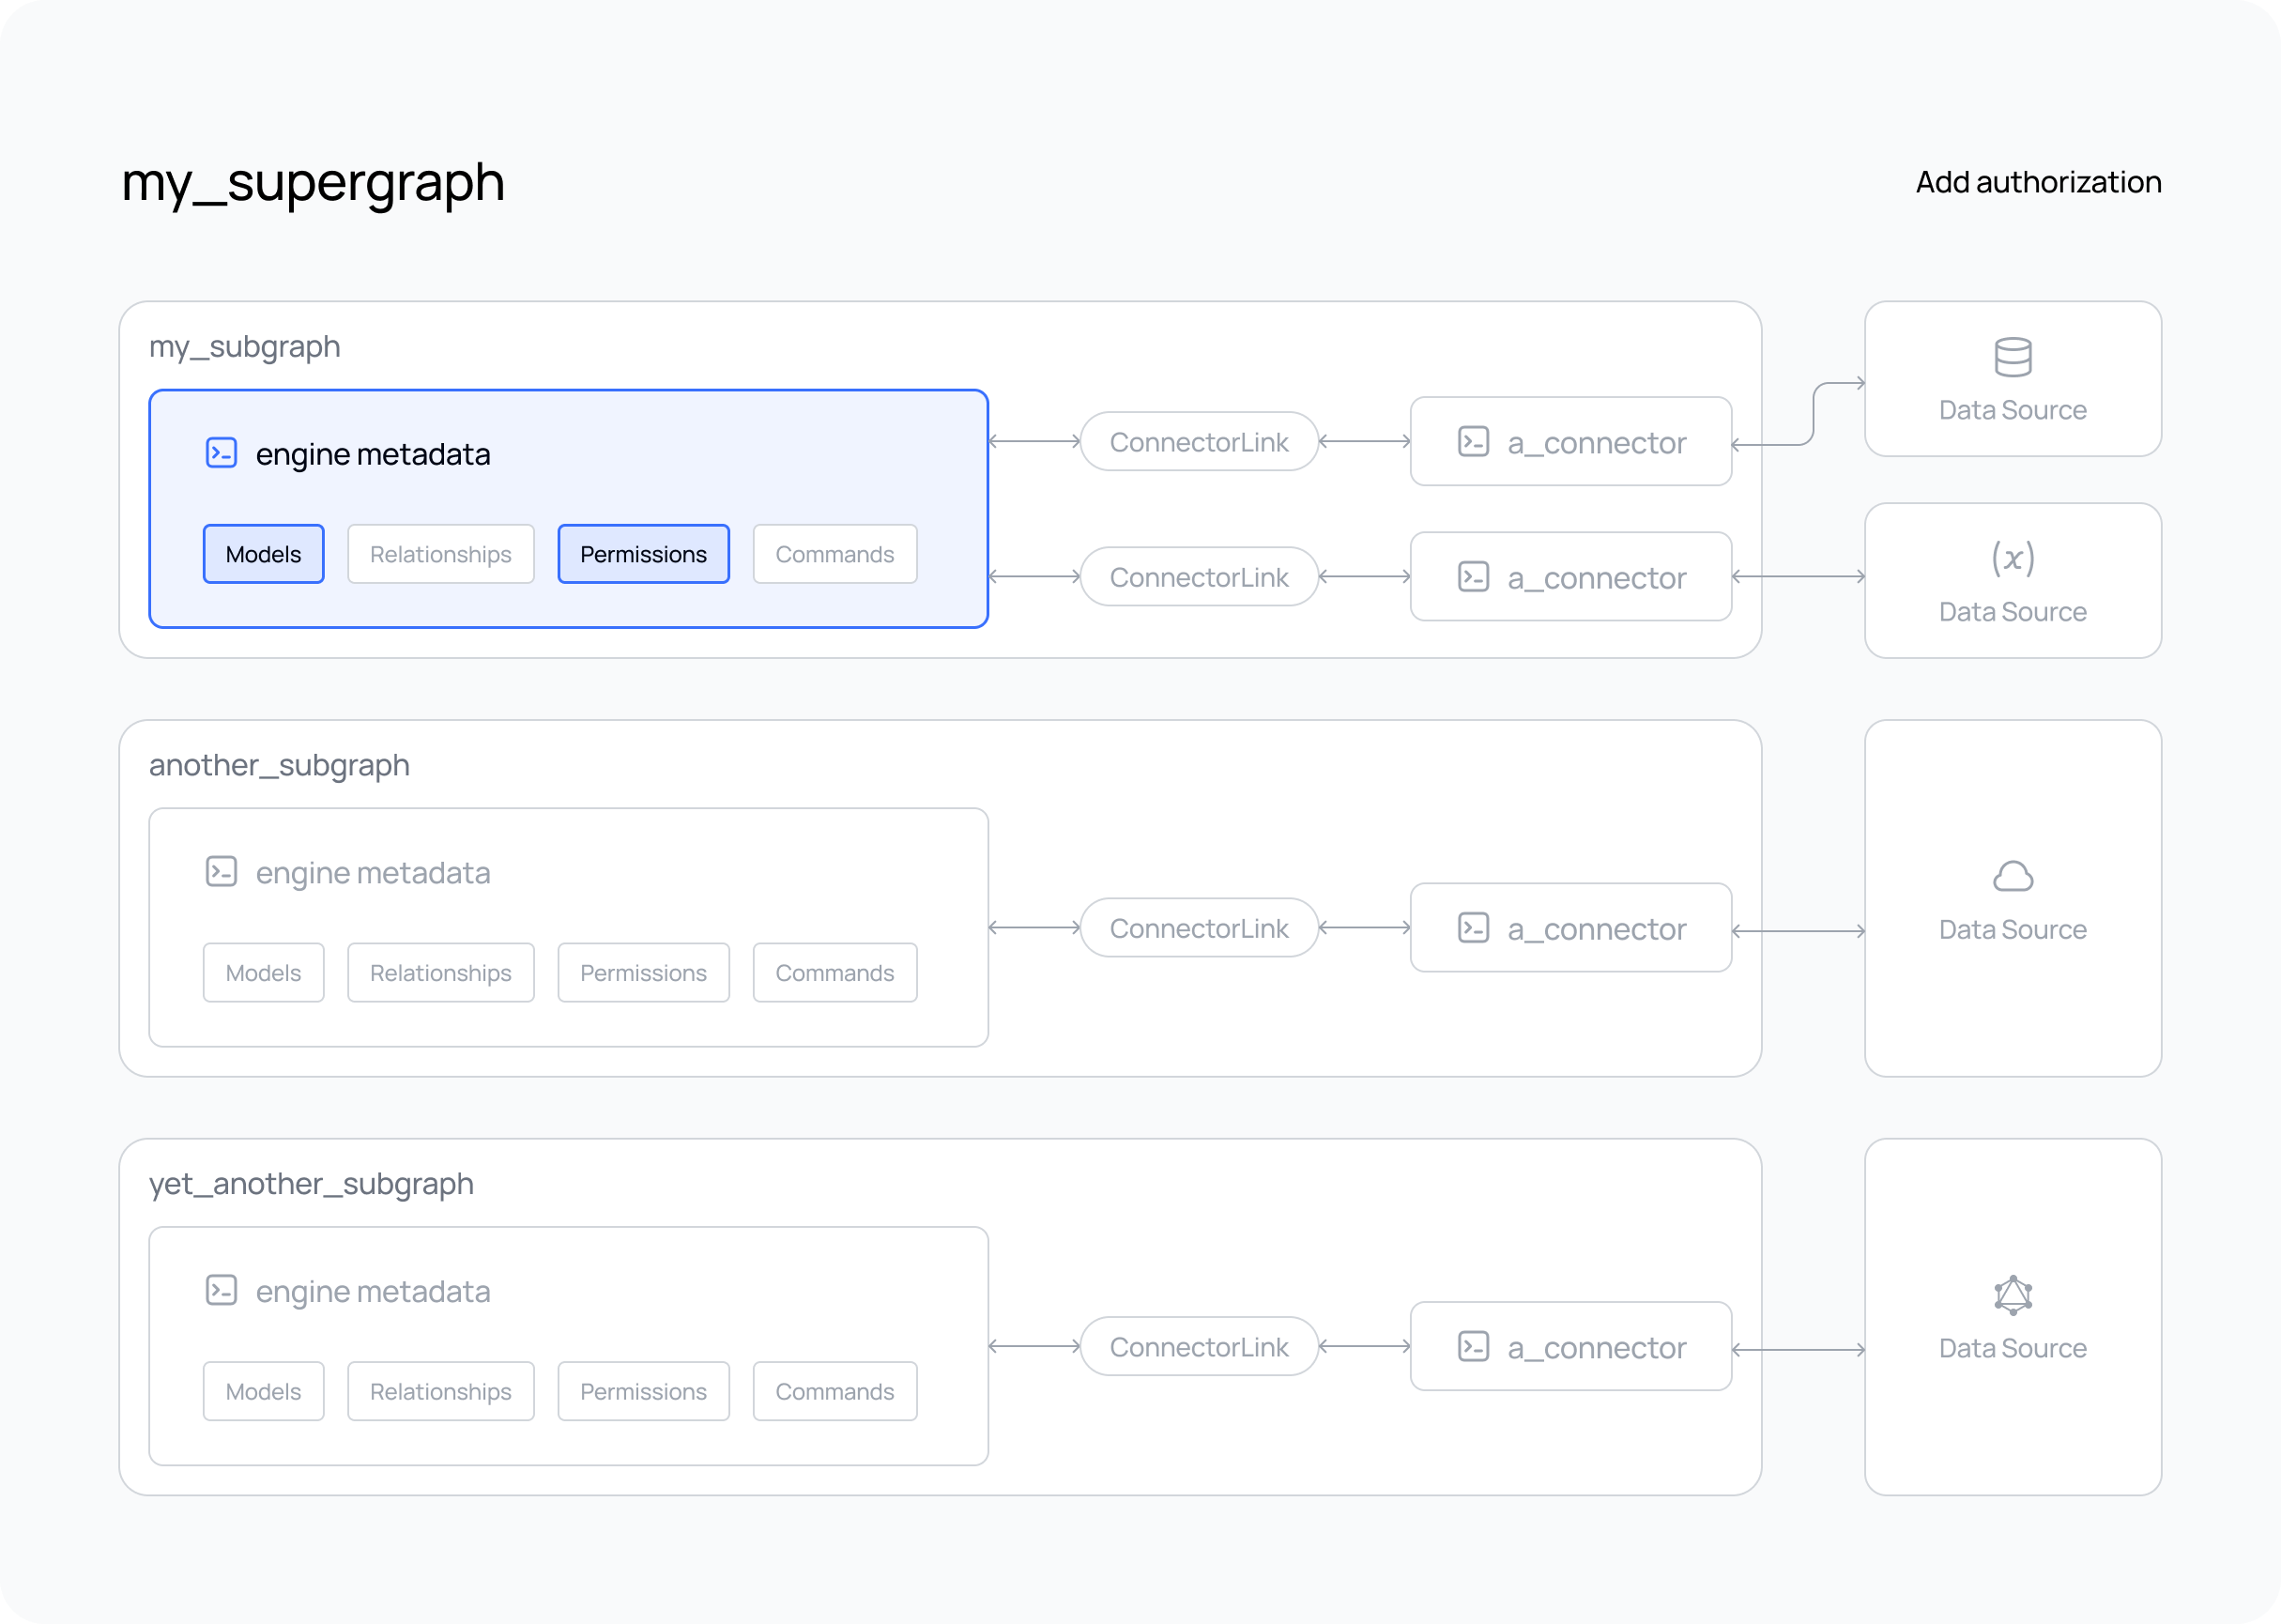
In the steps below, we'll add
modelPermissions to filter the data that can
be accessed by a role and typePermissions to
control what fields are returned by your API.
You can use the Hasura VS Code extension to help you author any metadata objects or updates, including
modelPermissions and typePermissions. You can activate its autocomplete abilities using CTRL+SPACEBAR inside of
any hml file.
Steps
- The DDN CLI, VS Code extension, and Docker installed
- A new or existing project
- At least one subgraph
- At least one data connector running
- Models added to your subgraph
Step 1. Create a modelPermission
By default, a role of admin exists for your API and can access all models. To create a new role, such as user,
simply add the role to the list of permissions for a model and set up your access control rules. In the example below,
we'll allow users with the role of user to access only their own rows from a Users model by checking for a header
value matching their id:
---
kind: ModelPermissions
version: v1
definition:
  modelName: Users
  permissions:
    - role: admin
      select:
        filter: null
    - role: user
      select:
        filter:
          fieldComparison:
            field: id
            operator: _eq
            value:
              sessionVariable: x-hasura-user-id
Remember, models are under the metadata subdirectory under the subgraph directory.
Step 2. Create a typePermission
The admin role also has access to all fields for each model. However, adding a new role and limiting what columns can
be returned from your data source is just as simple. For example, let's restrict what a user can see by omitting
several fields from the typePermissions:
---
kind: TypePermissions
version: v1
definition:
  typeName: Users
  permissions:
    - role: admin
      output:
        allowedFields:
          - createdAt
          - email
          - favoriteArtist
          - id
          - isEmailVerified
          - lastSeen
          - name
          - password
          - updatedAt
    - role: user
      output:
        allowedFields:
          - email
          - favoriteArtist
          - id
          - name
          - password
Step 3. Create a new build
As we've altered our metadata, create a new build to test it.
ddn supergraph build local \
  --output-dir engine \
  --subgraph-env-file my_subgraph:my_subgraph/.env.my_subgraph.local
Want to test your supergraph? Don't forget to start your GraphQL engine and connectors using the following command.
HASURA_DDN_PAT=$(ddn auth print-pat) docker compose up --build --watch
If you haven't included your connector(s) in your compose.yaml,
don't forget to start it as well.
Creating a new build after modifying this metadata will allow us to use two headers in our request: x-hasura-role and
x-hasura-user-id:
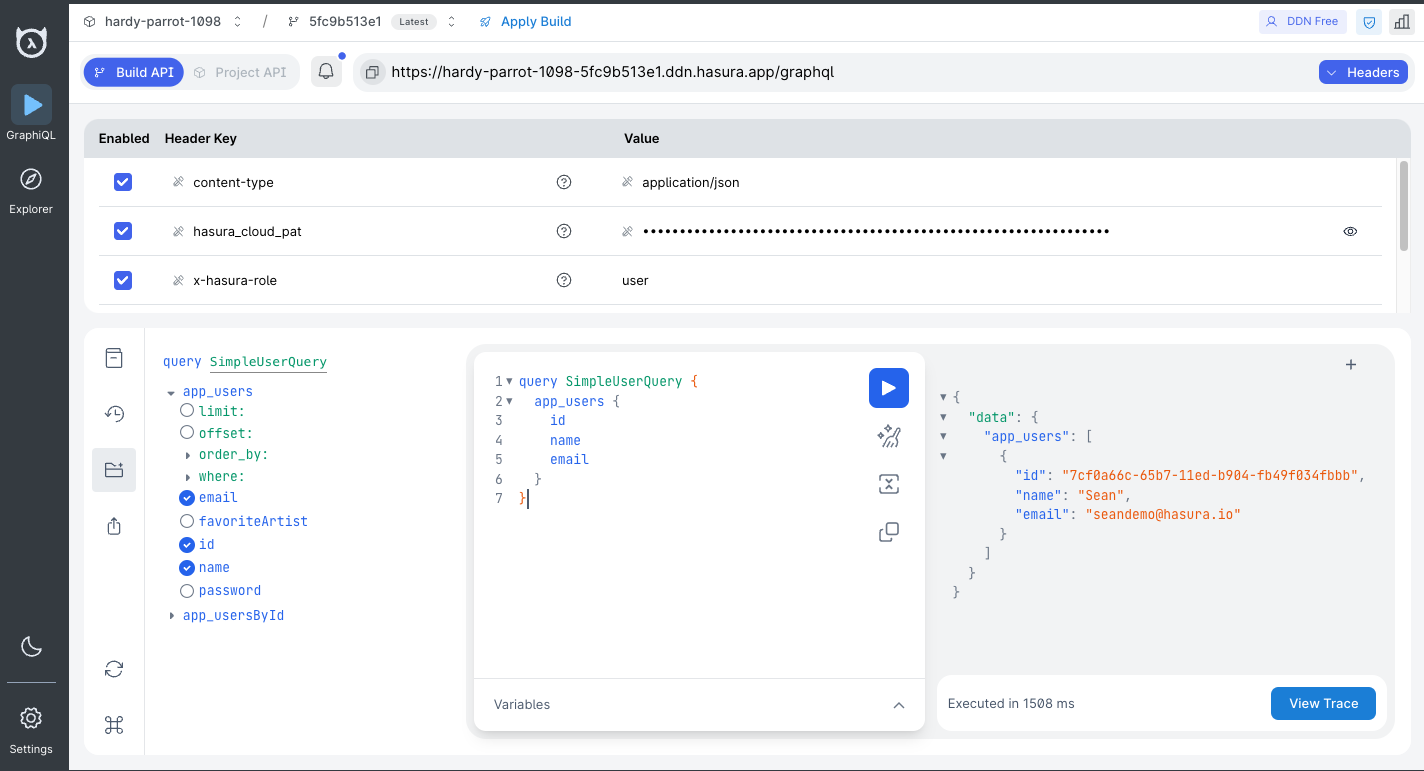
What did this do?
In our example, we're passing headers as unencoded values to control access and filtering for different roles.
Specifically, the x-hasura-role and x-hasura-user-id headers are used to manage permissions and data access. These
headers can be part of your claims when using JWTs or
webhooks for authentication. You can read more about Hasura's approach to
authentication here.
By adding modelPermissions, we've enabled access to the Users model for the user role. As shown in the screenshot
above, this means that only the Users model is available to a consumer with the x-hasura-role value of user.
Additionally, modelPermissions are used to filter the rows that can be returned from this model. They don't simply
check if the returned data is allowed; instead, they filter the data before it can be returned. In our example, this is
achieved by validating the x-hasura-user-id value against the matching record with the same id in the data source.
Finally, we limited the fields they can access to the ones listed above, thereby preventing someone with the user role
from accessing irrelevant system information, such as when users were last seen.
We recommend you keep going and check out the custom business logic section next.