Dedicated: Create a Data Plane
Introduction
A Data Plane in Hasura provides dedicated infrastructure for running your GraphQL workloads. This guide walks you through the process of creating a new Data Plane for dedicated Private DDN.
To create a Data Plane in Private DDN, you'll need an Enterprise contract. Reach out to sales here to get started.
How to create a new Data Plane on Dedicated Private DDN
Step 1. Create a new Data Plane
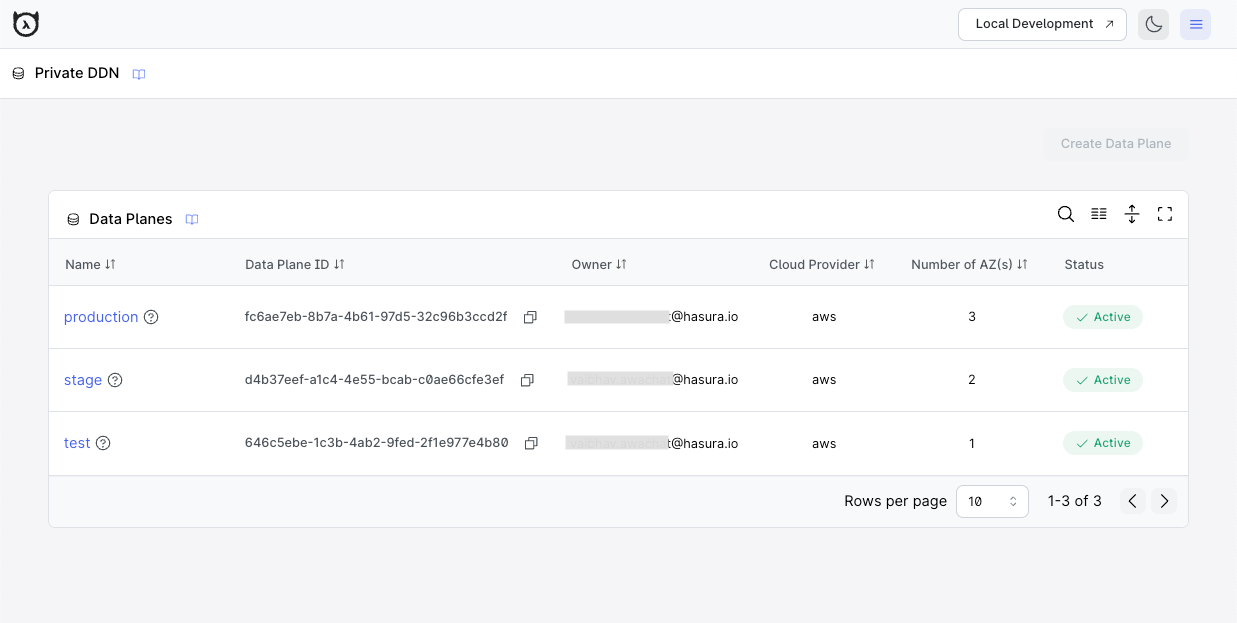
Navigate to the Private DDN section in your Hasura console.
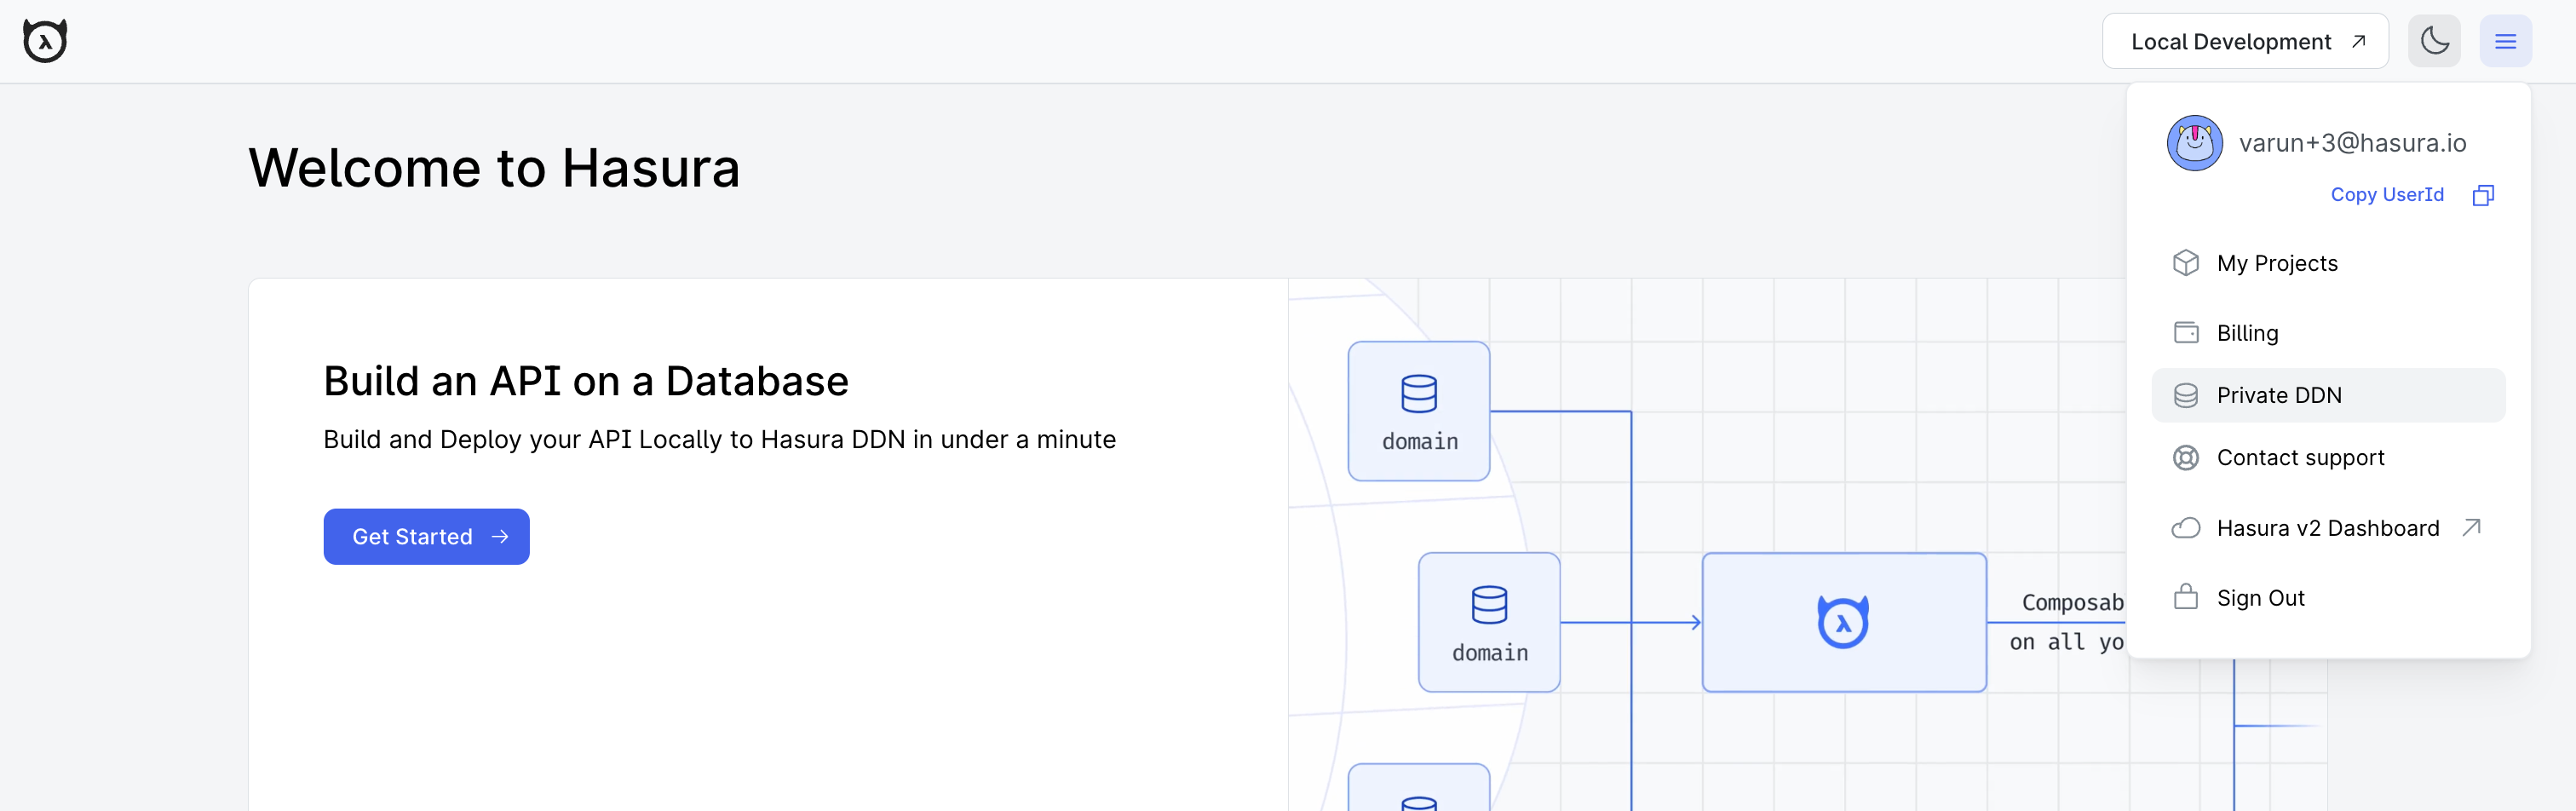
Click the Create Data Plane button.

Step 2. Complete the Data Plane Configuration Form
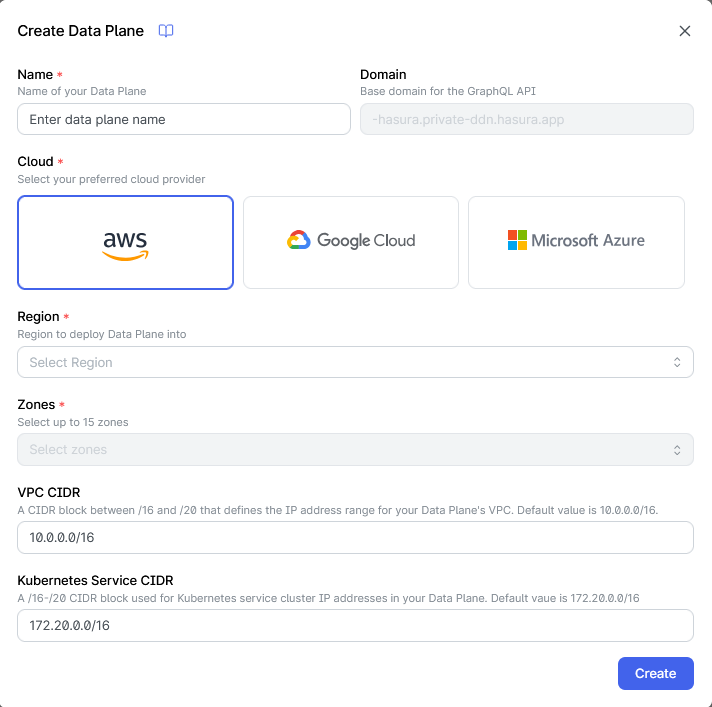
-
Name: Enter a descriptive name using only letters and spaces, between 4-30 characters. This will be used to identify your Data Plane.
-
Domain: This field is automatically generated from your Data Plane name. This is the base domain for the GraphQL API on this Data Plane.
-
Cloud Provider: Select your preferred cloud provider. Currently available options:
- Amazon Web Services (AWS)
- Google Cloud Platform (GCP)
- Microsoft Azure
-
Region: Select the geographical region for your Data Plane.
-
Zones: Select availability zones for your Data Plane. The maximum number of zones depends on your Hasura Private DDN subscription.
- For AWS: Use AZ IDs (e.g., use1-az1, use1-az2)
- For GCP: Use zone names (e.g., us-west2-a, us-west2-b)
- For Azure: Use physical zone names (e.g., eastus-az1, eastus-az2)
Expand below to view available zones for your cloud:
AWS zones
Availability Zone (AZ) IDs are unique identifiers for AWS Availability Zones within a region. Using AZ IDs ensures consistency across different AWS accounts and optimizes performance by aligning your Data Plane with your database's physical location.
Why Use AZ IDs Instead of AZ Names?
- Consistency: AZ IDs are consistent across all AWS accounts, whereas AZ Names can differ.
- Performance: Deploying resources in the same physical AZ reduces latency.
- Cost Efficiency: Avoids cross-zone network costs by ensuring resources are within the same AZ.
Note: When selecting AZ IDs, ensure they correspond to the AZs where your database resides to maintain low latency and avoid cross-zone network costs. It is recommended to choose at least two AZs for higher availability and fault tolerance.
Steps to View Available Zones:
Using AWS CLI:
aws ec2 describe-availability-zones \
  --region us-east-1 \
  --output table \
  --query "AvailabilityZones[?State=='available'] | [].{ZoneName: ZoneName, ZoneId: ZoneId}"
Example output:
-----------------------------
| DescribeAvailabilityZones |
+-----------+---------------+
| ZoneId    | ZoneName      |
+-----------+---------------+
| use1-az1  | us-east-1a    |
| use1-az2  | us-east-1b    |
| use1-az3  | us-east-1c    |
+-----------+---------------+
Note: Replace us-east-1 in the command with your desired region.
GCP zones
Zones in Google Cloud Platform (GCP) are identified by their zone names, which follow a consistent pattern across all GCP projects. Unlike AWS, GCP uses straightforward zone names that don't require separate ID mapping.
Why Use Zone Names?
- Consistency: Zone names are consistent across all GCP projects.
- Performance: Deploying resources in the same zone reduces latency.
- Cost Efficiency: Avoids cross-zone network costs by ensuring resources are within the same zone.
Note: When selecting zones, ensure they correspond to the zones where your database resides to maintain low latency and avoid cross-zone network costs. It is recommended to choose at least two zones for higher availability and fault tolerance.
Steps to View Available Zones:
Using gcloud CLI:
gcloud compute zones list \
  --filter="region:us-west2" \
  --format="table(name,region,status)"
Example output:
NAME        REGION    STATUS
us-west2-a  us-west2  UP
us-west2-b  us-west2  UP
us-west2-c  us-west2  UP
Note: Replace us-west2 in the command with your desired region.
Azure zones
Physical Zone Names are unique identifiers for Azure Availability Zones within a region. Using physical zone names ensures consistency across different Azure subscriptions and optimizes performance by aligning your Data Plane with your database's physical location.
Why Use Physical Zone Names Instead of Logical Zones?
- Consistency: Physical zone names are consistent across all Azure subscriptions, whereas logical zones (1,2,3) can map differently.
- Performance: Deploying resources in the same physical zone reduces latency.
- Cost Efficiency: Avoids cross-zone network costs by ensuring resources are within the same physical zone.
Note: When selecting physical zones, ensure they correspond to the zones where your database resides to maintain low latency and avoid cross-zone network costs. It is recommended to choose at least two physical zones for higher availability and fault tolerance.
Learn more about Azure Physical vs Logical Zone Mapping
Steps to View Available Zones:
Using Azure CLI:
az rest --method get \
  --uri '/subscriptions/{subscriptionId}/locations?api-version=2022-12-01' \
  --query 'value[?name==`eastus` && availabilityZoneMappings != `null`].{displayName: displayName, name: name, availabilityZoneMappings: availabilityZoneMappings}'
Example output:
[
  {
    "availabilityZoneMappings": [
      {
        "logicalZone": "1",
        "physicalZone": "eastus-az1"
      },
      {
        "logicalZone": "2",
        "physicalZone": "eastus-az3"
      },
      {
        "logicalZone": "3",
        "physicalZone": "eastus-az2"
      }
    ],
    "displayName": "East US",
    "name": "eastus"
  }
]
Note: Replace eastus in the command with your desired region name.
- VPC CIDR: A /16-/20 CIDR block that defines the IP address range for your Data Plane's Virtual Private Cloud (VPC). Default value: 10.0.0.0/16. See Why Hasura Requires a /16 to /20 CIDR Range for details on this requirement.
- Kubernetes Service CIDR: A /16-/20 CIDR block used for Kubernetes service cluster IP addresses in your Data Plane. This CIDR range is used internally by Kubernetes to assign IP addresses to services running in the cluster. Default value: 172.20.0.0/16.
- Consider your current and future network topology, ensuring these CIDR ranges don't conflict with existing network routes or address spaces, especially for VPC peering or VPN connections.
- Consult with your network administrator if you're unsure about potential conflicts.
- Remember that VPC CIDR and Kubernetes Service CIDR cannot be modified once the Data Plane has been created.
- Kubernetes Service CIDR is only required for AWS.
Data Plane Configuration form for AWS:
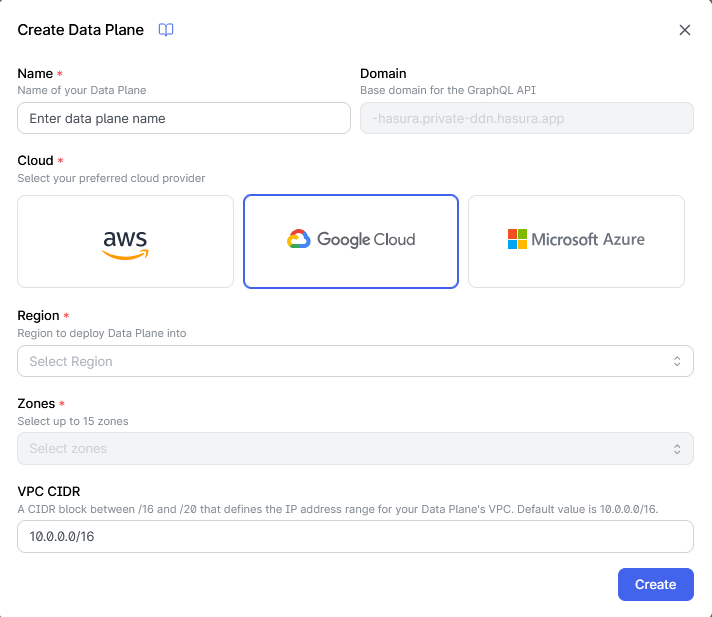
Data Plane Configuration form for GCP:
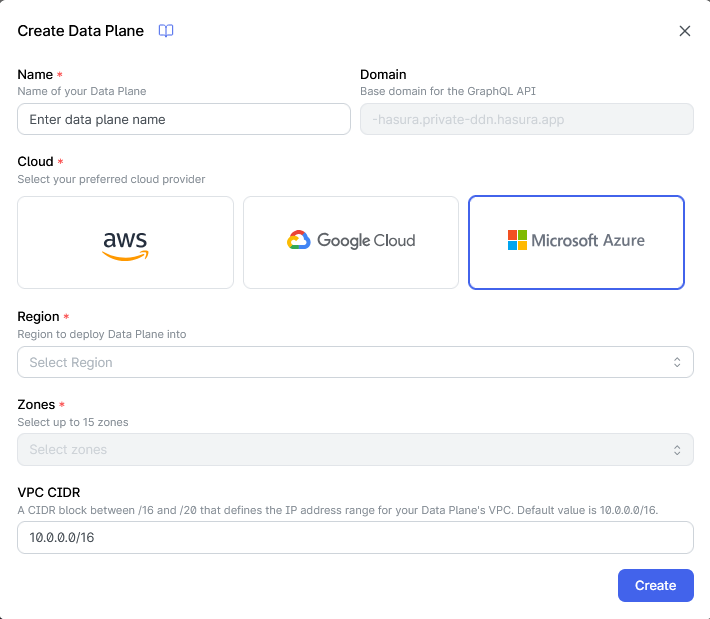
Data Plane Configuration form for Azure:
Why Hasura Requires a /16 to /20 CIDR Range
When creating a Data Plane, Hasura requires a VPC CIDR block between /16 and /20 (providing between 4,096 and 65,536 IP addresses). This requirement exists because:
Kubernetes Infrastructure Requirements:
- Pod IP Allocation: Each pod running in the Kubernetes cluster receives its own IP address. A production data plane can run hundreds or thousands of pods across multiple services.
- Service IP Allocation: Kubernetes services require dedicated ClusterIP addresses for internal service discovery.
- Node IP Allocation: Each worker node in the cluster requires IP addresses for the node itself and its network interfaces.
Operational Headroom:
- Scaling Capacity: The data plane needs room to scale horizontally during traffic spikes or when adding new features.
- Rolling Updates: During deployments, both old and new pods run simultaneously, temporarily doubling IP usage.
- Multi-AZ Deployment: For high availability, resources are distributed across multiple availability zones, each requiring subnet IP ranges.
Network Segmentation:
- Subnet Division: The VPC CIDR is divided into multiple subnets (public, private, etc.) for security isolation.
- Future Growth: Additional subnets may be needed for new services, private endpoints, or integration requirements.
Why Not Smaller?
A /21 or smaller CIDR provides fewer than 2,048 addresses. After accounting for cloud provider reserved addresses, subnet division, and Kubernetes overhead, this leaves insufficient room for workloads and scaling.
Why Not Larger than /16?
A /16 provides 65,536 addresses, which is typically sufficient for even the largest enterprise deployments. Larger ranges (/15 or bigger) would reserve excessive IP space that's unlikely to be utilized.
A /20 CIDR range provides limited IP capacity (~4,096 addresses). Heavy usage of custom connectors without build hibernation may lead to IP address exhaustion. For deployments expecting many concurrent connectors, we recommend using /19 or larger CIDR ranges.
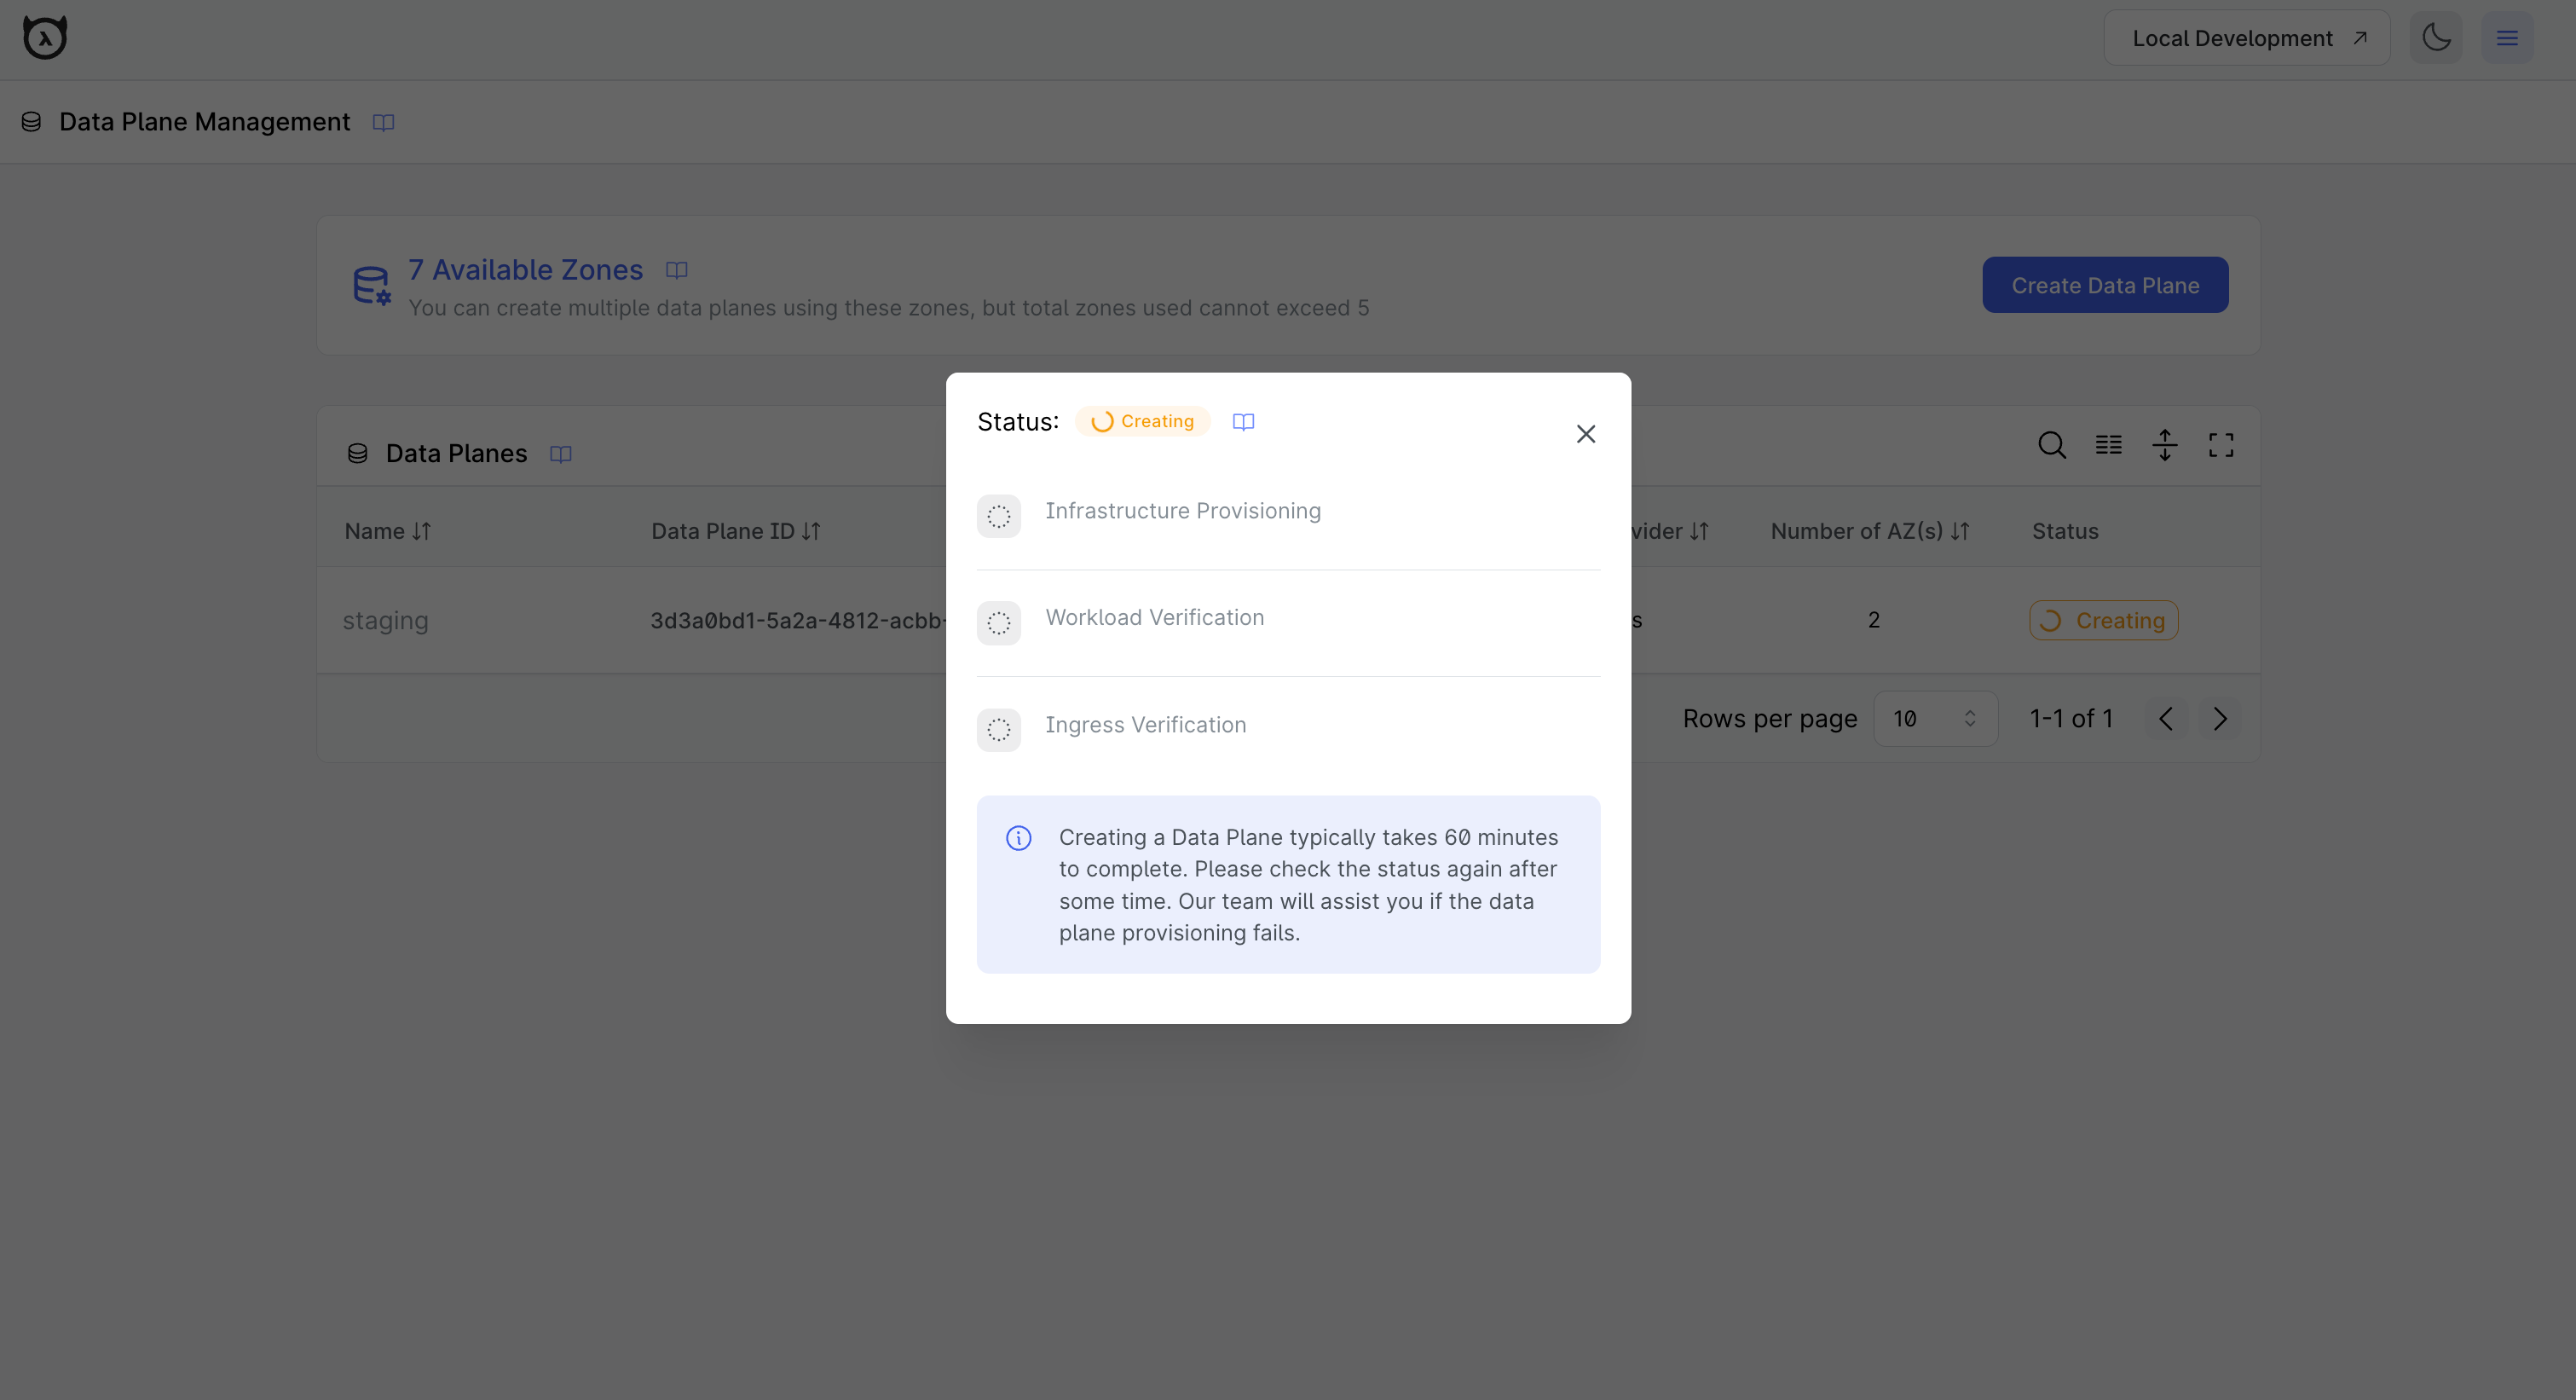
Step 3. Create and Monitor your Data Plane
Click the Create button after filling out all required fields. The creation process will begin, and you'll see your
Data Plane listed with a Creating status. The creation process typically takes 60 minutes to complete.
Click on the Creating button in the status column to see detailed progress.
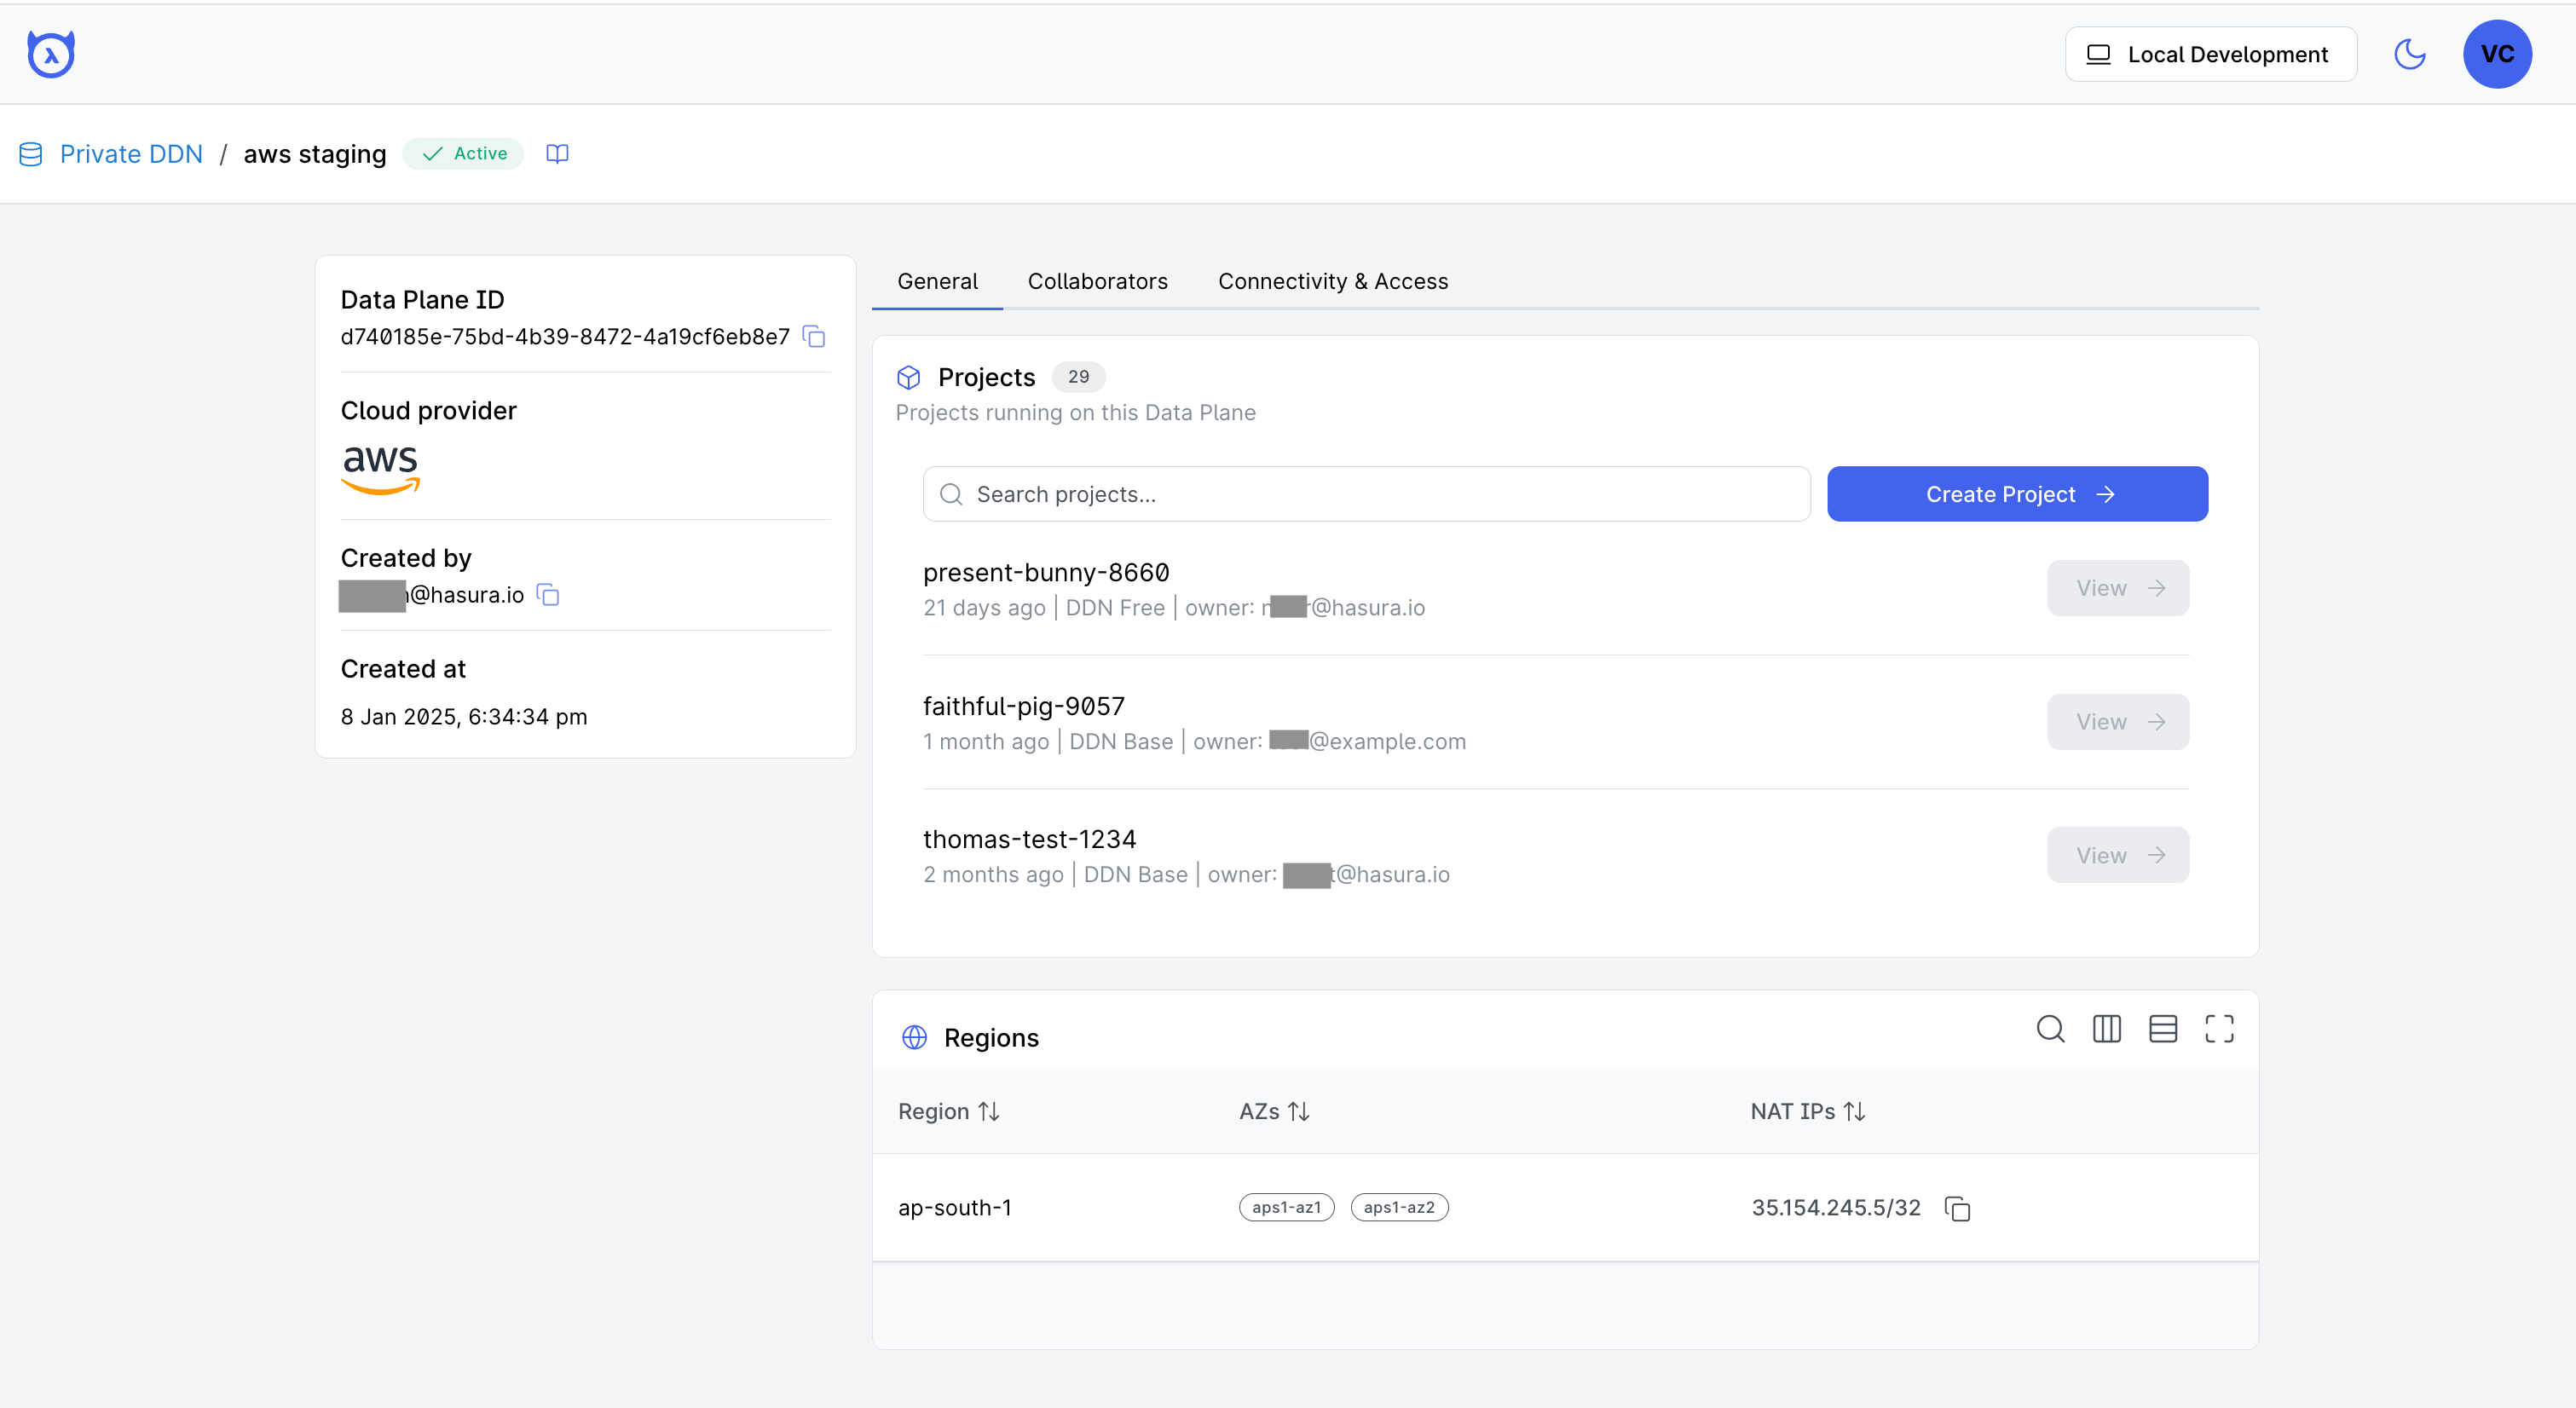
After Creation
Once your data plane is successfully created and the status updates to Active, you and your team can begin creating projects on your Data Plane. To access more information about a specific Data Plane, simply click on its name within the Data Planes table. This action will navigate you to a detailed view page of the selected Data Plane, as illustrated below.
Next steps
Now that you've created a Data Plane on dedicated Private DDN, learn how to add collaborators so they can create projects.
