Get Started with Hasura and MongoDB in Docker
Introduction
This guide will help you get set up with the Enterprise Edition of Hasura GraphQL Engine with our MongoDB integration using Docker Compose. This is the easiest way to set up Hasura Enterprise Edition and the MongoDB GraphQL Data Connector.
Hasura GraphQL Engine v2.27.0 onwards
Hasura currently supports queries, table relationships, remote relationships and permissions on MongoDB databases.
A logical model or database validation schema is required for generating your GraphQL schema.
Deploying Hasura Enterprise with Docker
Prerequisites
This tutorial assumes that the following prerequisites have been met:
- You have Docker and Docker Compose working on your machine.
- You have MongoDB Compass installed on your machine.
Step 1: Get the Docker Compose file
The install manifests repo contains all installation manifests required to deploy Hasura anywhere. The Docker Compose manifest also contains a Postgres database in order to store the Hasura metadata and a Redis instance for caching.
# in a new directory run
wget https://raw.githubusercontent.com/hasura/graphql-engine/master/install-manifests/enterprise/mongodb/docker-compose.yaml
# or run
curl https://raw.githubusercontent.com/hasura/graphql-engine/master/install-manifests/enterprise/mongodb/docker-compose.yaml -o docker-compose.yml
When you use these to launch the services, you'll see four containers running. The first two are Hasura GraphQL Engine and a Postgres Database for storing Hasura's metadata. The third container is the MongoDB GraphQL Connector agent. The fourth container is a copy of MongoDB Community Edition.
Step 2: Set the Hasura Enterprise Edition license key and the admin secret
If you've been provided a license key by the Hasura team, you can edit the downloaded docker-compose.yaml to set
the license key and admin secret.
---
graphql-engine:
  image: hasura/graphql-engine:v2.27.0
  environment:
    HASURA_GRAPHQL_EE_LICENSE_KEY: <license key>
    HASURA_GRAPHQL_ADMIN_SECRET: <your secretkey>
An admin secret key is required to make sure that your GraphQL endpoint and the Hasura Console are not publicly accessible.
If you don't already have a license key and are interested in trying out Hasura Enterprise Edition with MongoDB, you can
start a free 30-day trial. Leave the HASURA_GRAPHQL_EE_LICENSE_KEY environment variable commented out we'll return to
this in Step 6.
The HASURA_GRAPHQL_ADMIN_SECRET should never be passed from the client to the Hasura GraphQL Engine as it would give
the client full admin rights to your Hasura instance. See Authentication & Authorization for
information on setting up auth in Hasura.
Step 3: Run the containers
The following command will create and run the containers in the Docker Compose manifest:
docker compose up -d
Step 4: Create a MongoDB database
This guide assumes you don't have a MongoDB instance already set up. If you do, you can skip to Step 6.
Open MongoDB Compass and create a new connection using this connection string:
mongodb://mongouser:mongopassword@localhost:27017/?authMechanism=DEFAULT
Create a new database called demo using the MongoShell at the bottom of the MongoDB compass screen by entering the command:
use demo;
Via MongoShell, create a new users collection:
db.createCollection('users');
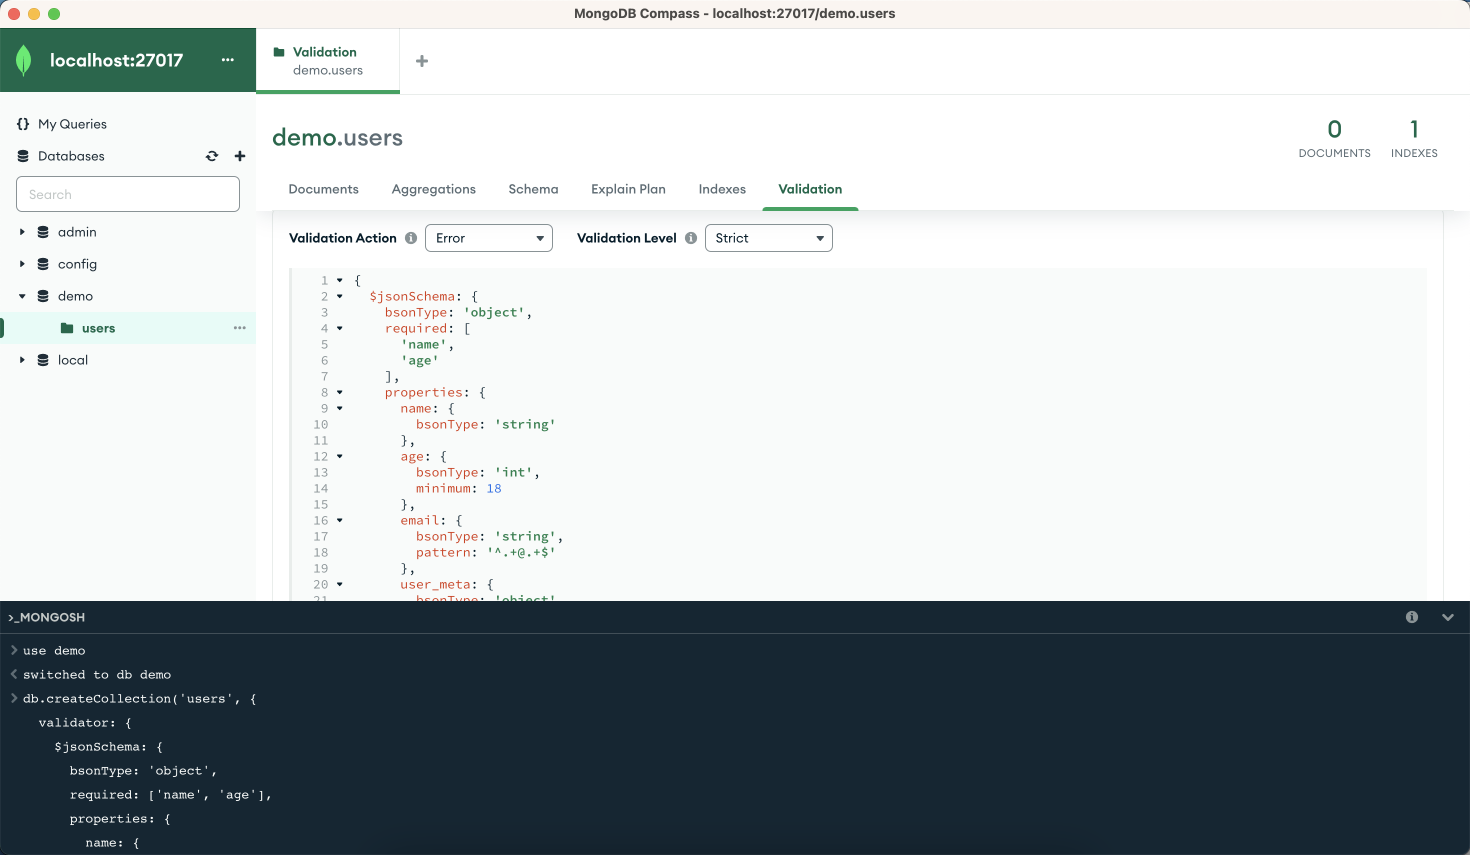
If you don't see your changes, you can refresh your databases on the left-hand sidebar. Once applied, you can view the
users Collection in MongoDB Compass:
Step 5: Insert your first sample Documents
Insert a few sample documents to query on afterwards.
db.users.insertMany([
  {
    name: 'John',
    age: 44,
    email: '[email protected]',
    user_meta: {
      user_role: 'user',
      email_verified: true,
    },
  },
  {
    name: 'Jane',
    age: 24,
    email: '[email protected]',
    user_meta: {
      user_role: 'user',
      email_verified: true,
    },
  },
  {
    name: 'Emma',
    age: 36,
    email: '[email protected]',
    user_meta: {
      user_role: 'manager',
      email_verified: true,
    },
  },
  {
    name: 'Liam',
    age: 64,
    email: '[email protected]',
    user_meta: {
      user_role: 'manager',
      email_verified: true,
    },
  },
]);
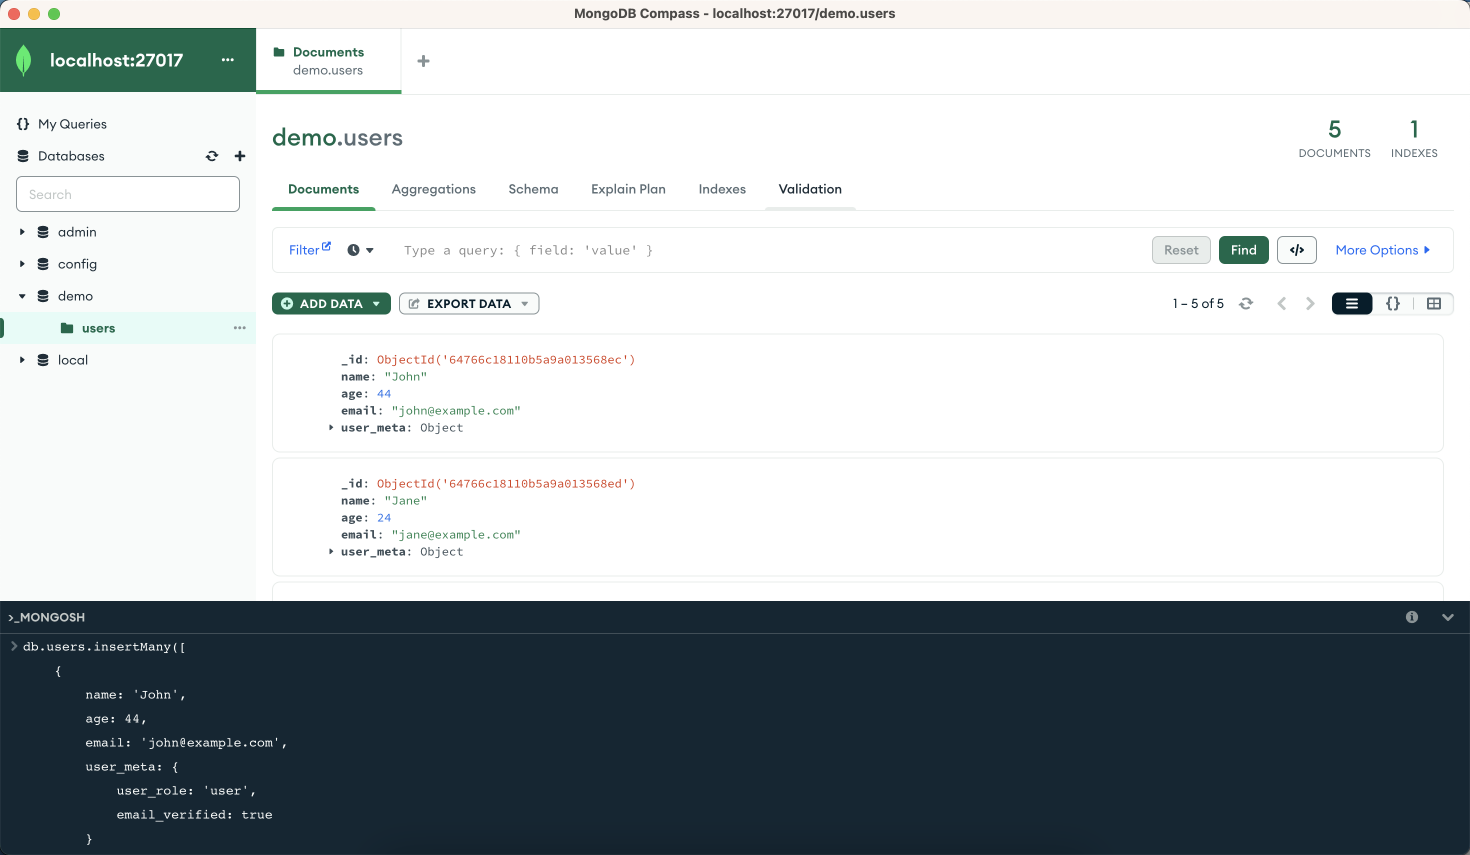
You should see an output similar to this:
Step 6: Load the Hasura Console
Open the Hasura Console by navigating to http://localhost:8080/console. You will need to input your admin secret key
as set in your Docker Compose file to log in.
If you don't already have a license key, you can start a 30-day free trial by clicking the ENTERPRISE button in the
top navigation. You can read more details here.

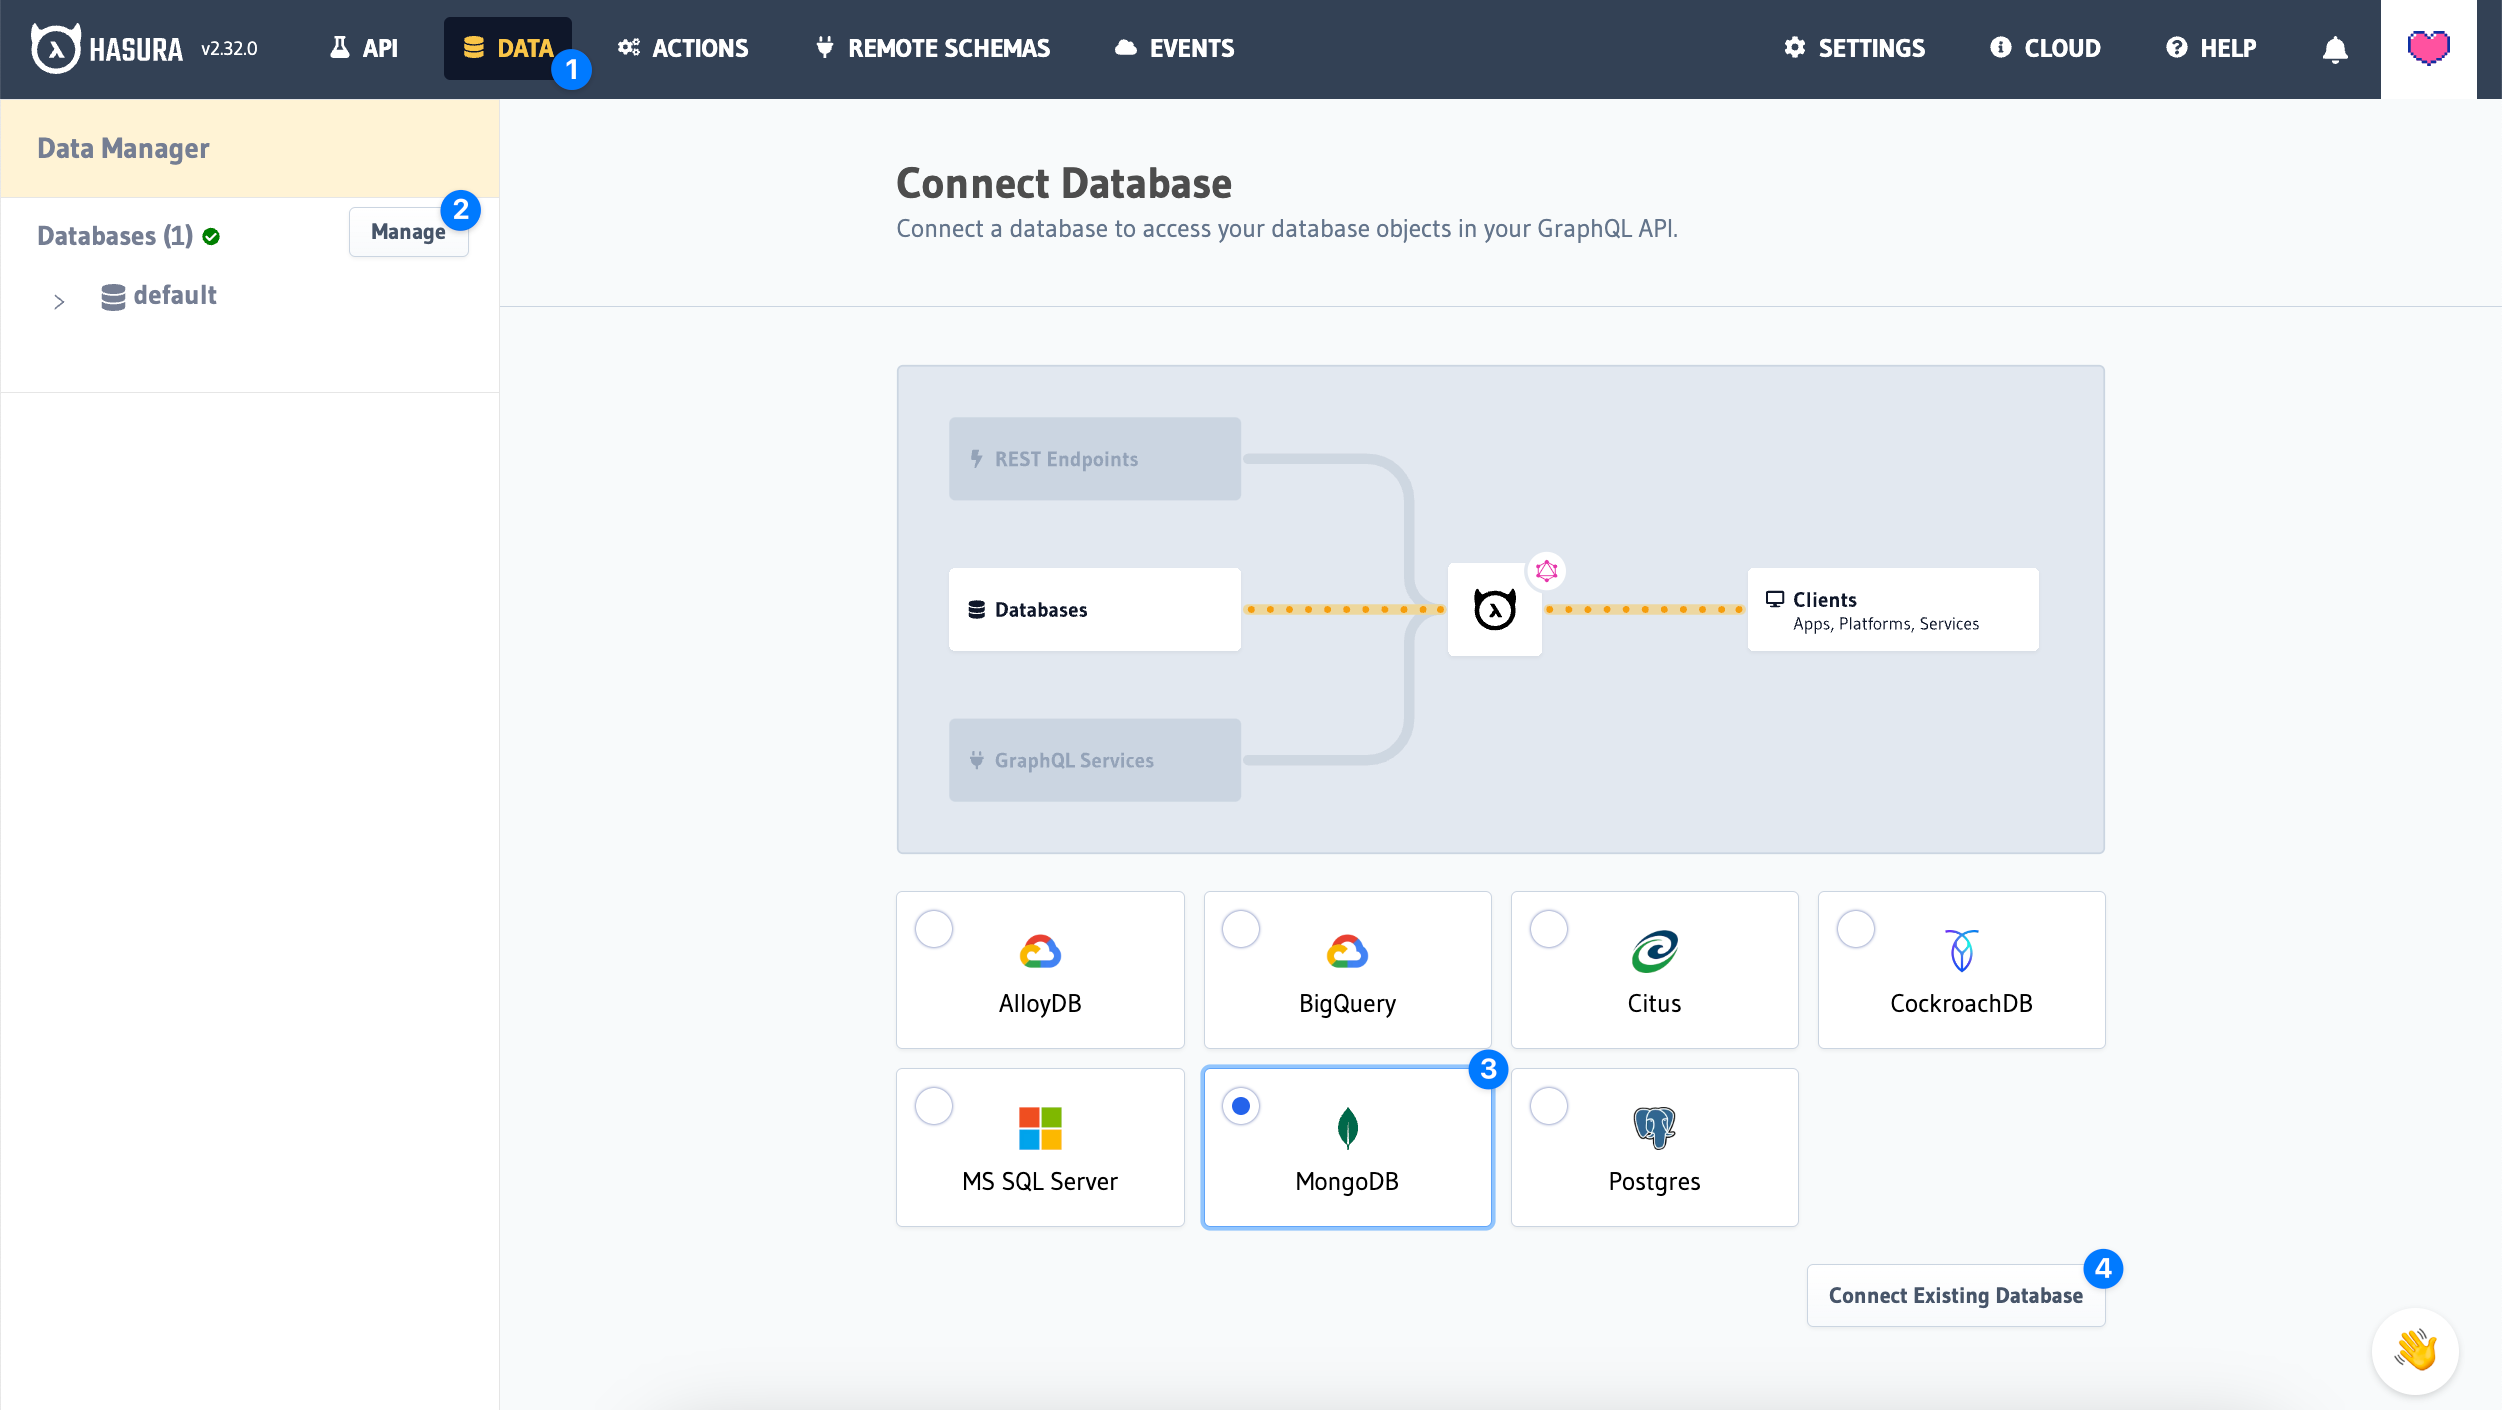
Step 7: Connect to MongoDB
Visit Data > Manage to connect your MongoDB database.
If you've connected using the Docker guide above, your MongoDB data connector should be pre-connected to your Hasura
instance.
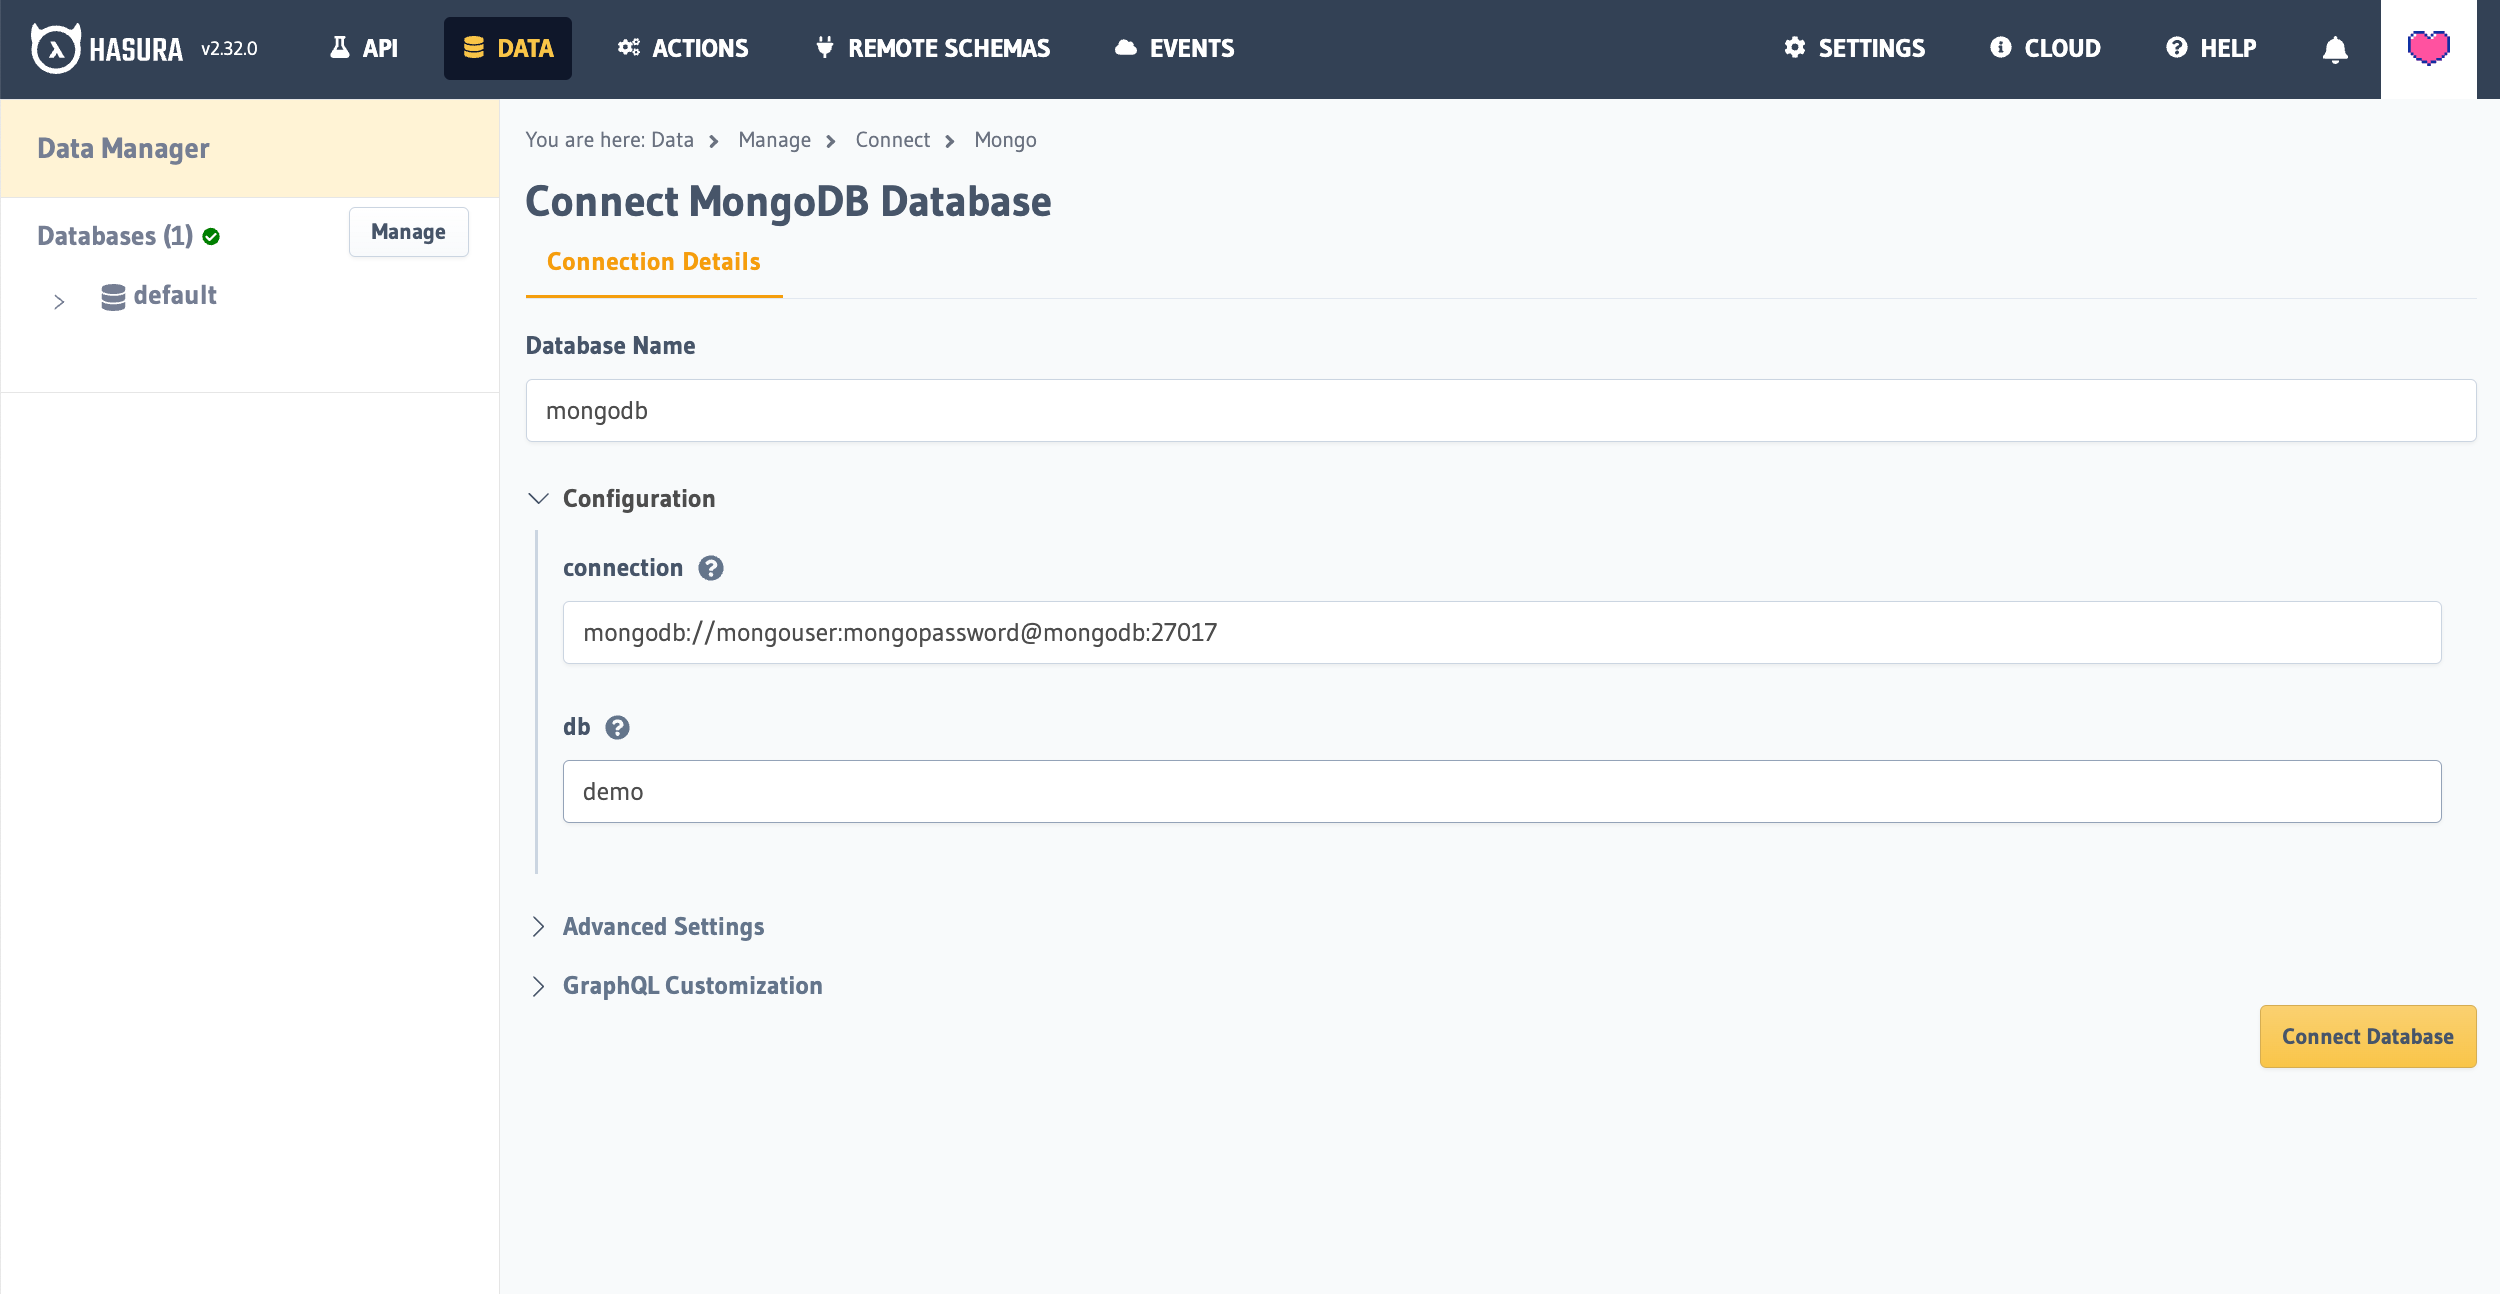
Then click, Connect Database.
If you're using the Docker guide you can also connect your database using the following details:
- Database Name:
mongodb - Connection:
mongodb://mongouser:mongopassword@mongodb:27017 - db:
demo
If you're using a MongoDB instance hosted on MongoDB Atlas or elsewhere, simply add the connection details for your
instance and click Connect Database.
Step 8: Tracking Collections
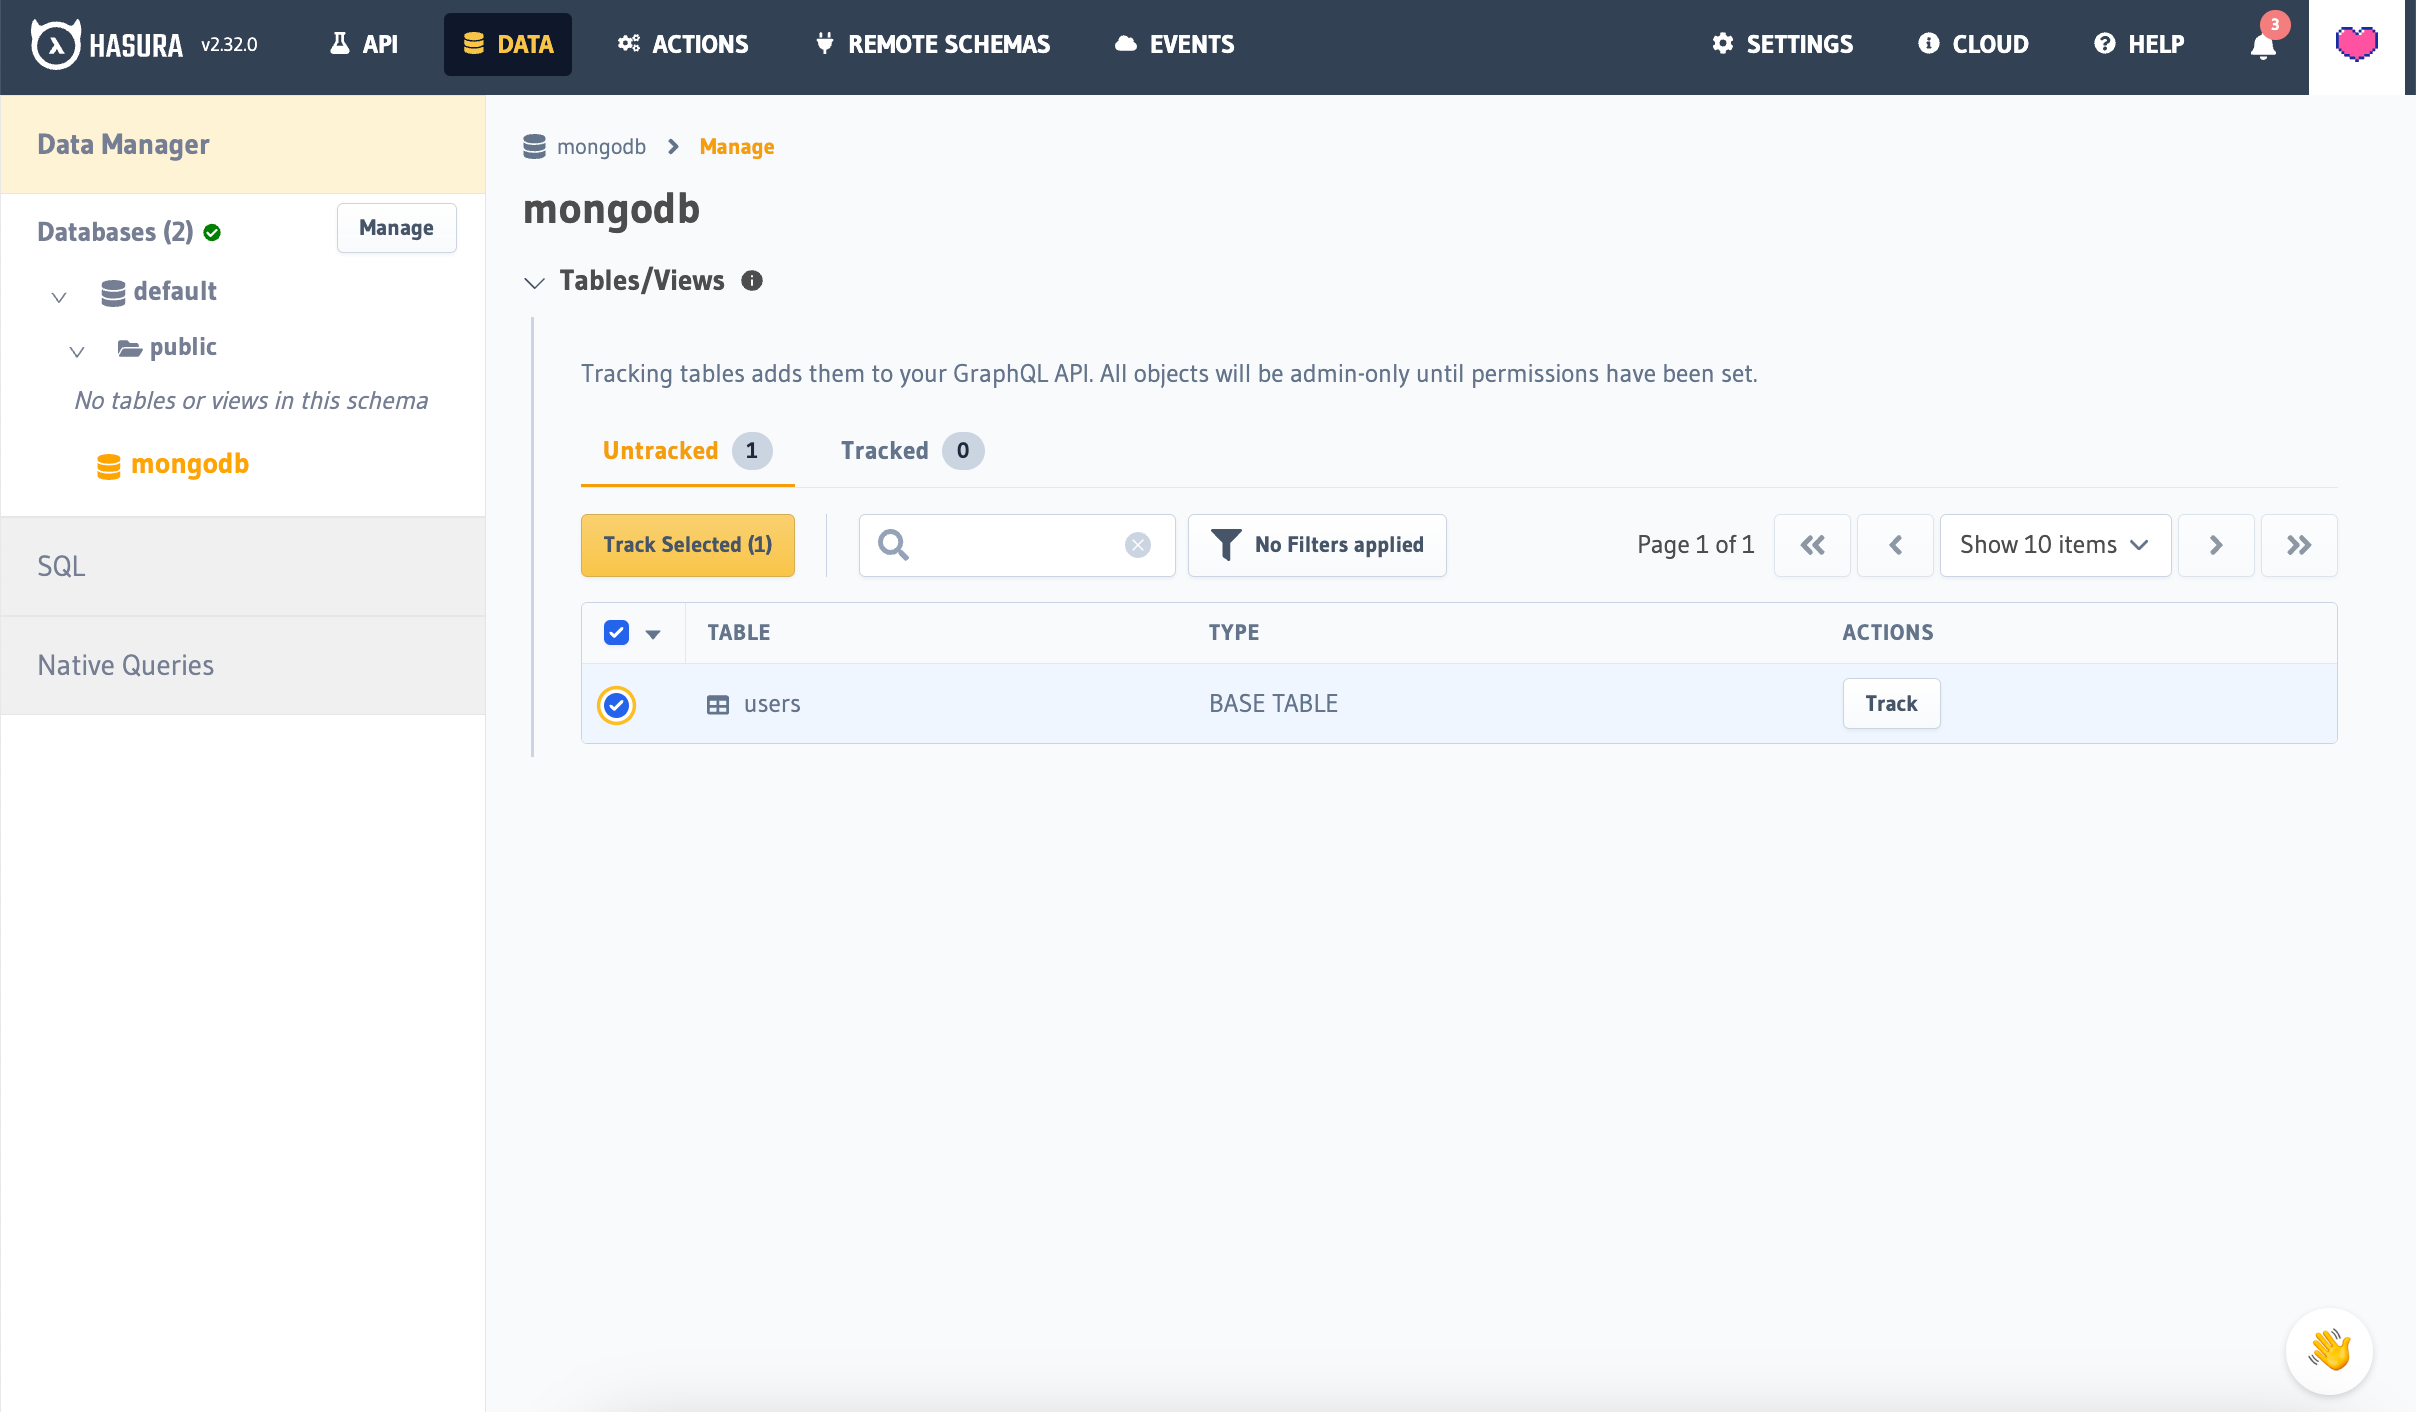
Once your database has been connected, select the database name from the left-hand sidebar.
You should see your users Collection listed here. Select it, and select Track Selected.
Since MongoDB is a NoSQL database, Documents can be variable within each of the Collections. Hasura supports and recommends defining a logical model for each Collection which will define the Document schema.
We also support optionally generating a schema automatically from your database's validation schema if one is available.
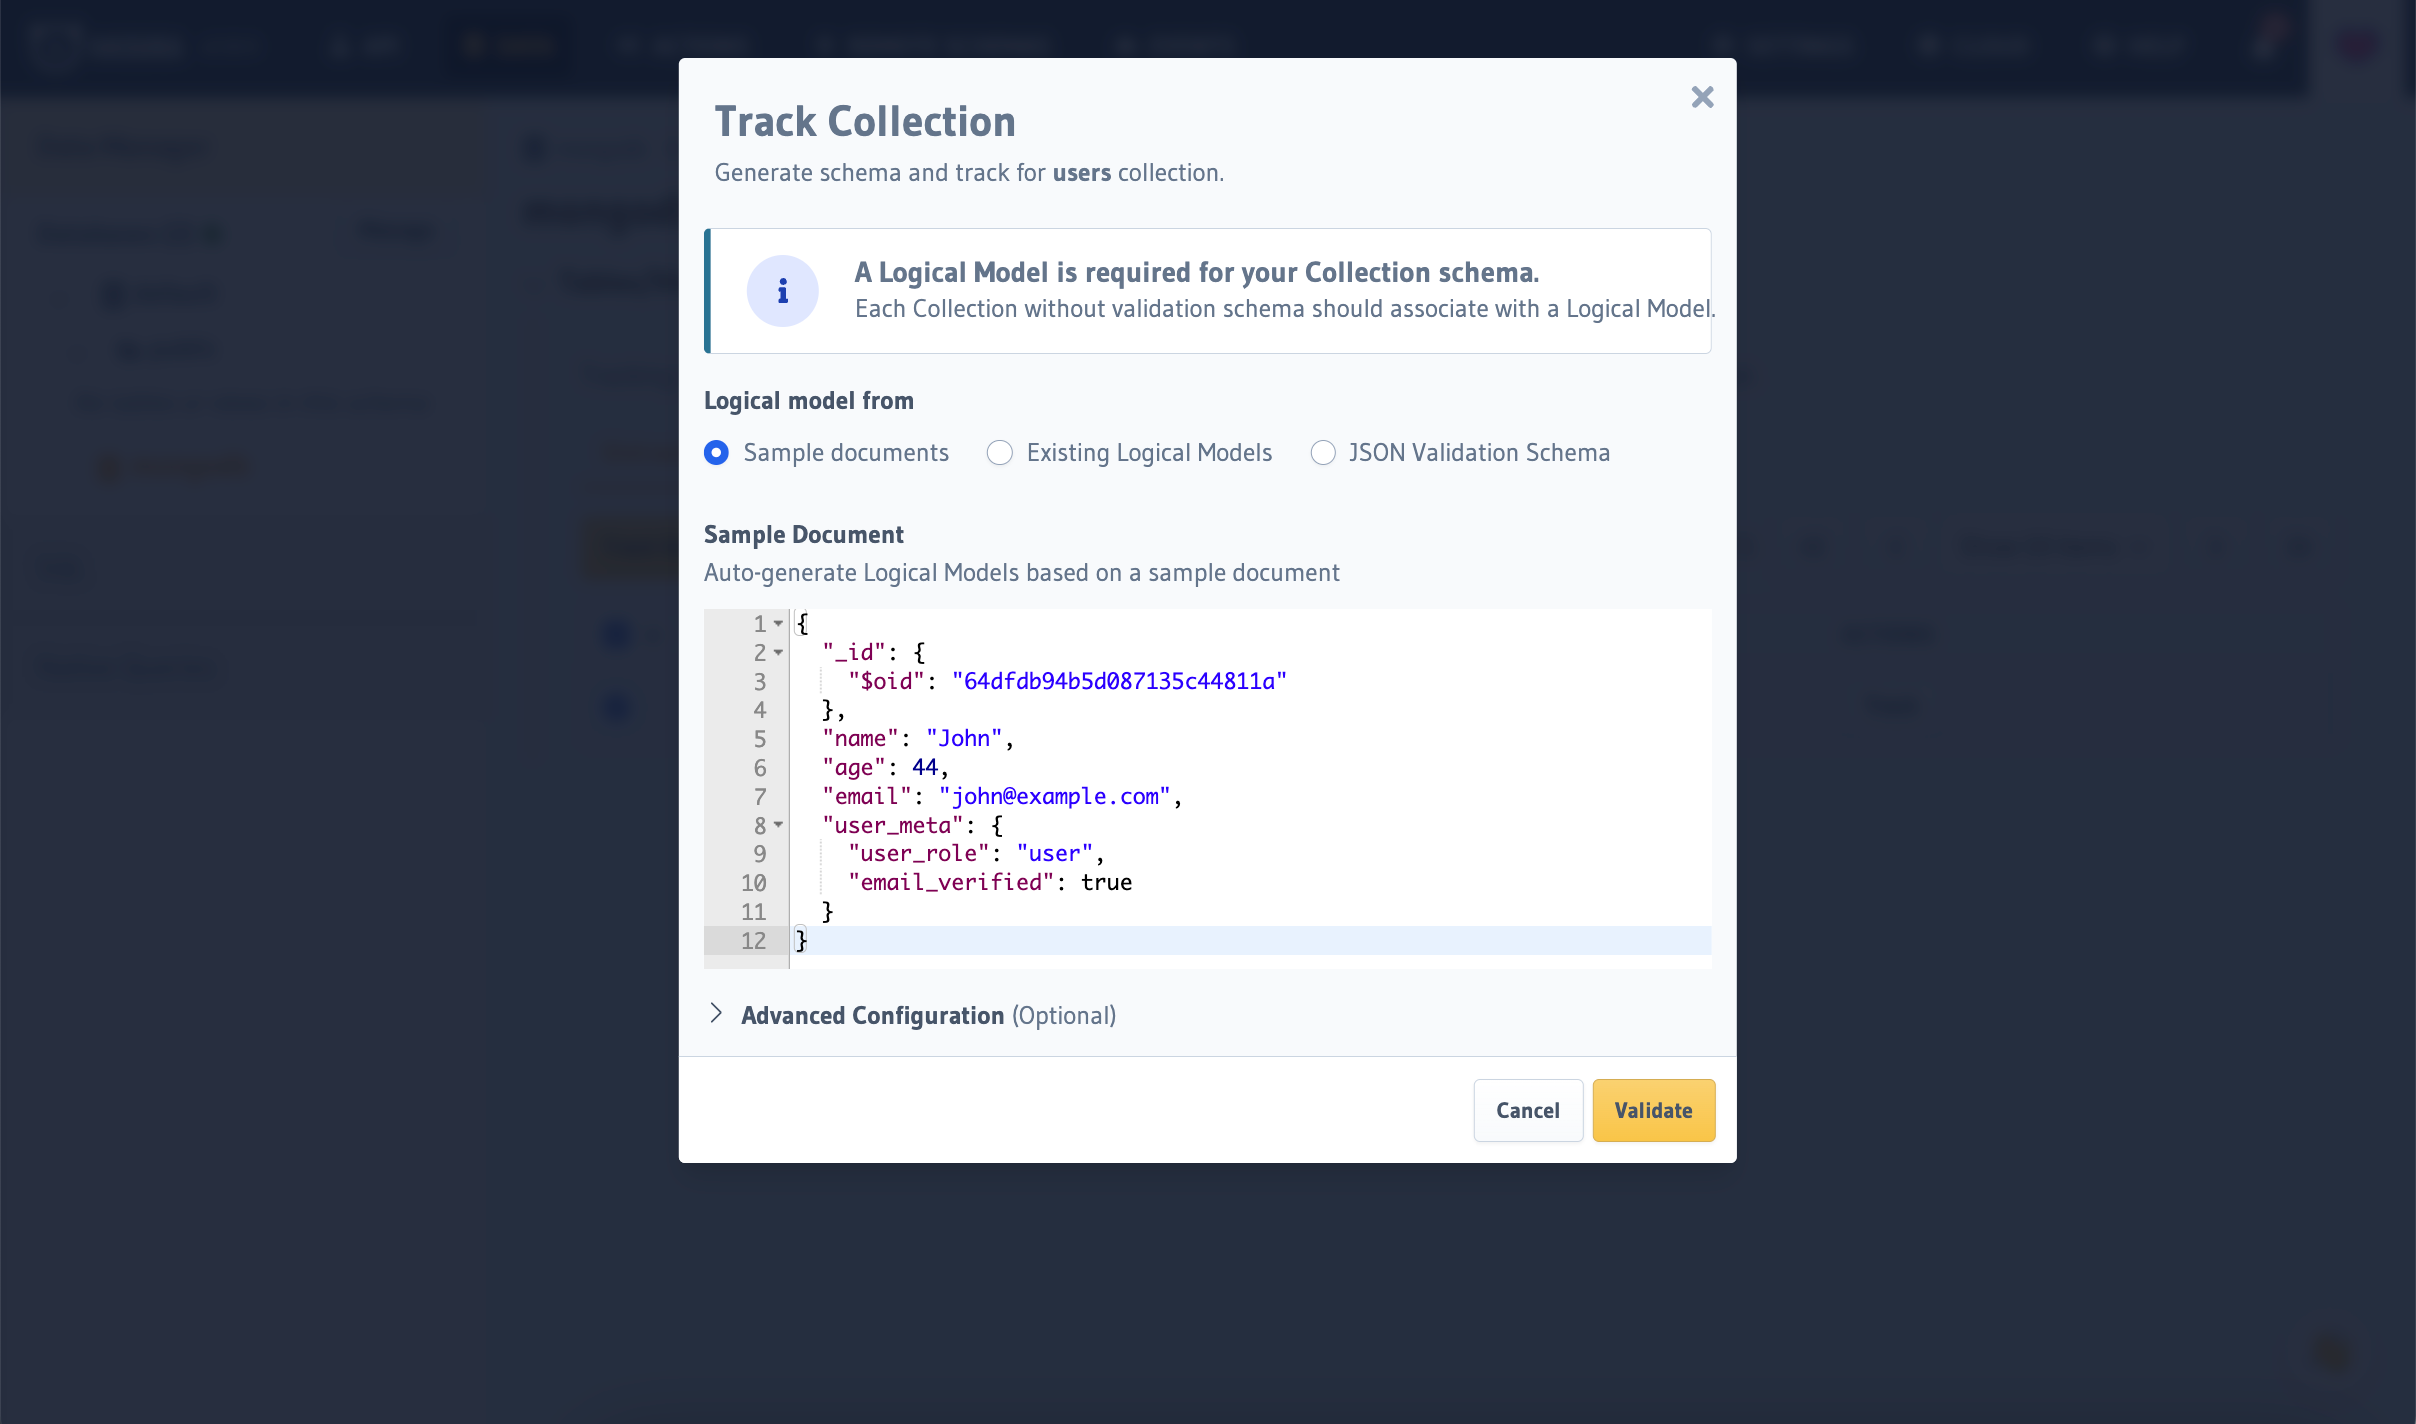
You will now see a modal with a few options for setting up your Collection's schema.
- Infer Schema from Document allows you to take a single Document from your Collection and infer the
- Use Existing Logical Model allows you to select a previously created logical model.
- Use Database Schema allows you to use your database's validation schema if one is present in your database (a GraphQL schema will be automatically generated for you).
Your users Collection is now added to your GraphQL API! 🎉
By default, this Collection is only available to admin users. To make it available for more user groups, select the
Collection name from the left-hand sidebar, and select Permissions to setup permission rules for the Collection. You
can read more about permissions here.
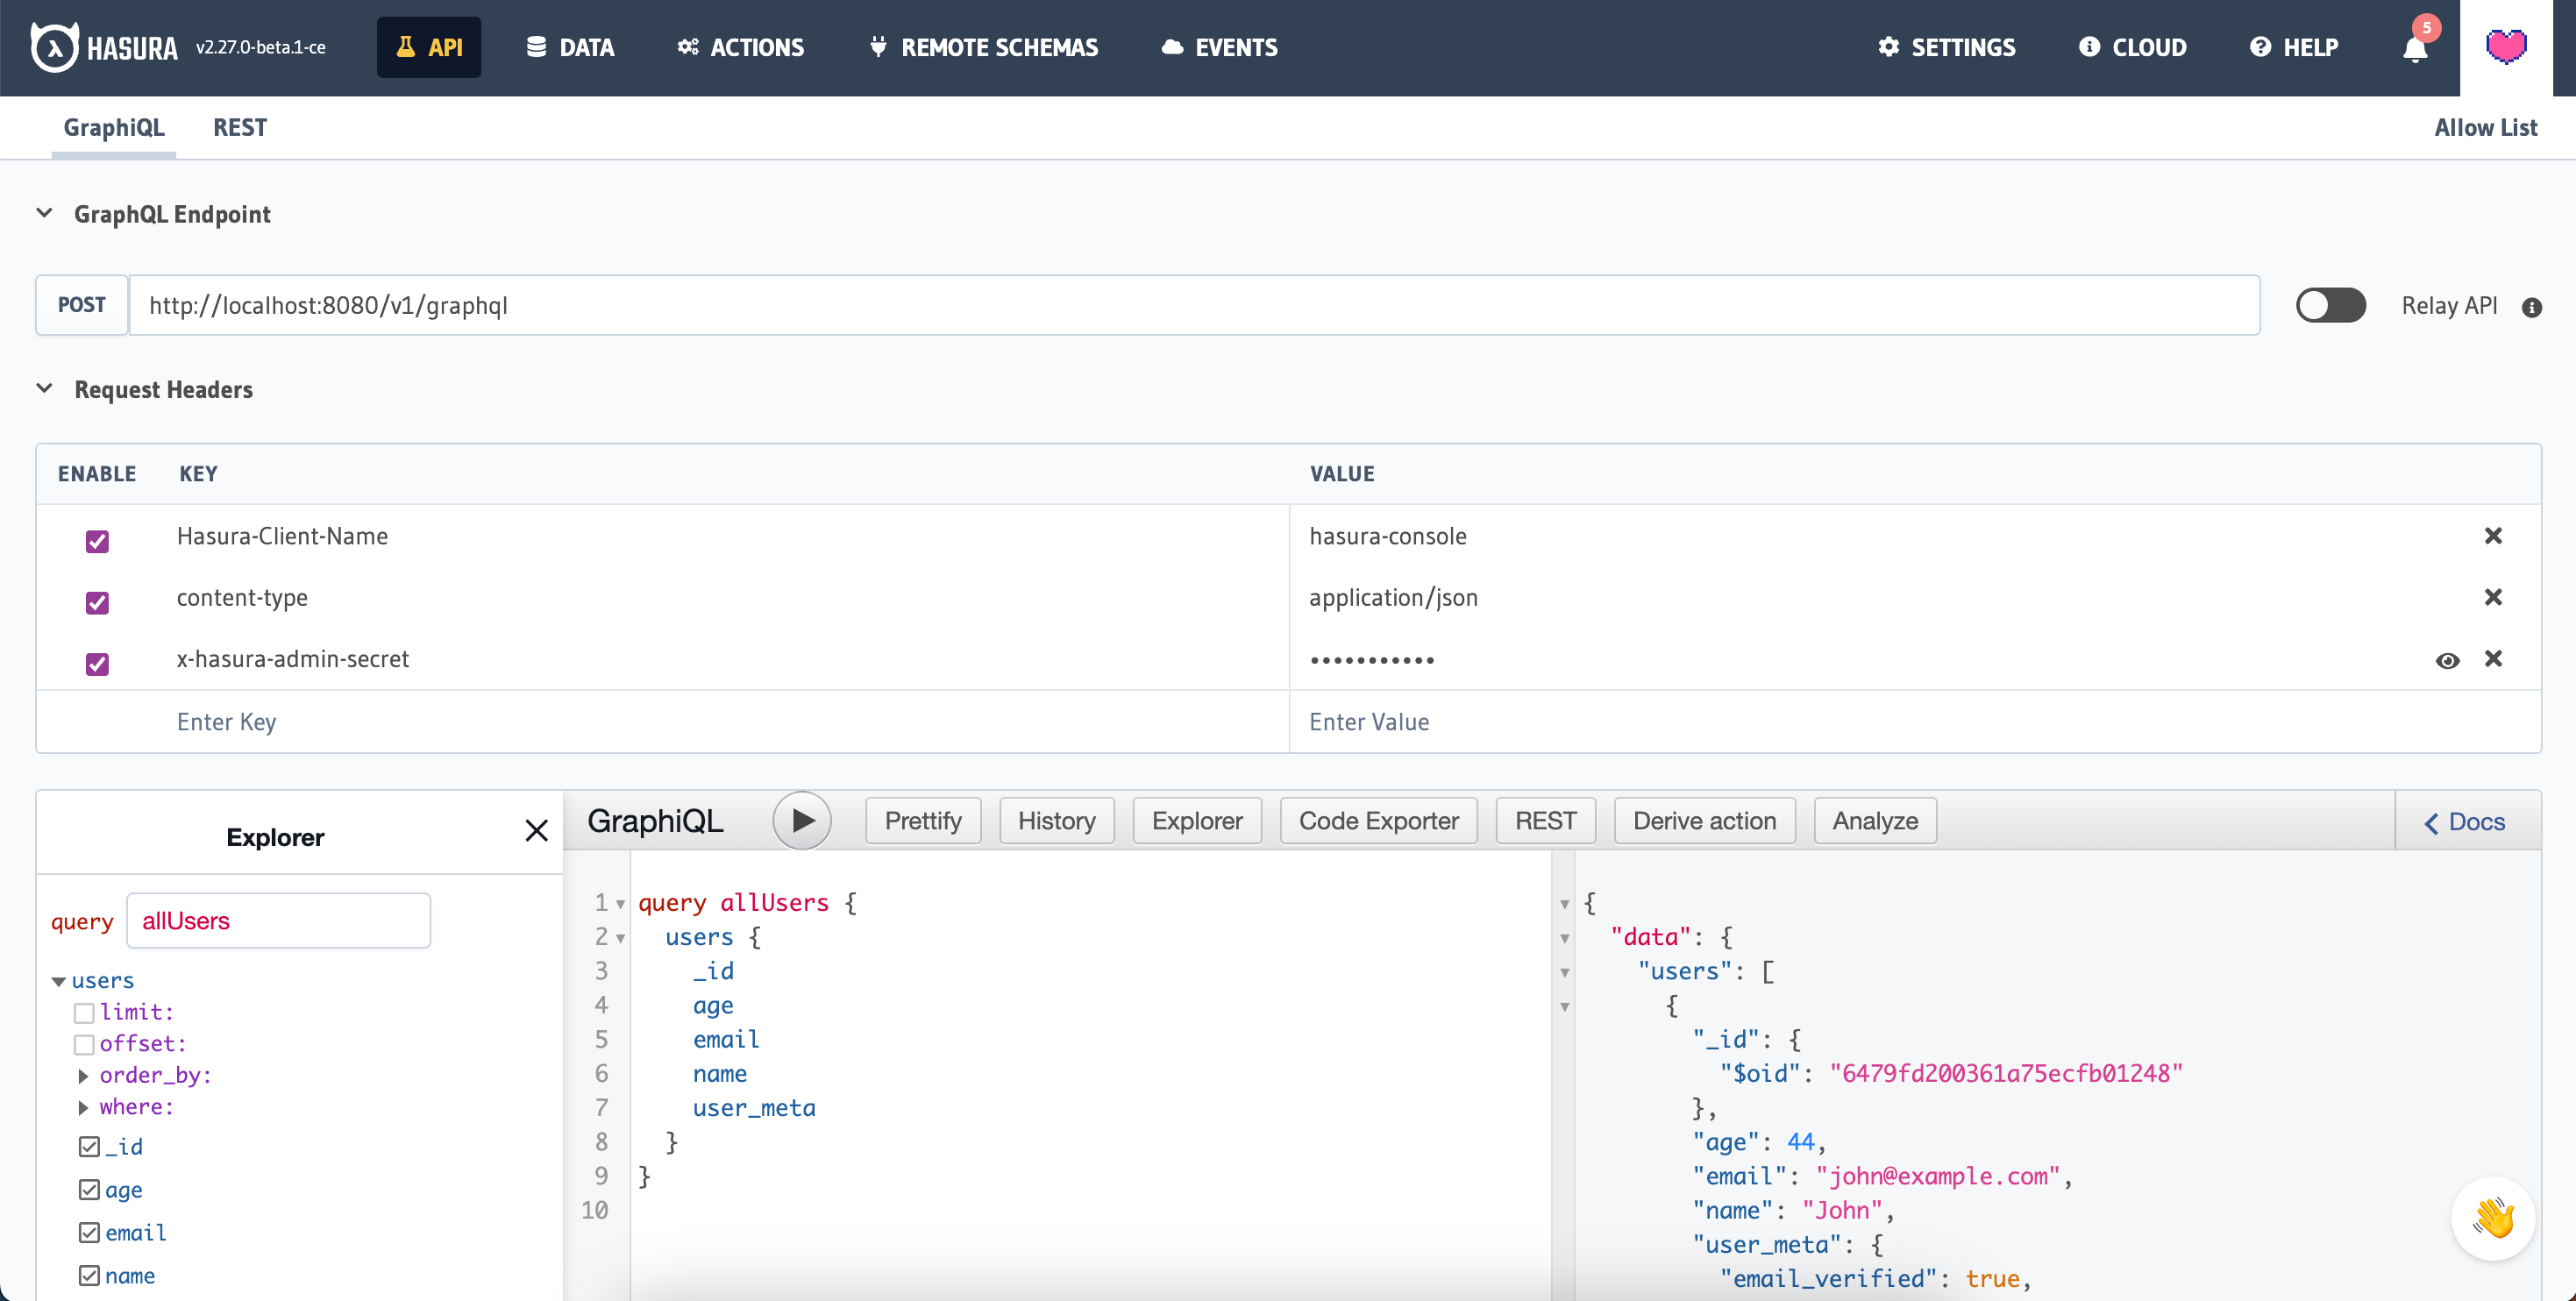
Step 9: Running your first query
Select API from your header, this will take you to GraphiQL, our API testing utility.
Entering the following query and running will return all your users:
query allUsers {
  users {
    _id
    age
    email
    name
    user_meta {
      email_verified
      user_role
    }
  }
}
Entering the following will only return users with the names 'John' or 'Jane':
query userFiltered {
  users(where: { name: { _in: ["John", "Jane"] } }) {
    _id
    age
    email
    name
    user_meta {
      email_verified
      user_role
    }
  }
}
Keep up to date
Please watch this space to get the latest docs on how you can try these features out via the Console or by manipulating Metadata in JSON/YAML directly.
If you'd like to stay informed about the status of MongoDB support, subscribe to our newsletter and join our Discord!