Snowflake: Logical Models
Introduction
Logical Models are supported from v2.33.0.
Logical Models are a GraphQL representation of database data. They provide an abstraction over the underlying database.
Logical Models are a new approach from Hasura and are currently used by the Native Queries and the GraphQL API for a native database query.
You can find examples of how to use Logical Models in the Native Queries documentation. For a more detailed explanation of Logical Models themselves, read on.
Tracking a Logical Model
- Console
- CLI
- API
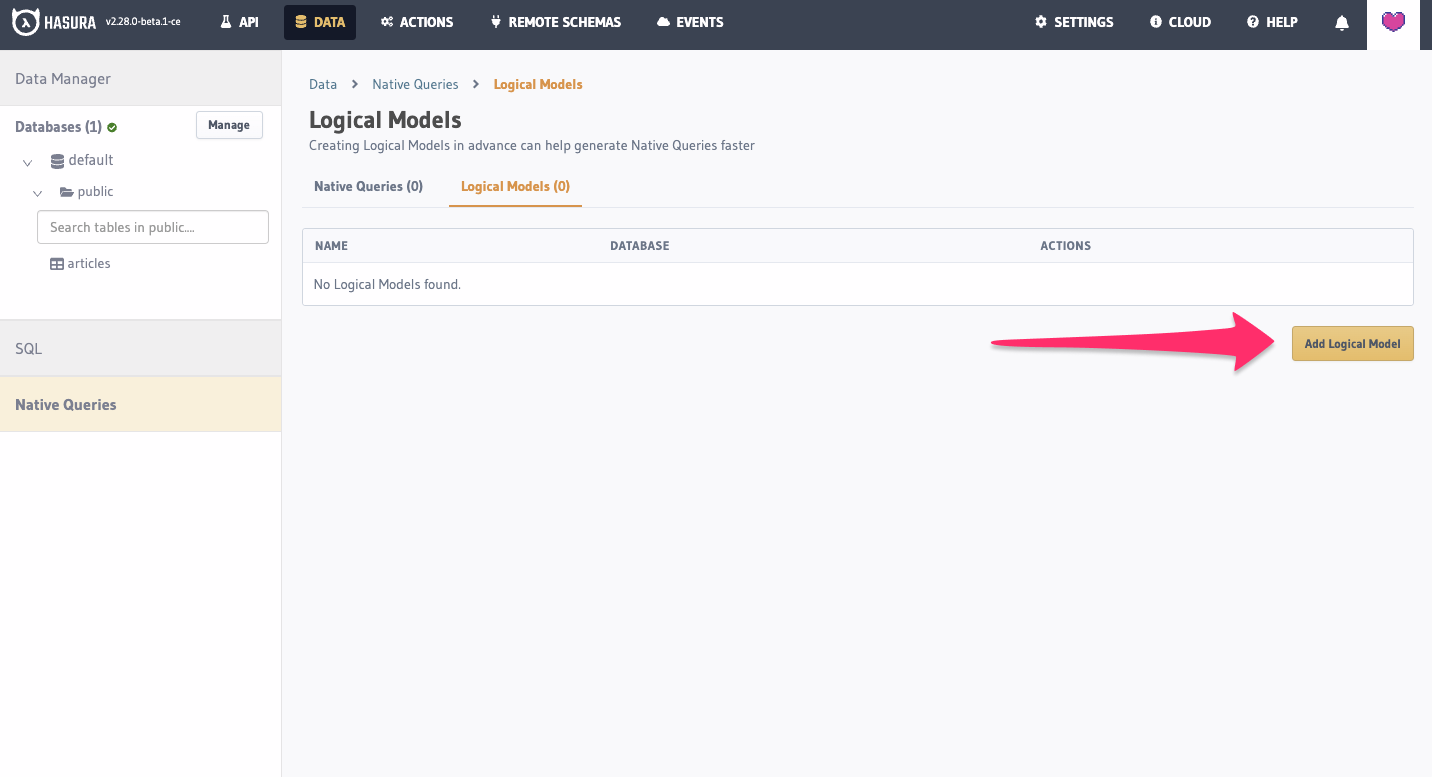
You can create a Logical Model from the "Data" tab of the Console, by clicking on Native Queries in the sidebar, then
Add Logical Model:
You can create a logical model by adding it to the appropriate database definition in the
metadata > databases > databases.yaml file:
  logical_models:
    - name: "<name>"
      fields:
        "<field name>":
          type: "<Snowflake field type>"
          nullable: false | true
          description: "<optional field description>"
        ...
You create a logical model through the metadata API:
POST /v1/metadata HTTP/1.1
Content-Type: application/json
X-Hasura-Role: admin

{
  "type": "snowflake_track_logical_model",
  "args": {
    "source": "default",
    "name": "<name>",
    "fields": [
      {
        "name": "<field name>",
        "type": "<Snowflake field type>",
        "nullable": false | true,
        "description": "<optional field description>"
      },
      ...
    ]
  }
}
The type of each field can be either a Snowflake data type or references to other Logical Models, and each field can be marked as nullable or not, see LogicalModelType.
For example, we could track a representation of an article as follows:
- Console
- CLI
- API
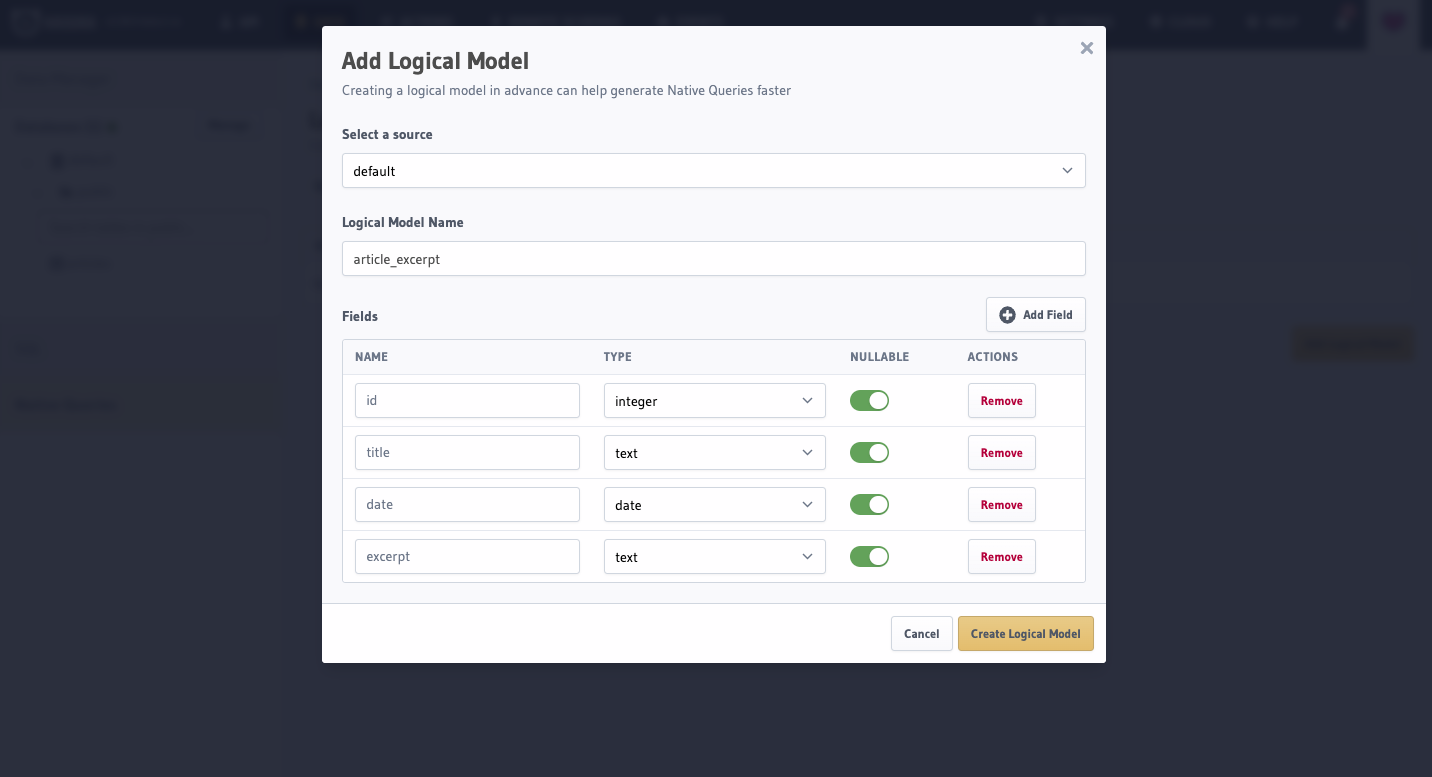
Add the following to the default database definition in the metadata > databases > databases.yaml file:
logical_models:
  - name: article
    fields:
      id:
        type: integer
        nullable: false
      title:
        type: text
        nullable: false
      contents:
        type: text
        nullable: false
      published_date:
        type: date
        nullable: true
      is_published:
        type: bit
        nullable: false
POST /v1/metadata HTTP/1.1
Content-Type: application/json
X-Hasura-Role: admin

{
  "type": "snowflake_track_logical_model",
  "args": {
    "source": "default",
    "name": "article",
    "fields": [
      {
        "name": "id",
        "type":
          {
            "scalar": "int"
          }
      },
      {
        "name": "title",
        "type":
          {
            "scalar": "text"
          }
      },
      {
        "name": "contents",
        "type":
          {
            "scalar": "text"
          }
      },
      {
        "name": "published_date",
        "type":
          {
            "scalar": "date",
            "nullable": true
          },
      },
      {
        "name": "is_published",
        "type":
          {
            "scalar": "bit"
          }
      }
    ]
  }
}
Untracking a Logical Model
- Console
- CLI
- API
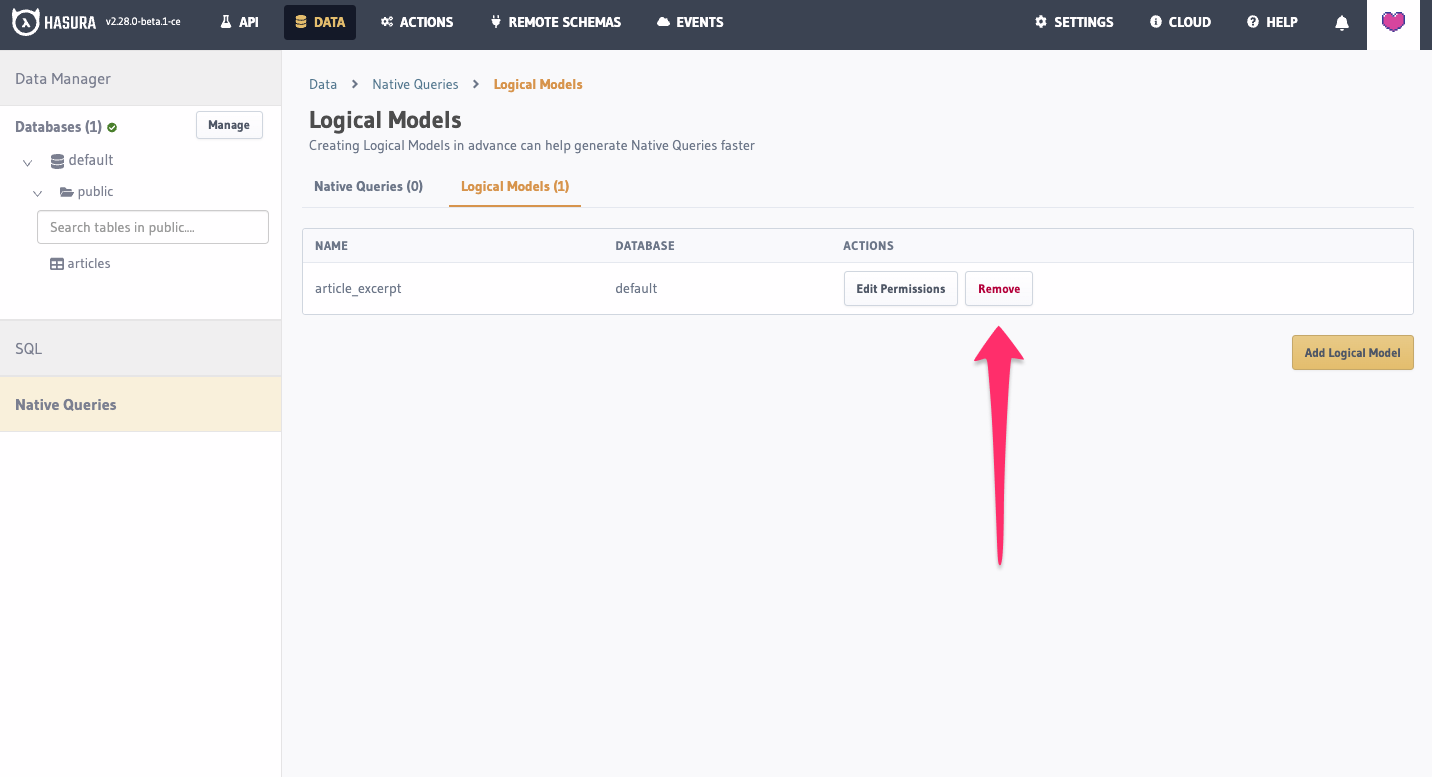
To untrack a Logical Model, click Remove next to the Logical Model:
You can remove a Logical Model by removing it from the metadata > databases > databases.yaml file.
You can remove a Logical Model the same way:
POST /v1/metadata HTTP/1.1
Content-Type: application/json
X-Hasura-Role: admin

{
  "type": "snowflake_untrack_logical_model",
  "args": {
    "source": "default",
    "name": "<name>"
  }
}
Note that you can only remove an unused Logical Model; if the model is attached to a Native Query, this operation will fail. You must remove the Native Query first.
To untrack the above article Logical Model, we would run the following:
- Console
- CLI
- API

Remove the above metadata from the metadata > databases > databases.yaml file.
POST /v1/metadata HTTP/1.1
Content-Type: application/json
X-Hasura-Role: admin

{
  "type": "snowflake_untrack_logical_model",
  "args": {
    "source": "default",
    "name": "article"
  }
}
Referencing other Logical Models
Logical Model fields are allowed to refer to other Logical Models, even recursively, allowing nested data types.
Object or array relationships between Native Queries are an example use of this.
To elaborate on the article example above, we can include authors in the data model:
- API
POST /v1/metadata HTTP/1.1
Content-Type: application/json
X-Hasura-Role: admin

{
  "type": "bulk_atomic",
  "args":
  [
    {
      "type": "snowflake_track_logical_model",
      "args": {
        "source": "default",
        "name": "article",
        "fields": [
          {
            "name": "id",
            "type":
              {
                "scalar": "integer"
              }
          },
          {
            "name": "title",
            "type":
              {
                "scalar": "text"
              }
          },
          {
            "name": "contents",
            "type":
              {
                "scalar": "text"
              }
          },
          {
            "name": "author_id",
            "type":
              {
                "scalar": "integer"
              }
          },
          {
            "name": "author",
            "type":
              {
                "logical_model": "author",
              },
          }
        ]
      }
    },
    {
      "type": "snowflake_track_logical_model",
      "args": {
        "source": "default",
        "name": "author",
        "fields": [
          {
            "name": "id",
            "type":
              {
                "scalar": "integer"
              }
          },
          {
            "name": "name",
            "type":
              {
                "scalar": "text"
              }
          },
          {
            "name": "articles",
            "type":
              {
                "array":
                  {
                    "logical_model": "article"
                  }
              }
          }
        ]
      }
    }
  ]
}
bulk_atomicTracking the Logical Models one-by-one would fail, since article refers to author, which is not yet defined.
Tracking the Logical Models in one atomic operation postpones coherency checks until all models are tracked, which allows for mutual references.
Permissions
By default, a model has no permissions, and only the admin account will be able to use it. You can enable the model by adding permissions for a given role.
As Logical Models are currently only used for read-only purposes, you can only add select permissions.
The permissions consist of a list of columns that the role can access, and a filter that specifies which rows the role can receive.
- Console
- CLI
- API
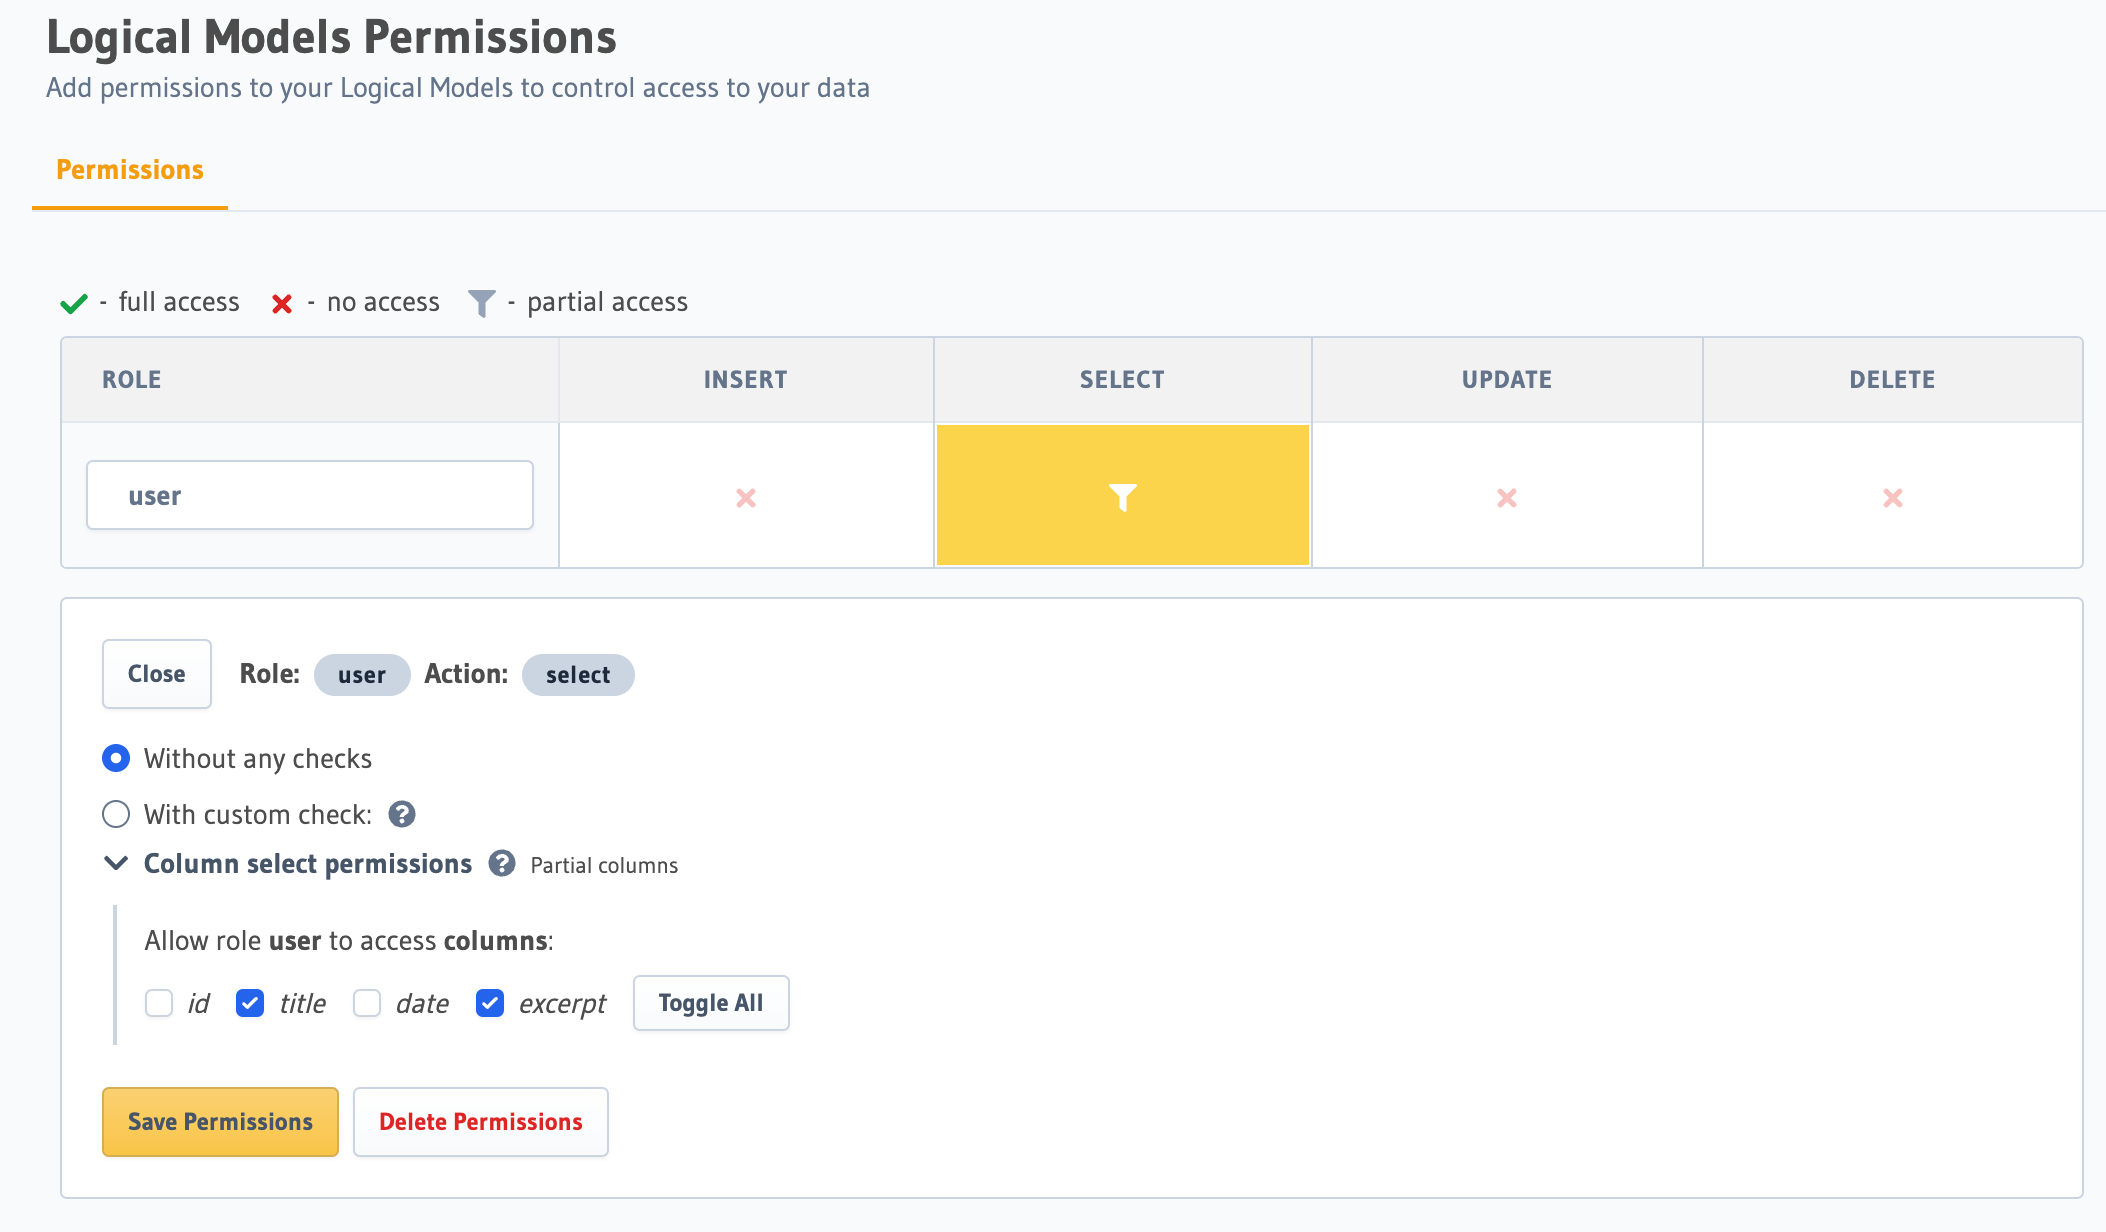
Columns must be specified, though you can use "*" to specify that you want to allow all columns.
The filter is the same boolean expression syntax as query filters. To allow
all rows to be passed through to the response, you can specify an empty filter, {}.
Add the required permissions to the relevant logical model in metadata > databases > databases.yaml:
  logical_models:
    - name: "<name>"
      fields:
        ...
      select_permissions:
        - role: "<role name>"
          permission:
            columns: "*" | [
              "column 1",
              "column 2",
              ...
            ]
            filter: "<boolean expression>"
        - ...
Columns must be specified, though you can use "*" to specify that you want to allow all columns.
The filter is the same boolean expression syntax as query filters. To allow
all rows to be passed through to the response, you can specify an empty filter, {}.
POST /v1/metadata HTTP/1.1
Content-Type: application/json
X-Hasura-Role: admin

{
  "type": "snowflake_create_logical_model_select_permission",
  "args": {
    "source": "default",
    "name": "<logical model name>",
    "role": "<role name>",
    "permission": {
      "columns": "*" | [
        "column 1",
        "column 2",
        ...
      ],
      "filter": <boolean expression>
    }
  }
}
For example, to allow access to the article Logical Model for the reader role, but only for published articles, we
could use the following permission to limit the accessible rows to those where is_published is true, and then hide
that column from the list (by specifying all other columns).
- Console
- CLI
- API
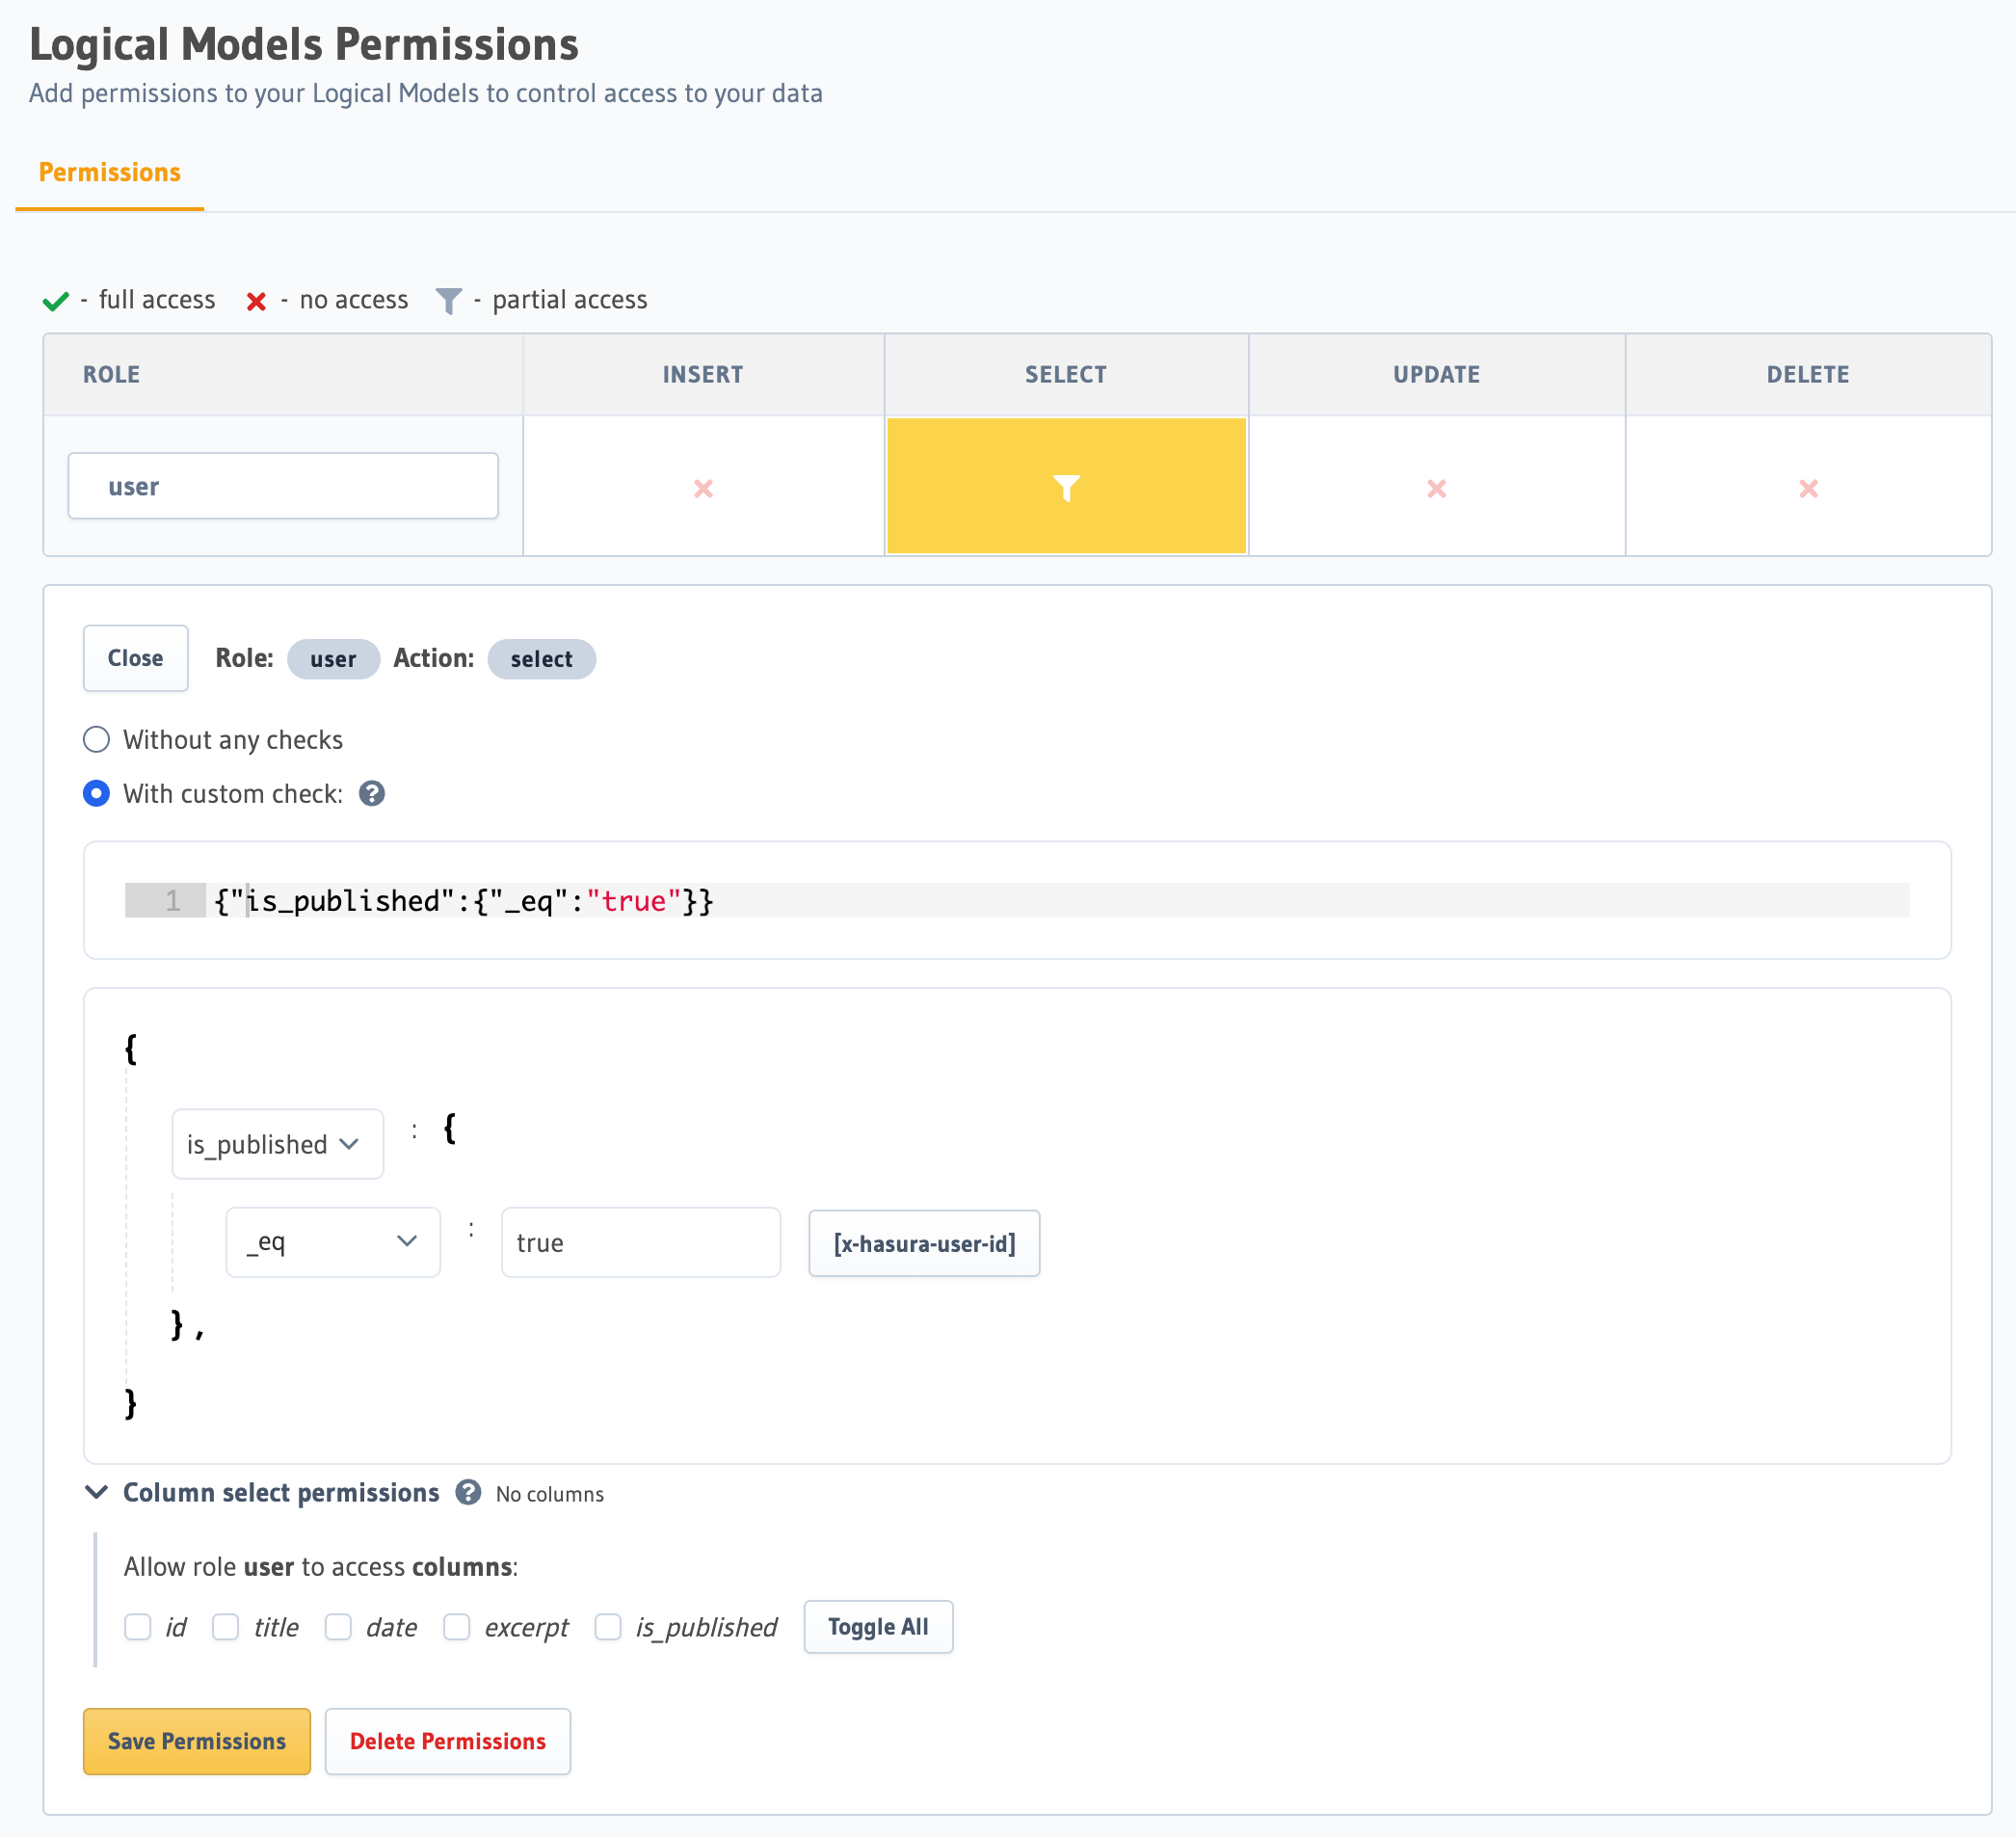
Add the required permissions to the relevant logical model in metadata > databases > databases.yaml:
logical_models:
  - name: '<name>'
    fields: ...
    select_permissions:
      - role: reader
        permission:
          columns:
            - id
            - title
            - contents
            - date
          filter:
            is_published:
              _eq: true
      - ...
POST /v1/metadata HTTP/1.1
Content-Type: application/json
X-Hasura-Role: admin

{
  "type": "snowflake_create_logical_model_select_permission",
  "args": {
    "source": "default",
    "name": "article",
    "role": "reader",
    "permission": {
      "columns": [
        "id",
        "title",
        "contents",
        "date"
      ],
      "filter": {
        "is_published": {"_eq": true}
      }
    }
  }
}
You can also drop permissions:
- Console
- CLI
- API
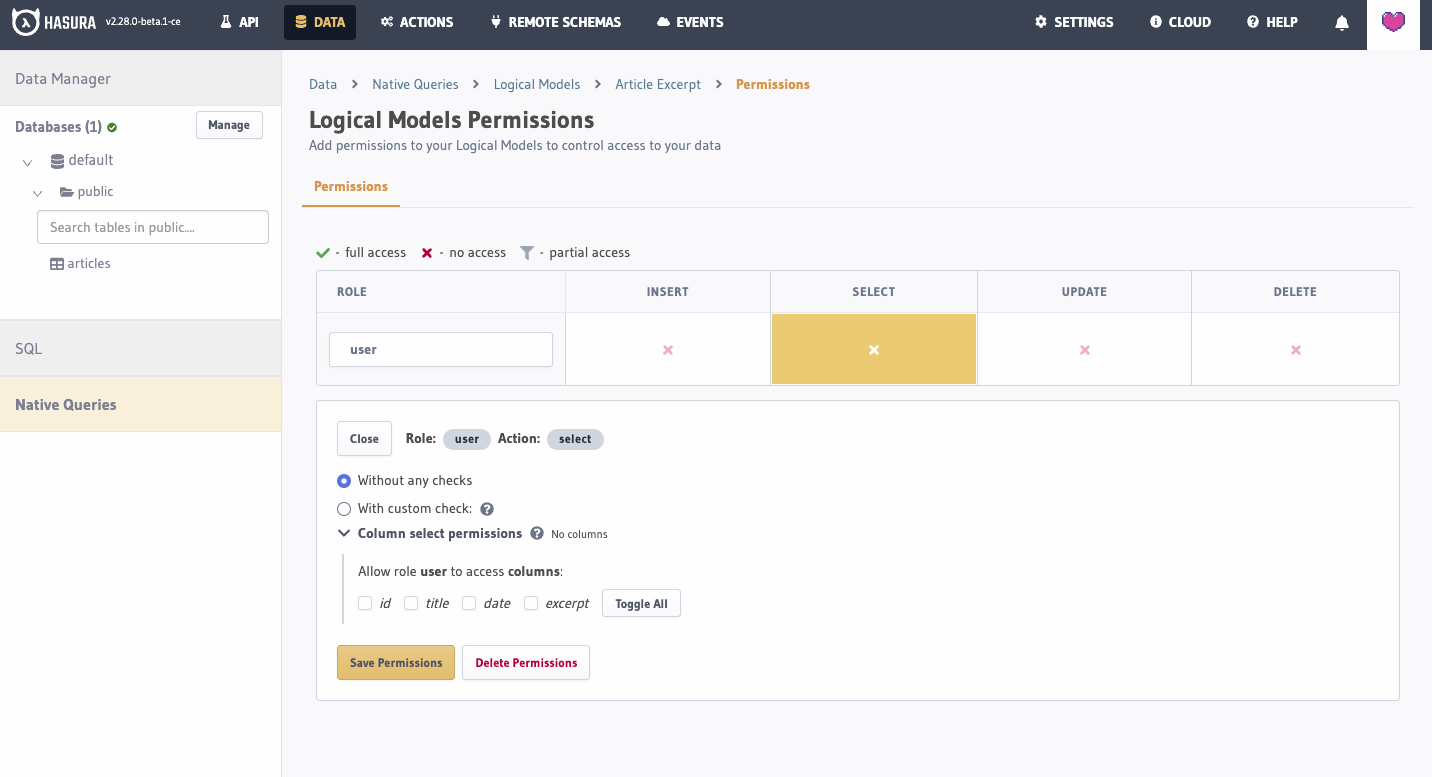
Remove the relevant permission from metadata > databases > databases.yaml.
POST /v1/metadata HTTP/1.1
Content-Type: application/json
X-Hasura-Role: admin

{
  "type": "snowflake_drop_logical_model_select_permission",
  "args": {
    "source": "default",
    "name": "<logical model name>",
    "role": "<role name>"
  }
}