Console SSO with Active Directory Federation Services (ADFS)
Introduction
SSO can be configured with ADFS SAML by setting up Dex as an OAuth2 proxy. Access can be configured for all users of a domain or only for members of certain groups.
This guide assumes you have a Hasura GraphQL Engine instance running with a valid license key. If you don't have one, you can get a license key via a 30-day free trial or by contacting the Hasura team.
SSO for ADFS is supported from versions v2.25.0 and above.
Step 1: Configure ADFS
We assume that you have deployed the ADFS service. To configure SAML for ADFS, you need to create a Relying party trust and make sure that:
The
Enable support for the SAML 2.0 WebSSO protocolcheckbox is checked.The Dex callback URL is entered in the
Relying party SAML 2.0 SSO service URLtextbox.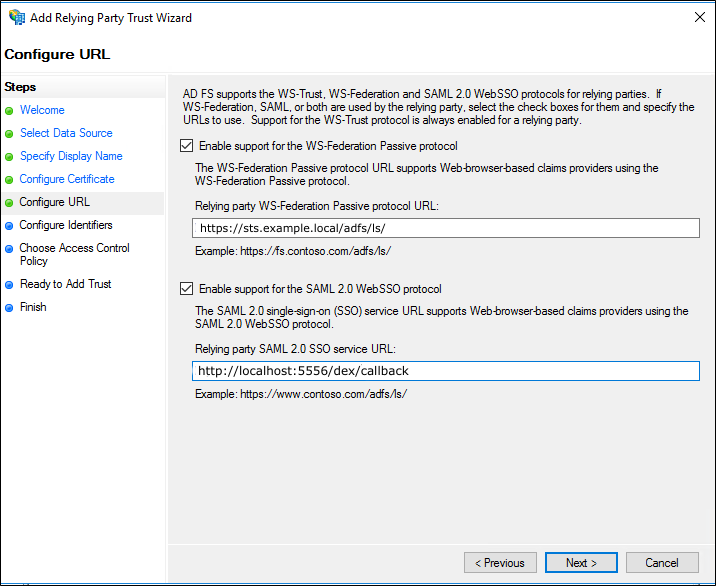
On the
Configure Identifiers page, add aRelying party trust identifier
You'll need the Relying party trust identifier to configure Dex's entityIssuer. Note this value.
Add Claims
After creating the Relying Party Trust, select the Relying Party Trusts folder from AD FS Management, and choose
Edit Claim Rules from the Actions sidebar to add claims.
To pass attributes of a user from LDAP, create a rule with the
Send LDAP Attributes as Claimsas a template.Choose
Active Directoryas your Attribute Store.Map your LDAP attributes to ongoing claim types. Dex only requires the
username,mail, and role-equivalent fields.
Click on the
View Rule Languagebutton to get the attribute name. These were the attribute names that were mapped in the previous step.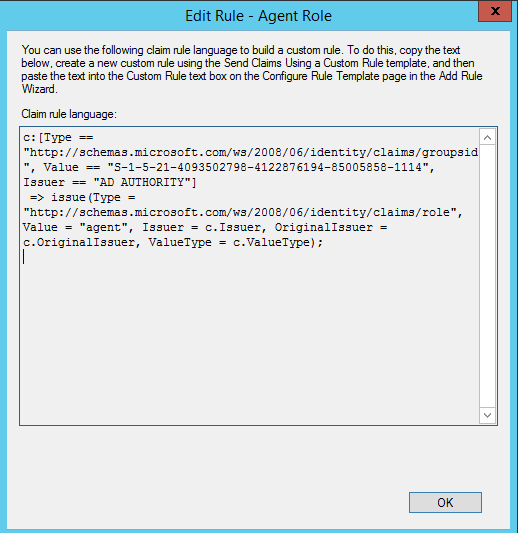
Click
FinishandApplythe change in theEdit Claim Issuance Policywindow.
Export Signing Certificate
Finally, you'll need to export the signing certificate from the ADFS console to mount it to Dex.
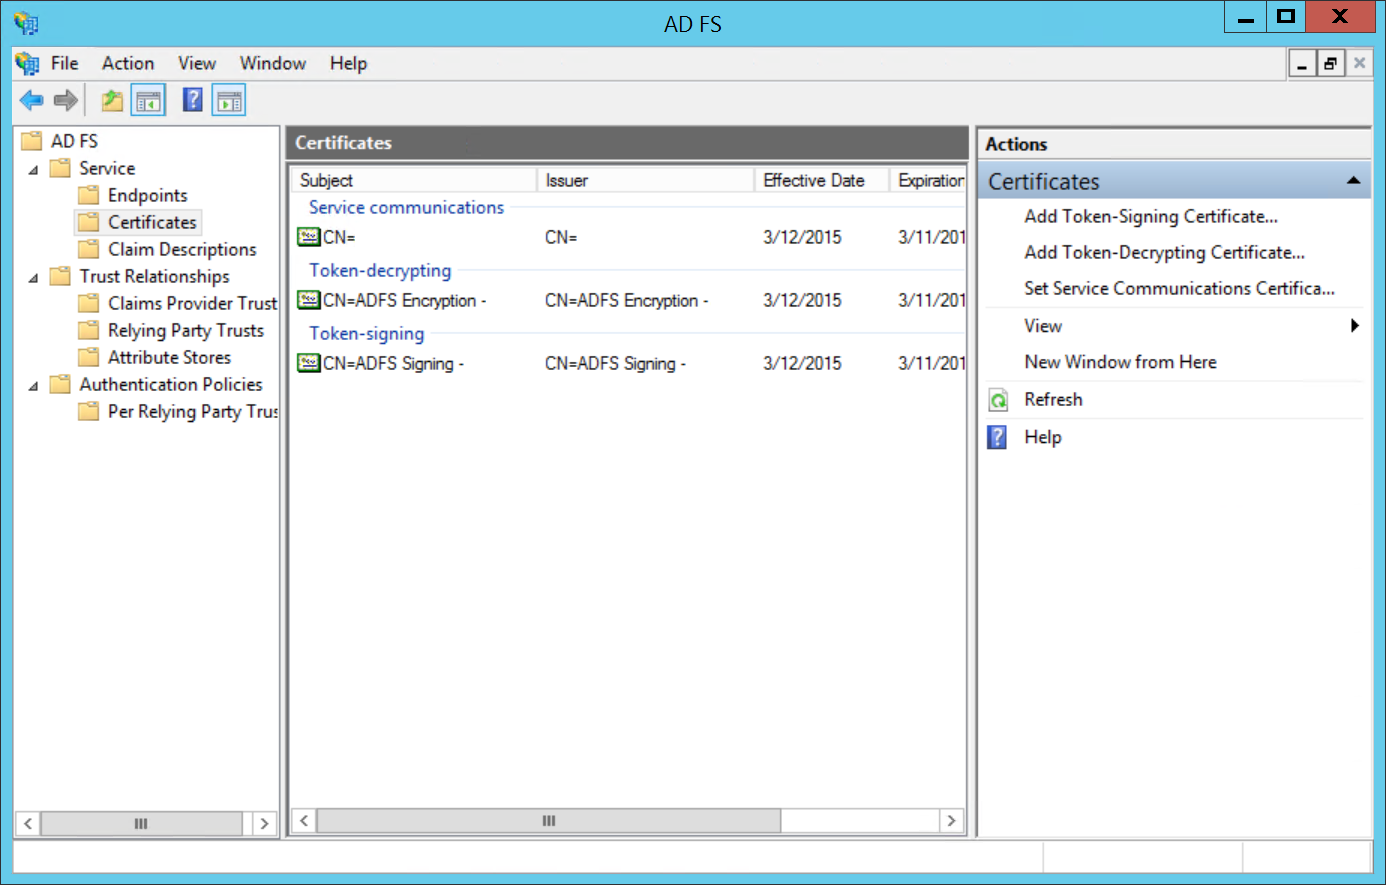
- Go to
ADFS > Service > Certificates. Select theToken-signingcertificate, and right-click to selectView Certificate. - On the
Details tab, clickCopy to File.... This launches the Certificate Export Wizard. ClickNext. - Choose
Base-64 encoded X.509 (.CER)as the format you'd like to use. Click Next. - Download to the location where Dex is deployed.
Step 2: Configure Hasura
The table below describes the configuration options for ADFS SSO. Hasura GraphQL Engine will expect these values to be
set as the value of the
HASURA_GRAPHQL_SSO_PROVIDERS environment
variable:
| Key | Example | Description |
|---|---|---|
client_id | dex-login | Any name identifying the Dex client |
admin_roles | ["admin"] | X-hasura-roles that should be given admin access to Console |
name | Dex Login | A display name for this login method on the Console |
authorization_url | http://dex-endpoint-from-browser:port/dex/auth | Endpoint of Dex for auth request, should be reachable from browser |
request_token_url | http://dex-endpoint-from-browser:port/dex/token | Endpoint of Dex for token request, should be reachable from browser |
scope | openid offline_access groups | Oauth2 scopes to be used against Dex |
jwt_secret.type | RS256 | Key type Dex is configured with |
jwt_secret.jwk_url | http://dex-endpoint-from-hasura:port/dex/keys | JWK URL that is published by dex |
jwt_secret.issuer | http://dex-endpoint-from-browser:port/dex | Issuer that is configured with Dex, same as issuer in Dex configuration, this is typically the endpoint at which Dex can be reached at |
jwt_secret.claims_map | {"x-hasura-allowed-roles": {"path": "$.groups"},"x-hasura-default-role": {"path": "$.groups[0]"}} | Mapping groups parsed by Dex to roles on Hasura |
Using the information above as an example, you can configure the HASURA_GRAPHQL_SSO_PROVIDERS environment variable as
follows:
[
  {
    "client_id": "dex-login",
    "admin_roles": ["admin"],
    "name": "Dex Login",
    "authorization_url": "http://localhost:5556/dex/auth",
    "request_token_url": "http://localhost:5556/dex/token",
    "scope": "openid offline_access groups",
    "jwt_secret": {
      "type": "RS256",
      "jwk_url": "http://localhost:5556/dex/keys",
      "issuer": "http://localhost:5556:5556/dex",
      "claims_map": {
        "x-hasura-allowed-roles": {
          "path": "$.groups"
        },
        "x-hasura-default-role": {
          "path": "$.groups[0]"
        }
      }
    }
  }
]
For guidance on setting environment variables or flags for Hasura GraphQL Engine, see server configuration.
Step 3: Configure Dex
Your Dex configuration will need the following fields set to enable ADFS SAML SSO. You can find a sample configuration
file below. This file should be saved in the /dex directory of your container.
Issuer
The base path of Dex and the external name of the OpenID Connect service. This is the canonical URL that all clients must use to refer to Dex. If a path is provided, Dex's HTTP service will listen at a non-root URL. This is the public URL at which Dex is available.
Example:
http://dex-domain:5556/dex
Static clients
This contains the id and redirectURIs. The id will reference the client_id in the Hasura configuration. The
redirectURIs will be the oauth callback URL of Hasura Console, which is at
http(s)://<hasura-endpoint>/console/oauth2/callback.
Example:
staticClients:
  - id: dex-login
    redirectURIs:
      - 'http://localhost:8080/console/oauth2/callback'
    name: 'Dex Login'
    public: true
Connectors
The connectors field is an array of objects that define the various connectors being used in the Dex configuration. Each
object in the array contains a type field that specifies the type of connector being used. Here, we'll use type: saml
along with a series of fields that are specific to the SAML connector.
connectors:
  - type: saml
    id: saml-auth0
    name: Auth0 SAML
    config:
      ssoURL: https://sts.example.local/adfs/ls/
      ca: /etc/dex/saml-ca.pem
      # insecureSkipSignatureValidation: true
      redirectURI: http://localhost:5556/dex/callback
      usernameAttr: http://schemas.xmlsoap.org/ws/2005/05/identity/claims/name
      emailAttr: http://schemas.xmlsoap.org/ws/2005/05/identity/claims/emailaddress
      groupsAttr: http://schemas.xmlsoap.org/ws/2005/05/identity/claims/role
      entityIssuer: https://sts.example.local/adfs/ls/
Sample configuration file for Dex
Click here to see a sample configuration file for Dex.
# The base path of dex and the external name of the OpenID Connect service.
# This is the canonical URL that all clients MUST use to refer to dex. If a
# path is provided, dex's HTTP service will listen at a non-root URL.
# Public URL that dex is available at
issuer: http://localhost:5556/dex

# The storage configuration determines where dex stores its state. Supported
# options include SQL flavors and Kubernetes third party resources.
#
# See the documentation (https://dexidp.io/docs/storage/) for further information.
storage:
  type: sqlite3
  config:
    file: /var/dex/dex.db

# Configuration for the HTTP endpoints.
web:
  http: 0.0.0.0:5556
  allowedOrigins: ['*']
  # Uncomment for HTTPS options.
  # https: 127.0.0.1:5554
  # tlsCert: /etc/dex/tls.crt
  # tlsKey: /etc/dex/tls.key

# Uncomment this block to enable configuration for the expiration time durations.
# Is possible to specify units using only s, m and h suffixes.
# expiry:
#   deviceRequests: "5m"
#   signingKeys: "6h"
#   idTokens: "24h"
#   refreshTokens:
#     reuseInterval: "3s"
#     validIfNotUsedFor: "2160h" # 90 days
#     absoluteLifetime: "3960h" # 165 days

# Options for controlling the logger.
# logger:
#   level: "debug"
#   format: "text" # can also be "json"

oauth2:
  responseTypes: ['code'] # also allowed are "token" and "id_token"
  skipApprovalScreen: true
#
staticClients:
  - id: dex-login
    redirectURIs:
      - 'http://localhost:8080/console/oauth2/callback'
    name: 'Dex Login'
    public: true

connectors:
  - type: saml
    id: saml-auth0
    name: Auth0 SAML
    config:
      ssoURL: https://sts.example.local/adfs/ls/
      ca: /etc/dex/adfs-saml.cer
      # insecureSkipSignatureValidation: true
      redirectURI: http://localhost:5556/dex/callback
      usernameAttr: http://schemas.xmlsoap.org/ws/2005/05/identity/claims/name
      emailAttr: http://schemas.xmlsoap.org/ws/2005/05/identity/claims/emailaddress
      groupsAttr: http://schemas.xmlsoap.org/ws/2005/05/identity/claims/role
      entityIssuer: https://sts.example.local/adfs/ls/
Step 4: Update your deployment
Finally, you'll need to configure your deployment with these changes. Here is a Docker Compose example, with the configuration:
version: '3.8'

services:
  postgres:
    image: postgres:15
    restart: always
    volumes:
      - postgres_data:/var/lib/postgresql/data
    ports:
      - '5432'
    environment:
      POSTGRES_PASSWORD: postgrespassword

  hasura-pro:
    image: hasura/graphql-engine:v2.25.0
    ports:
      - '8080:8080'
    depends_on:
      - postgres
    restart: always
    environment:
      HASURA_GRAPHQL_EE_LICENSE_KEY: <YOUR_EE_LICENSE_KEY>
      HASURA_GRAPHQL_ADMIN_SECRET: <YOUR_ADMIN_SECRET>
      HASURA_METADATA_DATABASE_URL: postgres://postgres:postgrespassword@postgres:5432/postgres?sslmode=disable
      PG_DATABASE_URL: postgres://postgres:postgrespassword@postgres:5432/postgres?sslmode=disable
      HASURA_GRAPHQL_ENABLE_CONSOLE: 'true'
      HASURA_GRAPHQL_DEV_MODE: 'true'
      HASURA_GRAPHQL_ENABLED_LOG_TYPES: startup,http-log,webhook-log,websocket-log,query-log
      HASURA_GRAPHQL_ENABLED_APIS: metadata,graphql,config,metrics
      HASURA_GRAPHQL_METRICS_SECRET: <YOUR_METRICS_SECRET>
      HASURA_GRAPHQL_CONSOLE_ASSETS_DIR: /srv/console-assets
      HASURA_GRAPHQL_SSO_PROVIDERS:
        '[{"client_id": "dex-login","admin_roles": ["[email protected]"], "name": "Dex
        Login","authorization_url": "http://127.0.0.1:5556/dex/auth","request_token_url":
        "http://127.0.0.1:5556/dex/token","scope": "openid offline_access groups","jwt_secret": {"type":
        "RS256","jwk_url": "http://dex:5556/dex/keys","issuer": "http://127.0.0.1:5556/dex","claims_map":
        {"x-hasura-allowed-roles": { "path": "$.groups" },"x-hasura-default-role": { "path": "$.groups[0]" }}}}]'

  dex:
    image: dexidp/dex
    restart: always
    volumes:
      - ./dex/config.docker.yaml:/etc/dex/config.docker.yaml
      - ./dex/adfs-saml.cer:/dex/adfs-saml.cer
    ports:
      - '5556:5556'

volumes:
  postgres_data:
Step 5: Log in
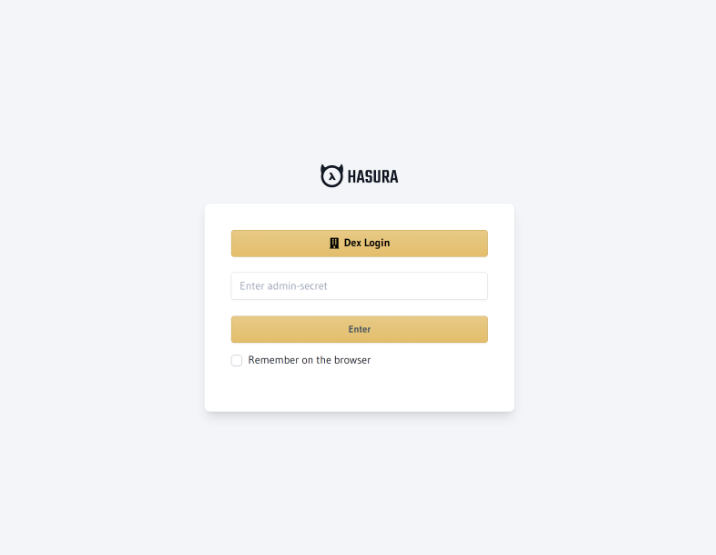
At this point, you should see a Dex Login option on the Hasura Console. Now, you're ready to log in with your ADFS
account 🎉