Add another Subgraph
Introduction
Our supergraph wouldn't be much of a supergraph with only a single subgraph. As we said in the overview, it's convenient, but not required, to organize subgraph metadata files around data domains / data sources.
Ideally, for organizations, the team responsible for a set of data sources owns a specific subgraph and is responsible for authoring and maintaining it.
Step 1: Stop dev mode
Before we add the subgraph, we'll first need to stop dev mode in the CLI. In the terminal tab in which this is
running, press CTRL+C.
Step 2: Add the new subgraph
Using the same tab, while we're still in the project directory, we'll add a second subgraph using the following command:
ddn create subgraph chinook
The CLI should respond that the subgraph was successfully created and that you need to add this new subgraph to a
SupergraphManifest to start using it in your DDN project. We can make our base.supergraph.hml look like this:
kind: SupergraphManifest
version: v1
definition:
  name: base
  envfile: base.env.yaml
  subgraphs:
    - app
    - chinook
Step 3: Connect a new data source
Since this is a PostgreSQL database, we can add a connector manifest using the following CLI command:
ddn add connector-manifest chinook_connector --subgraph chinook --hub-connector hasura/postgres --type cloud
Then, in our chinook/chinook_connector/connector/chinook_connector.build.hml, we can add the new subgraph and
connection string:
CONNECTION_URI:
  value: "postgresql://read_only_user:[email protected]:5432/Chinook"
Alternatively, you could add this as an environment variable as we did in the first part of this guide.
We can then run dev mode to generate a new build, introspect our Chinook data source, and watch for changes:
ddn dev
Before proceeding, let's remove the x-hasura-role and x-hasura-user-id headers we added earlier.
Step 4: Create relationships across subgraphs
Finally, we'll create a relationship between entities in our different subgraphs. Our Chinook data source is a
music-based dataset that contains a type called Artist. We have a favorite_artist colum on our app_users table.
In /app/app_connector/models/Users.hml, let's add the following relationship:
---
kind: Relationship
version: v1
definition:
  name: user_to_favorite_artist
  source: Users
  target:
    model:
      subgraph: chinook
      name: Artist
      relationshipType: Object
  mapping:
    - source:
        fieldPath:
          - fieldName: favoriteArtist
      target:
        modelField:
          - fieldName: artistId
While you can copy and paste the value above, don't forget that LSP is available to assist you when writing your own relationships, permissions, and any other metadata-authoring tasks you'll need to complete.
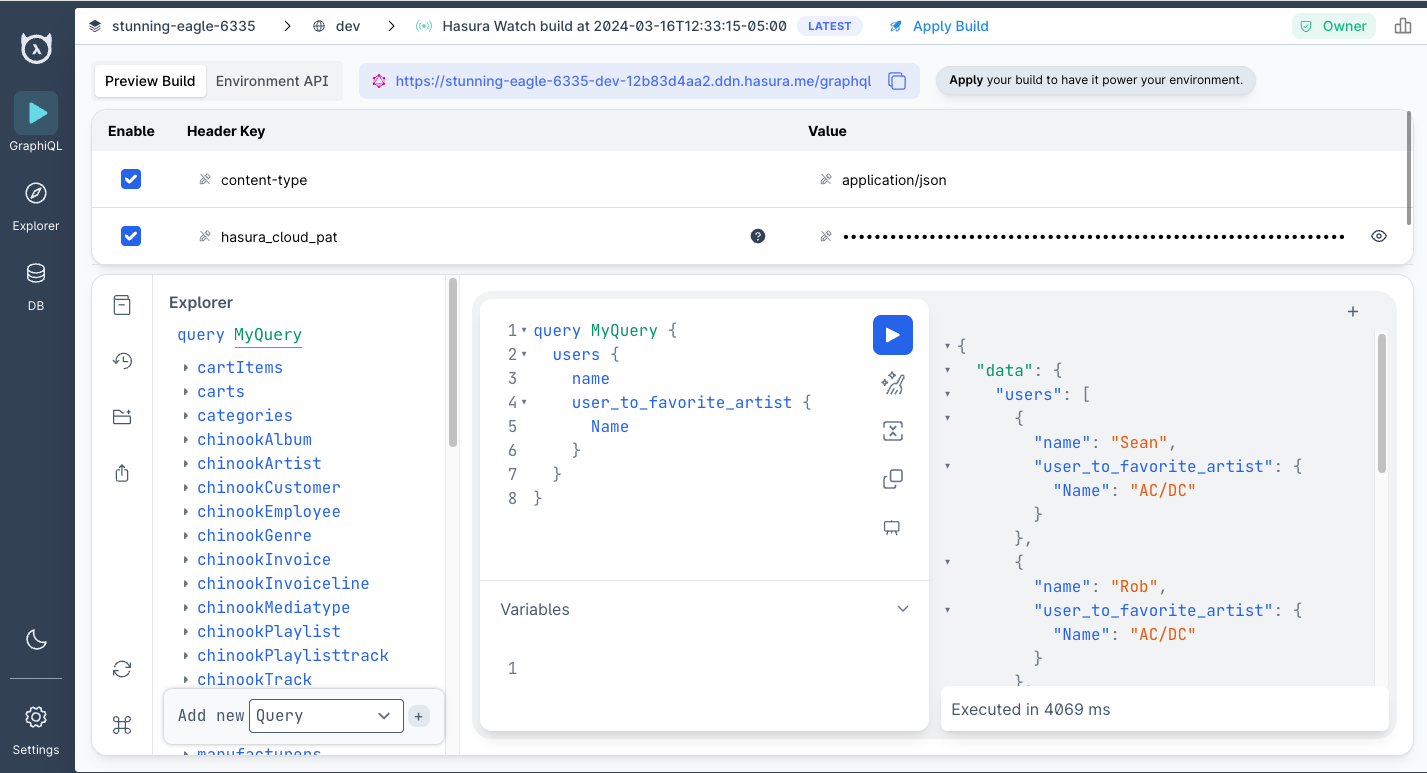
We can then run the following query and see that — rightly so — everyone's favorite artist is AC/DC 🤘
query MyQuery {
  app_users {
    name
    user_to_favorite_artist {
      name
    }
  }
}
What just happened?
We created a second subgraph called chinook and added a completely separate data source using the chinook_connector.
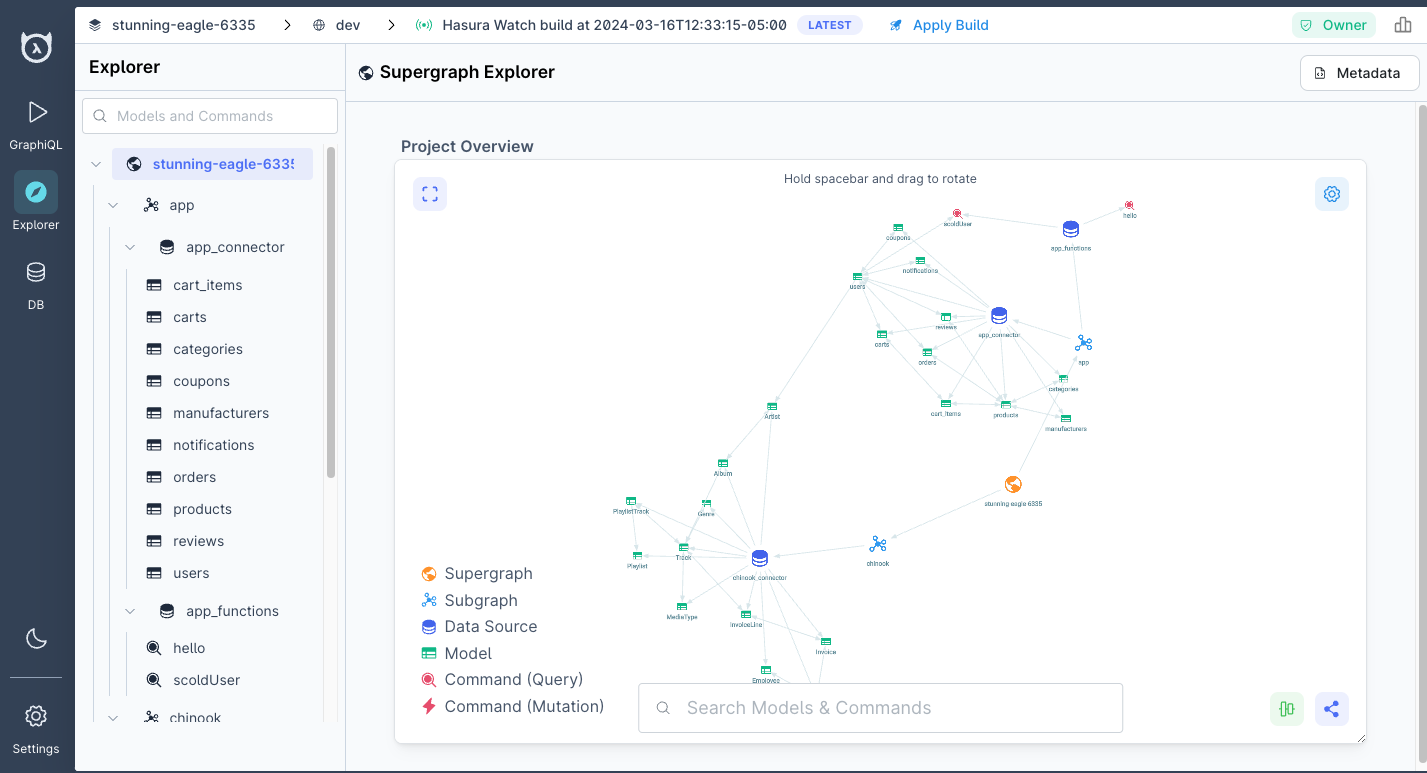
We then created a relationship across these subgraphs to link disparate tables and make them available via a single
query. We can even visualize this using the console's explorer, available in the left-hand navigation.
Check out the final page in our getting-started guide to learn how easy it is to add your own authentication platform, build and deploy connectors, and create rock-solid CI/CD pipelines for easy and automated deployments.