Add Permissions
Introduction
Authorization is a critical concept for any API. Historically, it's one of the most time-consuming and error-prone portions of the software development lifecycle. Hasura makes it a breeze allowing you to declaratively determine which users can access which models and even which types are returned by those models.
In this section, we'll cover:
- The live-reload capabilities of your API
- Authoring metadata
- Adding robust and fine-grained authorization rules
Step 1: Enable Auto-select
In our browser, let's select the auto-select latest build option. This will ensure we're always seeing the latest build
generated by the dev command:
Step 2: Add ModelPermission
For our users model, we want to introduce an authorization concept we call
permissions. This allows you to control which models are accessible to which
users — via a model permission — and which fields can be returned using type permissions.
Presently, if we run the following query, we'll see all users' information returned:
query UsersQuery {
  app_users {
    id
    name
  }
}
In just a few lines — and with the assistance of LSP powering our extension — we can declaratively restrict access so that a user is only able to see a limited set of their own data.
Open your project in VS Code and find the /app/app_connector/models/Users.hml file.
As you can see below, when we start typing role, LSP kicks in and assists us with creating the following permission
which checks the x-hasura-user-id header to only return a specific user's information. We're triggering the
auto-complete options using TAB and CTRL+SPACE:
With the guidance of LSP, let's make our ModelPermissions object look like the metadata below in our Users.hml file:
---
kind: ModelPermissions
version: v1
definition:
  modelName: Users
  permissions:
    - role: admin
      select:
        filter: null
    - role: user
      select:
        filter:
          fieldComparison:
            field: id
            operator: _eq
            value:
              sessionVariable: x-hasura-user-id
Step 3: Add TypePermissions
We can then modify the TypePermissions in the same file to the following:
---
kind: TypePermissions
version: v1
definition:
  typeName: Users
  permissions:
    - role: admin
      output:
        allowedFields:
          - createdAt
          - email
          - favoriteArtist
          - id
          - isEmailVerified
          - lastSeen
          - name
          - password
          - updatedAt
    - role: user
      output:
        allowedFields:
          - email
          - favoriteArtist
          - id
          - name
          - password
Since the CLI should still be running in dev mode, as we make our changes it will create a new build automatically.
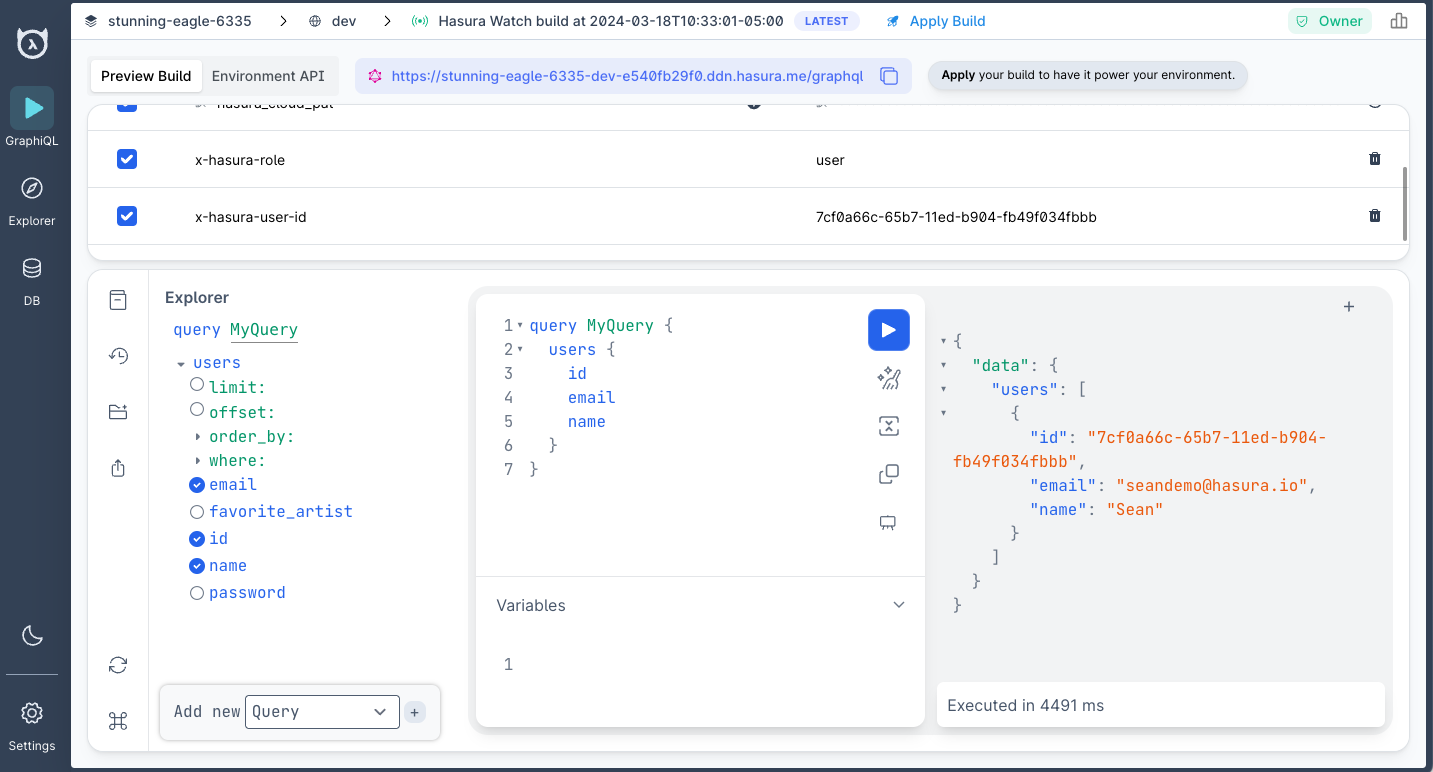
When our build is ready, we can add the following headers in our project's Console:
| Key | Value |
|---|---|
x-hasura-role | user |
x-hasura-user-id | 7cf0a66c-65b7-11ed-b904-fb49f034fbbb |
If you copy/paste these values, take care to ensure no trailing whitespace.
If we re-run the same query as before, Hasura will parse these values and apply our permissions, returning only Sean's
data and only the fields he access to under the user role:
What just happened?
Permissions
With only a few lines of YAML, you added row-level and column-level permissions to your API. You can learn more about how to pass these values as session variables using your preferred authentication solution in our auth section.
To wrap up, let's add an additional subgraph and make this a true supergraph 🚀