Add Business Logic
Introduction
With DDN, Hasura introduces a new way of writing custom business logic using connectors. We can expose generic functions or procedures that can be added to metadata as a command, which can be made available over your GraphQL API as a query or a mutation.
Let's take a look at doing this with the Node.js Lambda Connector with TypeScript.
Step 1: Add the TypeScript connector
Let's kill dev mode by pressing CTRL+C. Then, like we did with our Postgres connector, let's add the TypeScript
connector:
ddn add connector-manifest ts_connector --subgraph app --hub-connector hasura/nodejs --type cloud
This will generate the necessary configuration files in addition to adding a connector manifest for our TypeScript connector.
Let's go ahead and re-start dev mode so as we make changes, our API will live-update:
ddn dev
Step 2: Navigate to the TypeScript connector
Inside of the /app/ts_functions directory we can find all the files the CLI generated, including
connector/functions.ts which will contain our custom logic:
├── connector
│   ├── functions.ts
│   ├── package-lock.json
│   ├── package.json
│   ├── ts_functions.build.hml
│   └── tsconfig.json
└── ts_functions.hml
If we open functions.ts, we'll see the following contents:
/**
 * @readonly Exposes the function as an NDC function (the function should only query data without making modifications)
 */
export function hello(name?: string) {
  return `hello ${name ?? "world"}`;
}
We can use this in our API by running the following query, assuming we removed the x-hasura-role and
x-hasura-user-id headers we added on the previous page:
query MyQuery {
  app_hello(name: "Hasura")
}
Which should return:
{
  "data": {
    "app_hello": "hello Hasura"
  }
}
Step 3: Make some changes
Since we're running ddn dev, the CLI generated a tunnel between this locally running TypeScript connector and our API
hosted on Hasura DDN. This means any changes we make will trigger a new build and instantly be available via our API.
Let's modify hello() to the following:
/**
 * @readonly Exposes the function as an NDC function (the function should only query data without making modifications)
 */
export function hello(name?: string) {
  return `Hello, ${name ?? "World"}! 👋`;
}
Now, if we re-run our query, we should see nearly the same message...just with a bit more gusto!
{
  "data": {
    "app_hello": "Hello, Hasura! 👋"
  }
}
Step 4: Create and track a new function
Of course, our API will need more than one function. Let's create a new function called scoldUser() inside
functions.ts that yells at a user if they do something they're not supposed to do:
/**
 * @readonly
 */
export function scoldUser(userId: string) {
  return `DON'T DO THAT, ${userId}!`;
}
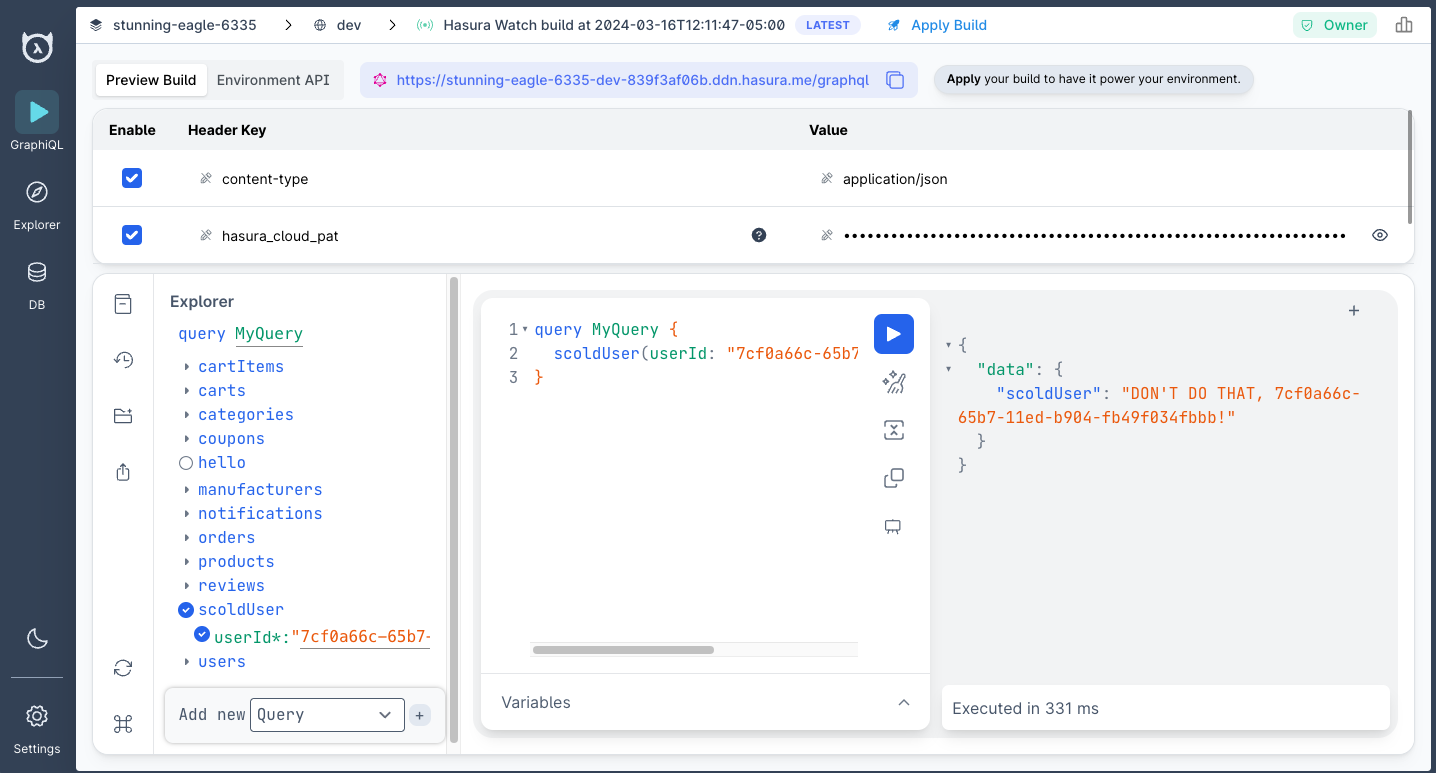
This will trigger a rebuild of our connector and our new function will instantly be available in our API. We can test it by running the following query:
query ScoldUserQuery {
  app_scoldUser(userId: "7cf0a66c-65b7-11ed-b904-fb49f034fbbb")
}
Step 5: Import a package
The TypeScript connector acts like any NodeJS project; this means you can use all the packages you're already familiar
with. Let's add the pg package so we can directly interact with our database.
In an available terminal tab, run the following from the root of the project:
cd ./app/ts_functions/connector
Then, let's install the pg package and its types:
npm i pg
npm i --save-dev @types/pg
Update your functions.ts file to read as follows:
import { Client } from "pg";

/**
 * @readonly Exposes the function as an NDC function (the function should only query data without making modifications)
 */
export function hello(name?: string) {
  return `Hello, ${name ?? "World"}! 👋`;
}

/**
 * @readonly
 */
export async function scoldUser(userId: string) {
  // Yes, for ease we're reusing the same sample app 😉
  const client = new Client({
    host: "35.236.11.122",
    port: 5432,
    database: "v3-docs-sample-app",
    user: "read_only_user",
    password: "readonlyuser",
  });

  await client.connect();

  const queryText = "SELECT name FROM users WHERE id = $1";
  const result = await client.query(queryText, [userId]);

  if (result.rows.length > 0) {
    const userName = result.rows[0].name;
    return `DON'T DO THAT, ${userName.toUpperCase()}!`;
  } else {
    return `Issue retrieving user`;
  }
}
We'll use this to determine who our user is and scold them by name.
After modifying the functions.ts file, re-run the same query in your API and you should see the following returned:
{
  "data": {
    "app_ScoldUser": "DON'T DO THAT, SEAN!"
  }
}
Step 6: Create a relationship from a command to a model
It would be nice to call this function as part of a larger query for a user. We can create relationships directly
between our commands and models. That means we can call ScoldUser directly on Sean from our API without requiring
additional queries, and — if we'd like — can even return other related data.
Find the Users.hml file in /app_connector/models and add a new entry at the bottom of the file by adding --- and
hitting ENTER.
Once you hit enter, you should see Hasura's LSP kick in and provide you with the variety of options of new metadata
objects you can add. If you start typing relationship, choose the Relationship (to command) option, and hit ENTER,
the LSP will scaffold out your metadata object.
You can tab through each key-value pair; the LSP will assist you by returning available options based on your data sources. Your final relationship should look like this:
---
kind: Relationship
version: v1
definition:
  name: scold_user
  source: Users
  target:
    command:
      name: ScoldUser
  mapping:
    - source:
        fieldPath:
          - fieldName: id
      target:
        argument:
          argumentName: userId
Upon saving the file, your API will be re-built. If you head to your project's console and run the following query, you can directly call your TypeScript function from your API based on your user's ID:
query UserQueryWithCommand {
  app_users(where: { id: { _eq: "7cf0a66c-65b7-11ed-b904-fb49f034fbbb" } }) {
    id
    email
    scold_user
  }
}
And the response is:
{
  "data": {
    "app_users": [
      {
        "id": "7cf0a66c-65b7-11ed-b904-fb49f034fbbb",
        "email": "[email protected]",
        "scold_user": "DON'T DO THAT, SEAN!"
      }
    ]
  }
}
Step 7: Add permissions
Of course, we don't want any user accessing this command from the API. Just as we did earlier with the users model,
with commands we can also declaratively restrict access to specific roles using permissions.
Find the ScoldUser.hml file in /app/ts_functions/commands and let's use the LSP to help us create a permission.
Within this file, you'll see CommandPermissions for ScoldUser command. There's already a permissions array with the
role of admin enabled by default.
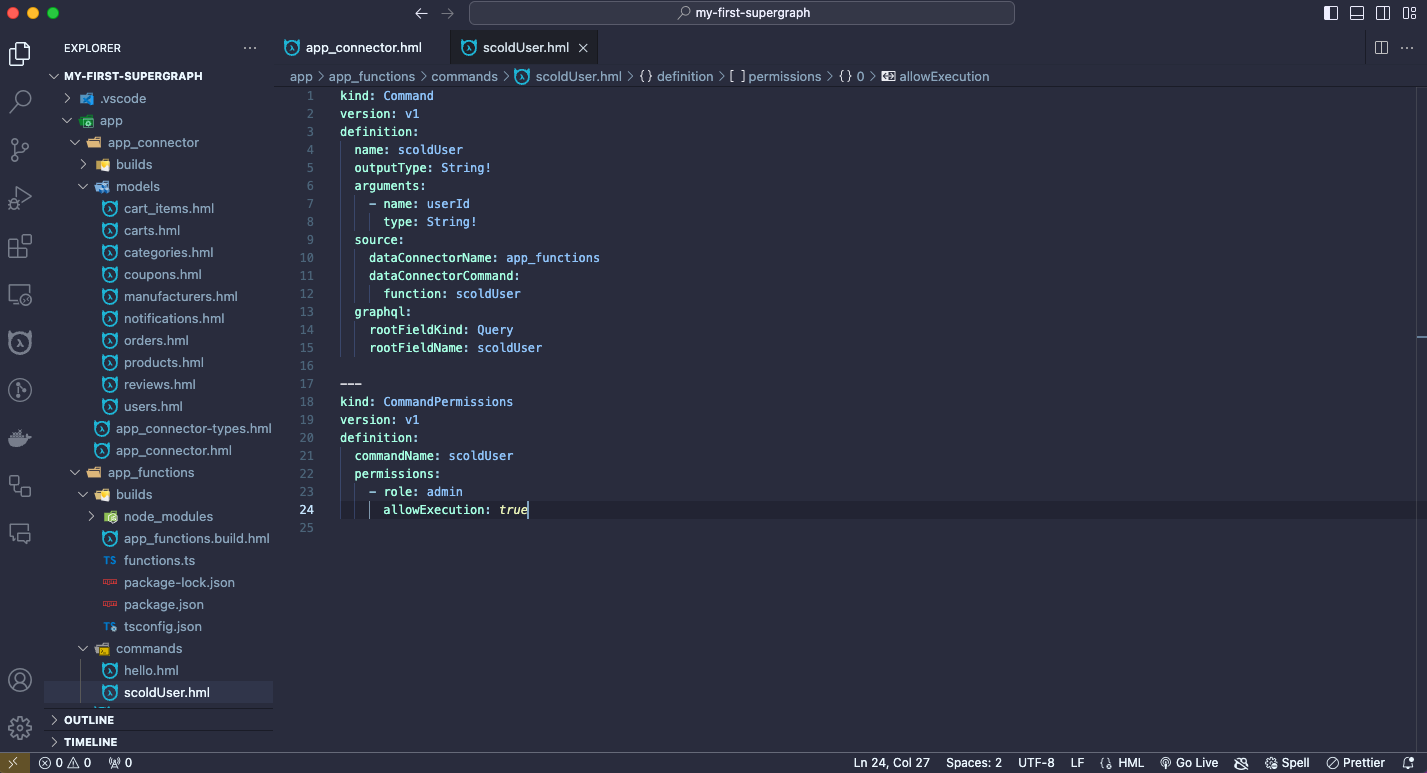
Let's add a new item to the array for a user role and disallow execution:
---
kind: CommandPermissions
version: v1
definition:
  commandName: ScoldUser
  permissions:
    - role: admin
      allowExecution: true
    - role: user
      allowExecution: false
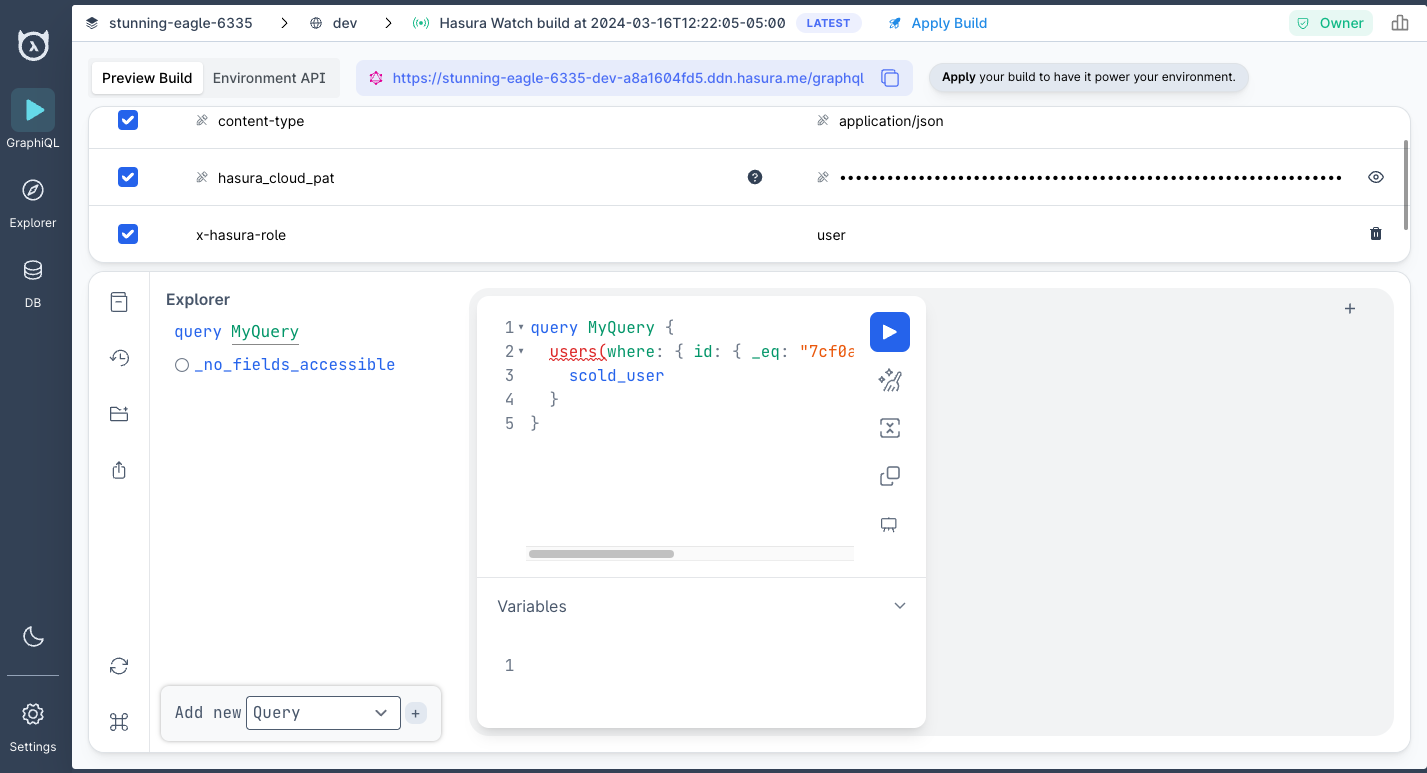
If you head back to your API, you can use the following key-value pair from earlier:
| Key | Value |
|---|---|
x-hasura-role | user |
This header tells your API that the request is being made by someone with the role of user. That role's access-control
rules are then evaluated against your metadata resulting in whether or not that role has access to the requested
resource.
What just happened?
We learned a lot!
Custom business logic
First, we introduced you to a quick and easy way of adding custom business logic to your API. As we learned on the previous page, Hasura can host your TypeScript connector for you, or you can host it yourself.
Familiarity of Node.js
We saw that as this connector uses Node.js under the hood, we can utilize any existing npm package for working with
and enriching data before returning it to our end users.
Easy authoring
Finally, we learned that with the superpower of LSP-assisted metadata authoring, we can intuitively and declaratively create relationships and permissions to use these functions in concert with models present in our supergraph 🤯
For our final step in this getting started guide, let's add a second subgraph with a data source to truly make this a supergraph.