


Creating actions
Table of contents
Introduction
An action is a GraphQL query or mutation. You have to define the GraphQL type of the arguments that the query or mutation accepts and the GraphQL type of its response.
To create an action, you have to:
- Define the query or mutation
- Define the required types
- Create a handler
Let’s look at examples for mutation and query type actions.
Setup
Install or update to the latest version of Hasura CLI.
You can either get started with an existing project or create a new project.
For a new project
hasura init
This will create a new project. You can set up your GraphQL engine endpoint
(and admin secret if it exists) in the config.yaml.
Run hasura metadata export so that you get server’s metadata into the
metadata/ directory.
For existing projects
Actions are supported only in the v2 config of the CLI. Check the config.yaml
of your Hasura project for the version key.
If you see version: 1 (or do not see a version key), upgrade to version
2 by running:
hasura scripts update-config-v2
Run hasura metadata export so that you get server’s metadata into the
metadata/ directory.
Mutation type action
Let’s start with a mutation that accepts a username and password, and returns
an access token. We’ll call this mutation login.
Step 1: Define your mutation and associated types
Start with defining the mutation and the required types. These types will reflect in the GraphQL schema.
Go to the Actions tab on the console and click on Create. This will
take you to a page like this:
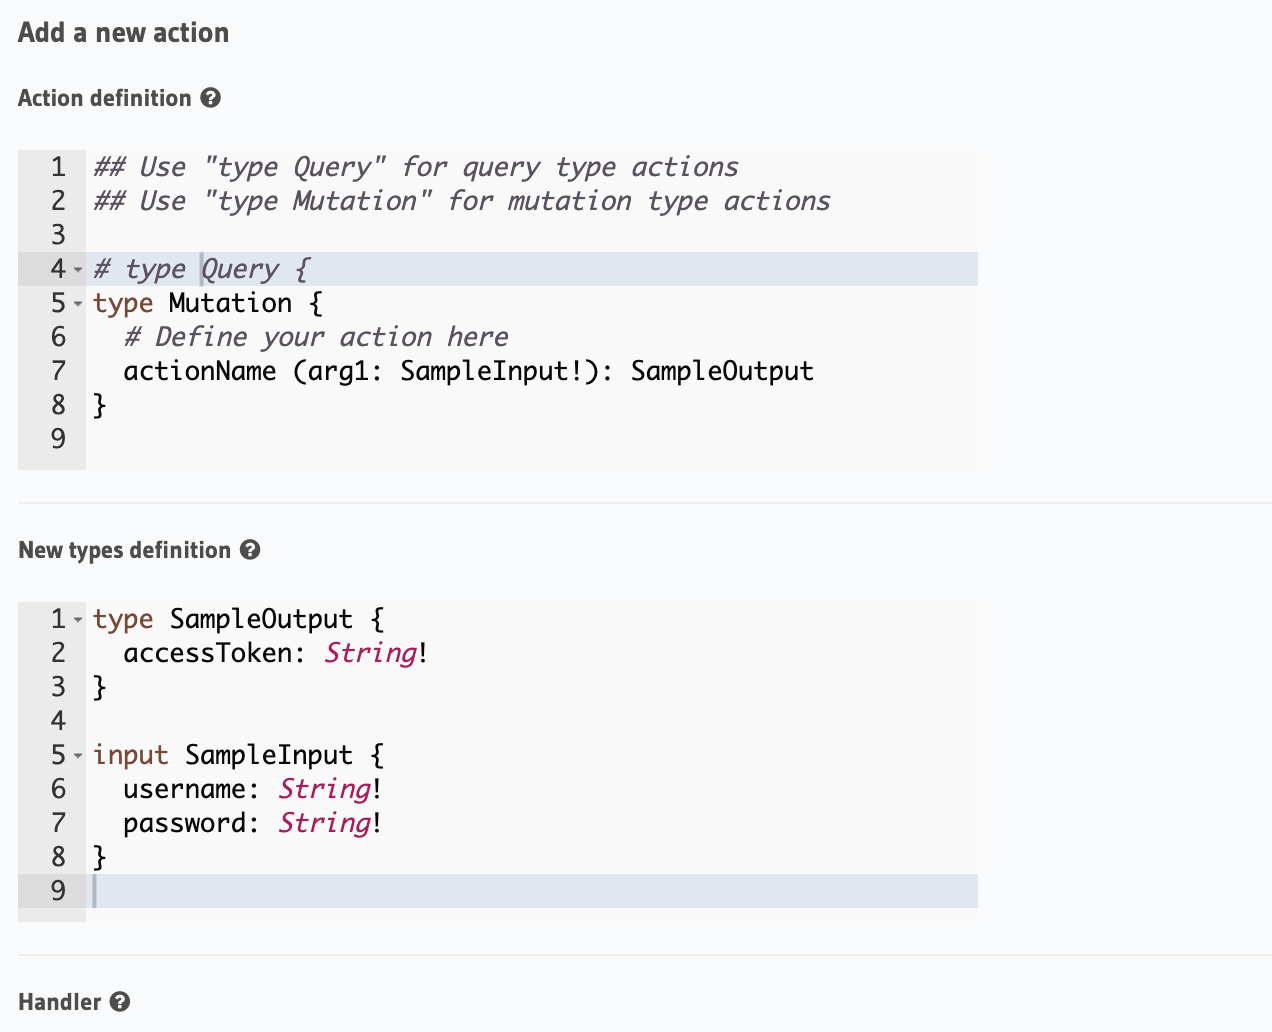
Define the action as follows in the Action Definition editor.
type Mutation {
  login (username: String!, password: String!): LoginResponse
}
In the above action, we called the returning object type to be LoginResponse.
Define it in the New types definition as:
type LoginResponse {
  accessToken: String!
}
To create an action, run
hasura actions create login
This will open up an editor with metadata/actions.graphql. You can enter
the action’s mutation definition and the required types in this file. For your
login mutation, replace the content of this file with the following
and save:
type Mutation {
  login (username: String!, password: String!): LoginResponse
}

type LoginResponse {
  accessToken: String!
}
It is essential that the custom types used in the action are defined beforehand via the set_custom_types metadata API:
POST /v1/query HTTP/1.1
Content-Type: application/json
X-Hasura-Role: admin

{
  "type": "set_custom_types",
  "args": {
    "scalars": [],
    "enums": [],
    "input_objects": [],
    "objects": [
      {
        "name": "LoginResponse",
        "fields": [
          {
            "name": "accessToken",
            "type": "String!"
          }
        ]
      }
    ]
  }
}
Once the custom types are defined, we can create an action via the create_action metadata API:
POST /v1/query HTTP/1.1
Content-Type: application/json
X-Hasura-Role: admin

{
  "type": "create_action",
  "args": {
    "name": "Login",
    "definition": {
      "kind": "synchronous",
      "type": "mutation",
      "arguments": [
        {
          "name": "username",
          "type": "String!"
        },
        {
          "name": "password",
          "type": "String!"
        }
      ],
      "output_type": "LoginResponse",
      "handler": "https://hasura-actions-demo.glitch.me/login"
    }
  }
}
The above definition means:
- This action will be available in your GraphQL schema as a mutation called
login. - It accepts two arguments called
usernameandpasswordof typeString!. - It returns an output type called
LoginResponse. LoginResponseis a simple object type with a field calledaccessTokenof typeString!.
Step 2: Create the action handler
A handler is an HTTP webhook where you can perform the custom logic for the action.
In this case, we will just return an access token, but typically you would want to run all the business logic that the action demands. NodeJS/Express code for this handler would look something like:
const handler = (req, resp) => {
  // You can access their arguments input at req.body.input
  const { username, password } = req.body.input;

  // perform your custom business logic
  // check if the username and password are valid and login the user

  // return the response
  return resp.json({
    accessToken: "Ew8jkGCNDGAo7p35RV72e0Lk3RGJoJKB"
  })

};
You can deploy this code somewhere and get the URI. For getting started quickly, we
also have this handler ready at https://hasura-actions-demo.glitch.me/login.
Set the handler
Now, set the handler for the action:
handler field to the above endpoint.metadata/actions.yaml. You must see a handler like http://localhost:3000 or http://host.docker.internal:3000 under the action named login. This is a default value taken from config.yaml.
Update the handler to the above endpoint.The action handler must be set when creating an action via the create_action metadata API.
It can be updated later by using the update_action metadata API.
URL templating
To manage handler endpoints across environments it is possible to template the endpoints using ENV variables.
e.g. https://my-handler-endpoint/addNumbers can be templated to {{ACTION_BASE_ENDPOINT}}/addNumbers
where ACTION_BASE_ENDPOINT is an ENV variable whose value is set to https://my-handler-endpoint
Note
If you are running Hasura using Docker, ensure that the Hasura Docker container can reach the handler endpoint. See this page for Docker networking.
Step 3: Finish action creation
Finally, to save the action:
Create.hasura metadata apply.Step 4: Try it out
In the Hasura console, head to the GraphiQL tab and try out the new action.
mutation {
  login (username: "jondoe", password: "mysecretpassword") {
    accessToken
  }
}
And that’s it. You have extended your Hasura schema with a new mutation.
Query type action
Let’s start with a basic query that accepts a list of numbers and returns
their sum. We’ll call this query addNumbers.
Step 1: Define your query and associated types
Start with defining the query and the required types. These types will reflect in the GraphQL schema.
Go to the Actions tab on the console and click on Create. This will
take you to a page like this:
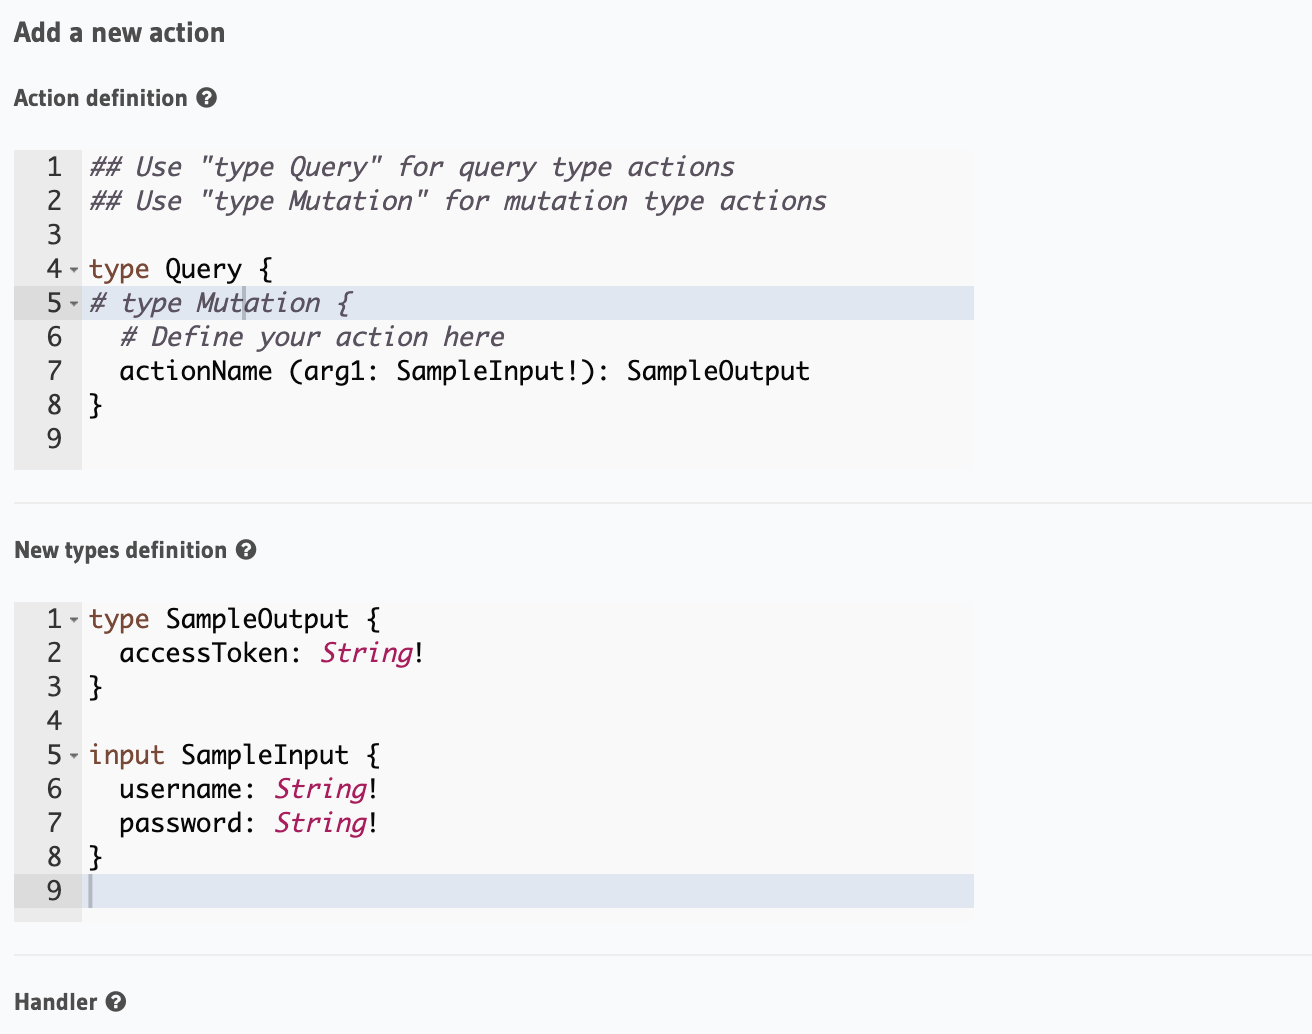
Define the action as follows in the Action Definition editor.
type Query {
  addNumbers (numbers: [Int]): AddResult
}
In the above action, we called the returning object type to be AddResult.
Define it in the New types definition as:
type AddResult {
  sum: Int
}
To create an action, run
hasura actions create addNumbers
This will open up an editor with metadata/actions.graphql. You can enter
the action’s query definition and the required types in this file. For your
addNumbers query, replace the content of this file with the following
and save:
type Query {
  addNumbers (numbers: [Int]): AddResult
}

type AddResult {
  sum: Int
}
It is essential that the custom types used in the action are defined beforehand via the set_custom_types metadata API:
POST /v1/query HTTP/1.1
Content-Type: application/json
X-Hasura-Role: admin

{
  "type": "set_custom_types",
  "args": {
    "scalars": [],
    "enums": [],
    "input_objects": [],
    "objects": [
      {
        "name": "AddResult",
        "fields": [
          {
            "name": "sum",
            "type": "Int!"
          }
        ]
      }
    ]
  }
}
Once the custom types are defined, we can create an action via the create_action metadata API:
POST /v1/query HTTP/1.1
Content-Type: application/json
X-Hasura-Role: admin

{
  "type":"create_action",
    "args": {
      "name":"addNumbers",
      "definition": {
        "kind":"synchronous",
        "type": "query",
        "arguments":[
          {
            "name":"numbers",
            "type":"[Int]!"
          }
        ],
        "output_type":"AddResult",
        "handler":"https://hasura-actions-demo.glitch.me/addNumbers"
    }
  }
}
The above definition means:
- This action will be available in your GraphQL schema as a query called
addNumbers - It accepts an argument called
numberswhich is a list of integers. - It returns an output type called
AddResult. AddResultis a simple object type with a field calledsumof type integer.
Step 2: Create the action handler
A handler is an HTTP webhook where you can perform the custom logic for the action.
In this case, it is the addition of the numbers. NodeJS/Express code for this handler would look something like:
const handler = (req, resp) => {
  // You can access their arguments input at req.body.input
  const { numbers } = req.body.input;

  // perform your custom business logic
  // return an error or response
  try {
    return resp.json({
      sum: numbers.reduce((s, n) => s + n, 0)
    });
  } catch(e) {
    console.error(e)
    return resp.status(500).json({
      message: 'unexpected'
    })
  }
};
You can deploy this code somewhere and get the URI. For getting started quickly, we
also have this handler ready at https://hasura-actions-demo.glitch.me/addNumbers.
Set the handler
Now, set the handler for the action:
handler field to the above endpoint.Go to metadata/actions.yaml. You must see a handler like http://localhost:3000
or http://host.docker.internal:3000 under the action named addNumbers.
This is a default value taken from config.yaml.
Update the handler to the above endpoint.
The action handler must be set when creating an action via the Once the custom types are defined, we can create an action via the create_action metadata API.
It can be updated later by using the update_action metadata API.
URL templating
To manage handler endpoints across environments it is possible to template the endpoints using ENV variables.
e.g. https://my-handler-endpoint/addNumbers can be templated to {{ACTION_BASE_ENDPOINT}}/addNumbers
where ACTION_BASE_ENDPOINT is an ENV variable whose value is set to https://my-handler-endpoint
Step 3: Finish action creation
Finally, to save the action:
Create.hasura metadata apply.Step 4: Try it out
In the Hasura console, head to the GraphiQL tab and try out the new action.
query {
  addNumbers(numbers: [1, 2, 3, 4]) {
    sum
  }
}
And that’s it. You have extended your Hasura schema with a new query.
 Thank you for subscribing to our newsletter!