


Access control basics
Table of contents
Introduction
To understand the basics of access control in Hasura, let’s take a look at this analogy to a SQL query:
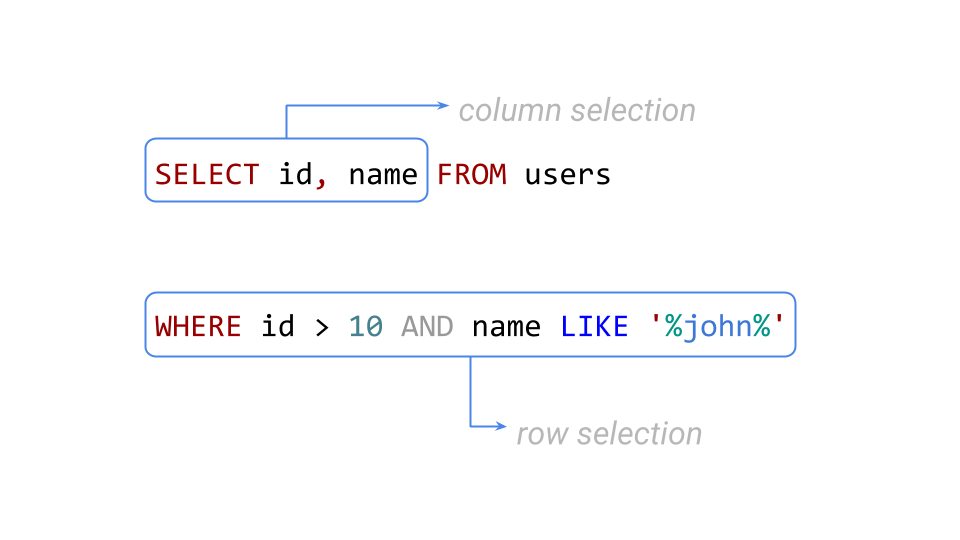
This query returns the right set of results by defining the requirements for columns and rows in a given table. Hasura’s rule-based access control works similary - you define the following permissions for a combination of role, table and action (insert, update, select and delete):
Row-level permissions
Limit access to a subset of the rows in the table based on this permission. Row-level permissions are essentially boolean expressions that, when evaluated against any row, determine access to it. These permissions are constructed from the values in columns, session variables and static values to build this boolean expression.
Column-level permissions
For the rows that are accessible based on the above, limit access to a subset of the columns based on this permission rule.
More information
For details on all the configuration options, see Configuring permission rules.
Example
Let’s see access control in action using a simple example.
Create a table
Head to your console and create a table called authors with the following
schema:
authors (
  id INT PRIMARY KEY,
  name TEXT
)
Now, insert some sample data into the table using the Insert Row tab of the authors table.
Run a query without access control
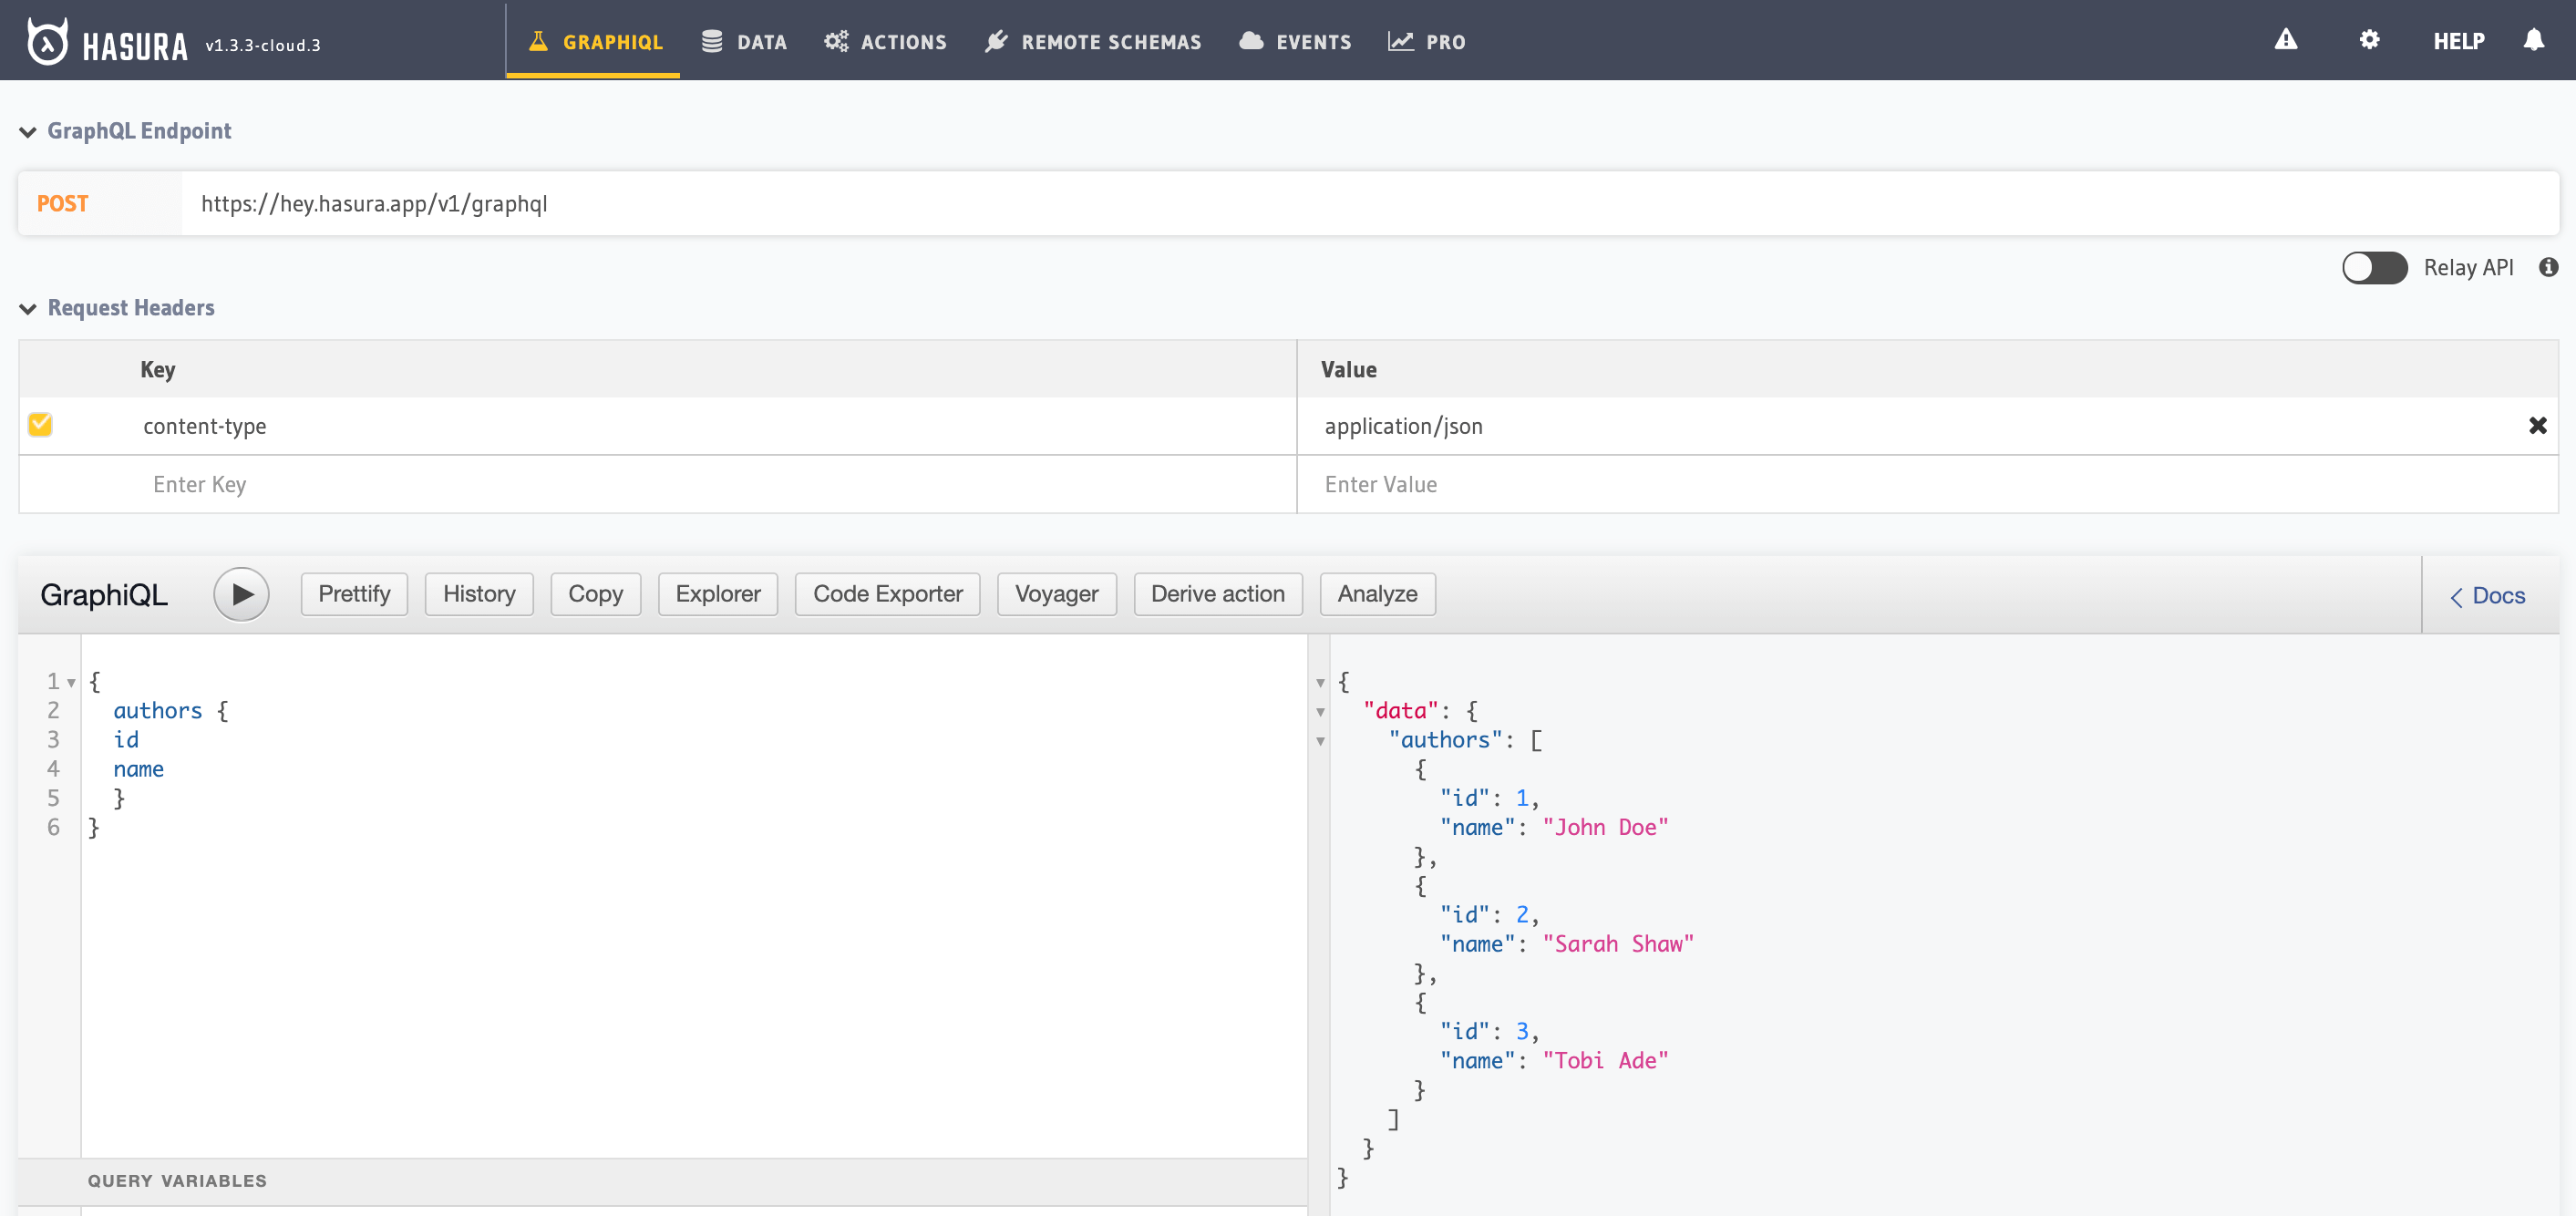
Head to the GraphiQL tab in your console and try out the below query:
query {
  authors {
    id
    name
  }
}
You’ll see that this results in a response that contains all the authors because by default the GraphQL query is accepted with admin permissions.
Define access control rules
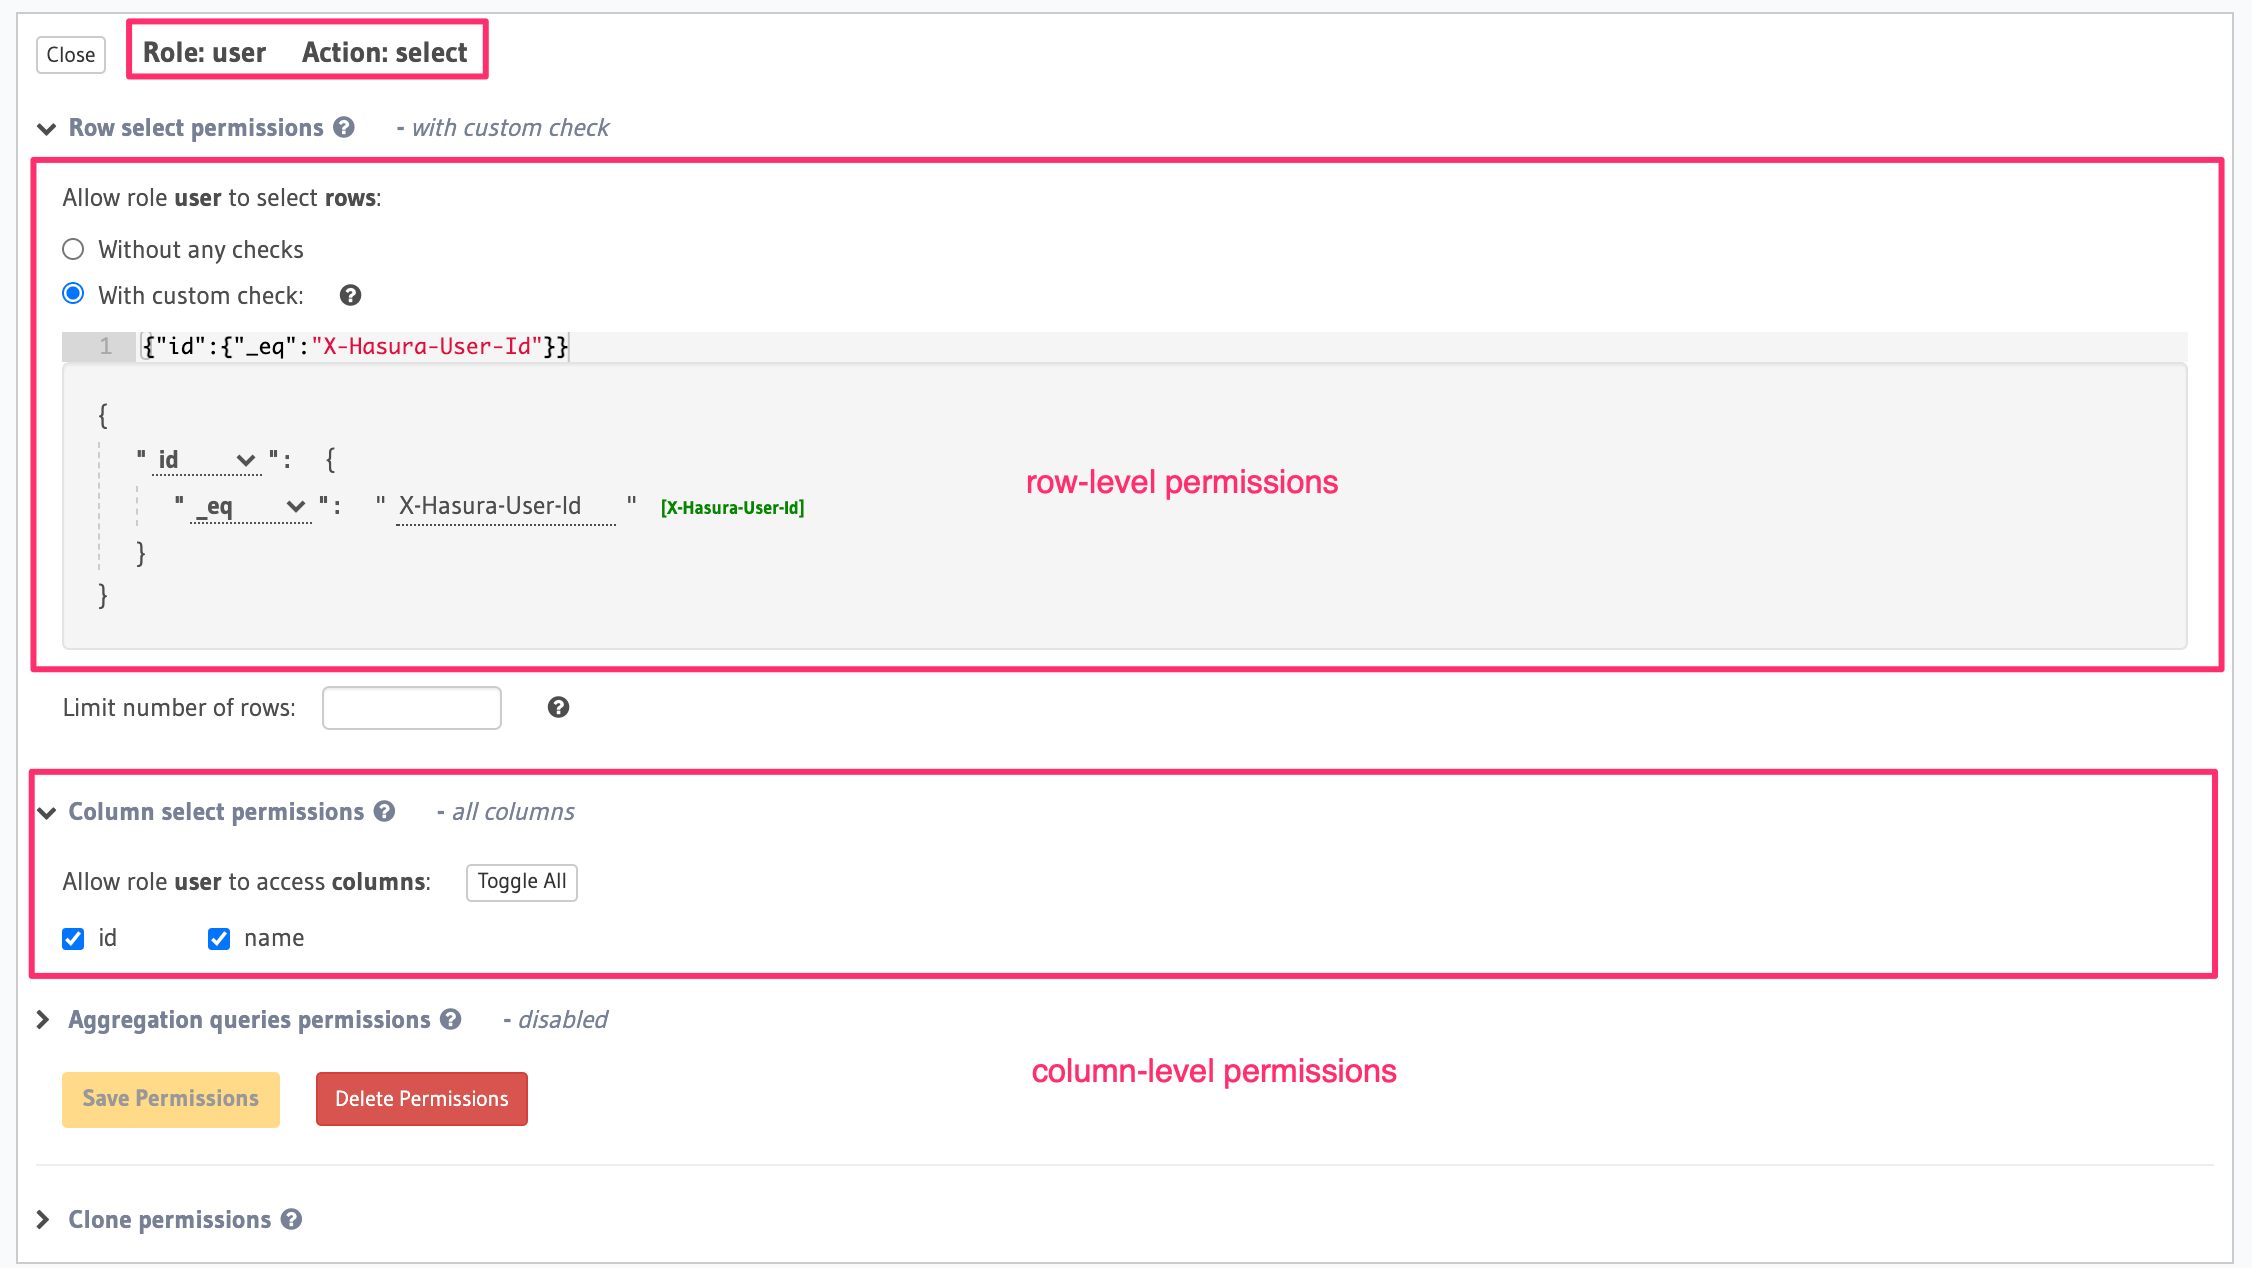
Now let’s define an access control rule for the authors table for a role user.
Head to the
Permissions section of the table (Data -> [table] -> Permissions tab) and define permissions
as shown below:
You can add permissions in the tables.yaml file inside the metadata directory:
 - table:
     schema: public
     name: authors
   select_permissions:
   - role: user
     permission:
       columns:
       - id
       - name
       filter:
         id:
           _eq: X-Hasura-User-Id
Apply the metadata by running:
hasura metadata apply
You can add select permissions by using the create_select_permission metadata API:
POST /v1/query HTTP/1.1
Content-Type: application/json
X-Hasura-Role: admin

{
    "type" : "create_select_permission",
    "args" : {
        "table" : "authors",
        "role" : "user",
        "permission" : {
            "columns" : [
              "id",
              "name"
            ],
            "filter" : {
                "id" : "X-Hasura-User-Id"
            }
        }
    }
}
This permission rule reads as: “For the role user , table authors and operation select/query,
allow access to those rows where the value in the id column is the same as the value in the
X-Hasura-User-ID session variable”.
Run a query with access control
Let’s run the same query as above but now with the X-Hasura-Role and X-Hasura-User-ID session
variables also included to indicate role and user information. These session variables are passed in
the Request Headers section of GraphiQL as highlighted below:

As you can see, the results are now filtered based on the access control rule for the role user
(since that is the role indicated by the X-Hasura-Role session variable) and the results are
restricted to only those rows where the value in the id column is equal to 1 (as indicated by
the X-Hasura-User-ID session variable).
As described in the Introduction to Authentication and Authorization section of the docs, your auth service is required to resolve authentication tokens into these session variables. See Reference - Session Variables for more details.
Next steps
Read about roles and session variables at: Roles & Session variables
See more detailed examples at: Common access control examples
 Thank you for subscribing to our newsletter!