


Tables basics
Table of contents
Introduction
Adding tables allows you to define the GraphQL types of your schema including their corresponding fields.
Creating tables
Let’s say we want to create two simple tables for articles and author schema:
author (
  id SERIAL PRIMARY KEY,
  name TEXT
)

articles (
  id SERIAL PRIMARY KEY,
  title TEXT,
  content TEXT,
  rating INT,
  author_id INT
)
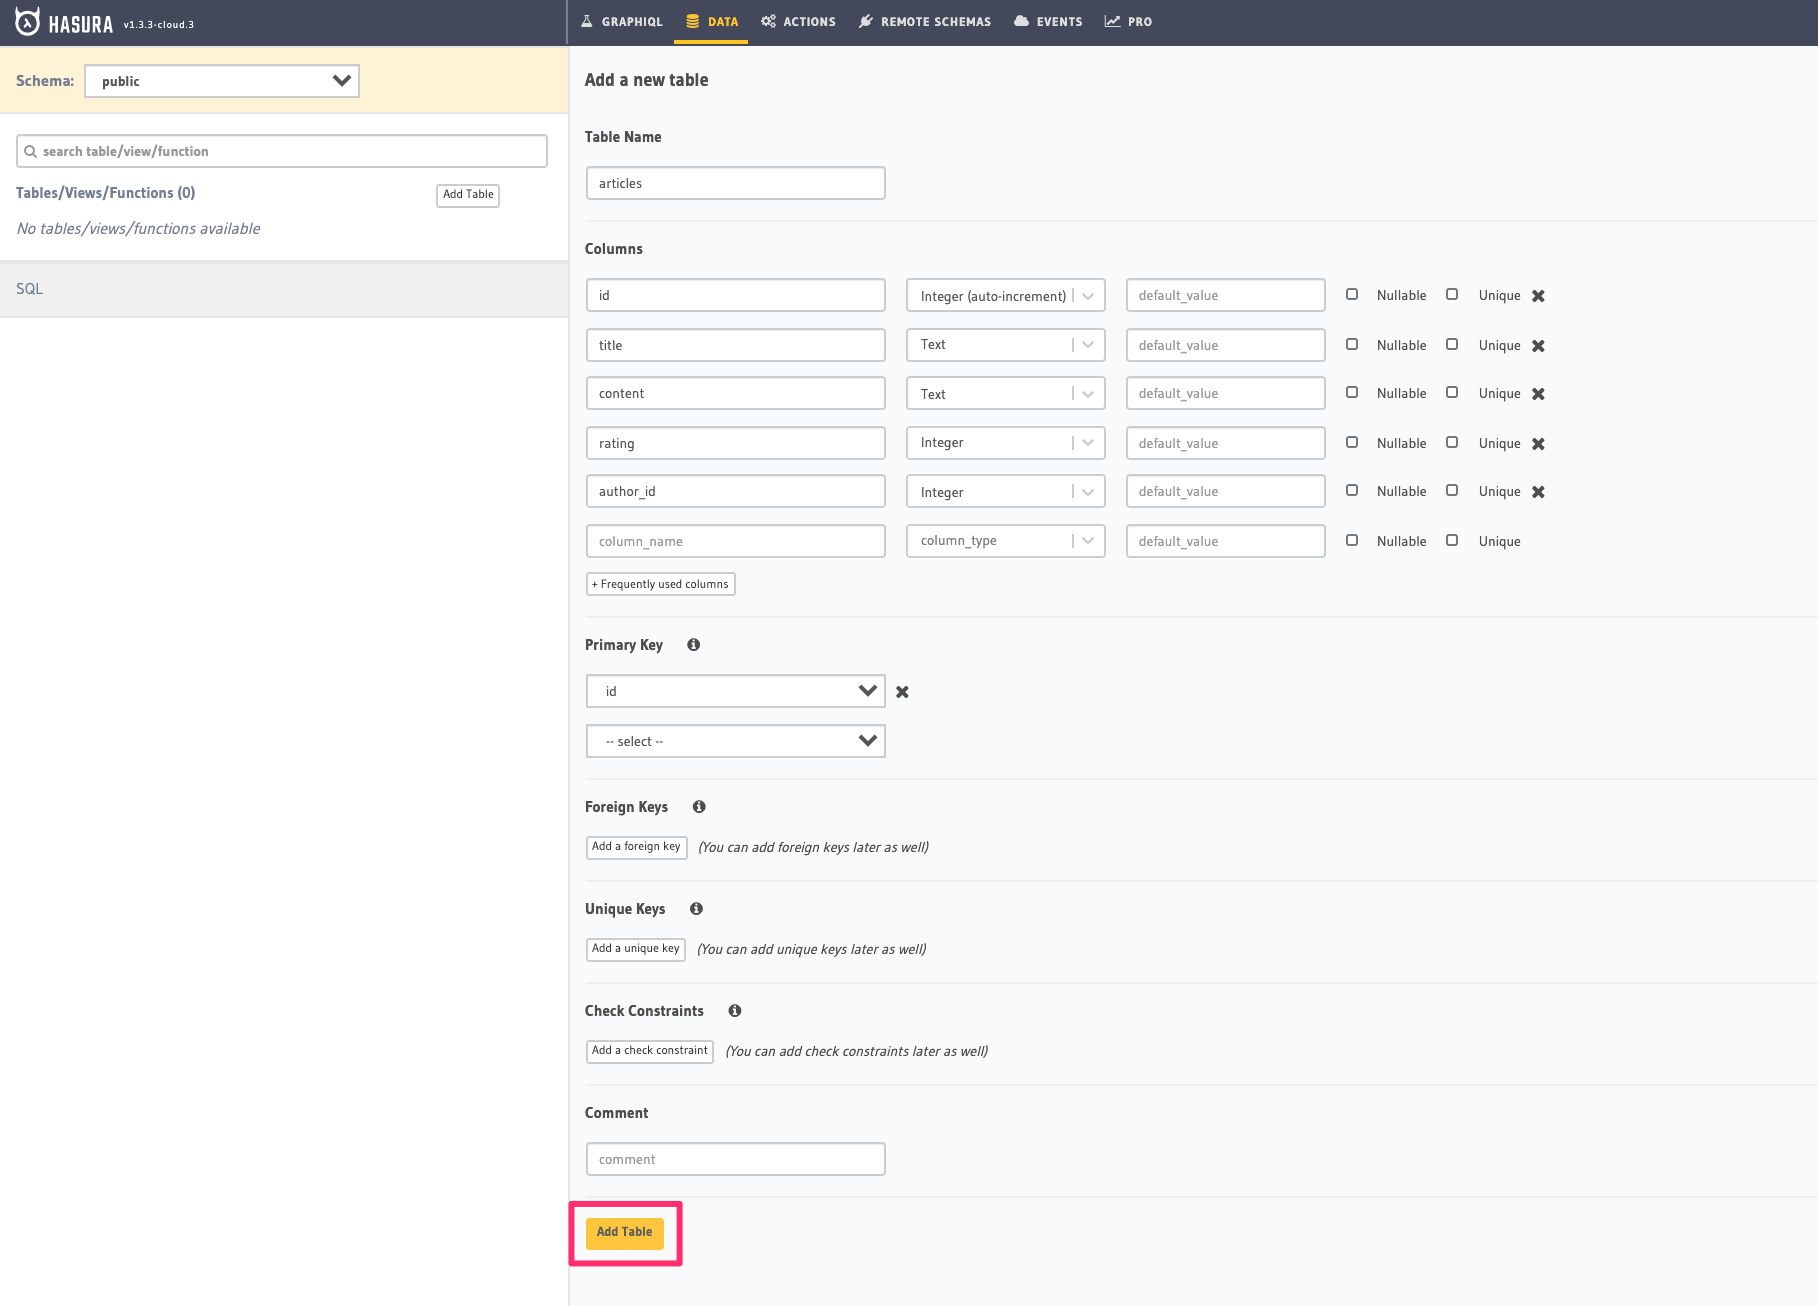
Open the Hasura console and head to the Data tab and click on the button on the left side bar to open up an interface to
create tables.
For example, here is the schema for the articles table in this interface:
Create a migration manually and add the following SQL statement to the
up.sqlfile:CREATE TABLE articles(id serial NOT NULL, title text NOT NULL, content text NOT NULL, rating integer NOT NULL, author_id serial NOT NULL, PRIMARY KEY (id));
Add the following statement to the
down.sqlfile in case you need to roll back the above statement:DROP TABLE articles;
Apply the migration by running:
hasura migrate apply
You can create a table by making an API call to the run_sql metadata API:
POST /v1/query HTTP/1.1
Content-Type: application/json
X-Hasura-Role: admin

{
  "type": "run_sql",
  "args": {
    "sql": "CREATE TABLE articles(id serial NOT NULL, title text NOT NULL, content text NOT NULL, rating integer NOT NULL, author_id serial NOT NULL, PRIMARY KEY (id));"
  }
}
Tracking tables
Tables can be present in the underlying Postgres database without being exposed over the GraphQL API. In order to expose a table over the GraphQL API, it needs to be tracked.
When a table is created via the Hasura console, it gets tracked by default.
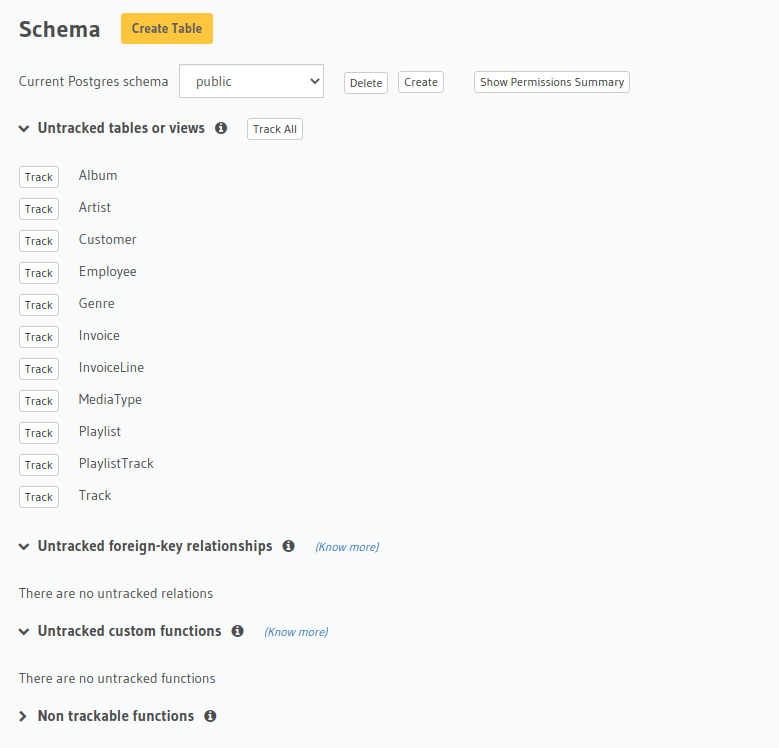
You can track any existing tables in your database from the Data -> Schema page:
To track the table and expose it over the GraphQL API, edit the
tables.yamlfile in themetadatadirectory as follows:- table: schema: public name: authors - table: schema: public name: articles
Apply the metadata by running:
hasura metadata apply
To track the table and expose it over the GraphQL API, make the following API call to the track_table metadata API:
POST /v1/query HTTP/1.1
Content-Type: application/json
X-Hasura-Role: admin

{
  "type": "track_table",
  "args": {
    "schema": "public",
    "name": "articles"
  }
}
Generated GraphQL schema types
As soon as a table is created and tracked, the corresponding GraphQL schema types and query/mutation fields will be automatically generated.
The following object type is generated for the articles
table we just created and tracked:
# Object type
type Articles {
  id: Int
  title: String
  content: String
  rating: Int
  author_id: Int
}
Let’s analyze the above type:
Articlesis the name of the typeid,title,content,ratingandauthor_idare fields of theArticlestypeIntandStringare types that fields can have
The following query/mutation fields are generated for the articles
table we just created and tracked:
# Query field
articles (
  where: articles_bool_exp
  limit: Int
  offset: Int
  order_by: [articles_order_by!]
): [articles!]!

# insert/upsert mutation field
insert_articles (
  objects: [articles_insert_input!]!
  on_conflict: articles_on_conflict
): articles_mutation_response

# update mutation field
update_articles (
  where: articles_bool_exp!
  _inc: articles_inc_input
  _set: articles_set_input
): articles_mutation_response

# delete mutation field
delete_articles (
  where: articles_bool_exp!
): articles_mutation_response
These auto-generated fields will allow you to query and mutate data in our table.
See the query and mutation API references for the full specifications.
Try out basic GraphQL requests
At this point, you should be able to try out basic GraphQL queries/mutations on the newly created tables from the GraphiQL tab in the console. (You may want to add some sample data into the tables first)
Query all rows in the
articlestable:query { articles { id title author_id } }
query { articles { id title author_id } }{ "data": { "articles": [ { "id": 1, "title": "sit amet", "author_id": 4 }, { "id": 2, "title": "a nibh", "author_id": 2 }, { "id": 3, "title": "amet justo morbi", "author_id": 4 }, { "id": 4, "title": "vestibulum ac est", "author_id": 5 } ] } }Insert data in the
authortable:mutation add_author { insert_author( objects: [ { name: "Jane" } ] ) { affected_rows returning { id name } } }
mutation add_author { insert_author( objects: [ { name: "Jane" } ] ) { affected_rows returning { id name } } }{ "data": { "insert_author": { "affected_rows": 1, "returning": [ { "id": 11, "name": "Jane" } ] } } }
Note
author’s id does not need to be passed as an input as it is of type serial (auto incrementing integer).
 Thank you for subscribing to our newsletter!