


Run Hasura GraphQL engine on Heroku
Table of contents
Introduction
This guide shows how to deploy Hasura GraphQL engine on Heroku.
Deploying Hasura with a new Postgres DB
Option 1: One-click deployment
Click the below button to deploy Hasura on Heroku in a few seconds:
Note
If you don’t have an account on Heroku, you need to sign up on Heroku. You won’t need a credit card, and once you sign up you’ll be redirected to your Heroku app creation page automatically.
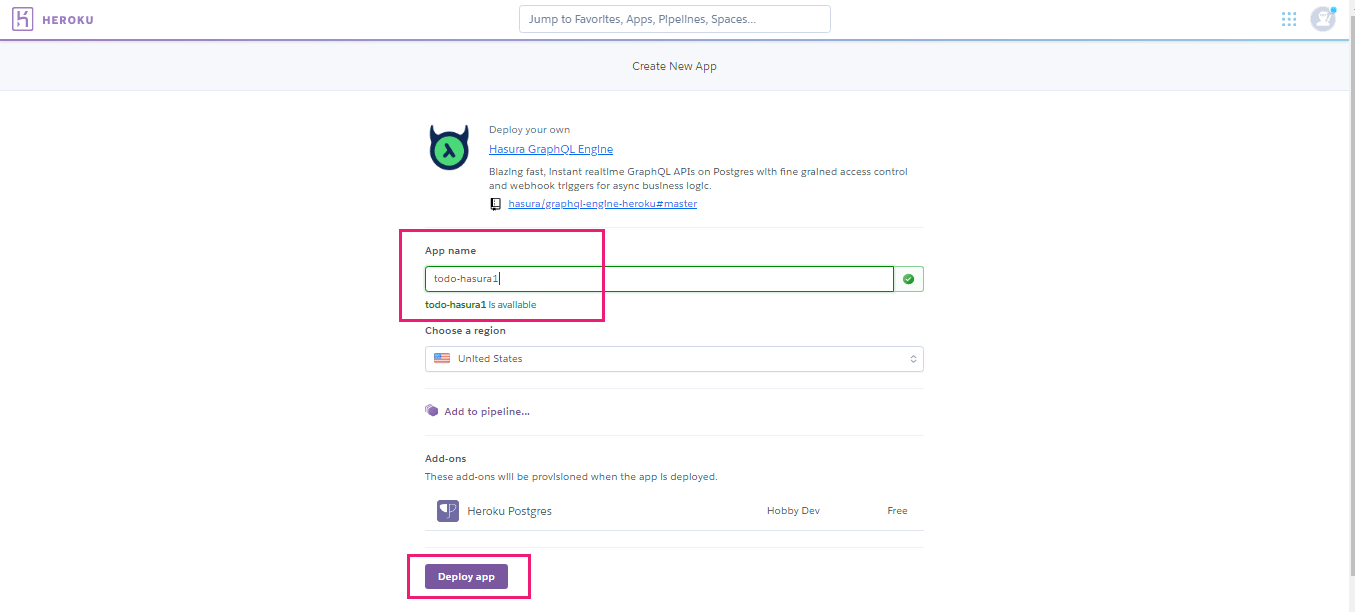
Heroku’s free Postgres add-on is automatically provisioned.
Option 2: Deploy via Heroku CLI
Follow these instructions to create a new Heroku app with a Postgres add-on using the Heroku CLI.
Step 1: Clone the Hasura GraphQL engine Heroku app
The Hasura app with Heroku buildpack/configuration is available at:
Step 2: Create an app with –stack=container
Use the Heroku CLI to create a new Heroku app from inside the cloned directory. Let’s call
the app todo-hasura1.
# Replace todo-hasura1 with whatever you'd like your app to be called
$ heroku create todo-hasura1 --stack=container

Creating ⬢ todo-hasura1... done, stack is container
https://todo-hasura1.herokuapp.com/ | https://git.heroku.com/todo-hasura1.git
Note:
HEROKU_GIT_REMOTE: https://git.heroku.com/todo-hasura1.gitHEROKU_APP_URL: https://todo-hasura1.herokuapp.com/
Step 3: Create the Heroku Postgres add-on
Create the Postgres add-on in your Heroku app.
$ heroku addons:create heroku-postgresql:hobby-dev -a todo-hasura1

Creating heroku-postgresql:hobby-dev on ⬢ todo-hasura1... free
Database has been created and is available
 ! This database is empty. If upgrading, you can transfer
  ! data from another database with pg:copy
  Created postgresql-angular-20334 as DATABASE_URL
  Use heroku addons:docs heroku-postgresql to view documentation
Step 4: git push to deploy
Remember to change HEROKU_GIT_REMOTE to your git remote below. In our case:
https://git.heroku.com/todo-hasura1.git.
$ git init && git add .
$ git commit -m "first commit"
$ git remote add heroku <HEROKU_GIT_REMOTE>
$ git push heroku master
Visit https://todo-hasura1.herokuapp.com (replace todo-hasura1 with your app name) and
you should see the Hasura console.
Deploying using an existing Postgres DB
Let’s say you have an existing Heroku Postgres database with data in it, and you’d like to add GraphQL to it.
Note
As you’re exposing an existing database, please configure an admin secret to prevent public access of the console and the GraphQL endpoint.
Option 1: Via Heroku UI
Step 1: Deploy Hasura on Heroku
Deploy Hasura on Heroku as described in this section.
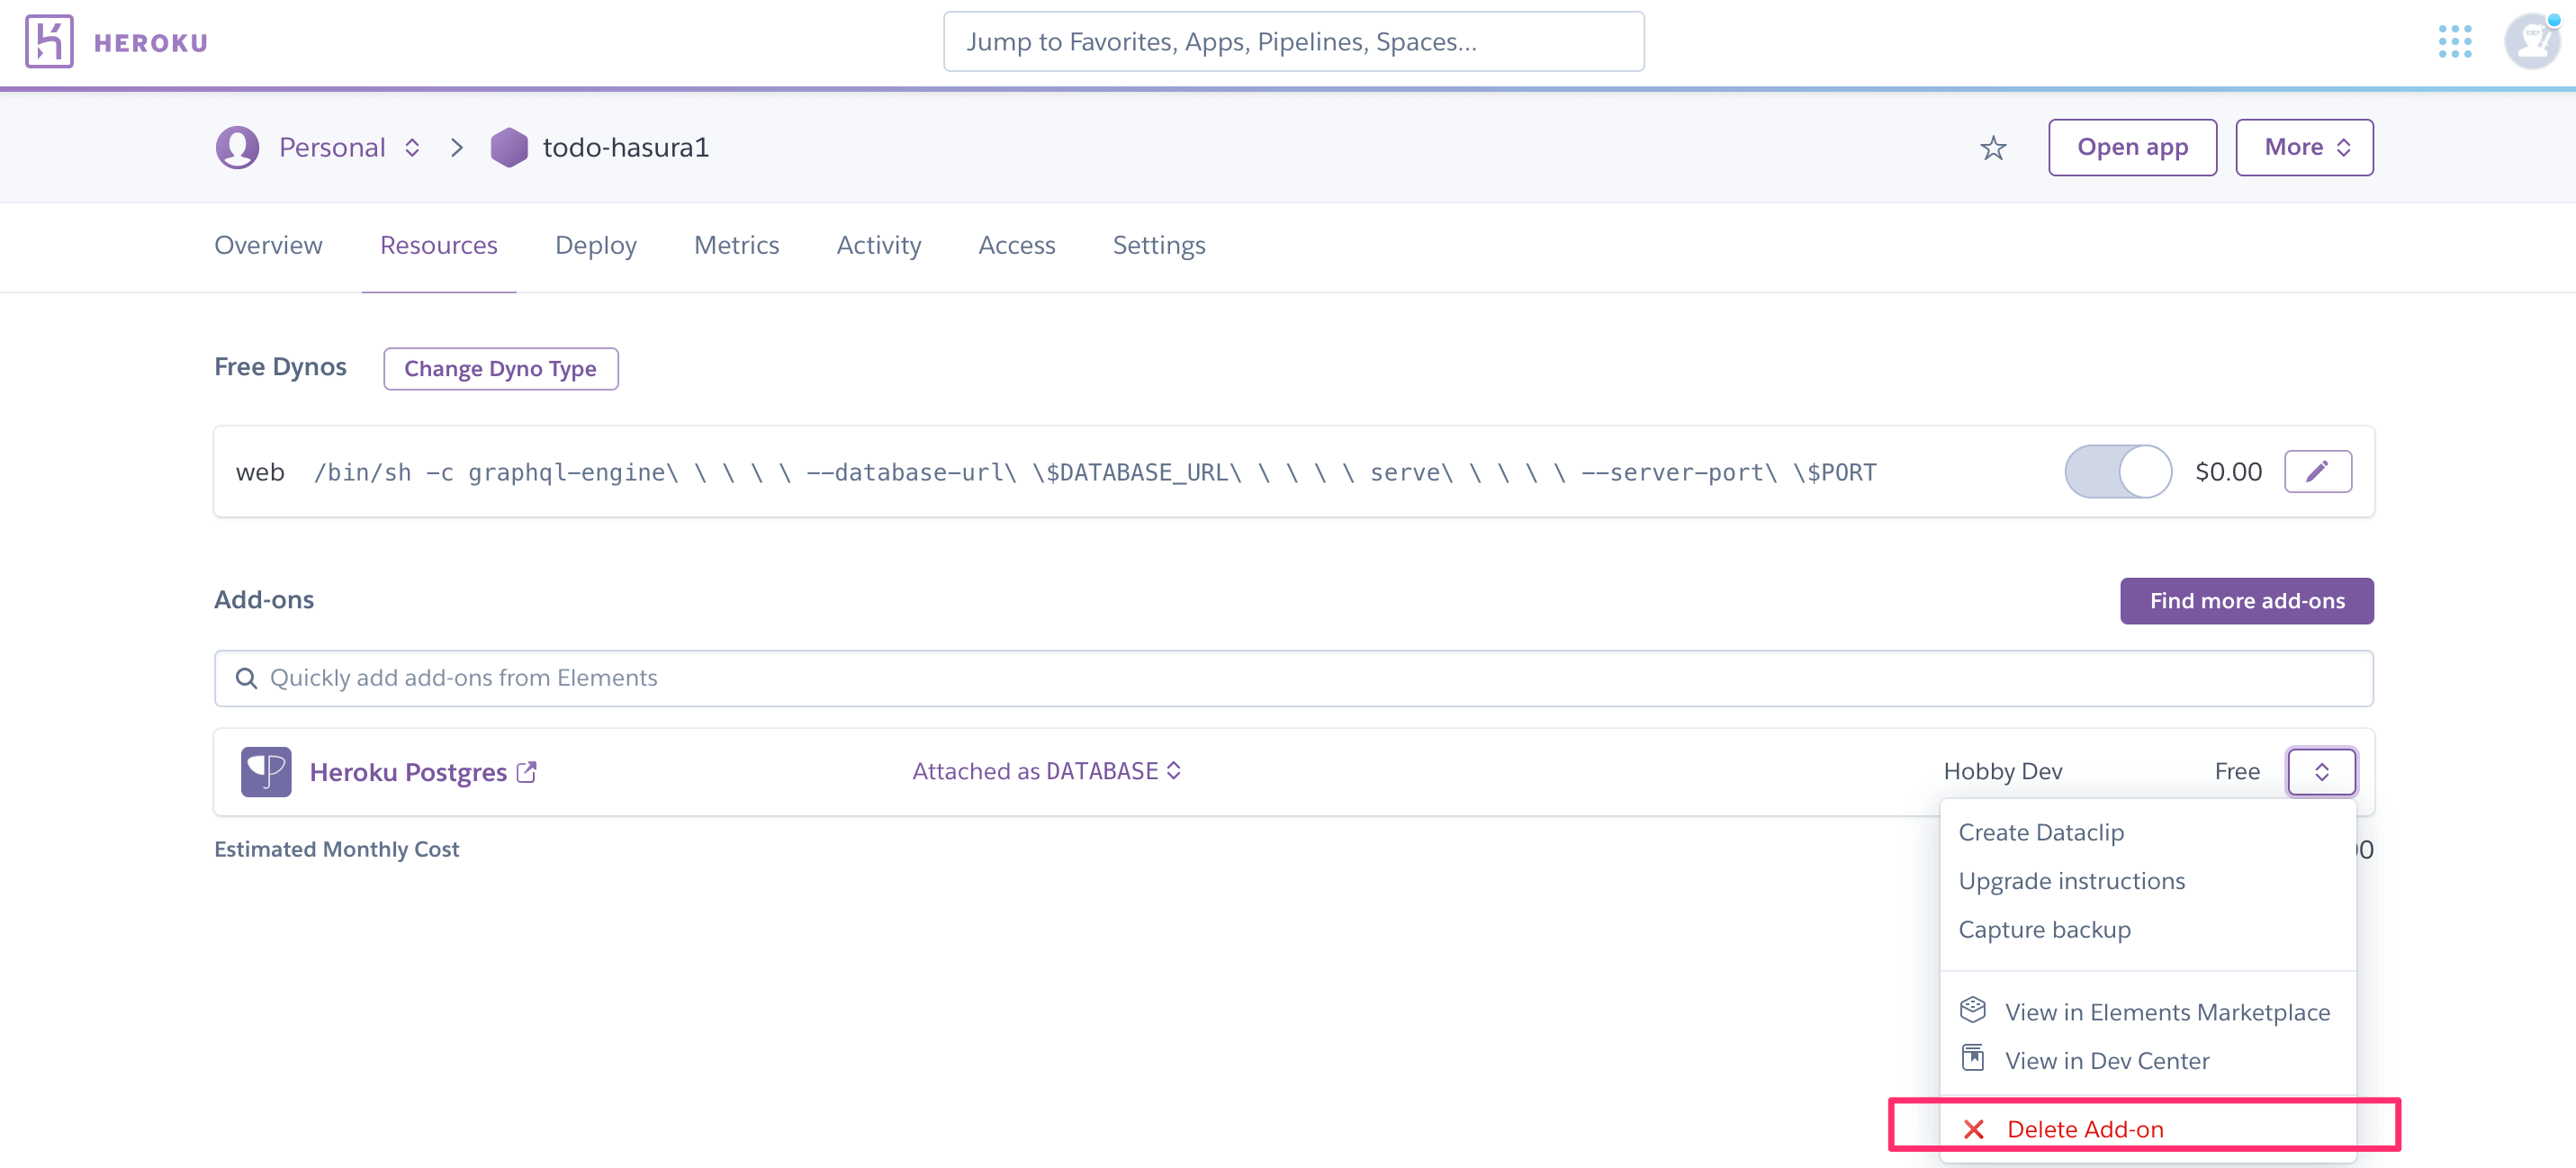
Step 2: Remove the created Postgres add-on in the app
Head to your Heroku dashboard and delete the Postgres add-on created in the previous step:
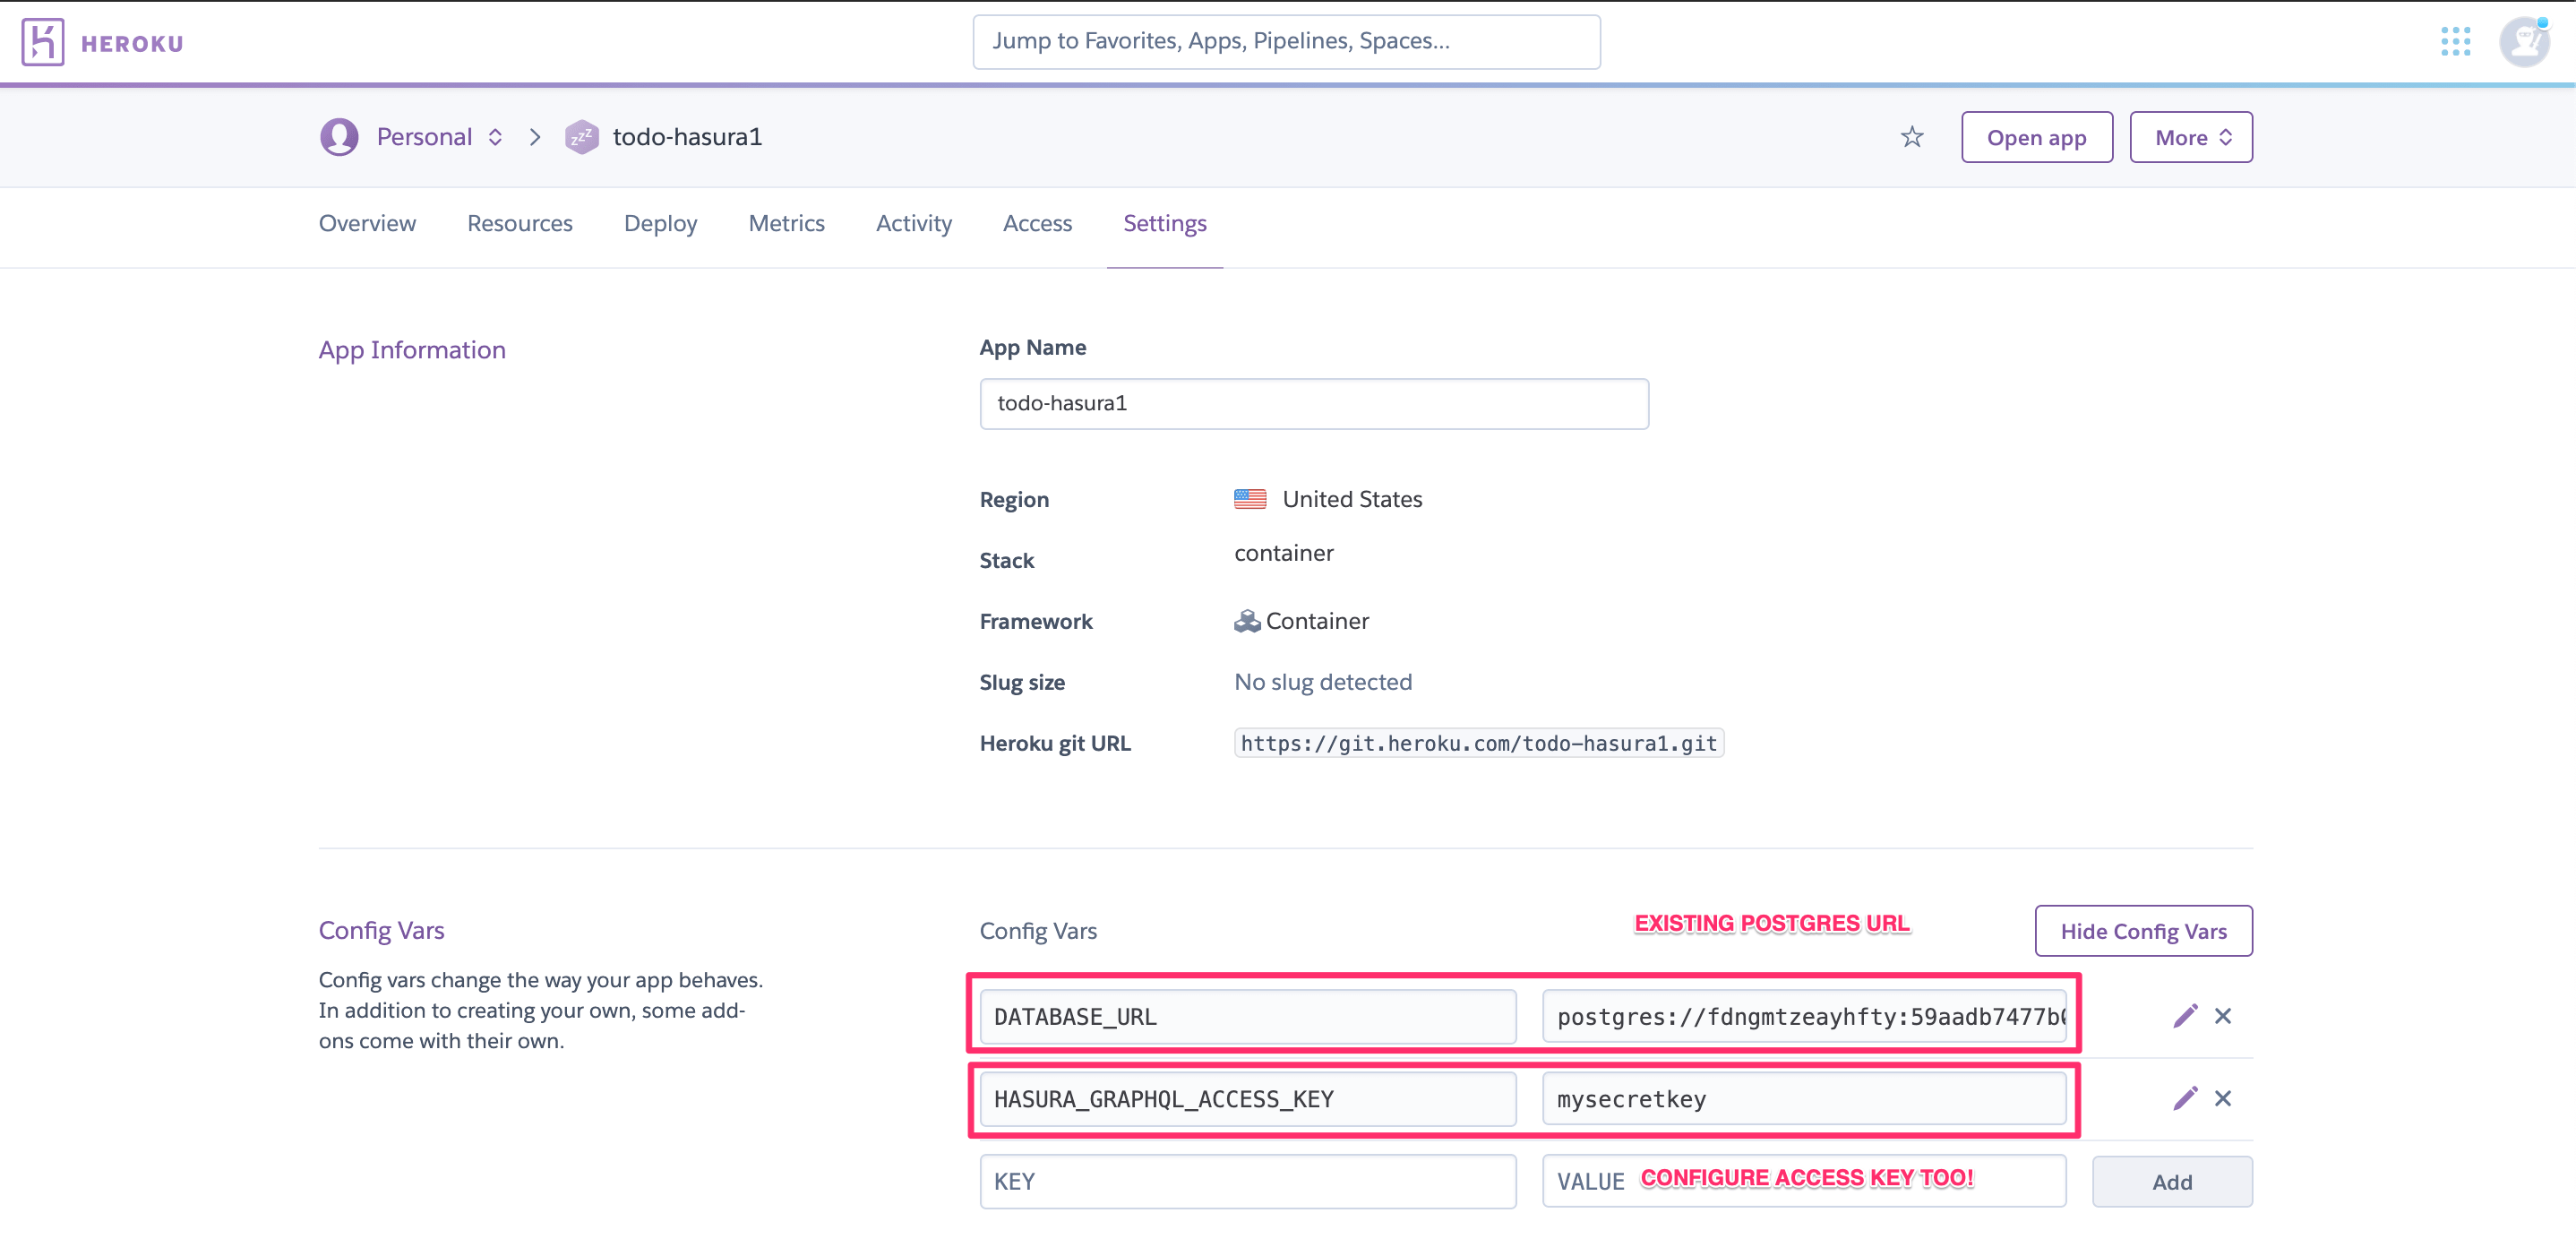
Step 3: Configure environment variables
Now configure the DATABASE_URL with your existing Heroku Postgres database URL and a HASURA_GRAPHQL_ADMIN_SECRET
if you want to secure your endpoint.
Note
The Hasura GraphQL engine needs access permissions to your Postgres database as described in Postgres permissions.
Step 4: Track tables and relationships
Wait for the GraphQL engine to restart and then see Setting up a GraphQL schema using an existing database to enable GraphQL over the database.
Option 2: Via Heroku CLI
You can set up the Hasura GraphQL engine as a “git push to deploy” app on Heroku and connect it to a Heroku Postgres instance.
Step 1: Clone the Hasura GraphQL engine Heroku app
The Hasura app with Heroku buildpack/configuration is available at:
Step 2: Configure the database URL
Edit the command in the Dockerfile to change which database the Hasura GraphQL engine connects to.
By default, it connects to the primary database in your app which is available at DATABASE_URL.
FROM hasura/graphql-engine:latest

# Change $DATABASE_URL to your Heroku Postgres URL if you're not using
# the primary Postgres instance in your app
CMD graphql-engine \
  --database-url $DATABASE_URL \
  serve \
  --server-port $PORT \
  --enable-console
Read about more configuration options here.
Note
Hasura GraphQL engine needs access permissions to your Postgres database as described in Postgres permissions.
Securing the GraphQL endpoint
To make sure that your GraphQL endpoint and the Hasura console are not publicly accessible, you need to configure an admin secret key.
Add an admin secret
Head to the config-vars URL on your Heroku dashboard and set the HASURA_GRAPHQL_ADMIN_SECRET environment variable.
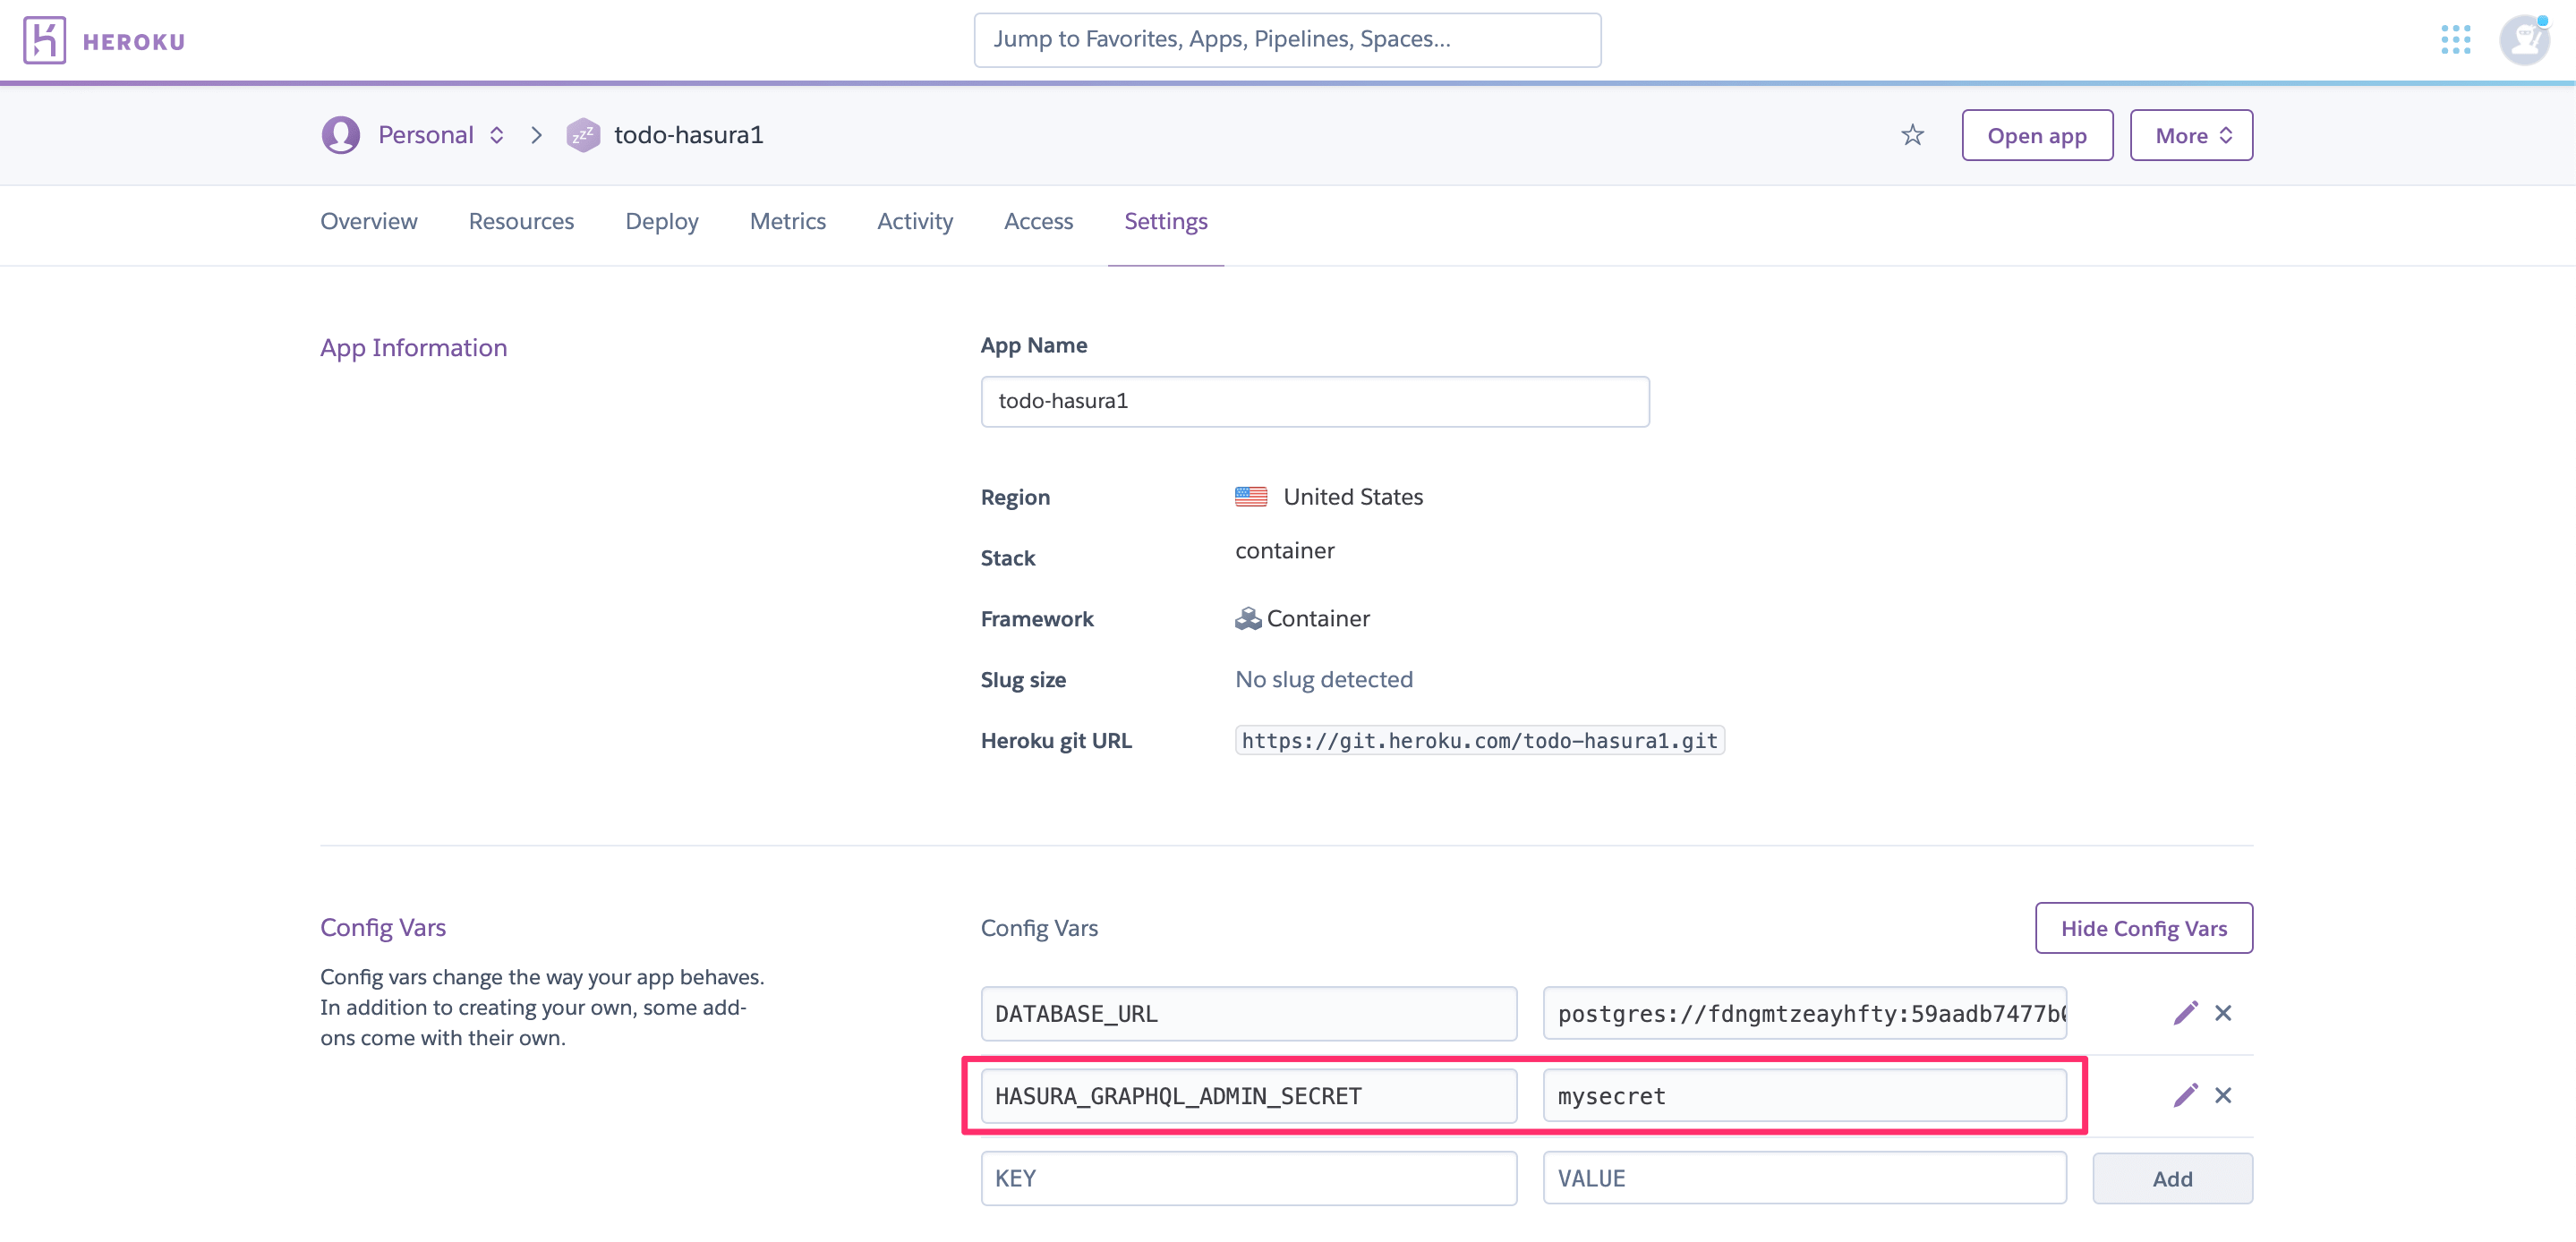
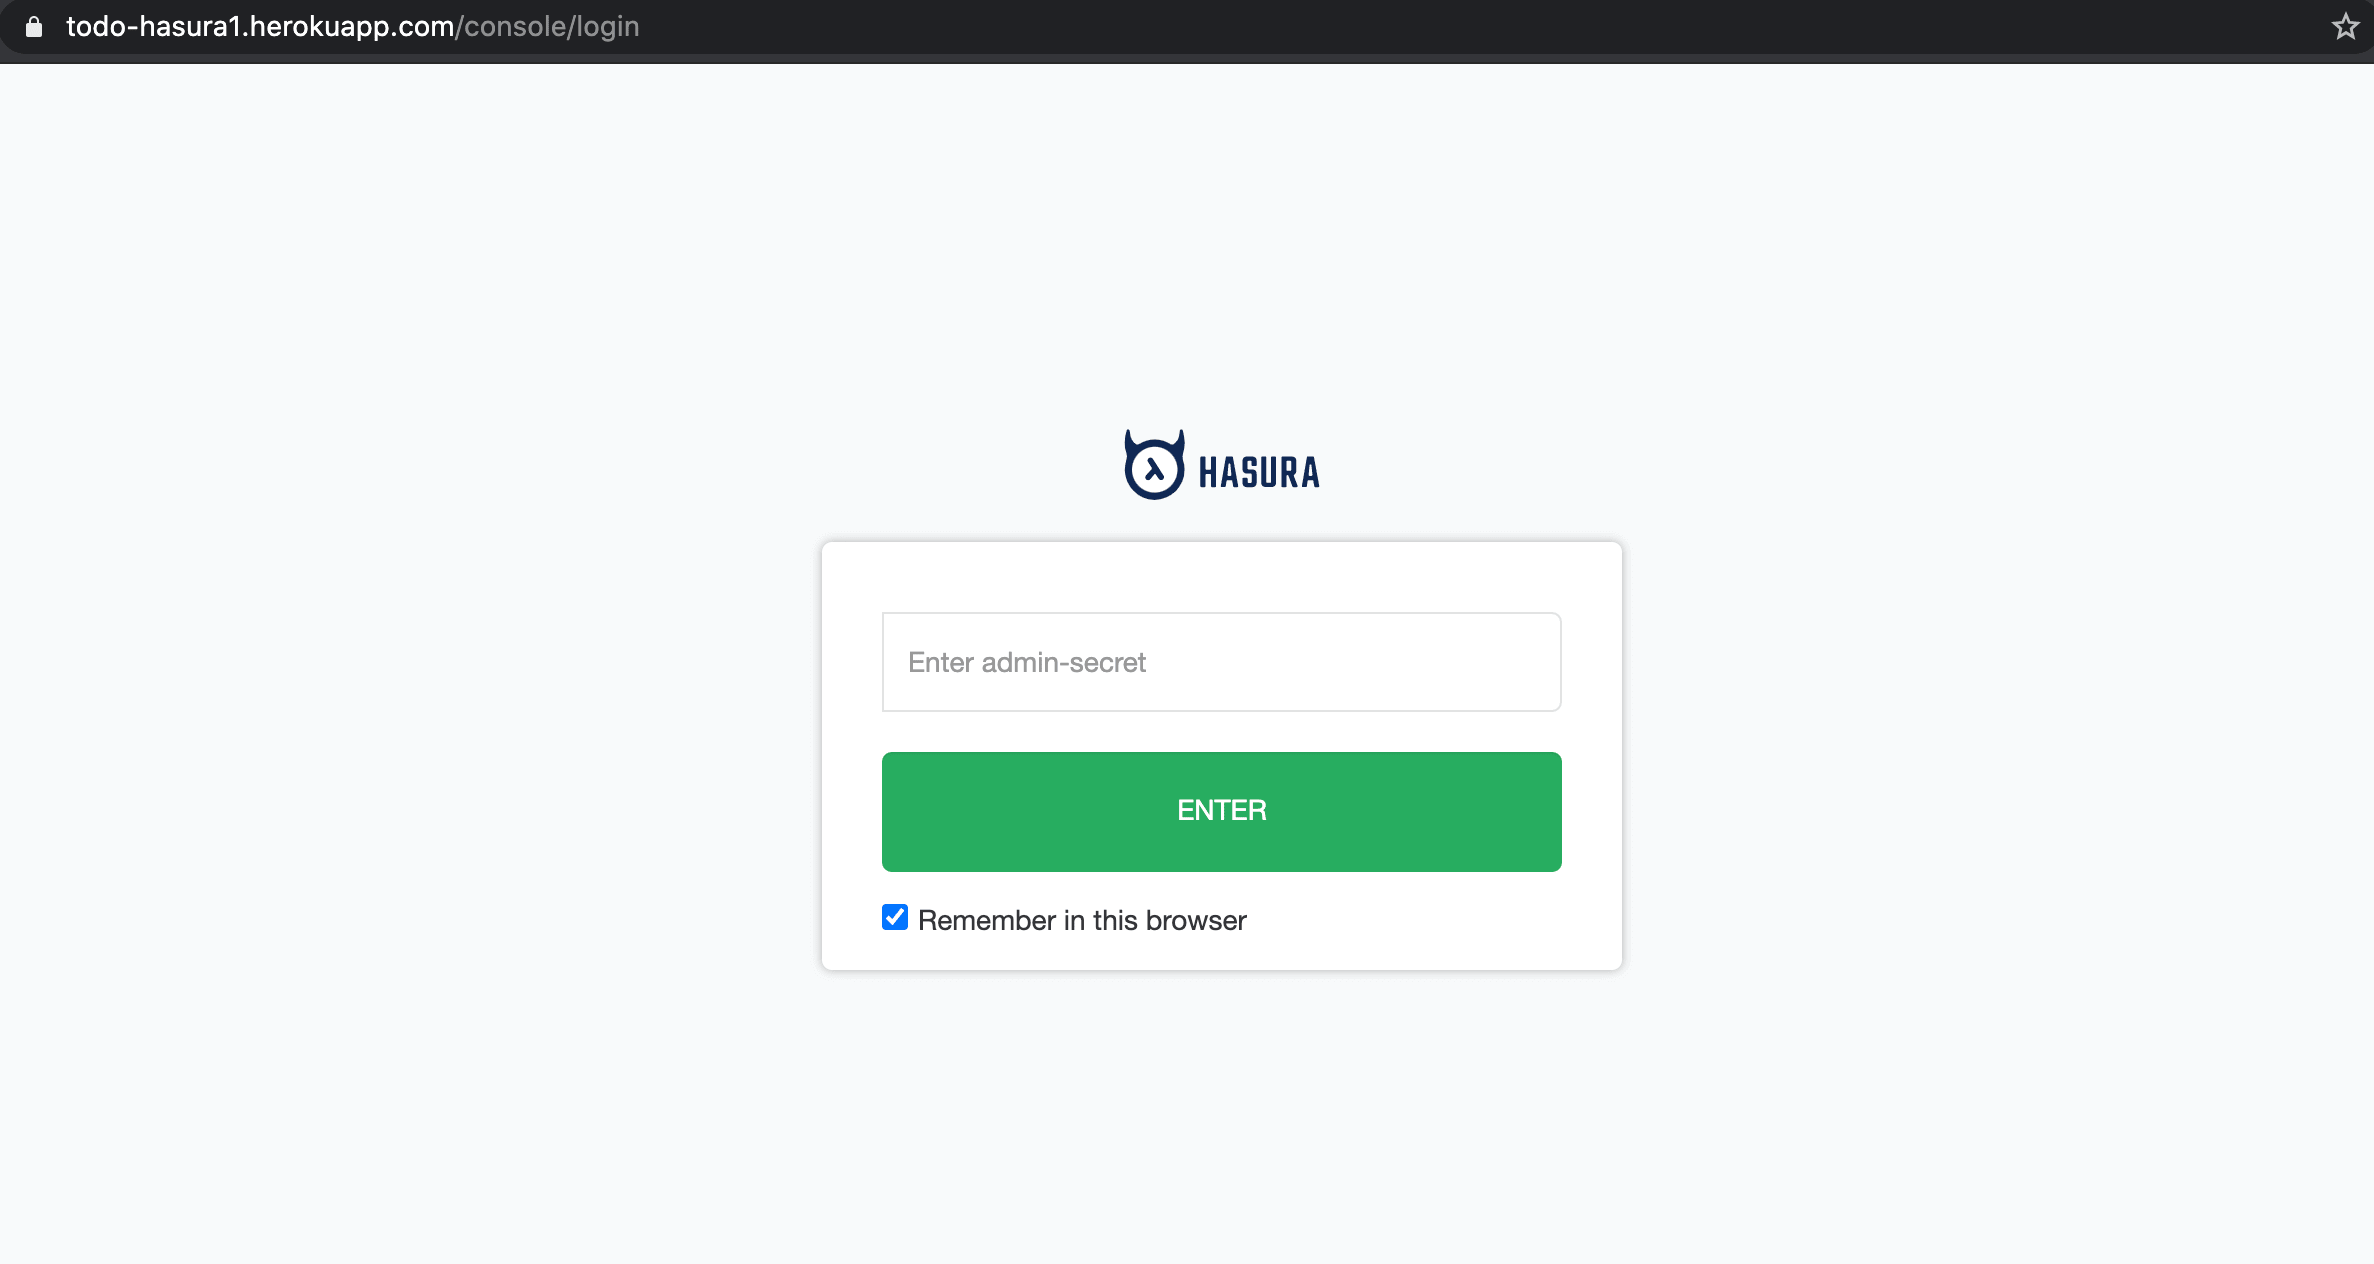
Setting this environment variable will automatically restart the dyno. Now when you access your console, you’ll be prompted for the admin secret key.
Note
The HASURA_GRAPHQL_ADMIN_SECRET should never be passed from the client to Hasura GraphQL engine as it would
give the client full admin rights to your Hasura instance. See Authentication & Authorization for information on
setting up authentication.
(optional) Use the admin secret with the CLI
In case you’re using the CLI to open the Hasura console, use the admin-secret flag when you open the console:
hasura console --admin-secret=myadminsecretkey
GraphQL engine server logs
You can use the Heroku CLI to check the logs of the Hasura GraphQL engine deployed on Heroku:
$ heroku logs --app <hasura-graphql-engine-app-name>

2018-10-09T11:18:21.306000+00:00 app[web.1]: {"timestamp":"2018-10-09T11:18:21.305+0000", "level":"info", "type":"http-log", "detail":{"status":200, "query_hash":"48c74f902b53a886f9ddc1b7dd12a4a6020d70c3", "http_version":"HTTP/1.1", "query_execution_time":9.477913e-3, "request_id":"b7bb6fb3-97b3-4c6f-a54a-1e0f71a190e9", "url":"/v1/graphql", "user":{"x-hasura-role":"admin"}, "ip":"171.61.77.16", "response_size":15290, "method":"POST", "detail":null}}
...
See:
- https://devcenter.heroku.com/articles/logging for more details on logging on Heroku.
- Hasura GraphQL engine logs for more details on Hasura logs
Updating GraphQL engine
This section will help you update the Hasura GraphQL engine running on Heroku.
The current latest version is:
hasura/graphql-engine:latestUpdate to the latest version
Step 1: Clone the Hasura GraphQL engine Heroku app
The Hasura app with Heroku buildpack/configuration is available at: https://github.com/hasura/graphql-engine-heroku.
Clone the above repository.
git clone https://github.com/hasura/graphql-engine-heroku
cd graphql-engine-heroku
If you already have this, then pull the latest changes which will have the updated GraphQL engine Docker image.
Step 2: Attach your Heroku app
Let’s say your Heroku app is called hasura-heroku and is running on https://hasura-heroku.herokuapp.com.
From inside the graphql-engine-heroku directory, use the Heroku CLI to configure the git repo you cloned in Step 1
to be able to push to this app.
# Replace <hasura-heroku> with your Heroku app's name
heroku git:remote -a <hasura-heroku>
heroku stack:set container -a <hasura-heroku>
You can find your Heroku git repo in your Heroku - Settings - Info - Heroku Git URL
Step 3: git push to deploy the latest Hasura GraphQL engine
When you git push to deploy, the Heroku app will get updated with the latest changes:
git push heroku master
Deploy a specific version
Head to the Dockerfile in the git repo you cloned in step 1.
Change the FROM line to the specific version you want. A list of all releases can be found
at https://github.com/hasura/graphql-engine/releases.
FROM hasura/graphql-engine:v1.0.0

...
...
Change v1.0.0 to v1.1.0 for example, commit this and then git push heroku master to deploy.
Note
If you are downgrading to an older version of the GraphQL engine you might need to downgrade your metadata catalogue version as described in Downgrading Hasura GraphQL engine
 Thank you for subscribing to our newsletter!