


Auth0 JWT Integration with Hasura GraphQL engine
Table of contents
Introduction
In this guide, we will walk through how to set up Auth0 to work with the Hasura GraphQL engine.
Create an Auth0 Application
- Navigate to the Auth0 dashboard.
- Click on the
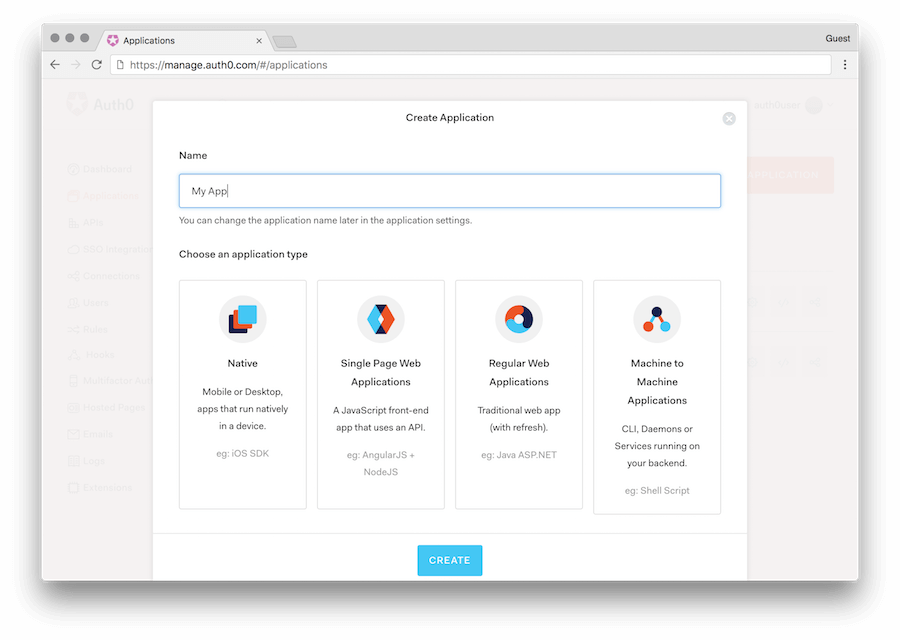
Applicationsmenu option on the left and then click the+ Create Applicationbutton. - In the
Create Applicationwindow, set a name for your application and selectSingle Page Web Applications(assuming your application is React/Angular/Vue etc).
Configure Auth0 Rules & Callback URLs
In the settings of the application, add appropriate (e.g: http://localhost:3000/callback) URLs as Allowed Callback
URLs and Allowed Web Origins. Add domain specific URLs as well for production apps (e.g: https://myapp.com/callback).
Auth0 has multiple versions of its SDK available and unfortunately they have different semantics when it comes to JWT handling. If you’re using Auth0.js, you’ll need to add a rule to update the idToken. If you’re using the Auth0 Single Page App SDK, you’ll need to add a rule to update the accessToken. If you update the wrong token, the necessary Hasura claims will not appear in the generated JWT and your client will not authenticate properly.
In both cases you’ll want to open the Auth0 dashboard and then navigate to “Rules”. Then add a rule to add the custom JWT claims. You can name the rule anything you want.
For Auth0.js:
function (user, context, callback) {
  const namespace = "https://hasura.io/jwt/claims";
  context.idToken[namespace] =
    {
      'x-hasura-default-role': 'user',
      // do some custom logic to decide allowed roles
      'x-hasura-allowed-roles': ['user'],
      'x-hasura-user-id': user.user_id
    };
  callback(null, user, context);
}
For auth0-spa-js:
function (user, context, callback) {
  const namespace = "https://hasura.io/jwt/claims";
  context.accessToken[namespace] =
    {
      'x-hasura-default-role': 'user',
      // do some custom logic to decide allowed roles
      'x-hasura-allowed-roles': ['user'],
      'x-hasura-user-id': user.user_id
    };
  callback(null, user, context);
}
Create an Auth0 API
In case you are using auth0-spa-js, you also need to create an API so that the access token issued by Auth0 is following the JWT standard. Read more about this here.
- Navigate to the Auth0 dashboard.
- Click on the
APIsmenu option on the left sidebar and then click the+ Create APIbutton. - In the
New APIwindow, set a name for your API and enter anidentifier(e.g.hasura) - In your application code, configure your API
identifieras theaudiencewhen initializing Auth0, e.g.:
<Auth0Provider
  domain={process.env.AUTH_DOMAIN}
  client_id={process.env.AUTH_CLIENT_ID}
  redirect_uri={window.location.origin}
  onRedirectCallback={() => ..}
  audience="hasura"
>
Test auth0 login and generate sample JWTs for testing
You don’t need to integrate your UI with auth0 for testing. You can follow the steps below:
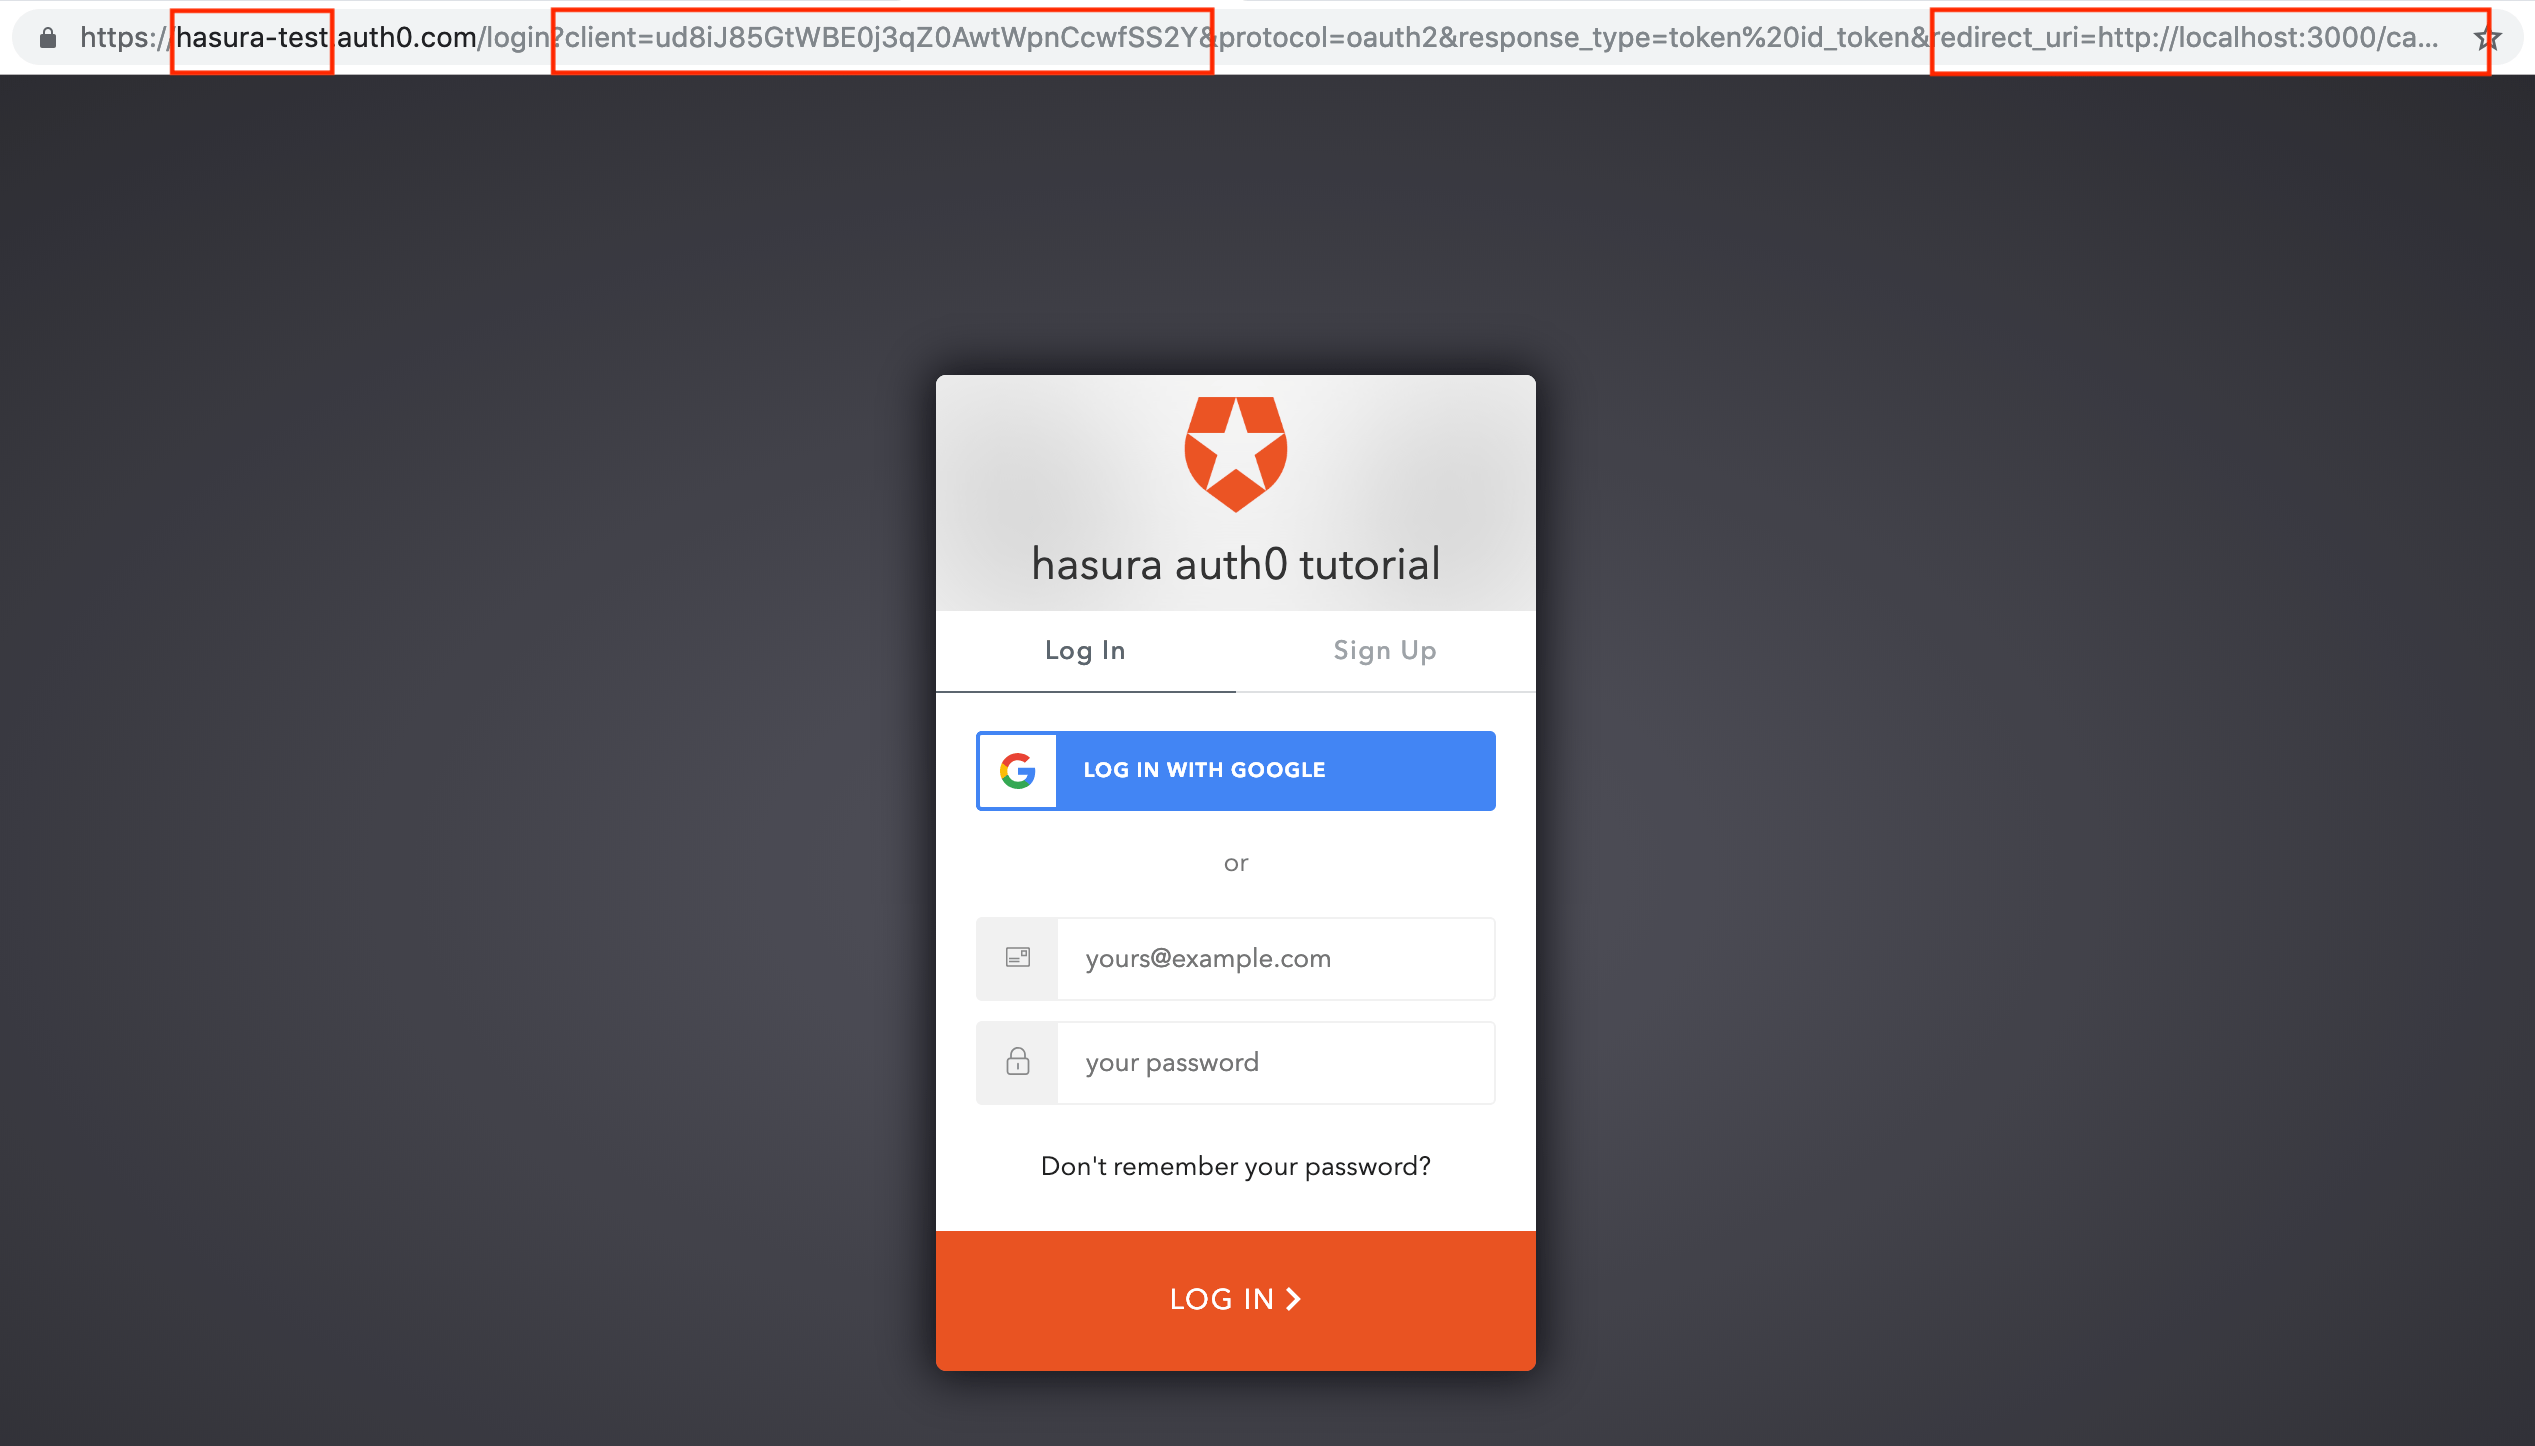
- Login to your auth0 app by heading to this URL:
https://<auth0-domain>.auth0.com/login?client=<client_id>&protocol=oauth2&response_type=token%20id_token&redirect_uri=<callback_uri>&scope=openid%20profile.- Replace
<auth0-domain>with your auth0 app domain. - Replace
<client-id>with your auth0 app client id. Get your client id from the app settings page on the auth0 dashboard. - Replace
callback_uriwithhttps://localhost:3000/callbackor the URL you entered above. Note that this URL doesn’t really need to exist while you are testing.
- Replace
- Once you head to this login page you should see the auth0 login page that you can login with.
Note
In case the above method gives a callback error (with access_denied in log), try disabling OIDC Conformant setting (https://auth0.com/docs/api-auth/tutorials/adoption/oidc-conformant) under Advanced Settings -> OAuth.
Do note that this method of generating tokens doesn’t work in case you are using auth0-spa-js with a custom API created.
- After successfully logging in, you will be redirected to
https://localhost:3000/callback#xxxxxxxx&id_token=yyyyyyy. This page may be a 404 if you don’t have a UI running on localhost:3000.
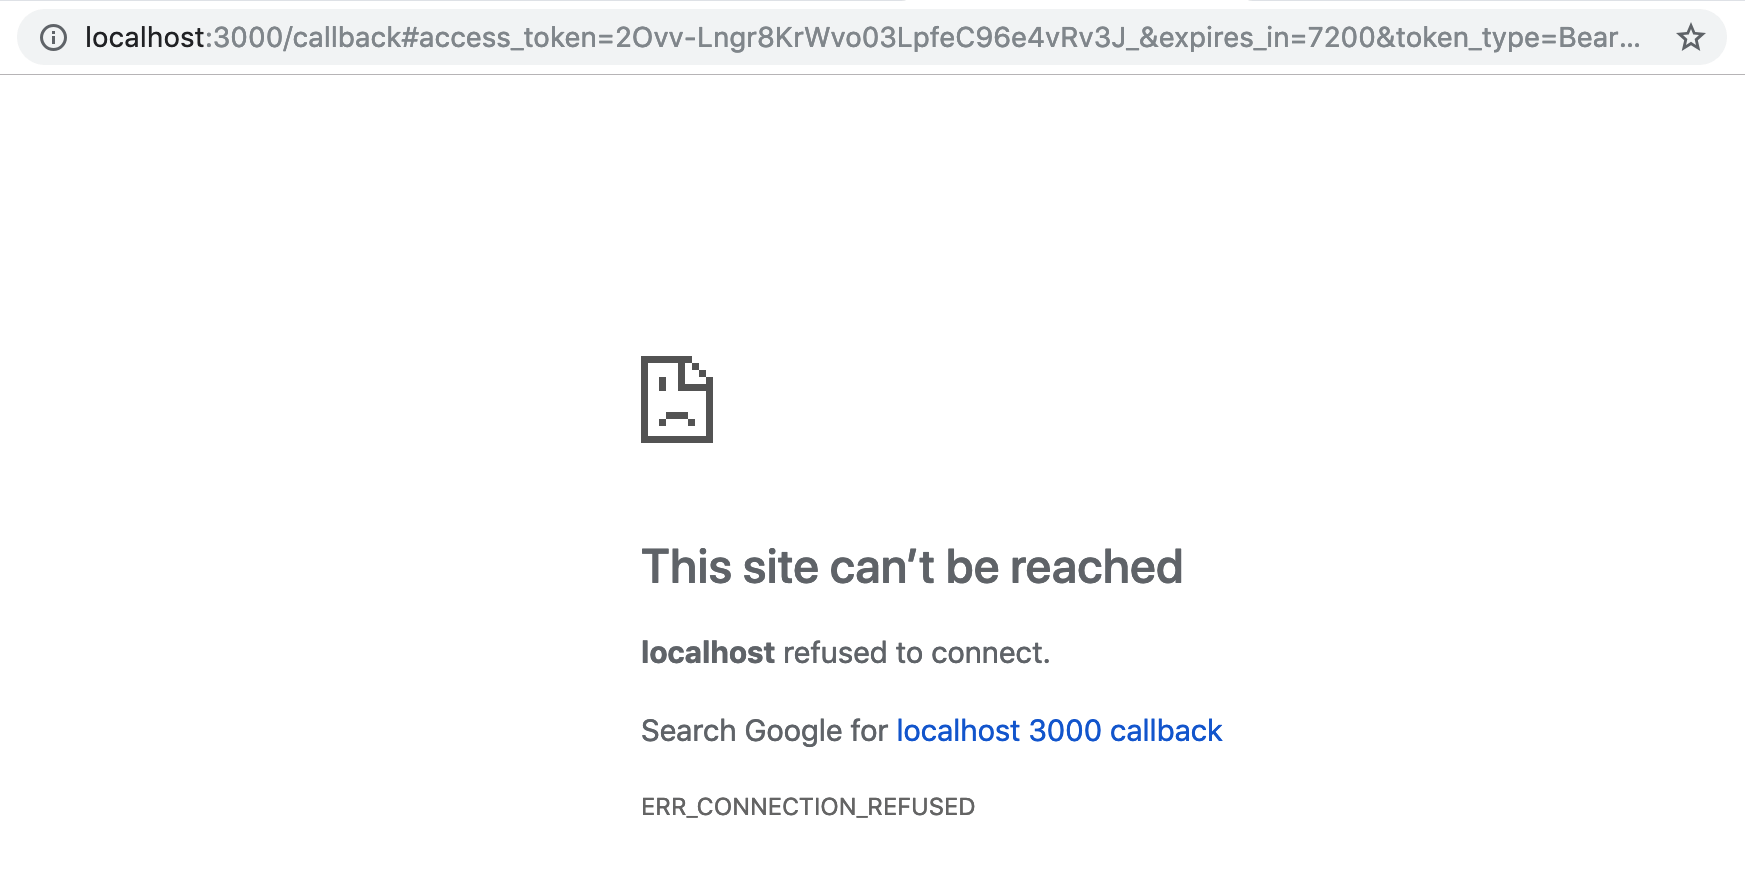
- Extract the
id_tokenvalue from this URL. This is the JWT.

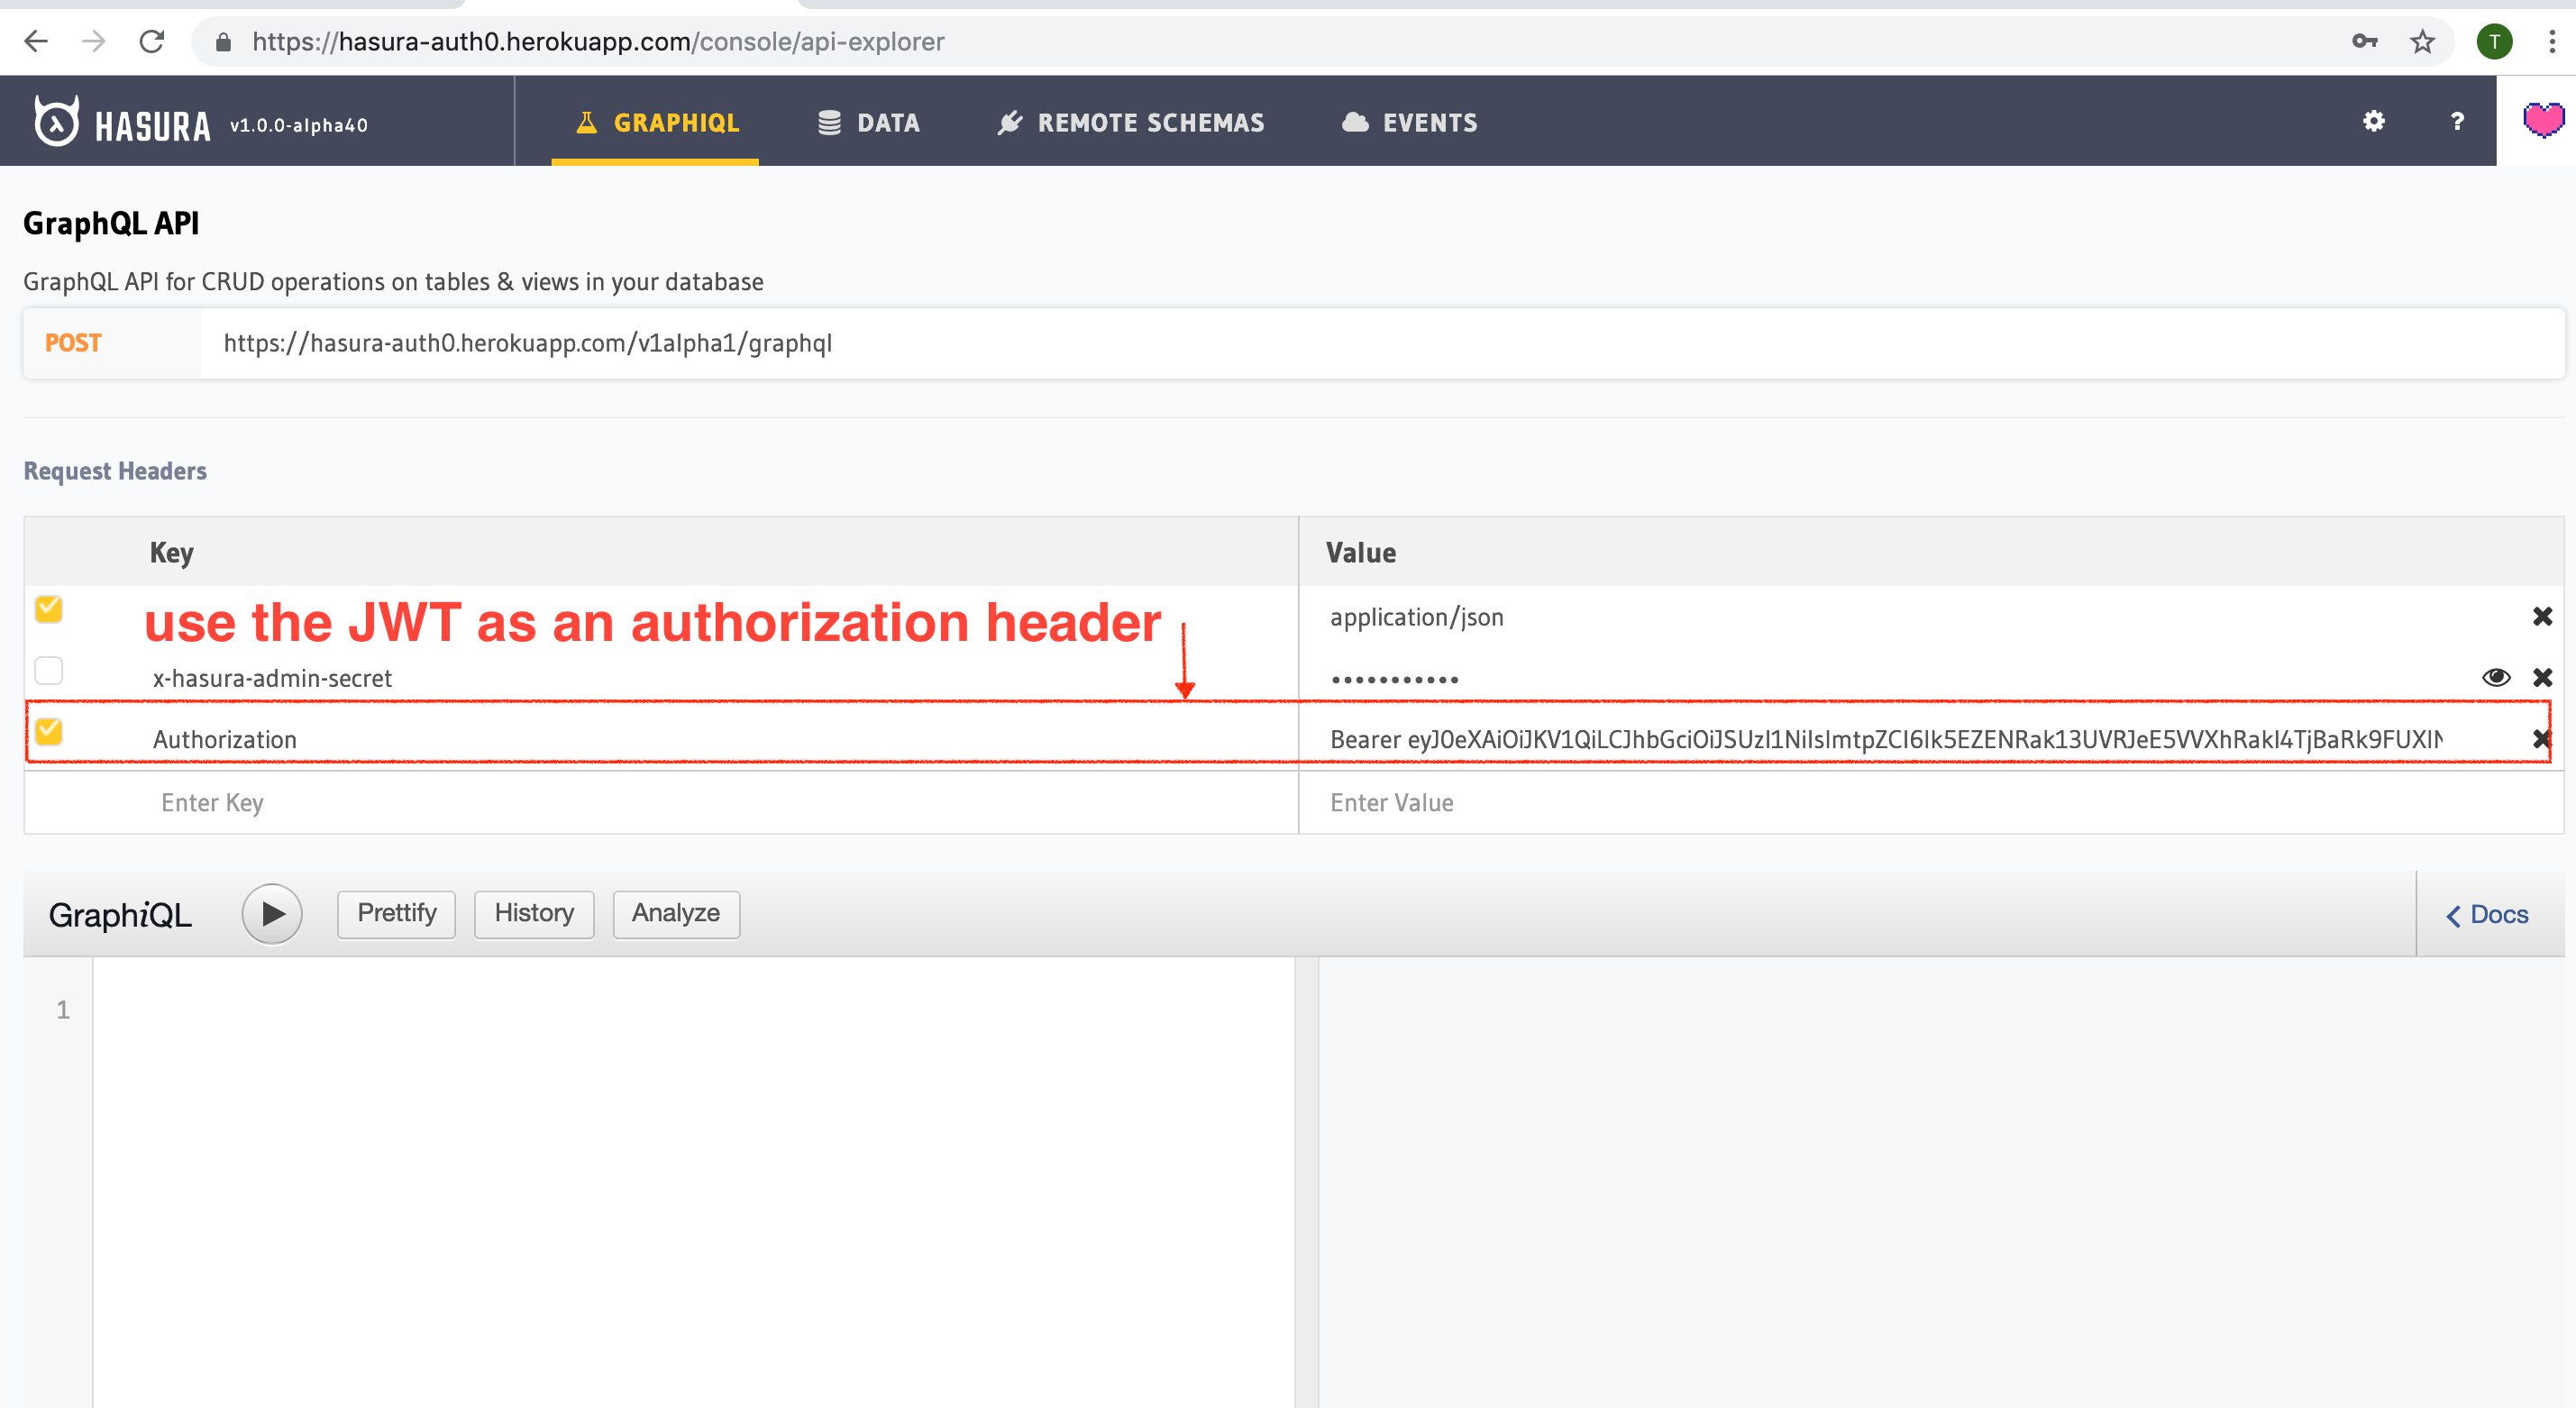
- To test this JWT, and to see if all the Hasura claims are added as per the sections above, let’s test this out with jwt.io!
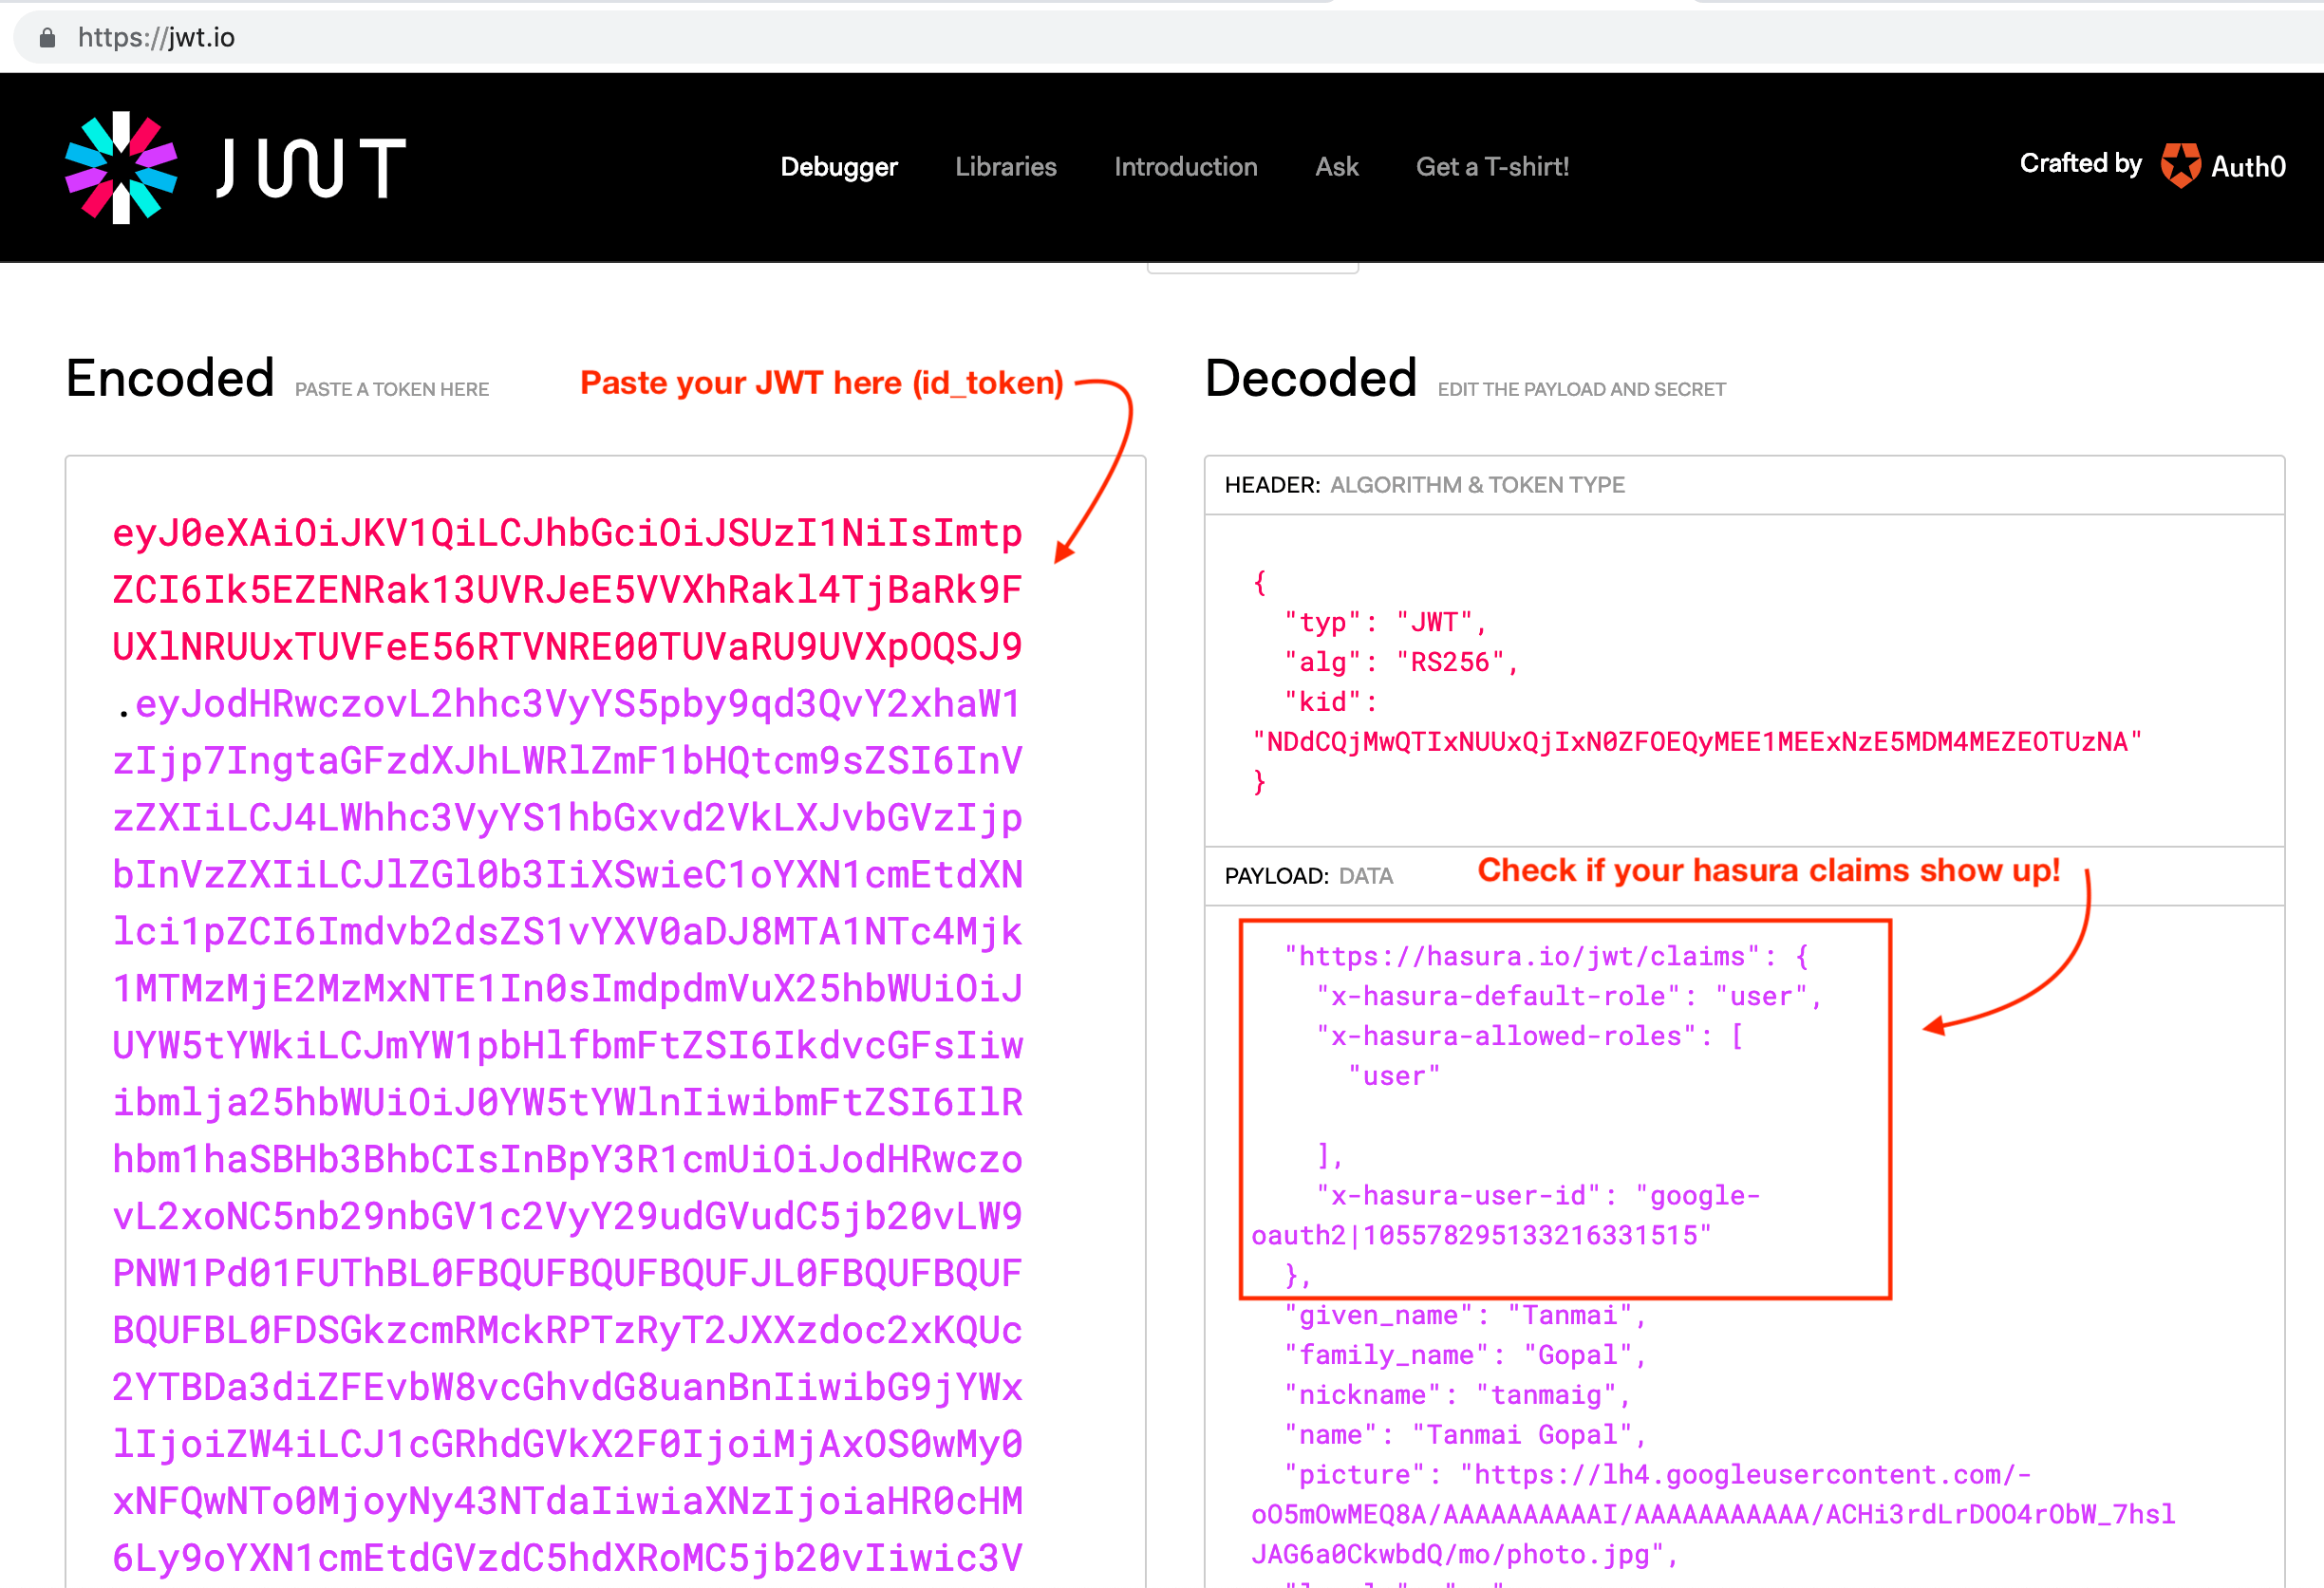
Save this JWT token value so that we can use it later to test authorization using the Hasura console.
Configure Hasura to use Auth0 Keys
Auth0 publishes their JWK under:
https://<your-auth0-domain>.auth0.com/.well-known/jwks.json
But they have a bug where the certificate thumbprint does not match. Hence, currently this URL does not work with Hasura.
Current workaround is to download the X590 certificate from:
https://<your-auth0-domain>.auth0.com/pem
And use it in the key field:
    {
      "type":"RS512",
      "key": "-----BEGIN CERTIFICATE-----
MIIDDTCAfWgAwIBAgIJhNlZ11IDrxbMA0GCSqSIb3DQEBCwUAMCQxIjAgBgNV
BAMTGXlc3QtaGdlLWp3C5ldS5hdXRoMC5jb20HhcNMTgwNzMwMTM1MjM1WhcN
MzIwND3MTM1MjM1WjAkSIwIAYDVQQDExl0ZXNLWhnZS1qd3QuZXUuYXV0aDAu
Y29tMIBIjANBgkqhkiGw0BAQEFAAOCAQ8AMIICgKCAQEA13CivdSkNzRnOnR5
ZNiReD+AgbL7BWjRiw3RwjxRp5PYzvAGuj94yR6LRh3QybYtsMFbSg5J7fNq6
Ld6yMpMrUu8CBOnYY456b/2jlf+Vp8vEQuKvPOOw8Ev6x7X3blcuXCELSwyL3
AGHq9OP2RV6V6CIE863zzuYH5HDLzU35oMZqogJVRJM0+6besH6TnSTNiA7xi
BAqFaiRNQRVi1CAUa0bkN1XRp4AFy7d63VldOsM+8QnCNHySdDr1XevVuq6DK
LQyGexFy4niALgHV0Q7A+xP1c2G6rJomZmn4j1avnlBpU87E58JMrRHOCj+5m
Xj22/QDAQABo0IwQDAPgNVHRMBAf8EBTADAQHMB0GA1UdDgQWBBT6FvNkuUgu
tk3OYQi4lo5aOgwazAOgNVHQ8BAf8EBAMCAoQDQYJKoZIhvcNAQELBQADggEB
ADCLj+L22pEKyqaIUlhUJh7DAiDSLafy0fw56CntzPhqiZVVRlhxeAKidkCLV
r9IEbRuxUoXiQSezPqM//9xHegMp0f2VauVCFg7EpUanYwvqFqjy9LWgH+SBz
4uroLSZ5g1EPsHtlArLChA90caTX4e7Z7Xlu8G2kHRJB5nC7ycdbMUvEWBMeI
tn/pcbmZ3/vlgj4UTEnURe2UPmSJpxmPwXqBcvwdKHRMgFXhZxojWCi0z4ftf
f8t8UJIcbEblnkYe7wzYy8tOXoMMHqGSisCdkp/866029rJsKbwd8rVIyKNC5
frGYaw+0cxO6/WvSir0eA=
-----END CERTIFICATE-----
"
    }
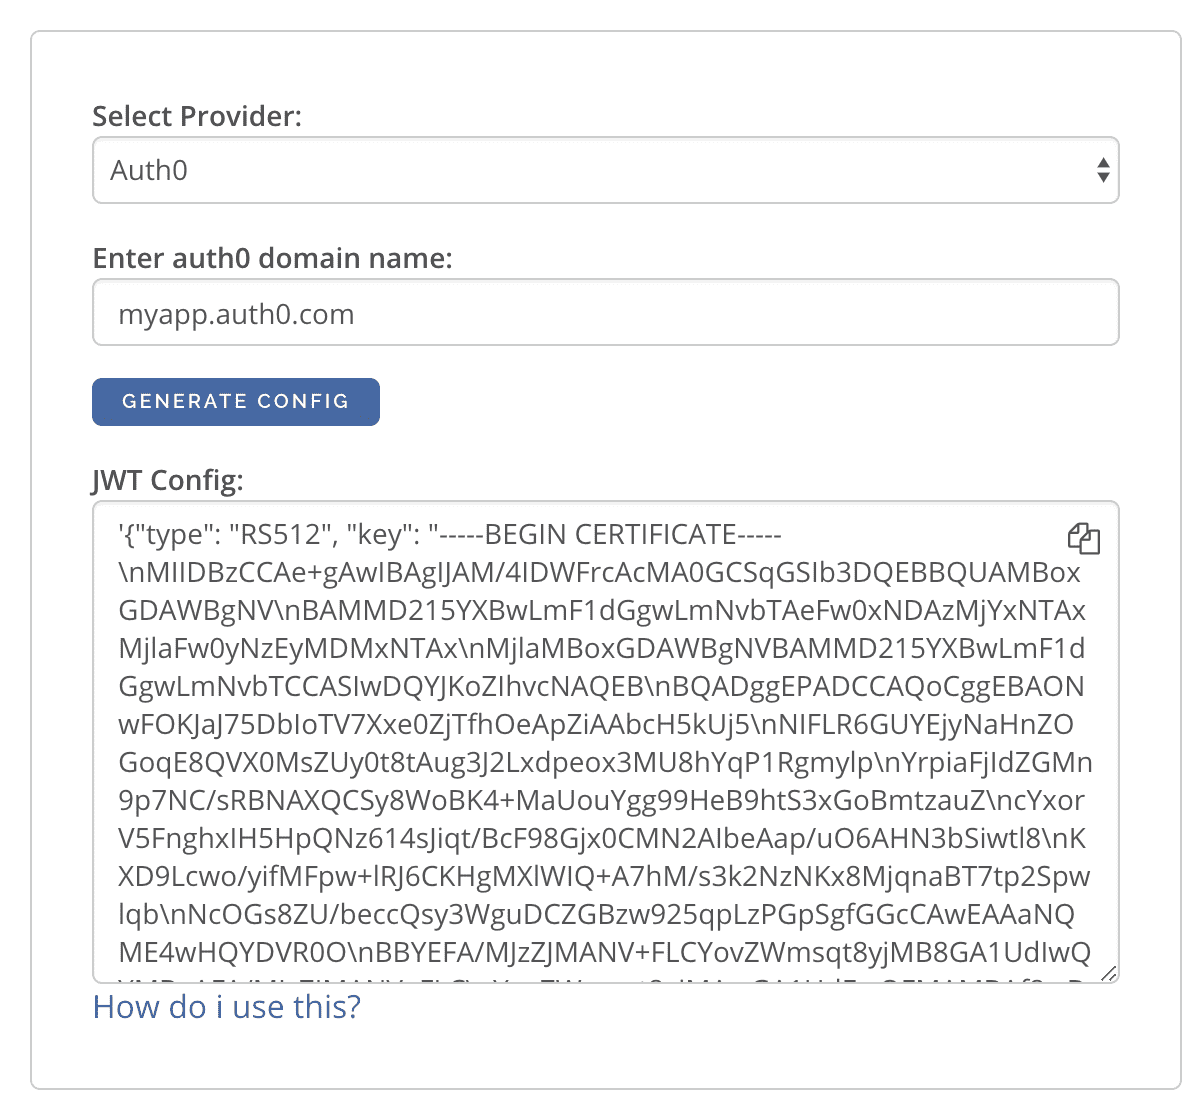
An easier way to generate the above config is to use the following UI:
https://hasura.io/jwt-config/.
The generated config can be used in env HASURA_GRAPHQL_JWT_SECRET or --jwt-secret flag.
The config generated from this page can be directly pasted in yaml files and command line arguments as it takes care of
escaping new lines.
Add Access Control Rules via Hasura Console
Auth0 is configured and ready to be used in the application. You can now set up access control rules that will automatically get applied whenever a client makes a GraphQL request with the Auth0 token.
Refer to Access control basics for more information.
To test this out, add an access control rule that uses x-hasura-user-id for the role user.
Then make a GraphQL query or a mutation, with the authorization token from the previous step
where we generated an Auth0 token.
You can also use the env variable HASURA_GRAPHQL_UNAUTHORIZED_ROLE or --unauthorized-role flag to set a role
for unauthorized users (e.g. anonymous). This will allow you to set permissions for users that are not
logged in.
The configured unauthorized role will be used whenever an access token is not present in a request to the GraphQL API.
This can be useful for data that you would like anyone to be able to access and can be configured and restricted just like any other role.
Sync Users from Auth0
Now that you have created an Auth0 application and can signup/login, you will need a way to sync your users in Postgres as well.
All you really need is the Auth0 user_id in something like a users table.
Using Auth0 Rules again, add the following rule which will insert a new user every time someone signs up.
function (user, context, callback) {
  const userId = user.user_id;
  const url = "https://my-hasura-app.hasura.app/v1/graphql";
  const upsertUserQuery = `
    mutation($userId: String!){
      insert_users(objects: [{ id: $userId }], on_conflict: { constraint: users_pkey, update_columns: [] }) {
        affected_rows
      }
    }`
  const graphqlReq = { "query": upsertUserQuery, "variables": { "userId": userId } }

  request.post({
      headers: {'content-type' : 'application/json', 'x-hasura-admin-secret': configuration.HASURA_ADMIN_SECRET},
      url:   url,
      body:  JSON.stringify(graphqlReq)
  }, function(error, response, body){
       console.log(body);
       callback(null, user, context);
  });
}
Make sure to specify the HASURA_ADMIN_SECRET variable in the “Rules > Settings” section of Auth0.
That’s it! This rule will be triggered on every successful signup/login and sync your Auth0 user into your postgres database.
Note
We need to use an upsert operation here because social logins do not distinguish between sign-up and login. Hence, we need to run this rule every time a successful login is made and do nothing if the user already exists.
Local dev with Auth0 rules
The sync step will require a reachable endpoint to Hasura and this is not possible in localhost. You can use ngrok or similar services to expose your locally running Hasura with a public endpoint temporarily.
 Thank you for subscribing to our newsletter!