


Using AWS Cognito for authentication
Table of contents
- Introduction
- Set up user pools and hosted web UI
- Create a lambda function to add claims to the JWT
- Configure Cognito to trigger the lambda function
- Test the Cognito login and generate sample JWTs for testing
- Configure Hasura to use Cognito keys
- Add access control rules via the Hasura console
- Sync users from Cognito
Introduction
In this guide, we will walk through how to set up AWS Cognito to work with the Hasura GraphQL engine.
Set up user pools and hosted web UI
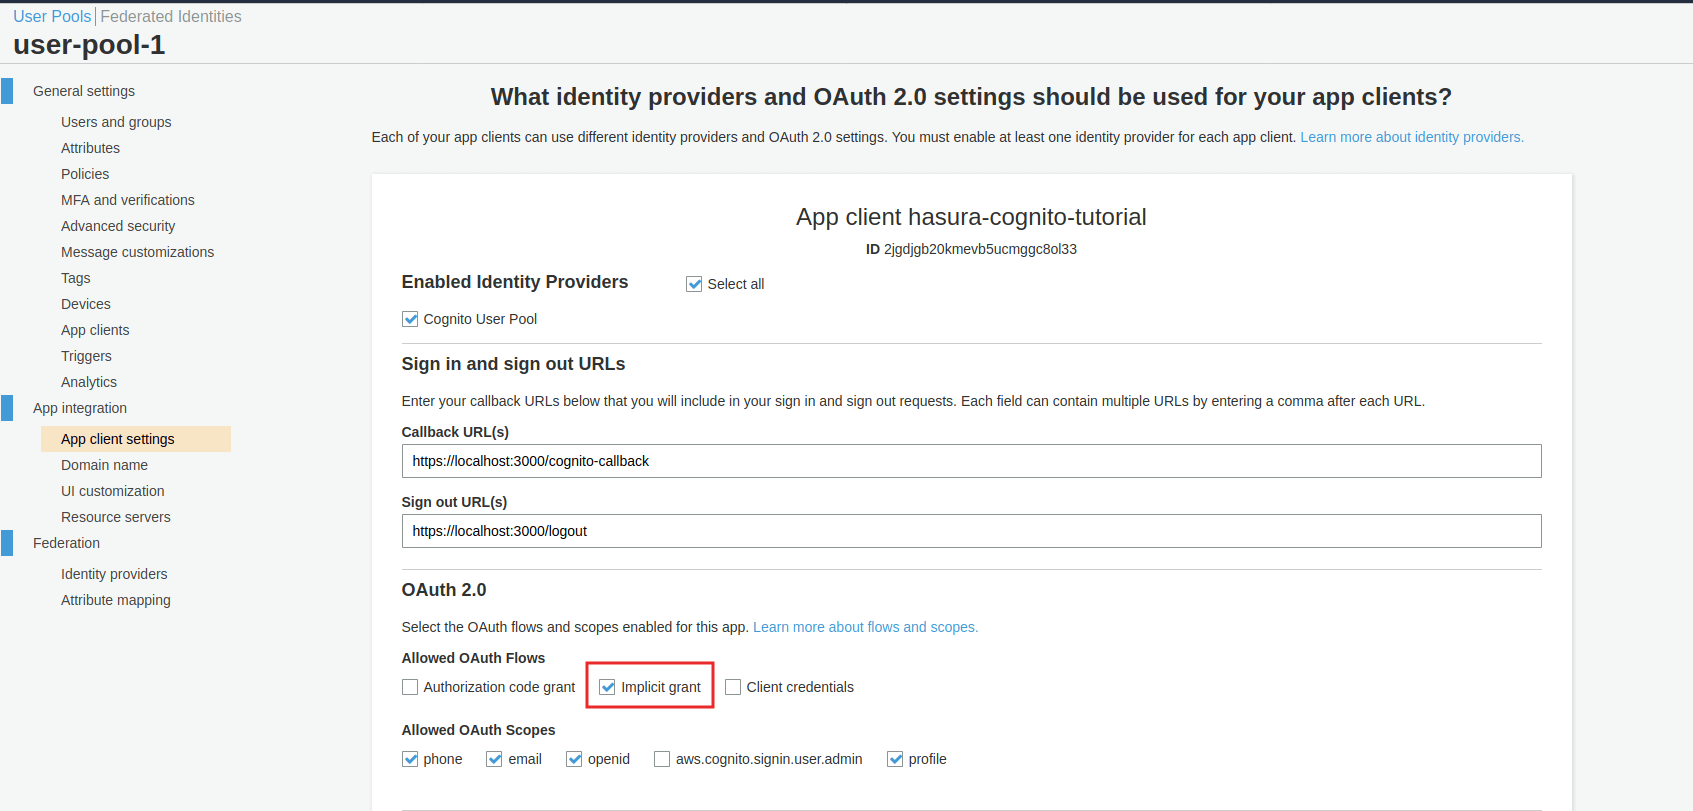
Follow these instructions
to set up a user pool, add an app and enable the hosted web UI in AWS cognito. While enabling the hosted web UI, you need to select the checkbox Implicit Grant.
Create a lambda function to add claims to the JWT
To add custom claims to the JWT, we need to create a lambda function and configure AWS cognito to invoke this lambda function before generating a token.
- Go to AWS Lambda home and click on the
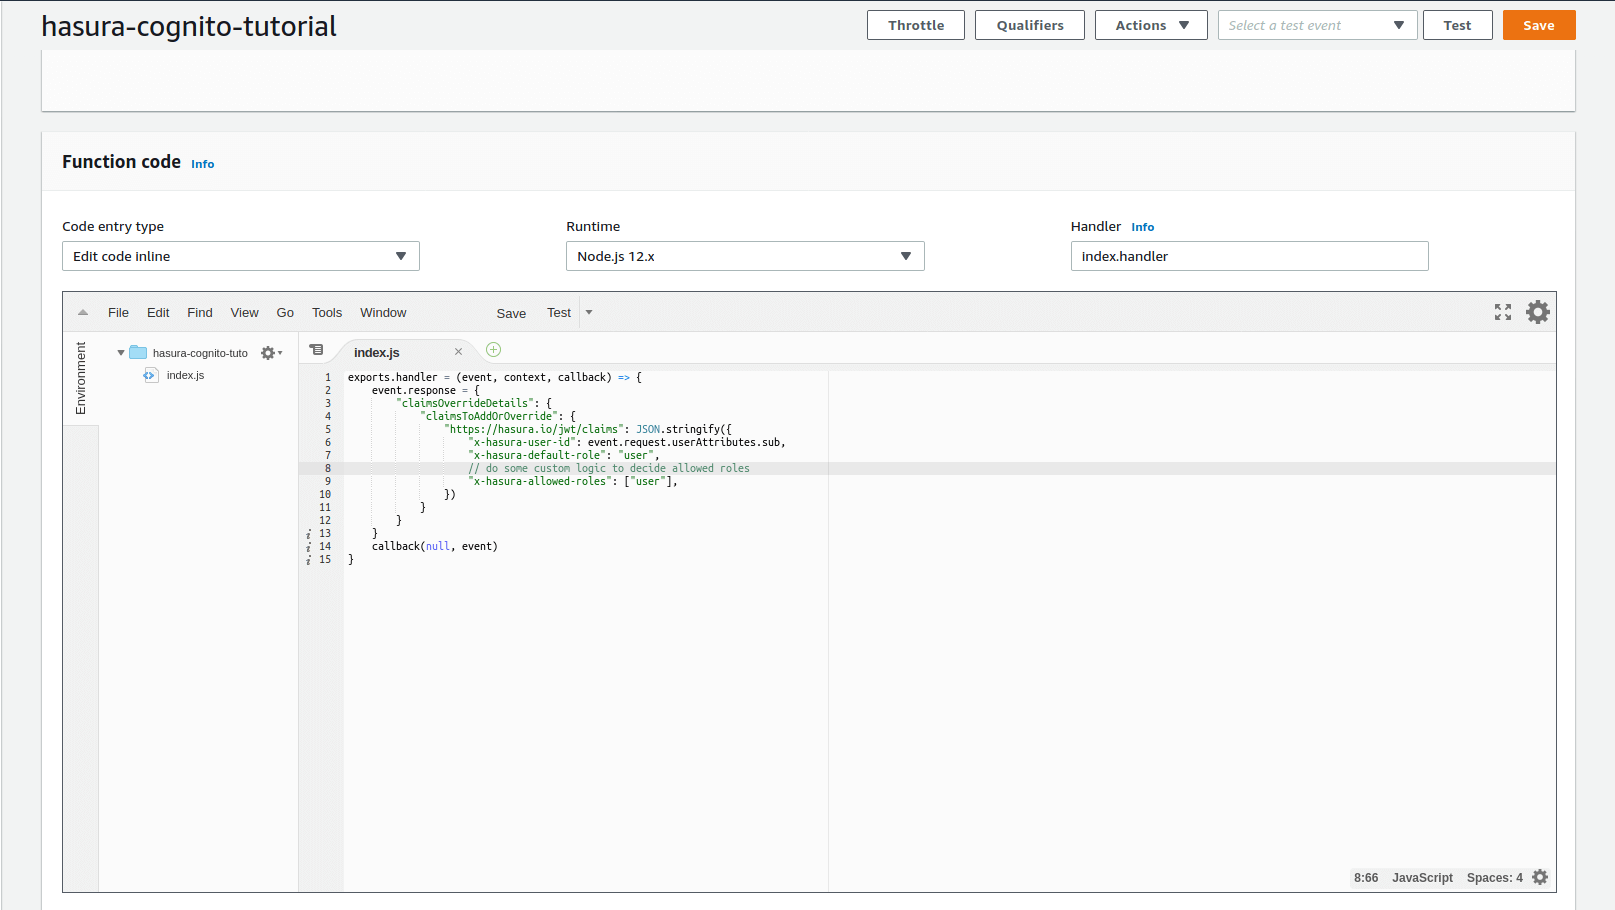
Create Functionbutton to create a new lambda function - Add the following code for the
Function Code
exports.handler = (event, context, callback) => {
    event.response = {
        "claimsOverrideDetails": {
            "claimsToAddOrOverride": {
                "https://hasura.io/jwt/claims": JSON.stringify({
                    "x-hasura-user-id": event.request.userAttributes.sub,
                    "x-hasura-default-role": "user",
                    // do some custom logic to decide allowed roles
                    "x-hasura-allowed-roles": ["user"],
                })
            }
        }
    }
    callback(null, event)
}
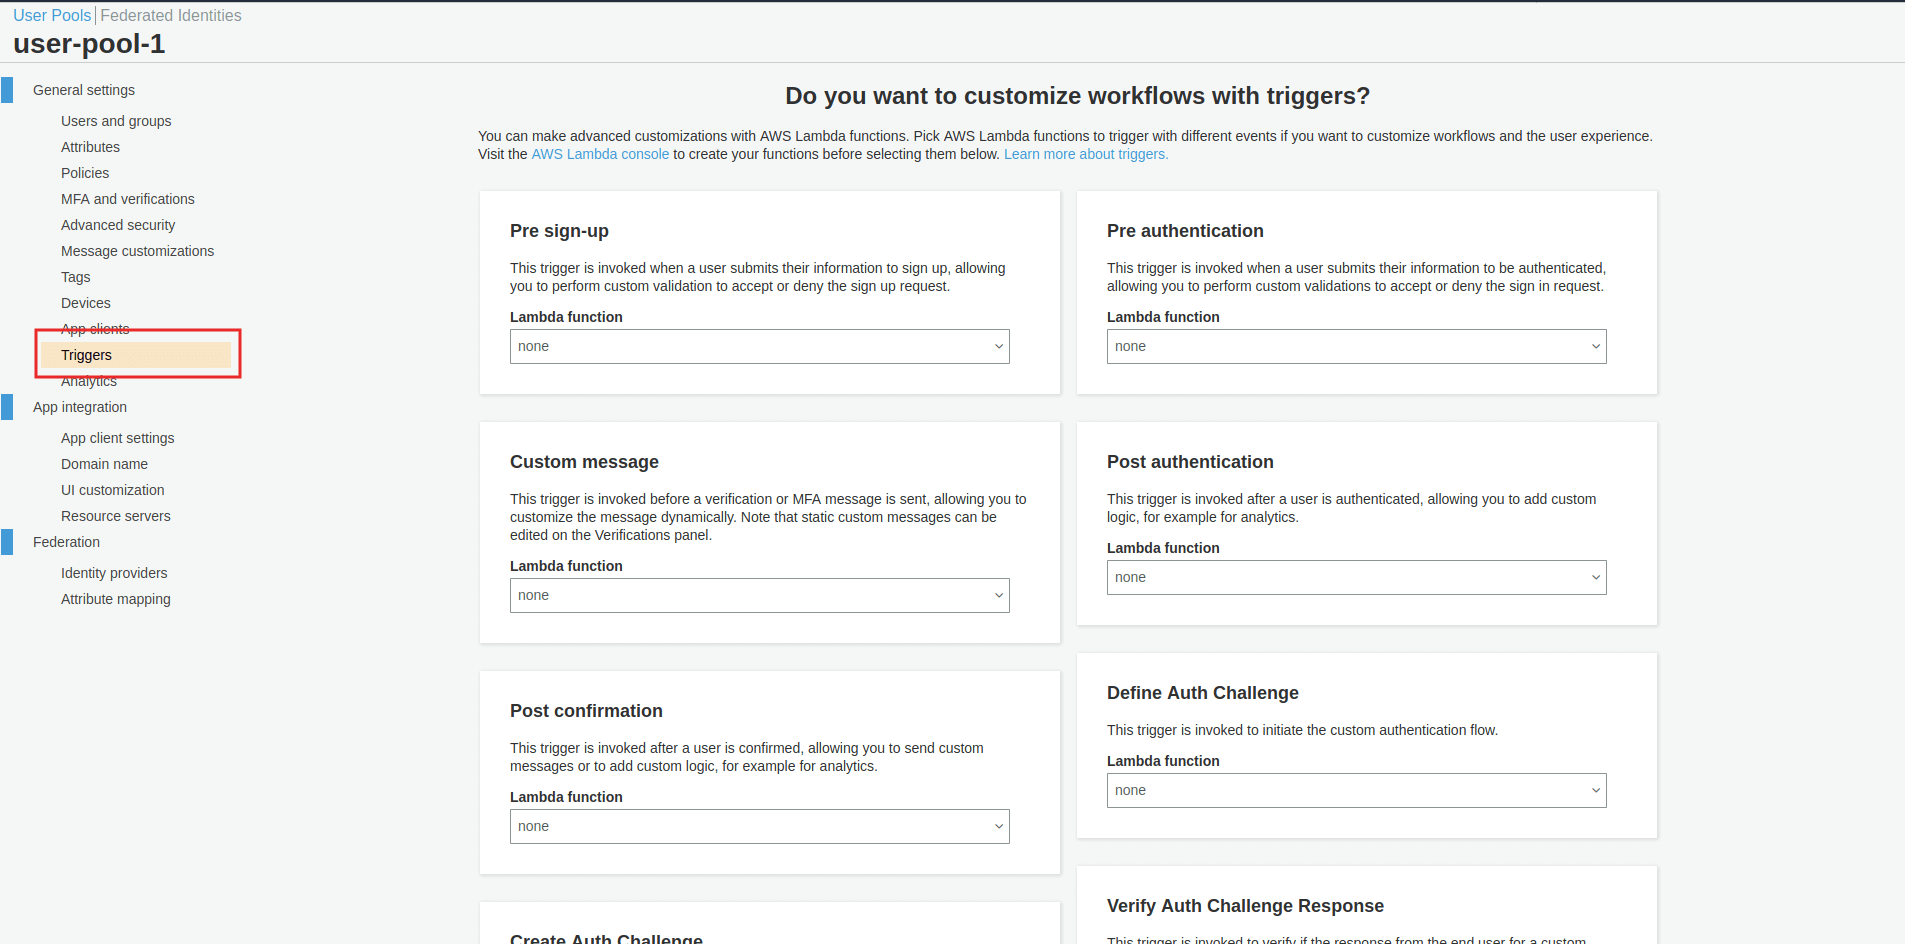
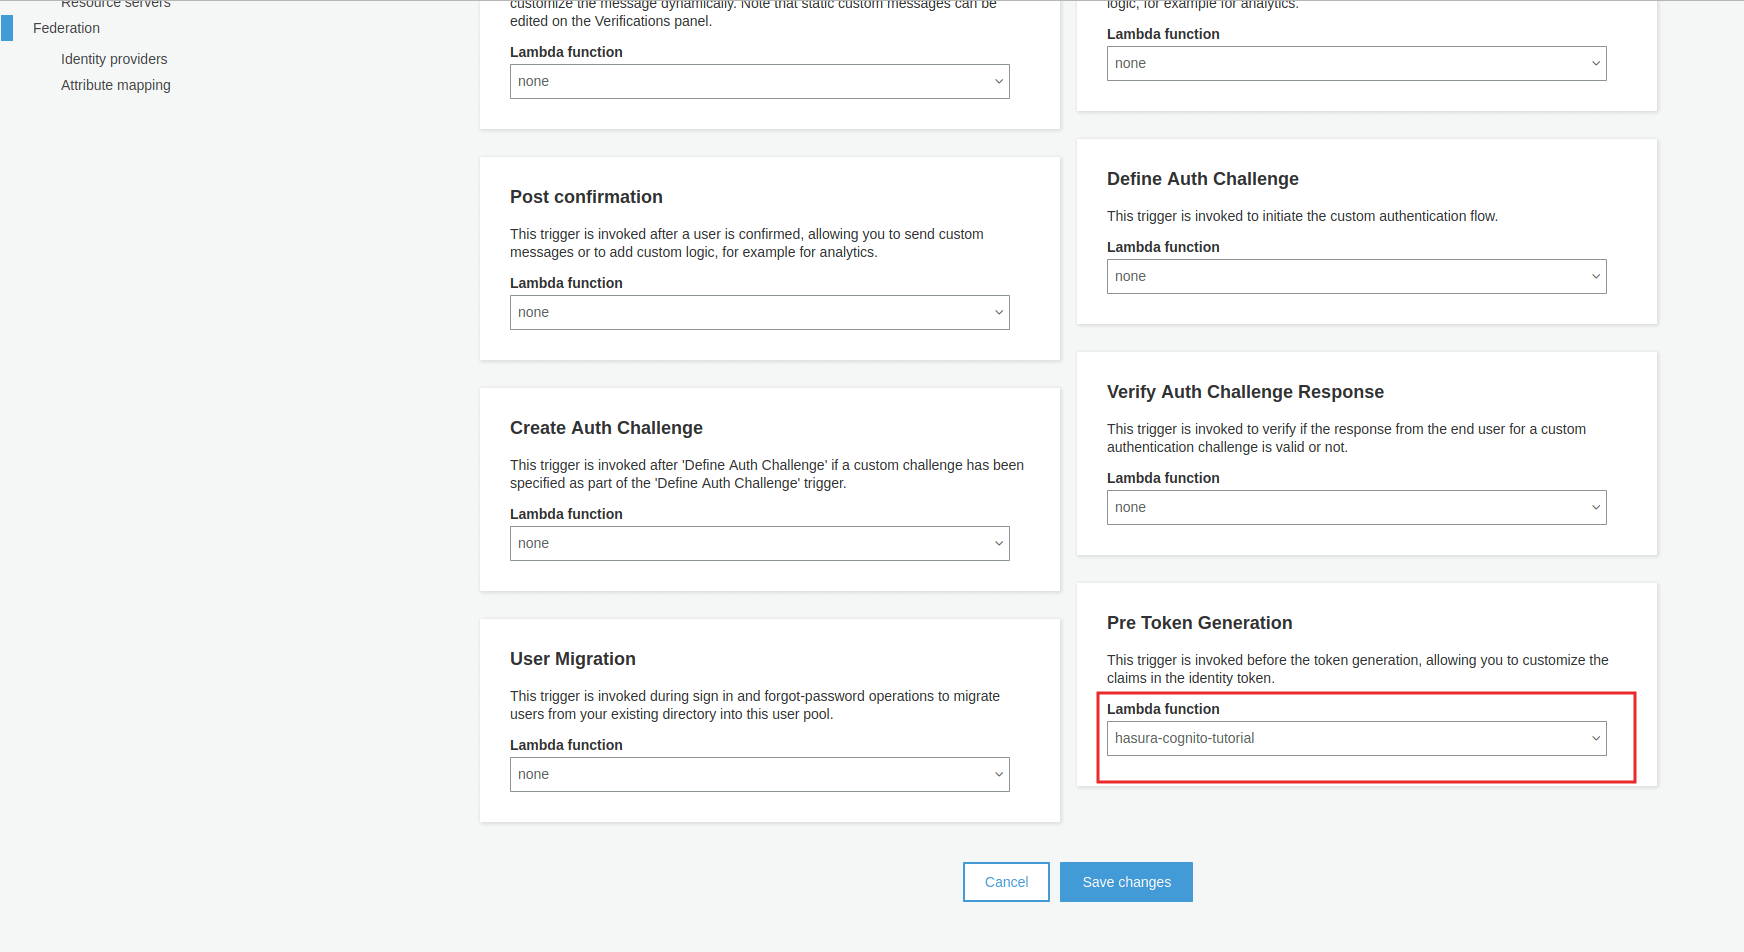
Configure Cognito to trigger the lambda function
In cognito, select Triggers -> Pre Token Generation and choose the lambda function created above:
Test the Cognito login and generate sample JWTs for testing
You don’t need to integrate your UI with Cognito for testing. You can follow the steps below:
- Launch the hosted UI from AWS Cognito.
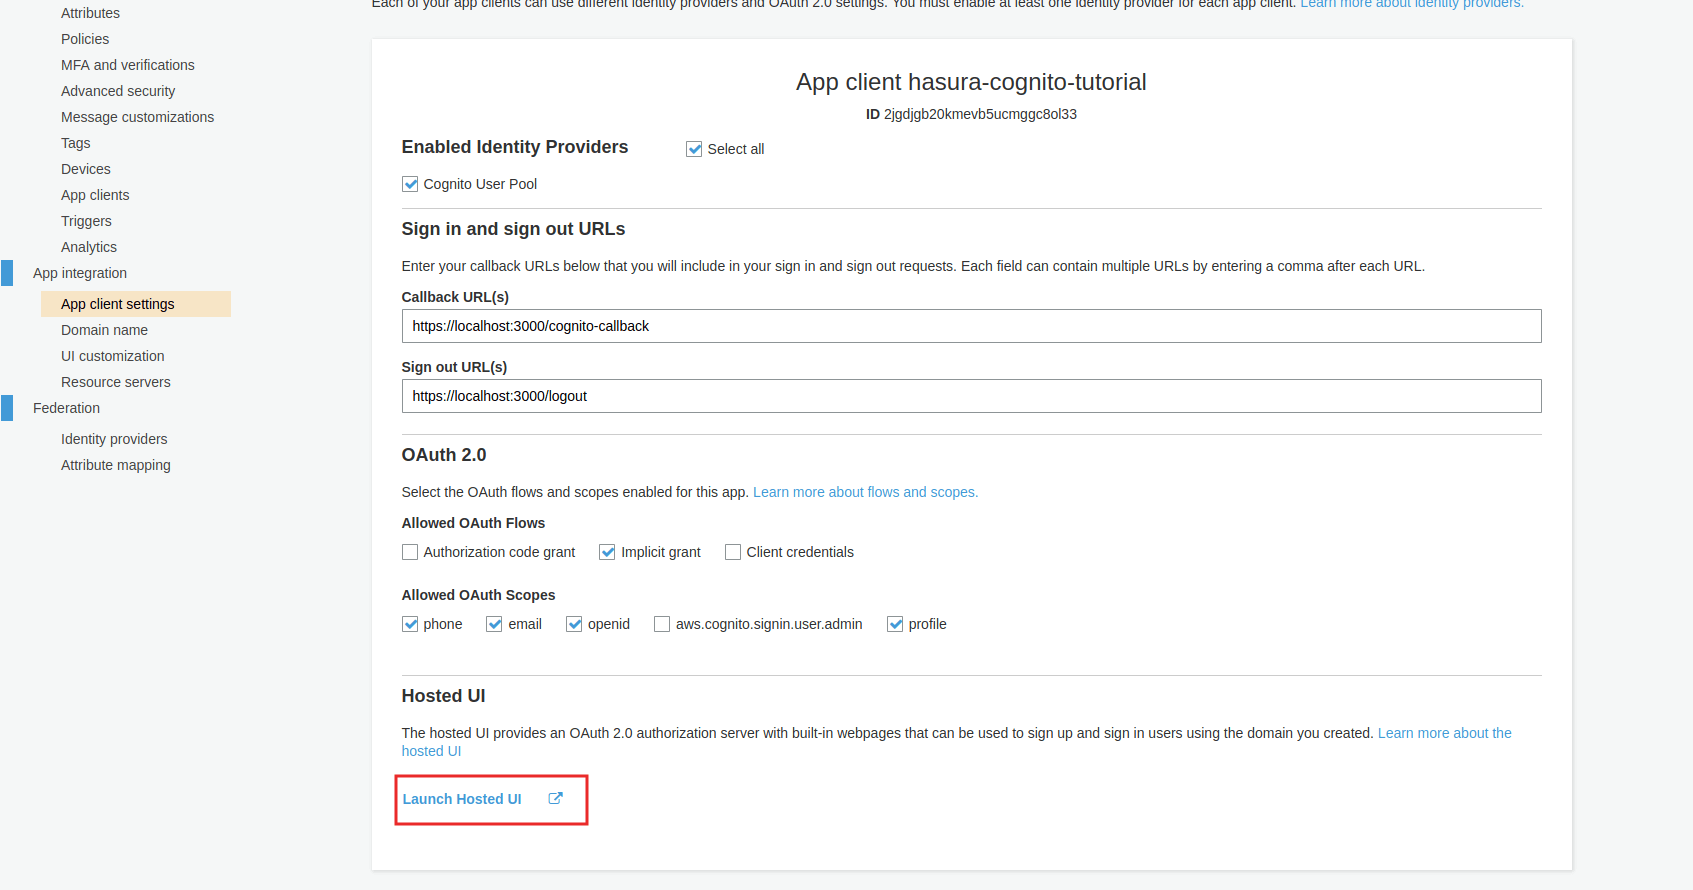
- You should see the Cognito login page where you can log in or sign up.

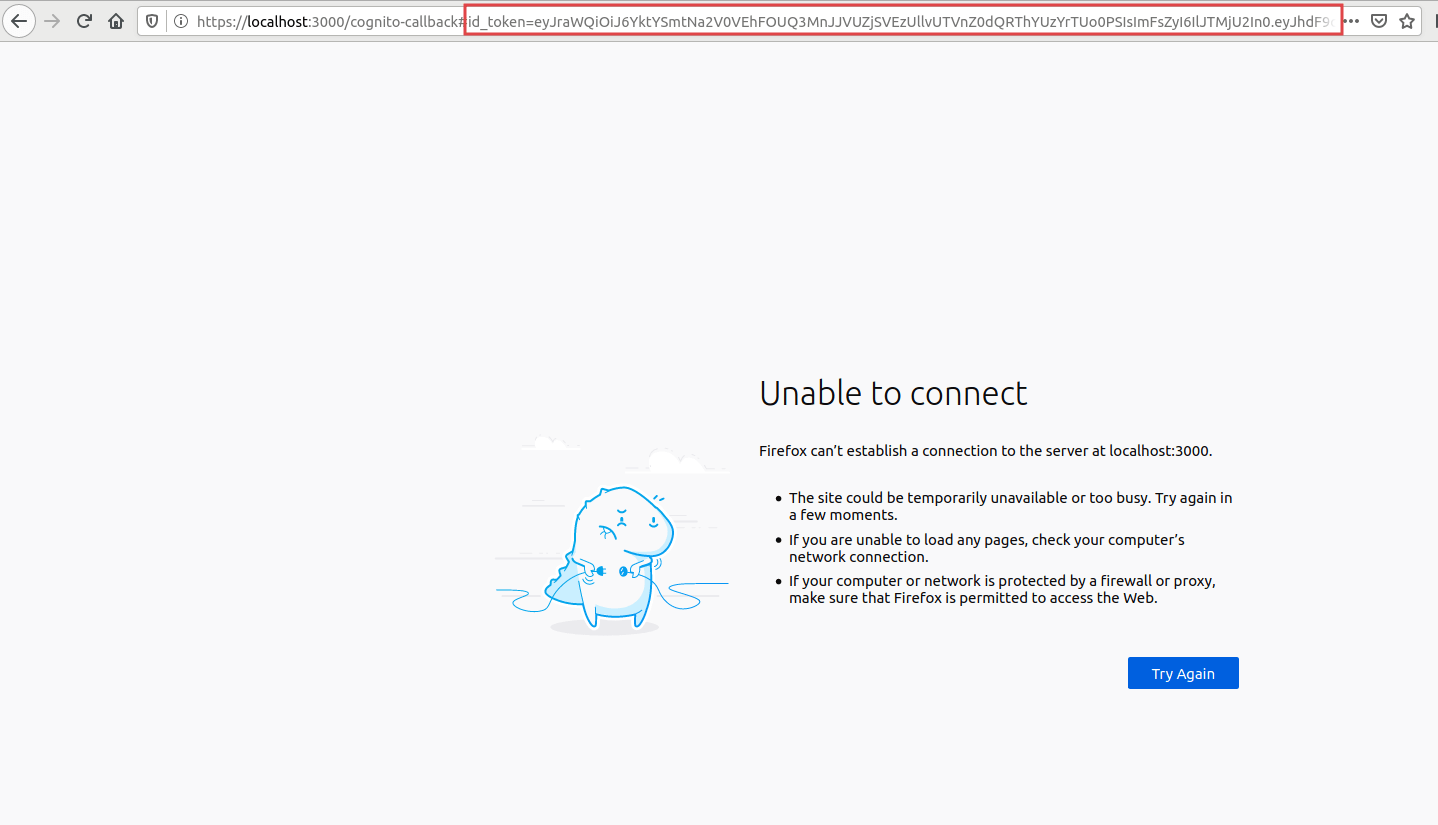
3. After successfully logging in, you will be redirected to https://localhost:3000/cognito-callback#id_token=xxxxxx&yyyyyy.
This page may be a 404 if you don’t have a UI running on localhost:3000. Extract the id_token value from this URL.
- To test this JWT, and to see if all the Hasura claims are added as per the sections above, let’s test this out with jwt.io!

Save this JWT token value so that we can use it later to test the authorization using the Hasura console.
Configure Hasura to use Cognito keys
Cognito publishes their JWK under:
https://cognito-idp.<aws-region>.amazonaws.com/<user-pool-id>/.well-known/jwks.json
While starting Hasura, set the environmental variable HASURA_GRAPHQL_JWT_SECRET or the flag --jwt-secret to the below JSON:
{
"type":"RS256",
"jwk_url": "https://cognito-idp.<aws-region>.amazonaws.com/<user-pool-id>/.well-known/jwks.json",
"claims_format": "stringified_json"
}
Add access control rules via the Hasura console
Cognito is configured and ready to be used in the application. You can now set up access control rules that will automatically get applied whenever a client makes a GraphQL request with the Cognito token.
Refer to Access control basics for more information.
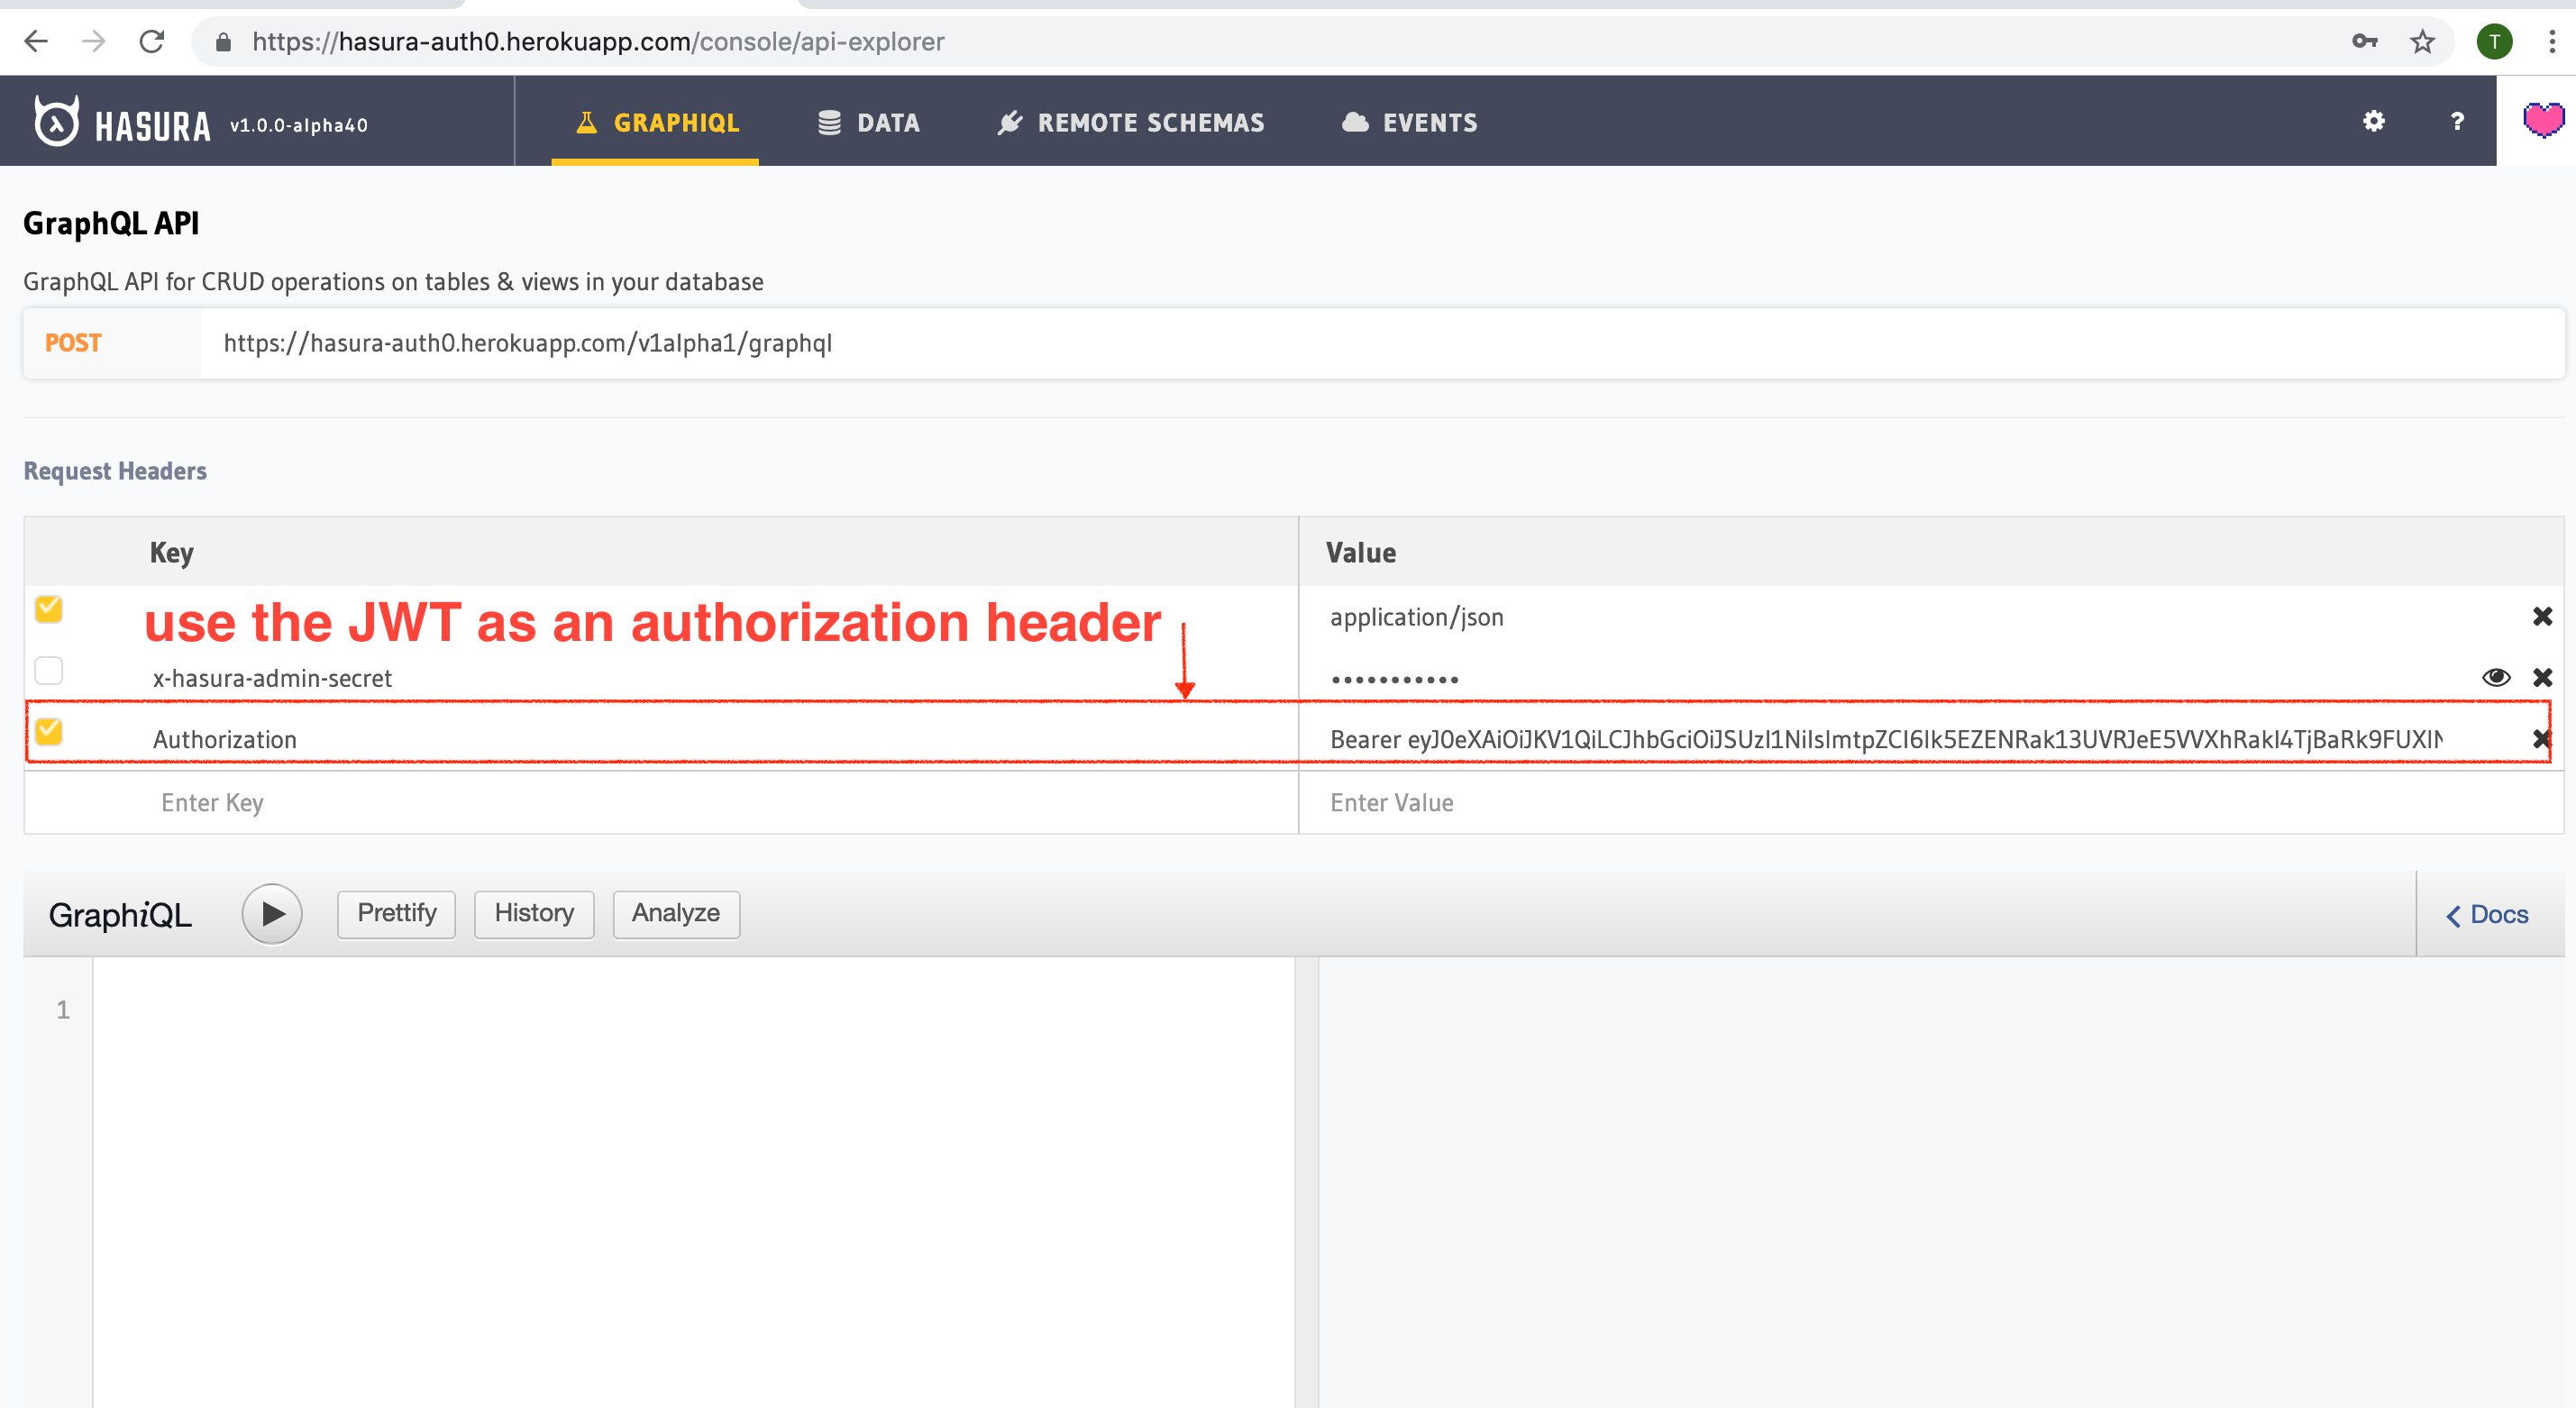
To test this out, add an access control rule that uses x-hasura-user-id for the role user.
Then make a GraphQL query or a mutation, with the authorization token from the previous step
where we generated an Cognito token.
You can also use the env variable HASURA_GRAPHQL_UNAUTHORIZED_ROLE or --unauthorized-role flag to set a role
for unauthorized users (e.g. anonymous). This will allow you to set permissions for users that are not
logged in.
The configured unauthorized role will be used whenever an access token is not present in a request to the GraphQL API.
This can be useful for data that you would like anyone to be able to access and can be configured and restricted just like any other role.
Sync users from Cognito
Now that you can sign up/log in using Cognito, you will need a way to sync your users in Postgres as well.
All you really need is the Cognito user_id in something like a users table.
This can be done creating a lambda function and configuring it as the Post Authentication Trigger.
The parameters available for this trigger are described here
. Here is a sample lambda function:
function (event, context, callback) {
  const userId = event.userName;
  const hasuraAdminSecret = "xxxx";
  const url = "https://my-hasura-app.hasura.app/v1/graphql";
  const upsertUserQuery = `
    mutation($userId: String!){
      insert_users(objects: [{ id: $userId }], on_conflict: { constraint: users_pkey, update_columns: [] }) {
        affected_rows
      }
    }`
  const graphqlReq = { "query": upsertUserQuery, "variables": { "userId": userId } }

  request.post({
      headers: {'content-type' : 'application/json', 'x-hasura-admin-secret': hasuraAdminSecret},
      url:   url,
      body:  JSON.stringify(graphqlReq)
  }, function(error, response, body){
       console.log(body);
       callback(null, user, context);
  });
}
That’s it! This lambda function will be triggered on every successful sign up/log in and sync your Cognito user into your Postgres database.
Note
We need to use an upsert operation here because social logins do not distinguish between sign up and login. Hence, we need to run this rule every time a successful login is made and do nothing if the user already exists.
Local dev with Cognito rules
The sync step will require a reachable endpoint to Hasura and this is not possible in localhost. You can use ngrok or similar services to expose your locally running Hasura with a public endpoint temporarily.
 Thank you for subscribing to our newsletter!