Building file upload and downloads with Hasura GraphQL
This tutorial was written by Johan Eliasson and published as part of the Hasura Technical Writer Program - an initiative that supports authors who write guides and tutorials for the open source Hasura GraphQL Engine.
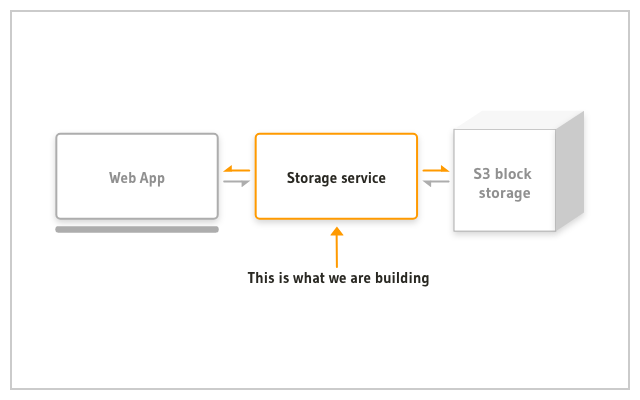
Hasura is great at handling data with its realtime GraphQL over Postgres but Hasura does not come with a built in solution on how to handle user generated files. Such as when a user wants to upload a file or download a file.
In this blog post you will learn how to manage user generated files in your Hasura app. Files will be handled with a microservice that uses a S3 compatible object storage. The storage microservice will also handle read and write permissions using JWT claims.
So your users want to upload a file. This file could be an image if you are building an image hosting service. Or it could be an Excel document if you are building a CRM. It does not matter what type of file the user wants to upload, you need to be able to save and serve these files.
Prerequisites
This blog post assumes you have previous knowledge in setting up a project with React and Apollo GraphQL.
Before we can start building our storage microservice for Hasura we must first get a few variables from both Hasura and our S3 service. We set up our domain correctly.
Hasura
We need the following
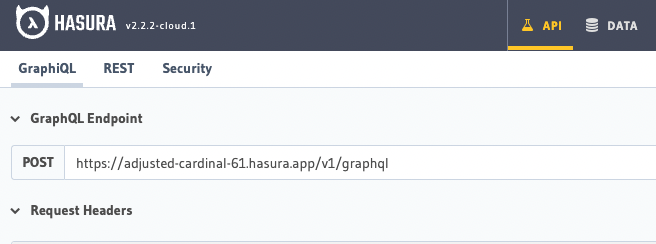
- Hasura Endpoint
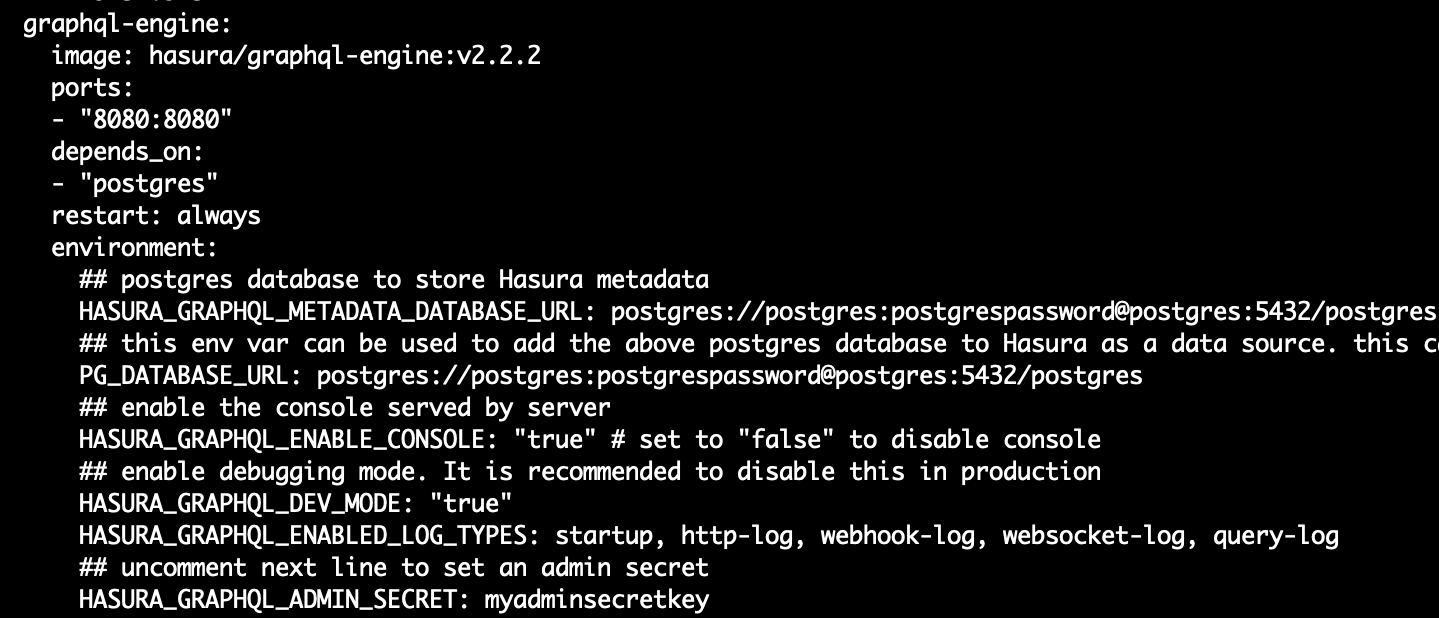
- Admin secret
The Hasura Endpoint can be found in your Hasura Console under the tab “GraphiQL”
The admin secret is located in your docker-compose.yaml file.
S3 Bucket
What we need:
- S3_ACCESS_KEY_ID
- S3_SECRET_ACCESS_KEY
- S3_ENDPOINT
- S3_BUCKET
Next we will create a S3 bucket. The S3 bucket is where all files will be stored. There are several S3-compatible object storage services. AWS S3 being the most popular. However, we will be using DigitalOcean Spaces for this example. There are several guides online on how to get started with S3 with DigitalOcean.
Storage Microservice
Now we will set up our storage microservice. Our microservice will consist of two files. Index.js and storage.js.
Upload (write)
Next create the file storage.js and add the following code.
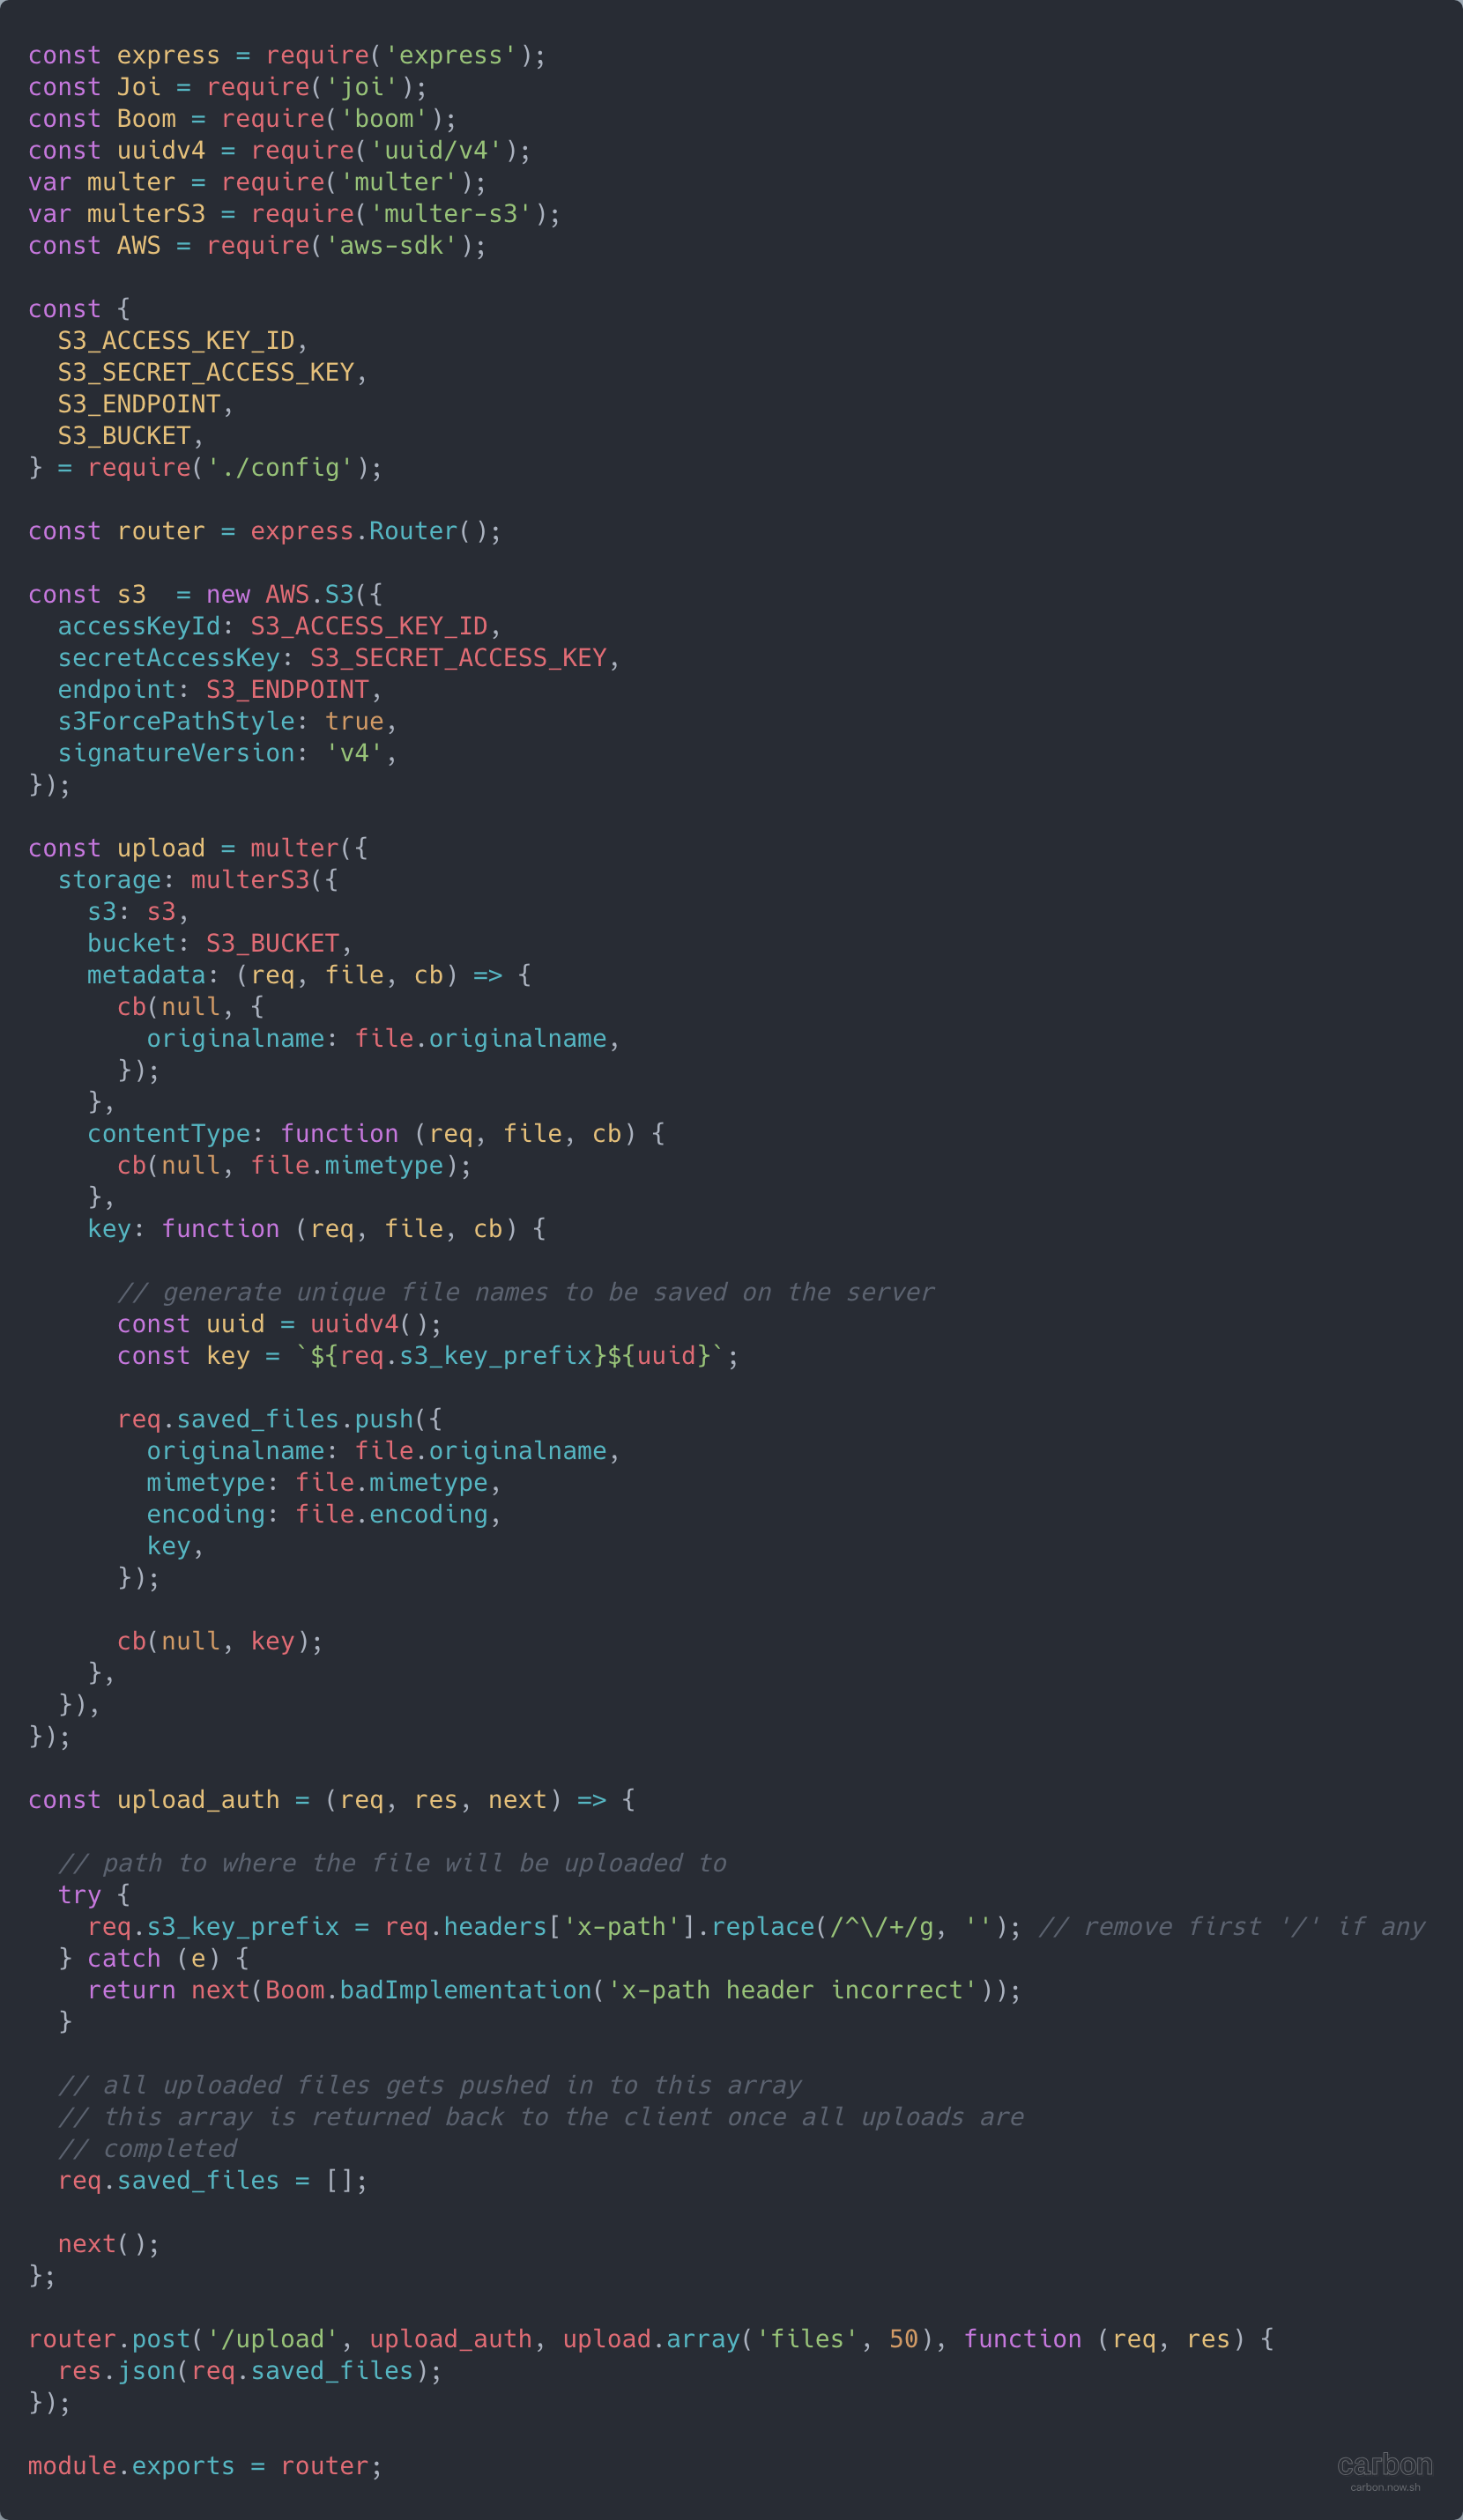
To this file we need config.js

The code will handle upload request to endpoint /storage/upload and stream all files from the client, via this microservice, then to the S3 bucket. The endpoint will return a list of keys (paths to the files) for the files in the S3 bucket.
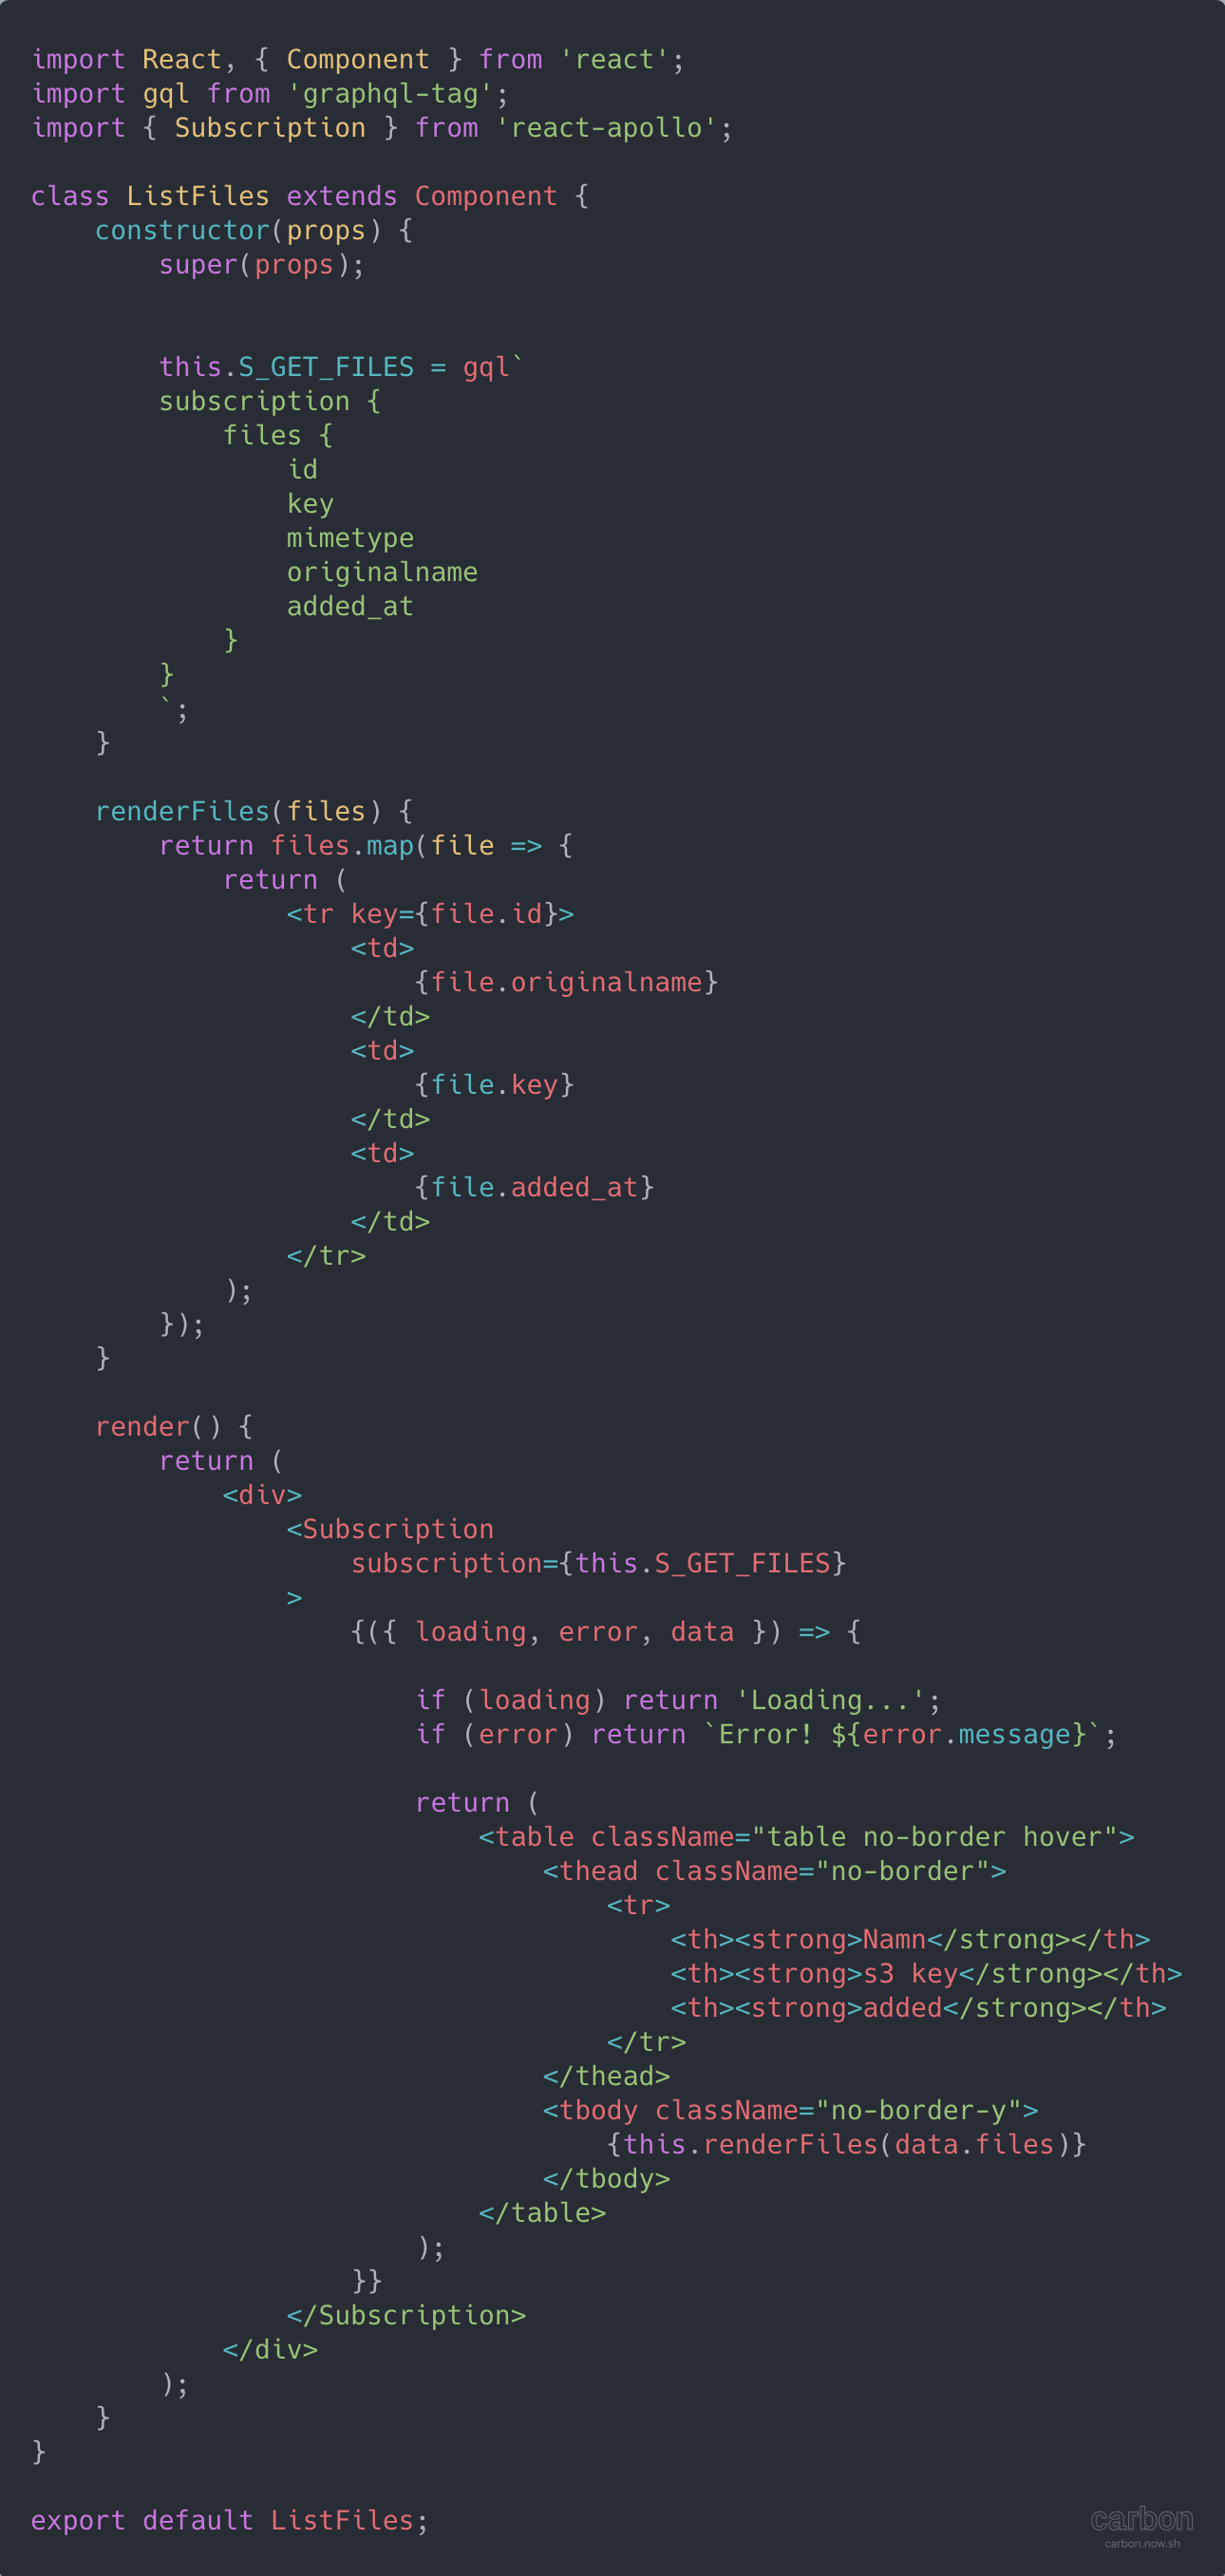
Next we will create a React component to handle file uploads:

The window.config.backend is the url to your backend. It can be localhost:3010.
Make sure your storage microservice has all appropriate packages installed and is running. You can run the index.js with the node index.js command.
Now file uploads are working correctly. Next we want to both list all files and be able to view and download all files.
Download (read)
First lets list all files. We will create a subscription to our files table and get updates in real time.
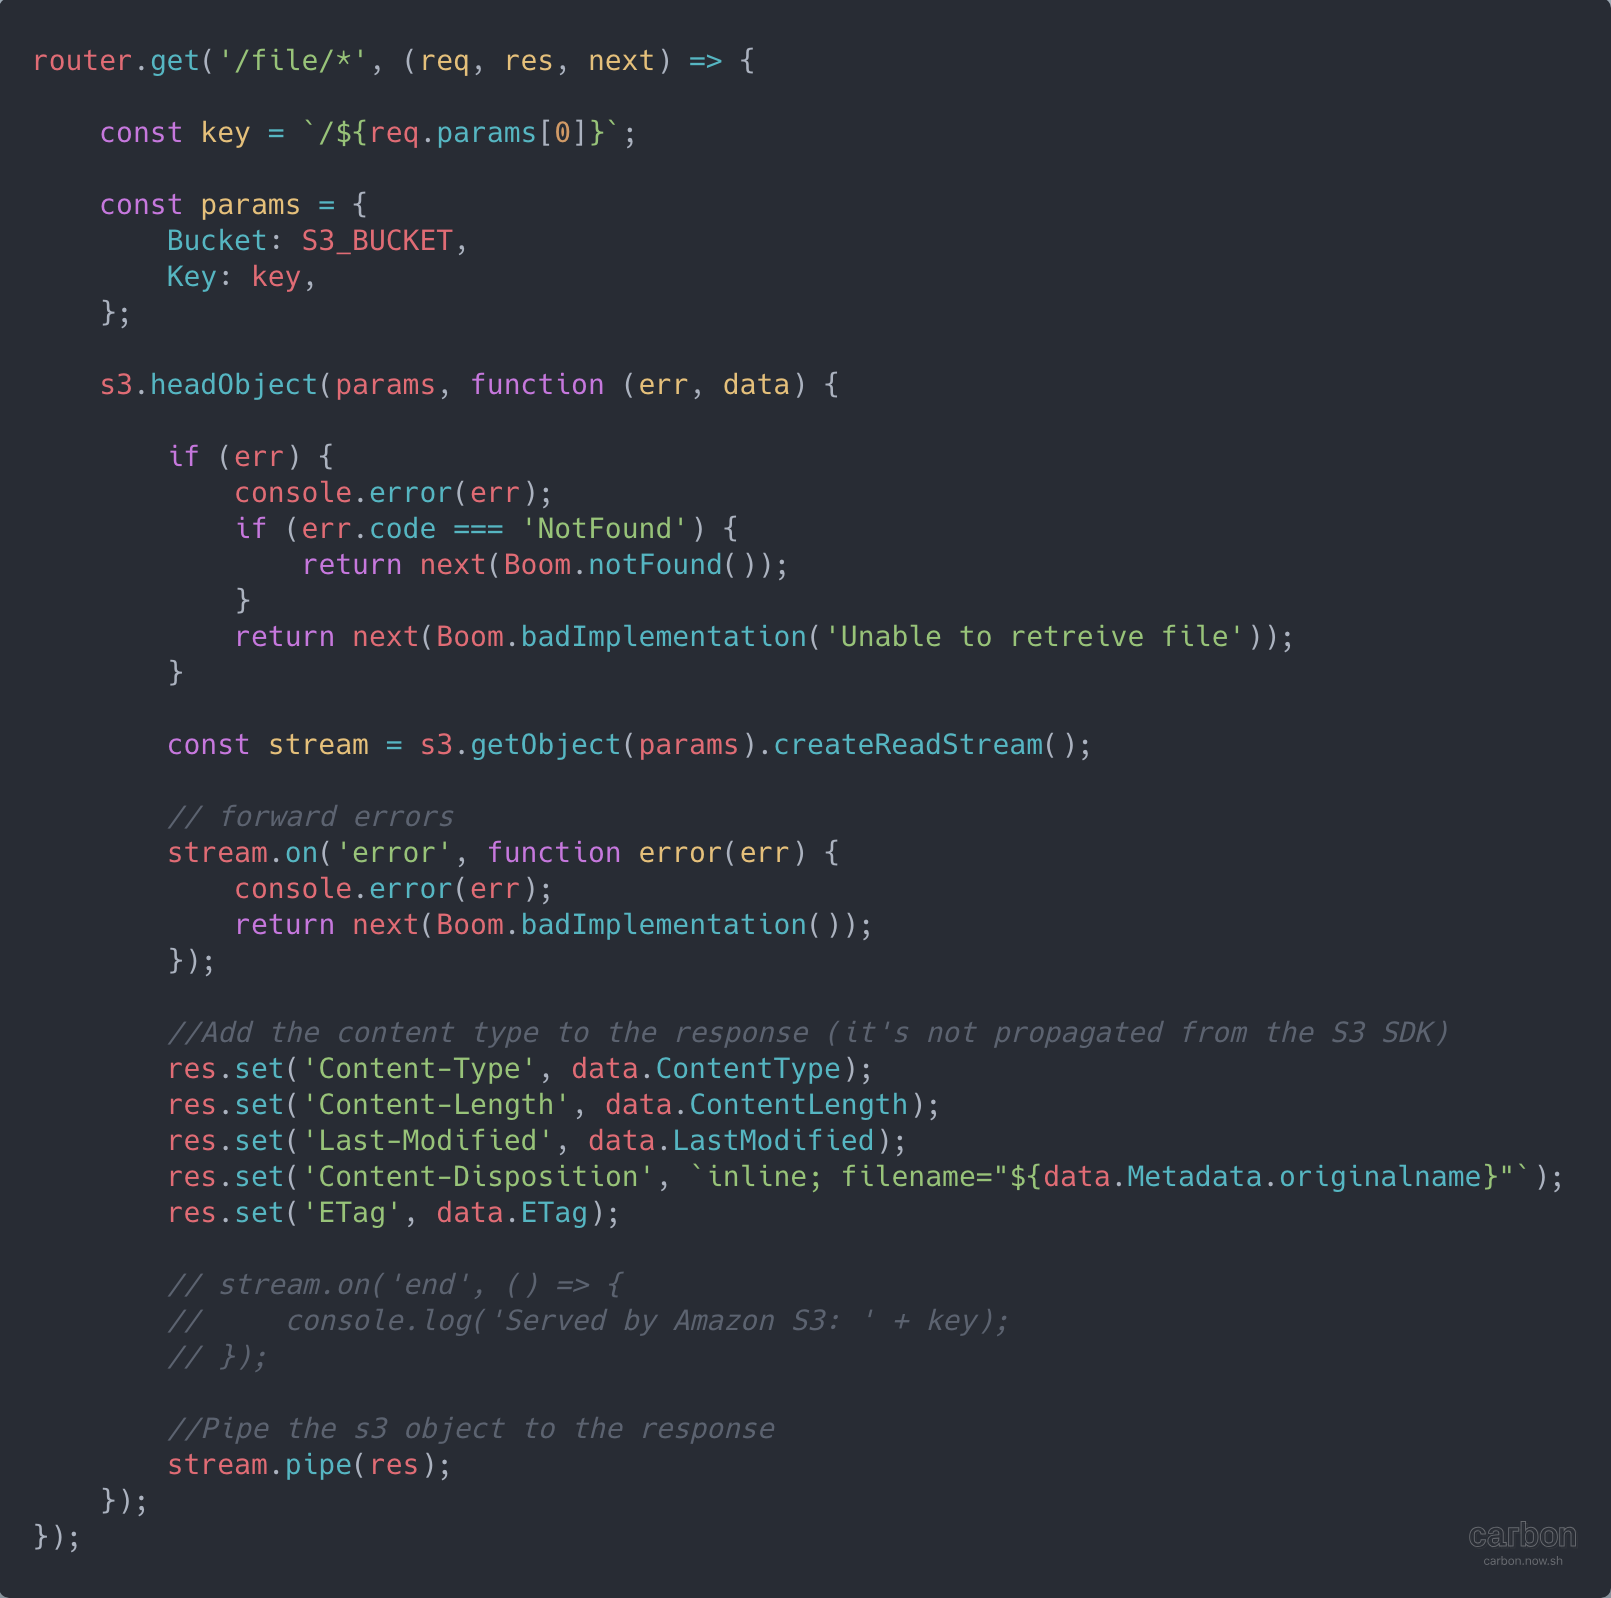
Before we can view the actual file we need to add a new route to our storage.js that will stream stream back the content from S3 to the client.
We now have a working solution for upload files, list files and download files in Hasura.
Security
Right now, anyone can upload and download files through our storage microservice. This is not good. We probably only want logged in users to upload and download content. Also, we might have use cases where we want to isolate files from users from one organisation.
This can be handled in different ways and we will look at one way of handling security in an overview. Security is tightly connected to your authentication service and different authentication service solutions can differ quite a lot.
When using JWT Tokens shared between Hasura and your storage microservice you have to make sure they are sharing the same JWT SECRET. The JWT SECRET is a environment variable in hasura and is located in your docker-compose.yaml file.
JWT Claims
Hsaura uses JWT Claims to handle CRUD permissions in the database so it make sense to use JWT Claims to secure files as well. So, in order for our storage microservice to handle read and write access using JWT Claims we need to somehow send our JWT token to our storage microservice for it to be used.
Cookies are one way of sending JWT claims with the requests to our storage microservice. Another way is to send the JWT claims as a header.
Once you can retrieve the JWT claims in your microservice you can start making rules based on the file, the key and the JWT claims to figure out if the request should be handled or not.
Here is an example:
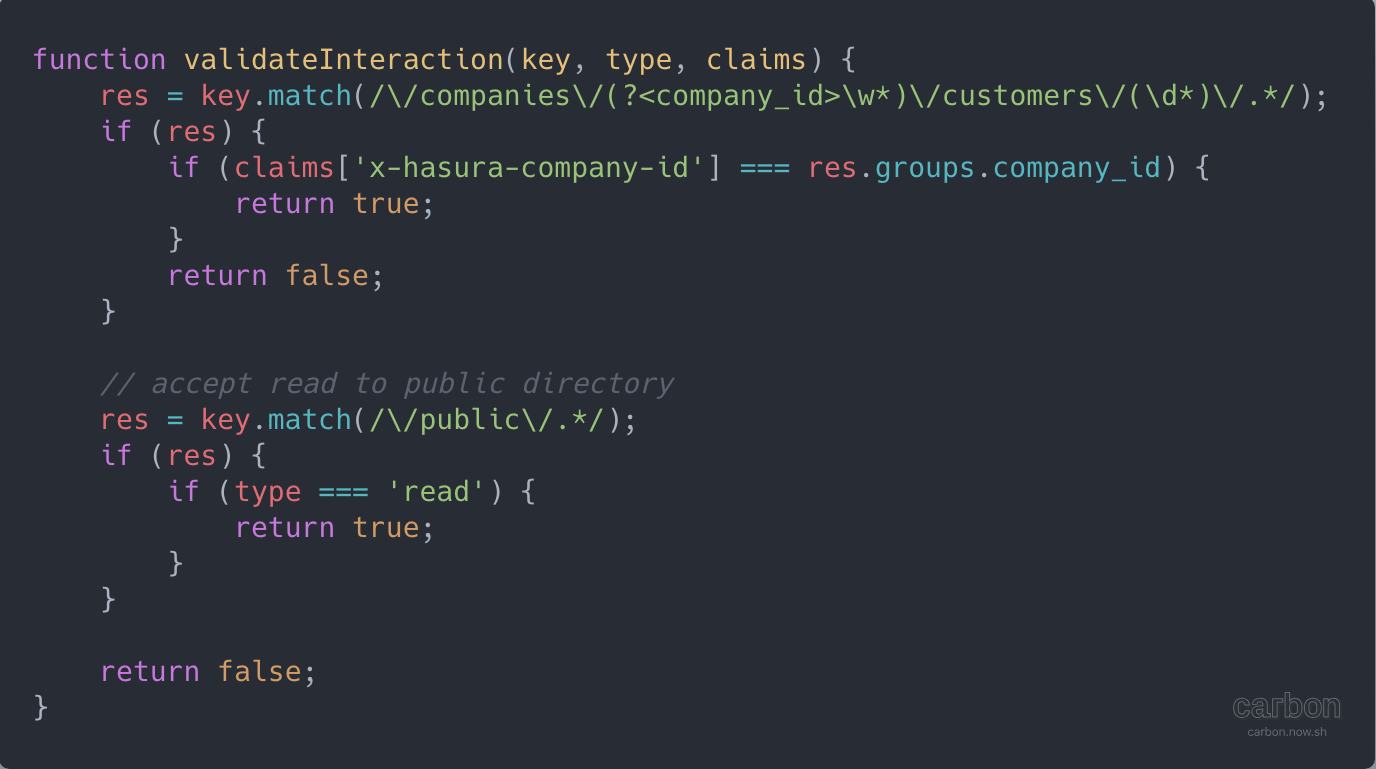
In the example above a user is allowed to upload and download files to its /company/<company_id> folder. Every user is also allowed to read files from the /public folder. All other requests can be dismissed.
Deployment
Our code can be deployed anywhere were we can run Node.js, ex: DigitalOcean, AWS Lambda, OpenFaaS, Zeit Now etc. We will start our own express server to handle all requests and let us see how to set that up.
Hasura Cloud
Head to the Getting Started with Hasura Cloud section to deploy graphql-engine server on Hasura Cloud.
The express server will be deployed on a DigitalOcean Droplet.
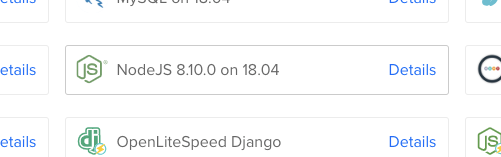
DigitalOcean Marketplace has a Node.js One-Click application that can be used to quickly create droplet optimised for Node.js. It comes with Node.js version 8.10.0 and npm 3.5.2.
Choose a standard $5 plan, we can always scale up / resize later.

Choose a suitable datacenter region, add your SSH key and click on Create.
Once the droplet is created, note the IP address of the droplet.
We will need to ssh into the droplet to continue the setup. In the terminal, run the following command:
$ ssh root@<do-ip-address>
Replace <do-ip-address> with your own droplet’s address.
We will use PM2, a process manager for Node.js, to make sure our Node.js and express server remains up and running as a daemon in the background.
Let’s get started by installing PM2 globally
$ npm install -g pm2
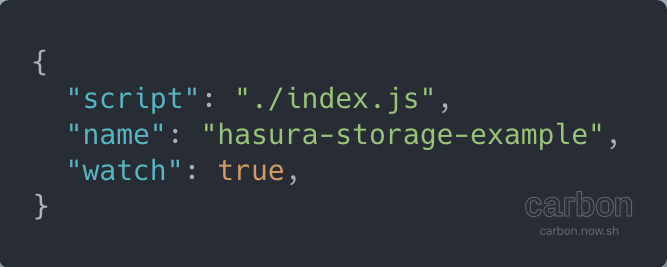
Let’s create a pm2.json config file to configure PM2 process manager.
Next, we will install all npm dependencies.
npm install --save pm2 express cors morgan joi boom uuid multer multer-s3 aws-sdk
Configure S3 Credentials
Create config.js with the following:

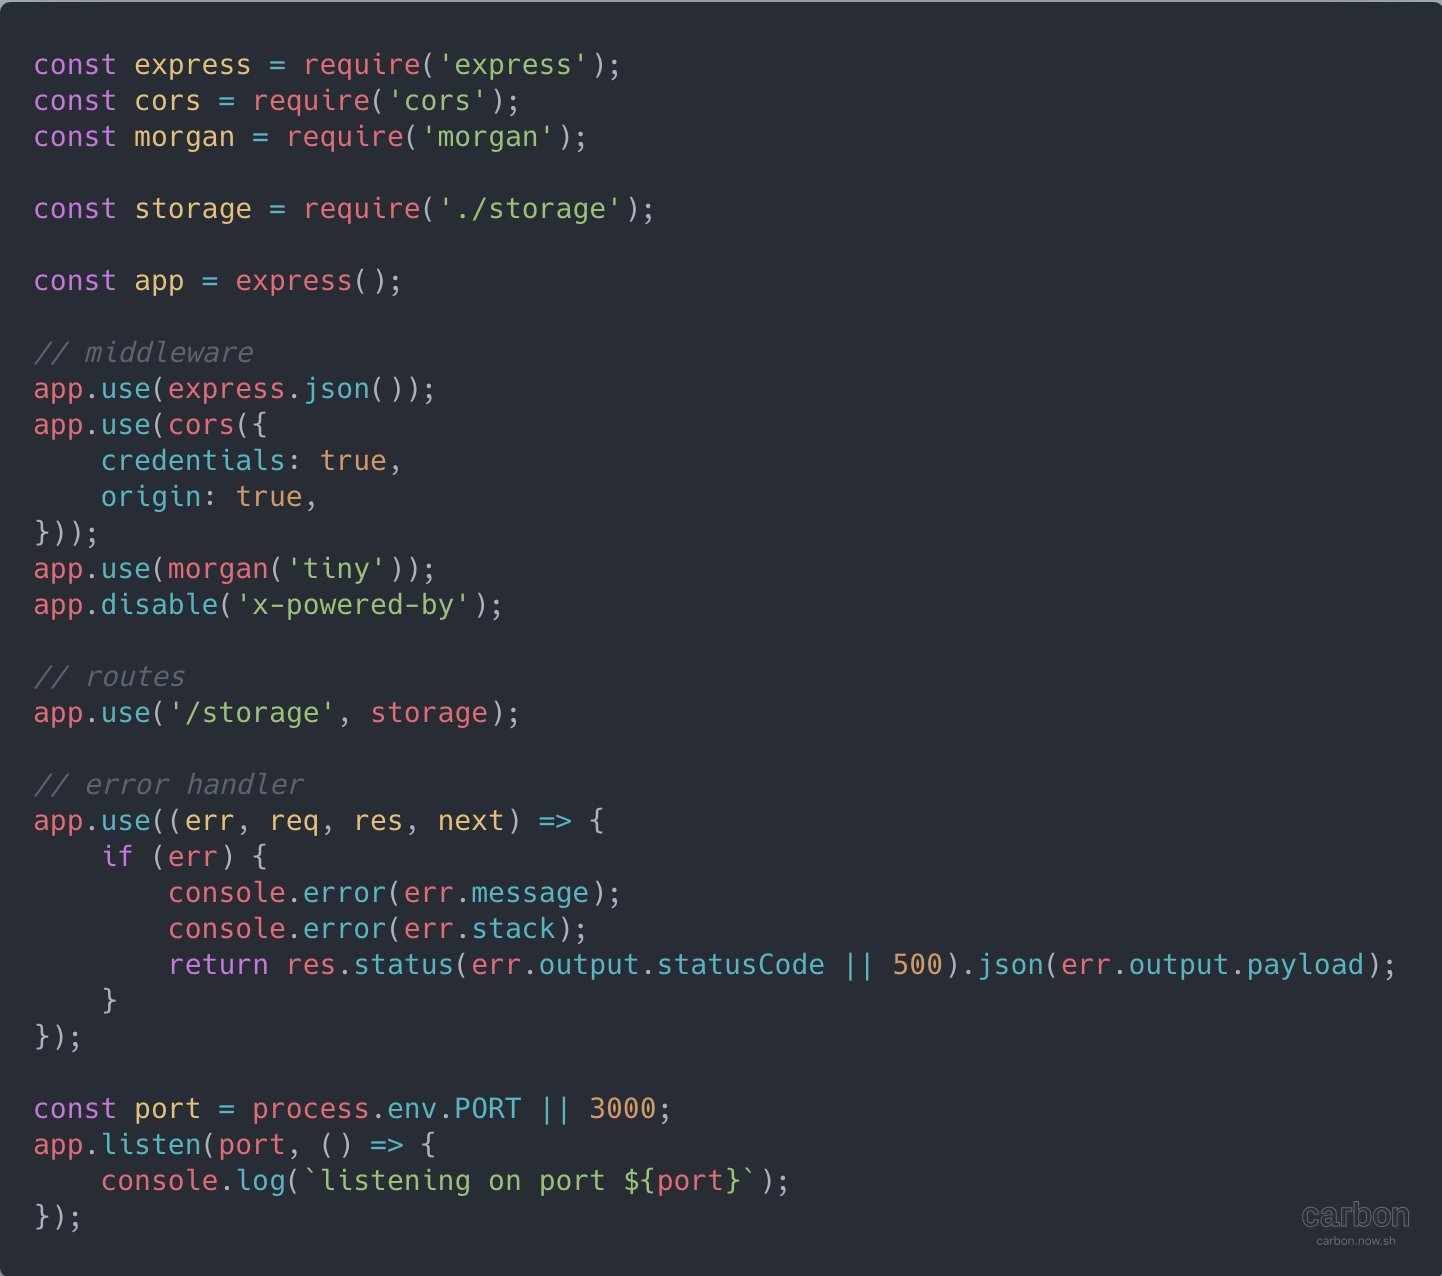
Create index.js
Create the full index.js file, configuring express and routes as follows:

Create storage.js
Create storage.js which handles file uploads as follows:

Configure environment variables
Head to https://github.com/elitan/hasura-backend-plus#env-variables and configure these environment variables by exporting them.
For example, to configure USER_REGISTRATION_AUTO_ACTIVE: 'false', run the following in the terminal
$ export USER_REGISTRATION_AUTO_ACTIVE=’false’
Similarly configure the environment variables required by this service.
Finally, start the server using the following command:
$ pm2 start pm2.json
Make sure that the server is running using PM2s monitor, pm2 monit.
We now have a working approach to handle user generated files for Hasura using a S3-compatible object storage services.
What is next?
Once you got this server working and after reading the code, you should have a better understanding on how to handle user generated files together with Hasura. Next thing you would want to take a close look is your permission rules, together with your JWT token provider, to enforce correct read and write rules for all your files.
Also you would want to make sure the server connection is encrypted using HTTPS. Caddy Server (https://caddyserver.com) is a great tool to serve site with automatic HTTPS.
About the Author
Johan Eliasson is an entrepreneur from Sweden with a strong background in computer science. He is currently in the process of rebuilding a big internal business system to React / Apollo / GraphQL / Hasura. In his free time he likes to spend time with his family, read books and work out. You can reach out to him at [email protected] or on Twitter.