This article was written by Oluwaseun Raphael Afolayanas part of the Hasura Technical Writer Program. If you would like to publish an article about Hasura or GraphQL on our blog, apply here.
Introduction
JAMStack, as you may already know, is an approach to building websites using Javascript, API, and Markup. In this article, we'll take a look at JungleJs and how it helps you build fast and light-weight static sites using Svelte and GraphQL. By the end of this article, you should be familiar with JungleJS enough to understand what makes it super awesome. Check out earlier posts from the JAMStack series.
What is Svelte?
Suppose you're not familiar with it already, Svelte is a front-end javascript framework similar to React and Vue but with a crucial difference: compiling your code into javascript at build time. This difference implies that your app works super fast as it does not have to interpret your code at runtime.
JungleJs is a static site generator similar to Gatsby or Hugo. JungleJs works by pulling data from a source such as a JSON or CSV file, any headless CMS, APIs such as WordPress, Ghost, etc. When working with JungleJS, you structure the different parts of your application using svelte components. In turn, Jungle builds the site and compiles it to static HTML content, ready for deployment on any web server of your choice.
GraphQL Data Layer
Before we go into the GraphQL Data layer and how it works, let’s take a brief look at GraphQL itself. According to it’s official documentation:
GraphQL is a query language for APIs and a runtime for fulfilling those queries with your existing data. GraphQL provides a complete and understandable description of the data in your API, gives clients the power to ask for exactly what they need and nothing more, makes it easier to evolve APIs over time, and enables powerful developer tools. Learn more about GraphQL.
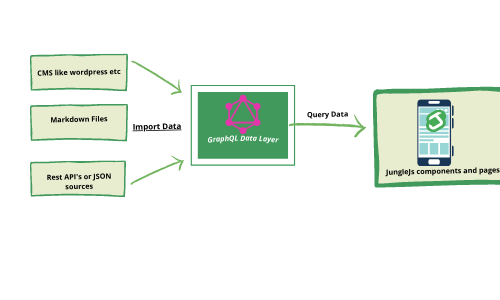
The GraphQL data layer is a tool JungleJs utilizes in development, and it serves as temporary storage for data imported into your JungleJS app. When data gets imported into our Jungle app, the GraphQL Data Layer converts it to static data. It is worthy of note that there is no real-time connection between the data layer and the source from where the data is imported. What this implies is that you need to re-generate the website to get the latest data updates.
A lazy sketch of how jungleJs uses the GraphQL Data layer
Since JungleJs works at build time, you only need to add a QUERY and a QUERYRES to access data in your svelte files, as shown in the example below.
Then you can access QUERYRES in the component like this:
{#each QUERYRES.items as item}
        <p> {item.property} </p>
{/each}
Installing JungleJS
To create a new JungleJS project, first, clone the starter project using degit and navigate into the directory where the files were downloaded by running:
npx degit junglejs/template jungle-app
cd jungle-app
Secondly, install the required dependencies by running
npm install
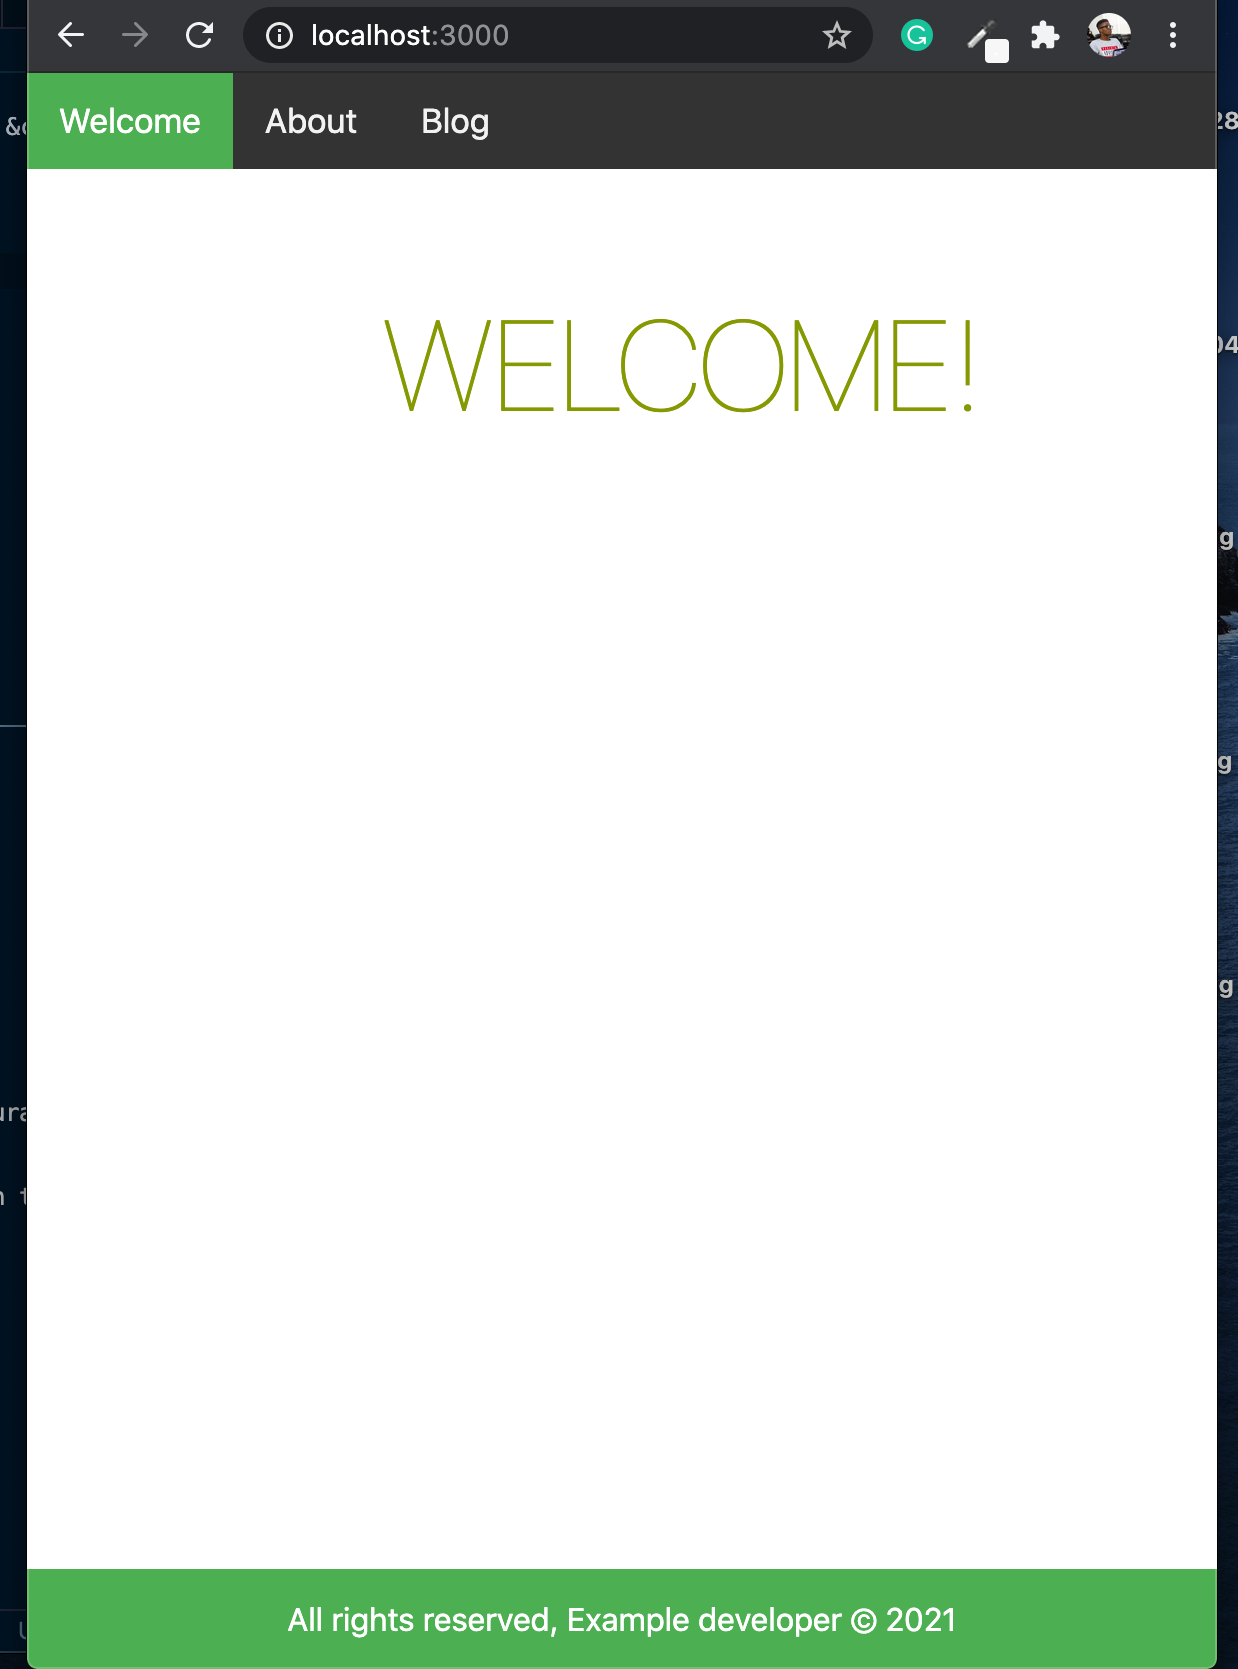
Running the Jungle App
To run the Jungle App, start the app using npm run start
At the time of writing this article, hot-reloading doesn't work in JungleJS yet. To reload the app with your changes, you need to stop and run the process once more. If you want to generate a build folder containing the compiled static files for deployment anywhere, you can do so by running npm run build
JungleJS app directory structure
If you're familiar with frameworks like Sapper, Nuxt, and the likes, their folder structure is pretty similar to that of JungleJs. However, here are some things to keep in mind, especially when working with JungleJs for the first time.
If you look in the installed starter files' root directory, you will find a file named jungle.config.js. This file is where configurations for your app are defined. This file contains a dataSources array which specifies the sources Jungle’s GraphQL Data Layer should pull its data. These data sources could be from a dynamic JSON source, a static object, or even markdown files. The default starter template currently contains two example data sources.
The /jungle/build/ folder generated when you run either npm run start or npm run build is the directory to be deployed when hosting a JungleJs project.
You should store static files such as images in the /static folder. When NPM generates the app's build folder, JungleJS will insert the content of our app's static folder into the build folder so the rest of the file can use them.
Components for use in multiple routes should be stored in the src/components directory.
The src/routes directory holds the routes for our application.
Components
Components like in any frontend development framework allows you break your app in to smaller parts so they can be managed. A typical web app for example can be broken down into components such as the Navbar, footer etc. The default Jungle installation already presents us with a Nav component, so in order to have a better feel of this, let’s create a footer component for our web app. To get started, create a Footer.svelte file in the src/components folder and add the following code in it:
Once the markup is written, your component is ready for use in any section of your app in this format:
<script>
// First import the component in your script tag
    import Footer from "../components/Footer.svelte";
<script>

<div>
// inject it anywhere suitable
<Footer/>
</div>
Creating pages and Linking Routes
To setup a page in a jungle app, simply create the [pagename].svelte file in the src/routes directory. Next, write the markup as you would in a normal svelte file. In order to create an about page in the default jungle starter code for example, create a file named about.svelte and add the content from your favorite text editor (eg, vs code)
//about.svelte
<script>
    import Nav from "../components/Nav.svelte";
// importing the Footer component we created earlier
    import Footer from "../components/Footer.svelte";
</script>
<svelte:head>
    <title>About Page</title>
</svelte:head>
<Nav page="/about"/>
<main>
    <h1>This is the About Page</h1>
    <p> JungleJS is Easy to use!</p>
</main>
<Footer/>
You can proceed to add the About route to the Nav component as such
JungleJS inherits its styling syntax from svelte, and as such, you can write CSS files in your svelte files using <style> </style> tags. One thing i find so handy about Jungle is that styles defined in Svelte components are scoped by default.
When compiled, Svelte generates unique class identifiers to ensure that styles for elements do not conflict with each other. you can learn more about styling in Svelte here.
To see this in action, let’s add a bit of styling to the Footer component we created earlier.
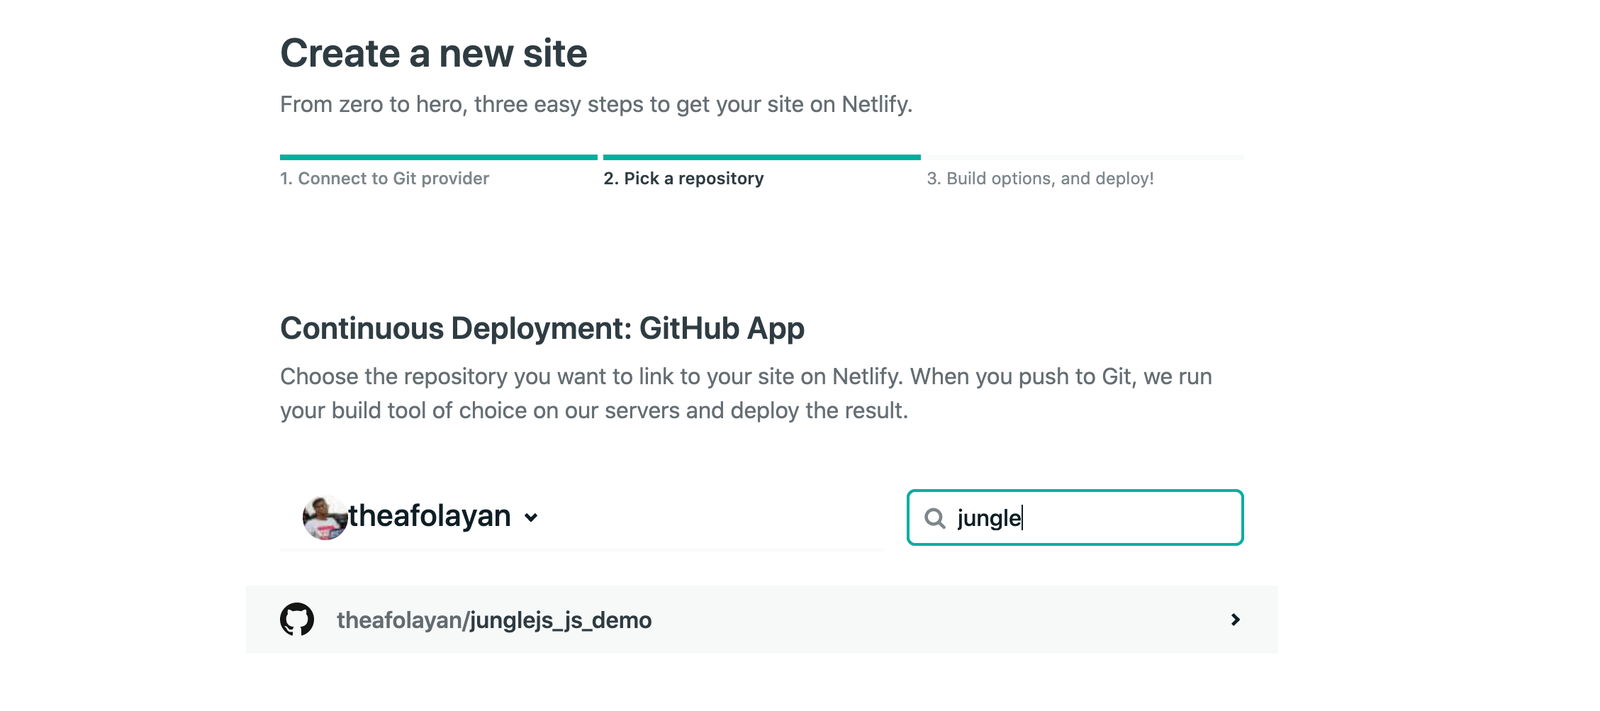
Once you run the npm run build command, all you need to do is deploy the resulting jungle/build folder in an hosting service of your choice. If, for example you want to deploy your site to Netlify, you can head over to your netlify dashboard and then drag/drop the folder unto your dashboard for a quick manual deploy. If on the other hand, you like to do things a bit more organised, you could setup your jungle app in a github repository and hit the “New site from git” button.
Next, Select the repo containing your jungle site and click on it to continue.
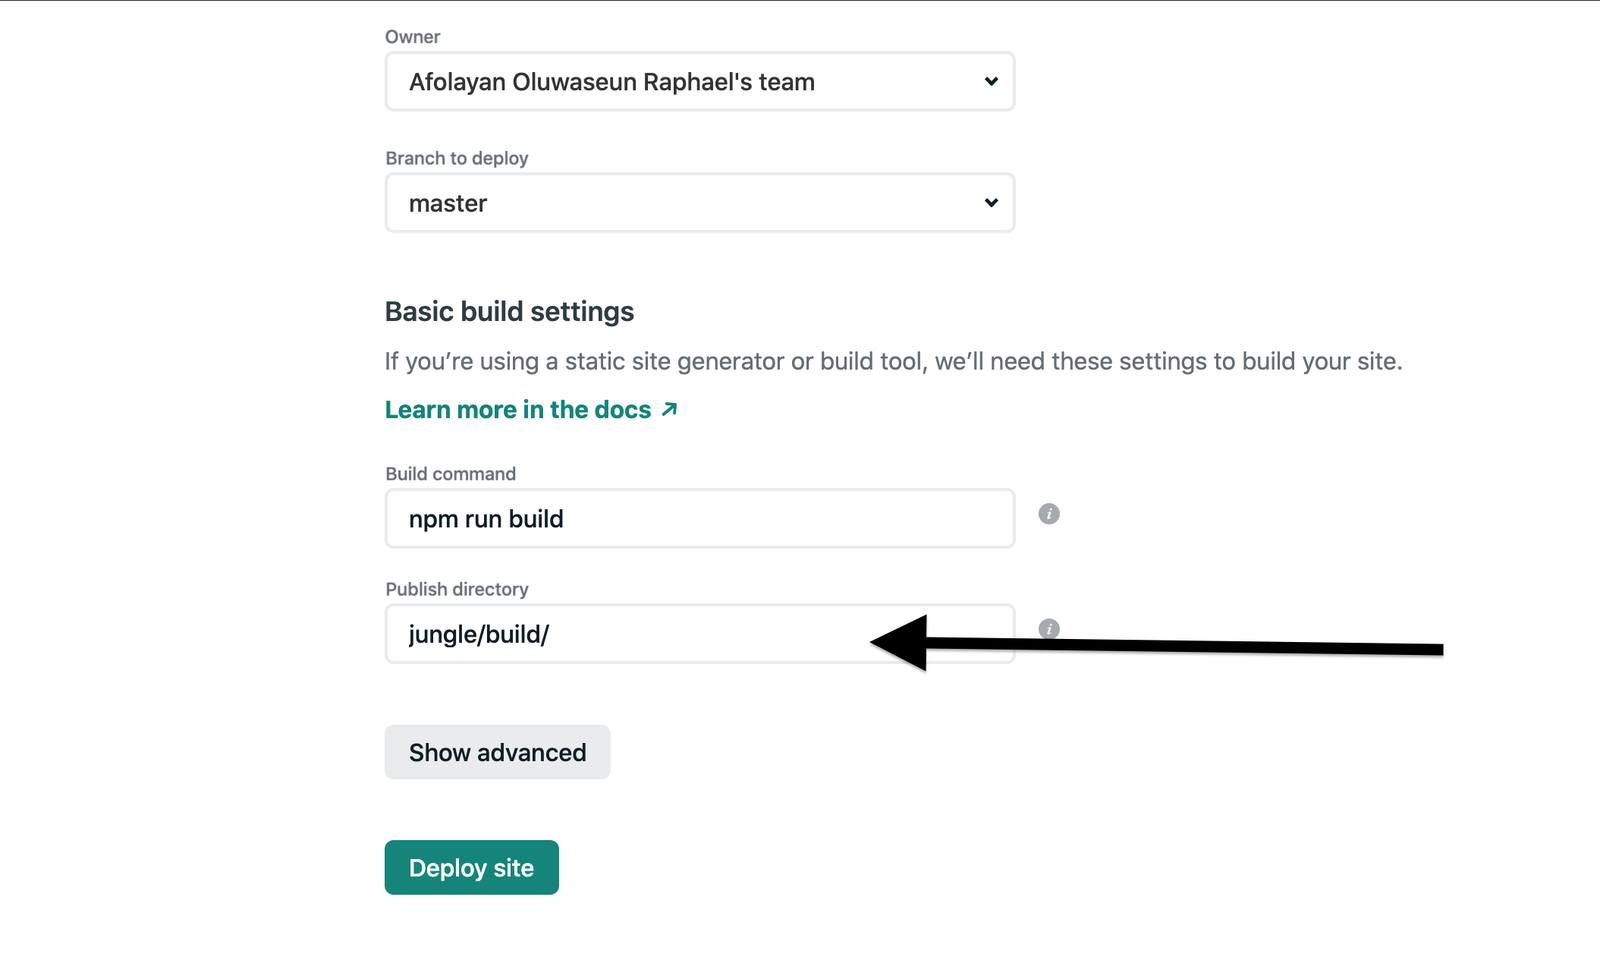
Once you have selected your preferred repo, make sure to modify your publish directory to reflect the the jungle/build folder like in the screenshot below, before you finally hit the deploy button.
Summary
So far, we have covered the steps involved in building a simple site using JungleJS and GraphQL.We got started by setting up a JungleJS scaffolding, next we added an about page to our site, we then created a footer component while how to style a Jungle app. Finally, we took a look at the deployment process involved in a JungleJs app. If you have any questions, feel free to reach out to me on Twitter.