Turn your Java REST API to GraphQL using Hasura Actions
This post is a part of a series which goes over how to convert an existing REST API to GraphQL by defining types and configuring endpoints.
Introduction
In this post, we will learn how to use Hasura Actions to convert your Java REST APIs to GraphQL.
Typically, writing a GraphQL server from scratch involves setting up the GraphQL schema, writing type definitions, and wiring it up with the resolvers in the language or framework of your choice. The hard part about this server component is the resolver code for someone who is used to writing a REST API with the simplicity of using GET/POST and handling authentication logic for each type; which becomes more and more complex as the app grows.
Hasura reduces bulk of the complexity of setting up a GraphQL API from scratch by giving you instant GraphQL CRUD for databases (currently Postgres) which should cover most of the data-fetching and real-time subscription use-cases.
In case of custom business logic, Hasura lets you extend the graph in several ways: 1. Remote Schemas: If you are comfortable writing GraphQL servers, you can add a custom GraphQL server as a Remote Schema and Hasura merges it automatically for you. 2. Actions: In case you are looking to write a new or keep your existing REST API for the custom logic, you can do so using Actions which is what we will focus in this post.
In this blog post, we'll explore the Actions route and learn how to use Hasura Actions to convert a new or existing Java REST API to GraphQL.
New REST API
In case you are starting from scratch, we will begin by defining the GraphQL types required for an Action and create a simple Spring Boot app to handle the resolver bit.
Let's take the example use-case of registering a new user.
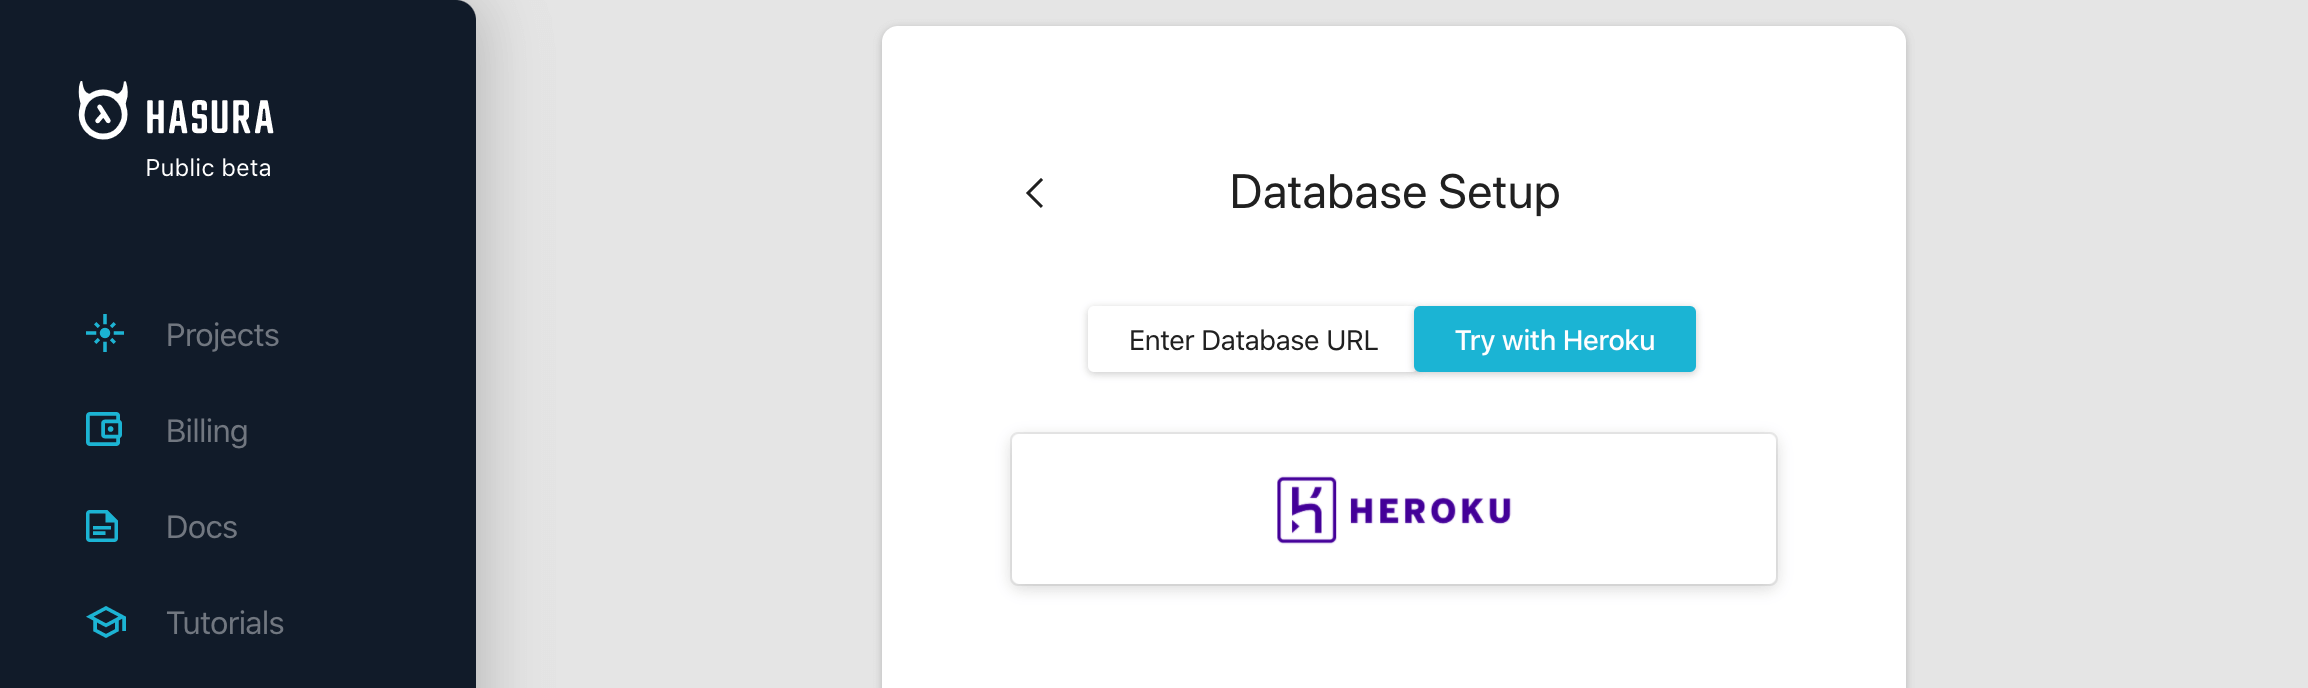
Creating a new Hasura Cloud project
Before we begin, let's create a project on Hasura Cloud to setup the Action. Click on the Deploy to Hasura button below, signup for free and create a new project.
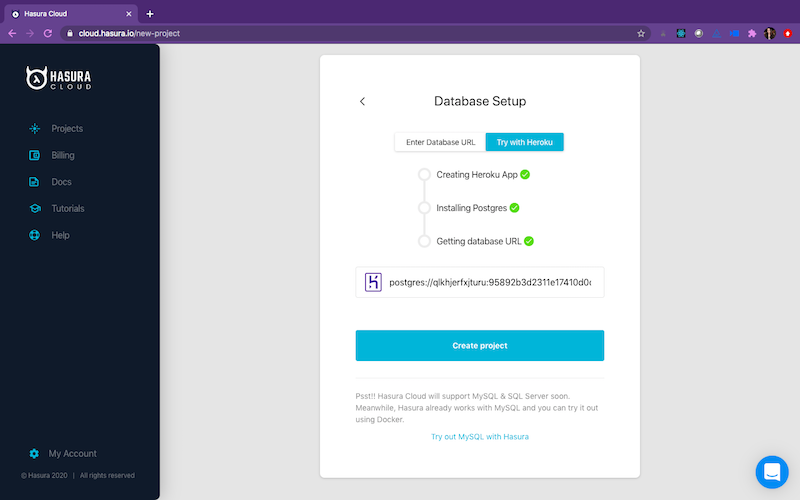
Hasura requires a Postgres database to start with. We can make use of Heroku's free Postgres database tier to try this app.
After signing in with Heroku, you should see the option Create project.
Once you are done creating the project, click on Launch the Console button on the Projects page for the newly created project and this will take you to the Hasura Console. By creating a new project, you get a GraphQL endpoint for the Postgres database that is globally available, secure, and scalable from the beginning.
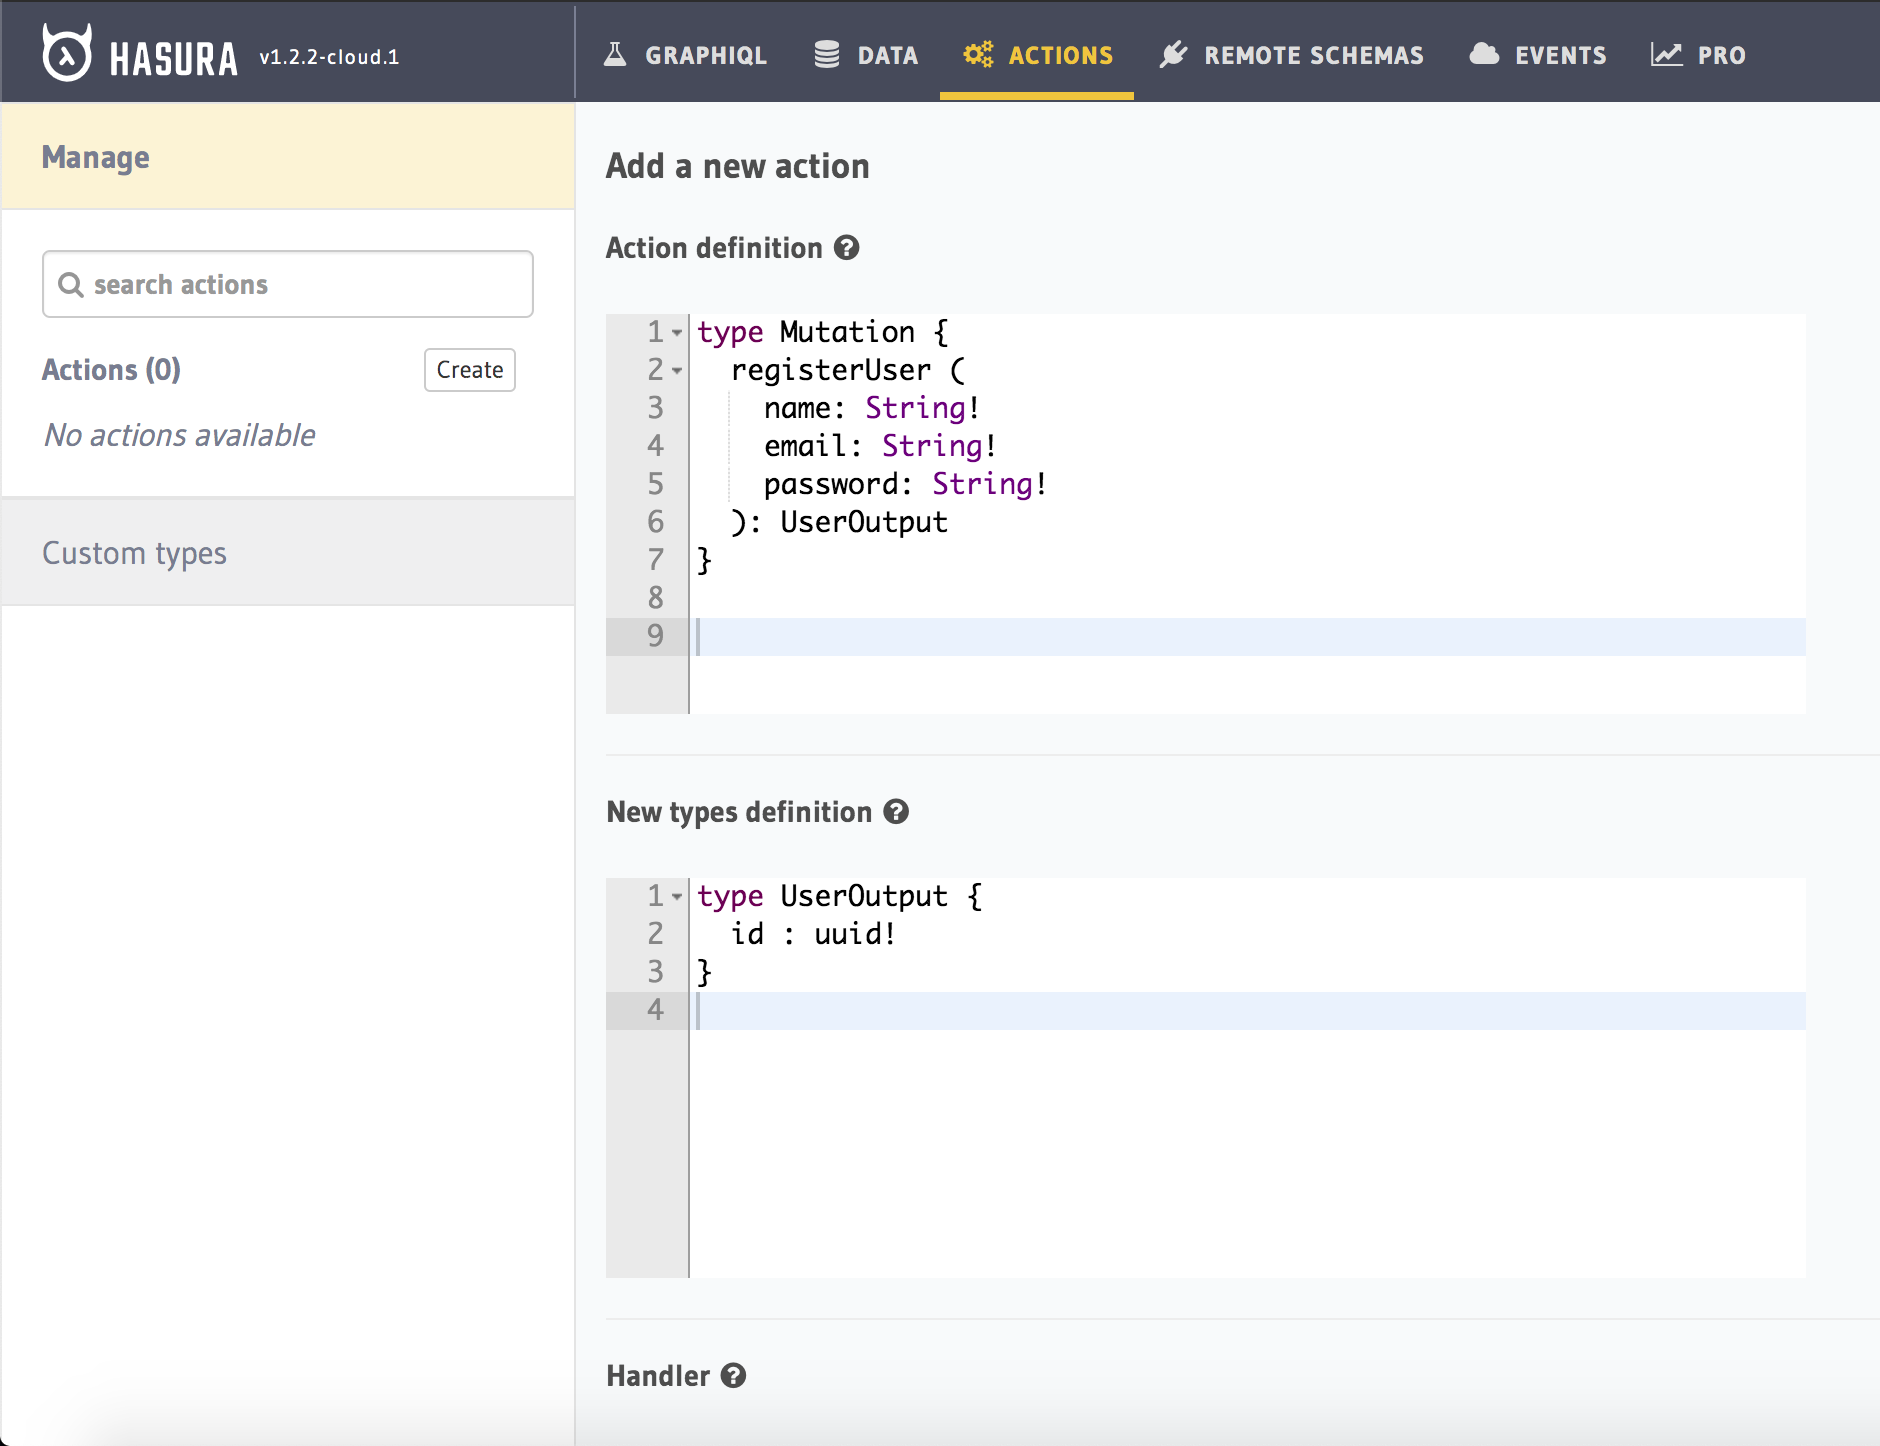
Now let's head to the Actions tab on the Hasura Console and define the GraphQL types for our app.
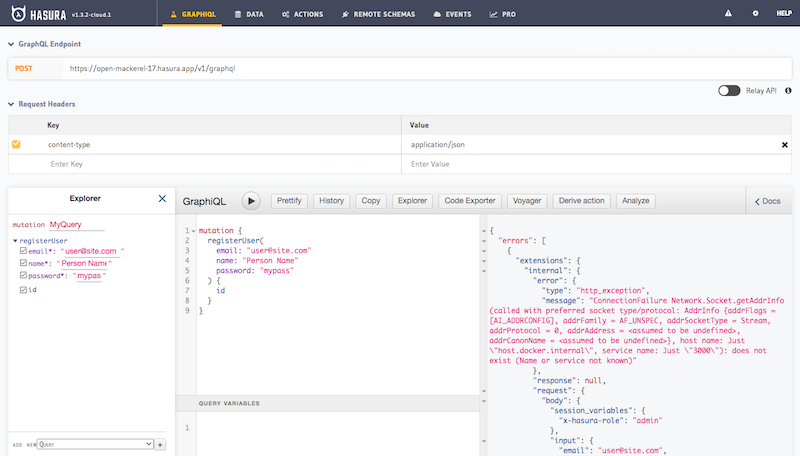
The above mutation should obviously give a http exception since the Handler URL has not been configured yet. But this test is to verify that Hasura generates mutations for you based on the types defined to query on the same GraphQL endpoint.
Now let's go ahead and define our Java app and try out the mutation.
Codegen: Auto generate boilerplate code
Now head over to the Codegen tab to autogenerate the boilerplate code for your Java server. Since we are generating the API from scratch, we need the full server setup instead of just the POST handler.
The console gives you options to generate code for different frameworks including but not limited to nodejs-express, nodejs-zeit, nodejs-azure-function etc.
We're using the Java framework Spring Boot for this example. However, any Java server that can serve a POST endpoint can be used to swap with this example.
Business logic required:
Receive the action arguments name, email and password on request.
Convert the plaintext password input into a hashed secure password.
Send a mutation to Hasura to save the newly created user with the hashed password.
Return the created user object to signal success, or else error.
The generated codegen from Hasura console (registerUser.java and registerUserTypes.java) can be copied to your filesystem to start making the changes to the handler.
Once you've copied the codegen, you can setup Spring Boot and run the server.
Setting up Spring Boot
Start by creating a new Spring Boot project by using start.spring.io.
Note: For this, you will need an IDE such as IntelliJ IDEA, Spring Tools, Visual Studio Code, or Eclipse, and JDK (Java Development Kit) installed. Learn more here.
Add your copied codegen to a new file called demo.java.
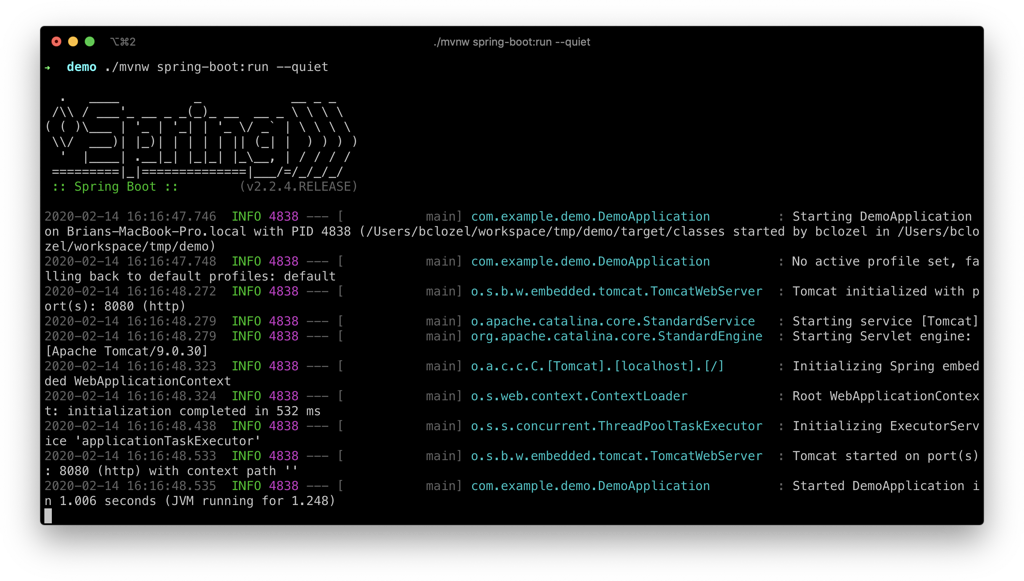
Build and run the project from your terminal by running the ./mvnw spring-boot:run command.
You will see an output similar to this:
Voila! You have set up and started your Spring Boot project. The above command starts Apache Tomcat that acts as a webserver at http://localhost:8080/. But we need to update our handler URL for the Action so that the HTTP call works. Add the registerUser endpoint that handles the mutation. So the final handler URL will look like http://localhost:8080/registerUser.
Since we want our Hasura Cloud instance to communicate with our Java server, we need to expose the Java server on a public URL. We can host this server on a cloud instance and point to that URL/IP. But for the sake of brevity for this tutorial, we will use ngrok, which gives public URLs for exposing your local servers to communicate with a cloud instance.
Assuming the use of ngrok, running ngrok http 8080 on your terminal should give a unique URL you can use. Go back to the Modify tab of the registerUser Action that was created on the Hasura Console. Update the handler URL to one generated by ngrok.
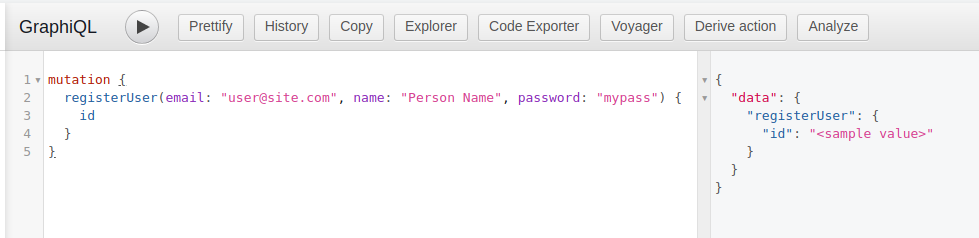
Finally let's try out the same mutation through GraphiQL and the connection should work returning a dummy < value > for id.
Alright! We have a working GraphQL API that is resolved using a Java REST API in the background.
Now you can modify your handler code as required to do any business logic; like connecting to a different API, connecting to a database (preferrably using Hasura's APIs) or using an ORM for a different databases etc. Hasura will take care of proxying the GraphQL mutation to the right REST API handler internally.
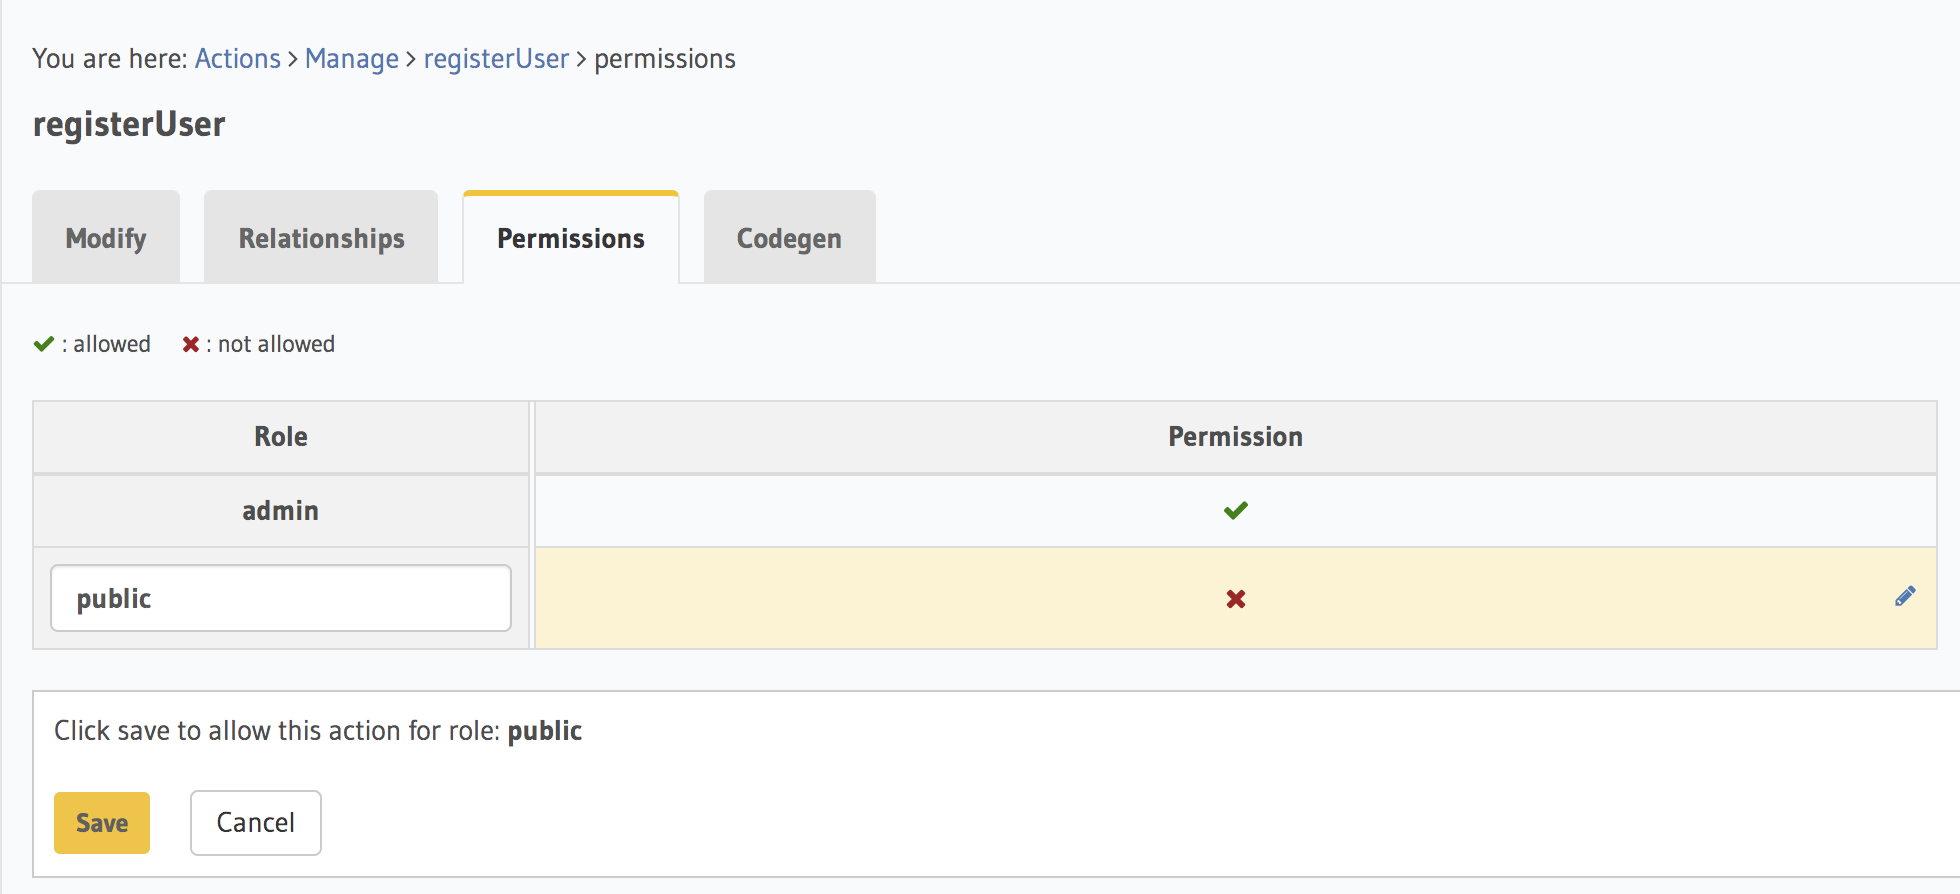
Permissions
What about permissions? Who will be able to make this GraphQL mutation from the client? Right now, it is configured to be admin only. We can configure roles to allow other kind of users to perform this mutation.
In the above example, I have created a role called public that is allowed to make this mutation. To read more about how the whole Authentication and Authorization works with Hasura, you can checkout the docs.
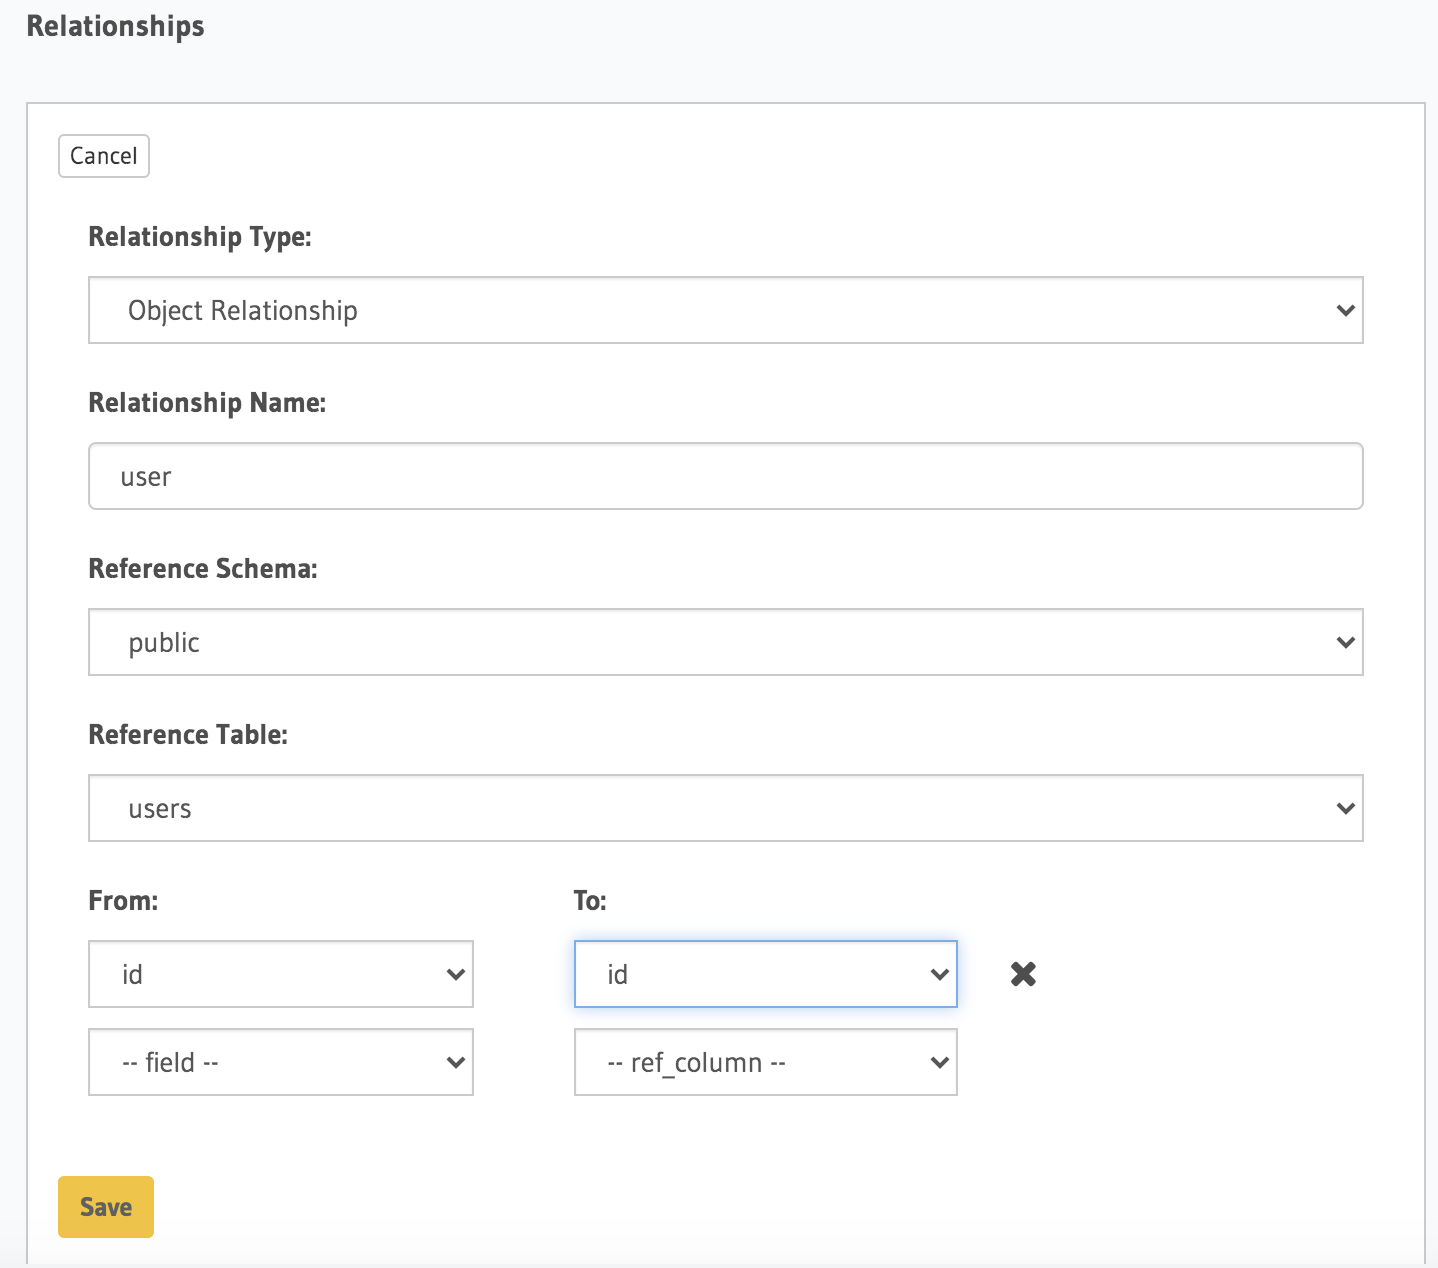
Relationship Data
Now consider that the Postgres database has users table. We can connect the id of the registerUser output to the id of the users table.
The related data also conforms to the permissions defined for the respective table. (ie. users)
Existing REST API
You might be wondering - what if you already have a Java server with a bunch of endpoints written to handle custom business logic? In that case, as long as it's a POST endpoint, you can define the necessary GraphQL types and make some modifications to the way you handle request body to get it working.
So in our example, the input arguments - name, email and password was wrapped inside an input object. If you can make necessary modifications to your existing REST API to handle this request body, your GraphQL API will work as expected.
Query Action
The above example showcased how to perform a GraphQL mutation. The same workflow can be extended to perform a GraphQL query which proxies to a Java REST API in the background. Typical use cases for query actions include computed fields, data enrichment, data transformations, fetching from multiple databases and API sources etc.
Supported Frameworks
The REST API can be in any framework like JAX-RS, Restlet, Jersey, RESTEasy, Apache CFX, or serverless functions. After all, Hasura just requires a reachable POST endpoint that it can forward the query to. In case you are going to deploy the API to a serverless function, you will need to follow the format of the cloud provider.