Setup and Installation
In this section, we will learn how to setup YugabyteDB and Hasura on Cloud.
Provision a YugabyteDB Cloud Cluster
The easiest way to get started with YugabyteDB is by provisioning a free cluster instance:
- Create or sign in to your Yugabyte Cloud account: https://cloud.yugabyte.com/.
- Provision a free YugabyteDB cluster:

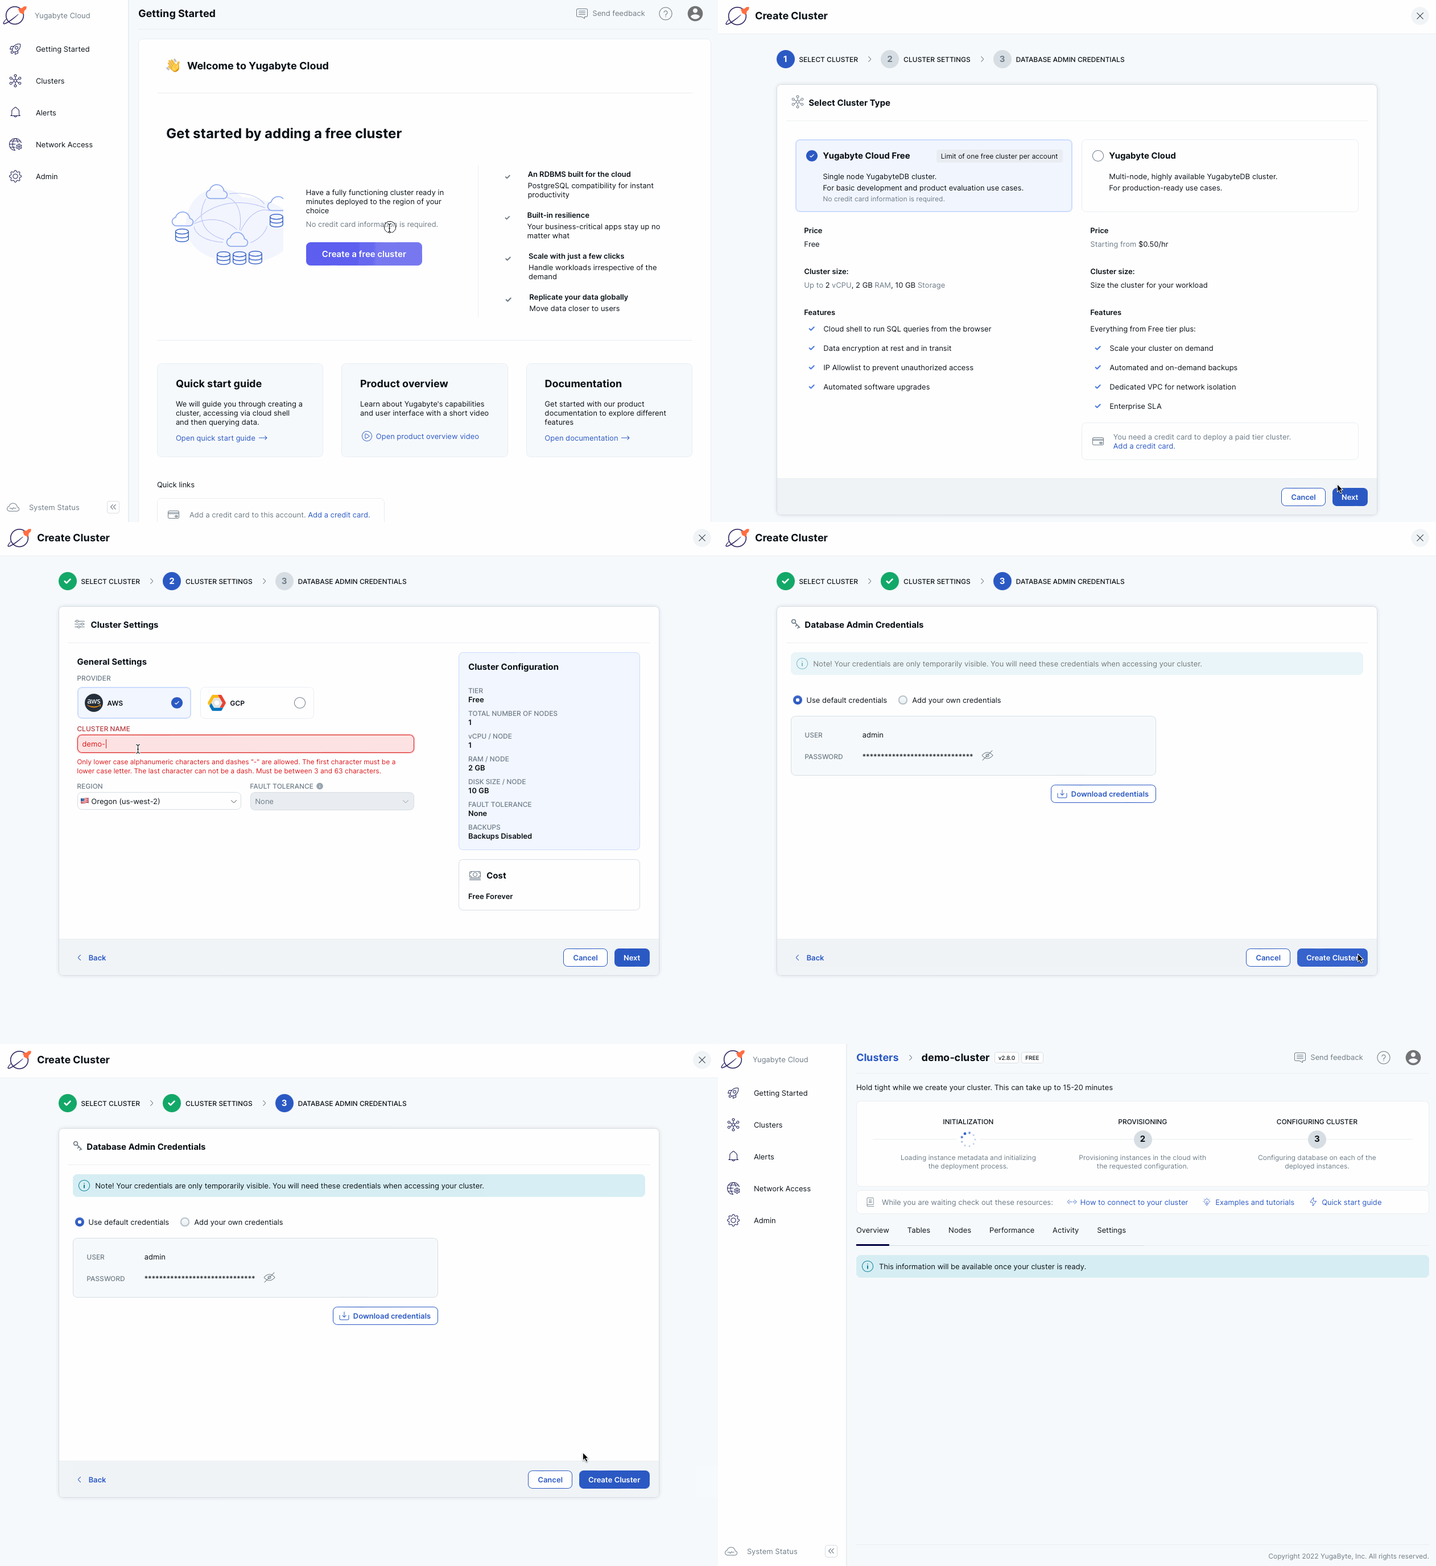
- Click the "Create a free cluster" button and select the "Yugabyte Cloud Free" instance type.
- Name the instance as "demo-cluster" and pick a cloud region that is nearest to you.
- Download your credentials for future reference and click Next to create the cluster.
- While the cluster is being prepared (may take several minutes), feel free to proceed with the next section of this tutorial by creating a Hasura backed-as-a-service (BaaS).
Deploy Hasura BaaS
Next, provision a free GraphQL BaaS using Hasura Cloud:
- Create or sign in to your Hasura Cloud account.
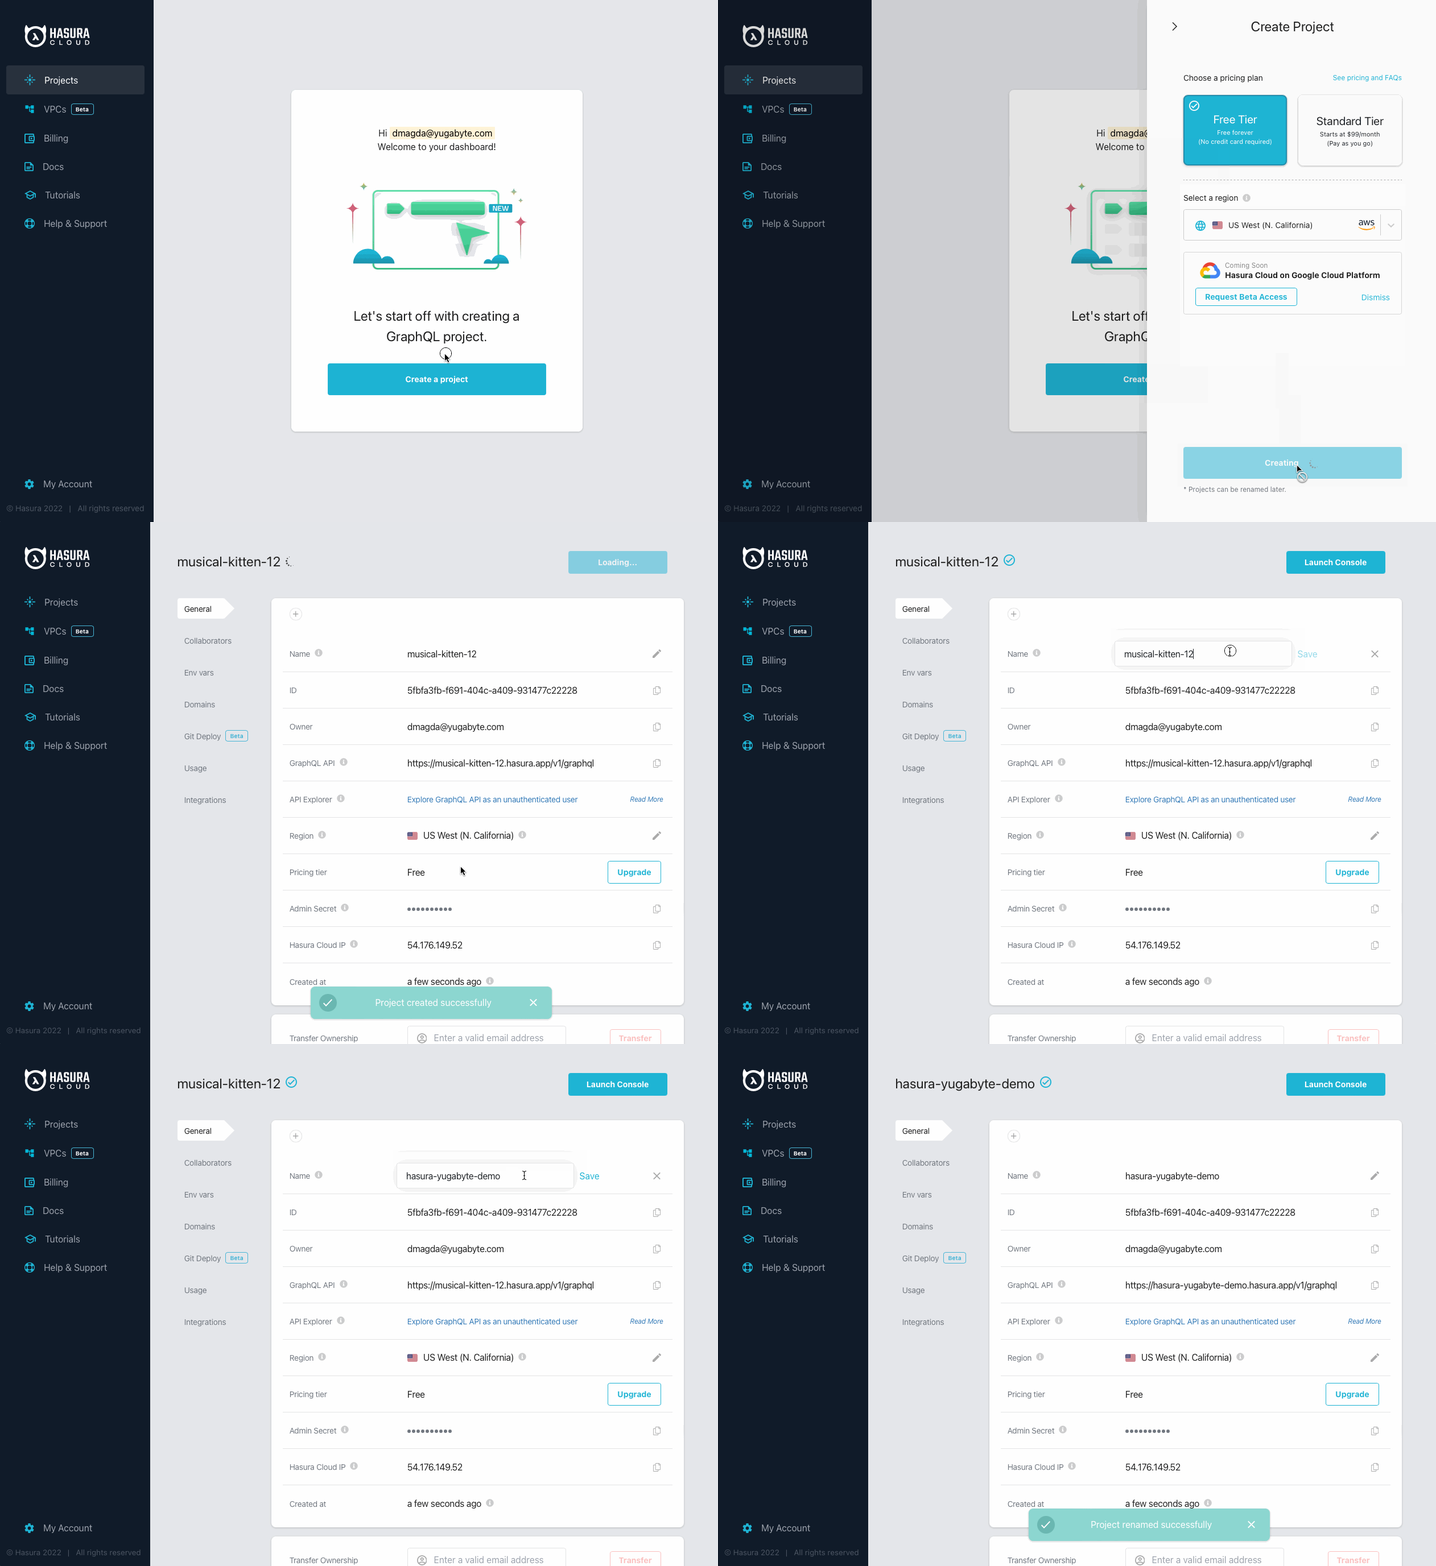
- Create a free Hasura project:

- Click the Create a project button and select the Free Tier option.
- Name the project as hasura-yugabyte-demo and click Save.
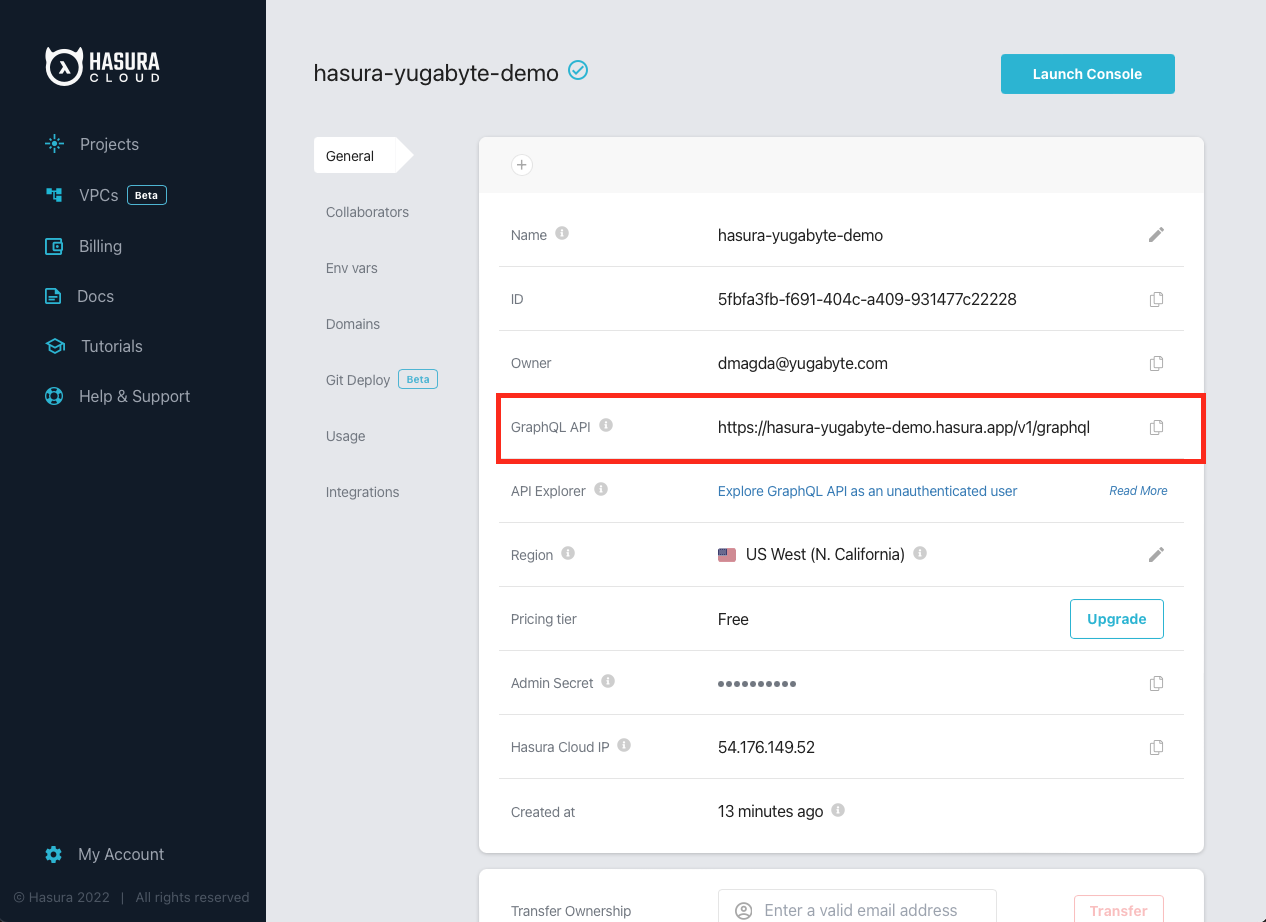
Your GraphQL BaaS is now ready for usage and can be accessed through the endpoint provided in the GraphQL API section of the project’s settings screen.

Did you find this page helpful?
Start with GraphQL on Hasura for Free
Build apps and APIs 10x faster
Built-in authorization and caching
8x more performant than hand-rolled APIs


