Exploring faster reads with Google AlloyDB PostgreSQL and Hasura GraphQL API
Google announced the launch of AlloyDB, a PostgreSQL compatible SQL database service in their I/O 2022 event. This is comparable to AWS Aurora PostgreSQL but Google claims better performance; 2x faster than Aurora, 4x faster than standard Postgres and even 100x faster for analytical workloads.
Update: On December 15, 2022, Google announced the general availability of AlloyDB and also announced the AlloyDB Partner Ecosystem. We are excited to announce that Hasura is a launch partner in this ecosystem.
Hasura should be able to connect to a fully compatible PostgreSQL database. In this post, we will explore connecting to AlloyDB step by step and finally make queries to see performance impact in comparison to standard Postgres.
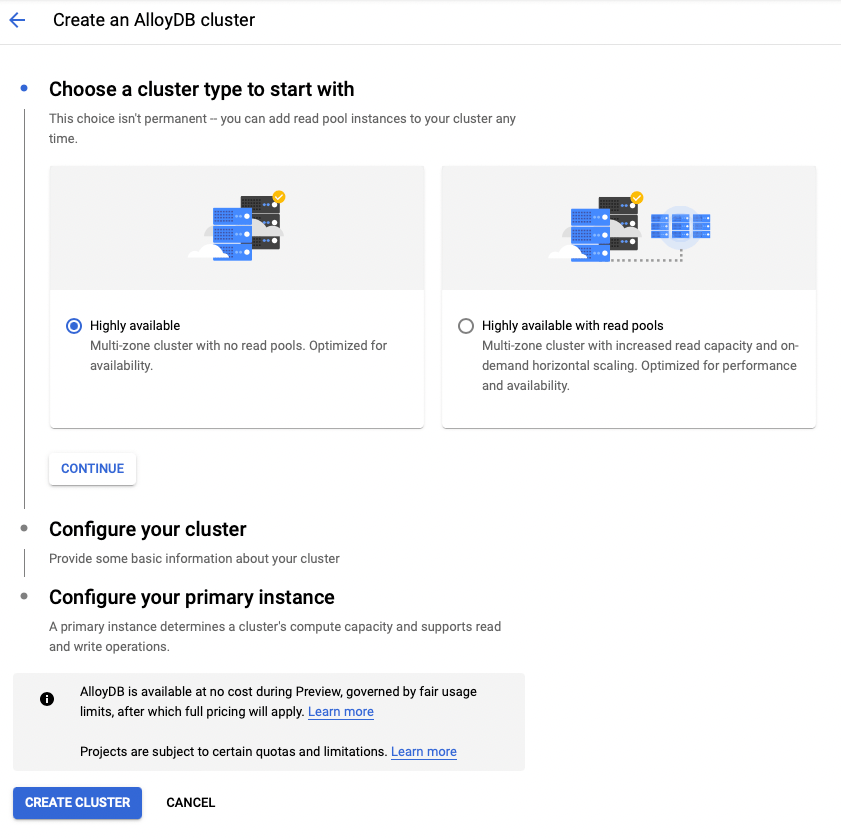
Configure your cluster with cluster ID, postgres password, region of choice, network path and click on Continue
Configure your primary instance with an instance ID and machine type.
Click on Create Cluster.
The cluster creation takes sometime. Meanwhile, let us setup the Auth proxy so that we can securely connect to AlloyDB from an authorized instance.
Connect securely using AlloyDB auth proxy
The AlloyDB Auth proxy gives IAM based connection authorization with a secure and encrypted 256-bit AES cipher between your client and an AlloyDB instance.
The idea is to run the Auth proxy somewhere authorized to connect to AlloyDB instance (say a GCE instance with IAM / service account configured) and expose the authorized instance to the outside world (like Hasura Cloud) to be able to establish a connection.
Create GCE Instance
Create a Compute Engine VM that can connect to AlloyDB instances using private services access.
Select the project containing the AlloyDB instance you want to connect to.
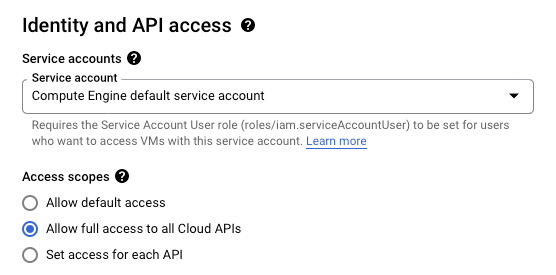
Click on Create instance, enter the name for the instance and set the following:
Access scopes (located under Identity and API access): set to Allow full access to all Cloud APIs.
fn
Network interfaces: set to the VPC network configured for private services access to AlloyDB:
a. Expand Networking, disks, security, management, sole-tenancy.
b. Expand Networking.
c. If Network interfaces is not set to the VPC network configured for private services access, expand it and then set Network to the VPC network.
Tip: Select the region of GCE instance closer or same as Hasura Cloud project
Get IP Address of the AlloyDB Instance
Head to the cluster listing page for AlloyDB and get the private IP address of the instance. Now this will be used in the next step to run the auth proxy connecting to the AlloyDB postgres instance.
This would start the Auth proxy client and expose it to the public. Do note that this setup is a ephermeral one. You should run the auth proxy in a permanent mode (for example via docker detached mode).
Add Firewall Rule
Once the Auth proxy is running, we should add a firewall rule that allows connection from Hasura Cloud project to this AlloyDB instance.
Copy the Hasura Cloud IP for your project from the Hasura Cloud dashboard.
Create a new firewall rule for the network interface attached to the AlloyDB instance and allow tcp:port 5432 and in the source IPv4 range, specify the Hasura Cloud IP. For example: 154:176:149:52/32.
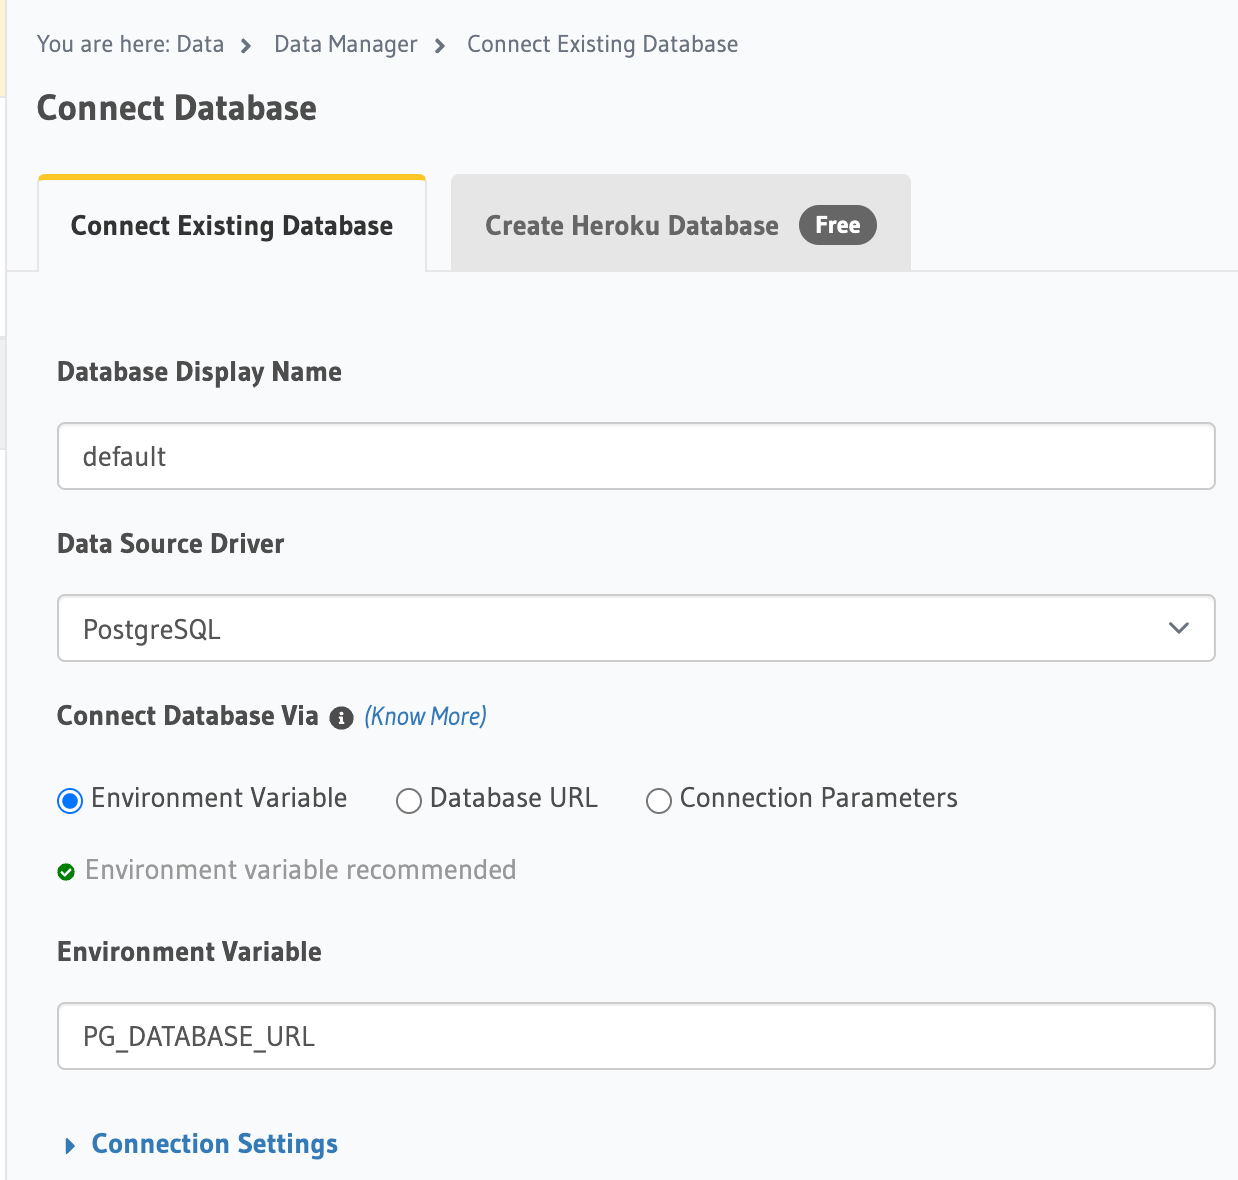
Add AlloyDB to Hasura Cloud project
All the configuration to connect an AlloyDB postgres to Hasura cloud project is done. Let us form the connection string now.
We need to enabe the AlloyDB Columnar Engine (CE). First, we need to adjust the instance so that the new google_columnar_engine.enabled flag is set to ON. This would restart the instance, so please be patient.
Next up, create the columnar engine extension
CREATE EXTENSION google_columnar_engine;
Optionally set the google_columnar_engine.memory_size_in_mbto a larger value.
Let us track the table pgbench_accounts to start making the GraphQL query. Finally make the following GraphQL query:
query{pgbench_accounts{aidbidfiller}}
This will fetch all the 1M rows from the pgbench_accounts.
There is a notable difference in query response times and improved execution times on the AlloyDB cluster instance.
We will update detailed benchmark numbers here soon, but roughly we saw a 3x improvement in response times.
Do you have a workload or a use case that runs analytical queries or heavy transactional queries? If so, AlloyDB might be worth a look for the performance gains.