Hasura is an open-source engine that gives you realtime GraphQL APIs on new or existing Postgres databases, with built-in support for stitching custom GraphQL APIs and triggering webhooks on database changes.
Deploy GraphQL Engine on Hasura Cloud and setup PostgreSQL via Heroku:
Note the Hasura URL for GraphQL Endpoint. You will be configuring this in the app later.
Apply the migrations by following the instructions in this section to create the necessary database schema and permissions.
Now the backend is ready! You will be able to instantly query using Hasura GraphQL APIs. The endpoint will look like (https://myapp.hasura.app/v1/graphql). We will come back to this during the integration with the Next.js app.
Run JWT Server
We will now run the JWT server locally to handle signup and login requests from the Next.js app.
#clone the repo
git clone https://github.com/hasura/graphql-engine

# Change directory
cd community/boilerplates/auth-servers/passportjs-jwt-roles

# Install NPM dependencies
npm install

# Generate the RSA keys
openssl genrsa -out private.pem 2048
openssl rsa -in private.pem -pubout > public.pem

# print the keys in an escaped format
awk -v ORS='\\n' '1' private.pem
awk -v ORS='\\n' '1' public.pem
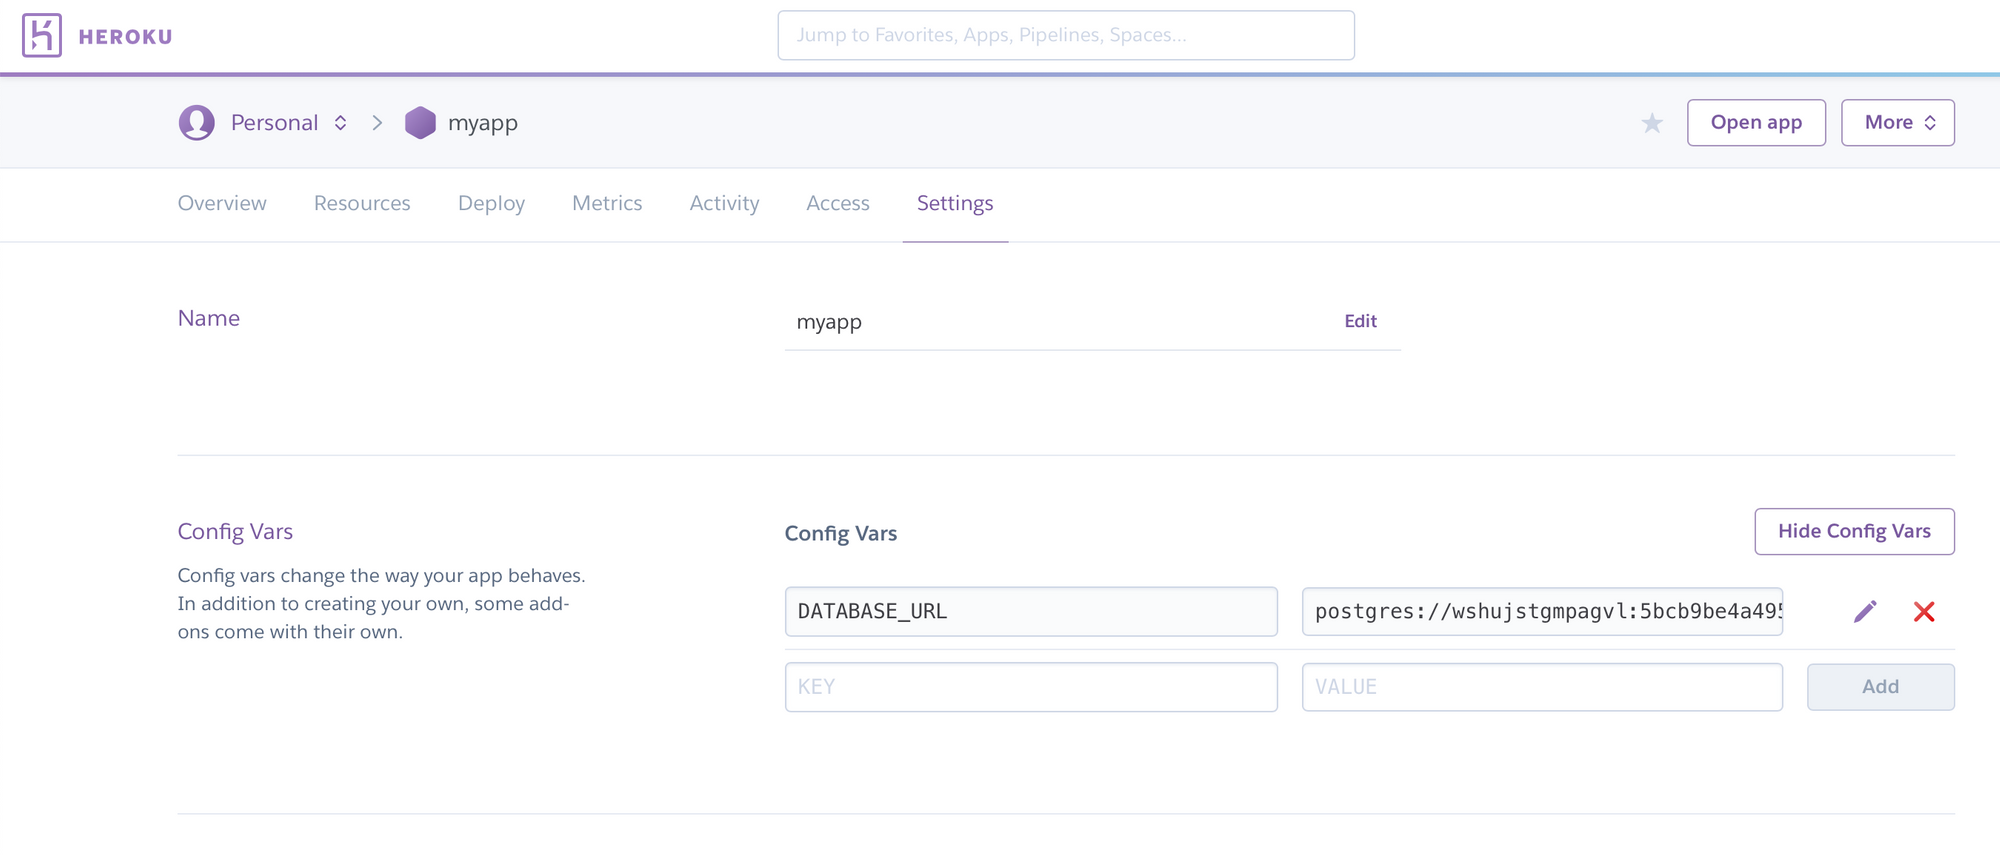
Now, get the database URL from Heroku by heading to the settings page of the app.
export DATABASE_URL=postgres://postgres:@localhost:5432/postgres?ssl=true

# Then simply start your app
npm start
Replace DATABASE_URL with the value obtained from Heroku config. Do note that you need to append ?ssl=true at the end of the DATABASE_URL.
Configure JWT with Hasura
Now that the JWT server is ready, we need to configure Hasura to use the JWT Secret. The env HASURA_GRAPHQL_JWT_SECRET should be set like this:
{ "type": "RS256", "key": "<AUTH_PUBLIC_KEY>" }
Where <AUTH_PUBLIC_KEY> is your RSA public key in PEM format, with the line breaks escaped with "\n". This was generated just above.
In order to configure the JWT Secret we also need to set the admin secret.
Run the Next.js App
Both the JWT server and Hasura GraphQL Engine has been setup and configured.
Now let's run the Next.js app by running the following commands:
# Change directory
cd community/sample-apps/nextjs-8-serverless/with-apollo-jwt/app
Configure the Hasura app url in lib/init-apollo.js.
Configure the Auth Server URL in pages/signup.js and pages/login.js. For example,
The actual implementation of signup and login sets the cookie with the token.
In the file utils/auth.js, we handle the logic of what needs to be done once the server returns the token after successful signup/login.
Authorization using JWT
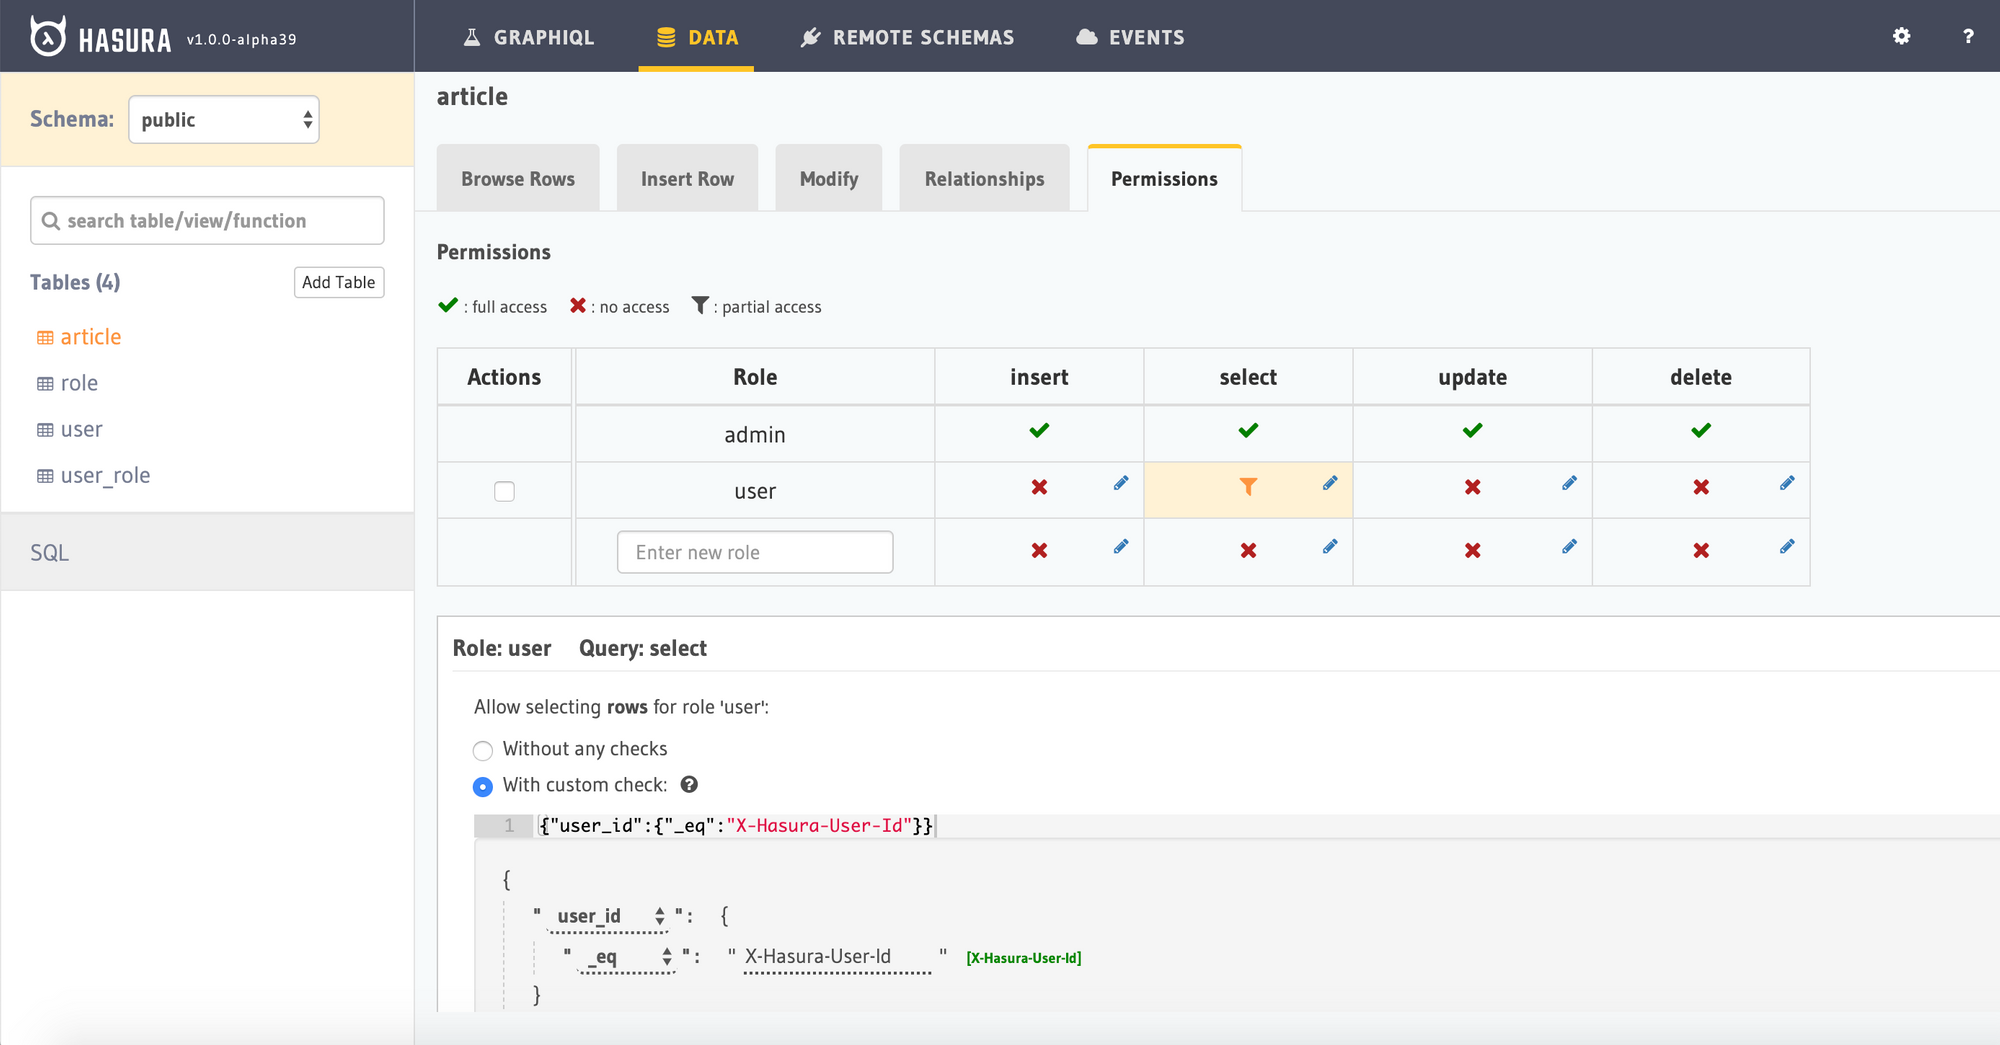
Now that the user is logged in, we would like to fetch only the articles written by the same user. The permissions have been configured in such a way that only the user who wrote the article will be able to fetch the data.
Head to the Hasura app URL to open Hasura console and navigate to Data->article->Permissions to see the permissions defined for the user role.
The permission check looks like:
{ "user_id": {"_eq": "X-Hasura-User-Id"}}
This means that when a request is being sent with Authorization: Bearer <token> from the client, it will look for the X-Hasura-User-Id value from the token payload and filter it for the user_id column, ensuring that only logged in users get the data and also get only their data. The user has permissions to access all columns.
Protected Routes using HOC
Though we have handled authorized queries, we would like to restrict access to pages like /articles at the route level because it is available only for logged in users. We again make use of an HOC to handle this.
When a navigation is triggered on a protected route, we call a utility helper method auth which will fetch the token from the cookie using the nextCookie module. In case the token is not available, then it will redirect to /login page.
export const withAuthSync = WrappedComponent =>
  class extends Component {
    static displayName = `withAuthSync(${getDisplayName(WrappedComponent)})`

    static async getInitialProps (ctx) {
      const token = auth(ctx)

      const componentProps =
        WrappedComponent.getInitialProps &&
        (await WrappedComponent.getInitialProps(ctx))

      return { ...componentProps, token }
    }

    constructor (props) {
      super(props)

      this.syncLogout = this.syncLogout.bind(this)
    }

    componentDidMount () {
      window.addEventListener('storage', this.syncLogout)
    }

    componentWillUnmount () {
      window.removeEventListener('storage', this.syncLogout)
      window.localStorage.removeItem('logout')
    }

    syncLogout (event) {
      if (event.key === 'logout') {
        console.log('logged out from storage!')
        Router.push('/login')
      }
    }

    render () {
      return <WrappedComponent {...this.props} />
    }
  }

export const auth = ctx => {
  const { token } = nextCookie(ctx)

  /*
   * This happens on server only, ctx.req is available means it's being
   * rendered on server. If we are on server and token is not available,
   * means user is not logged in.
   */
  if (ctx.req && !token) {
    ctx.res.writeHead(302, { Location: '/login' })
    ctx.res.end()
    return
  }

  // We already checked for server. This should only happen on client.
  if (!token) {
    Router.push('/login')
  }

  return token
}
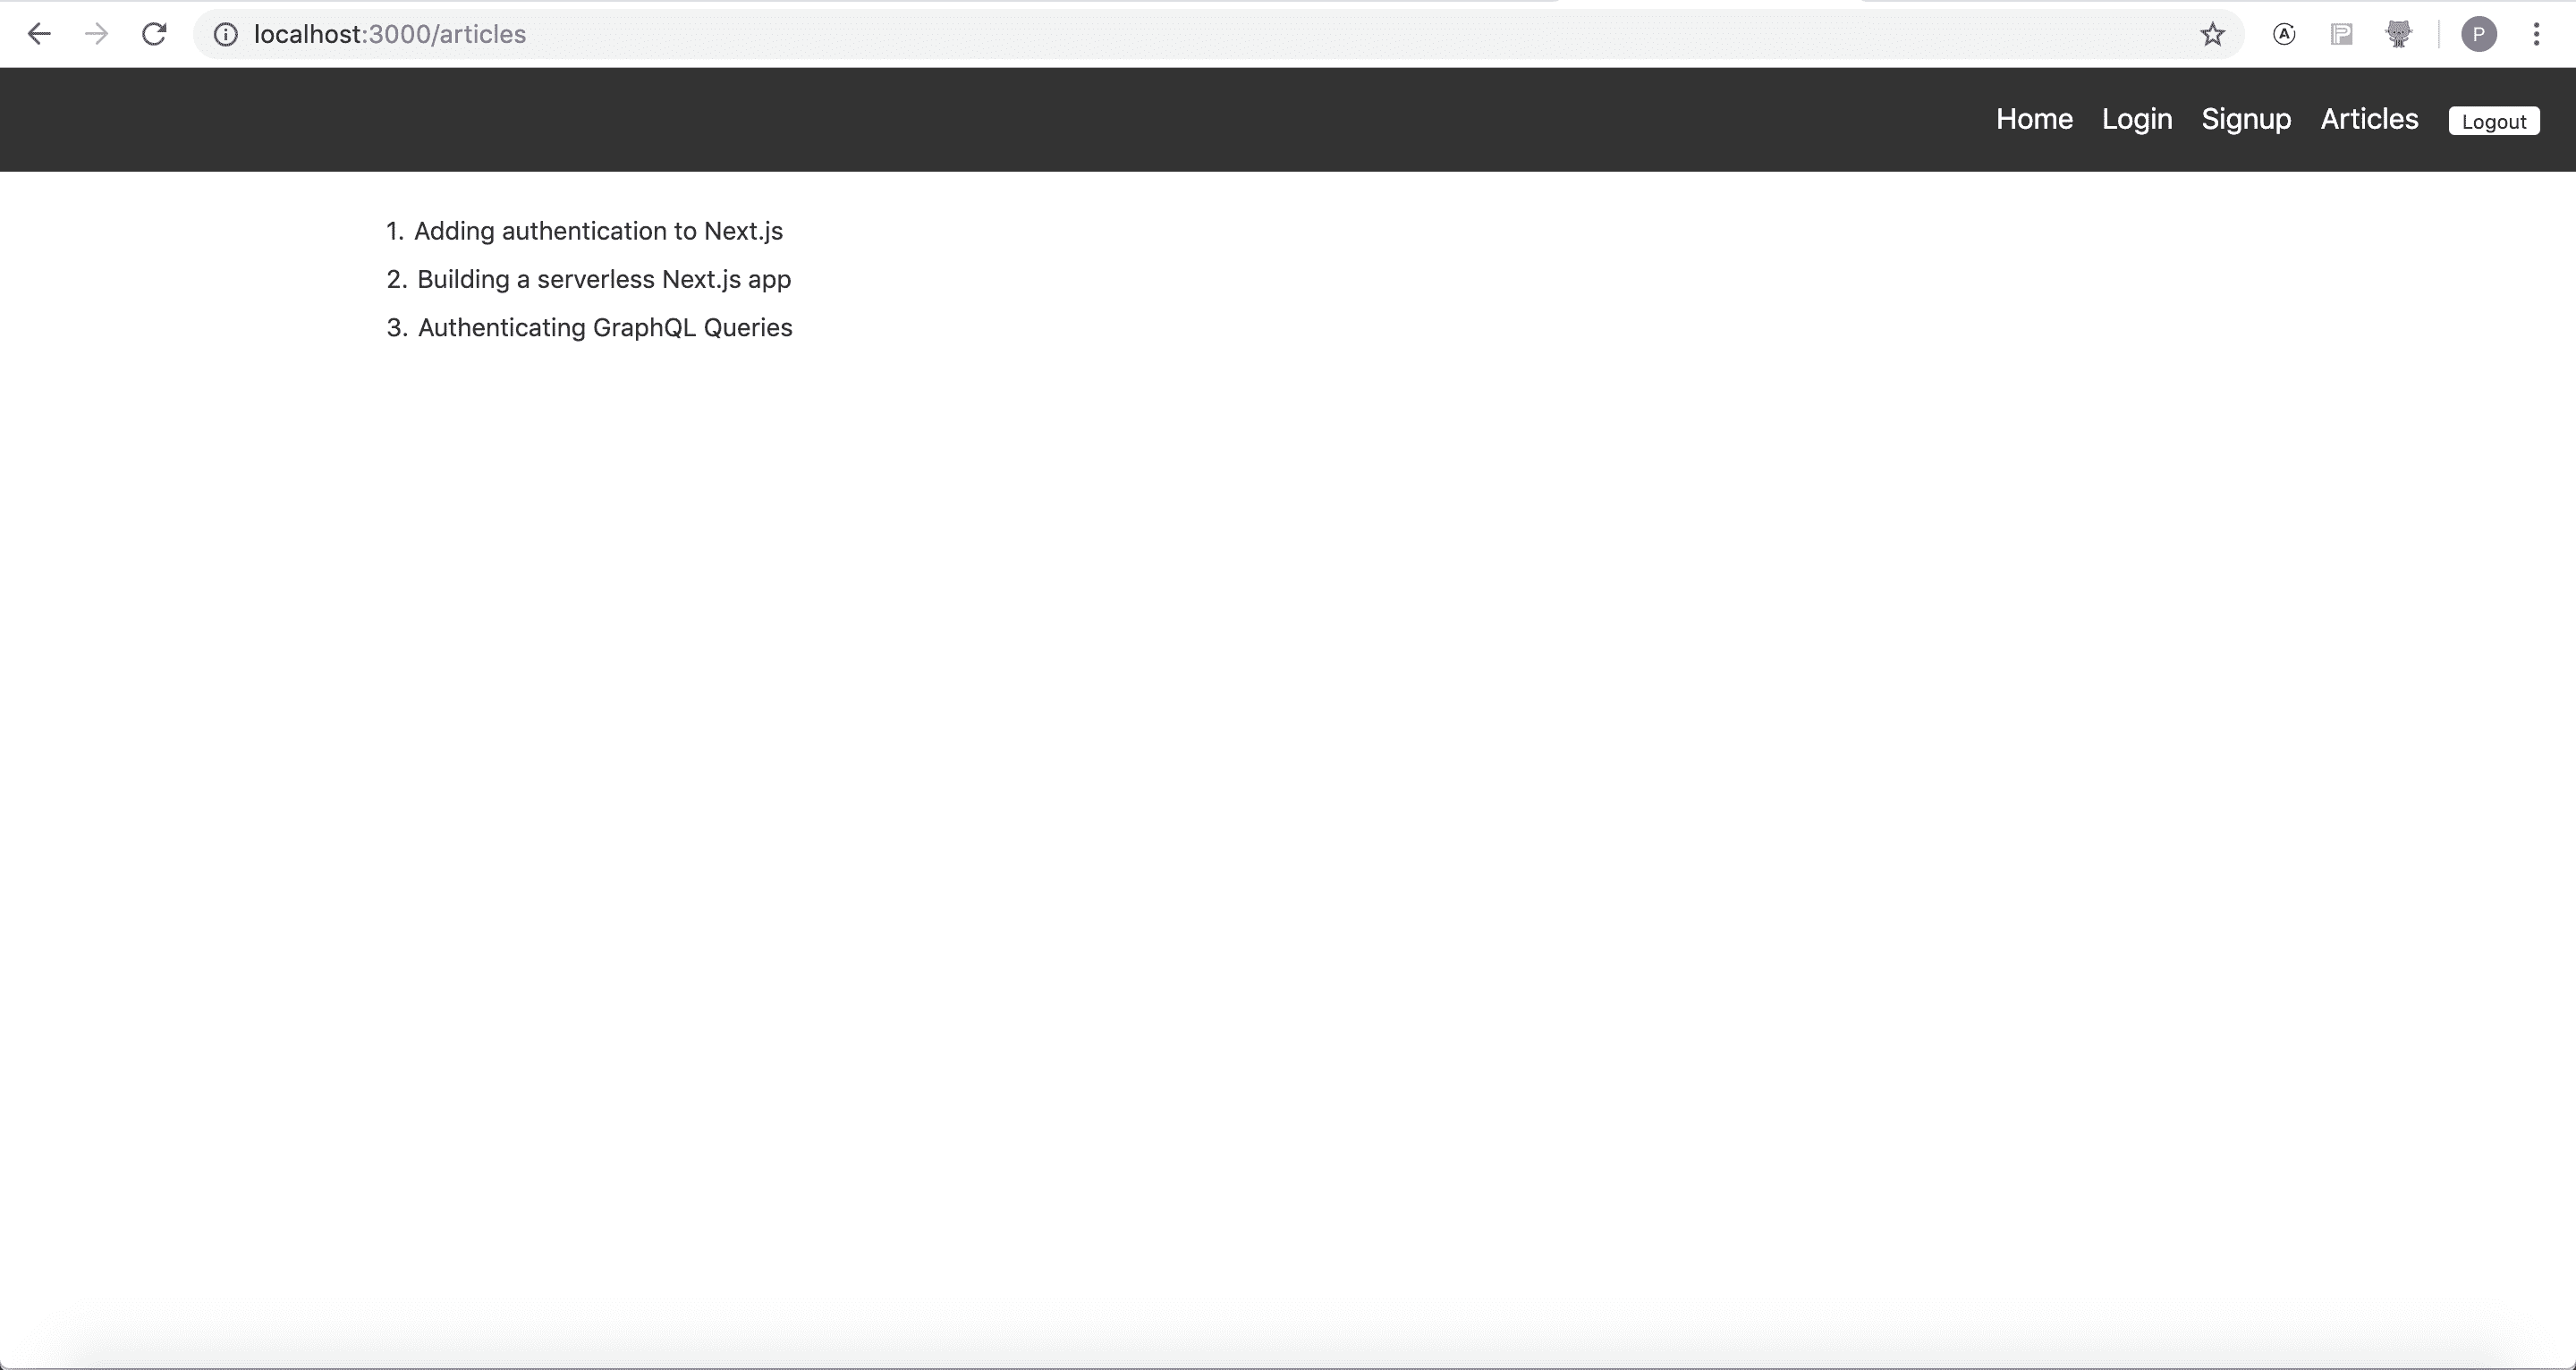
We wrap the protected components like articles using the withAuthSync HOC which will take care of the redirects on the server.
After logging in, when you visit the articles page, you should be seeing the articles written by you.
Don't be surprised to see data being empty. You would need to insert articles tagging your user id in the Hasura console.
Deploy on Now
We can deploy this Next.js app on now.sh with the serverless target.
Take it for a spin and let us know what you think. If you have any questions or run into any trouble, feel free to reach out to us on twitter, github or on our discord server.