/

hasura-header-illustration

Fetch your GraphQL data automagically: Building a movie app with Hasura & gqless

If you’re into laziness and magic (who isn’t?), here’s a frontend tidbit that will blow your mind:

ES6 Proxies let you assign a custom handler for fundamental operations like property lookup. gqless (by Sam Denty), a next-generation GraphQL client inspired by Relay & Apollo Client, uses this to know when properties are accessed, and convert the paths into GraphQL queries.

If you feel, as I do, that this might change your world forever, here’s a demo video of Sam and me building a movie app. Follow along with the tutorial below to join in the fun! You can find the demo app here on GitHub.

Step 1: Hasura setup

  • Create a project on Hasura Cloud. Click on the "Deploy to Hasura" button to signup for a free account and create a new project.
Deploy to Hasura button
  • From the Data tab on the Hasura console, create two tables: movies and characters.
    • Columns for movies: id (uuid), name (text), image_url (text)
    • Columns for characters: id (uuid), name (text), image_url (text), movie_id (uuid)
    • For the two id columns, enter the function gen_random_uuid() in the default value field.
  • Create a one-to-many relationship between movies and characters by:
    • Adding a foreign key constraint from the movie_id field of the characters table to the id field of the movies table
    • Clicking “Track All” in the Data tab
  • From the “Insert Row” tab on each table, add your favorite movies and characters as rows! Hint: you can also do this with mutations in the GraphiQL tab.

That’s all you need to get going with Hasura!

Step 2: App setup

Assuming you have npm installed, from your Terminal, run:

npx create-react-app movies

Then cd movies and install dependencies:

npm install gqless @gqless/react typescript
npm install @gqless/cli --save-dev

Open your app in your favorite text editor, preferably VS Code so you can autocomplete all the things—even GraphQL fields 😮, as we’ll see in a second.

Next, follow the instructions here to set up codegen and generate all the types from your schema. For the url, use your Hasura GraphQL endpoint, found in the GraphiQL tab of the Hasura console.

After you run the generate command, you should see a new folder in your app where you specified the outputDir.

We’re all set up for gqless magic!

Step 3: Basic app

Create two new files in your src folder.

index.tsx:

import React from "react";
import reactDOM from "react-dom";
import { App } from "./App";

reactDOM.render(<App />, document.getElementById("root"));

App.tsx:

import React from "react";

export const App = () => {
 return <div>movies!</div>;
}

From your Terminal, run npm start. Your app should load at http://localhost:3000.

Step 4: Fun with gqless

Let's make a list of movies, using gqless to run the query.

In App.tsx, update imports:

import React, { Suspense } from "react";
import { query } from "./movies_api";
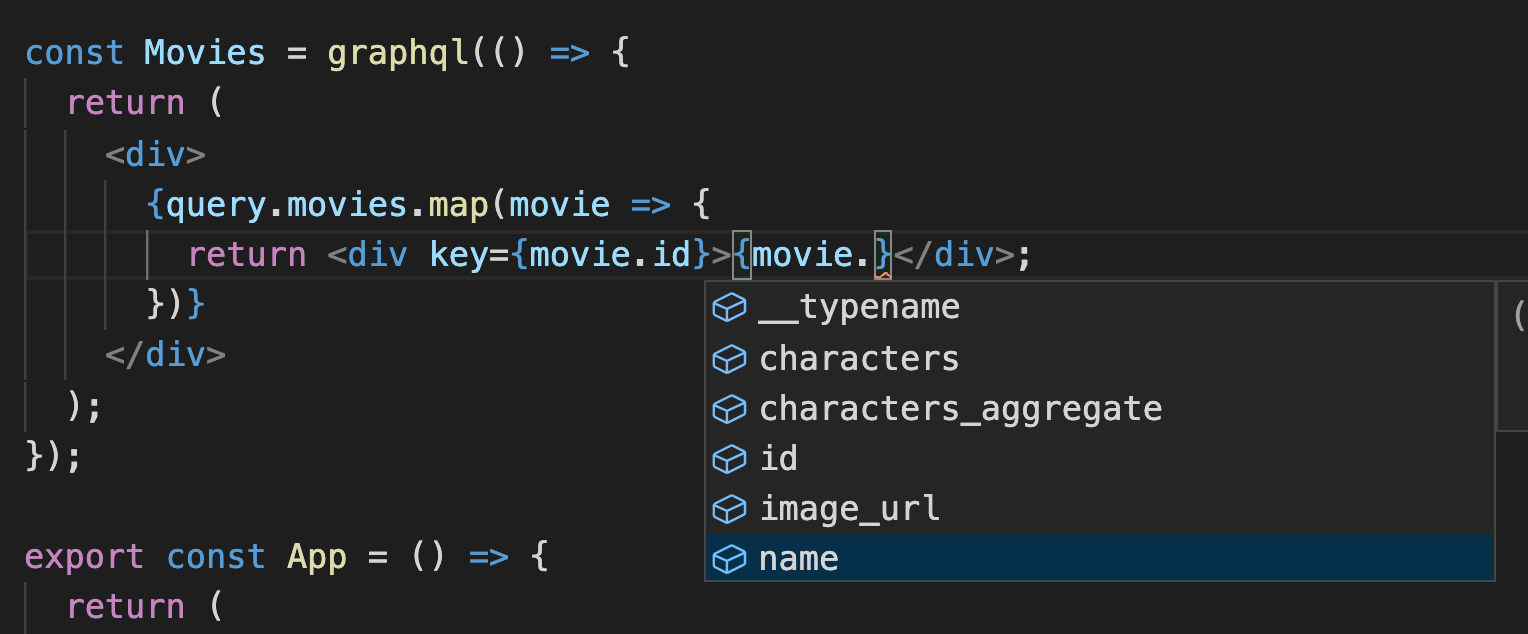
import { graphql } from "@gqless/react";

We'll use React's Suspense to specify a loading state. query will return an ES6 Proxy, which will be automatically typed from our schema. And we'll wrap our component in gqless's graphql so it automatically updates when the data is fetched.

Now add a new Movies component:

const Movies = graphql(() => {
  return (
    <div>
      {query.movies.map(movie => {
        return <div key={movie.id}>{movie.name}</div>;
      })}
    </div>
  );
});

export const App = () => {
  return (
    <Suspense fallback="loading">
      <Movies />
    </Suspense>
  );
};

See what happened there? You didn't have to write out the GraphQL query separately. All you need is query.movies, and gqless takes care of the query for you behind the scenes.

And here's the kicker: in VS Code, when you type movie., you can autocomplete the GraphQL fields available on the object! 💃

Step 5: Listing characters

Let's list the characters for each movie. Update the types import:

import { query, movies } from "./movies_api";

We'll use the movies type in our new Movie component:

const Movies = graphql(() => {
  return (
    <div>
      {query.movies.map(movie => {
        return <Movie key={movie.id} movie={movie}></Movie>;
      })}
    </div>
  );
});

const Movie = graphql(({ movie }: { movie: movies }) => {
  return (
    <div>
      <h3>{movie.name}</h3>
      {movie.characters.map(character => {
        return <div key={character.id}>{character.name}</div>;
      })}
    </div>
  );
});

You should now see the characters listed under each movie title.

We want each movie to link to its own page. We'll use React Router for navigation, and emotion for styling. In your Terminal, run:

npm install react-router react-router-dom @types/react-router @types/react-router-dom @emotion/styled @emotion/core

And add imports to App.tsx:

import { BrowserRouter, Link, Switch, Route } from "react-router-dom";
import styled from '@emotion/styled';

Update the App component:

export const App = () => {
  return (
    <BrowserRouter>
      <Suspense fallback="loading">
        <Switch>
          <Route path="/movie/:id">
            {({ match }) => {
              const movie = query.movies_by_pk({ id: match?.params.id! });
              return movie && <Movie movie={movie}></Movie>;
            }}
          </Route>
          <Movies />
        </Switch>
      </Suspense>
    </BrowserRouter>
  );
};

We add a route for viewing a movie by id, in which we query for the movie, passing the id from the route as a variable. We then pass the returned movie to the Movie component.

Let's also update our Movie component, so that each movie links to its respective route:

const Movie = graphql(({ movie }: { movie: movies }) => {
  return (
    <div>
      <h3>
        <Link to={`/movie/${movie.id}`}>
          {movie.name}
        </Link>
      </h3>
      {movie.characters.map(character => {
        return <div key={character.id}>{character.name}</div>;
      })}
    </div>
  );
});

You should now be able to click on each movie to navigate to its route.

Step 7: Extensions!

You may have noticed that when you click on a movie, it says "Loading" even though we've already fetched the same data for the Movies component. To fix this, we can use gqless's extensions to customize the cache. First, we'll set keyed values to make sure movies are keyed by their id in the cache. Then, we'll set up cached redirects, which let you first search for an existing value in the cache before fetching from the network.

In /movies_api/extensions, open index.ts, and add the following:

import { GET_KEY, REDIRECT, RedirectHelpers } from "gqless";

// Keyed values
// object name `movies` must match type name from our schema
export const movies = {
  [GET_KEY]: (movie: any) => movie.id
  // now the movie should be keyed by its `id` in the cache
};

// Cached redirects
// the names `query_root` and `movies_by_pk` are based on our schema
export const query_root = {
  movies_by_pk: {
    // we check the cache before fetching from the network
    [REDIRECT](args: any, { getByKey }: RedirectHelpers) {
      return getByKey(args.id);
    }
  }
};

Now if you reload the page and click on each movie, you should no longer see the "Loading" text.

Step 8: List characters

First, quick clean up: We don't actually need to list the characters on the index page. So let's remove those and just show a link to each movie:

const StyledMovies = styled.div`
  display: flex;
  flex-direction: column;
`;

const Movies = graphql(() => {
  return (
    <StyledMovies>
      {query.movies.map(movie => {
        return (
          <Link key={movie.id} to={`/movie/${movie.id}`}>
            {movie.name}
          </Link>
        );
      })}
    </StyledMovies>
  );
});

Now, update type imports:

import { query, movies, characters } from "./movies_api";

And add new components for the character list:

const StyledCharacter = styled.div`
  display: flex;
  align-items: center;
`;

const CharacterImg = styled.img`
  width: 100px;
  height: 100px;
  object-fit: cover;
  border-radius: 50%;
  margin: 10px;
`;

const Characters = graphql(({ movie }: { movie: movies }) => {
  return (
    <div>
      {movie.characters.map(character => {
        return <Character key={character.id} character={character} />;
      })}
    </div>
  );
});

const Character = graphql(({ character }: { character: characters }) => {
  return (
    <StyledCharacter>
      <CharacterImg className="charImg" src={character.image_url} />
      {character.name}
    </StyledCharacter>
  );
});

Finally, we render Characters inside the Movie component, wrapped in a Suspense fallback so that the movie name loads first, and we see "Loading" text while the characters load:

const Movie = graphql(({ movie }: { movie: movies }) => {
  return (
    <div>
      <h3>
        <Link to={`/movie/${movie.id}`}>{movie.name}</Link>
      </h3>
      <Suspense fallback="loading">
        <Characters movie={movie} />
      </Suspense>
    </div>
  );
});

Conclusion

That wraps it up for our demo app! Here's a summary of what we learned:

  • How to set up array relationships with Hasura,
  • How to set up gqless using Hasura's GraphQL endpoint,
  • Many of gqless's awesome features, including:
    • Automagic data fetching,
    • Type generation,
    • Extensions for caching behavior.

Now that you have these newfound superpowers, what will you build next? Please share in the comments! And if you'd like to venture further into the world of fluent GraphQL clients, check out our recent blog post: Fluent GraphQL clients: how to write queries like a boss.

Blog
20 Mar, 2020
Email
Subscribe to stay up-to-date on all things Hasura. One newsletter, once a month.
Loading...
v3-pattern
Accelerate development and data access with radically reduced complexity.