Edit on GitHub
This course is no longer maintained and may be out-of-date. While it remains available for reference, its content may not reflect the latest updates, best practices, or supported features.
Auth0 Setup
Create Auth0 Application
- Navigate to the Auth0 Dashboard
- Signup / Login to the account
- Create a new tenant.
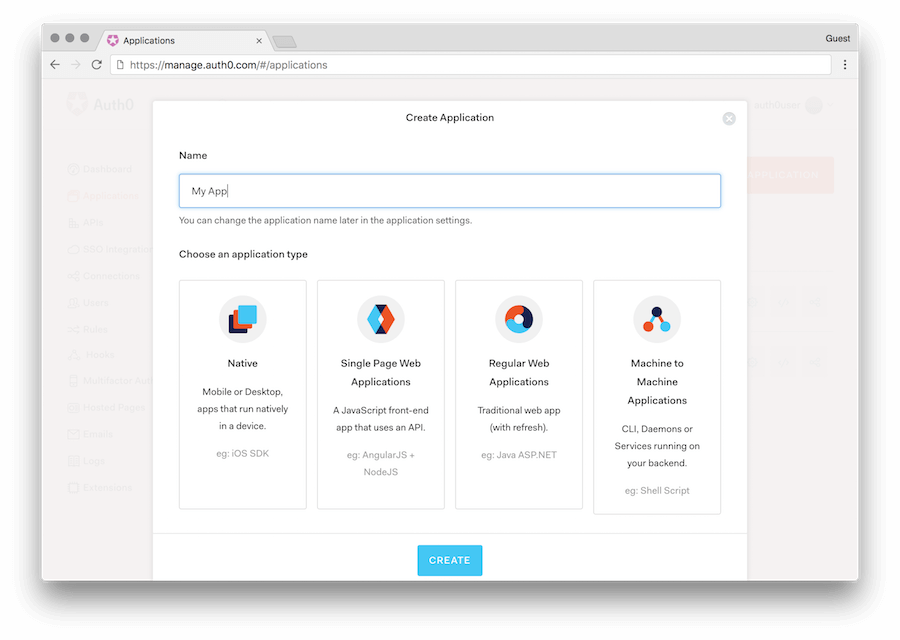
- Click on the
Applicationsmenu option on the left and then click the+ Create Applicationbutton. - In the Create Application window, set a name for your application and select
Regular Web Applications, since we will be using Next.js SSR
- In the settings of the application, we will add appropriate (e.g: http://localhost:3000/callback) URLs as Allowed Callback URLs and Allowed Web Origins. We can also add domain specific URLs as well for the app to work. (e.g: https://myapp.com/callback).
This would be the URL of the frontend app which you will deploy later. You can ignore this, for now. You can always come back later and add the necessary URLs.
Create Auth0 API
We need to create an API on Auth0 so that we can make the accessToken a valid JWT.
Now in the pop-up that appears, give the name of the API and the identifier. We can technically give any value.
Let's say the name is hasura and the identifier is https://hasura.io/learn.
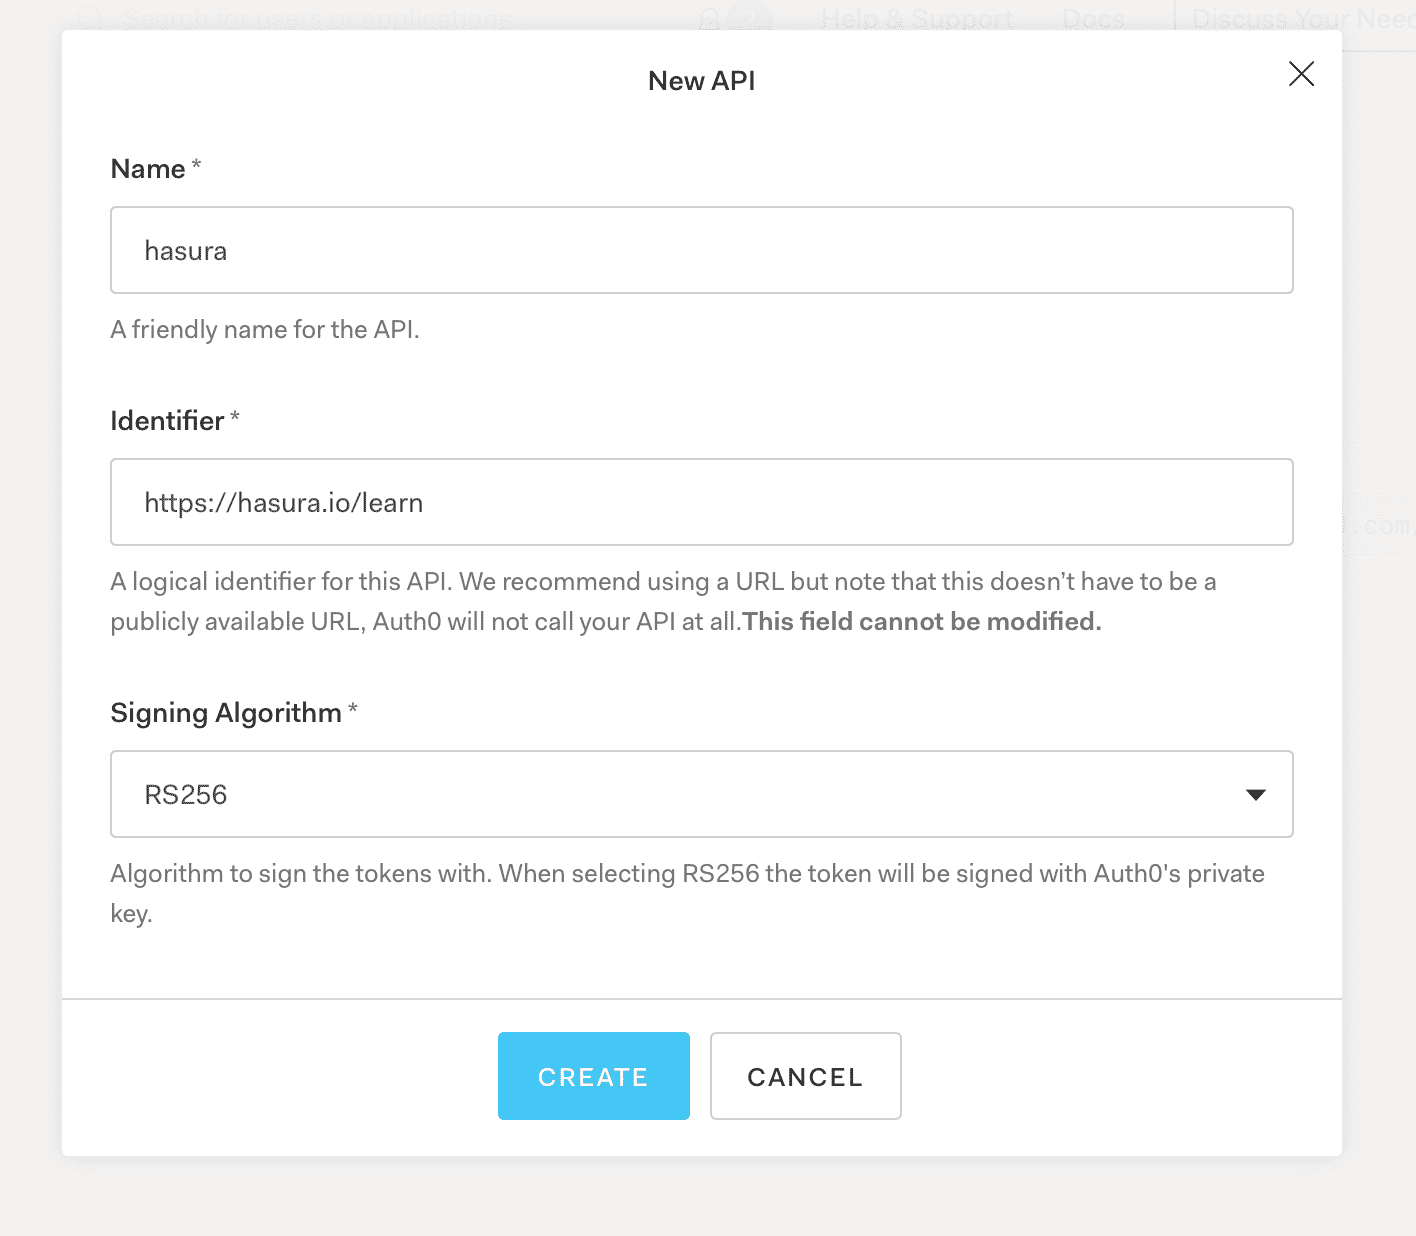
We can let the signing algorithm to be as it is. (RS256)
Click on Create once you are done.
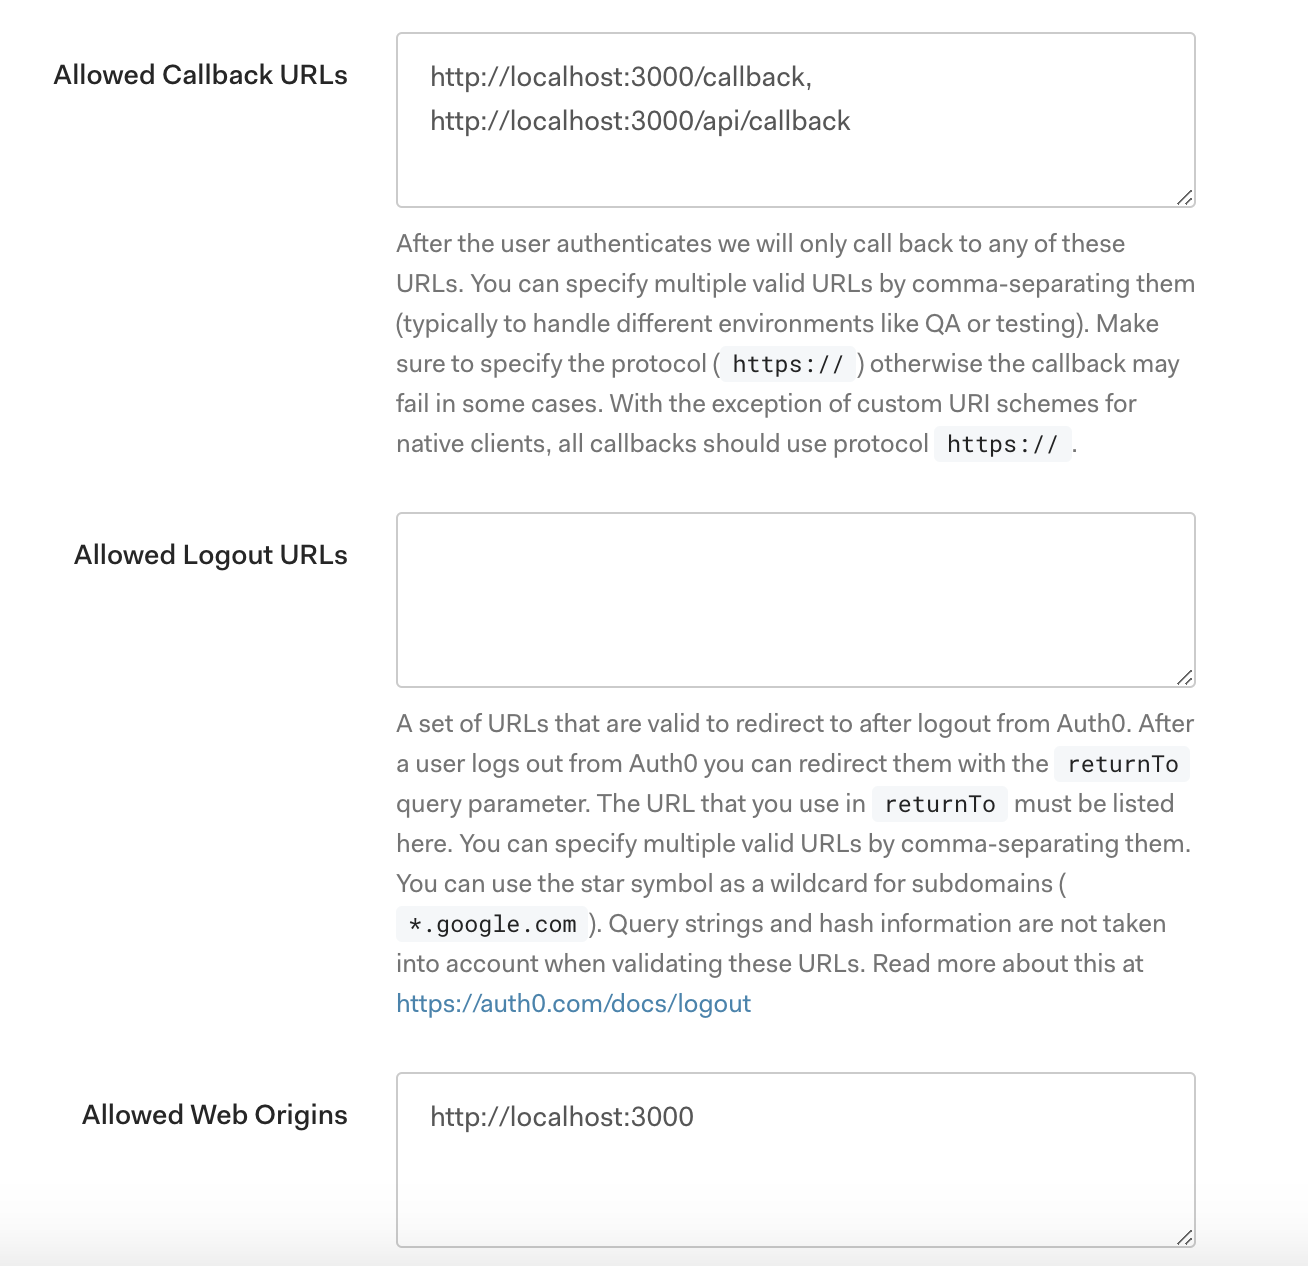
Add Callback URL
We will need to add a callback URL to the Application Settings to be able to allow the Next.js API route to be called.
Add http://localhost:3000/api/callback to the list of Allowed Callback URLs.
 .
.
Also make sure to add http://localhost:3000 to the list of Allowed Logout URLs.
 Build apps and APIs 10x faster
- Built-in authorization and caching
- 8x more performant than hand-rolled APIs