The event triggers in Hasura enable you to perform custom business logic on your data. They capture events (insert, update, delete) on a specified table and then invoke an HTTP webhook to run the custom business logic.
This article shows how to use event triggers with an MS SQL Server database.
SQL Server database
Before creating a Hasura application, you should have a SQL Server database available. Additionally, ensure that the database is reachable by Hasura.
Update the database settings to allow connections from the IP address of your Hasura project. You can find the IP address in the project's settings.
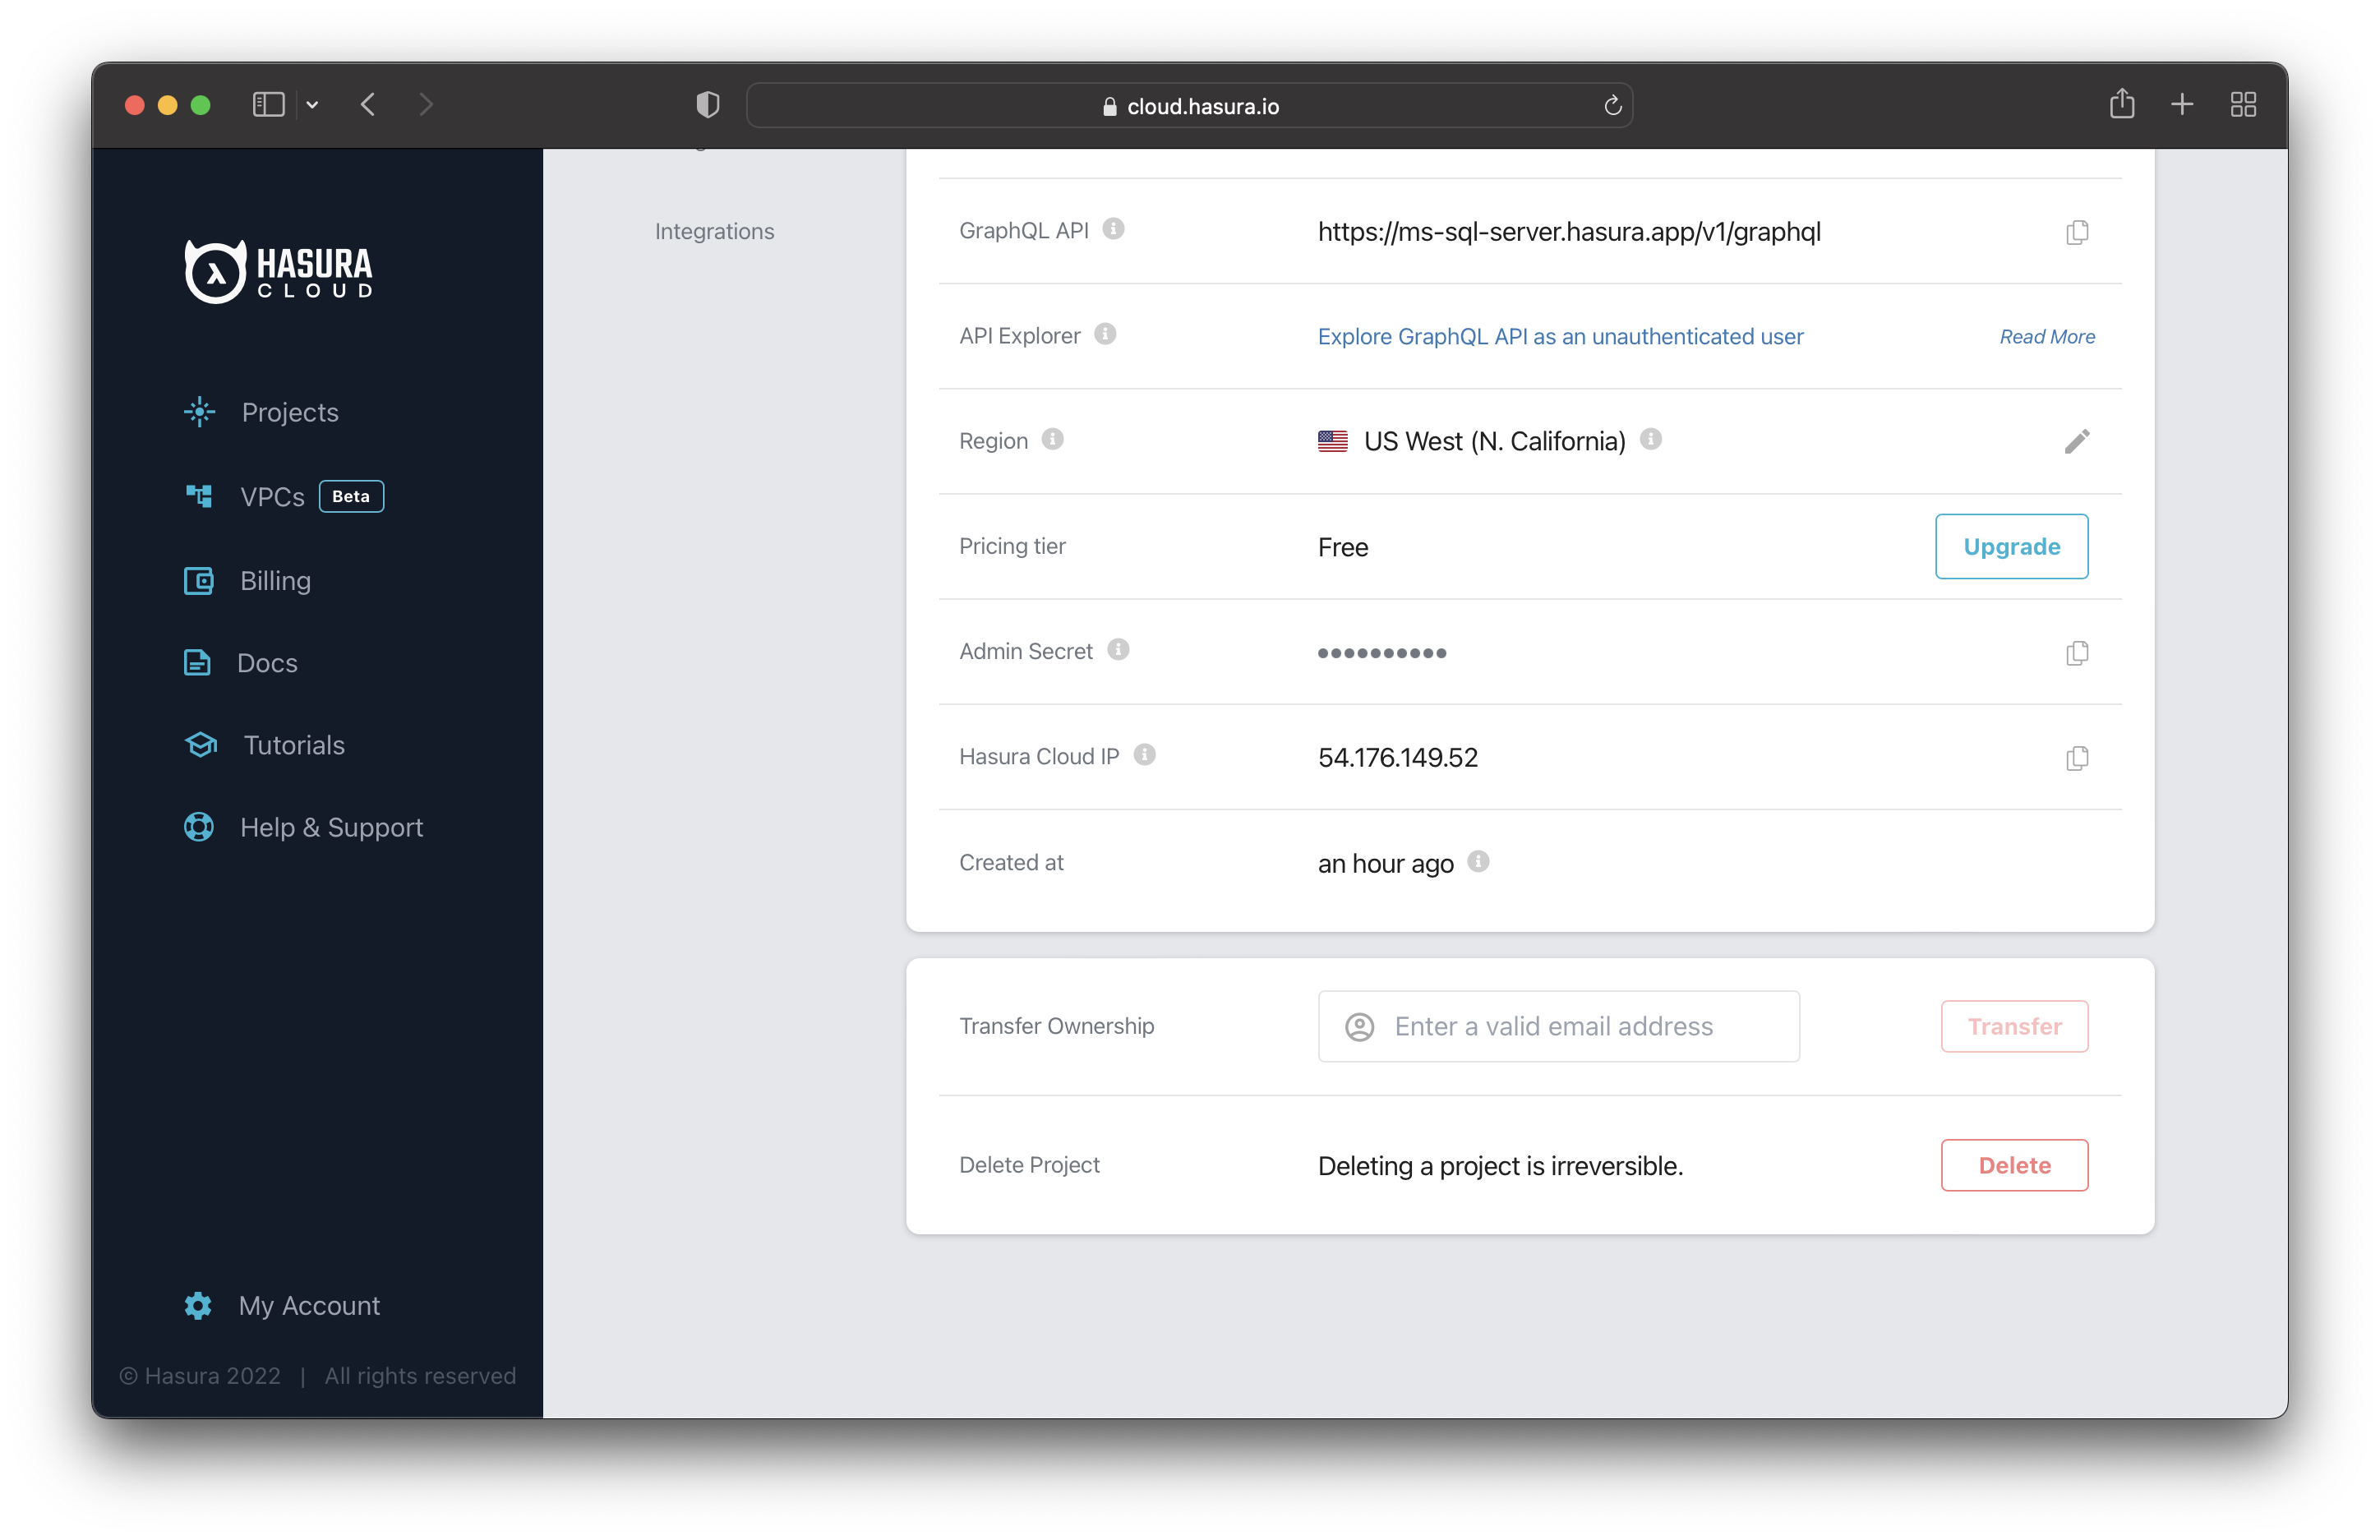
After that, you can connect the database to Hasura.
Connect SQL Server database to Hasura
Create a new Hasura project and launch the project console.

Then navigate to the "Data Manager" and connect Hasura to your existing SQL Server database. Choose a database name, select MS SQL Server and enter the database URL.
The database URL has the following format:
Driver={ODBC Driver 17 for SQL Server};Server=tcp:<b>hasura-test.database.windows.net</b>,<b>1433</b>;Database=<b>db-name</b>;Uid=<b>username</b>;Pwd=<b>password</b>;Encrypt=yes;TrustServerCertificate=no;Connection Timeout=30;
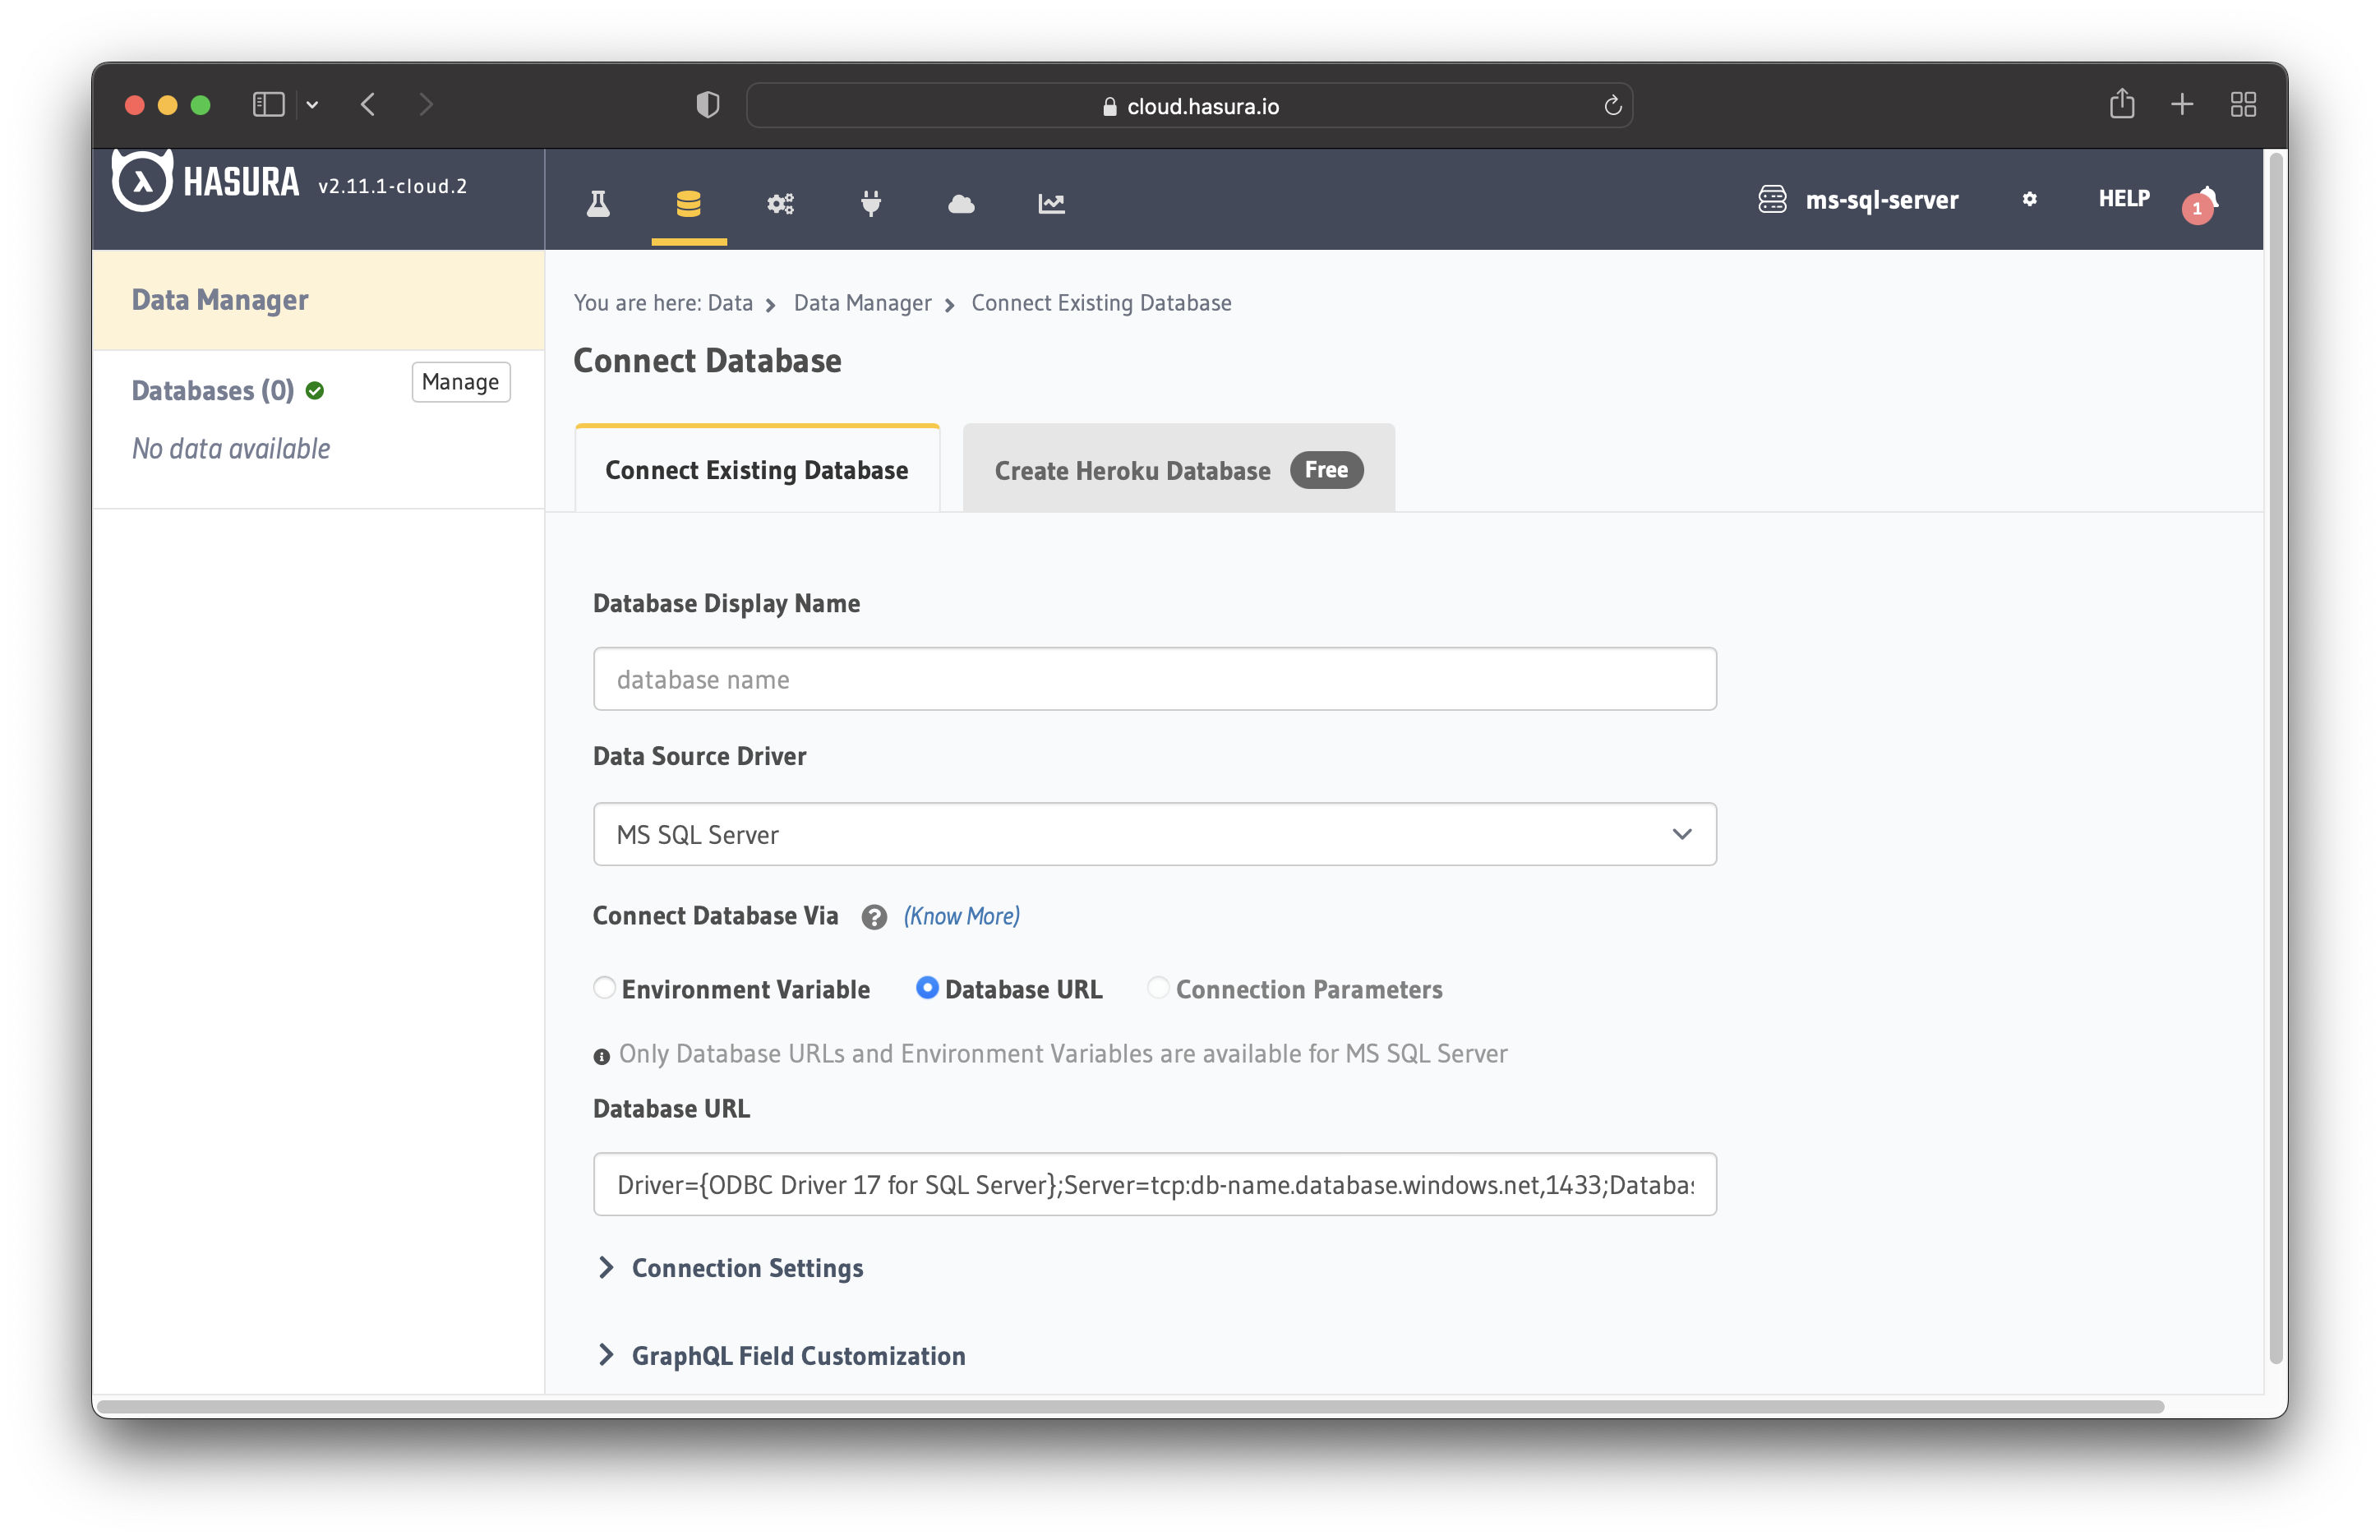
After connecting the database, create the user table with the following fields:
id of type "int" (Primary Key)name of type "varchar(250)"email of type "varchar(250)"
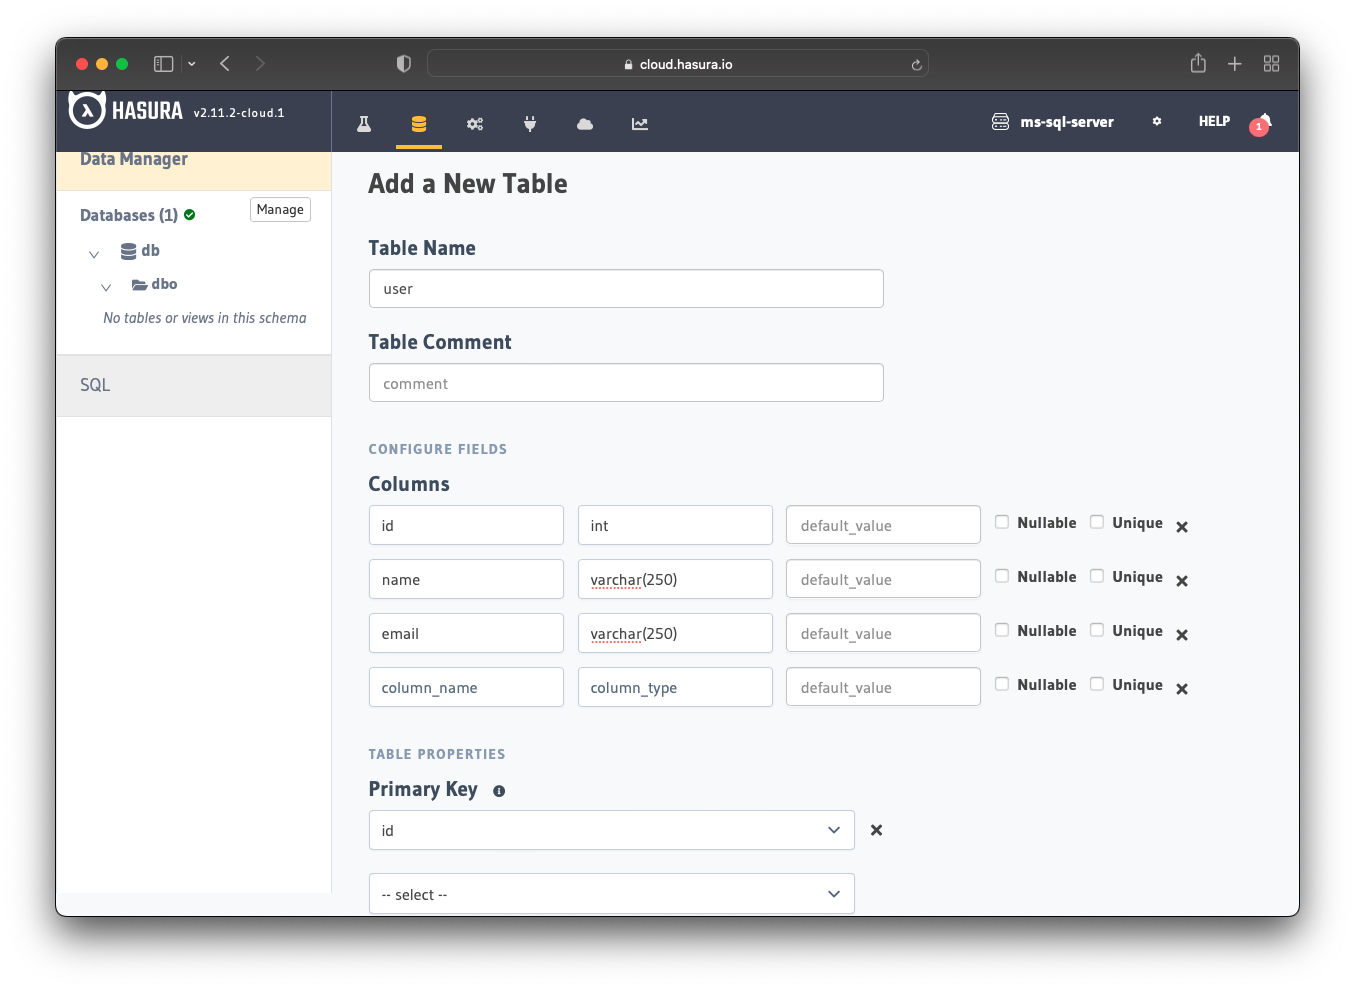
Choose the id field as the primary key and save the table.
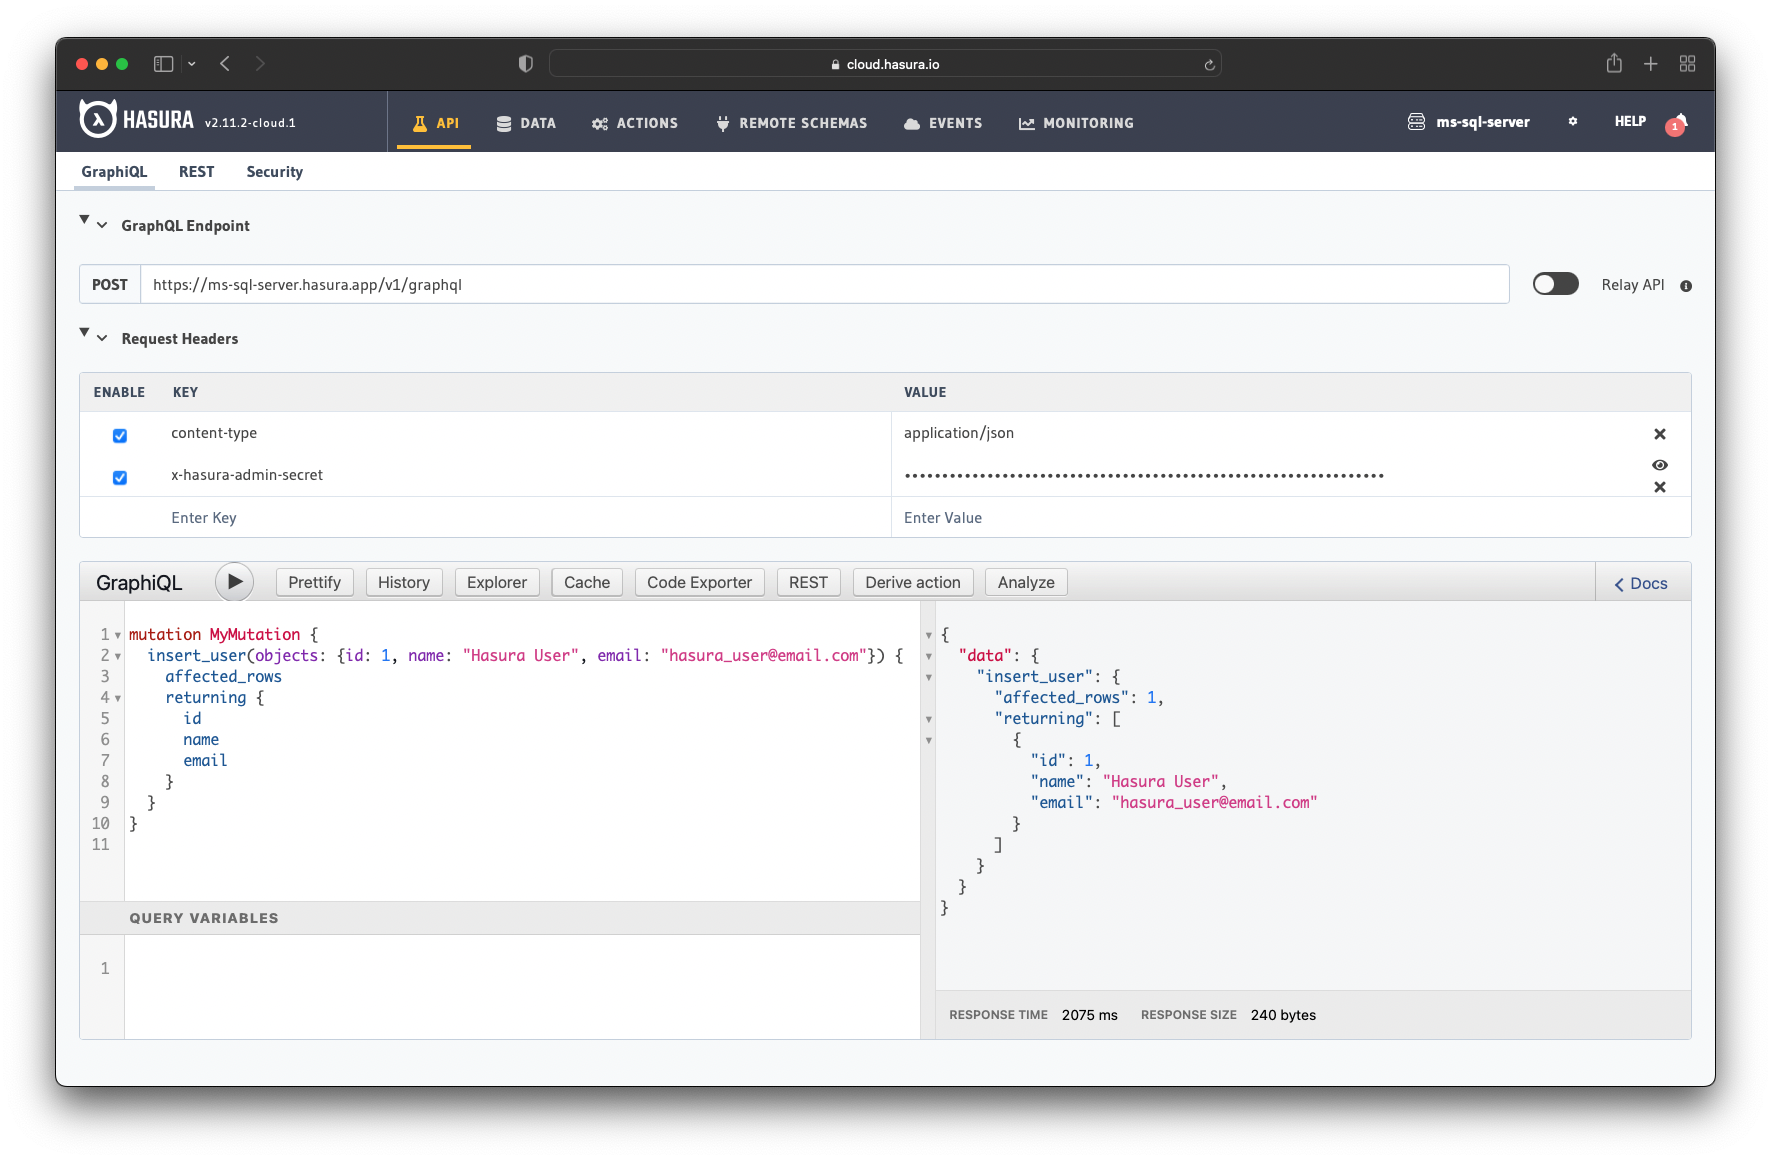
It's time to test the database connection. Navigate to the GraphiQL page and insert a new user into the database. Here's an example mutation you can use:
mutation MyMutation {
  insert_user(objects: {id: 1, name: "Hasura User", email: "[email protected]"}) {
    affected_rows
    returning {
      id
      name
      email
    }
  }
}
If the mutation is successful, you should see a response similar to the one in the image below.
Set up Hasura event trigger
With the event triggers, you need to have a webhook available that Hasura can invoke. In this case, let's assume you have a server that sends a welcome email to new users.
Each time a new user is added to the database, the server automatically sends a welcome email to that user.
Navigate to the "Events" page and create a new event trigger with the following details:
- Trigger name -
send_email
- Database -
default
- Schema/Table -
public/users
- Trigger Operations -
insert
In the "Webhook (HTTP/S) Handler" field, enter the endpoint Hasura needs to invoke when a new user is inserted into the database.
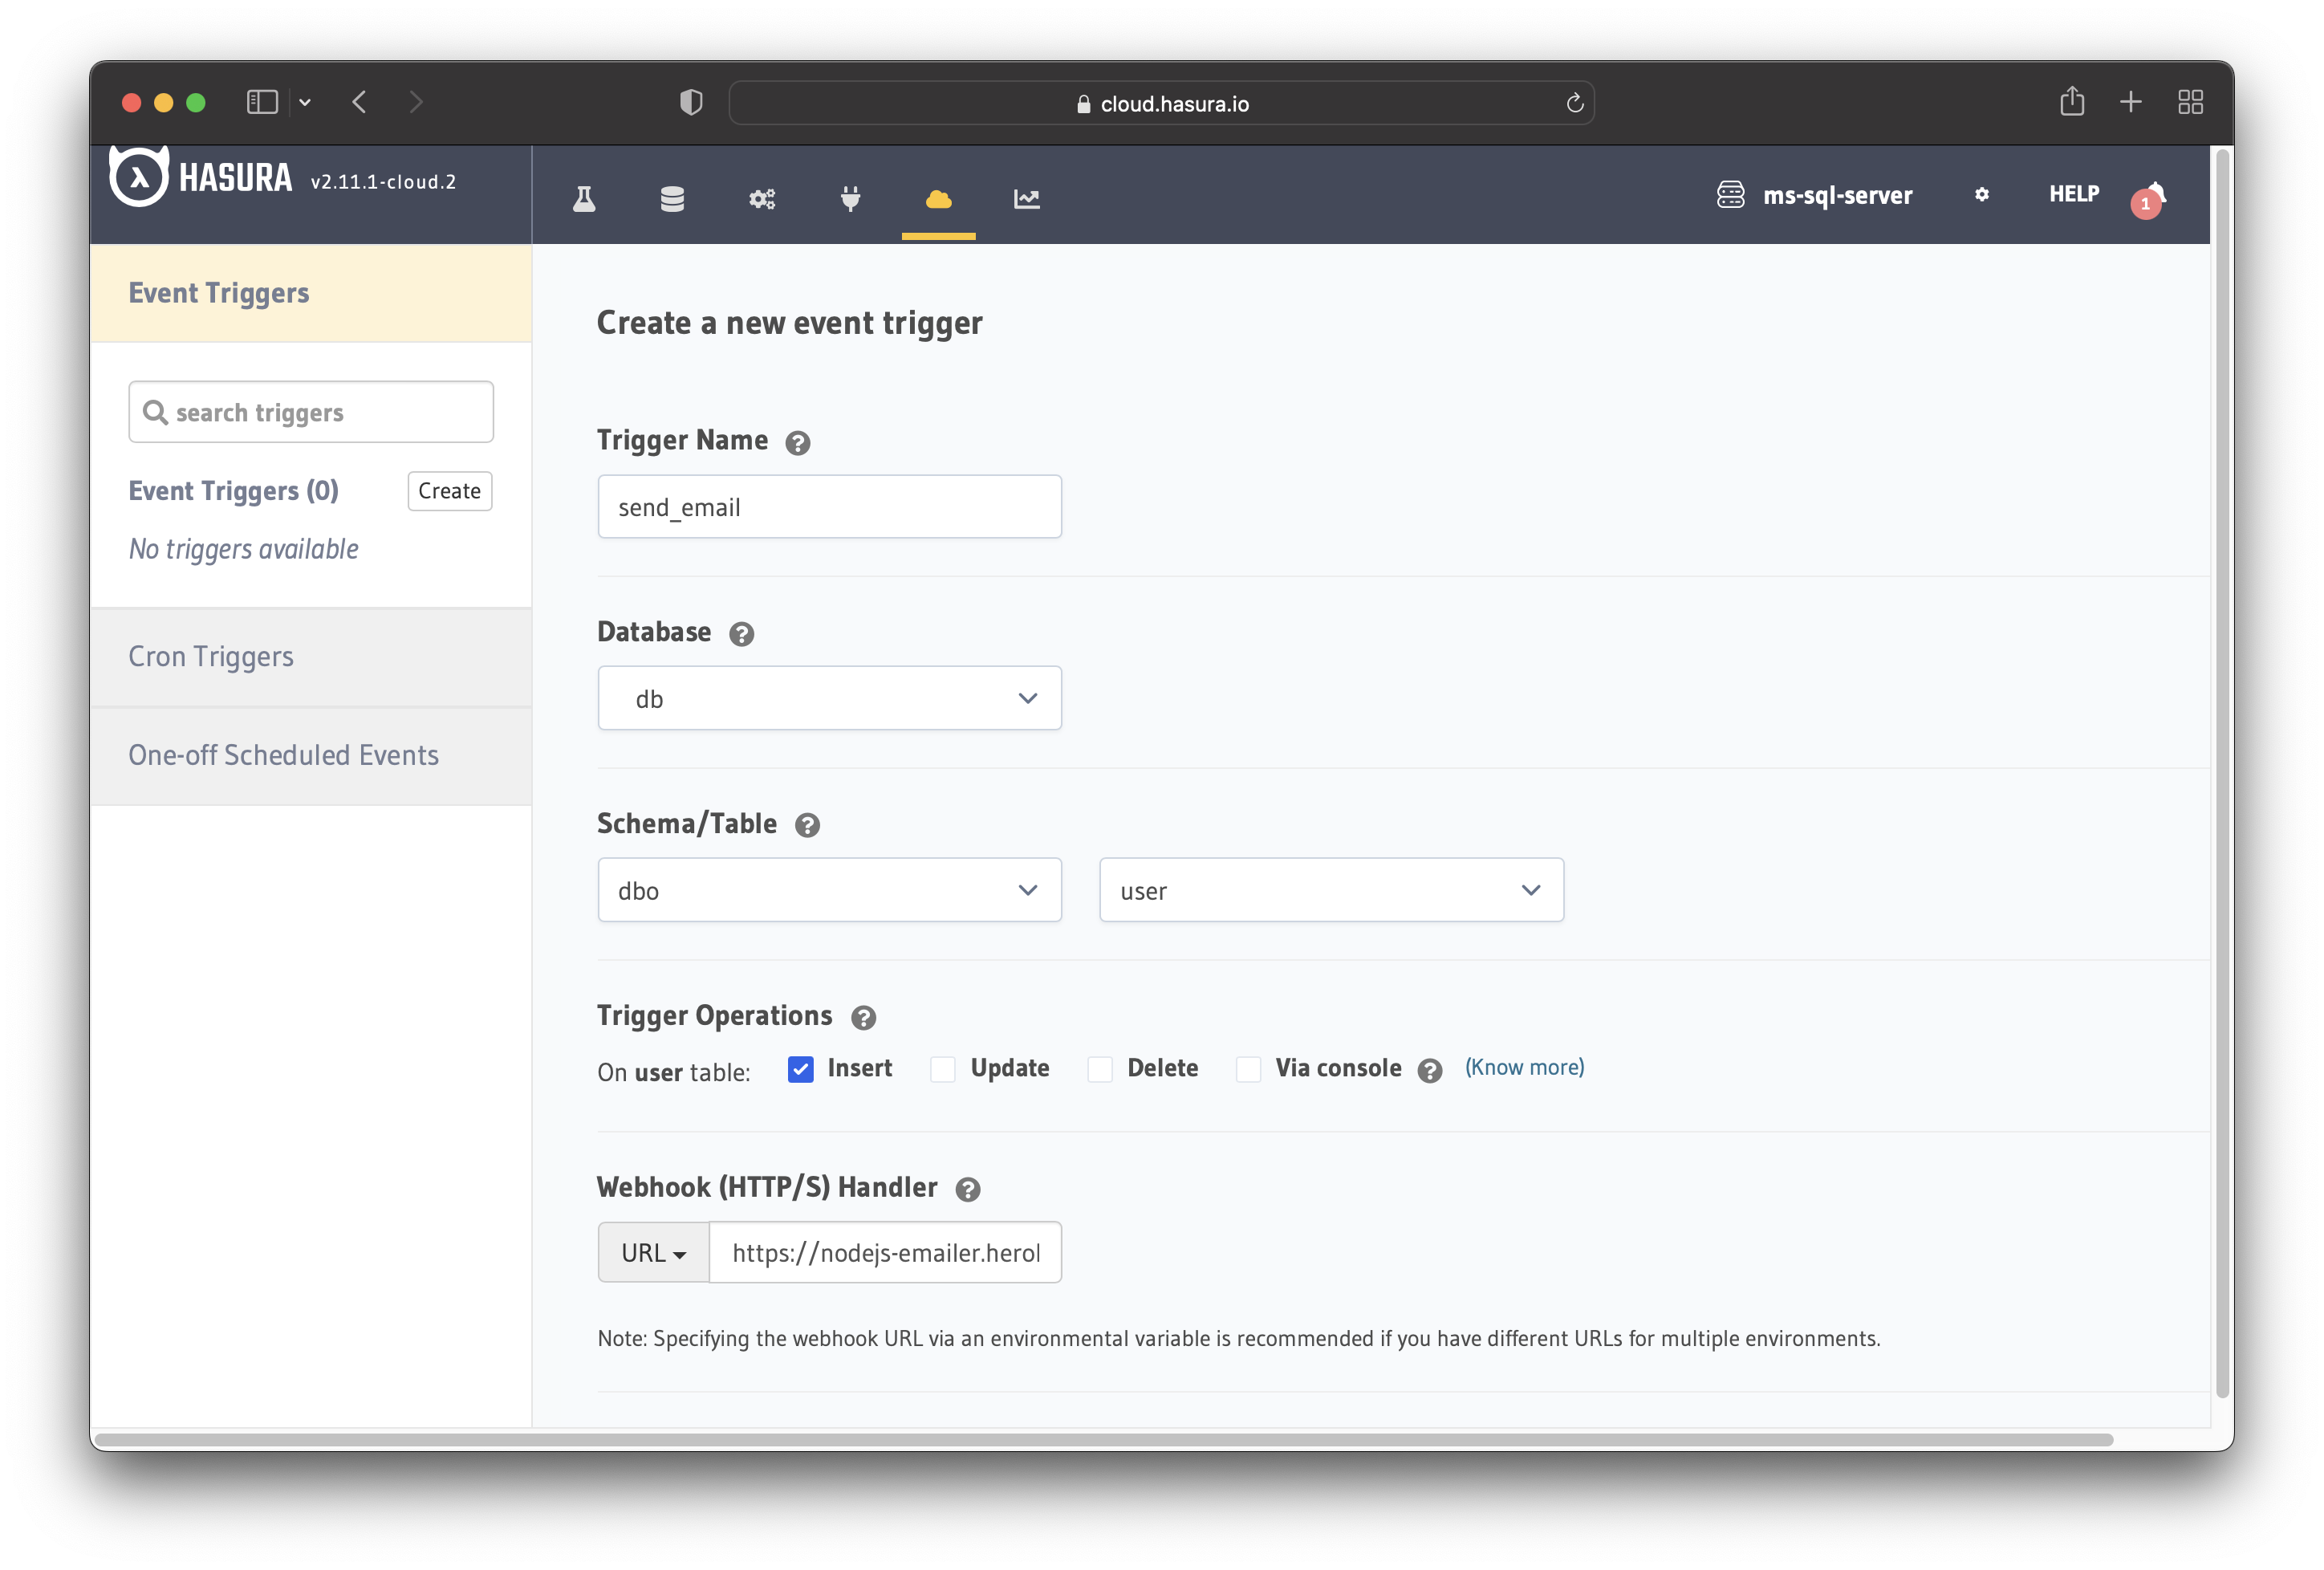
Now scroll down until you see the section "Configure REST Connectors" and click on the "Add Request Options Transform" button.
That opens a new section where you can modify the request method and URL template. You need to change the URL template to pass the name and email of the newly created user.
In the "Query Params" section, add the following parameters:
- name -
{{$body.event.data.new.name}}
- email -
{{$body.event.data.new.email}}
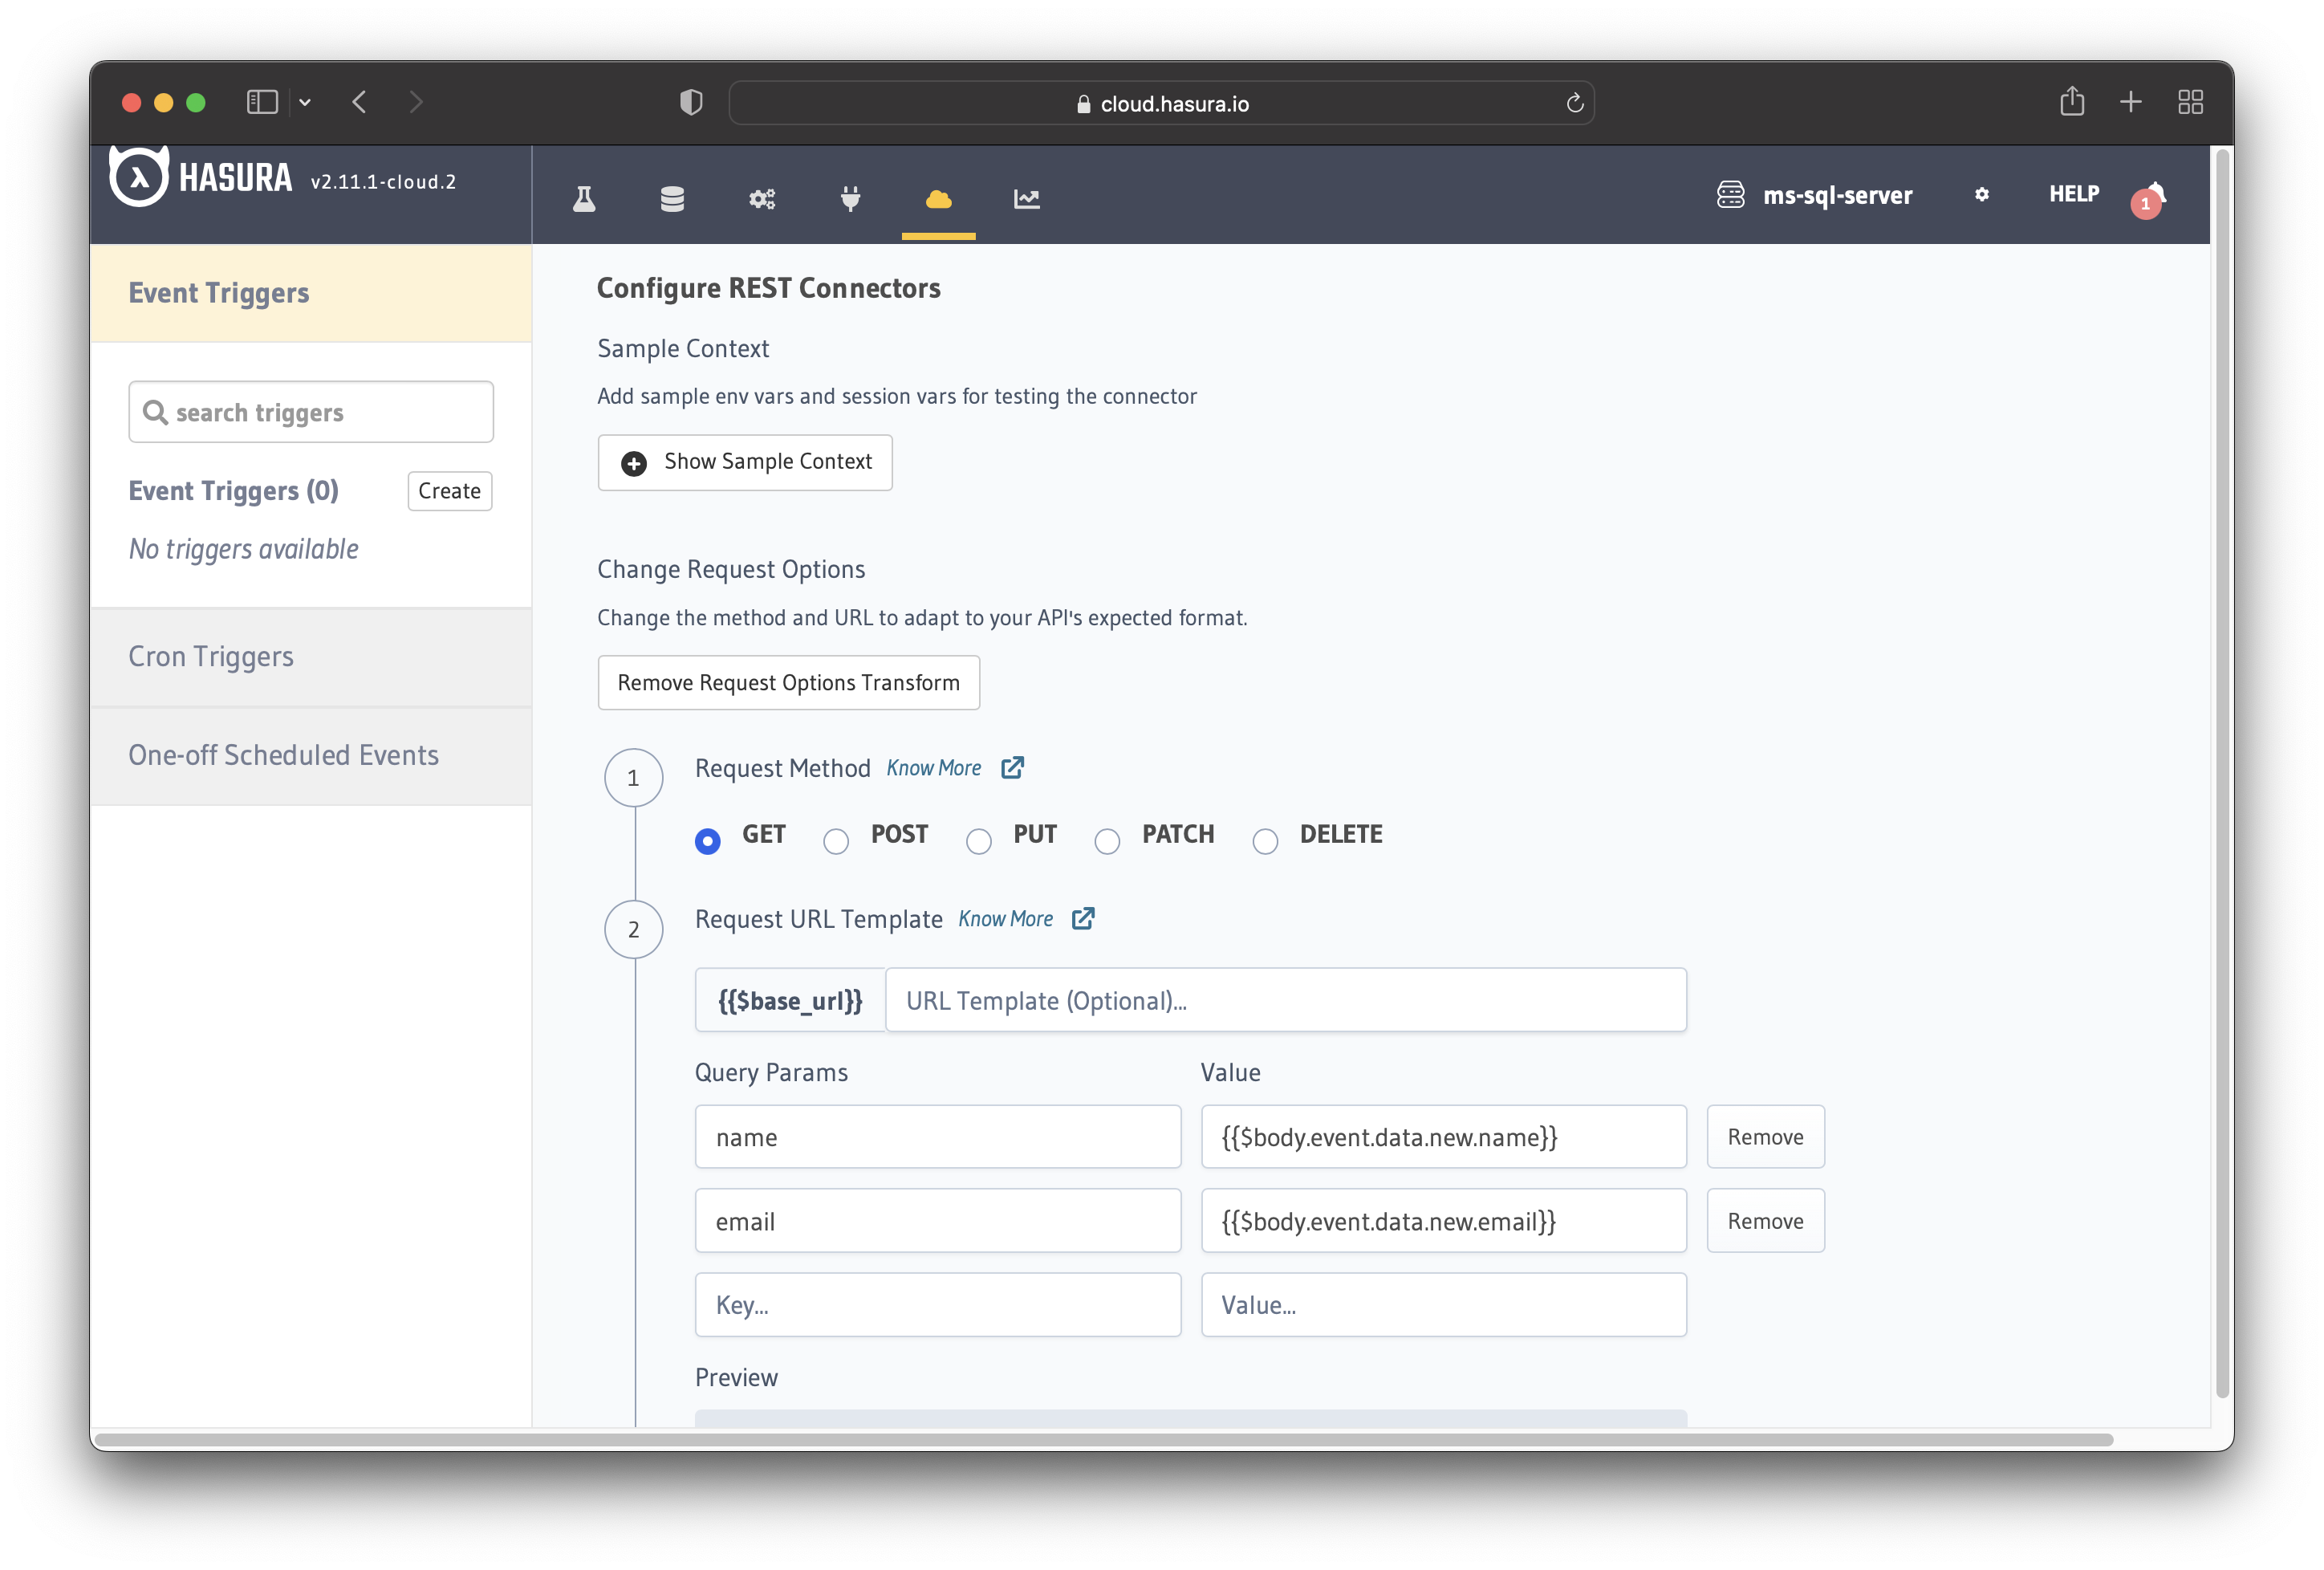
Save the new event trigger and you are done!
Test the event trigger
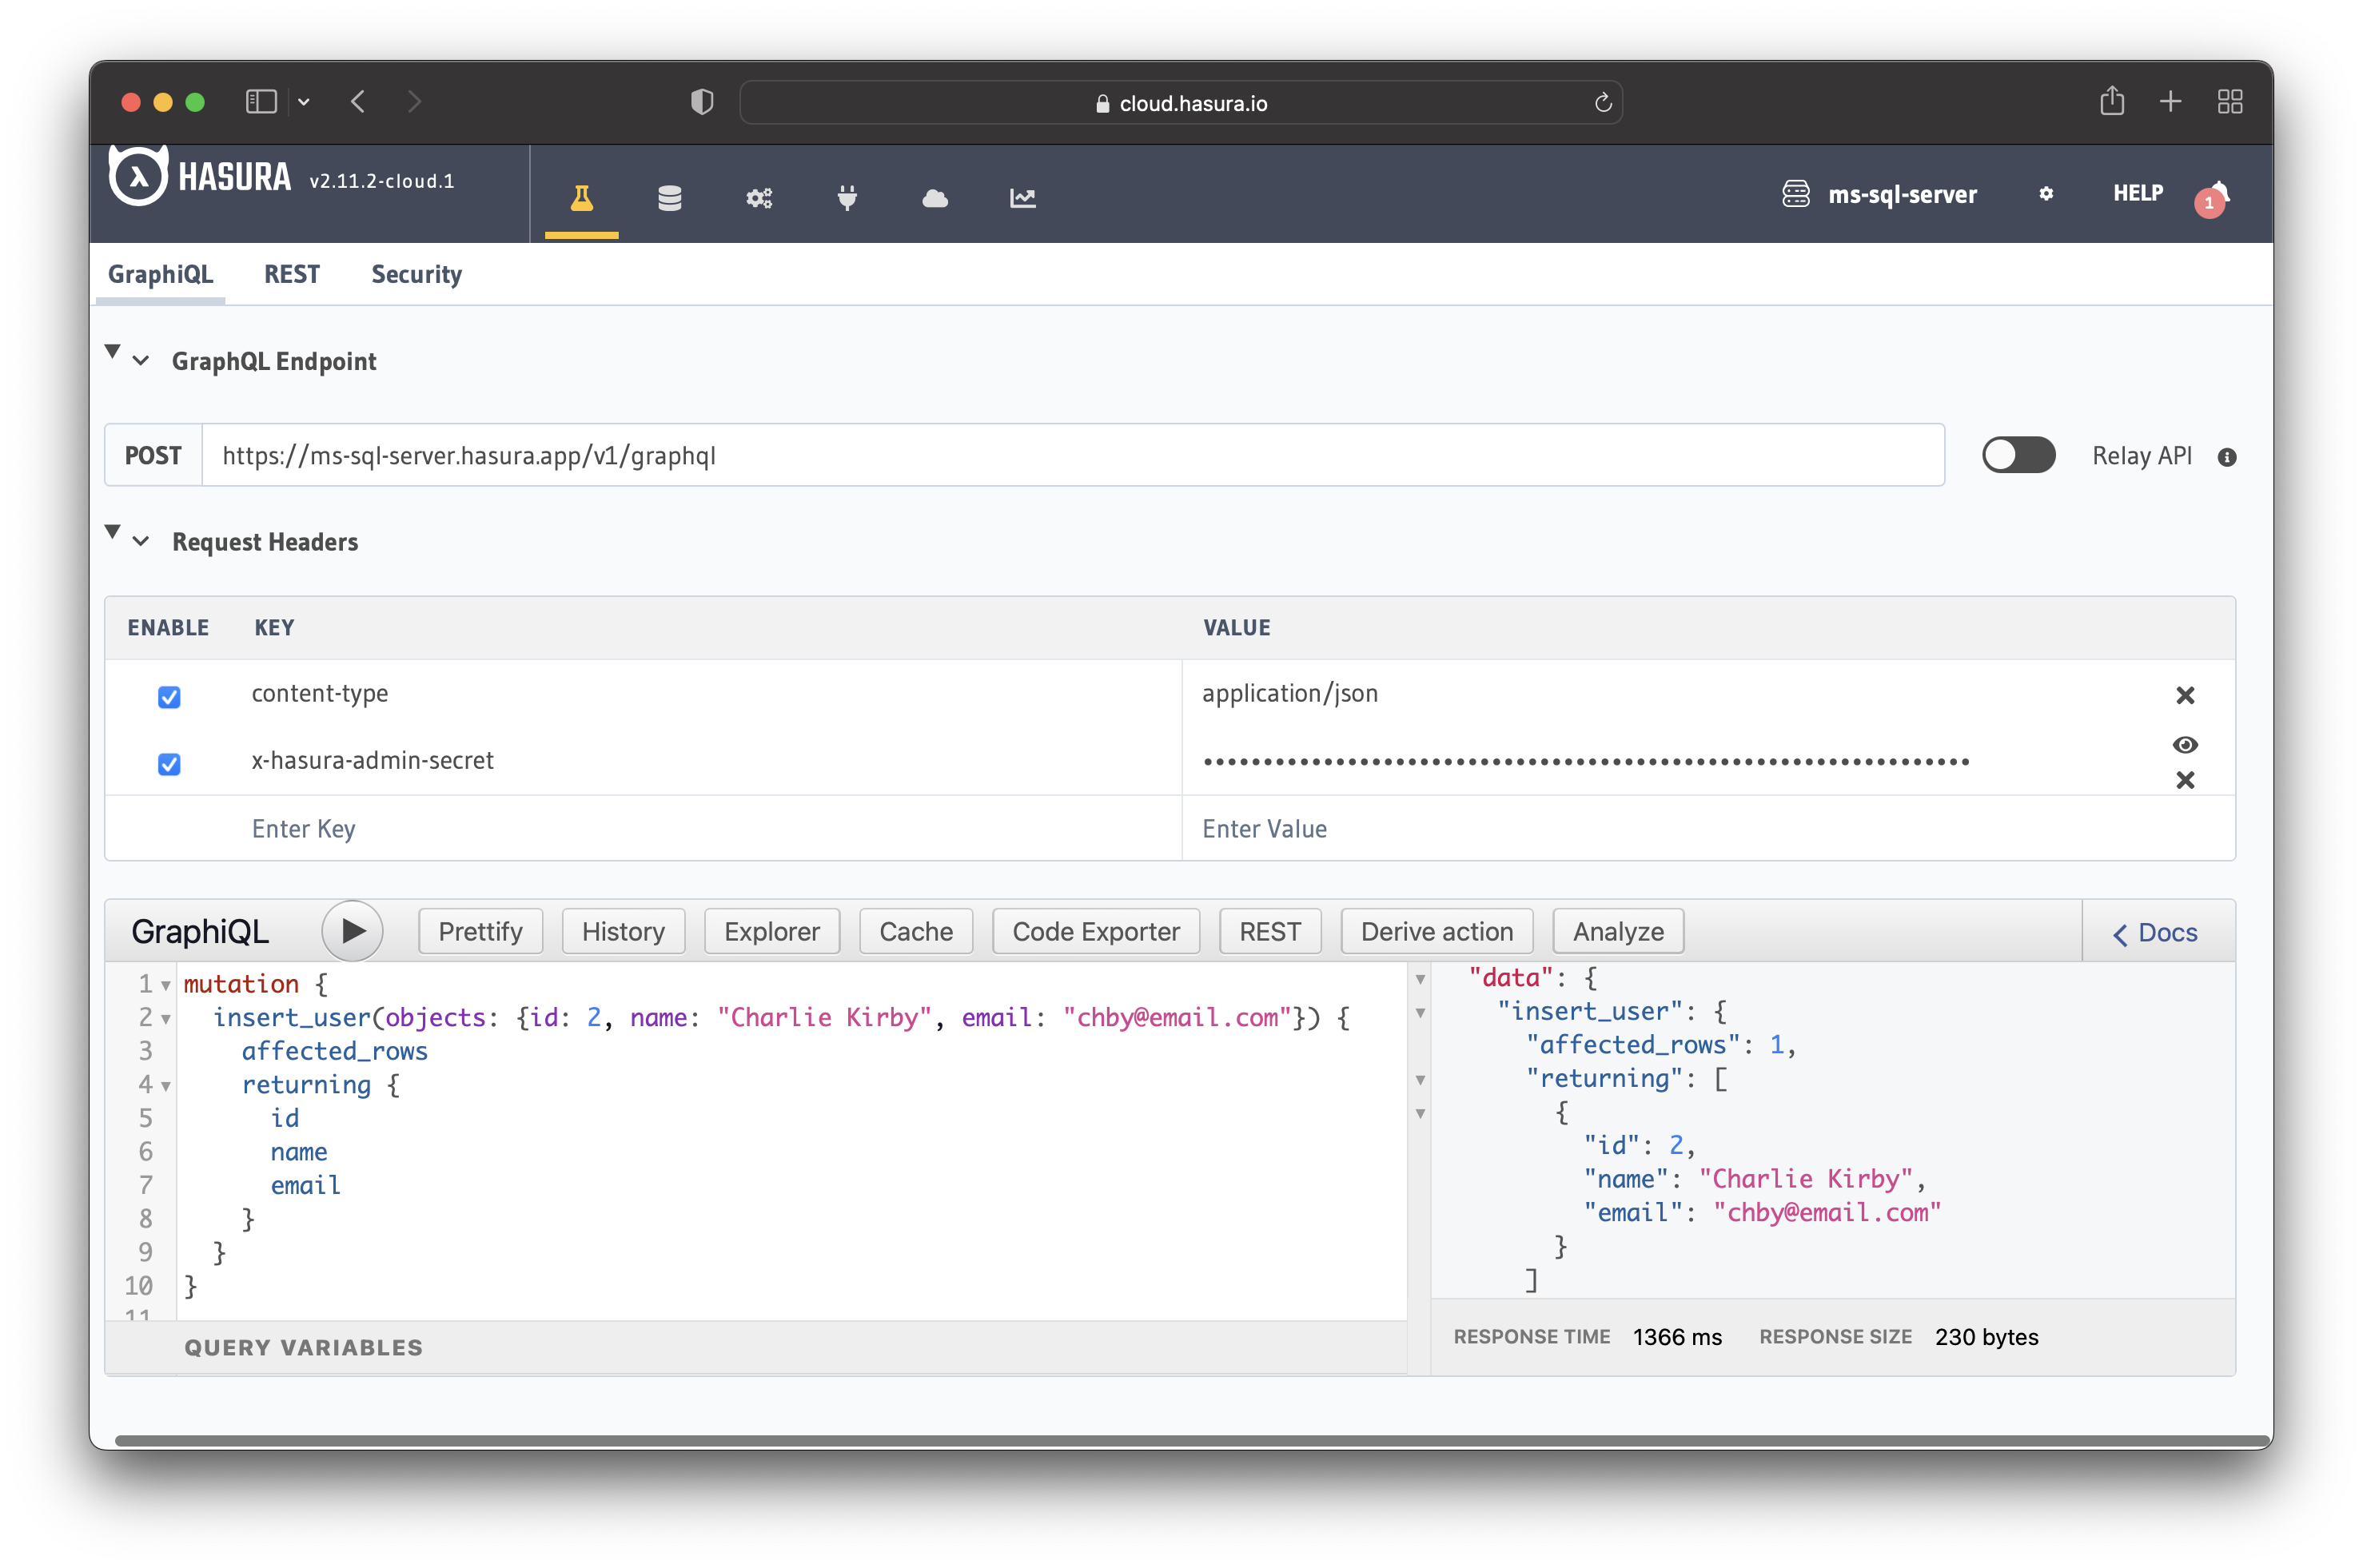
To test the event trigger, you need to insert a new user into the database. Run the following mutation in the GraphiQL editor:
mutation {
  insert_user(objects: {id: 2, name: "Charlie Kirby", email: "[email protected]"}) {
    affected_rows
    returning {
      id
      name
      email
    }
  }
}
The figure illustrates the mutation in action. Since the mutation is successful, the event trigger should invoke the webhook, and the user should receive a welcome email.
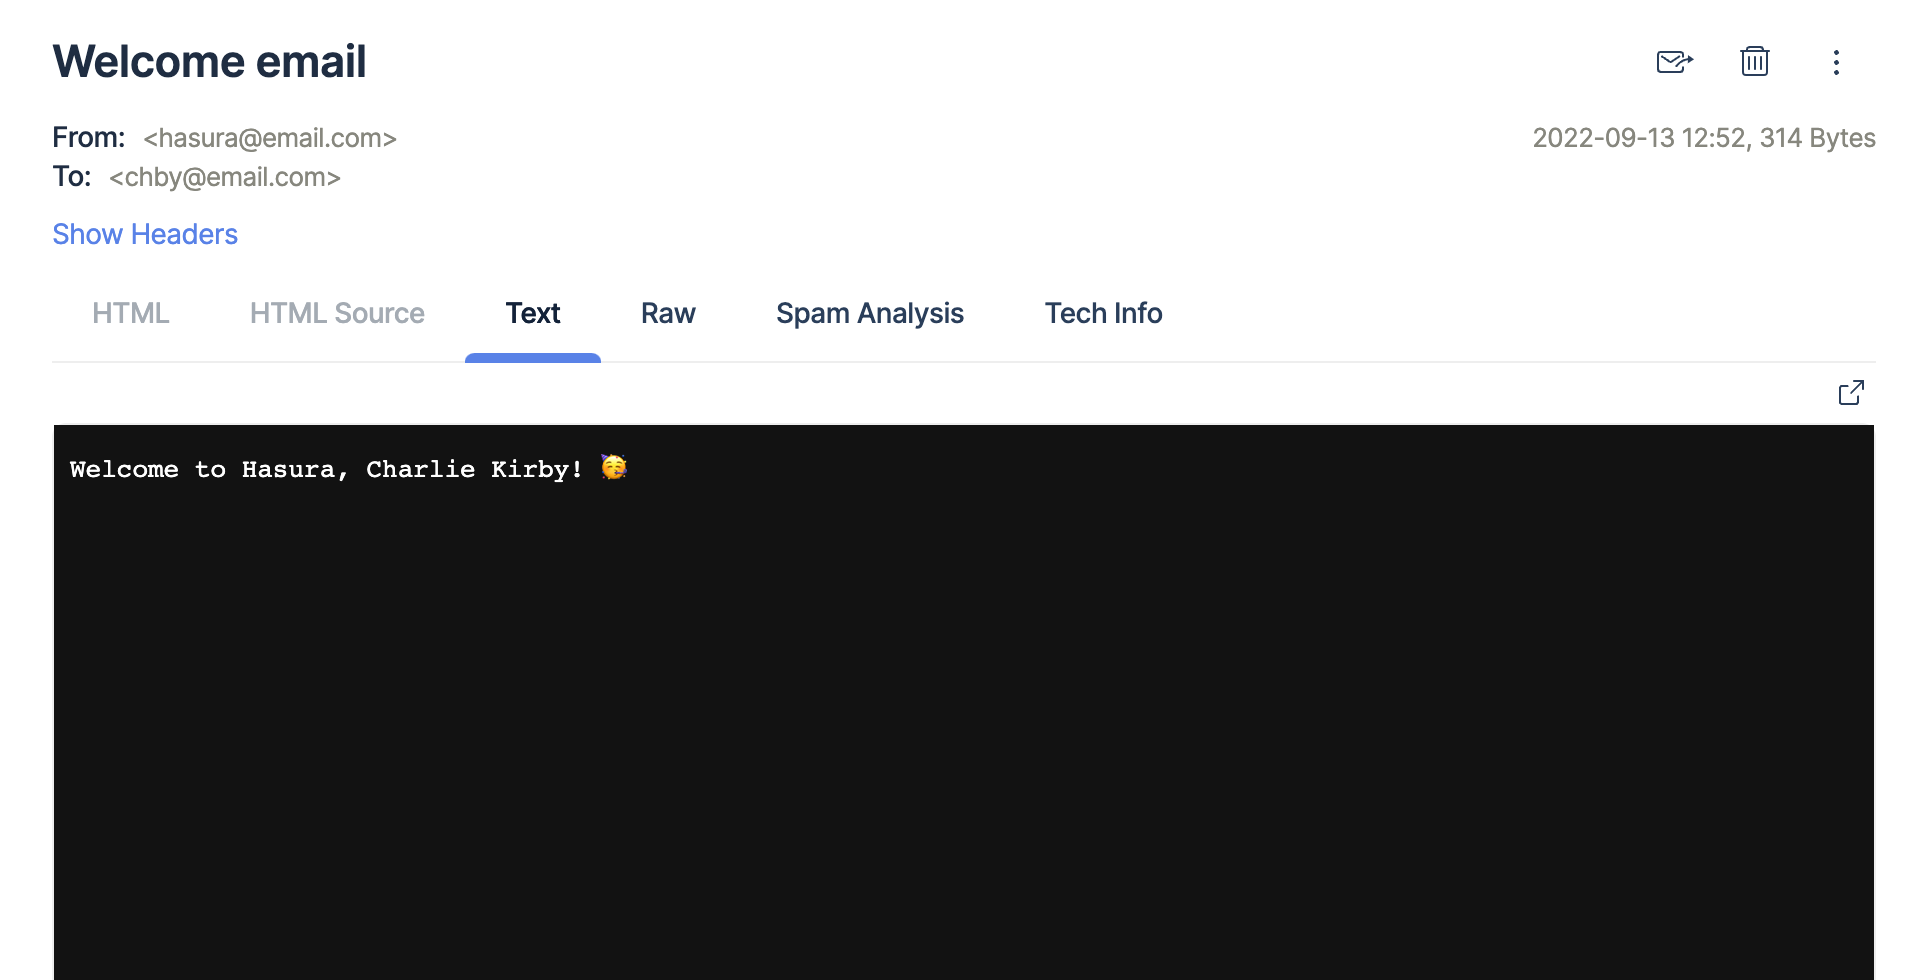
Checking the email inbox confirms that the user received the email.
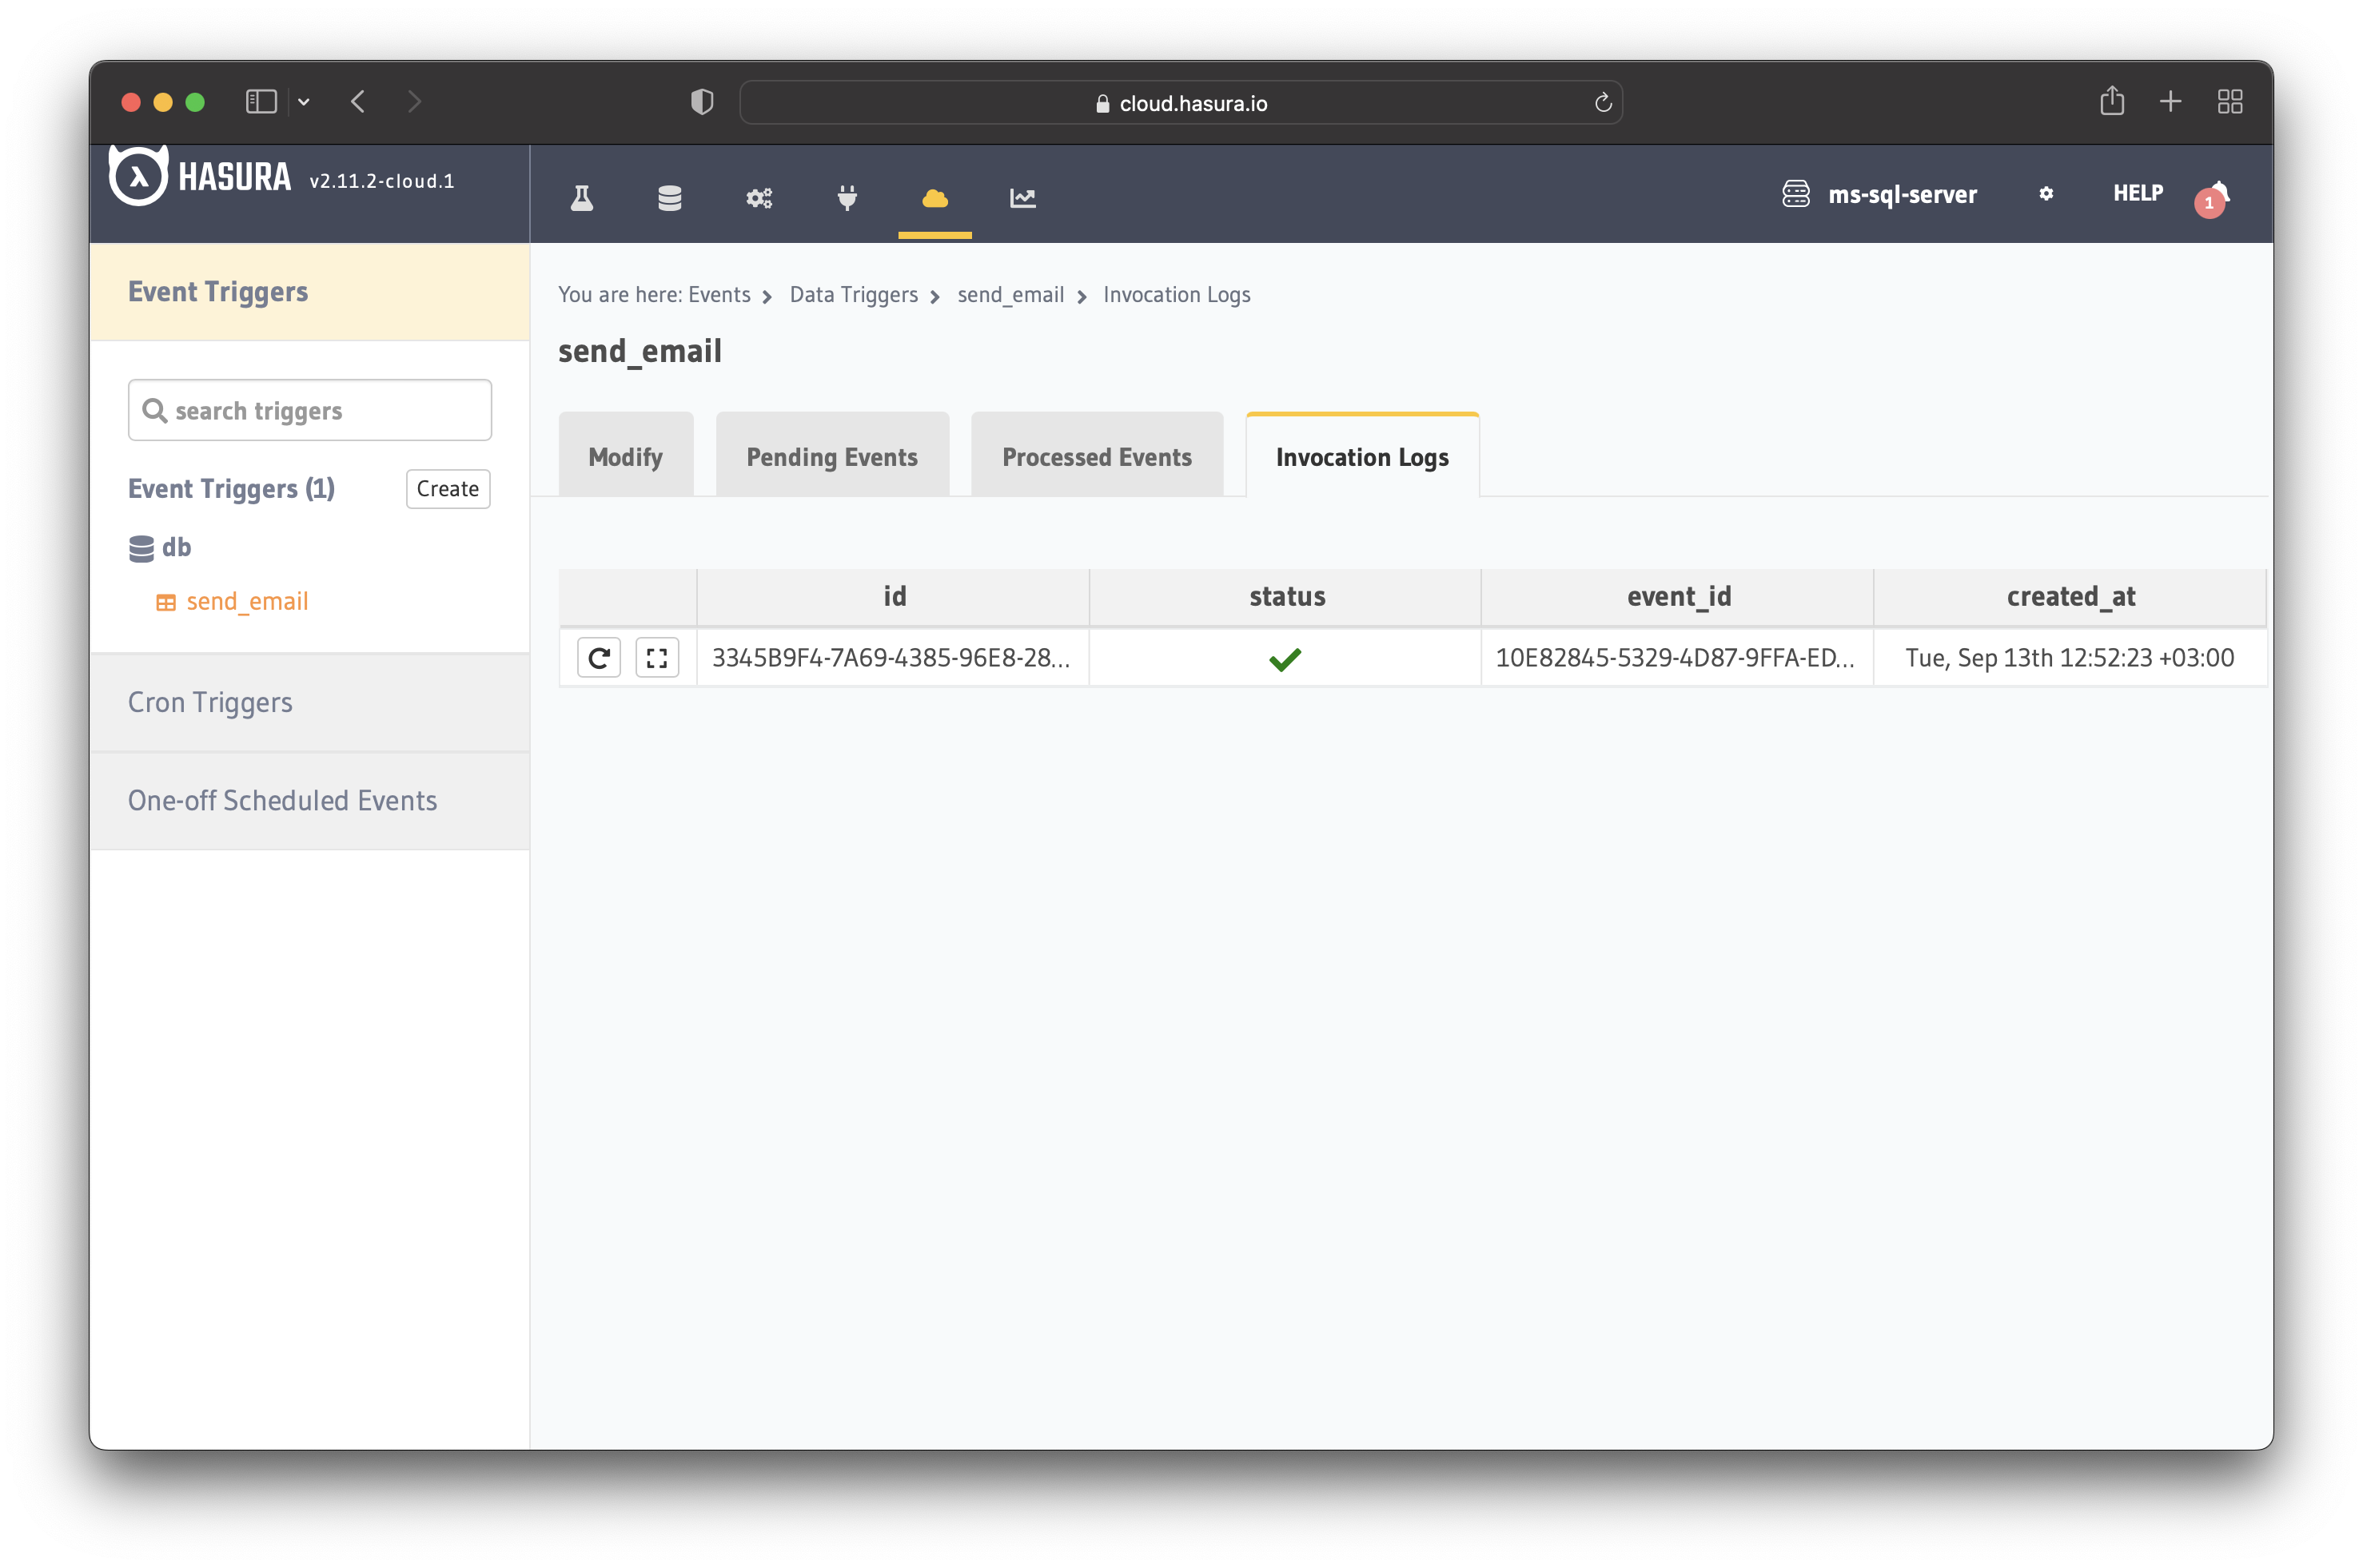
You can also check the "Invocation logs" to see whether the event trigger was successful or not.
This is just one example of using event triggers with a SQL Server database. The Hasura documentation covers event triggers in-depth if you want to learn more. There is also an extensive section covering MS SQL Server.


