This course is no longer maintained and may be out-of-date. While it remains available for reference, its content may not reflect the latest updates, best practices, or supported features.
Matchmake Logic
Alright! We've written fancy functions in GameData.cs and now it's time to utilize them.
Go to MenuManager.cs in Assets/_Game/Scripts/Managers/MenuManager.cs
This script contains the logic that contains the menu system of the game.
We would be adding two functions to it.
#region Matchmakingpublic async void StartBattle(){ActivateLoading("Searching for worthy opponents");previousScreen = titleScreen;RemoveScreen();await gameData.DeleteOldBattles();List<GameData.Battles> online = await gameData.GetOnlineBattles();MatchMake(online);}private async void MatchMake(List<GameData.Battles> availableBattles){if (availableBattles.Count == 0){gameData.user.role = Data.User.Role.SHOOTER;SetTheme(Color.red);GameData.Battles createdBattle = await gameData.CreateBattle();battleId = createdBattle.returning[0].id;}else{gameData.user.role = Data.User.Role.DEFENDER;SetTheme(Color.green);GameData.Battles updatedBattles = await gameData.UpdateBattle(availableBattles[0].id);battleId = updatedBattles.returning[0].id;}gameData.BattleSubscribe(battleId);gameData.StartWaiting();}#endregion
void MatchMake
This function takes in a list of Battles. This list is gotten by calling gameData.GetOnlineBattles() which returns a list of open battles.
If the list is empty, it means there are no open battles and a new Battle is created with gameData.CreateBattle(). The role of the user is also set to Shooter
Else, if there are open battles, it selects the first one and joins. To join a battle, our function gameData.UpdateBattle(int battleId) is called and the appropriate id supplied.
Remember, this simply changes the defender_id of our battle from null to an id.
void StartBattle
This is a public function that we would be assigning to a button on the menu to actually start a battle.
Set StartBattle function
Now open the menuScene which can be found in Assets/_Game/Scene/menuScene.
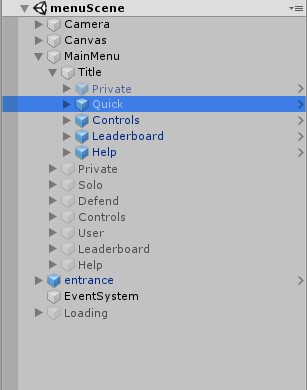
In the Hierarchy, go to the Quick gameobject in MainMenu/Title/Quick

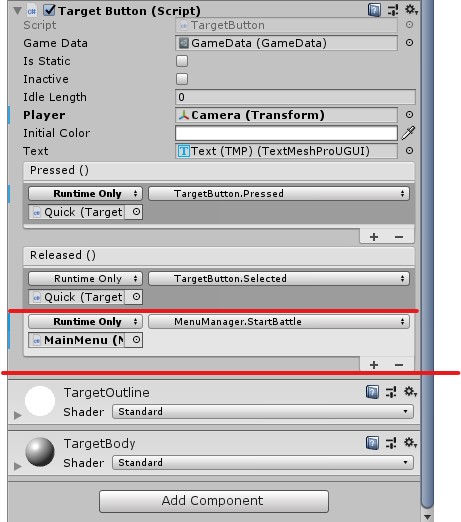
Go to the inspector and scroll down to the TargetButton component. There are Event Listeners there.
Add a new listener to the OnReleased(), drag the MainMenu object and select StartBattle

And that's it, we've set up matchmaking!
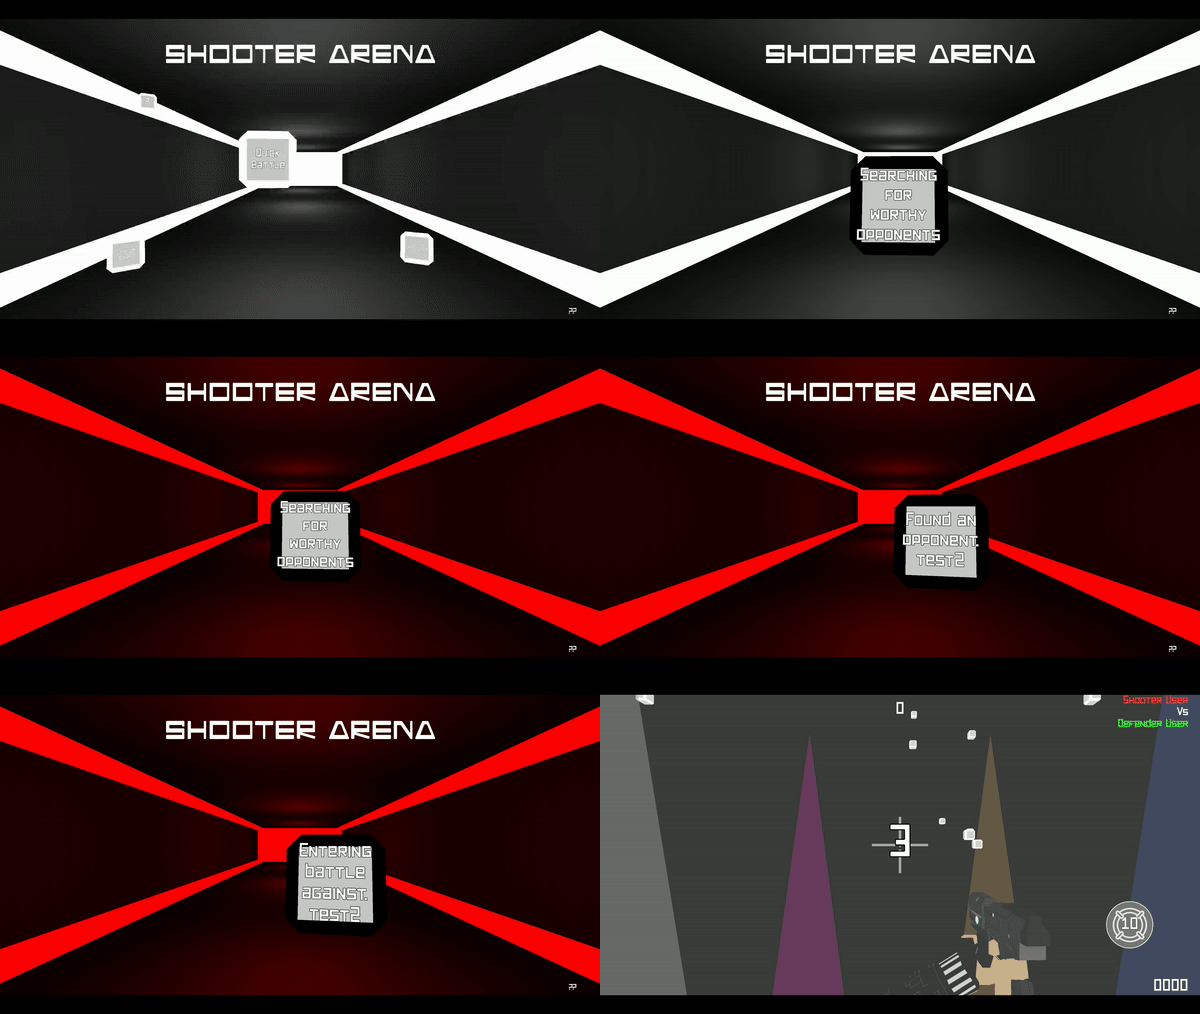
Test it out. Build the game.
On both devices click Quick Play and see as they are paired with one another.

Build apps and APIs 10x faster
Built-in authorization and caching
8x more performant than hand-rolled APIs


