This course is no longer maintained and may be out-of-date. While it remains available for reference, its content may not reflect the latest updates, best practices, or supported features.
Auto-vectorization
Let's say we want to automatically ingest and update resumes. We can set up an Event Trigger on our Postgres table, such that whenever there is a new record or change in a record, we automatically fetch the data and store the vectorized data in out VectorDB.
You can find this code under handlers/event.py and handlers/server.py in our repository. We'll go over information
step-by-step below but remember, this service is already running as part of your docker-comose. This will run a Flask
server on port 8400 that will handle all events as they're triggered from Hasura. If you're eager to get started, you
can skip to Step 4. Please also ensure your OpenAI API key is set as an
environment variable called OPENAI_API_KEY in the docker-compose file.
Step 1: Define your specific event handler
For all CRUD events, we'll need to define a specific handler. In our use case, we're only illustrating how to handle inserts and deletes.
In the example below, we're defining a handler for inserts and deletes. We're using the id field from the row to
identify the record in our VectorDB. We're also using the content field to store the vectorized data. In reality, you
would follow the URL from row['url'] to fetch the resume content.
def handle_insert(row, client):id = row['id']# In reality you would follow the URL from row['url']content = "dummy content"gql_query = gql("""mutation insertItem($id: String!, $content: text!) {insert_Resume_one(object: { application_id: $id, content: $content }) {id}}""")print(client.execute(gql_query, variable_values={'id': id, 'content': content}))def handle_delete(row, client):id = row['id']gql_query = gql("""mutation deleteItem($id: String!) {delete_Resume(where: {application_id: { _eq: $id } }) {affected_rows}}""")print(client.execute(gql_query, variable_values={'id': id}))
Step 2: Define an overall handler
After defining each event handler we'll need, we need an overall event handler defined that will execute the appropriate handler when an event occurs:
def handle_event(event):gql_headers = {'x-hasura-admin-secret': 'secret'}# Create a GraphQL client with the request transporttransport = RequestsHTTPTransport(url=GRAPHQL_ENDPOINT, headers=gql_headers)client = Client(transport=transport)event = event['event']op = event['op']if op == 'INSERT':row = event['data']['new']handle_insert(row, client)elif op == 'UPDATE':old_row = event['data']['old']new_row = event['data']['new']# TODO: Do somethingelif op == 'DELETE':old_row = event['data']['old']handle_delete(old_row, client)else:print(str(event))return "Success"
Step 3: Create an API for Hasura to call
Event Triggers in Hasura work by hitting an endpoint or server of your own design. This allows you to define your own
logic, in any language, for handling events. In our case, we're using Python and the lightweight Flask framework. In the
code below, you can see we've an endpoint at /handle_event that will handle all events from Hasura.
import query_llmimport eventfrom http.server import BaseHTTPRequestHandler, HTTPServerfrom flask import Flask, request, jsonifyapp = Flask("handlers")@app.route('/query_llm', methods=['POST'])def query_llm_handler():return jsonify(query_llm.query_llm(request.get_json(), request.headers))@app.route('/handle_event', methods=['POST'])def event_trigger_handler():return jsonify(event.handle_event(request.get_json()))if __name__ == '__main__':app.run(host='0.0.0.0', port=8400)
If you've built this in the /handler directory, you can start this from the repository's root by running
python3 server.py to start the server.
Step 4: Configure the Event Trigger in Hasura
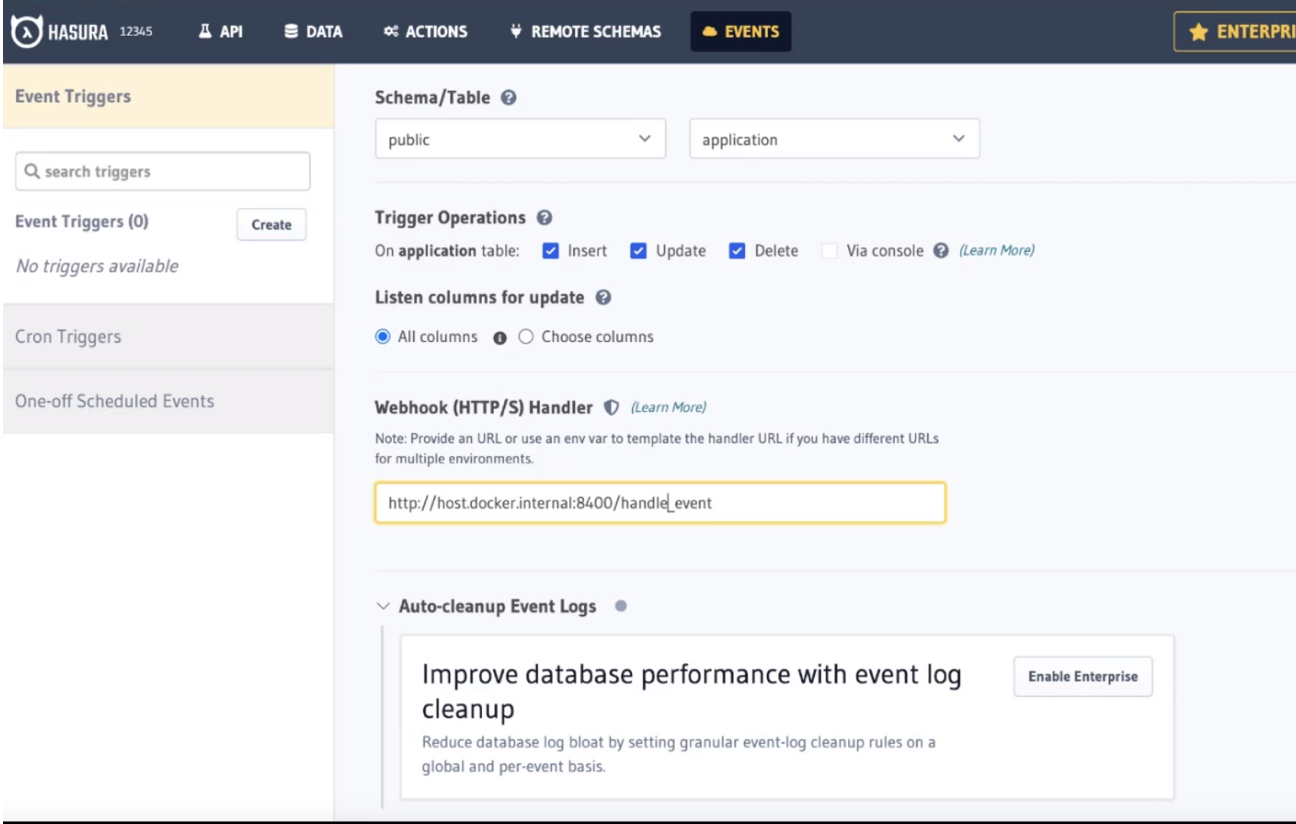
Head to the Events tab and click Create to configure a new Event Trigger. Let's name this ingestion. We'll
reference the public schema and application table of the HRTool database. Ensure all CRUD operations are checked as
triggers and enter the following URL for our Flask API:
http://host.docker.internal:8400/handle_event
Note: If your're using Linux, you'll need to replace host.docker.internal with localhost.
Then, we'll need to modify the Request Method underneath the Request Options Transform section to POST.
The configuration should look like this before clicking, Create Event Trigger:

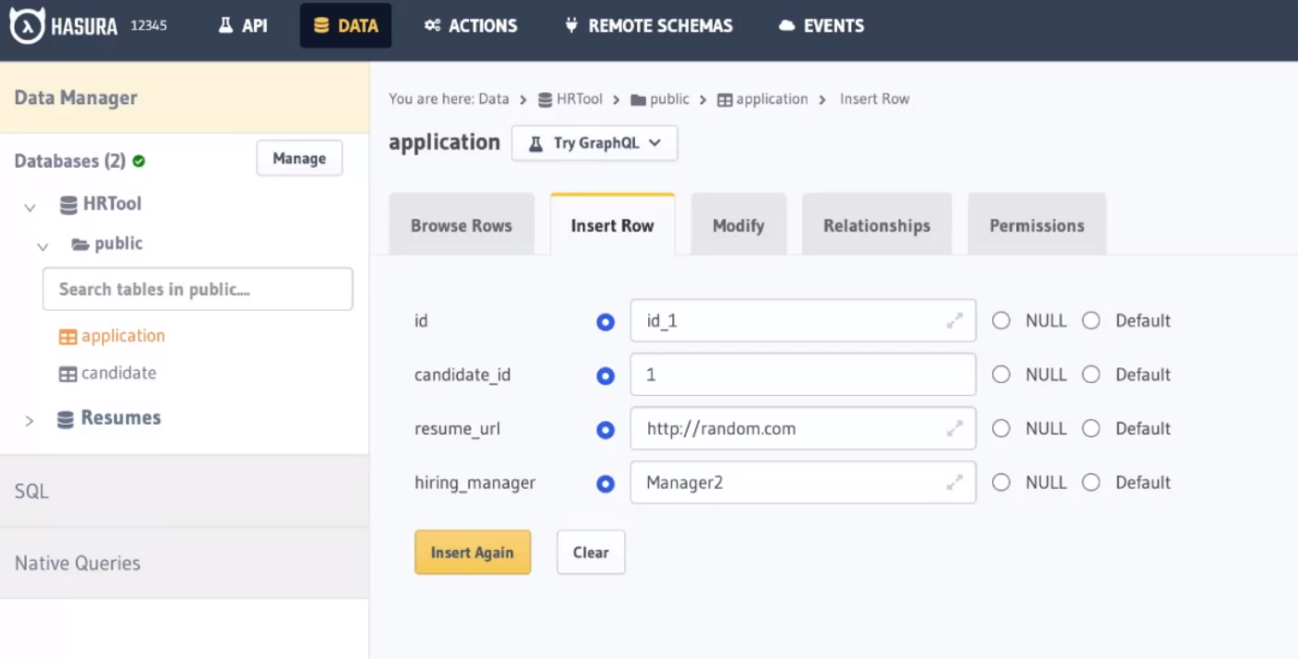
Finally, we can test this by entering a new application. Head to the Data tab and choose the application table
before clicking Insert Row. Enter a new application and click Insert.

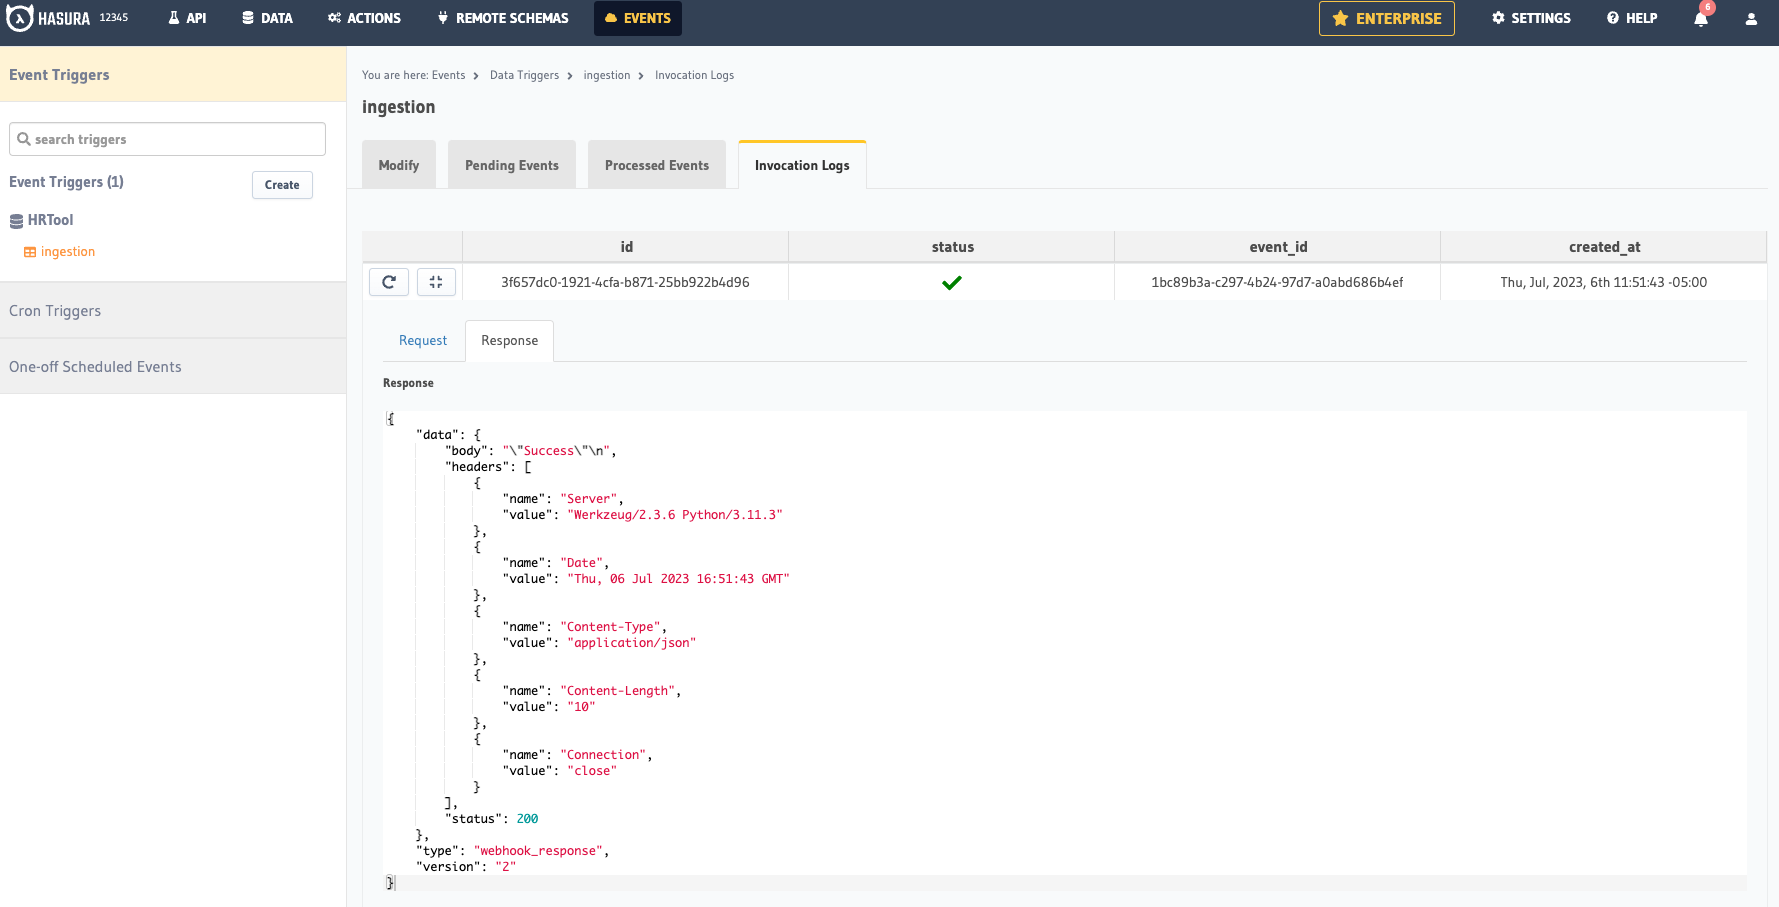
Then, you can check the Events tab and select the invocation trigger to see the response:

Build apps and APIs 10x faster
Built-in authorization and caching
8x more performant than hand-rolled APIs


