Using Gatsby for a web app with dynamic content — A case study

This is a case study of how we can use a static site generator like Gatsby to build out a web app with dynamic content.

If you are looking for a boilerplate app setup ? gatsby-postgres-graphql. This sources data from your existing postgres database for your gatsby site.

TL;DR

Here is a quick summary of what this blog post covers:

  • A basic overview of what a static site is and how it is different from a dynamic one.
  • What Gatsby is and its various features.
  • An action plan on what it takes to build a website with dynamic content using Gatsby.
  • Caveats and current solutions for it.
  • A step by step tutorial where we build out a product listing app with pagination and also programmatic page creation from an external data source. You can find the code to the whole app here.
  • Final thoughts on using Gatsby for such an app.

Content

Why a static site?

Usually when you visit a website which usually has some dynamic content, the browser sends a request for that page to a server. The server receives this request, fetches the data for the page from a database, it then loads a UI template. The template and the data are then combined and finally a response for that page is sent. This is how a dynamic site works.

What is this Gatsby you speak of?

Gatsby is a blazing-fast static site generator for React. So you get to build a React app and get server side rendering automagically because of Gatsby.

A Gatsby site is also highly performant because it gives you client side code splitting and lazy loading of assets. This means that Gatsby gives the browser a complete page as a single file. All the necessary CSS and images are embedded in the page. Only the CSS really needed for that page is included. Gatsby also performs prefetching. After a page is loaded, it fetches data for all the other pages that are linked on the loaded page. This makes user navigation extremely fast.

A complete list of Gatsby features can be found here.

What about a website with dynamic content?

Alright, so static websites are awesome because they’re fast. Gatsby is also awesome because it provides SSR for React apps and a whole bunch of other features. But all of this works for a website where the content does not change often.

What about websites with dynamic content? An e-commerce website, where you have a paginated product listing page or a lot of pages with product content? It would be awesome to get the same speed and performance for a dynamic web app!

Turns out, that since Gatsby is basically built on React, this is very easily doable. Let’s take a look at how this can be done and if it makes sense to do so.

The Action Plan

Gatsby maintains an internal GraphQL data store. This internal data store is query-able via GraphQL APIs in your react components. During build Gatsby fetches data for each page and then bundles them up as individual pages.

So the things we need to figure out are:

  • Adding our external data into Gatsby’s internal data store. This way our react components can then query this data using GraphQL.
  • Generate a static listing page with the external data.
  • Dynamically create static pages based on our data. For example, for an e-commerce web app, we would require individual pages for each product that we list on our listing page.
  • Make sure that our listing page is paginated.

Caveats

Data is only fetched during the build step. So if your external source has any new data to be shown, it won’t come up until we run another build.

There are multiple ways around this:

  • You can have a cron job running that rebuilds your app every 30 minutes or at a time interval of your choosing or just triggers a rebuild each time your data updates.
  • Gatsby is built to behave almost exactly like a normal React application, which means that you can make network APIs in your react components and update the data shown after the page loads. These are called Hybrid Components, you can read more about them here.
Hasura gives you instant GraphQL APIs and can be used to query your Gatsby data store. Here's a video on how to get started with Hasura, if you need it.

Executing the action plan

What are we going to build?

We are going to build a web app that will do the following:

  • Have a paginated listing page which gets its data from an external source
  • For each item shown on the listing page, create another page which will show more details about the item

We are going to use Algolia as our external source here and are also going to use their Javascript API client to fetch the data.

Note: You do not need to know how Algolia works or the various things you can do using it to make the most of this blog post. All you need to understand is that Algolia is a full fledged search engine. You can feed data to it and then easily query data from it using their APIs or their clients. You can easily replace Algolia with an external database and query that database instead as your data source.

Getting started

Before we begin, let’s install the gatsby-cli tool on our local machine. To install, run the following in your command shell:

$ npm install --global gatsby-cli

Once you have the cli tool installed, create a starter project

$ gatsby new my-listing-app

Note: you can replace my-listing-app with any name that you want your project to be called.

The above command will create a new directory with the specified project name, in this case my-listing-app

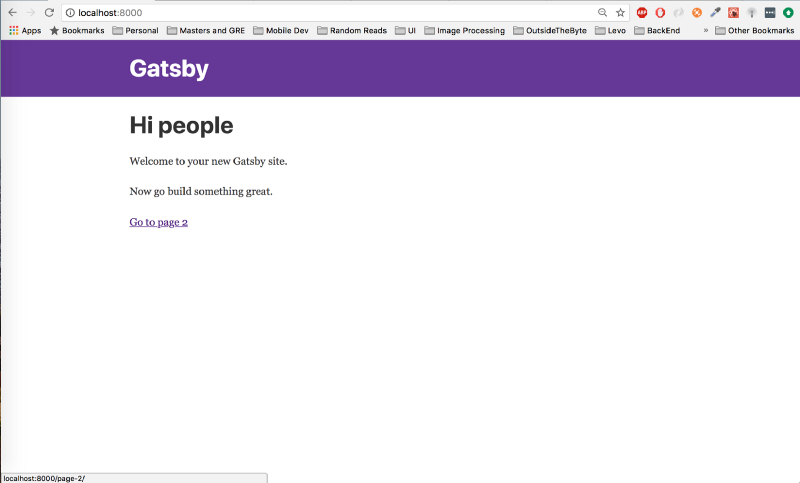
To run this app locally, run gatsby develop inside the project directory and your app will be available at localhost:8000

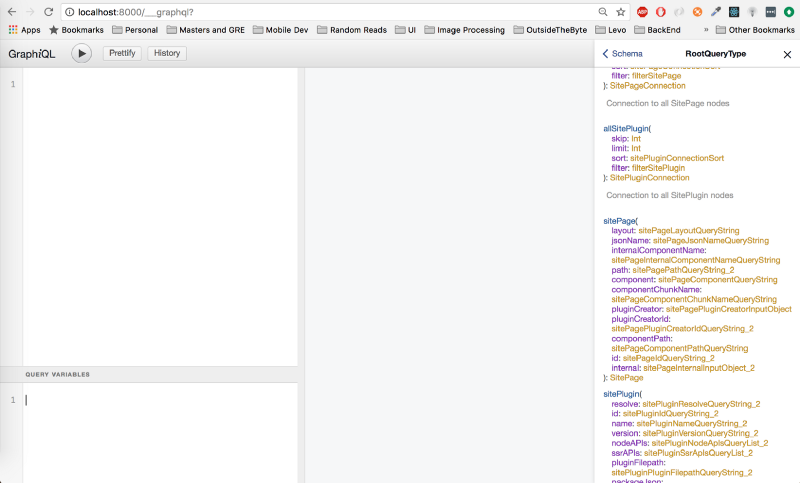
Moreover, you can also explore the site’s data and schema using GraphiQL which will be running at http://localhost:8000/___graphql

Ok, now that we have our basic gatsby app running locally, let’s build out our app one feature at a time.

Adding the external data to the gatsby data store

First, lets add the algoliasearch library to our project. In your root project directory (where your package.json file lives). Run the following:

$ npm install --save algoliasearch

The code to fetch data from an Algolia Index, looks like so:

const algoliasearch = require('algoliasearch');

algoliaIndex.search({
const algoliaClient = algoliasearch(ALGOLIA_APP_ID, ALGOLIA_API_KEY);
const algoliaIndex = algoliaClient.initIndex(ALGOLIA_INDEX);
      query: '', //empty query string returns all the data
      hitsPerPage: 1000 // This is the maximum data that can be fetched
    },
 function searchDone(err, content) {
      if (err) {
        console.log(err);
      } else {
        console.log(content);
      }
    });

In the above code snippet, we are querying Algolia for all the data from a particular index (specified by the empty query string) and fetching 1000 results per query (1000 is the maximum that we can fetch in a single query). ALGOLIA_APP_ID , ALGOLIA_API_KEY and ALGOLIA_INDEX are self explanatory constants.

Note: Since this is a simple implementation, we are going to assume that our data set is lesser than 1000. If this is not the case, we can either paginate on this request or use the browse feature provided by Algolia to fetch the complete data.

To add this data into the gatsby data source, we need to

  • Fetch the data during the gatsby build step.
  • Create new nodes for the fetched data.

Open up the gatsby-node.js file from your root project directory and add the following to it

const algoliasearch = require('algoliasearch');

const ALGOLIA_API_KEY = '<YOUR_ALGOLIA_API_KEY>';

const algoliaClient = algoliasearch(ALGOLIA_APP_ID, ALGOLIA_API_KEY);

exports.sourceNodes = async ({ boundActionCreators }) => {
const ALGOLIA_INDEX = '<YOUR_ALGOLIA_INDEX_NAME>';
const ALGOLIA_APP_ID = '<YOUR_ALGOLIA_APP_ID';
const algoliaIndex = algoliaClient.initIndex(ALGOLIA_INDEX);
  return new Promise((resolve, reject) => {
    algoliaIndex.search({
      query: '', //fetch all
      hitsPerPage: 1000
      },
      function searchDone(err, content) {
        if (err) {
          console.log('\nError');
          console.log(err);
          reject();
        } else {
          console.log('\nSuccess');
          console.log(content);
          resolve();
        }
      }
    );
  });
};

Note: We have wrapped the query in a promise. This is so that gatsby knows that it needs to wait for your query to resolve during the build process. Otherwise, it will not wait until the callback gets called. Alternative, you can also use async await and return after the required operation is complete.

Save the following and run gatsby develop again. If your query executes successfully, you will see the content being printed out in your command shell.

In this case, the query fetches a list of products with its name, stock and price.

Next, we need to add this fetched data into the existing internal gatsby data store

const algoliasearch = require('algoliasearch');


.....

exports.sourceNodes = async ({ boundActionCreators }) => {
const crypto = require('crypto');
  const { createNode } = boundActionCreators;
  return new Promise((resolve, reject) => {
    algoliaIndex.search({
      query: '', //fetch all
      hitsPerPage: 1000
      },
      function searchDone(err, content) {
        if (err) {
          console.log('\nError');
          console.log(err);
          reject();
        } else {
          content.hits.forEach(content => {
            const productNode =  {
              id: content.objectID,
              parent: null,
              children: [],
              internal: {
                type: `Product`,
                contentDigest: crypto
                  .createHash(`md5`)
                  .update(JSON.stringify(content))
                  .digest(`hex`),
              },
              name: content.name,
              stock: content.stock,
              price: content.price,
            }
            createNode(productNode);
          });
          resolve();
        }
      }
    );
  });
};
Note: We are using another javascript library called crypto . Run the command npm install --save crypto in the directory with the package.json file to include it in your project.

Here, the data being fetched is a list of products. We create a new node by passing an object to the createNode method. id, parent, children, internal.type and internal.contentDigest are mandatory parameters to the createNode method. Ensure that the id is unique for each node. The Type is the unique GraphQL node type. In this case, all the data being added is of the type Product. You can read about what the parameters are in the gatsby docs.

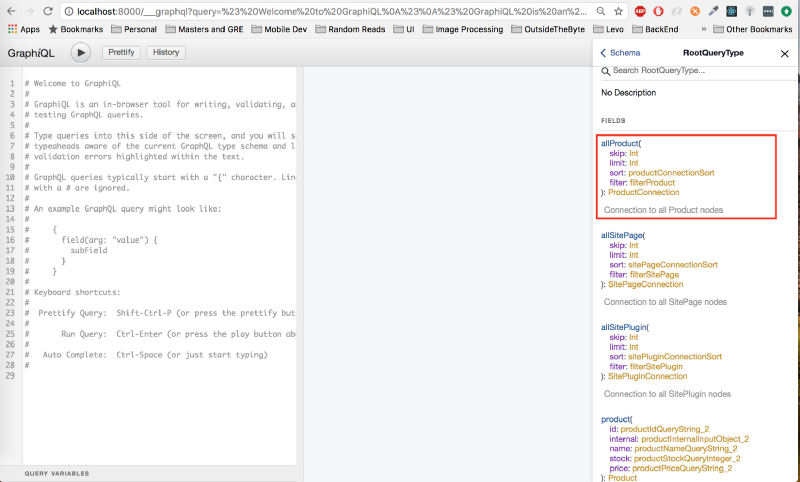
Run gatsby develop again and then open up the GraphiQL service running at http://localhost:8000/___graphql

Explore the schema docs by clicking on the docs button on the top right. You will see that a new query called allProduct is now available.

The GraphQL query to fetch all the products will be the following:

query {
  allProduct {
    edges {
      node {
        id
        name
        stock
        price
      }
    }
  }
}

Note: Use GraphiQL to figure out the query.

Accessing the data in the react component using GraphQL queries

Alright, now that we have added our external data to the gatsby data source. Lets create a component to access this data. Inside the src/pages directory, create a new file named productList.js with the following content:

import React from 'react'

export default class ProductList extends React.Component {

render() {

}

export const query = graphql`
    return (
      <div>
        <h1>Products</h1>
        {
          this.props.data.allProduct.edges.map((edge, index) => {
            const product = edge.node
            return (
              <div key={product.id}>{product.name}</div>
            )
          })
        }
      </div>
    );
  }
  query AllProducts {
    allProduct {
      edges {
        node {
          id
          name
        }
      }
    }
  }
`
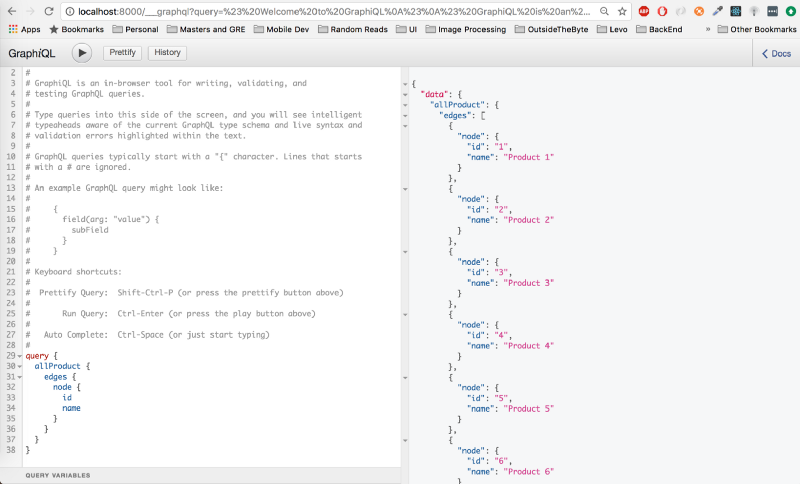
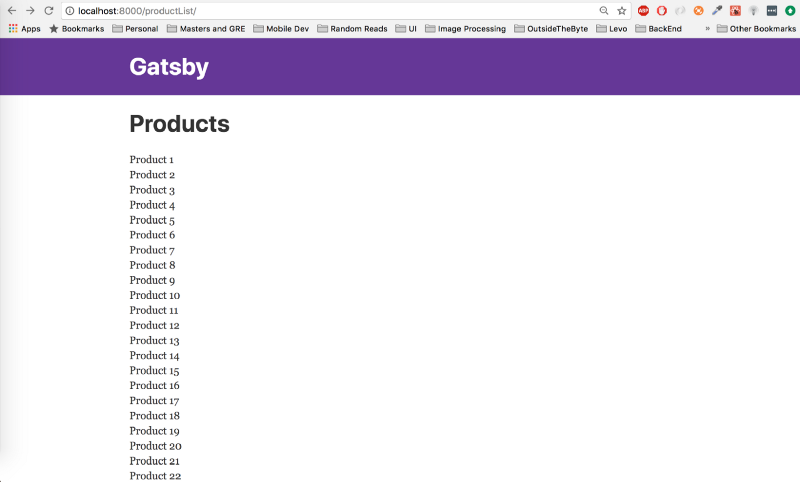
Note: We have not imported anything to access the graphql tag. This is because these queries are extracted out of the component by gatsby during the build process. You can read more about it in their docs.

The data returned from the query is available to the component via its props. You can find the structure of the data by running the query in GraphiQL.

Since gatsby supports hot reloading, you don’t really have to do anything else, other than save the productList.js file. This component will now be available at http://localhost:8000/productList

And voila! We have our listing page.

Creating dynamic pages for each product

Next, let’s create another set of pages for each of our products where we can show more information about the product, like the remaining stock quantity and the price. Let’s say we want the url of the page to be of the type /product/<product-id>

Open up the gatsby-node.js file and add the following

...


exports.sourceNodes = async ({ boundActionCreators }) => {....}

exports.createPages = ({ graphql, boundActionCreators }) => {
const path = require(`path`);
...  const { createPage } = boundActionCreators
  return new Promise((resolve, reject) => {
    graphql(`
      {
        allProduct {
          edges {
            node {
              id
            }
          }
        }
      }
    `  ).then(result => {
    result.data.allProduct.edges.forEach(({ node }) => {
      createPage({
        path: `product/${node.id}`,
        component: path.resolve(`./src/templates/productDetail.js`),
        context: {
          productId: node.id
        },
      })
    })
    resolve()
    })
  }).catch(error => {
    console.log(error)
    reject()
  })
};

To create dynamic pages, we use the method createPage. The method accepts an object with the following keys:

  • path: This is the path we want for our page. In this case, it is going to be /product/<productId>.
  • component: This is the location of our react component which will be used to render the page. For the time being, just leave this as shown in the code snippet. We will create the component next. Note: we are using a gatsby provided library called path for this. Ensure that you have imported it with const path = require('path').
  • context: is the data you want this component to get by default. In this case, we are sending it the product id, so that it can use it to fetch the complete data for the particular product.

Note: You can read more about the createPage method here.

Next, let’s create our ProductDetail component. Create a new directory inside the src directory called templates. Inside the templates directory, create a file named productDetail.js with the following content inside it:

import React from 'react'

export default class ProductDetail extends React.Component {

render() {

}

export const query = graphql`
    const product = this.props.data.product;
    return (
      <div>
        <h1>{product.name}</h1>
        <div>Price: {product.price}</div>
        <div>Stock: {product.stock}</div>
      </div>
    );
  }
  query ProductDetails($productId: String!) {
    product(id: { eq: $productId }) {
      id
      name
      stock
      price
    }
  }
`
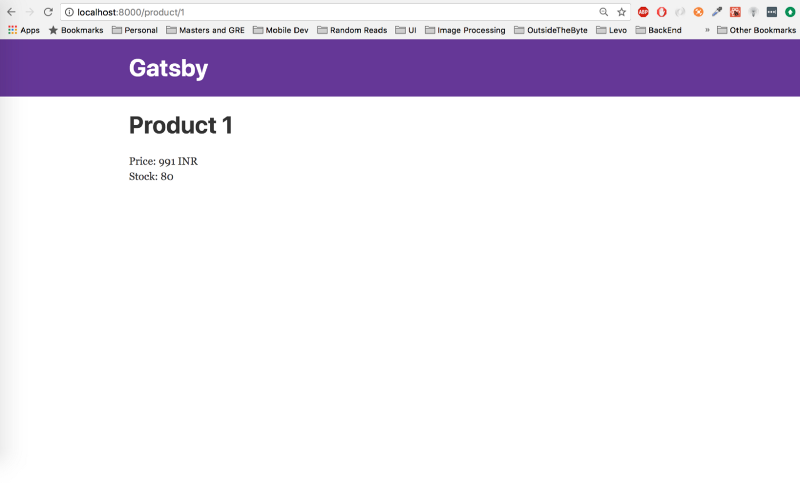
Note: the $productId is the data being sent from the context key specified in our createPage method inside the gatsby-node.js file, as shown in the previous step. Gatsby automatically uses that as the value for $productId when making the GraphQL query.

Save both the gatsby-node.js and productDetail.js files and run gatsby develop again. You can now access the detail page for each product at a url of the type, http://localhost:8000/product/<product-id>. Let’s try http://localhost:8000/product/1

Awesome, let’s now link these pages from our listing page.

Head to the productList.js file inside src/pages and make the following change

import React from 'react'


export default class ProductList extends React.Component {

render() {


}

export const query = graphql`
import Link from 'gatsby-link'
    return (
      <div>
        <h1>Products</h1>
        {
          this.props.data.allProduct.edges.map((edge, index) => {
            const product = edge.node
            return (
              <Link key={product.id} to={`/product/${product.id}`}>
                <div>{product.name}</div>
              </Link>
            )
          })
        }
      </div>
    );
  }
  query AllProducts {
    allProduct {
      edges {
        node {
          id
          name
        }
      }
    }
  }
`

There are two major additions made here

  • Import the Gatsby Link component with import Link from 'gatsby-link'
  • Wrap <div>{product.name}</div> inside the Link component.

Save the file and you would have your listing page now link to the detail pages.

Adding pagination to the product listing page

Next, let’s add pagination to our listing page.

To add pagination, we are going to leverage gatsby’s community support and use one of their plugins gatsby-paginate.

Run the following in the root project directory to include it in your project:

$ npm install --save gatsby-paginate

Next, open the gatsby-node.js file and make the following changes.

...


exports.sourceNodes = async ({ boundActionCreators }) => {...}

exports.createPages = ({ graphql, boundActionCreators }) => {
const createPaginatedPages = require("gatsby-paginate");
  const { createPage } = boundActionCreators
  return new Promise((resolve, reject) => {
    graphql(`     ...    `  ).then(result => {
    createPaginatedPages({
      edges: result.data.allProduct.edges,
      createPage: createPage,
      pageTemplate: "src/templates/productList.js",
      pageLength: 10,
      pathPrefix: "productList",
    });
    result.data.allProduct.edges.forEach(({ node }) => {
      createPage({
        path: `product/${node.id}`,
        component: path.resolve(`./src/templates/productDetail.js`),
        context: {
          productId: node.id
        },
      })
    })
    resolve()
    })
  }).catch(error => {
    console.log(error)
    reject()
  })
};

We are calling the createPaginatedPages with the following parameters:

  • edges: is the list of products we have fetched from our GraphQL query
  • createPage: is the createPage function we retrieve from boundActionCreators.
  • pageTemplate: is the path to our react component which will render this page. In this case it is src/templates/productList.js. We will get to this in a bit. For the time being, let this be.
  • pageLength: is the number of products we want to show per page. (defaults to 10)
  • pathPrefix: is the route we want this list to be rendered at. In this case, /productList/

Note: You can read the documentation for the plugin here to get more information about the customisations you can do.

Next, let’s create our productList.js template. Move the productList.js file from src/pages/productList.js to src/templates/ and make the following changes to it.

import React from 'react'

const NavLink = props => {

export default class ProductList extends React.Component {

render() {

return (
import Link from 'gatsby-link'
  if (!props.test) {
    return (
      <Link to={props.url}>
        {props.text} > {props.url}
      </Link>
    )
  } else {
    return (
      <span>
        {props.text} > {props.url}
      </span>
    )
  }}
    const { group, index, first, last, pageCount } = this.props.pathContext
    const previousUrl =
      index - 1 <= 1 ? '/productList/' : `${(index - 1).toString()}`
    const nextUrl = `${(index + 1).toString()}`
      <div>
        {
          group.map(edge => {
            const product = edge.node;
            return (
              <Link key={product.id} to={`/product/${product.id}`}>
                <div>{product.name}</div>
              </Link>
            )
          })
        }
        <div className="previousLink">
          <NavLink test={first} url={previousUrl} text="Go to Previous Page" />
        </div>
        <div className="nextLink">
          <NavLink test={last} url={nextUrl} text="Go to Next Page" />
        </div>
      </div>
    )
  }
}
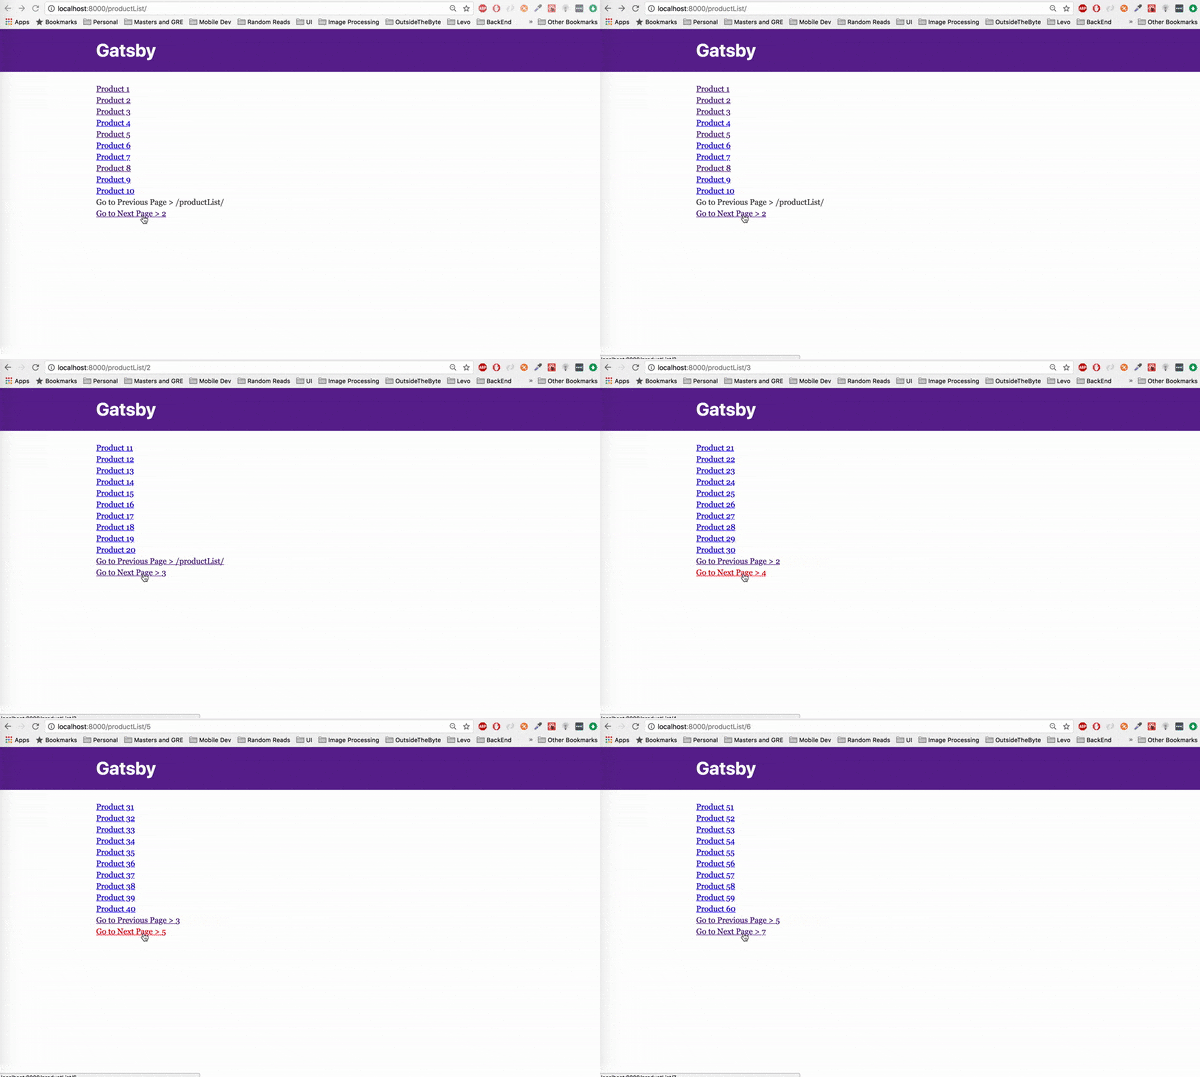
We have added a navigation component and also made the necessary changes to handle the data being sent to this component by the gatsby-paginate plugin.

Save both the files and run gatsby develop again. After the build, open up http://localhost:8000/projectList

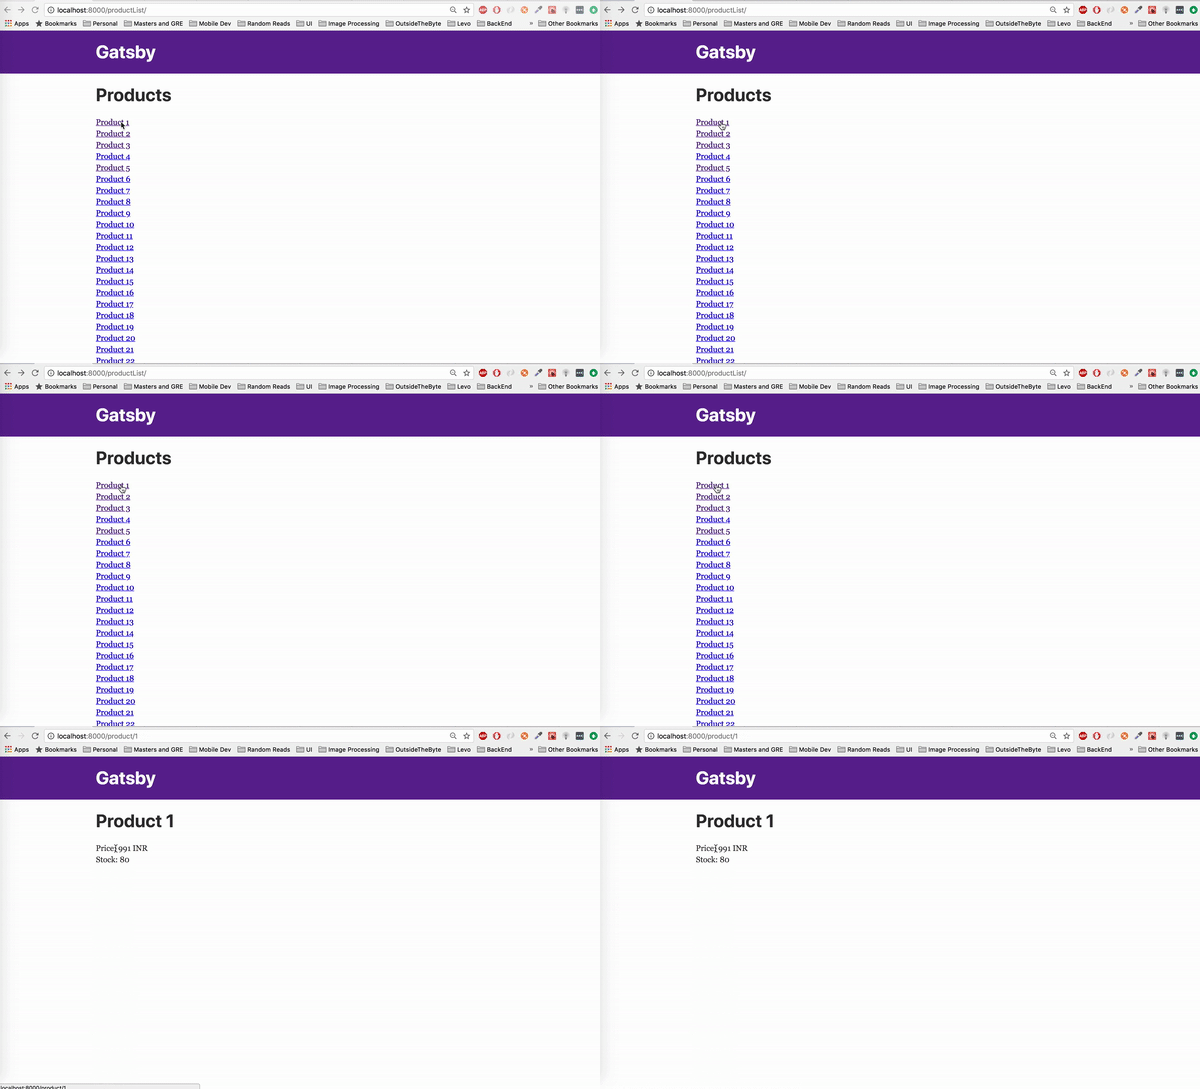
And there we have it! A listing page app with pagination and dynamic pages!

You can find the code for the whole app in the following repository.

jaisontj/gatsby-listing-example
gatsby-listing-example - An example gatsby app showcasing how a listing app can be made using gatsbygithub.com

Final Thoughts

Although building a dynamic app using Gatsby is possible, the current version of Gatsby (v1) is suitable to build a site that is not “too dynamic” (data changes every 30 mins or so).

Furthermore, there are a few features that would be really useful:

  • Faster build times by only rebuilding pages whose data has changed. Having this feature will make every rebuild for data changes the same as updating a cache.
  • Enabling fetching data directly from external GraphQL sources with the help of Schema Stitching. This way you can query the data directly from your source with your own GraphQL query.
  • Support for “large websites”. This means that sites with >1k pages will not perform well with Gatsby. Although, Gatsby does mention that there are people who have successfully built websites with more than 1k pages.

We have been looking at moving hasura.io to gatsby for the past few days. This blog post is a primer to a series of upcoming blogposts where we will live blog each step of the migration process.

If this attempt fails, this death will not be in vain. We will have learnt things about gatsby and about life. Which is always a good thing.

While you're here, why not try out Hasura? It's free to try and you can get started in 30 seconds or so.

Blog
04 Apr, 2018
Email
Subscribe to stay up-to-date on all things Hasura. One newsletter, once a month.
Loading...
v3-pattern
Accelerate development and data access with radically reduced complexity.