Edit on GitHub
Setup todos table permissions
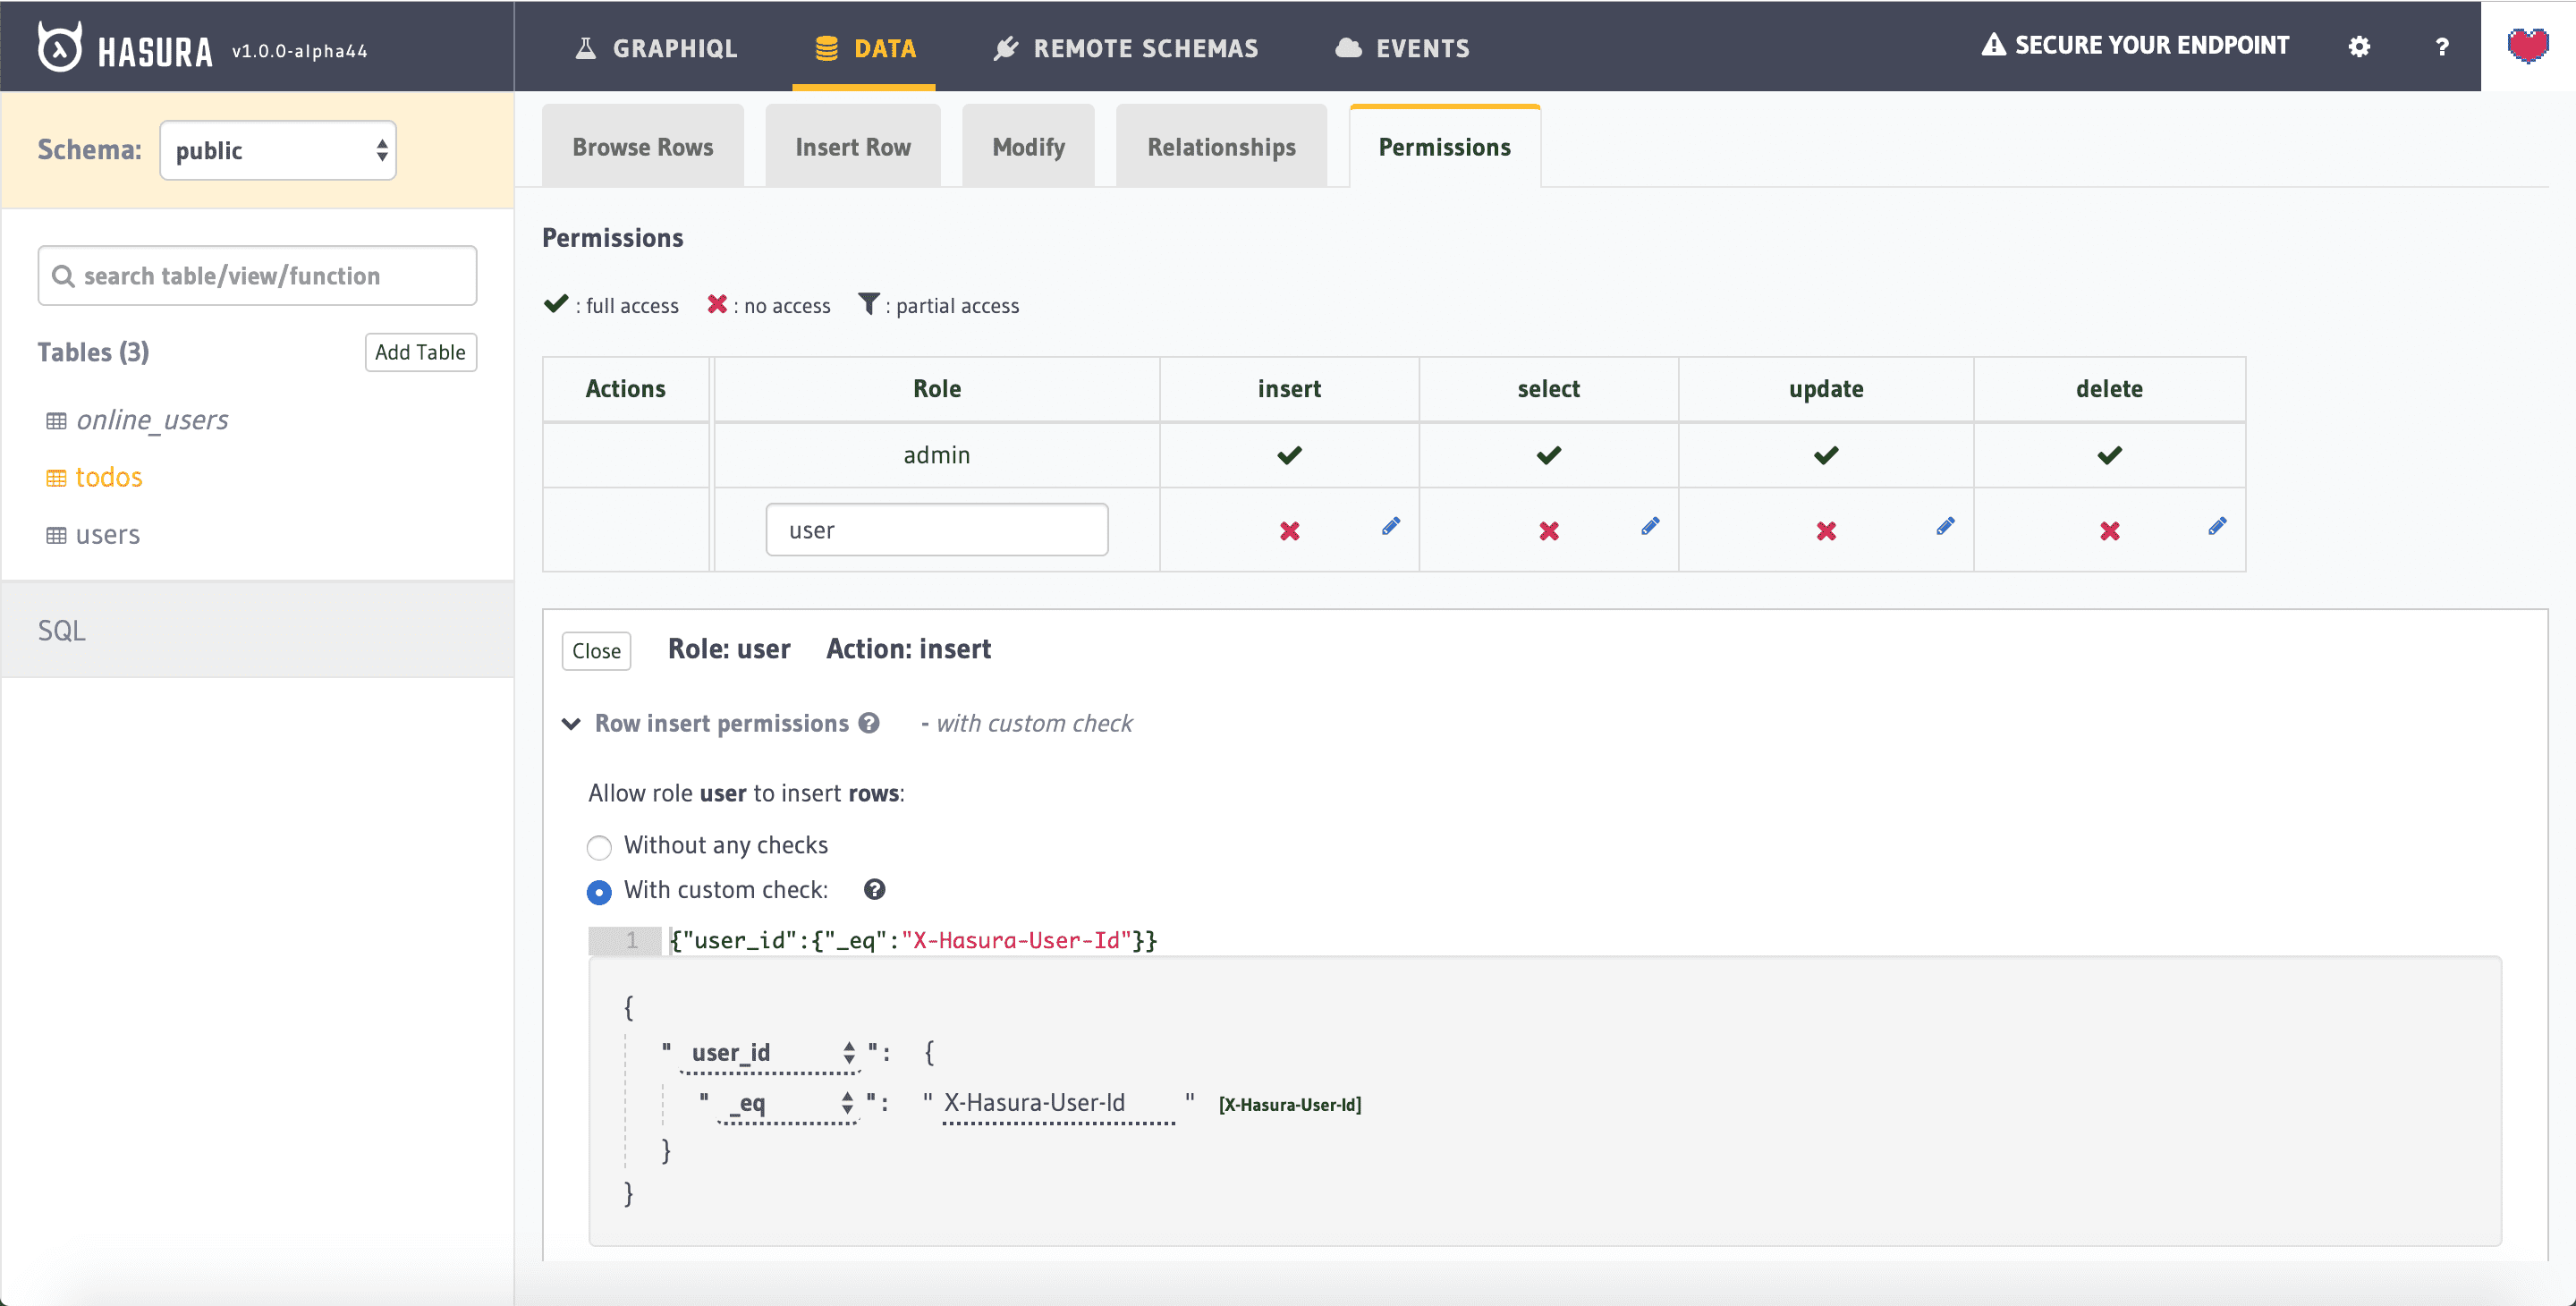
Head over to the Permissions tab under todos table to add relevant permissions.
Insert permission
We will allow logged-in users creating a new todo entry to only specify the is_public and title columns.
- In the enter new role textbox, type in “user”
- Click on edit (pencil) icon for “insert” permissions. This would open up a section below, which lets you configure custom checks and allow columns.
- In the custom check, choose the following condition
{"user_id":{"_eq":"X-Hasura-User-Id"}}
Now under "Column insert permissions", select the title and is_public columns.
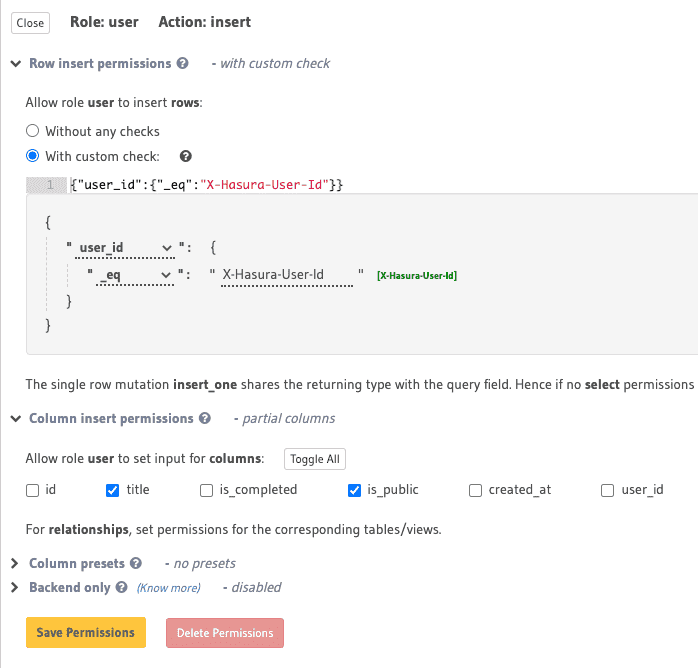
Finally under "Column presets", select user_id from from session variable mapping to X-HASURA-USER-ID.
Note: Session variables are key-value pairs returned from the authentication service for each request. When a user makes a request, the session token maps to a USER-ID. This USER-ID can be used in permission to show that inserts into a table are only allowed if the user_id column has a value equal to that of USER-ID, the session variable.
Click on Save Permissions.
Select permission
We will allow users to view a todo entry if it is public or if they are logged-in users.
Now click on edit icon for "select" permissions. In the custom check, choose the following condition
{"_or":[{"is_public":{"_eq":true}},{"user_id":{"_eq":"X-Hasura-User-Id"}}]}

Under "Column select permissions", select all the columns.
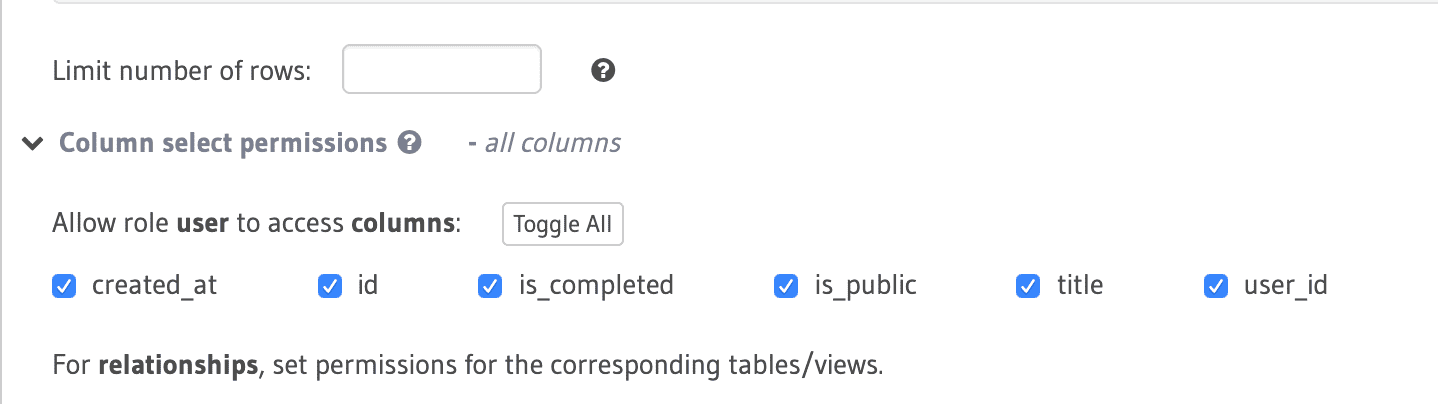
Click on Save Permissions
Update permission
We will only allow the is_completed column to be updated by a user.
Now click on edit icon for "update" permissions. In the pre-update custom check, choose With same custom checks as insert.
And under "Column update permissions", select the is_completed column.
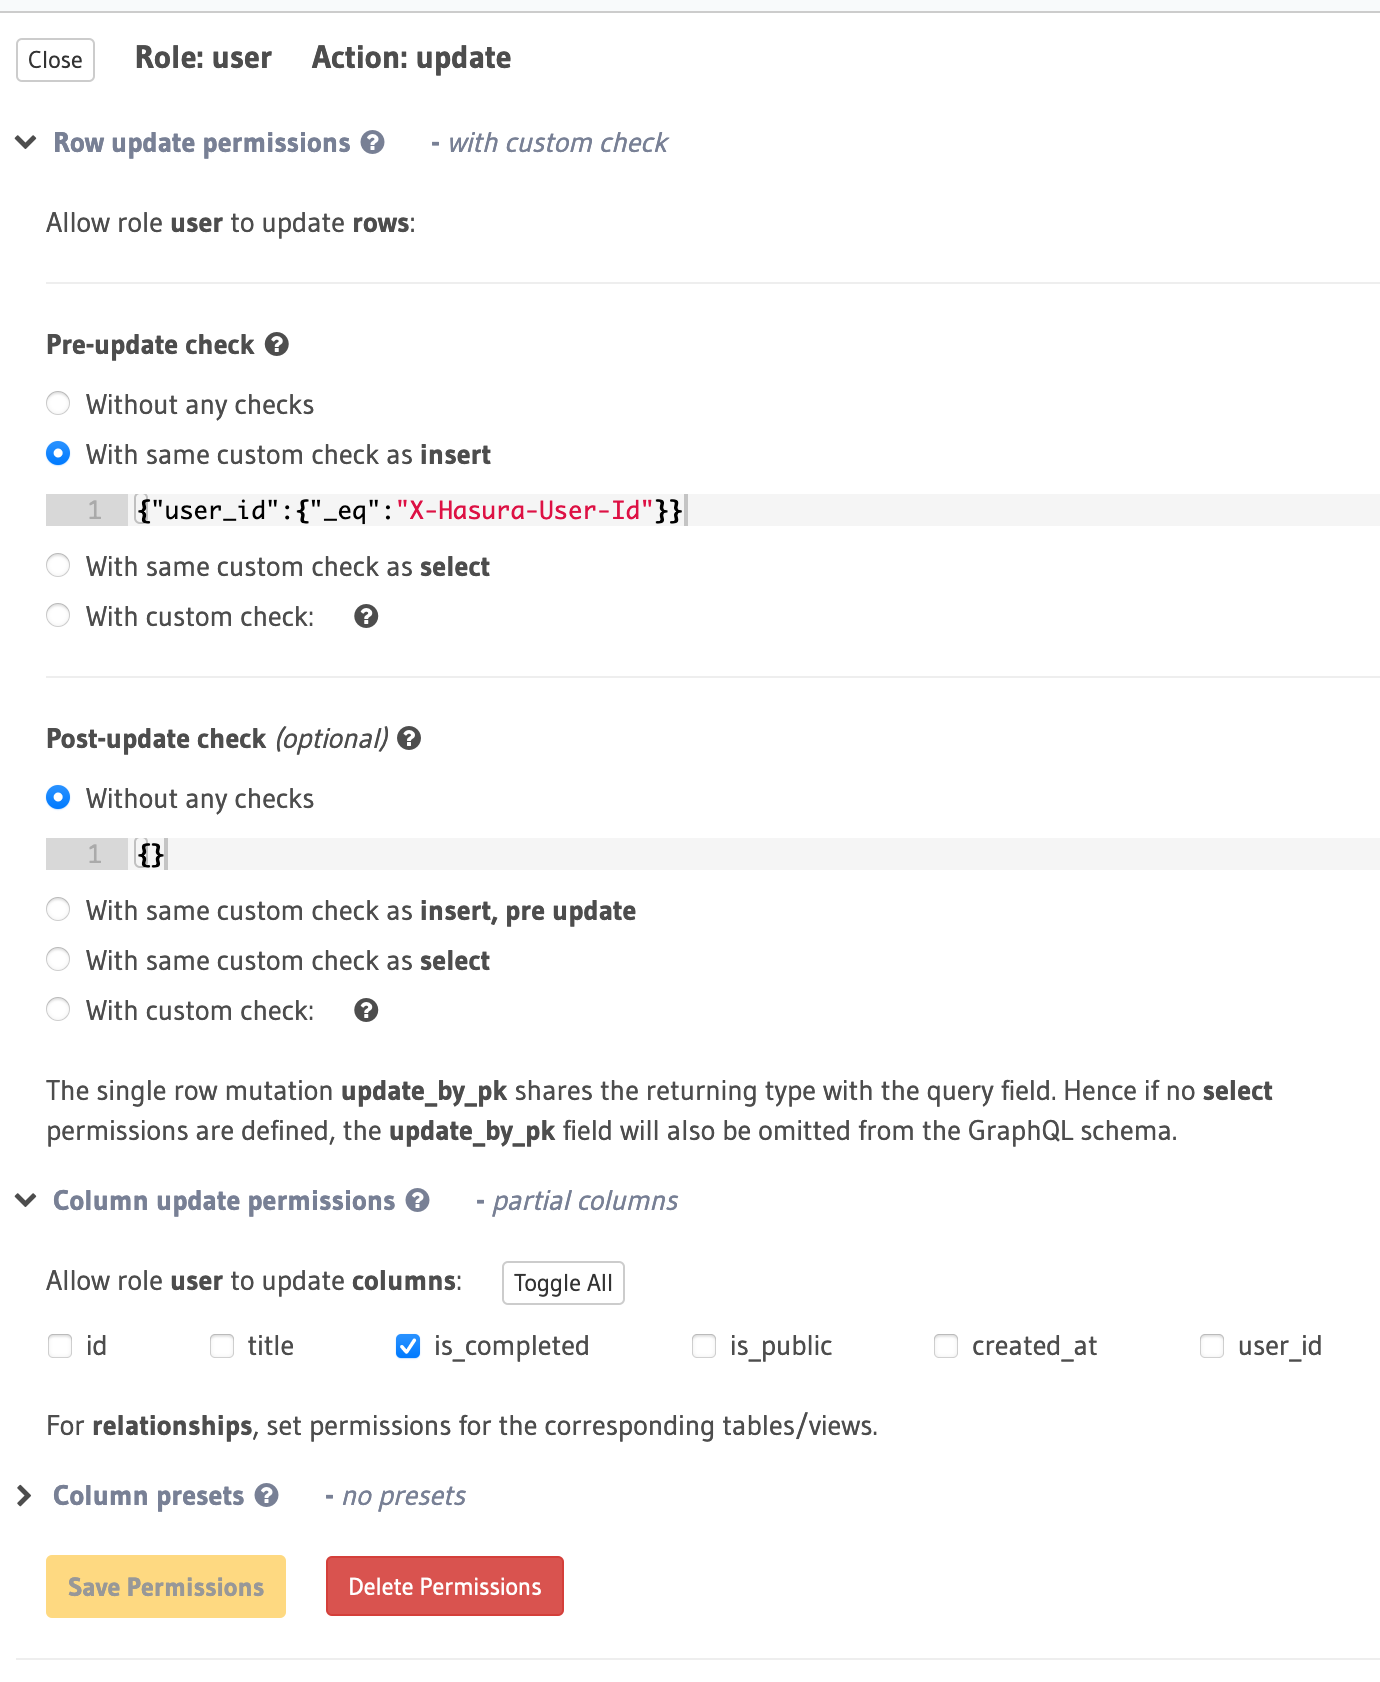
Click on Save Permissions once done.
Delete permission
Only logged-in users are allowed to delete a todo entry.
Finally for delete permission, under custom check, choose With same custom checks as insert, pre update.
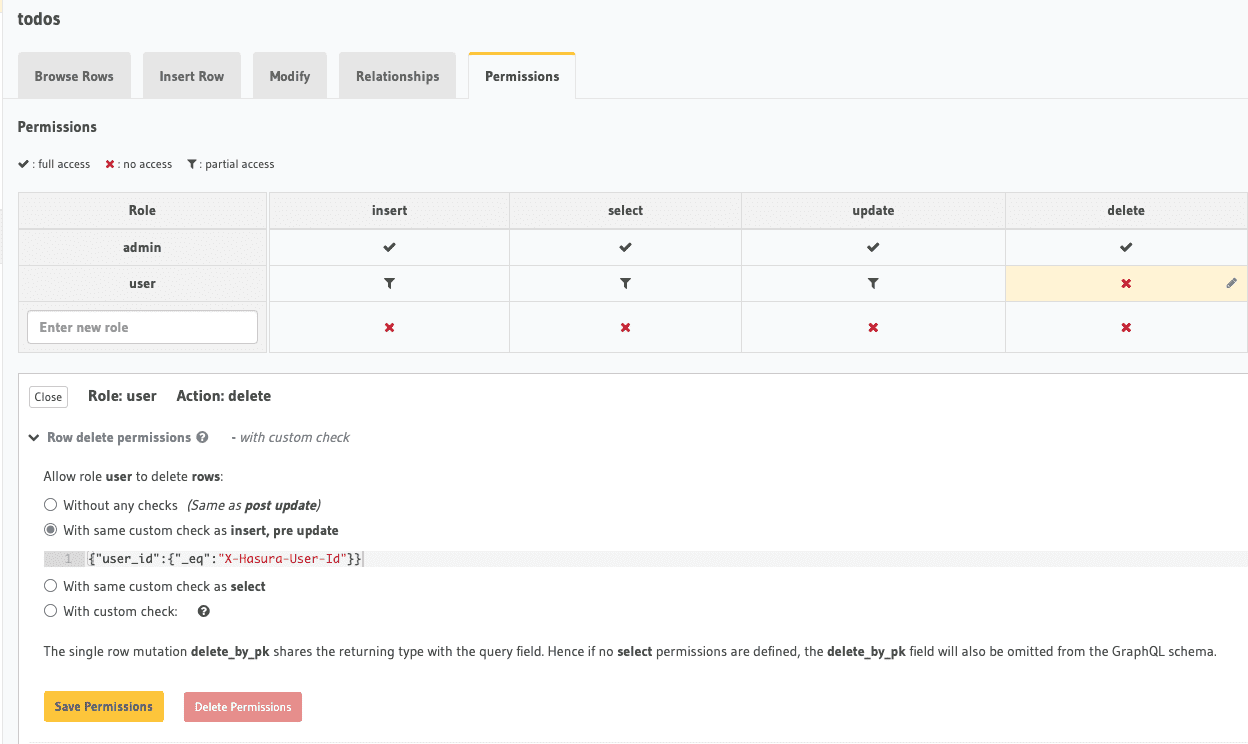
Click on Save Permissions and you are done with access control for todos table.
 Build apps and APIs 10x faster
- Built-in authorization and caching
- 8x more performant than hand-rolled APIs