Edit on GitHub
Creating Actions
Let's take the first use-case of fetching profile information from Auth0.
Ideally, you would want to maintain a single GraphQL endpoint for all your data requirements.
To handle the use-case of fetching Auth0 profile information, we will write a REST API in a custom Node.js server. This could be written in any language/framework, but we are sticking to Node.js for this example.
Hasura can then merge this REST API with the existing auto-generated GraphQL schema and the client will be able to query everything using the single GraphQL endpoint.
Creating an action
On the Hasura Console, head to the Actions tab and click on Create to create a new action.
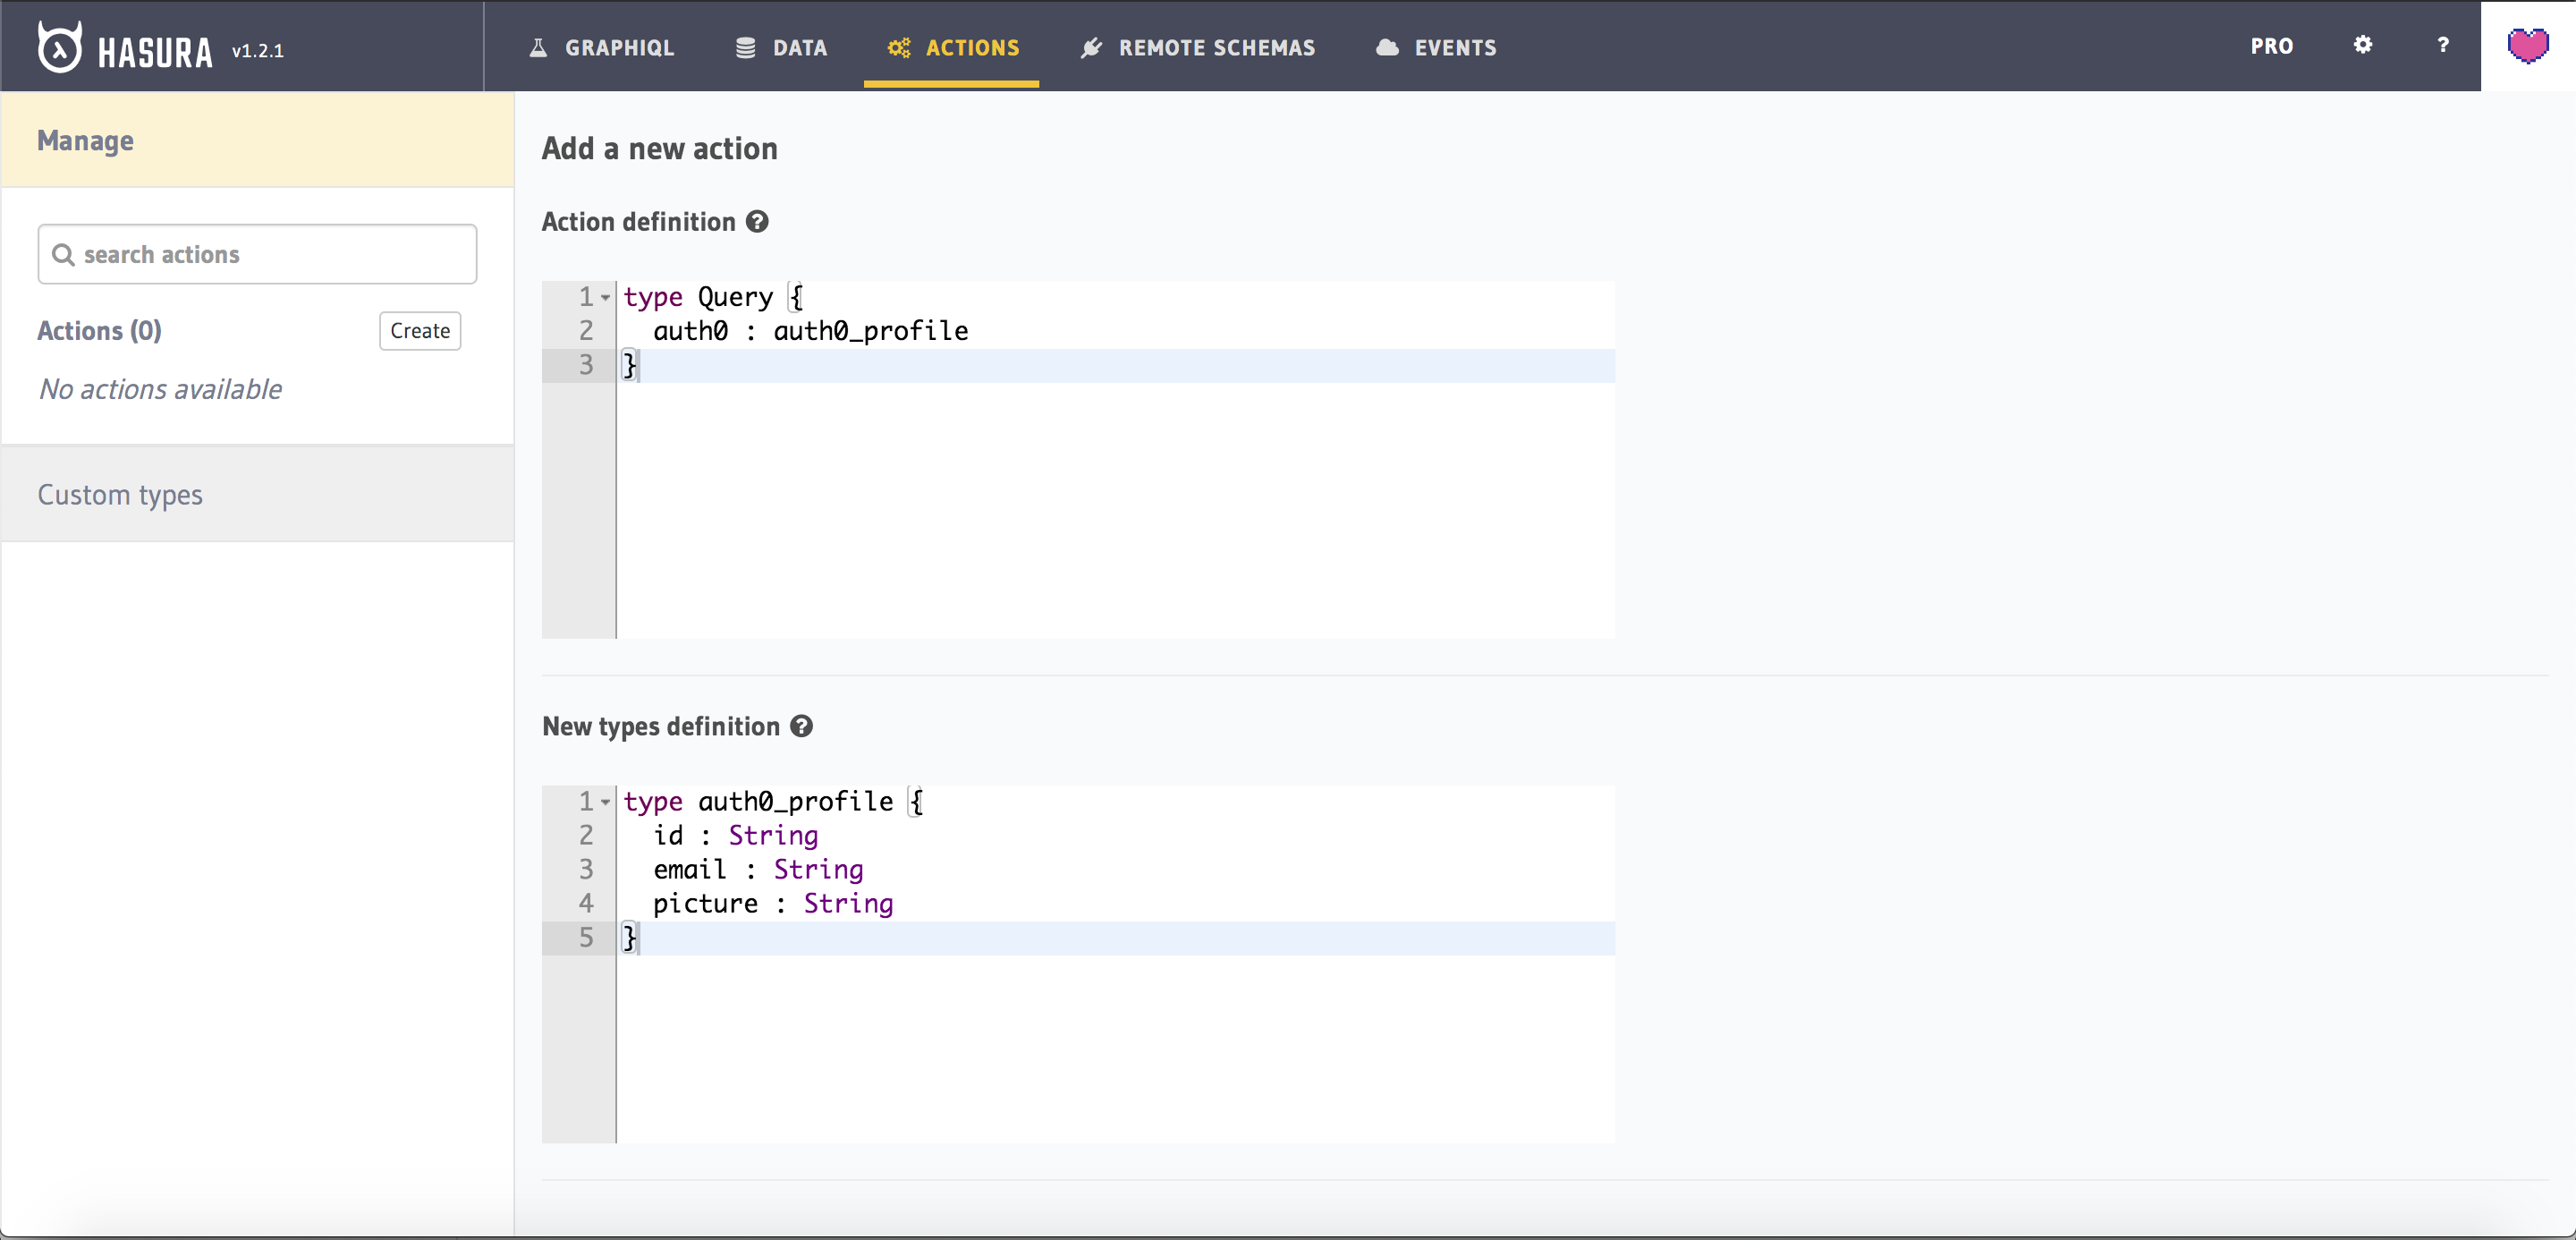
Action definition
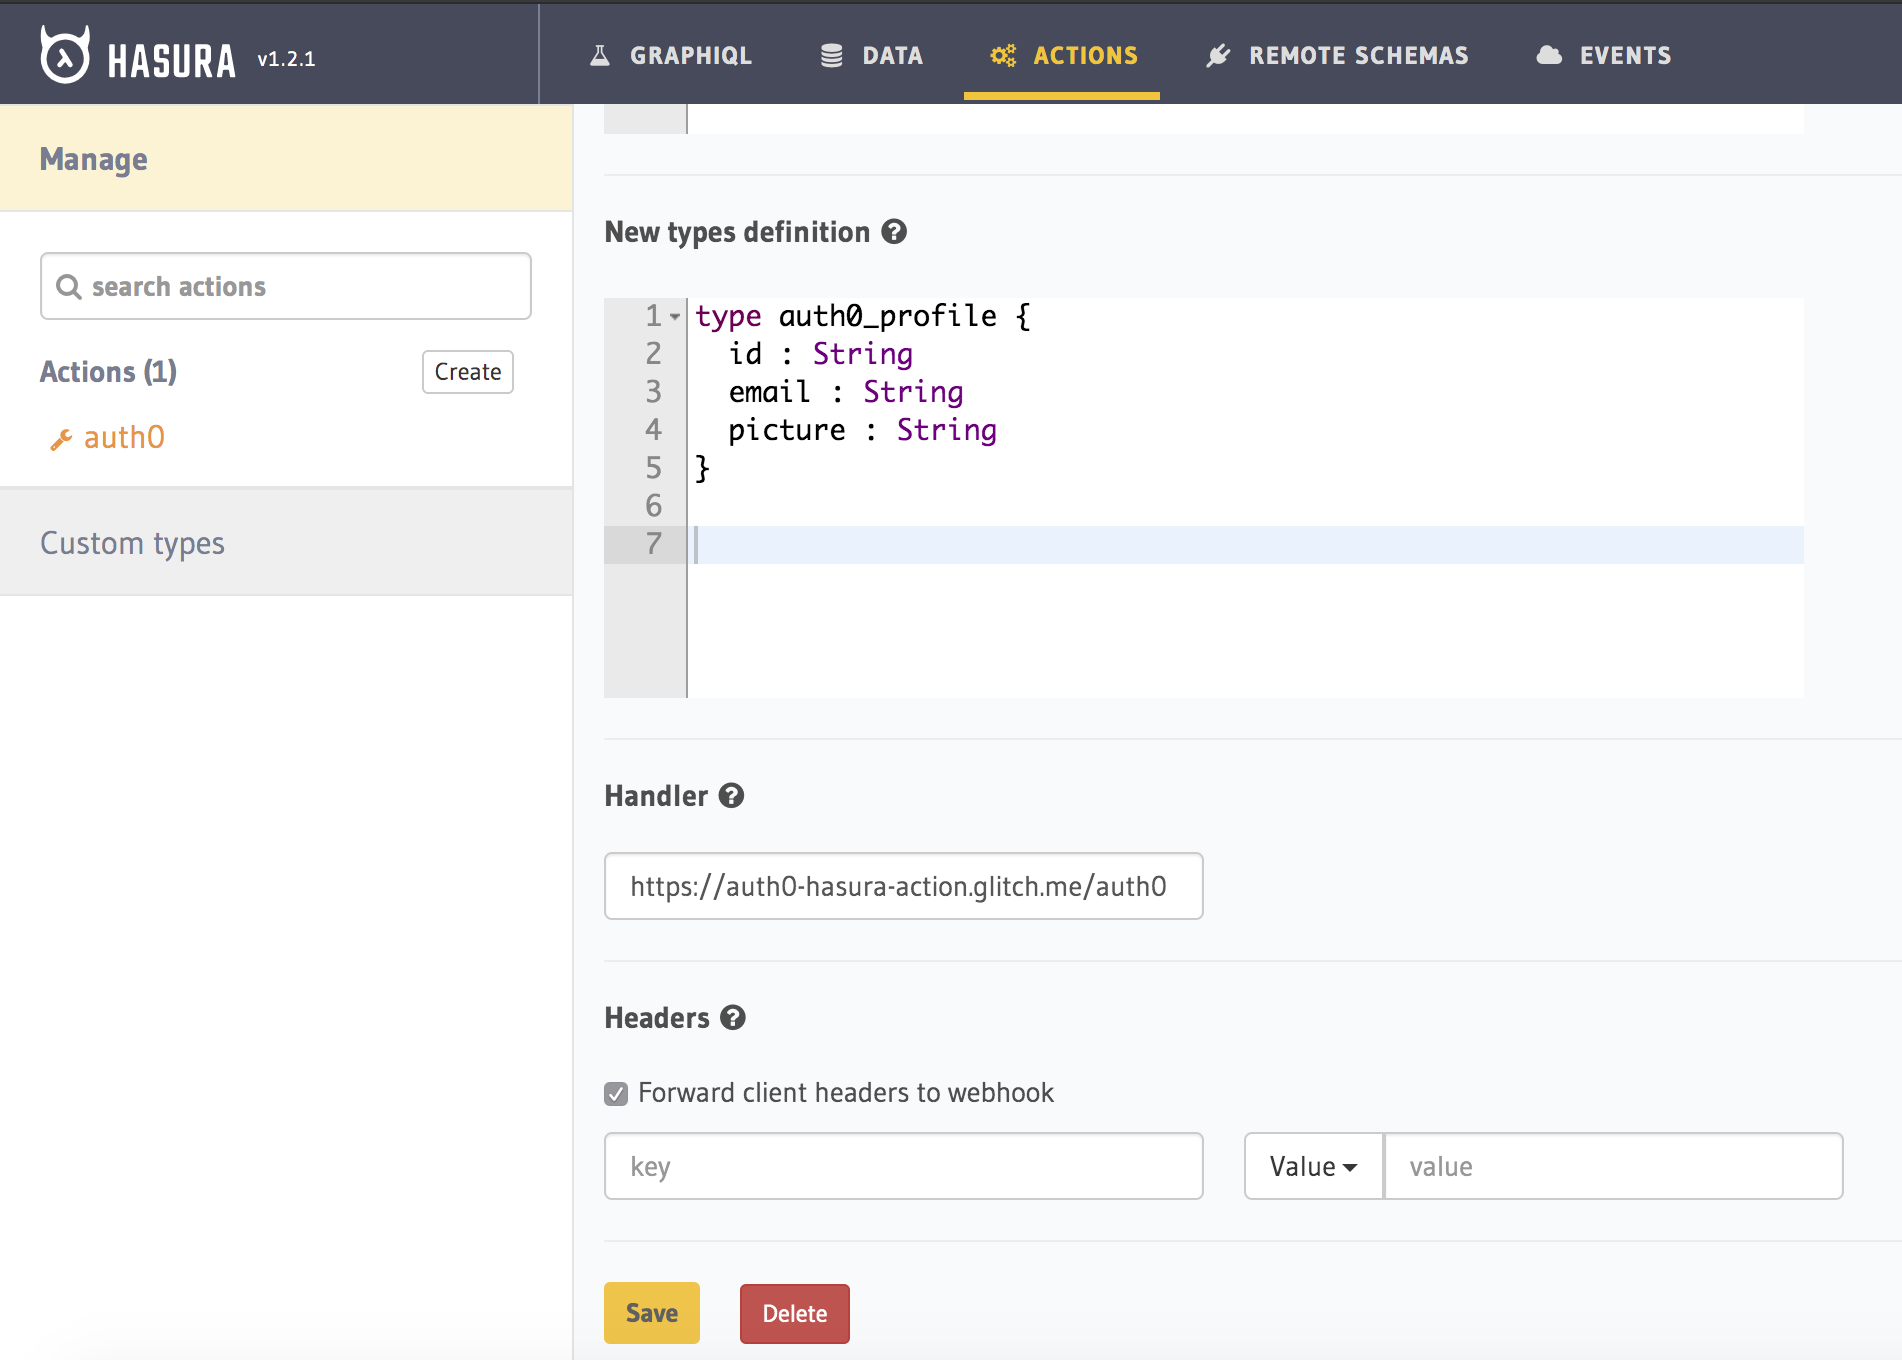
We will need to define our Action and the type of action. Since we are only reading data from an API, we will use the Query type for this Action. The definition will have the name of the action (auth0 in this case), input arguments (none in this case), and the response type of the action (auth0_profile in this case).
type Query {auth0 : auth0_profile}
Types definition
We defined that the response type of the action is auth0_profile. So what do we want in return from the Auth0 API? We want the id, email, and picture fields that aren't stored on our database so far.
type auth0_profile {id : Stringemail : Stringpicture : String}
All three fields are of type String. Note that auth0_profile is an object type that has 3 keys (id, email, and picture) and we are returning this object in our response.
We will change the Handler URL later once we write our REST API and deploy it on a public endpoint.
Click on Create once you are done configuring the above fields.
Write a REST API
Now that the Action has been created, let's write a REST API in a Node.js Express app that can later be configured for this Action.
Head to the Codegen tab to quickly get started with boilerplate code :)
Click on Try on Glitch to deploy a server. Glitch is a platform to build and deploy apps (Node.js) and is a quick way to test and iterate code on the cloud.
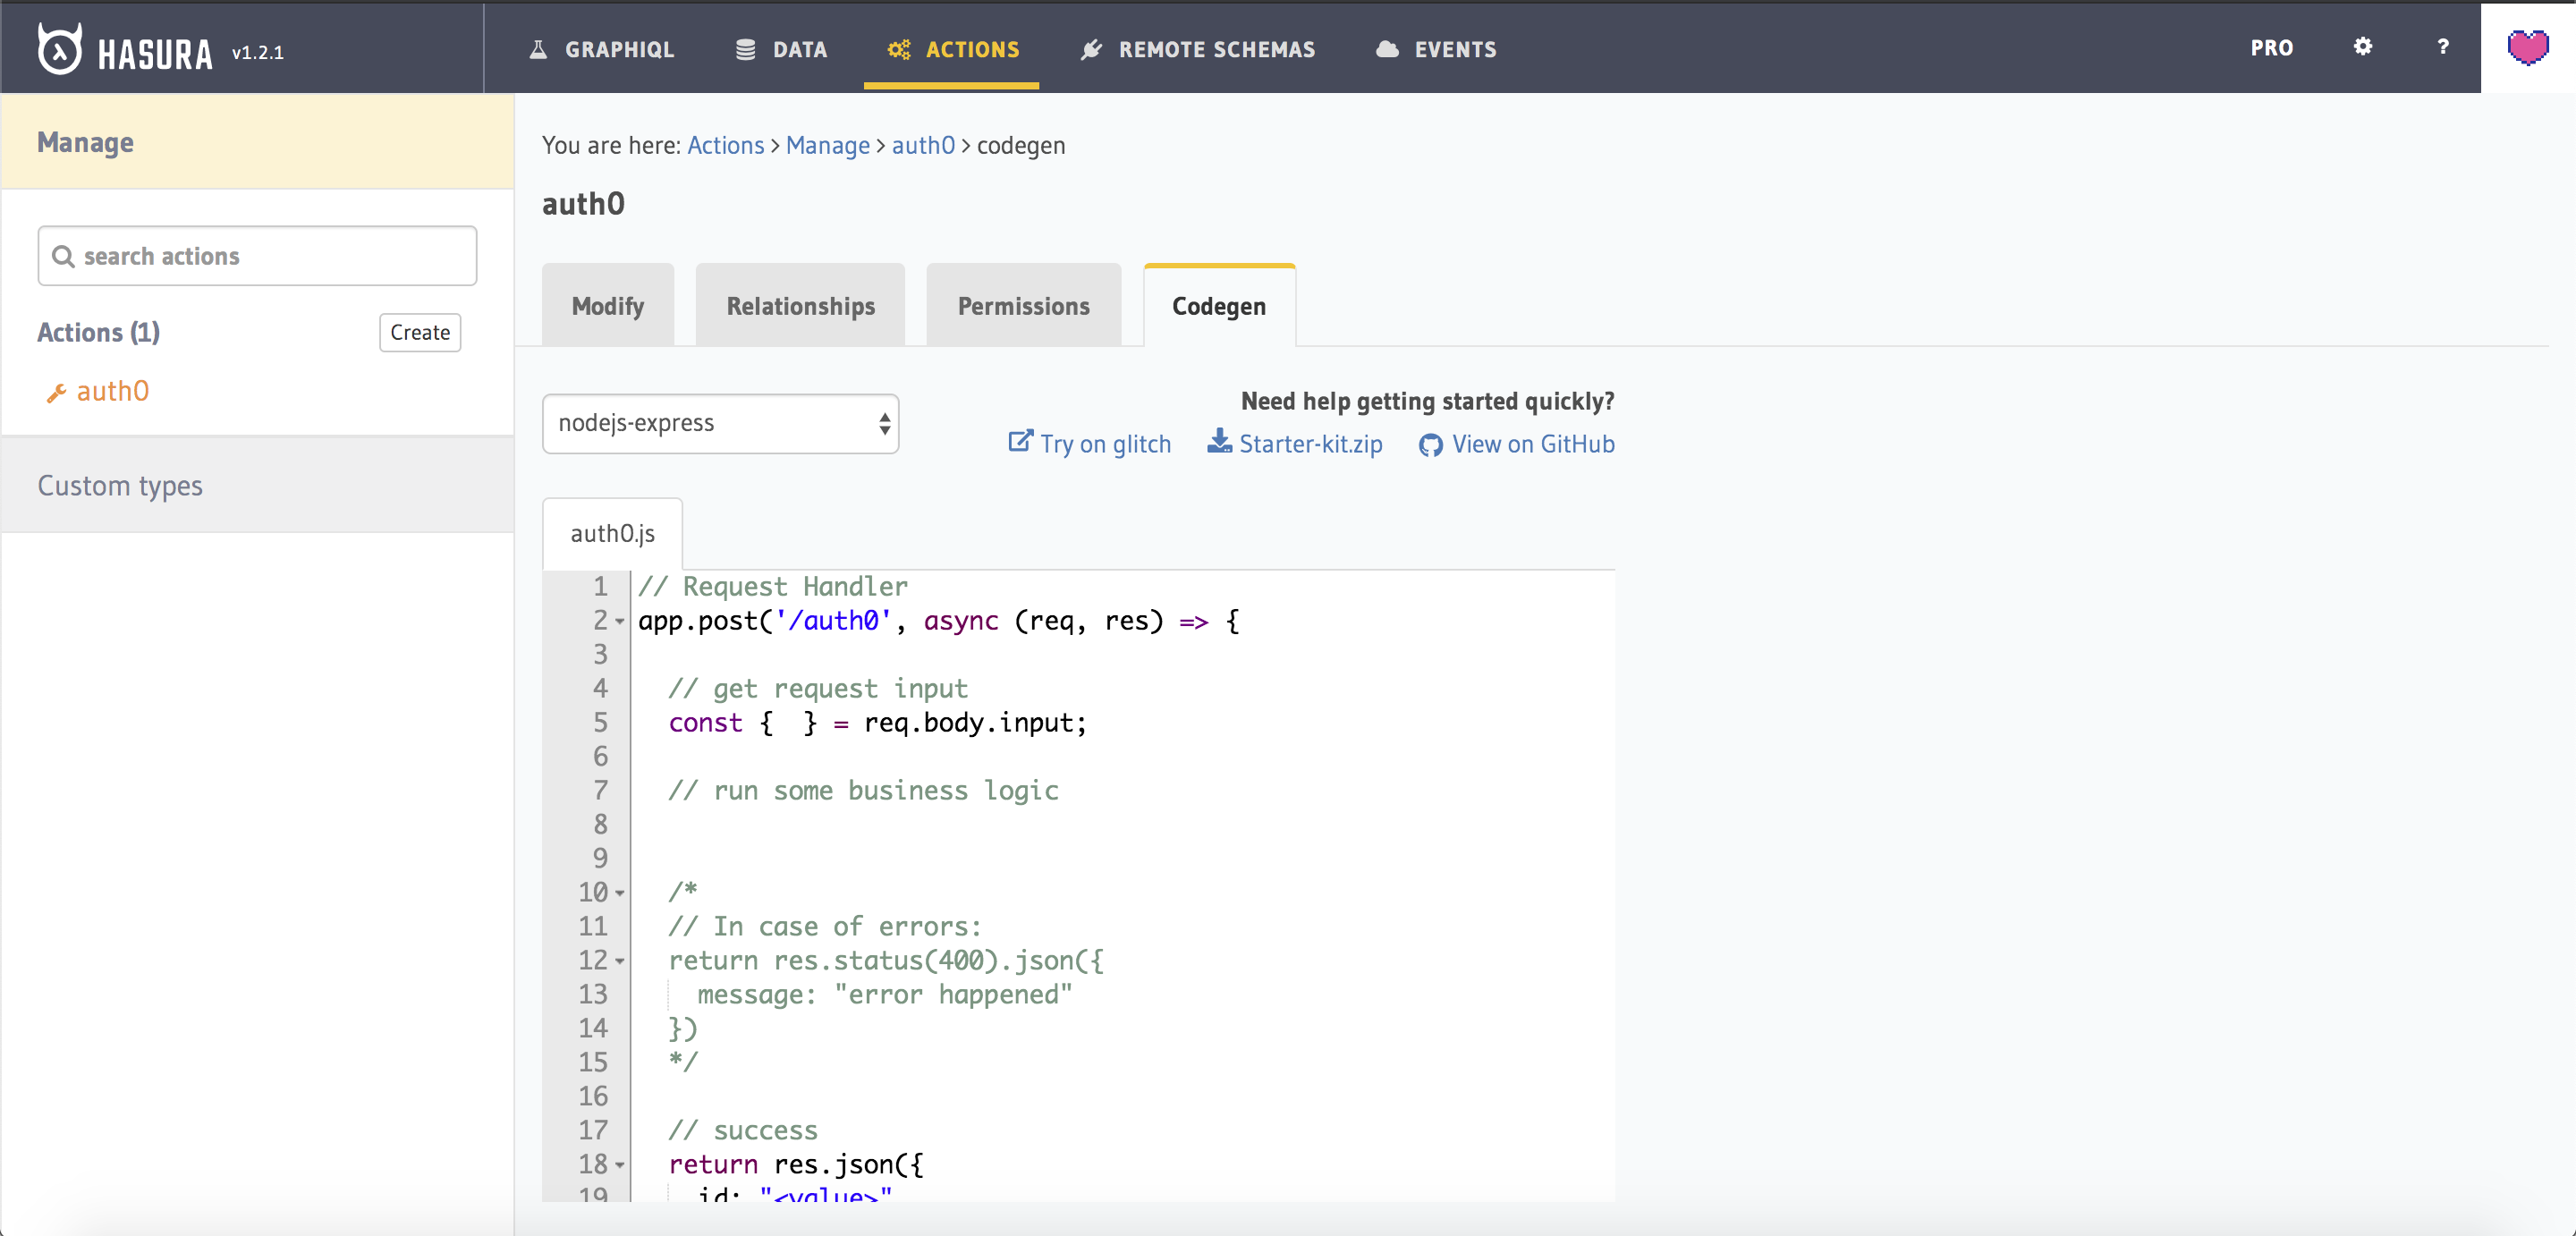
Now replace the contents of src/server.js with the following:
const express = require("express");const bodyParser = require("body-parser");const fetch = require('node-fetch');const app = express();const PORT = process.env.PORT || 3000;app.use(bodyParser.json());const getProfileInfo = (user_id) => {const headers = {'Authorization': 'Bearer '+process.env.AUTH0_MANAGEMENT_API_TOKEN};console.log(headers);return fetch('https://' + process.env.AUTH0_DOMAIN + '/api/v2/users/'+user_id,{ headers: headers}).then(response => response.json())}app.post('/auth0', async (req, res) => {// get request inputconst { session_variables } = req.body;const user_id = session_variables['x-hasura-user-id'];// make a rest api call to auth0return getProfileInfo(user_id).then( function(resp) {console.log(resp);if (!resp) {return res.status(400).json({message: "error happened"})}return res.json({email: resp.email,picture: resp.picture})});});app.listen(PORT);
In the server above, let's break down what's happening:
- We receive the payload
session_variablesas the request body from the Action. - We make a request to the Auth0's Management API, passing in the
user_idto get details about this user. - Once we get a response from the Auth0 API in our server, we form the following object
{email: resp.email, picture: resp.picture}and send it back to the client. Else, we return an error case.
In case you are stuck with the code above, use the following readymade server on Glitch to clone it. You also need to remix the Glitch project to start modifying any code.
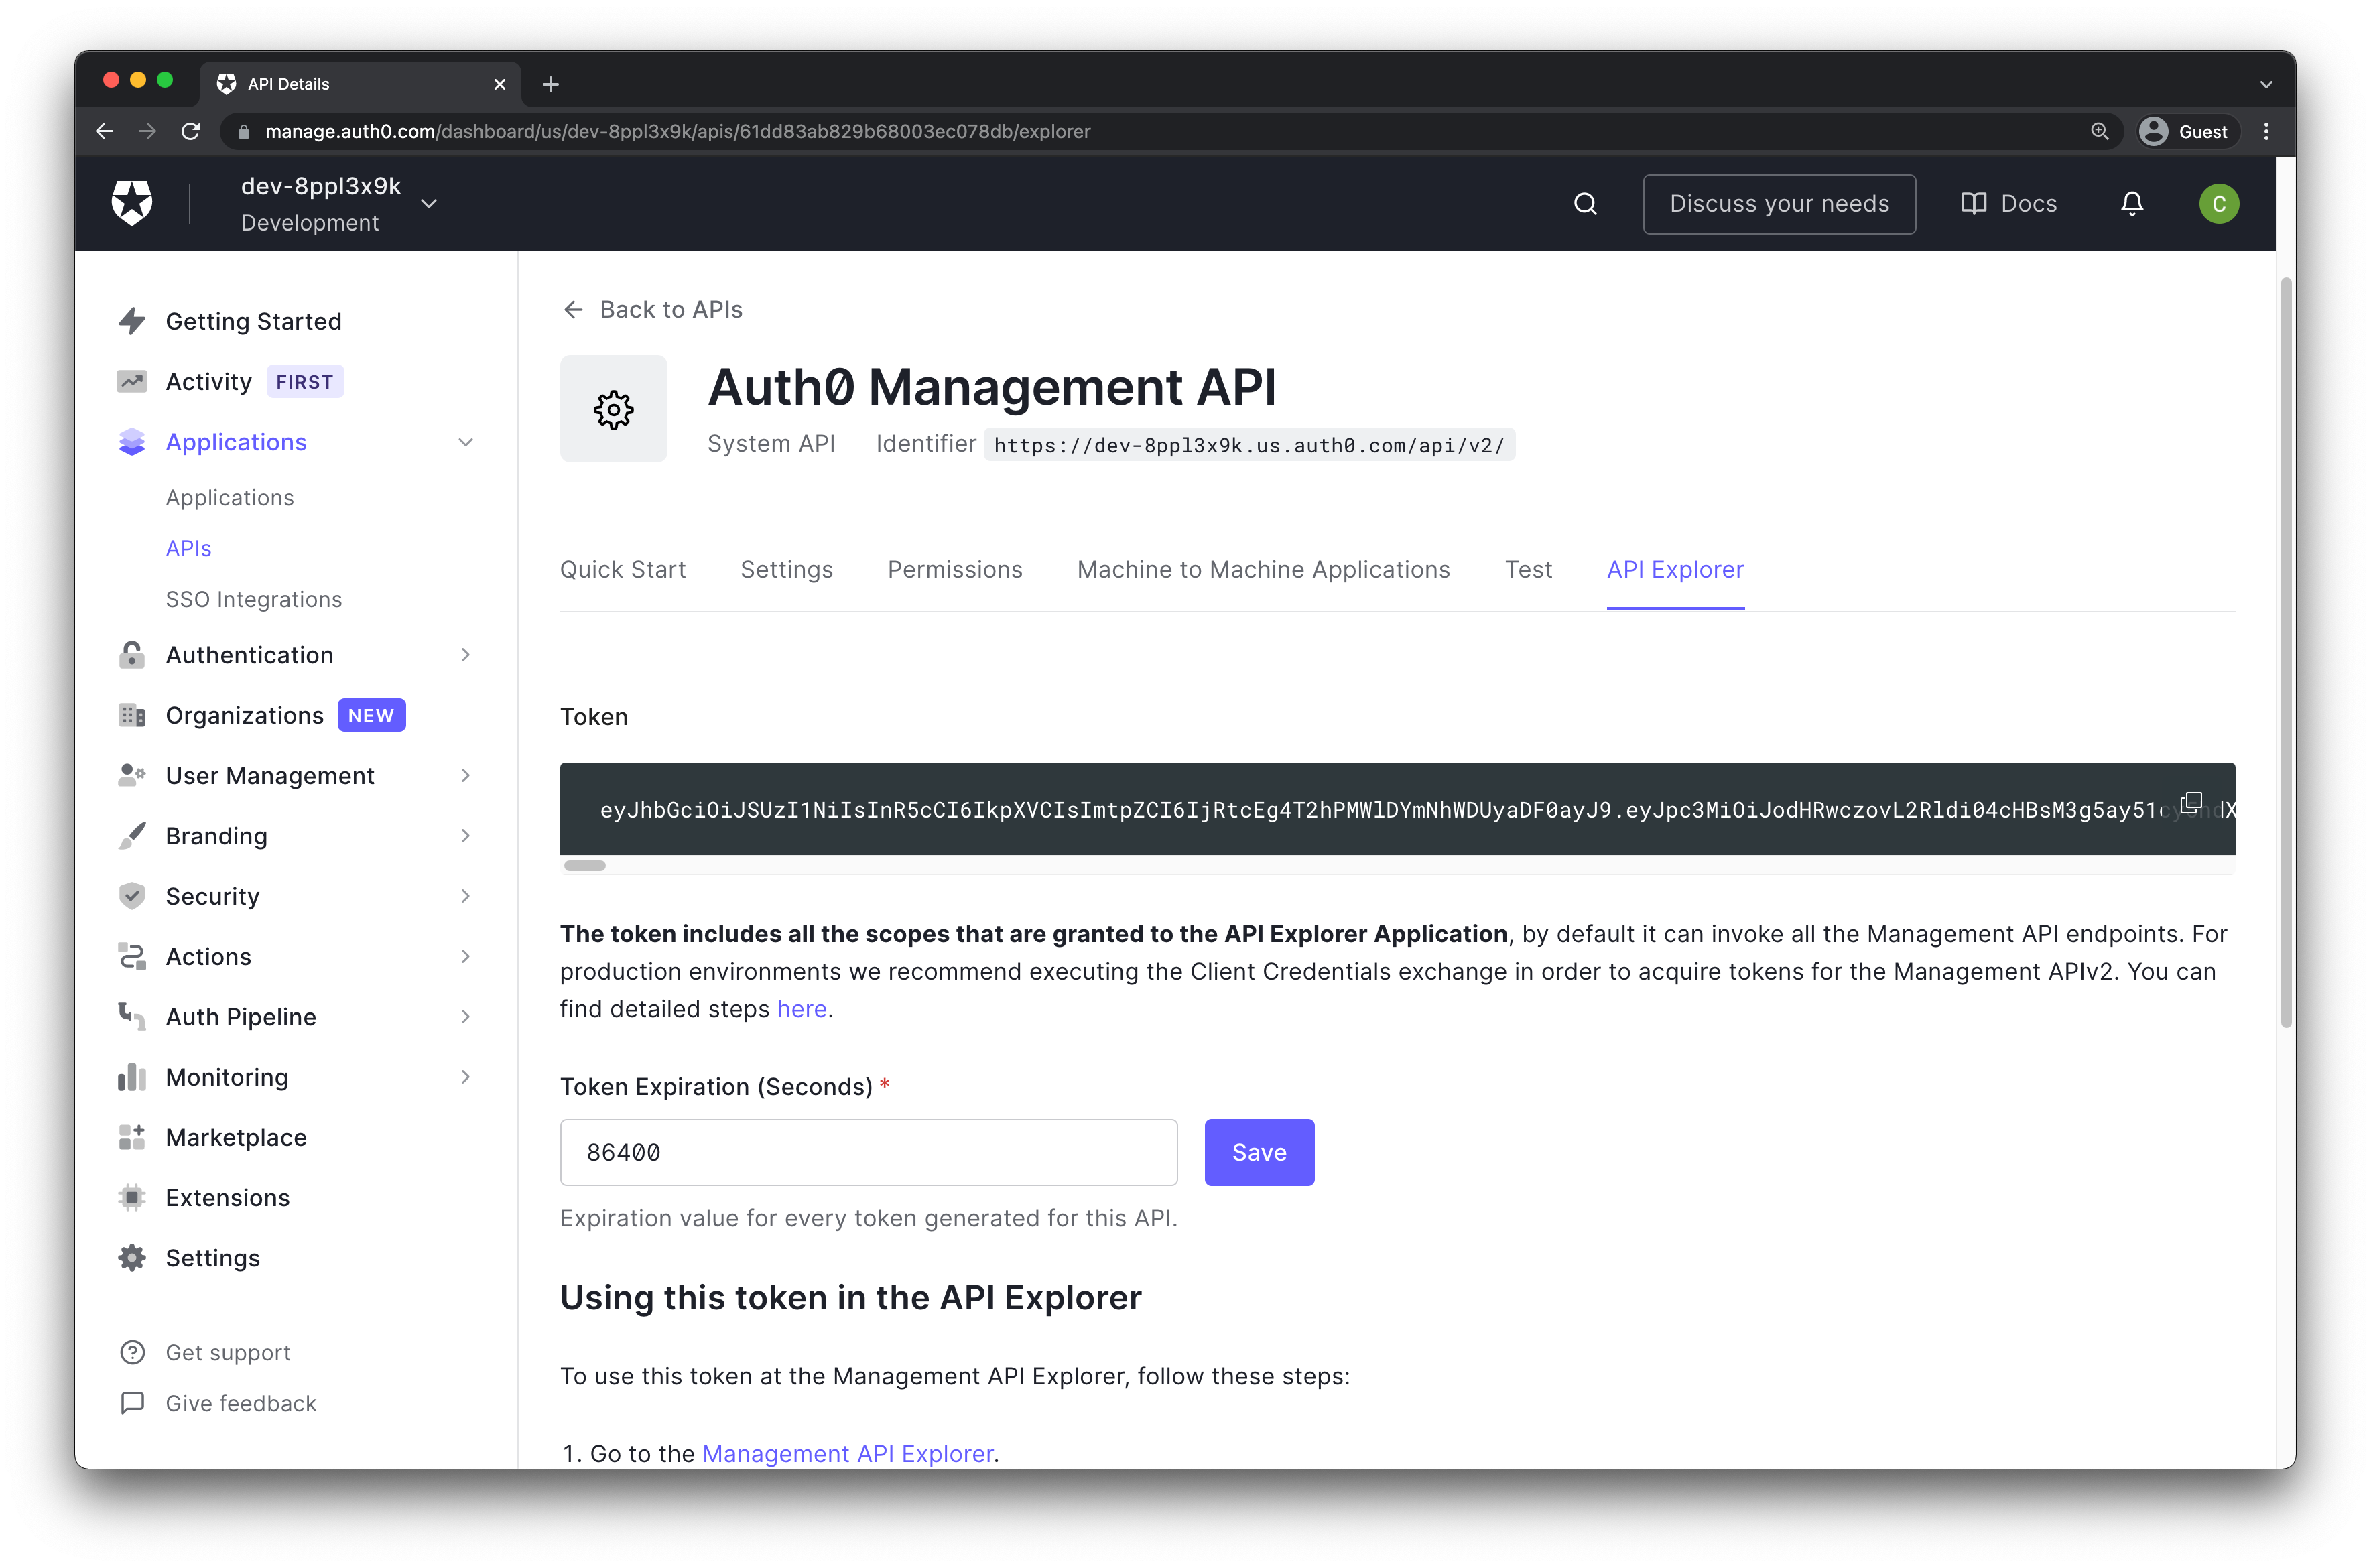
Environment variables
In your Glitch app source code, modify the .env file to enter the
AUTH0_MANAGEMENT_API_TOKENAUTH0_DOMAIN
values appropriately. The AUTH0_MANAGEMENT_API_TOKEN can be obtained from the Auth0 project.
Congrats! You have written and deployed your first Hasura Action to extend the Graph.
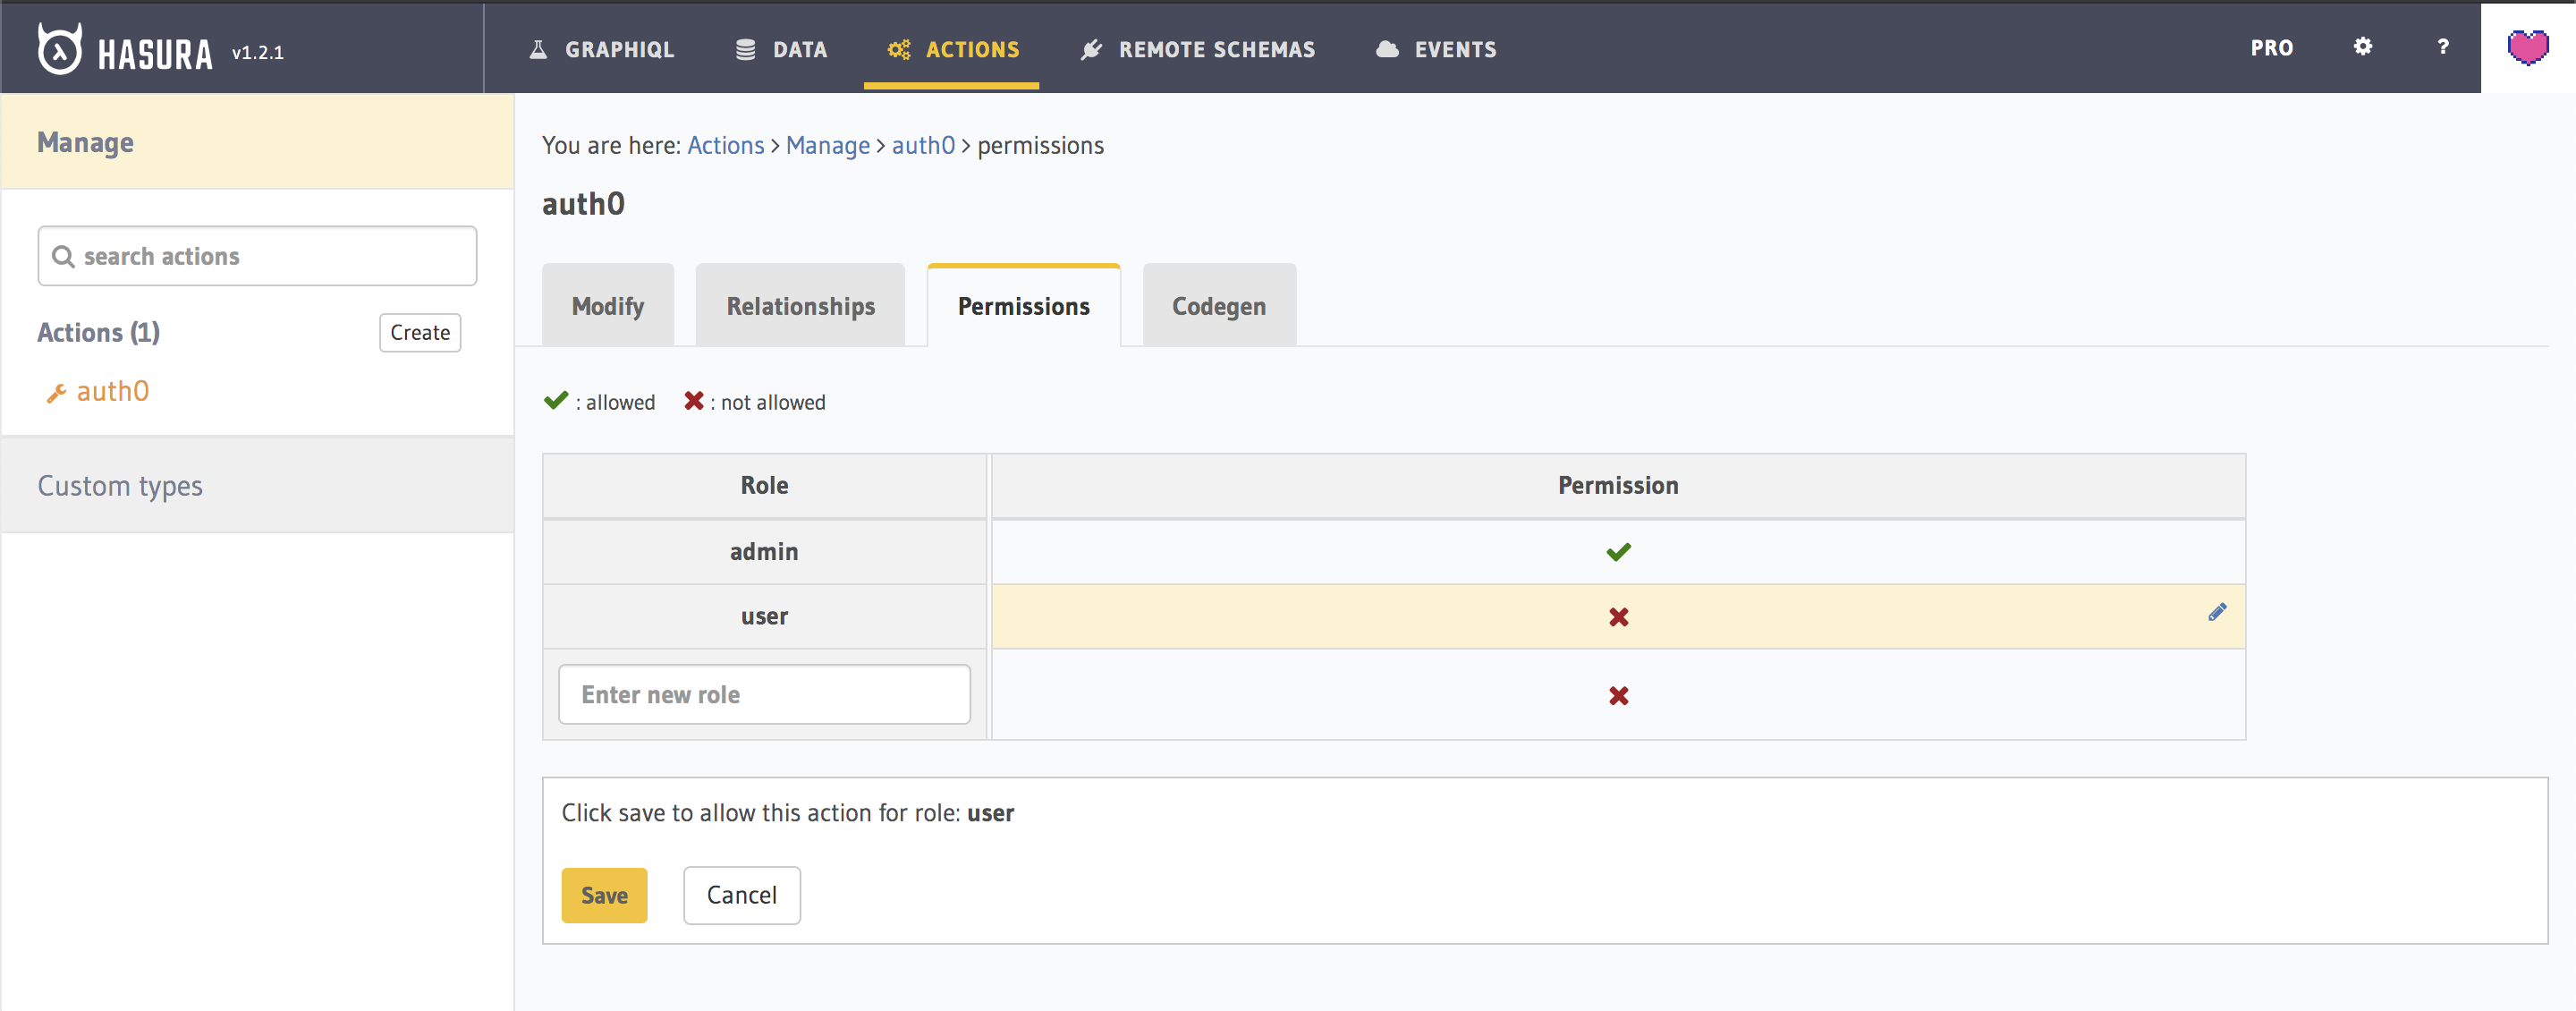
Permission
Now to query the newly added type, we need to give Permissions to the user role for this query type. Head to the Permissions tab of the newly created Action and configure access for the role user.
Alright, now how do we query this newly added API?
First, we need to update the webhook url for the Action. Copy the deployed app URL from Glitch and add that as the webhook handler. Don't forget to add the route /auth0 along with the Glitch app URL.
Now head to GraphiQL and try out the following query:
query {auth0 {picture}}
Remember the JWT token that we got after configuring Auth0 and testing it out? Here you also need to pass in the Authorization header with the same JWT token to get the right data.
In GraphiQL, uncheck the x-hasura-admin-secret header, create a new one called Authorization and paste this in the value Bearer eyJhb......
Note: You need to pass in the right header values. You can pass in the Authorization header with the correct token and your Node.js server will receive the appropriate x-hasura-user-id value from the session variables for the API to work as expected.
That's it! You have now extended the built-in GraphQL API with your custom code.
 Build apps and APIs 10x faster
- Built-in authorization and caching
- 8x more performant than hand-rolled APIs